How to create masks with Lightroom’s Adjustment Brush
Precisely select areas for tonal adjustment
Download project files to your computer here
There are a whole host of controls to make global adjustments to your images, often using handy one-click presets – see our list of the best free Lightroom presets. But, more often than not, you may only want to target certain areas within a scene. For this you can use the Adjustment Brush.
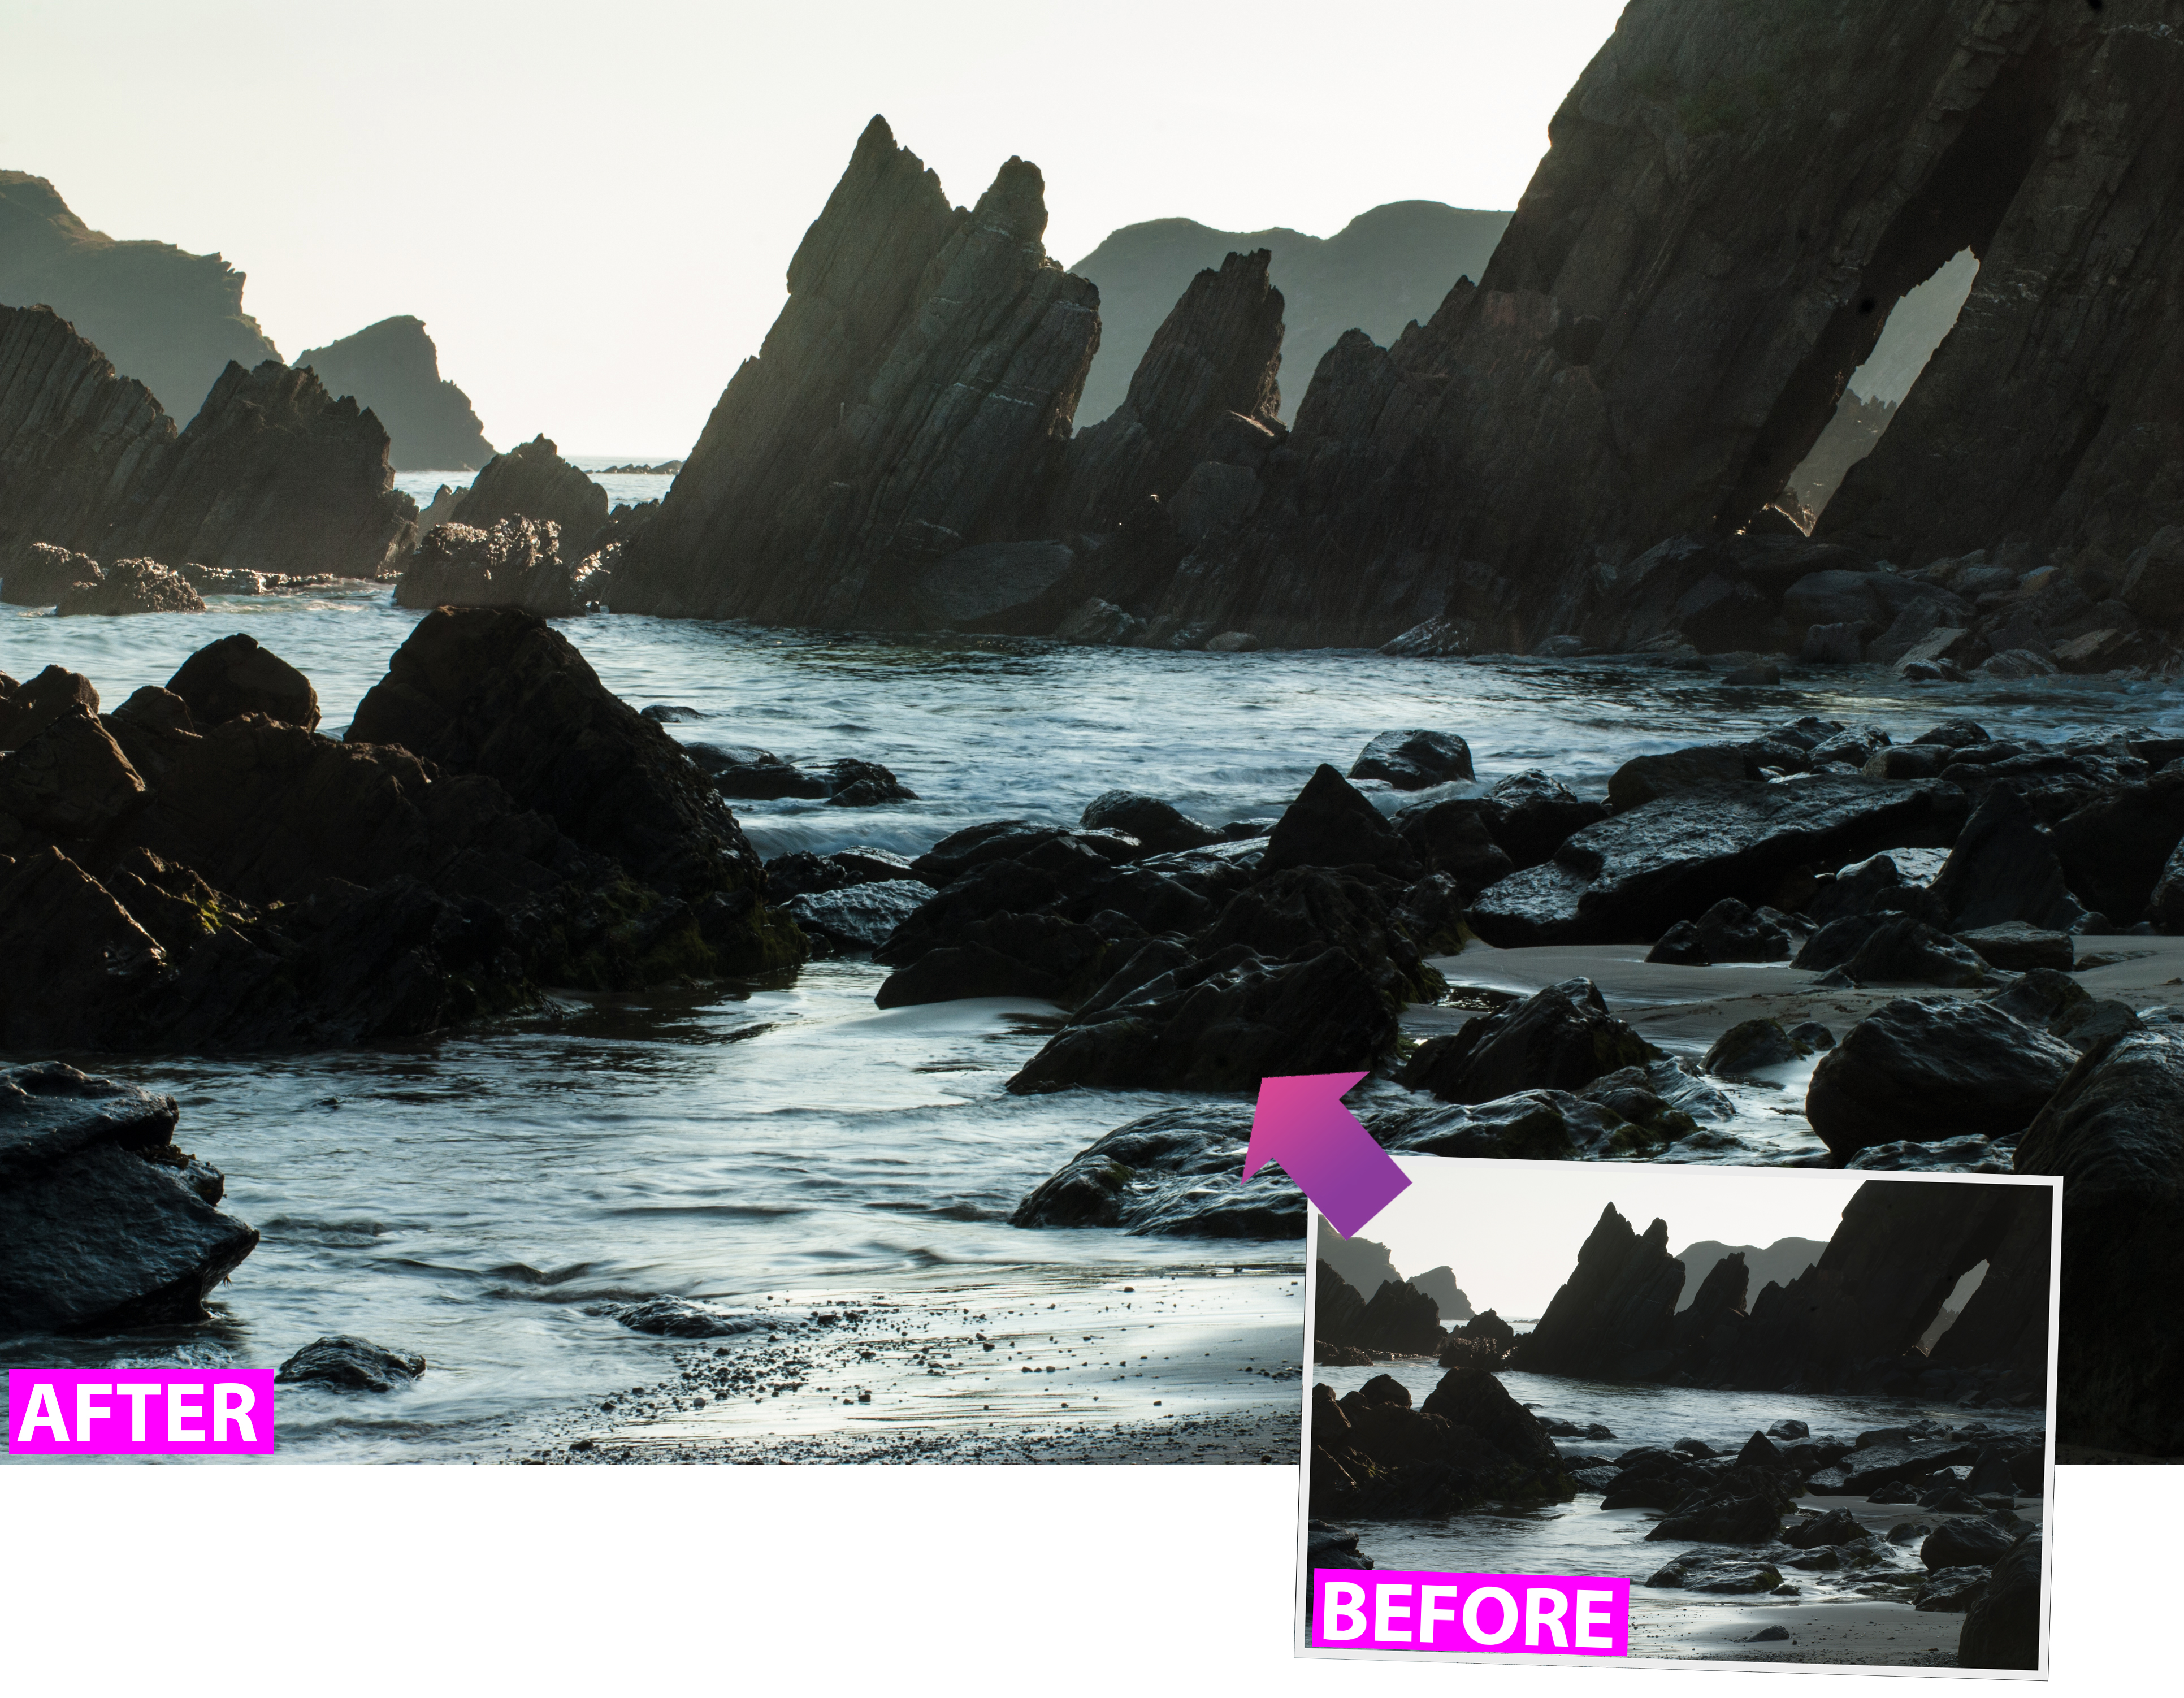
This tool enables you to selectively apply Exposure, Clarity, Brightness, and other adjustments to images by painting over the specific area in the photo that you want to adjust. In this image it’s ideal for dodging some dark standing stones, while burning more detail into the brighter sky. By altering the size, softness and flow of the Adjustment Brush, you can target and tweak the tones of specific objects with precision.
When you click on a photo with the Adjustment Brush you place an edit pin. This pin records the position and strength of all the tonal adjustments you make. Thanks to edit pins, you can make multiple adjustments to a photo and then click on a pin to fine-tune its effect at any time. If you click on a pin and drag to the right, you can increase the value setting of each associated slider to, say, brighten the image more or boost the contrast more. Drag left on a pin to reduce the slider settings. By moving the mouse over a particular pin, you can see a red mask overlay that indicates the area that is being adjusted by that pin. The Adjustment Brush strokes we used to lighten the stones were fairly soft and imprecise. It would be quite easy for the brush tip to stray over the background and lighten the sky or ground. So in this tutorial we’ll show you how to use Auto Mask to dodge and burn with much more precision, so you can lighten the complex jagged edges of the dark rocks in our starting image without blowing out the background details.
Step-by-step guide: Edit with masks
Create a mask for more precise selective adjustments
Tool options
There are a number of options relating to the Adjustment Brush, and while Size is rather self-explanatory, the options below are worth knowing. The Feather adjustment creates a soft-edged transition between area you’ve applied the brush to and the surrounding pixels. The amount of feather controls the distance between the inner and outer circle of the brush. The Flow controls the amount of the adjustment that is applied and the Density is the amount of transparency in the stroke. If you tick Auto Mask, this will confine the brush strokes to areas similar in colour.
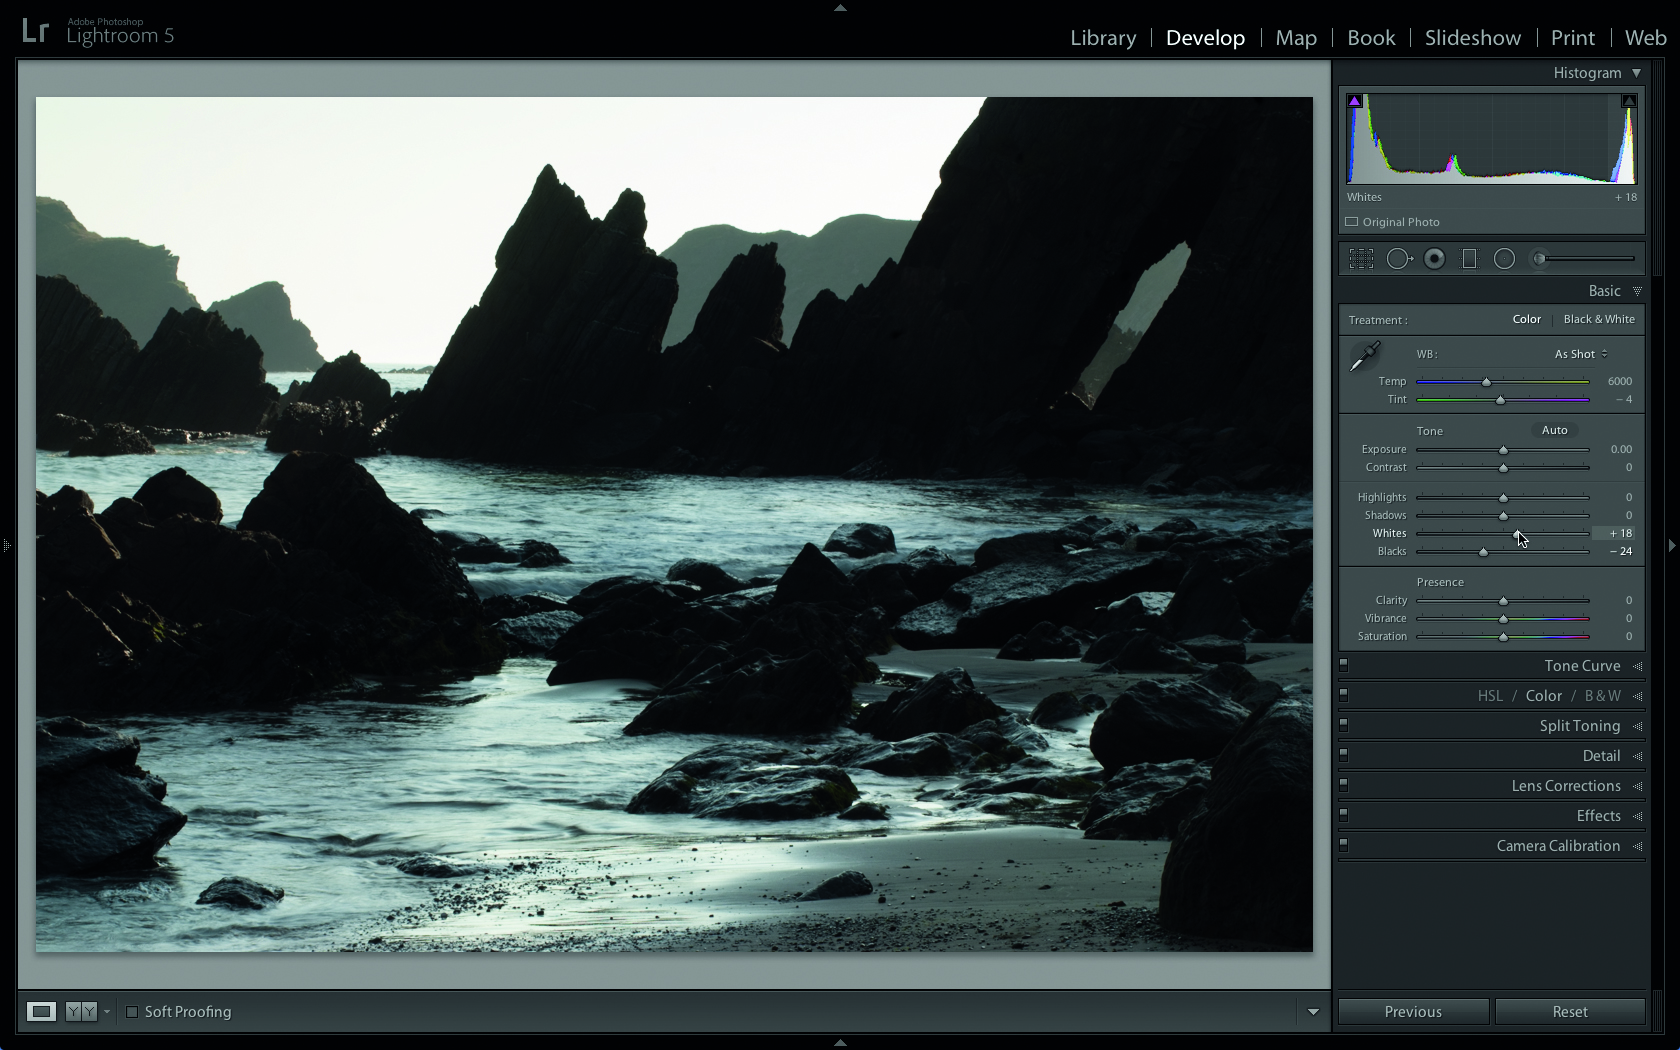
1. Improve the tonal range
Import mask_start.dng into Lightroom and click on Develop. The histogram graph doesn’t quite stretch to the far left. Drag Blacks to -24 and Whites to +18. Push Clarity to +30 to increase the contrast. The colours are rather weak, so push Vibrance up to +49.
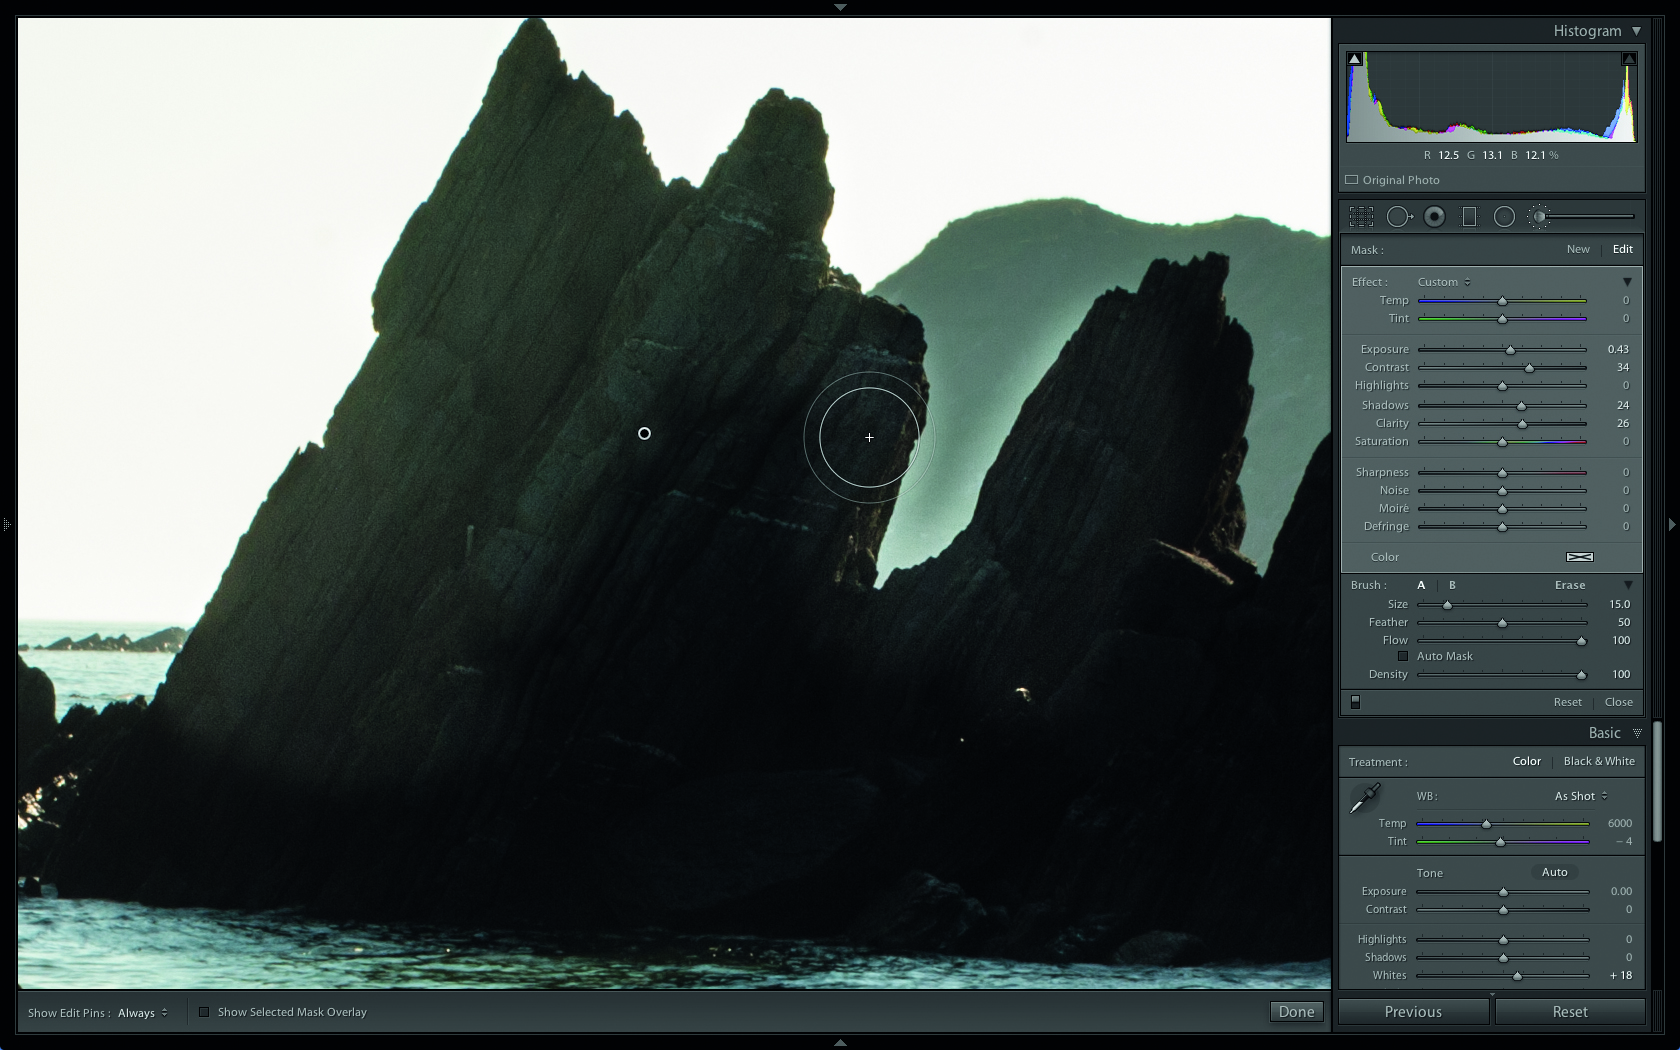
In the Brush section, click on A to access your original Adjustment Brush settings
2. Get specific
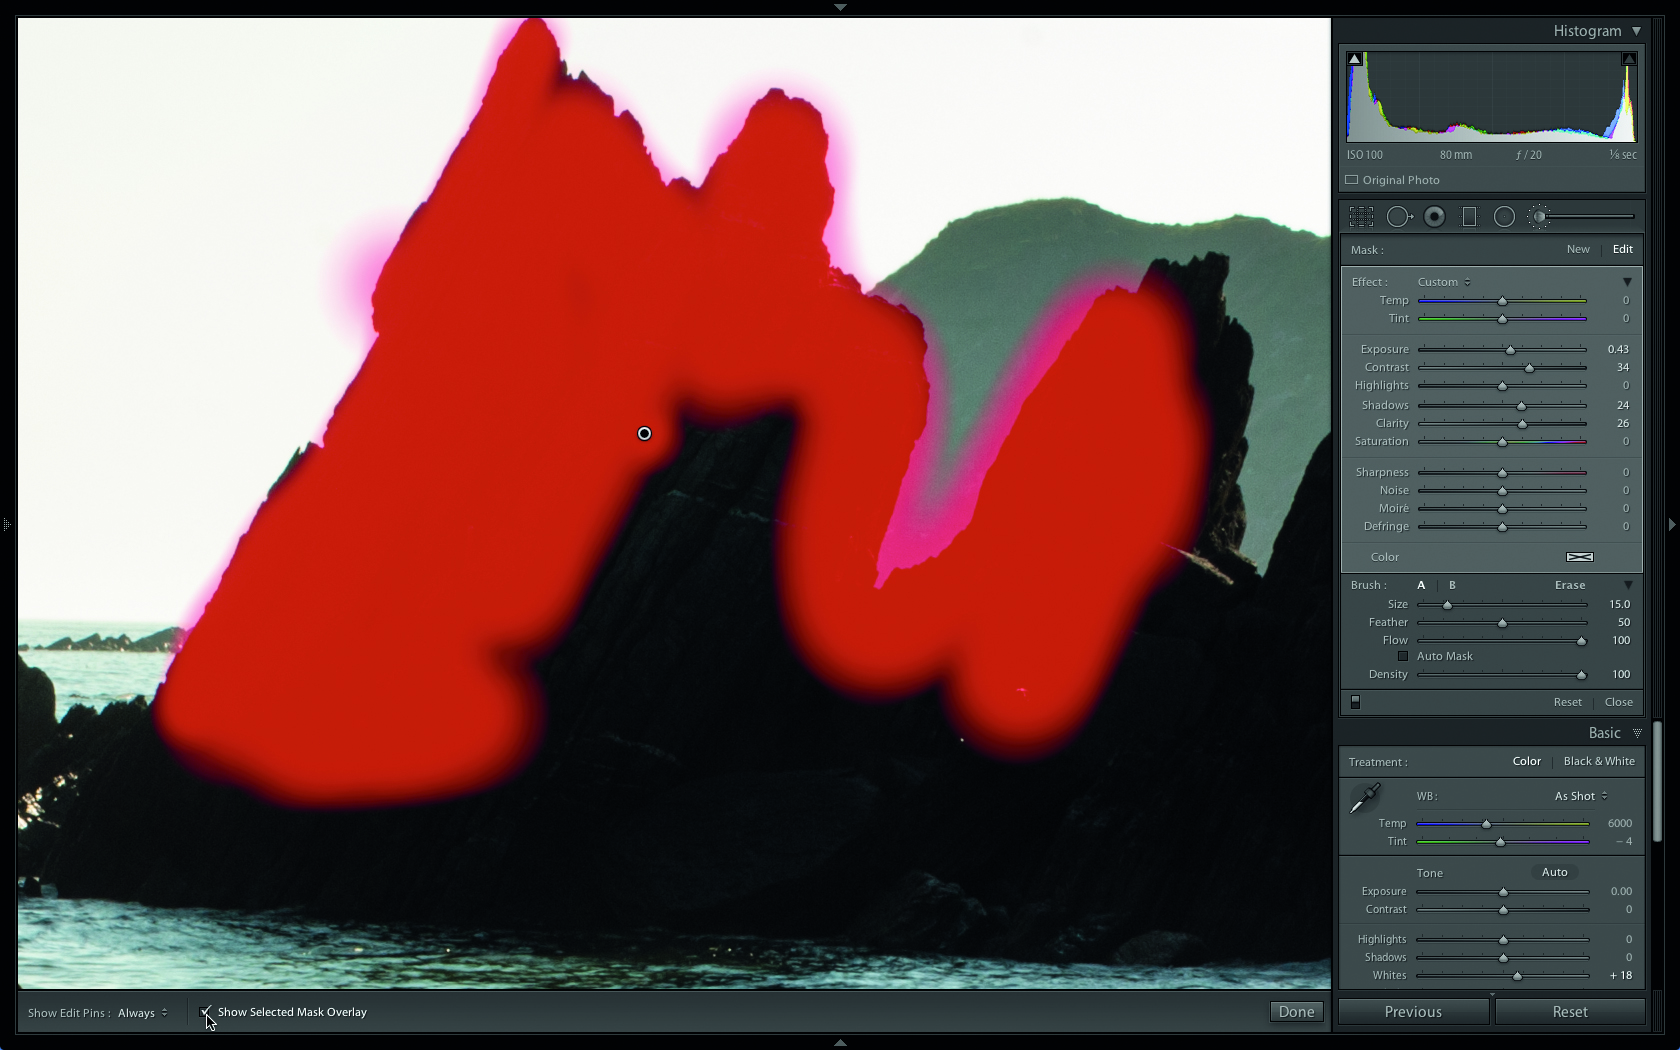
For the underexposed rocks, pick the Adjustment Brush (press K), click Effect, choose Dodge (Lighten). Set Exposure +0.43, Contrast +34, Shadows +24, Clarity +26, Flow 100. Zoom in to 1:2 magnification. Click to put a pin on a rock and paint to reveal detail.
3. Activate the mask
Hover the cursor over the edit pin to see a red mask overlay indicating the edited areas. To turn the overlay on permanently, tick the Show Selected Mask Overlay box at the bottom-left. Some of the Adjustment brush’s strokes have strayed over the background.
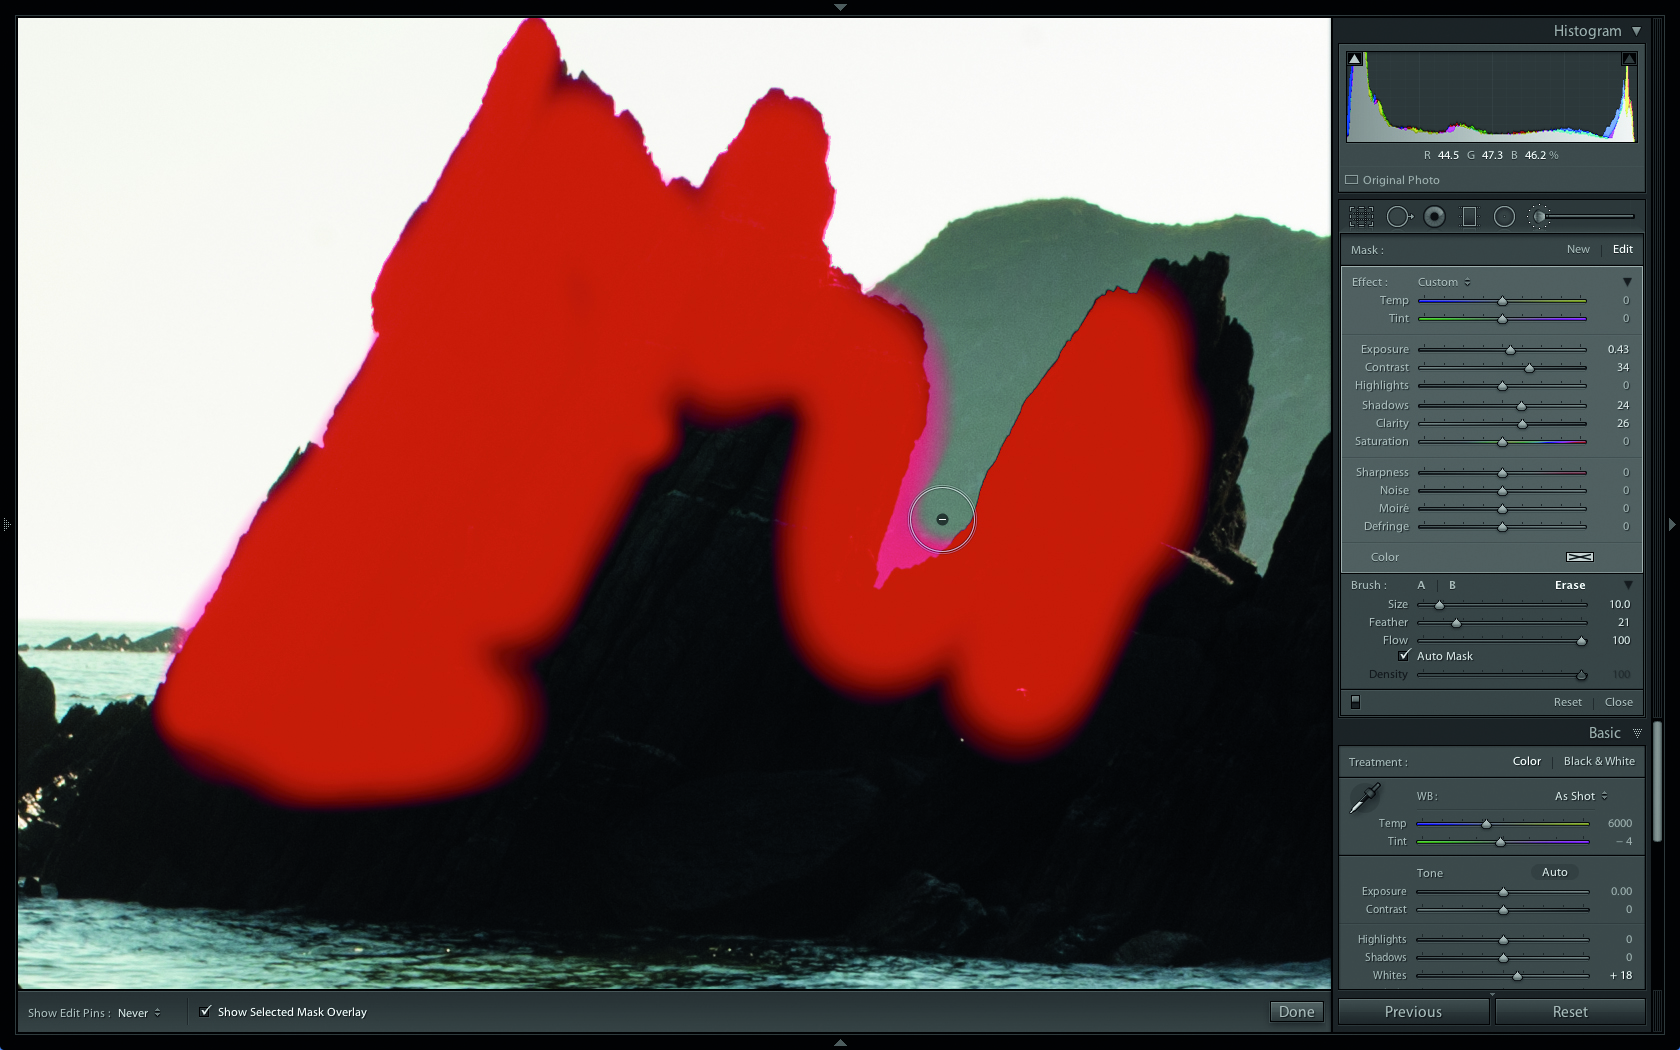
4. Erase the untidy areas
To tidy up the mask, go to the Brush section and click Erase. Set Size 10, Feather 21, Flow 100. By default the Auto Mask box is ticked, so the brush accounts for contrast changes, protecting the lighter background from the adjustment when you paint the rock edges.
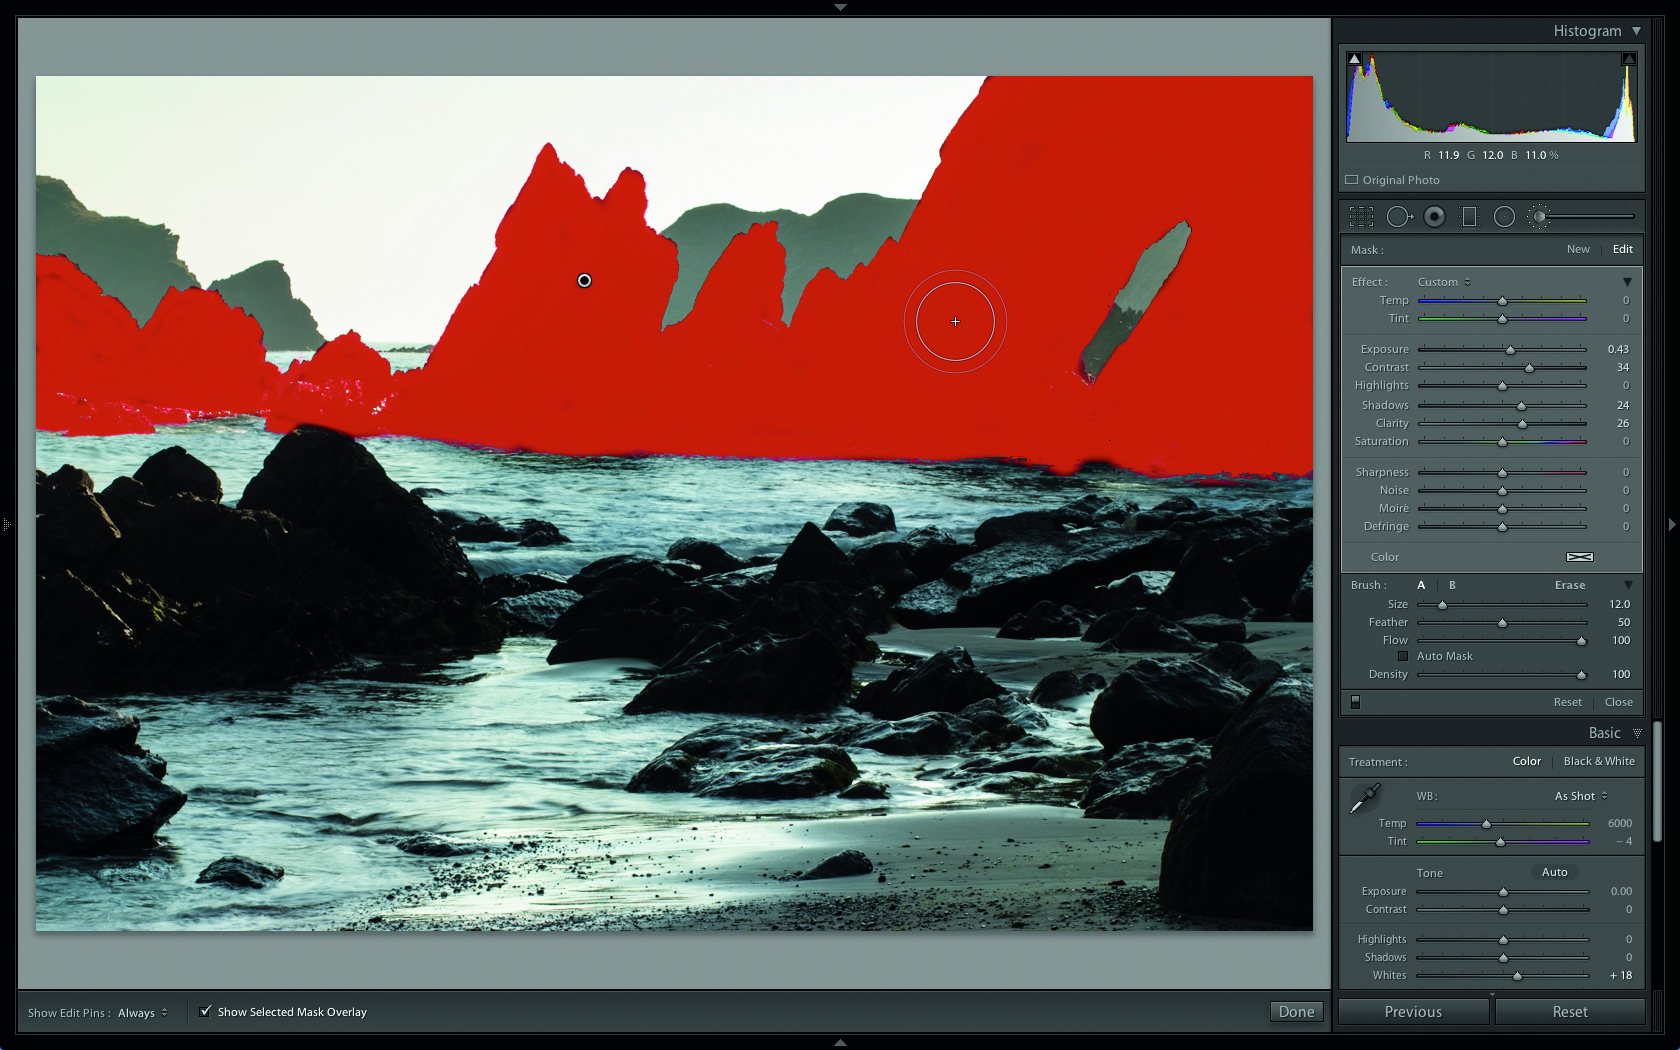
5. Use Auto Mask
Keep Auto Mask active as you continue to paint around the edges of the dark rock – it won’t select the lighter background details – but turn it off when painting inside the remaining sections of the rock. Turn off the mask overlay to see the lightened rocks.
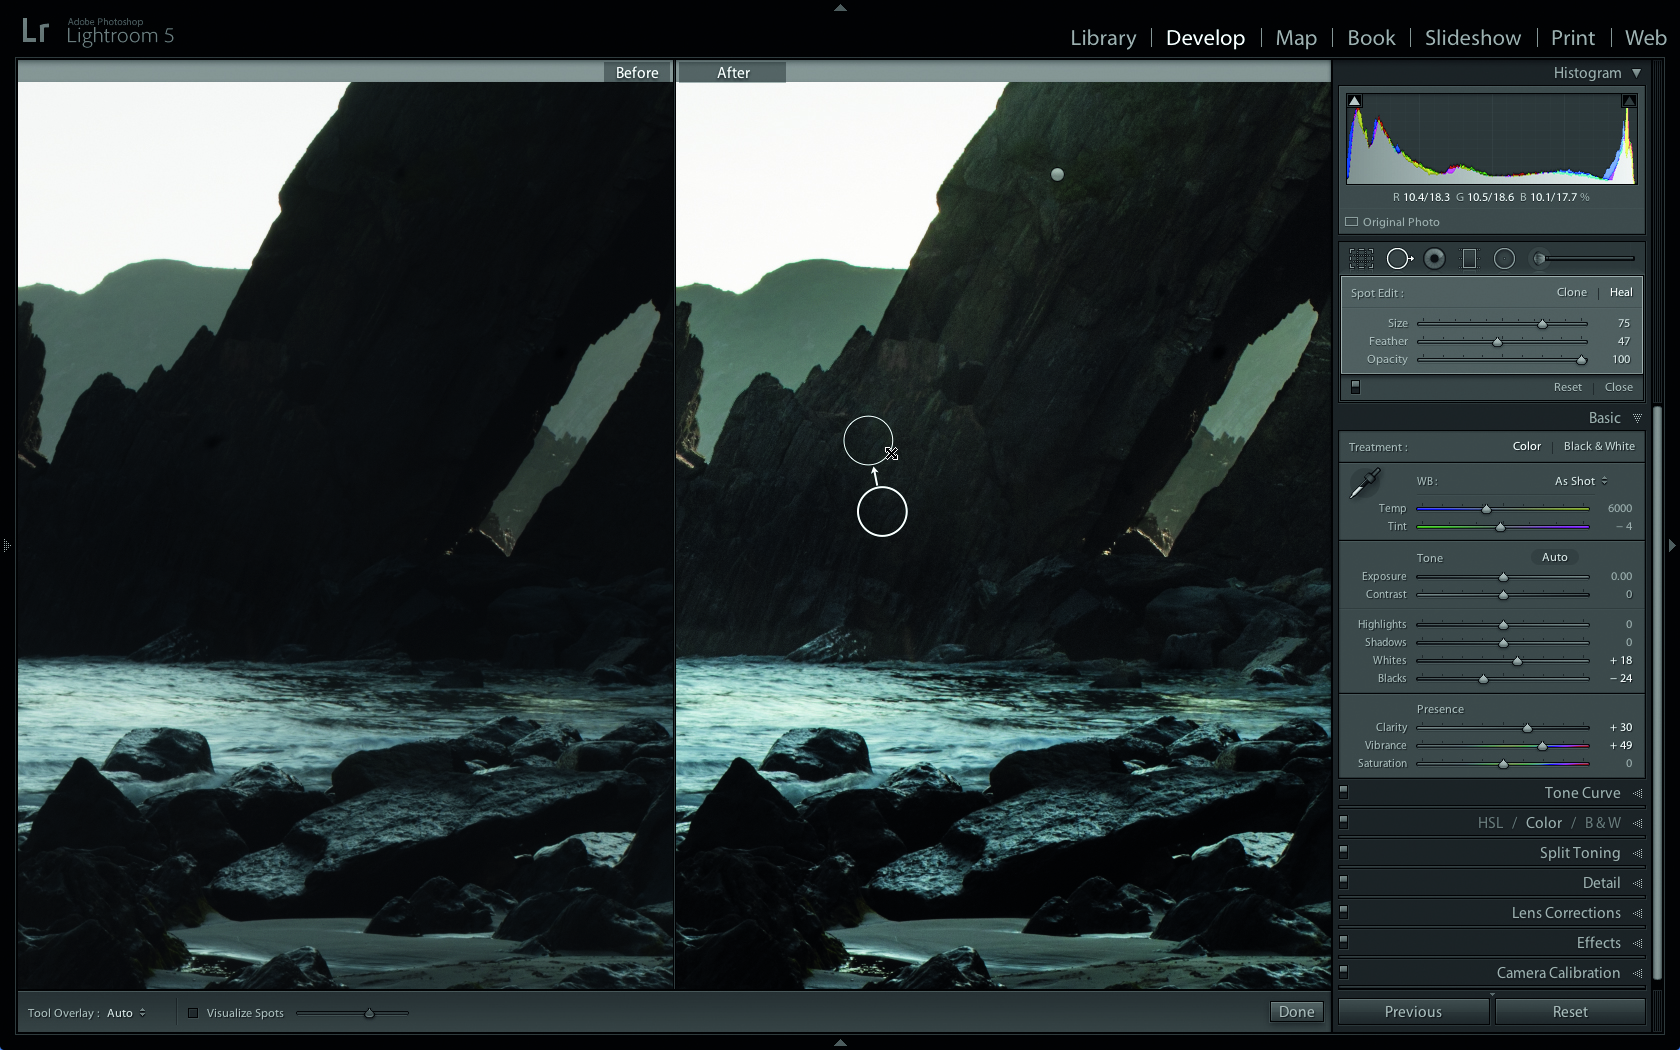
6. Add the finishing touches
Boost Shadows to 44 to reveal even more texture, then click Done. Click on the Before and After icon to see the effect of your adjustments. Lightening the rock has revealed some sensor spots. Use the Spot Removal tool (see issue 119) to replace them.
Read more: How to use Adobe Lightroom Mobile
Get the Digital Camera World Newsletter
The best camera deals, reviews, product advice, and unmissable photography news, direct to your inbox!
George has been freelancing as a photo fixing and creative tutorial writer since 2002, working for award winning titles such as Digital Camera, PhotoPlus, N-Photo and Practical Photoshop. He's expert in communicating the ins and outs of Photoshop and Lightroom, as well as producing video production tutorials on Final Cut Pro and iMovie for magazines such as iCreate and Mac Format. He also produces regular and exclusive Photoshop CC tutorials for his YouTube channel.

