How to fix tilted images in Adobe Lightroom
Use Lightroom's Upright to improve perspective
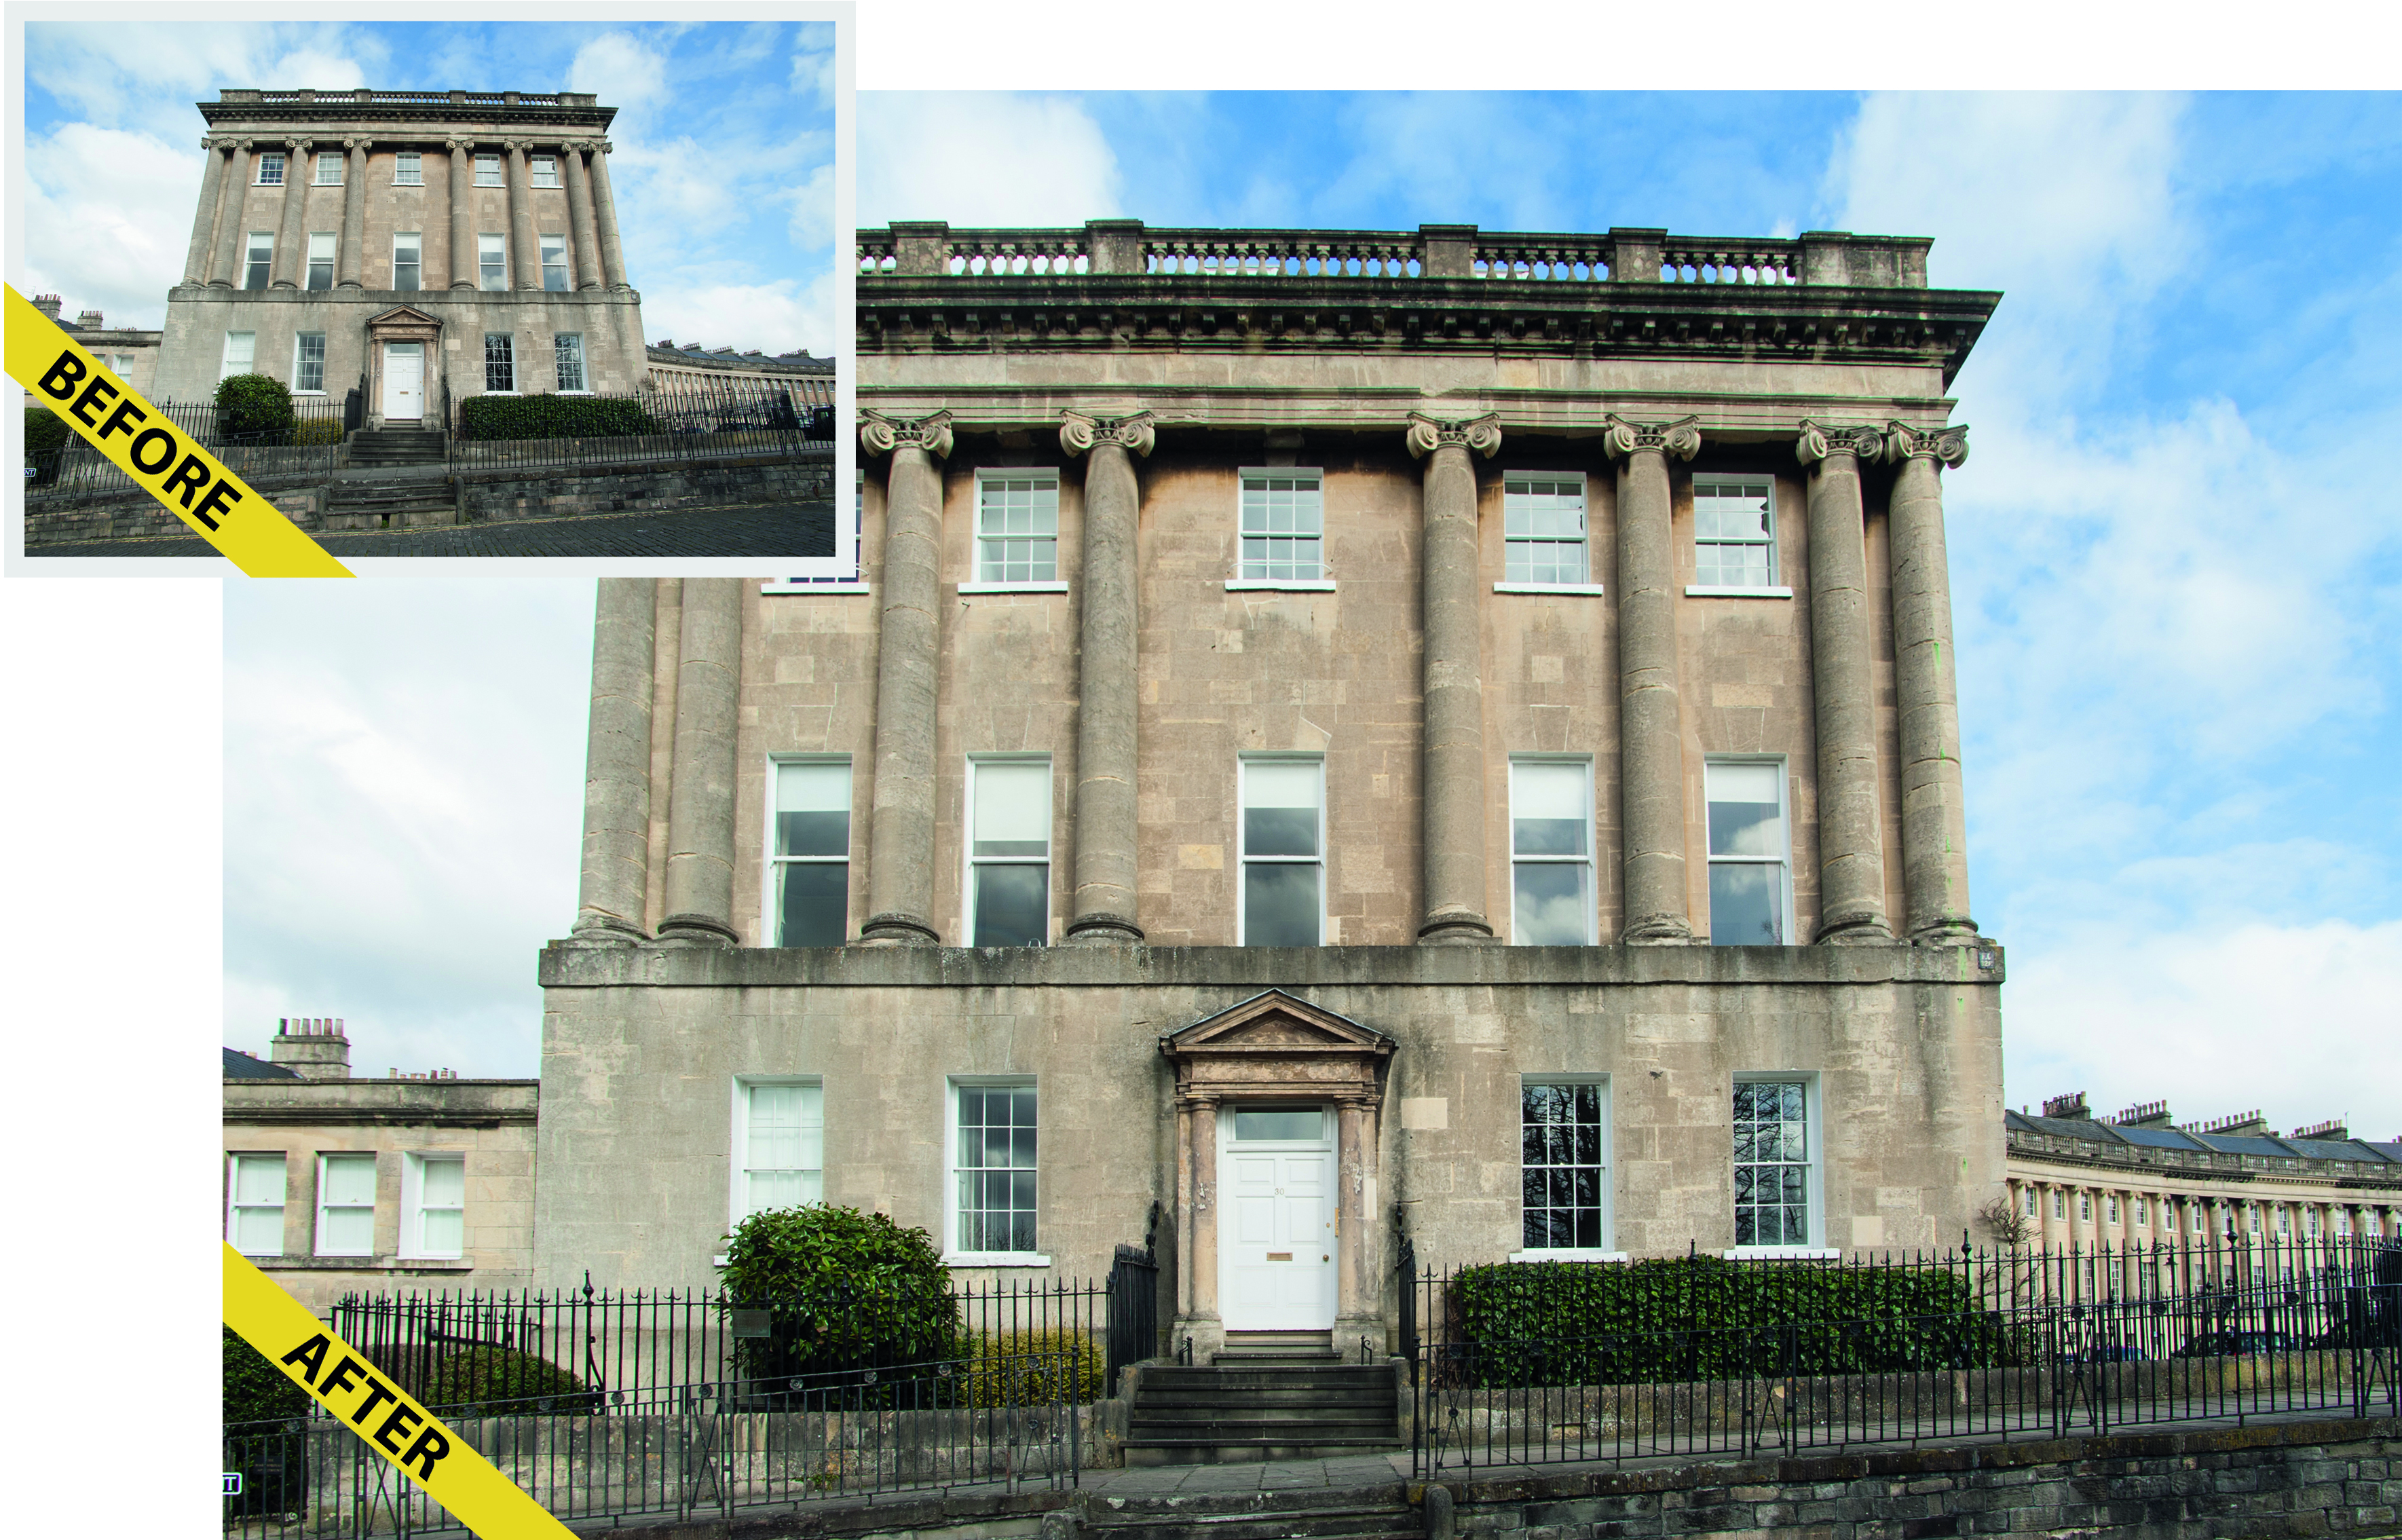
- Download the start image here
We take it for granted that most buildings have vertical walls that extend at a 90-degree angle from the ground. However, in photographs the walls often appear wider apart at the ground, but tilt inwards towards the top (as you can see in our start image). These converging vertical lines are created by perspectival distortion.
The distortion is created when you tilt your camera at an angle to get the top of a structure into a photo. The more extreme the tilt, the greater the perspectival distortion will be. Converging lines can also be exaggerated when you use a wide-angle lens in order to fit the sides of the building into the frame.
To avoid these converging vertical lines, you could try shooting your subject from a more distant (or higher) vantage point, so you no longer need to tilt the camera upwards. This will help the subject’s walls run parallel with the edge of the frame. Alternatively, you could buy a specialist tilt-shift lens that counteracts converging verticals as you shoot.
If neither of those options works for you, though, Lightroom provides several ways to straighten converging verticals. The Lens Correction panel, which we use here, enables you to manually or automatically counteract perspectival distortion and make walls run parallel with the edges of the frame.
Step-by-step guide: Get a better perspective
1. Correct manually
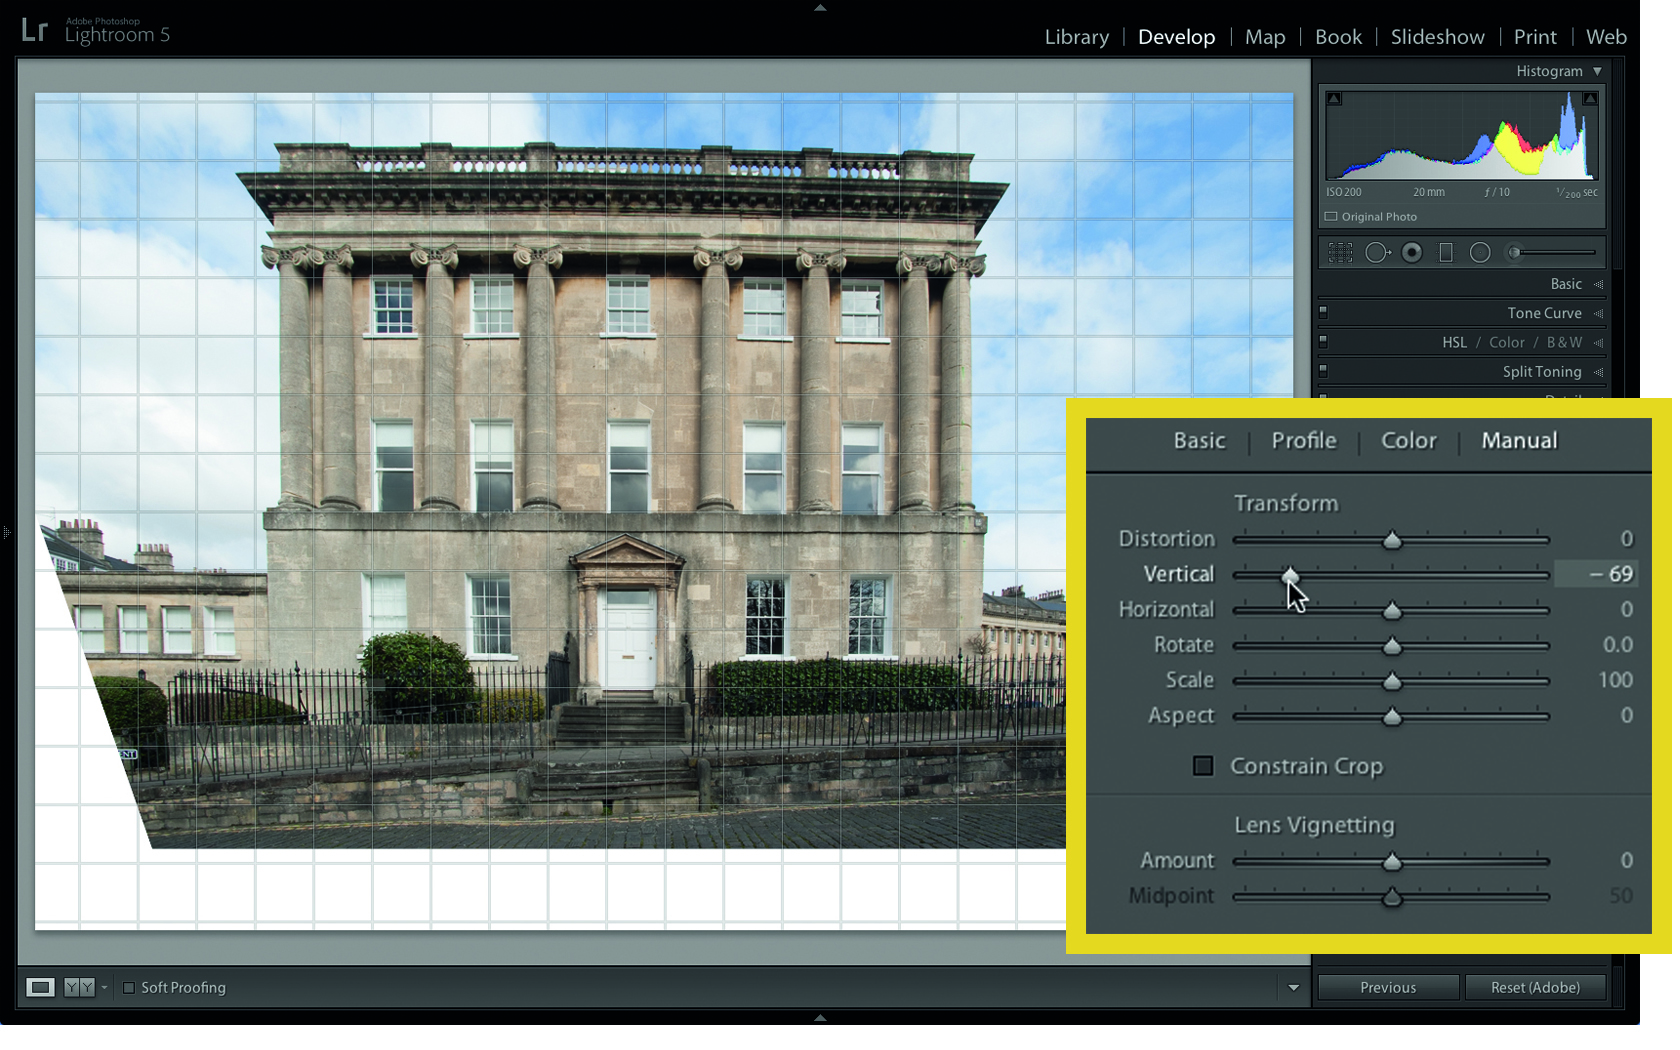
Take TYLR59.dng (which you can download here) into the Develop module. Toggle open the Lens Corrections panel and click on Manual. Drag Vertical to -69 to make the vertical lines run more parallel with the frame edges. However, this loses detail at the top of the frame and adds white areas at the bottom.
2. Crop the edges
The best camera deals, reviews, product advice, and unmissable photography news, direct to your inbox!
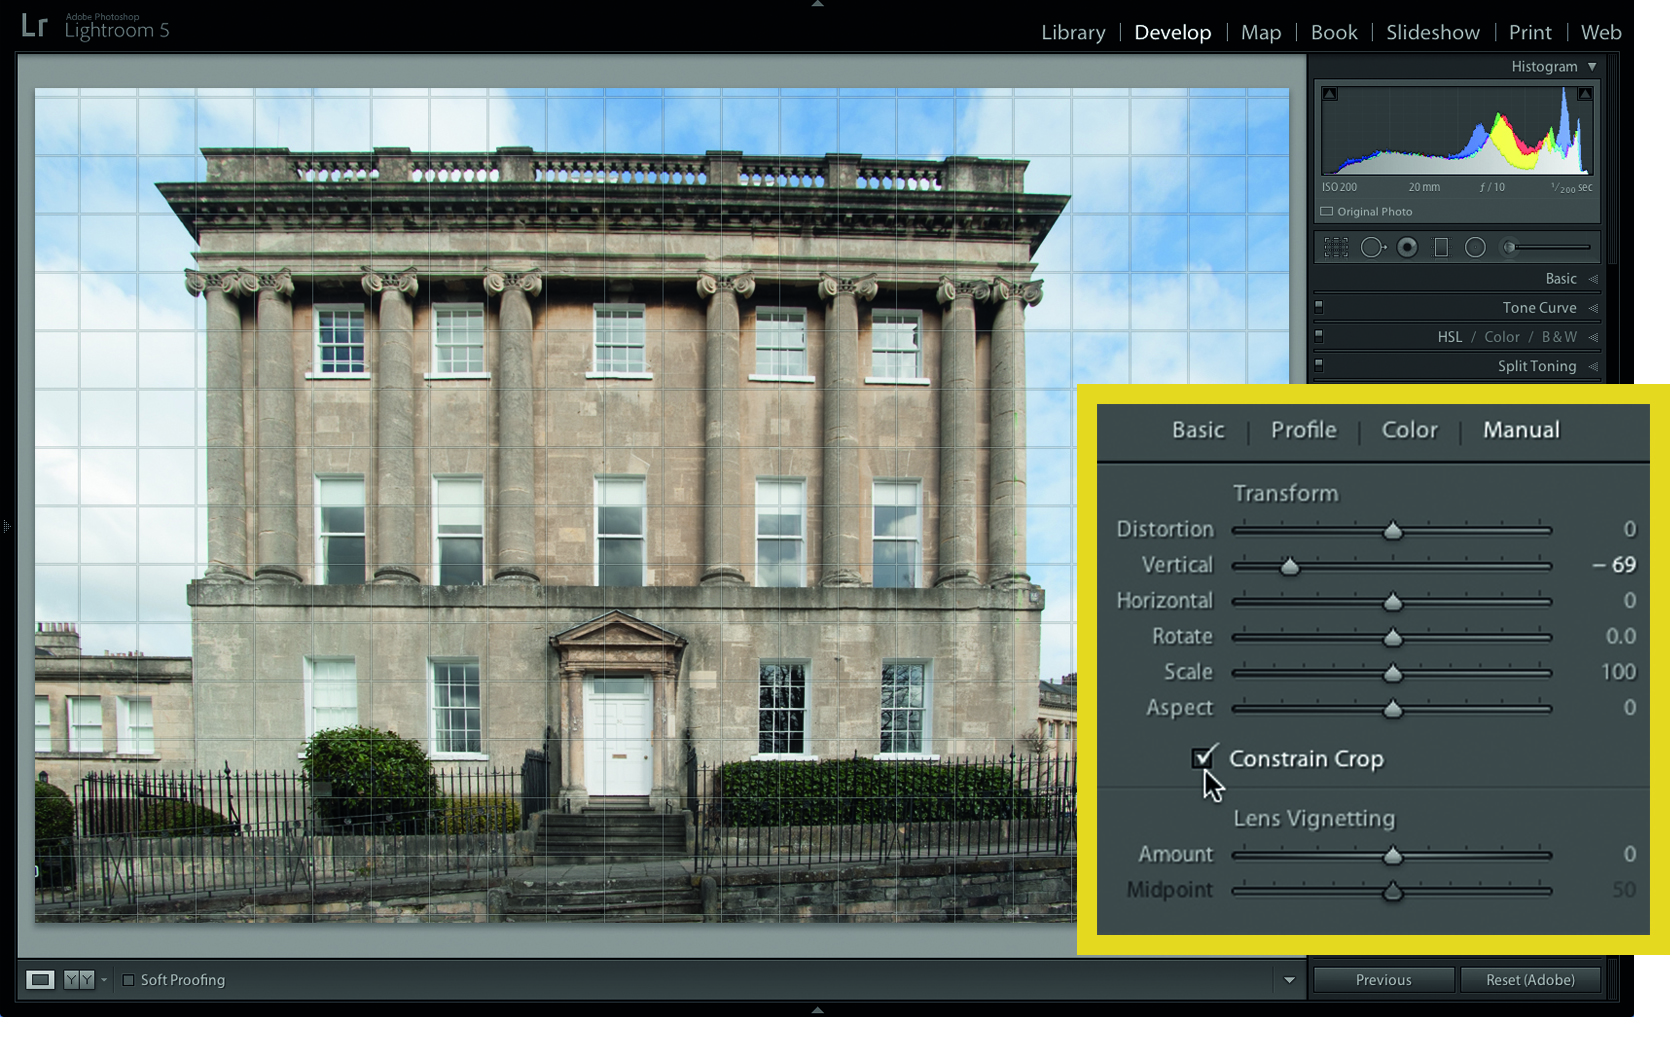
You can remove the white edges by dragging Scale to the right, but this also removes the top of the building. Click on Constrain Crop to remove the white edges but preserve the top of the house. Now, manual adjustments like this are effective, but there’s a better technique…
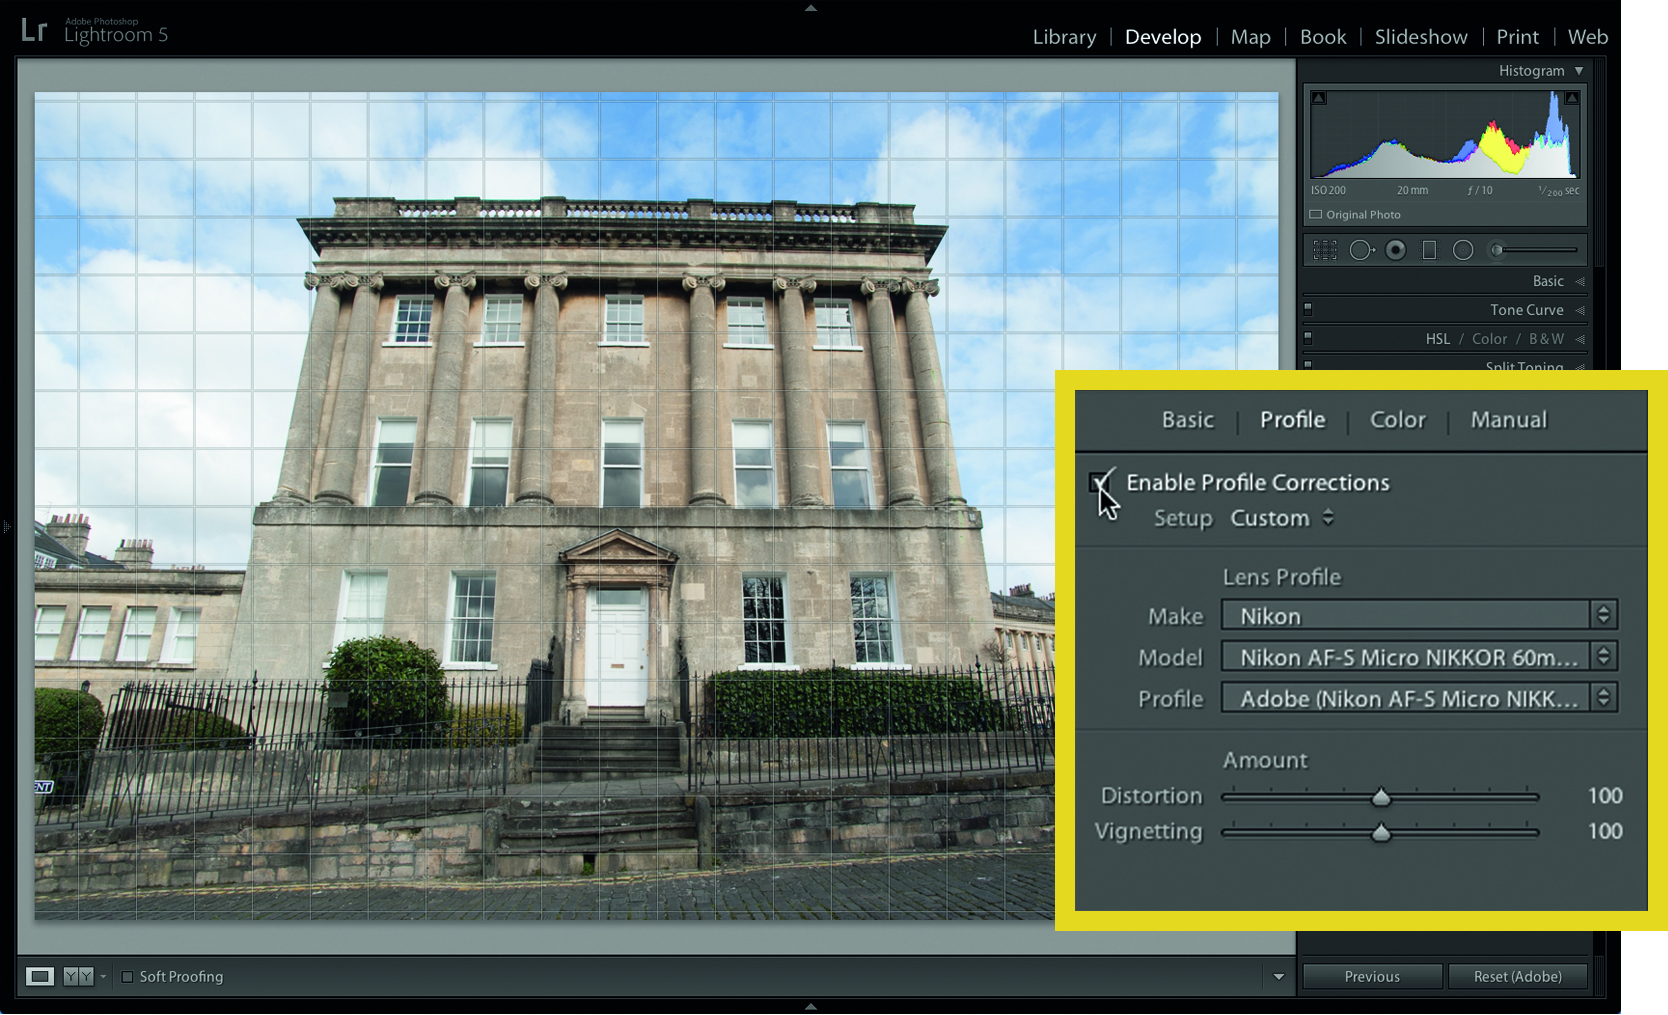
3. Create a profile
Click on the Reset button. Click on the Lens Correction panel’s Profile tab. Tick Enable Profile Corrections, and select your camera Make and Model. This profile counteracts vignetting and subtle barrel or pin-cushion distortions. It can also help to fix perspectival distortion.
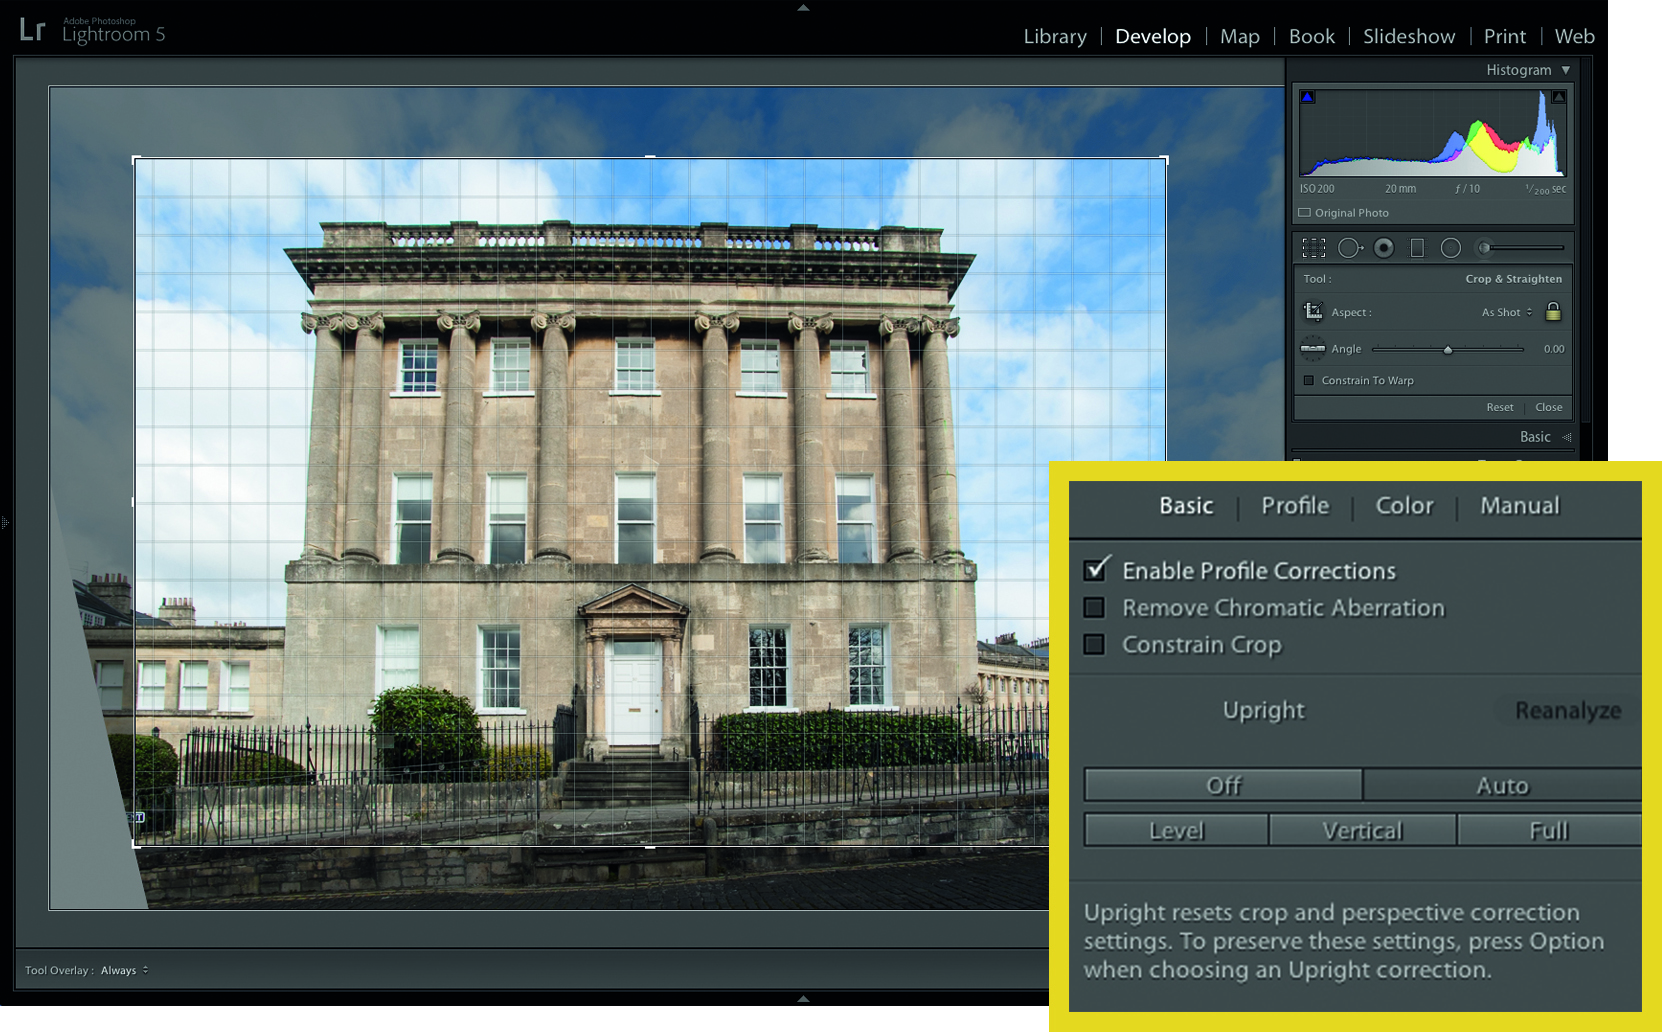
4. Correct automatically
Go to the Lens Correction panel’s Basic tab. Tick the Upright section’s Auto button to automatically counteract tilted horizons and converging verticals. This correction produces smaller white edges and preserves more of the sky. Crop out the white corners manually.
Key skills: Step back to go straight

1. Look up
If you’d prefer to get your perspective as straight as possible in-camera but don’t have a tilt-shift lens, there is a solution. Here’s our building shot with a 20mm lens; we’re standing close to it and looking up.
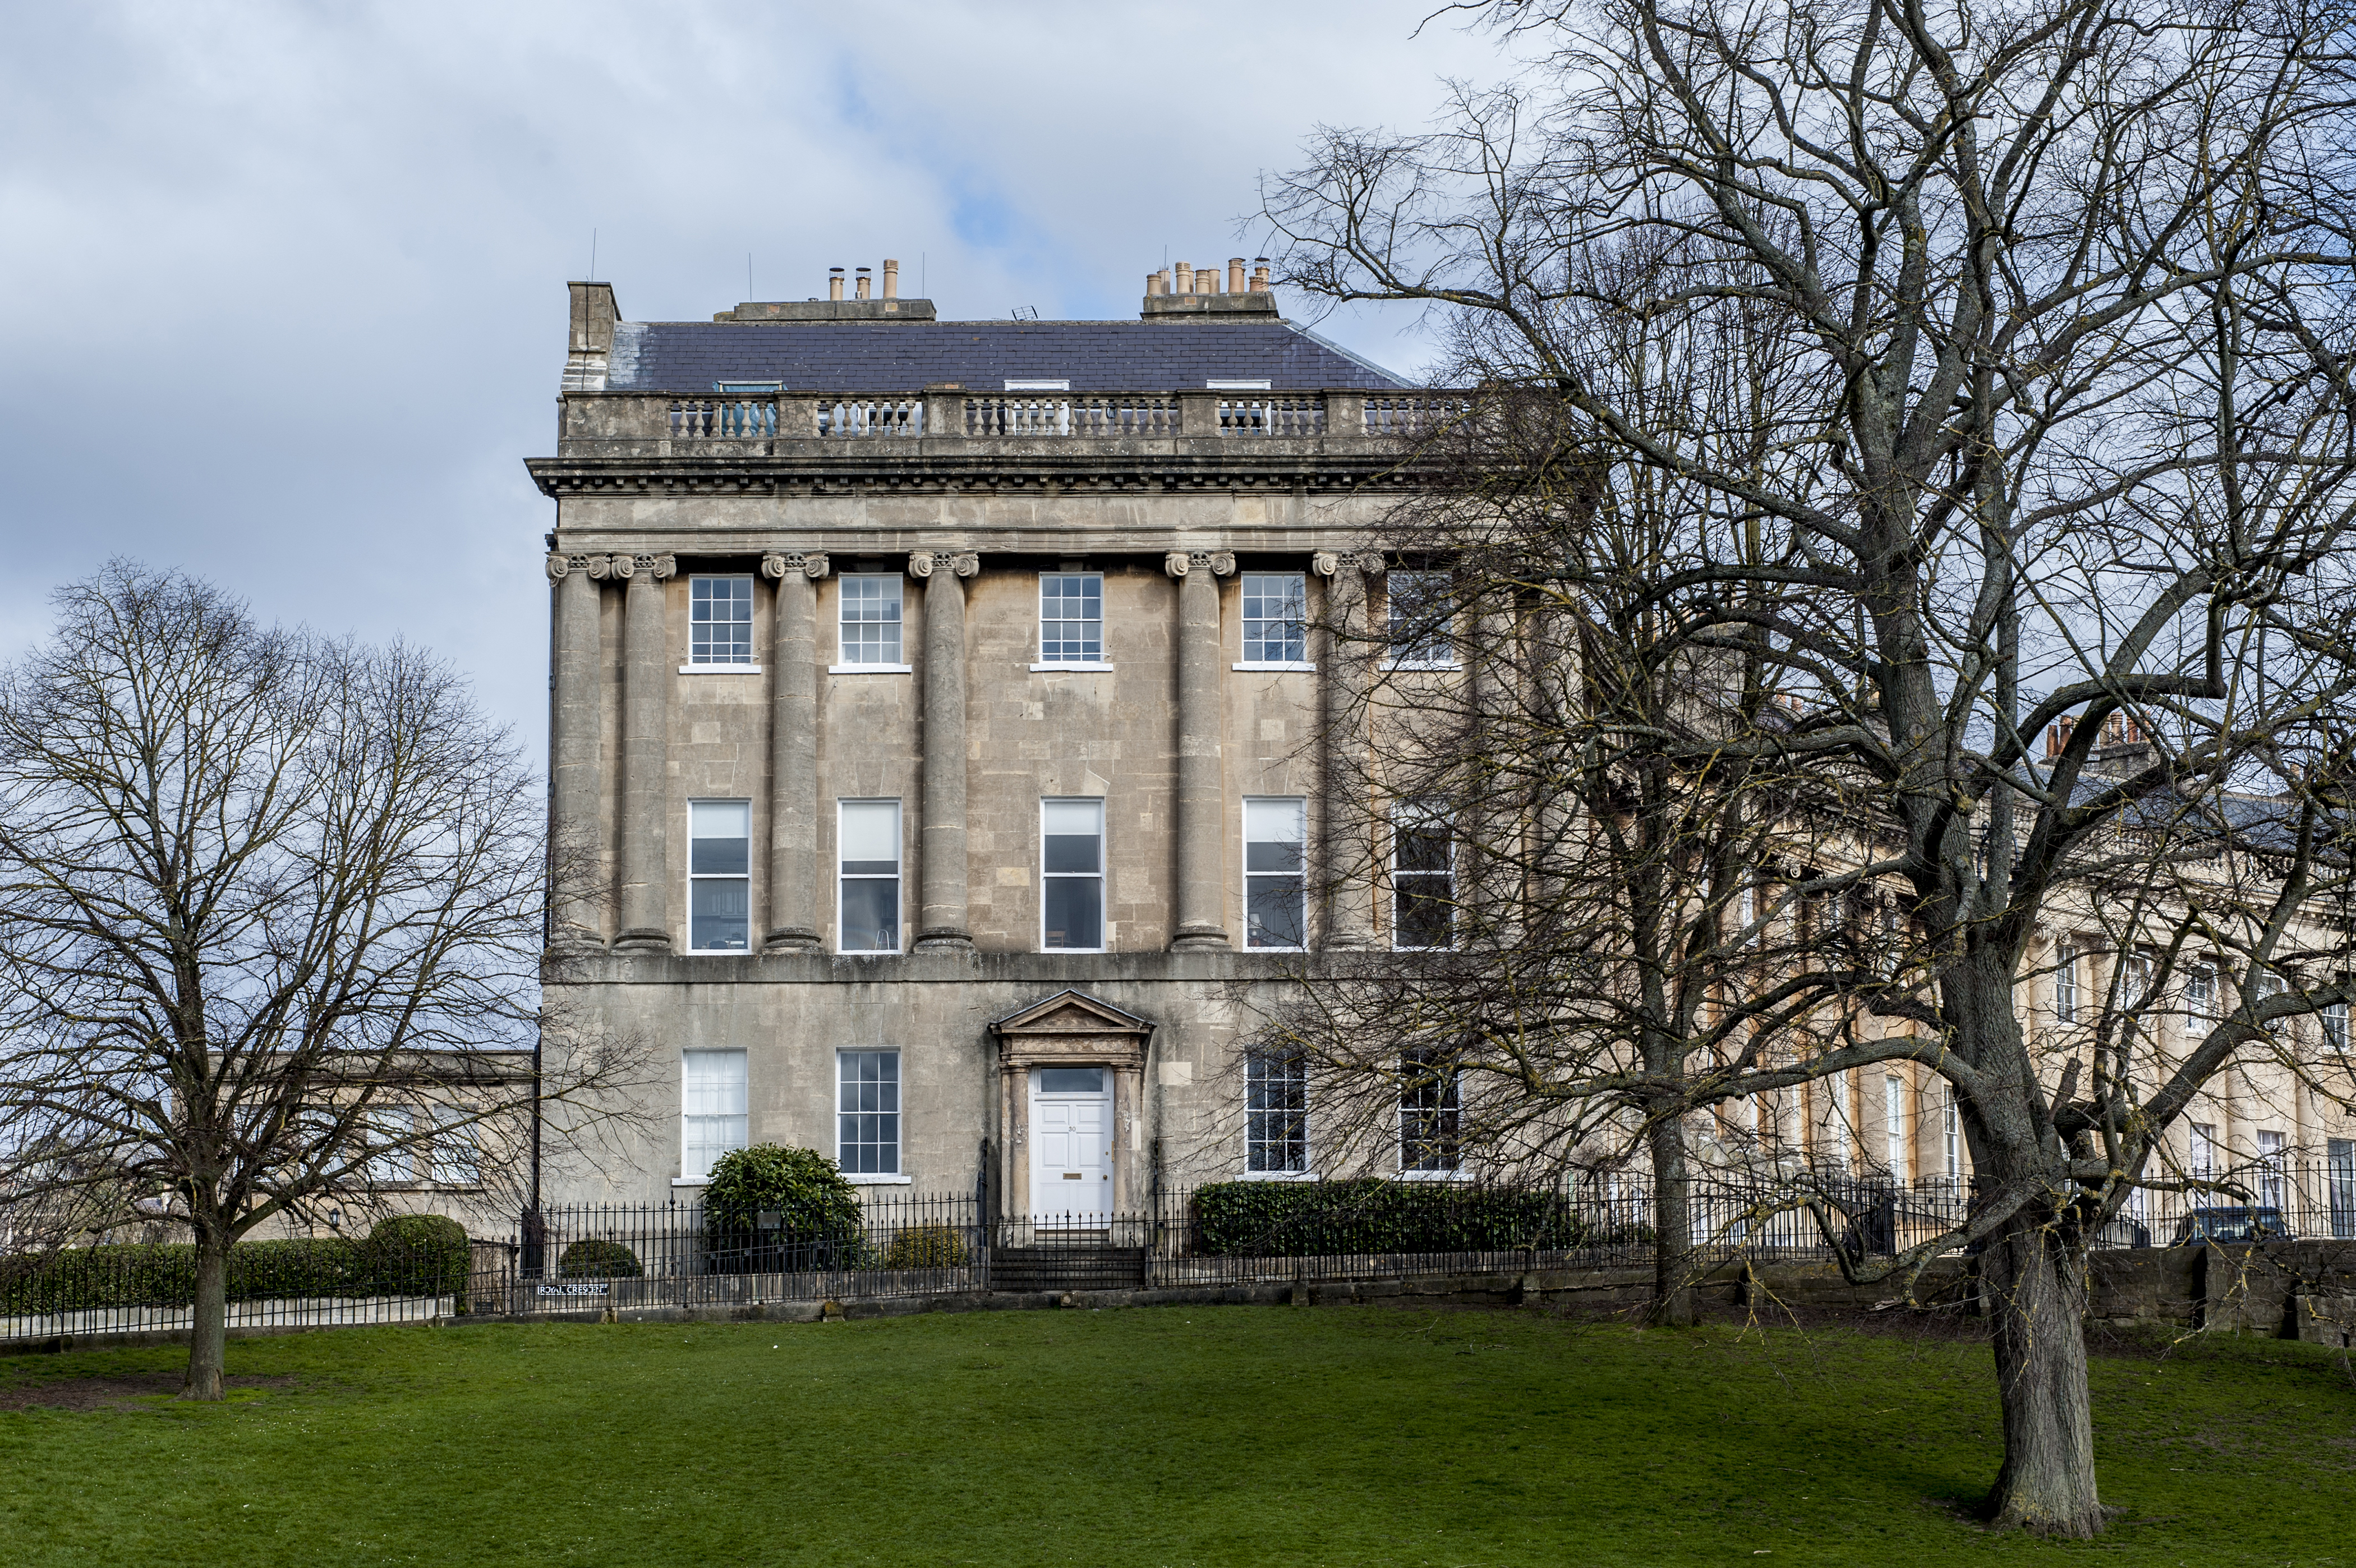
2. Step back
Step back and switch to a longer lens (we used a 100mm lens here), and you’ll be able to keep your camera level and avoid converging verticals – though your subject will now be smaller in the frame.
Read more:
George has been freelancing as a photo fixing and creative tutorial writer since 2002, working for award winning titles such as Digital Camera, PhotoPlus, N-Photo and Practical Photoshop. He's expert in communicating the ins and outs of Photoshop and Lightroom, as well as producing video production tutorials on Final Cut Pro and iMovie for magazines such as iCreate and Mac Format. He also produces regular and exclusive Photoshop CC tutorials for his YouTube channel.

