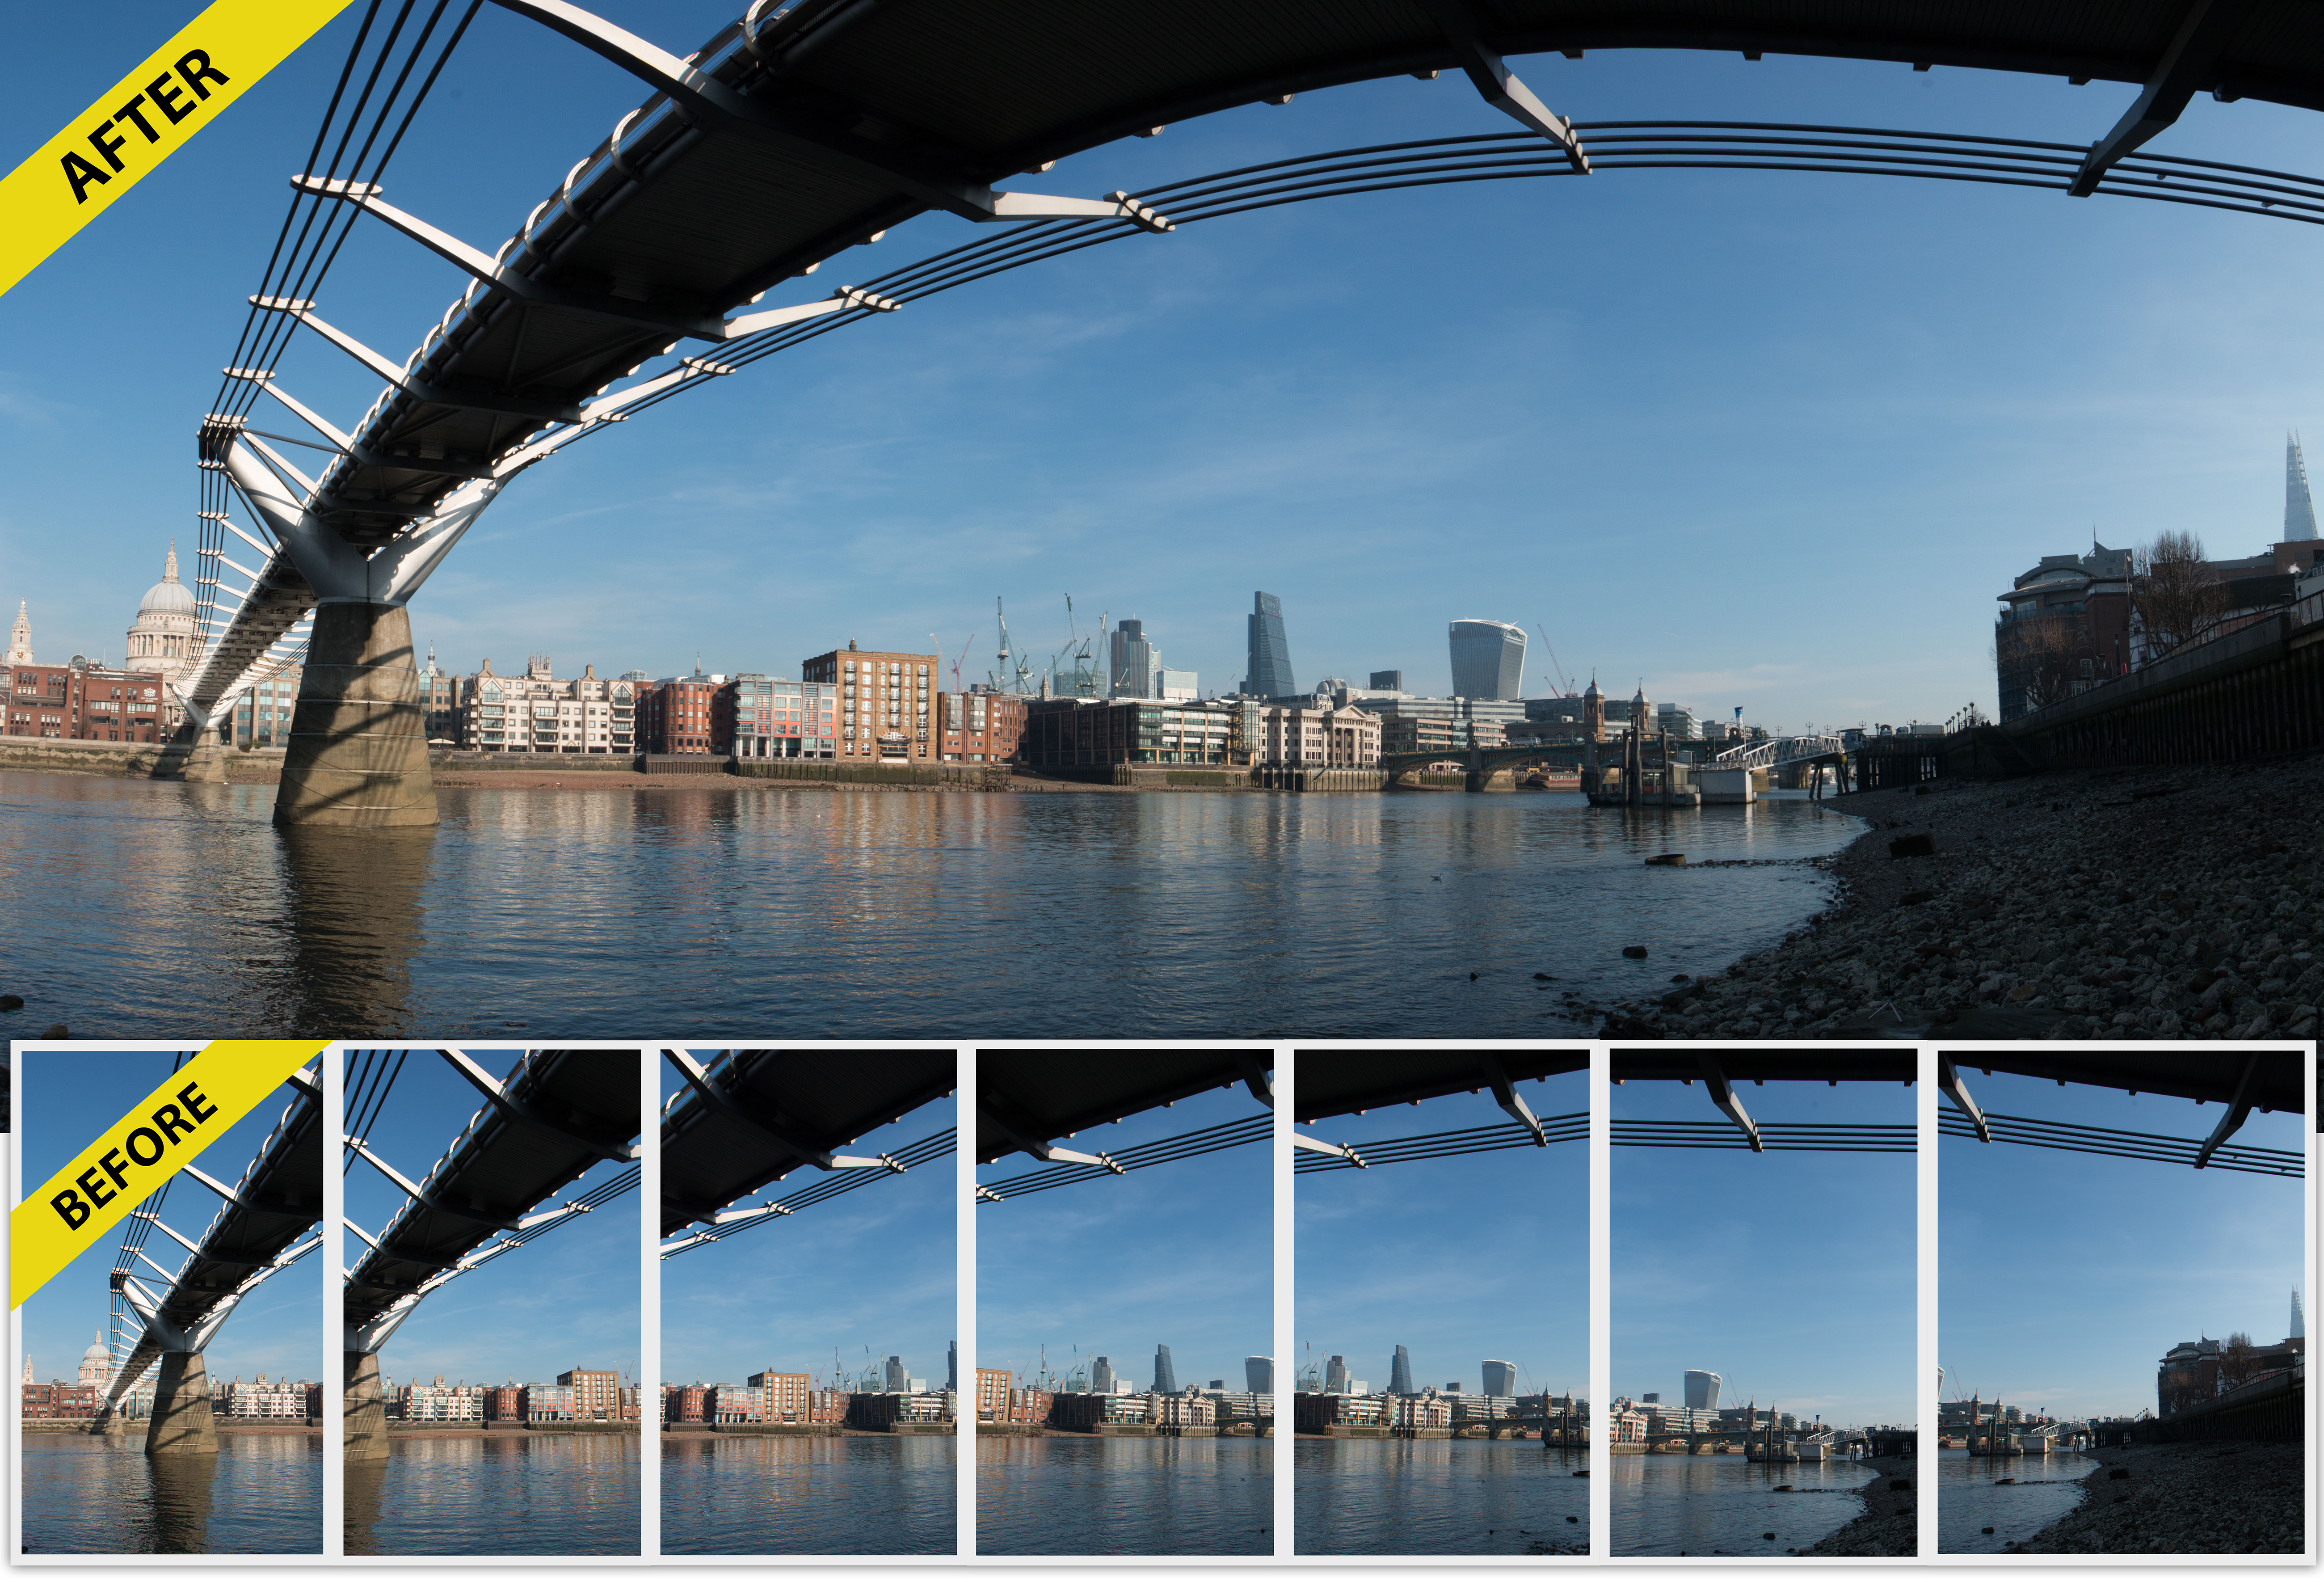
Download the start image(s) at: www.bit.ly/start-71
To create a seamless panorama in Adobe Camera Raw
Time: 10 minutes
Skill level: Beginner
Kit needed: Photoshop CC
There’s an increasing amount of crossover in editing tools between Camera Raw and Photoshop itself, and the panorama merging tools are a perfect example. It’s now possible to create seamless panoramic images straight from Camera Raw without having to open Photoshop at all.
There are advantages to doing it this way, partly because it is faster and partly because you get some interesting and highly effective merging tools. Using Camera Raw is especially efficient if you shot your original images in the Raw format, because there’s little point in converting them and opening them in Photoshop to merge them when you can do it as a single process from Camera Raw. It also outputs a ‘Raw’ panorama in Adobe’s DNG format, so you can still apply all the usual Raw processing decisions – exposure, white balance, distortion correction, curves and so on – even after the panorama has been created.
Inevitably, panoramas end up with rough edges because of the way the individual images have to be perspective-corrected, but Camera Raw has two options for dealing with this. Its Auto-Crop option crops right up to the edge of the image area, saving you from some precise and tedious manual cropping, while the Boundary Warp option distorts (warps) the image to fill the full panorama area.
STEP BY STEP: Get stitched up
Seamless panoramas
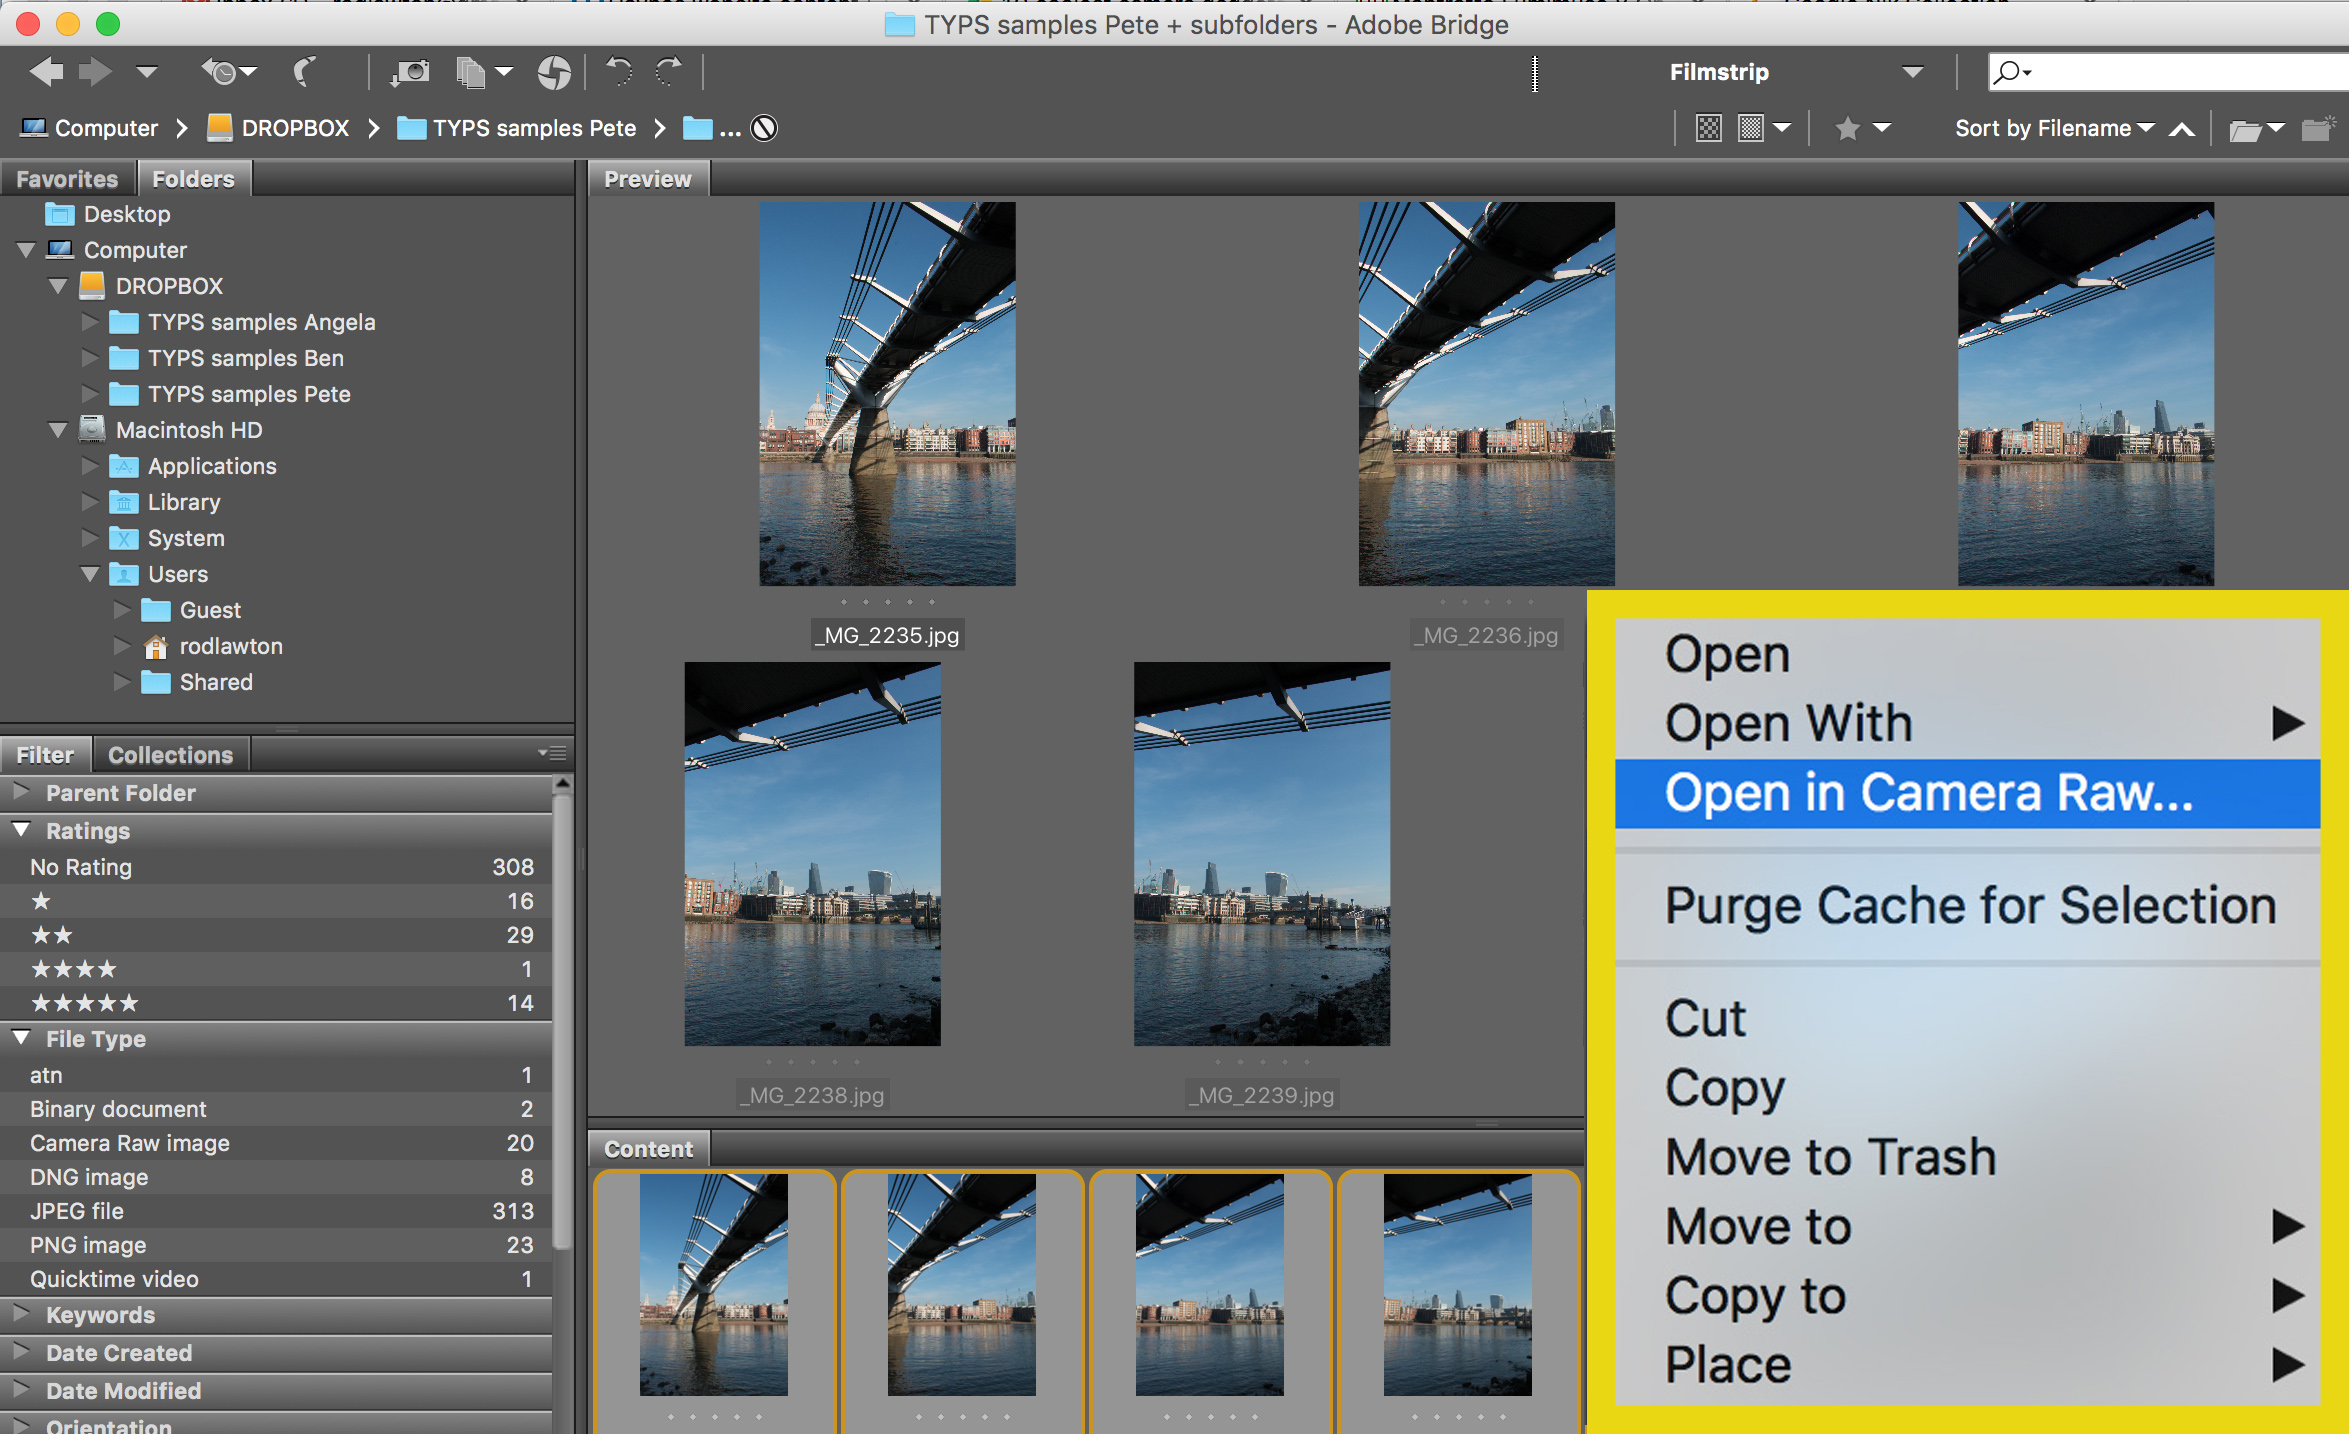
1. OPEN THE START FILES
Use our panorama start files if you want to follow our tutorial exactly – they are numbered 1-7. You should open them directly from Camera Raw by first selecting all seven files, then right-clicking any one of them and choosing Open in Camera Raw from the menu.
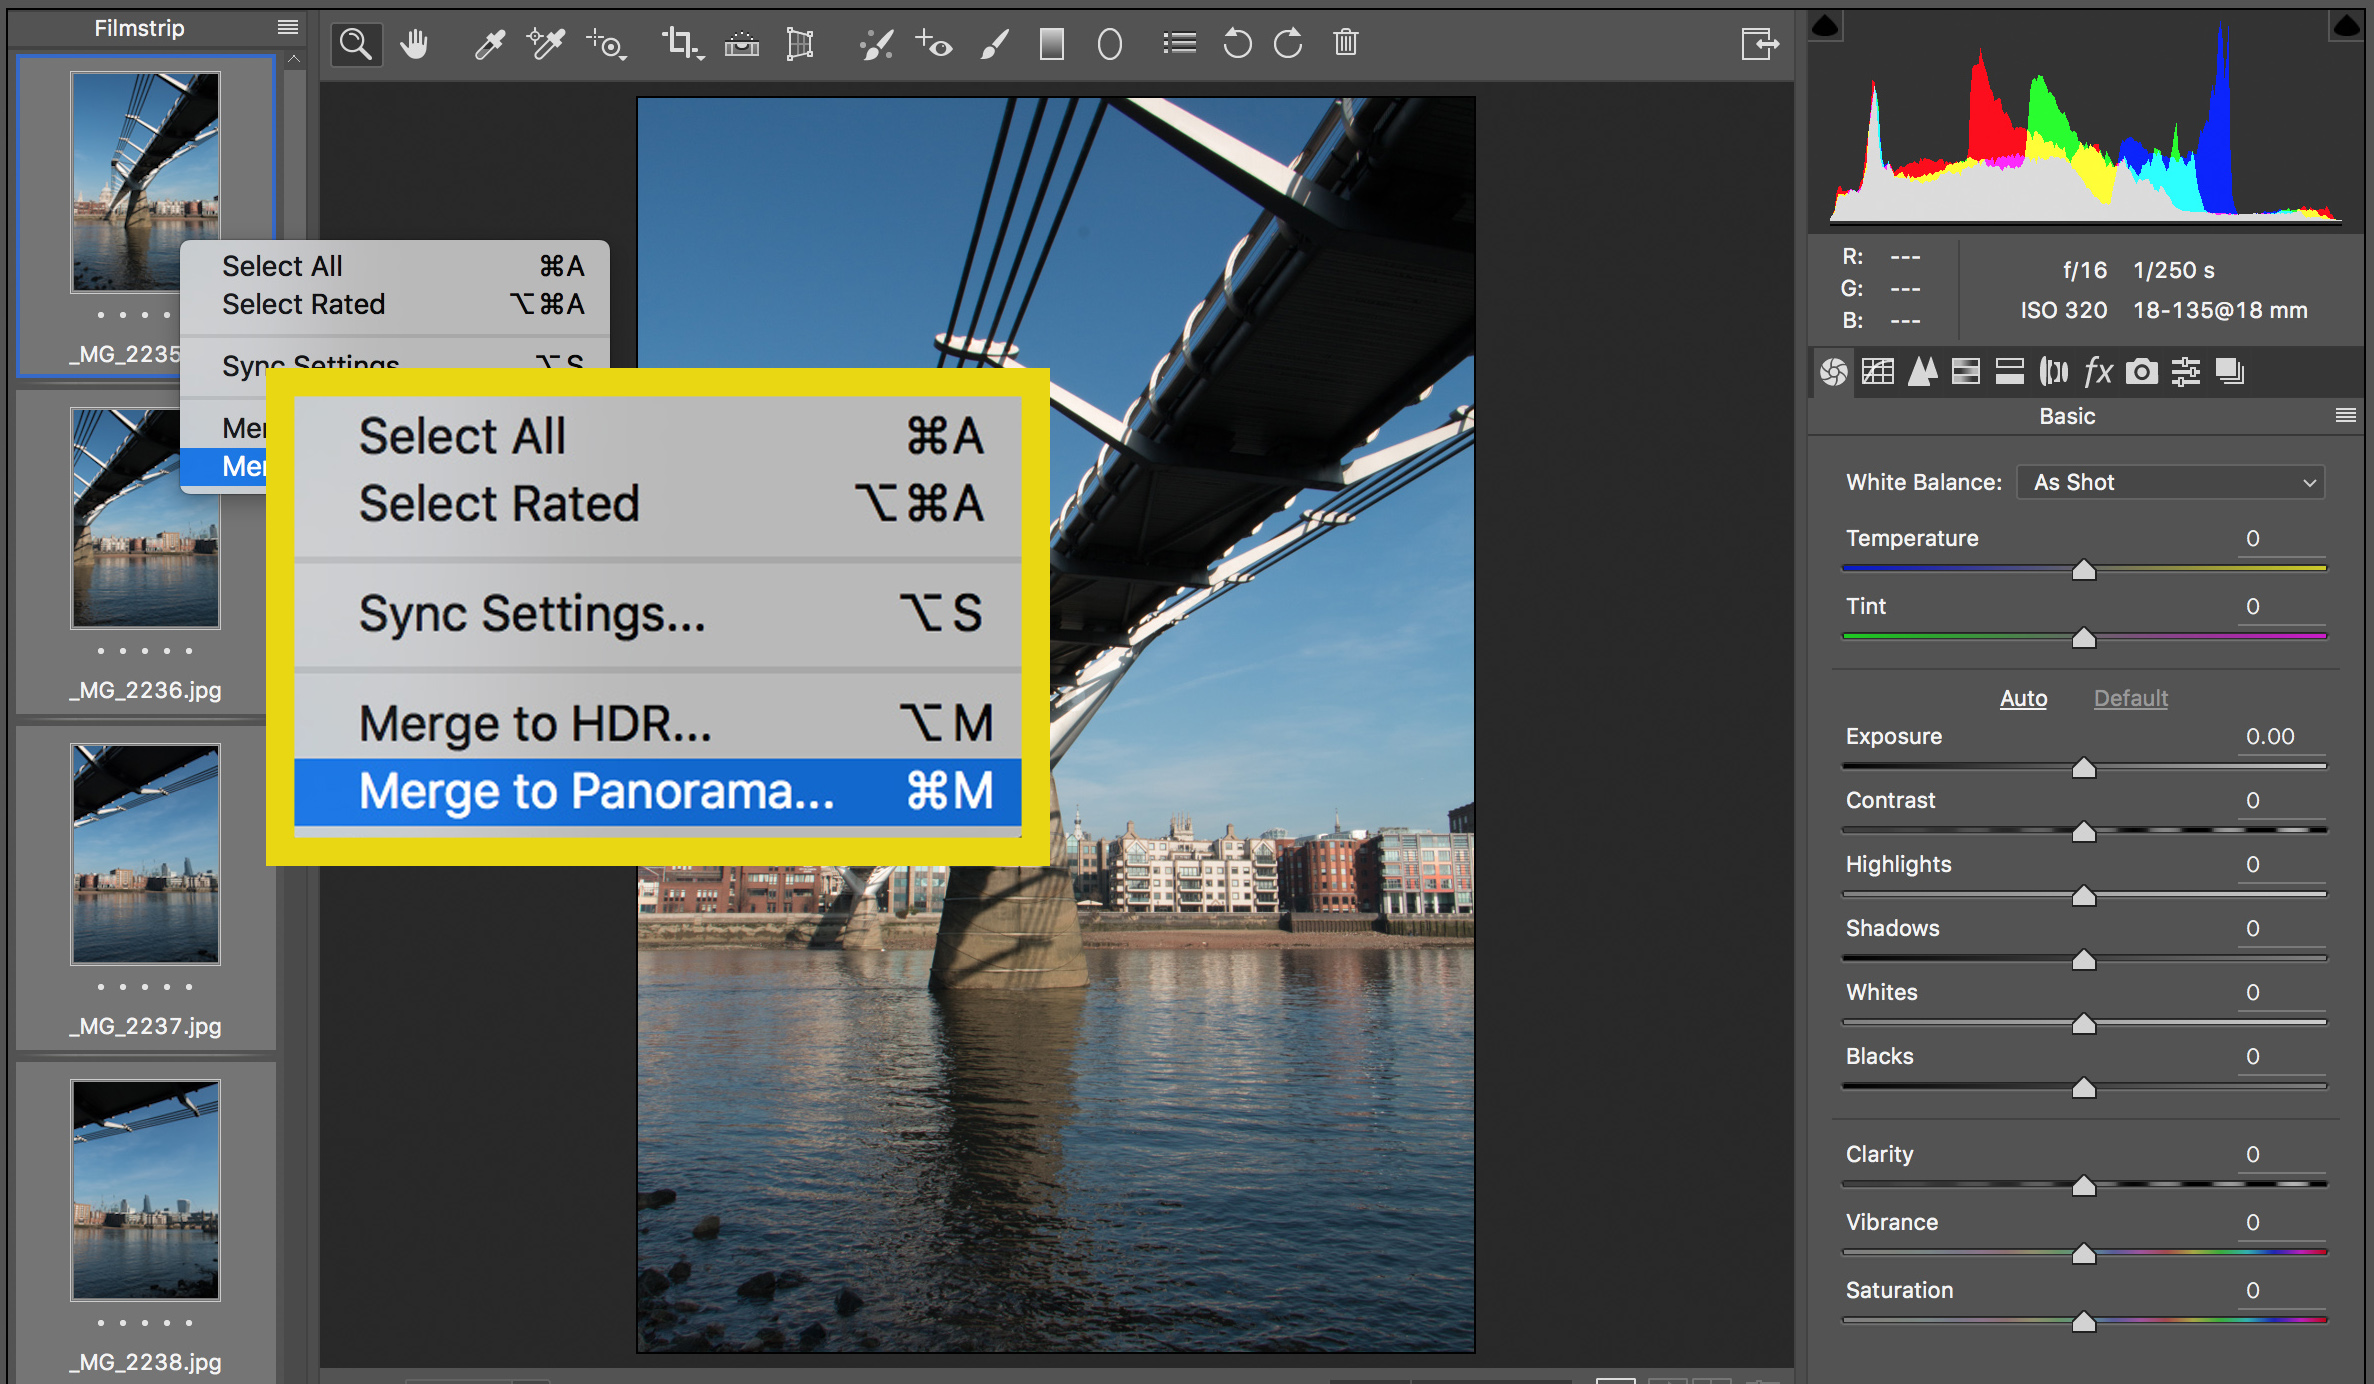
2. MERGE TO PANORAMA…
When you open more than one image in Camera Raw they’re displayed as a vertical filmstrip on the left side of the window. In the top corner you’ll see a drop-down menu icon, and from here you need to choose Select All and then the Merge to Panorama menu option.
3. CHOOSE YOUR SETTINGS
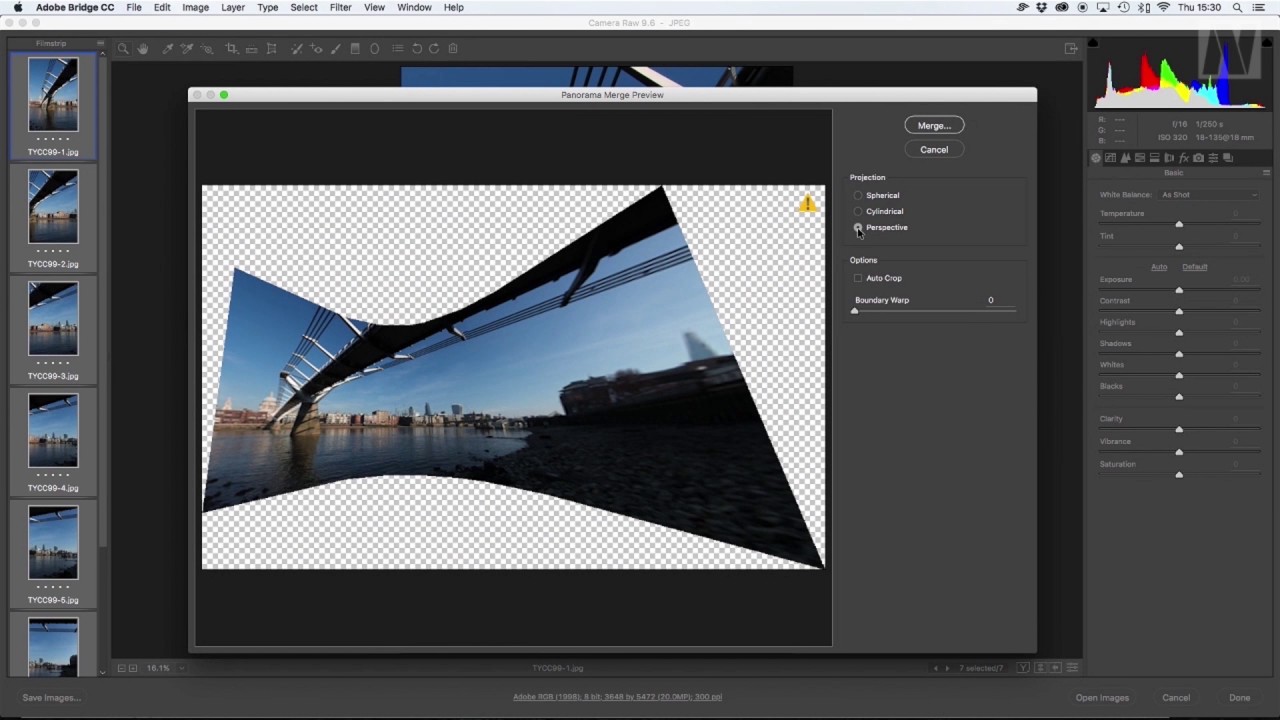
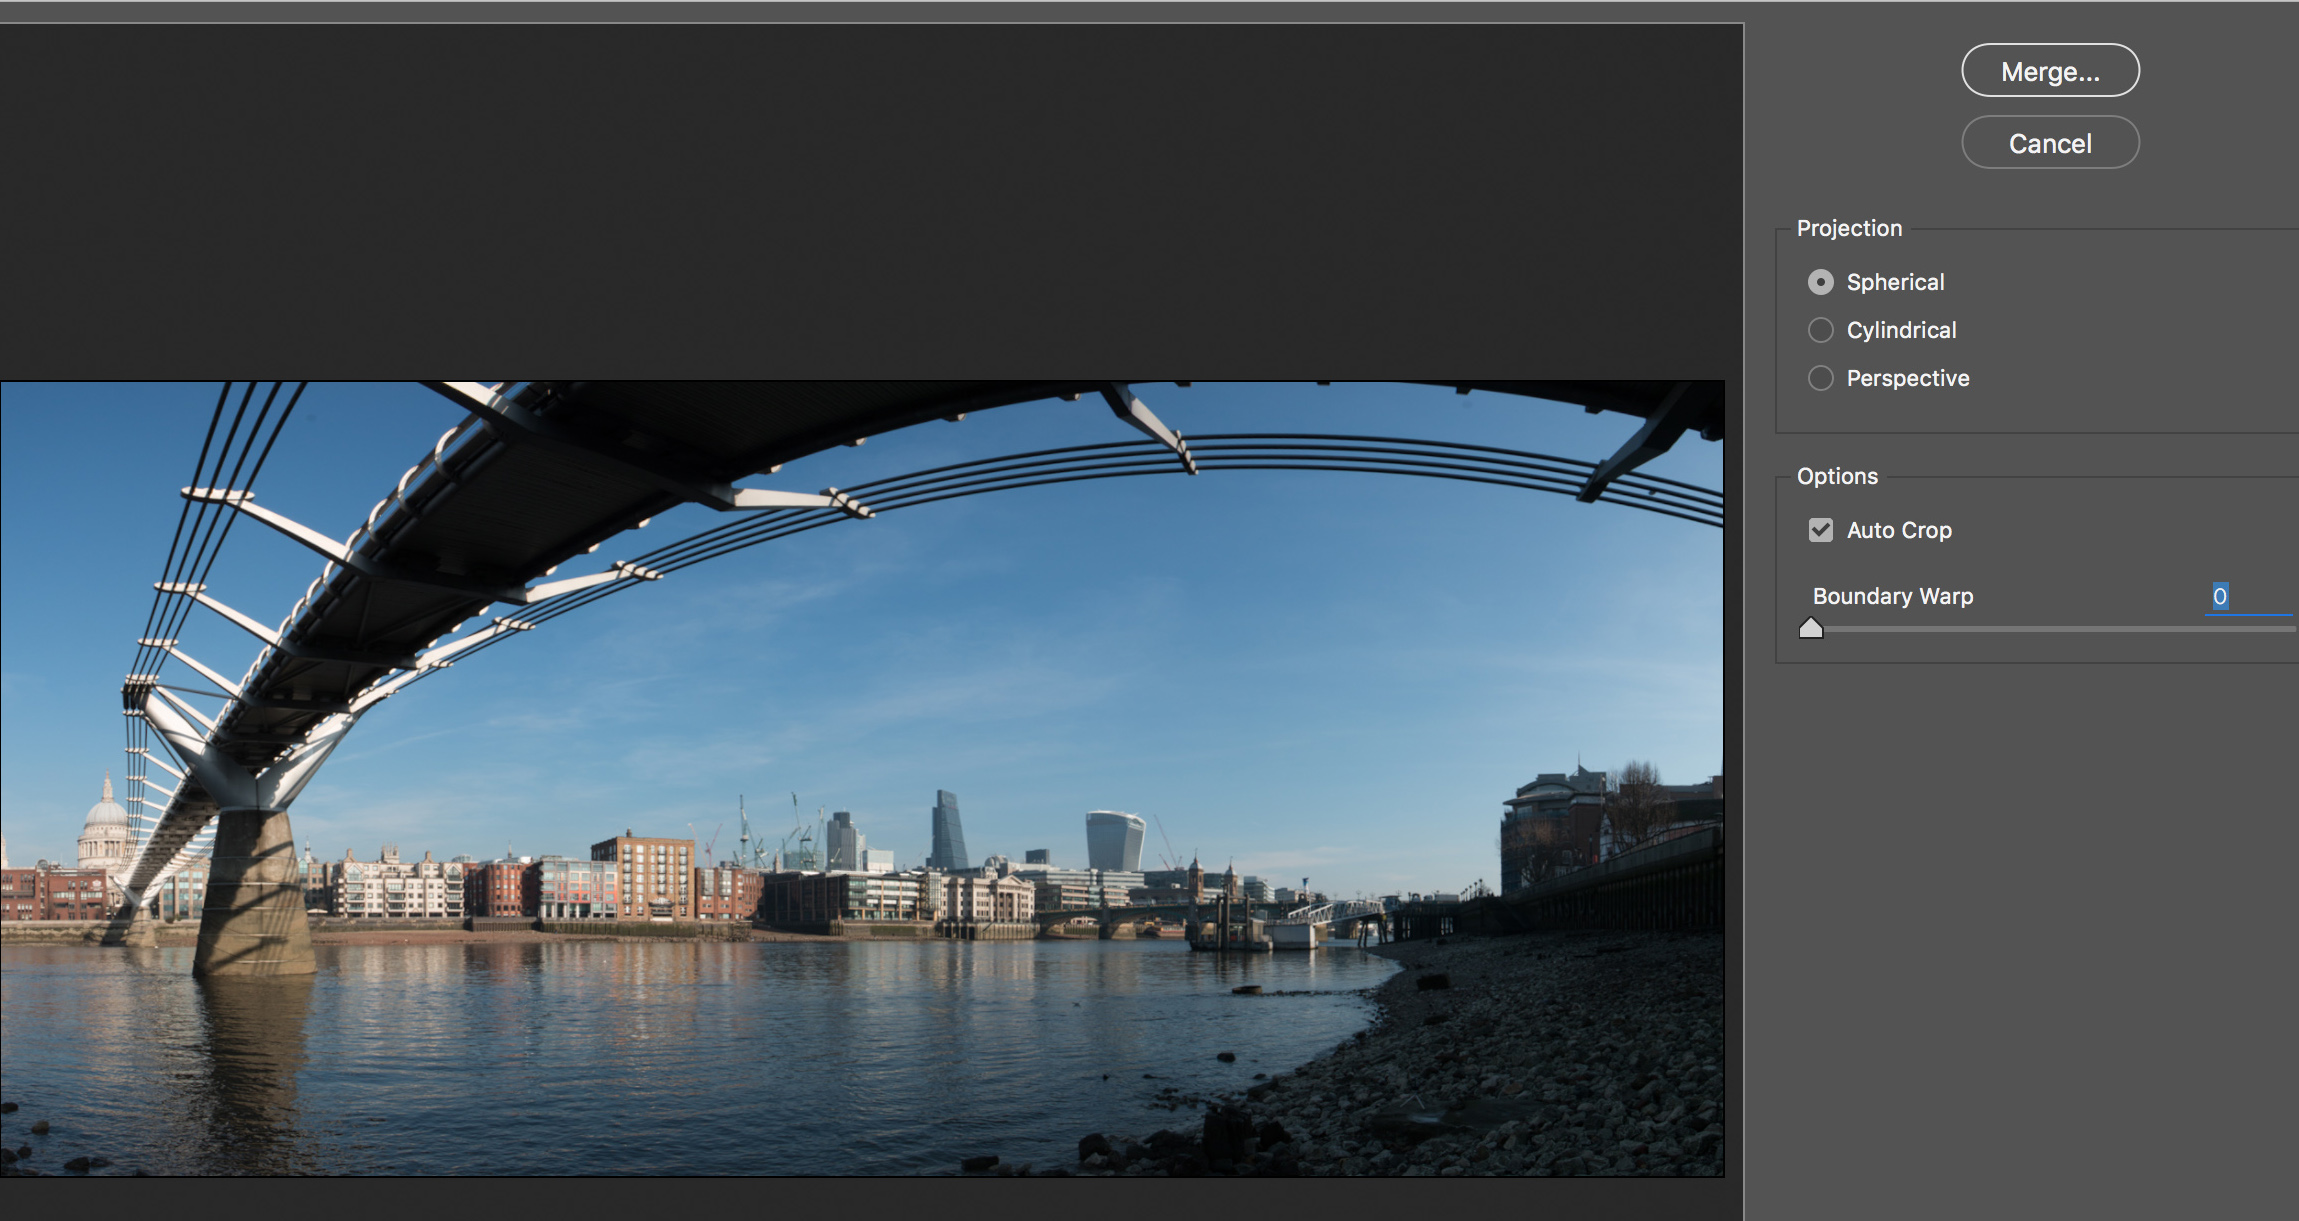
After a few moments spent merging the images, Camera Raw will open the Panorama Merge window, where you choose the ‘Projection’ settings and Crop and Warp settings. By default, the ‘Spherical’ projection is used and untidy edges are cropped off.
4. PREVIEW THE PROJECTIONS
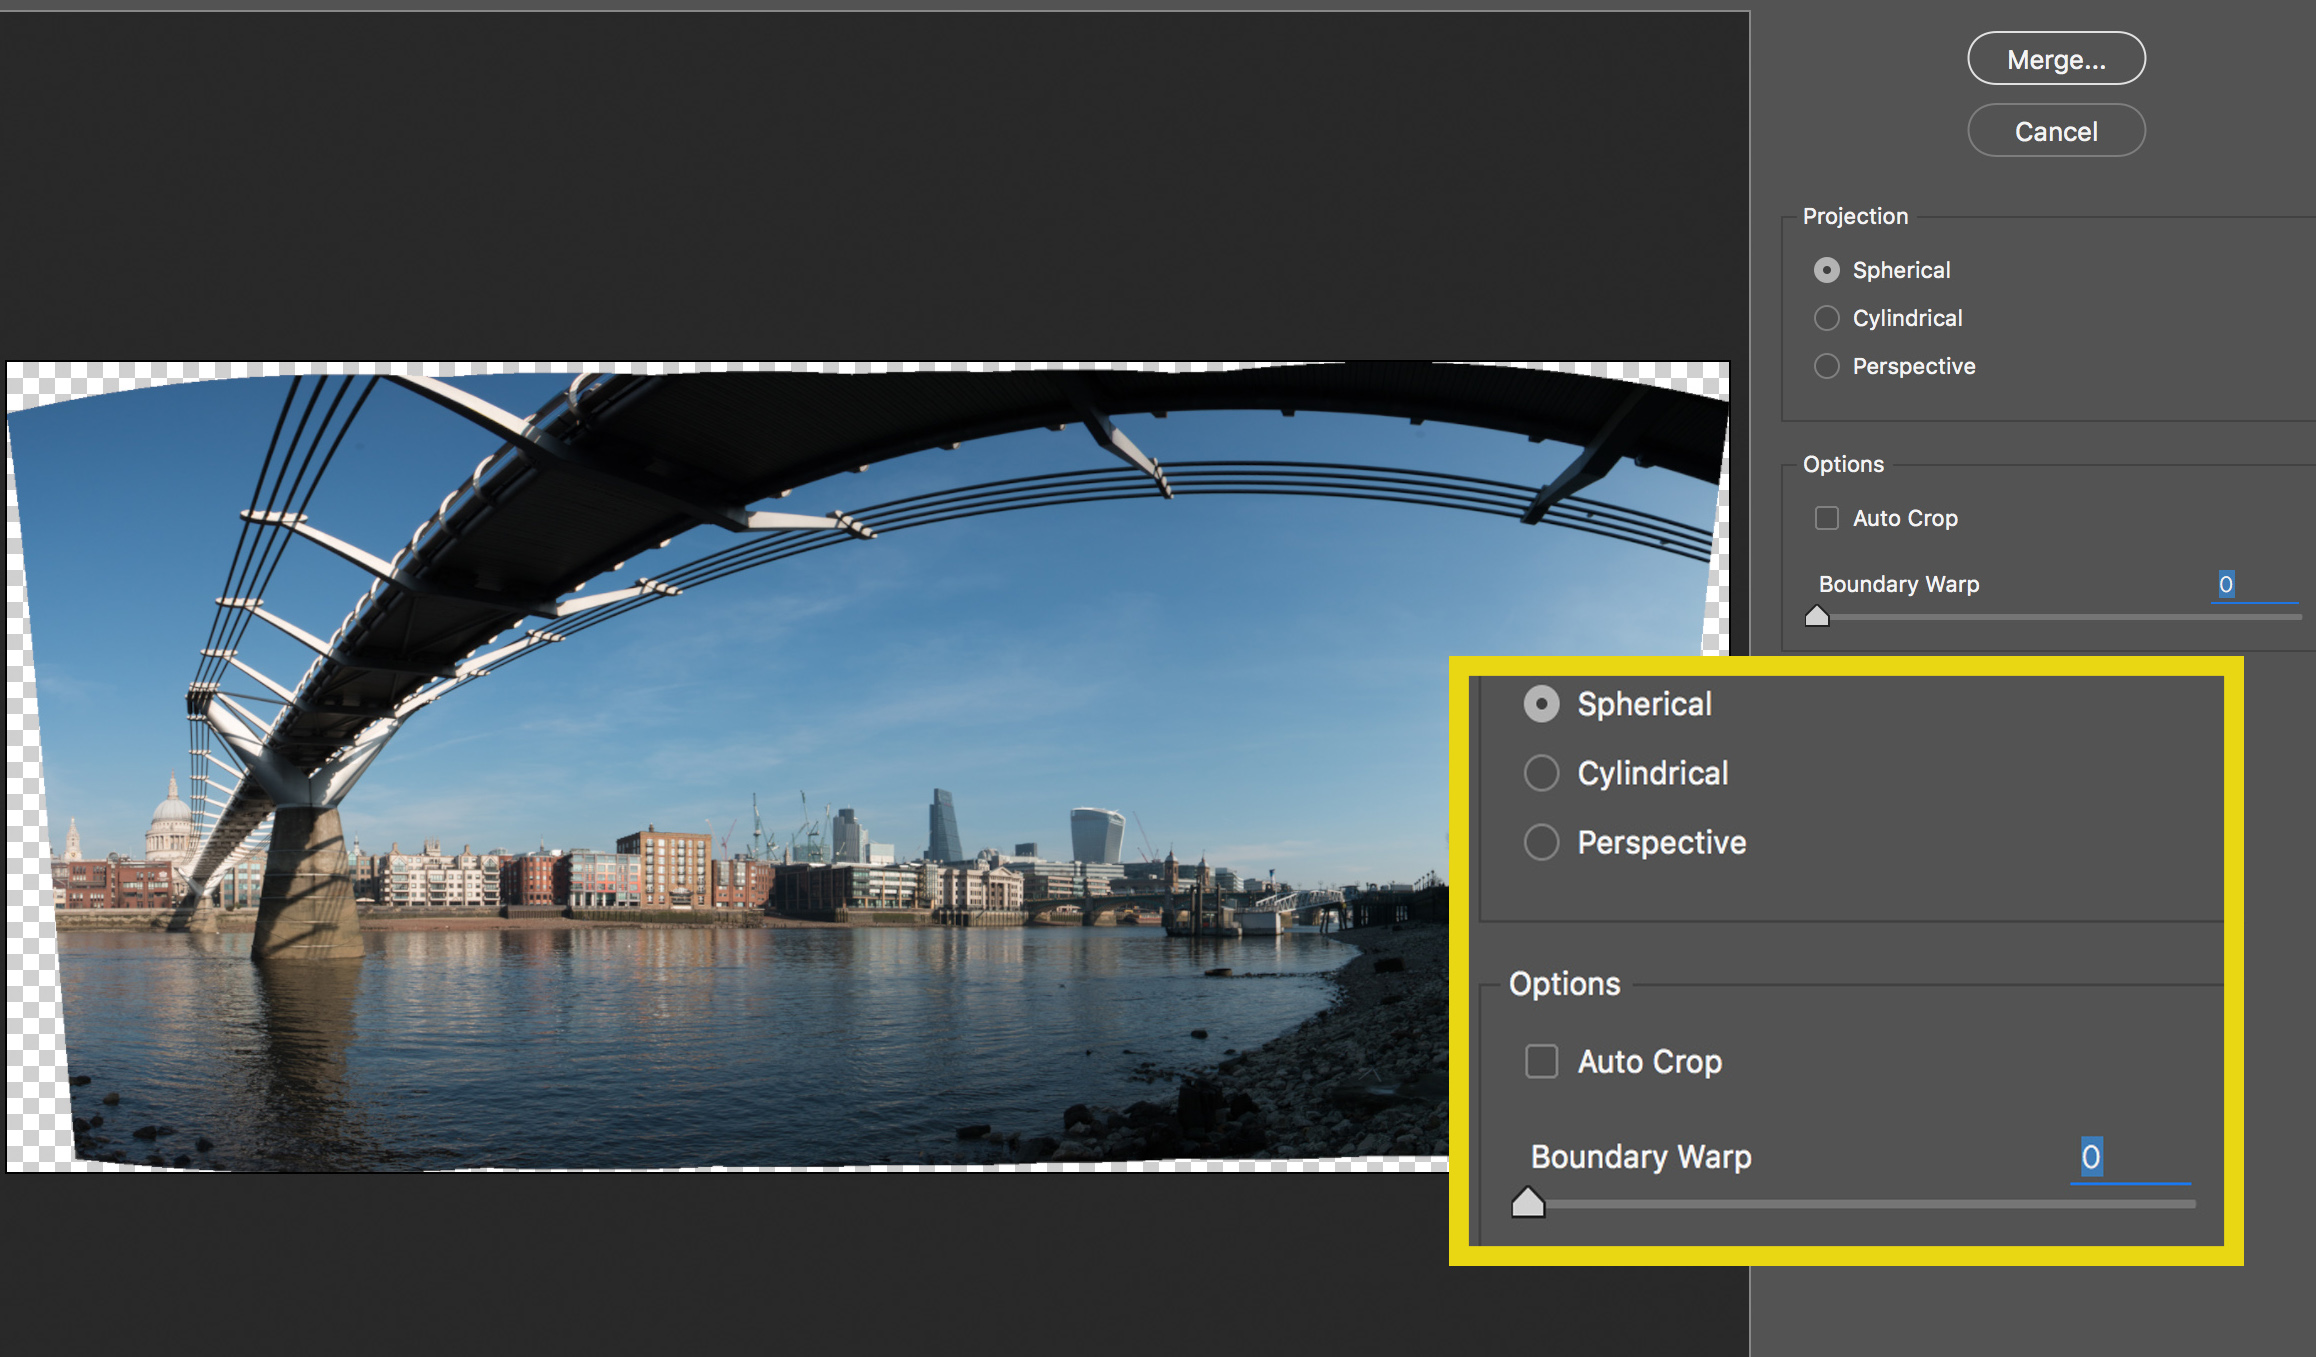
You’ll see the effect of the different projections more clearly if you deselect the Auto Crop box. Spherical projections combine the images on the inside surface of a virtual sphere, cylindrical projections use a virtual cylinder, while Perspective simulates a super-wide lens.
5. SET BOUNDARY WARP
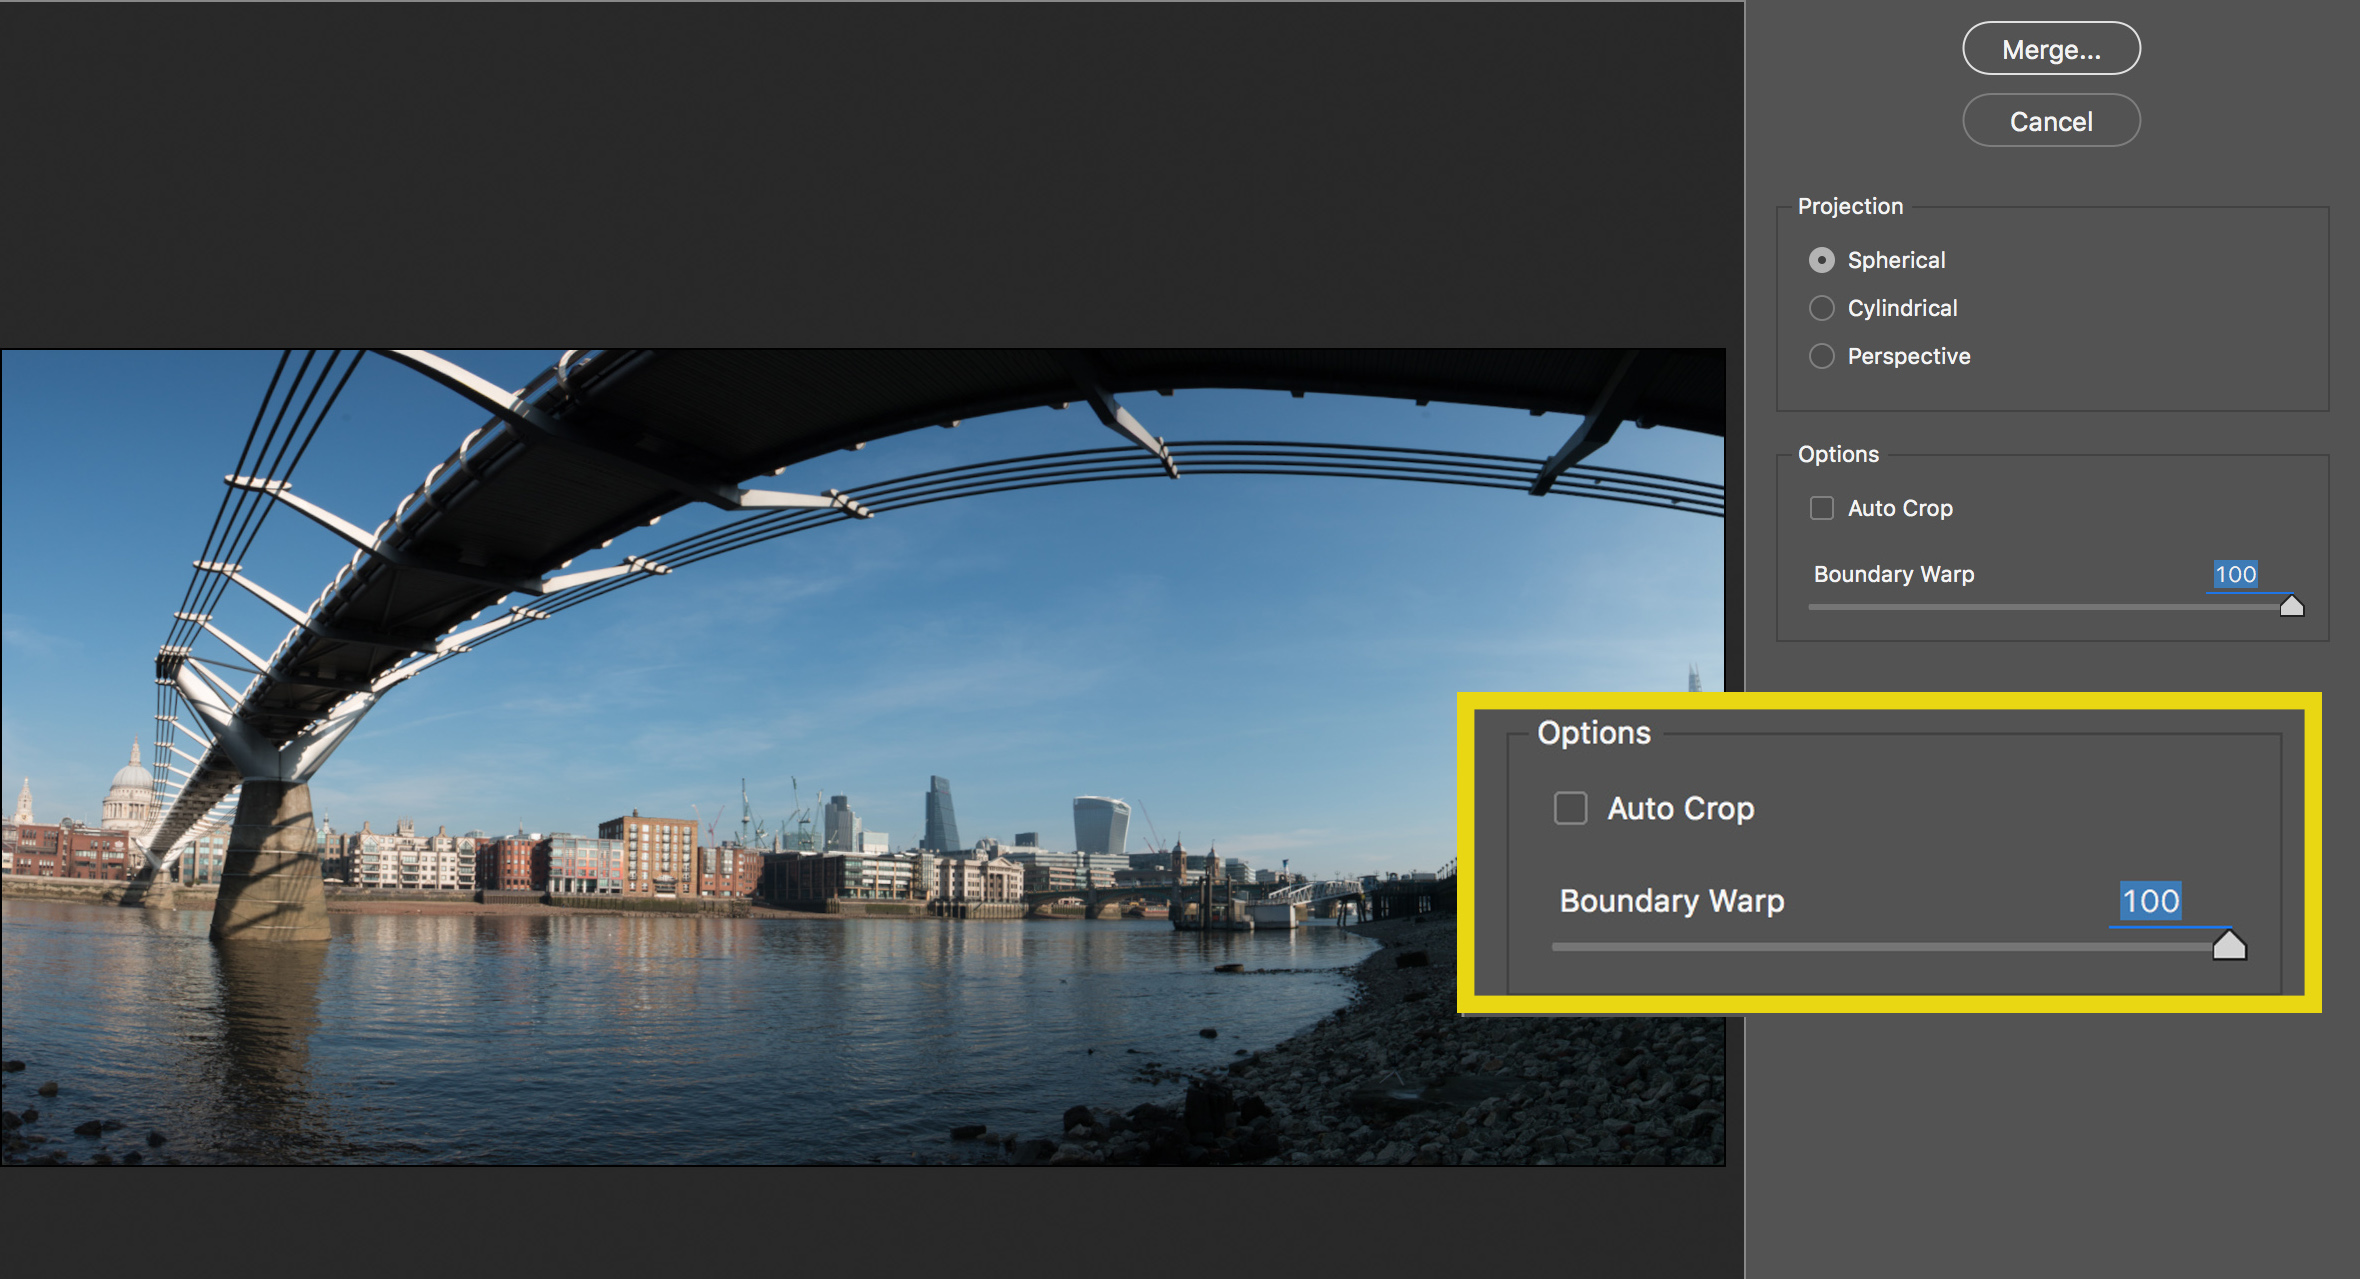
The Auto Crop option inevitably crops off some parts of the panorama, and, if you don’t want that, the alternative is the new Boundary Warp tool. This ‘warps’ the full panoramic image to push it right to the edges of the frame – the downside is that it does introduce some distortion.
6. MERGE THE IMAGES
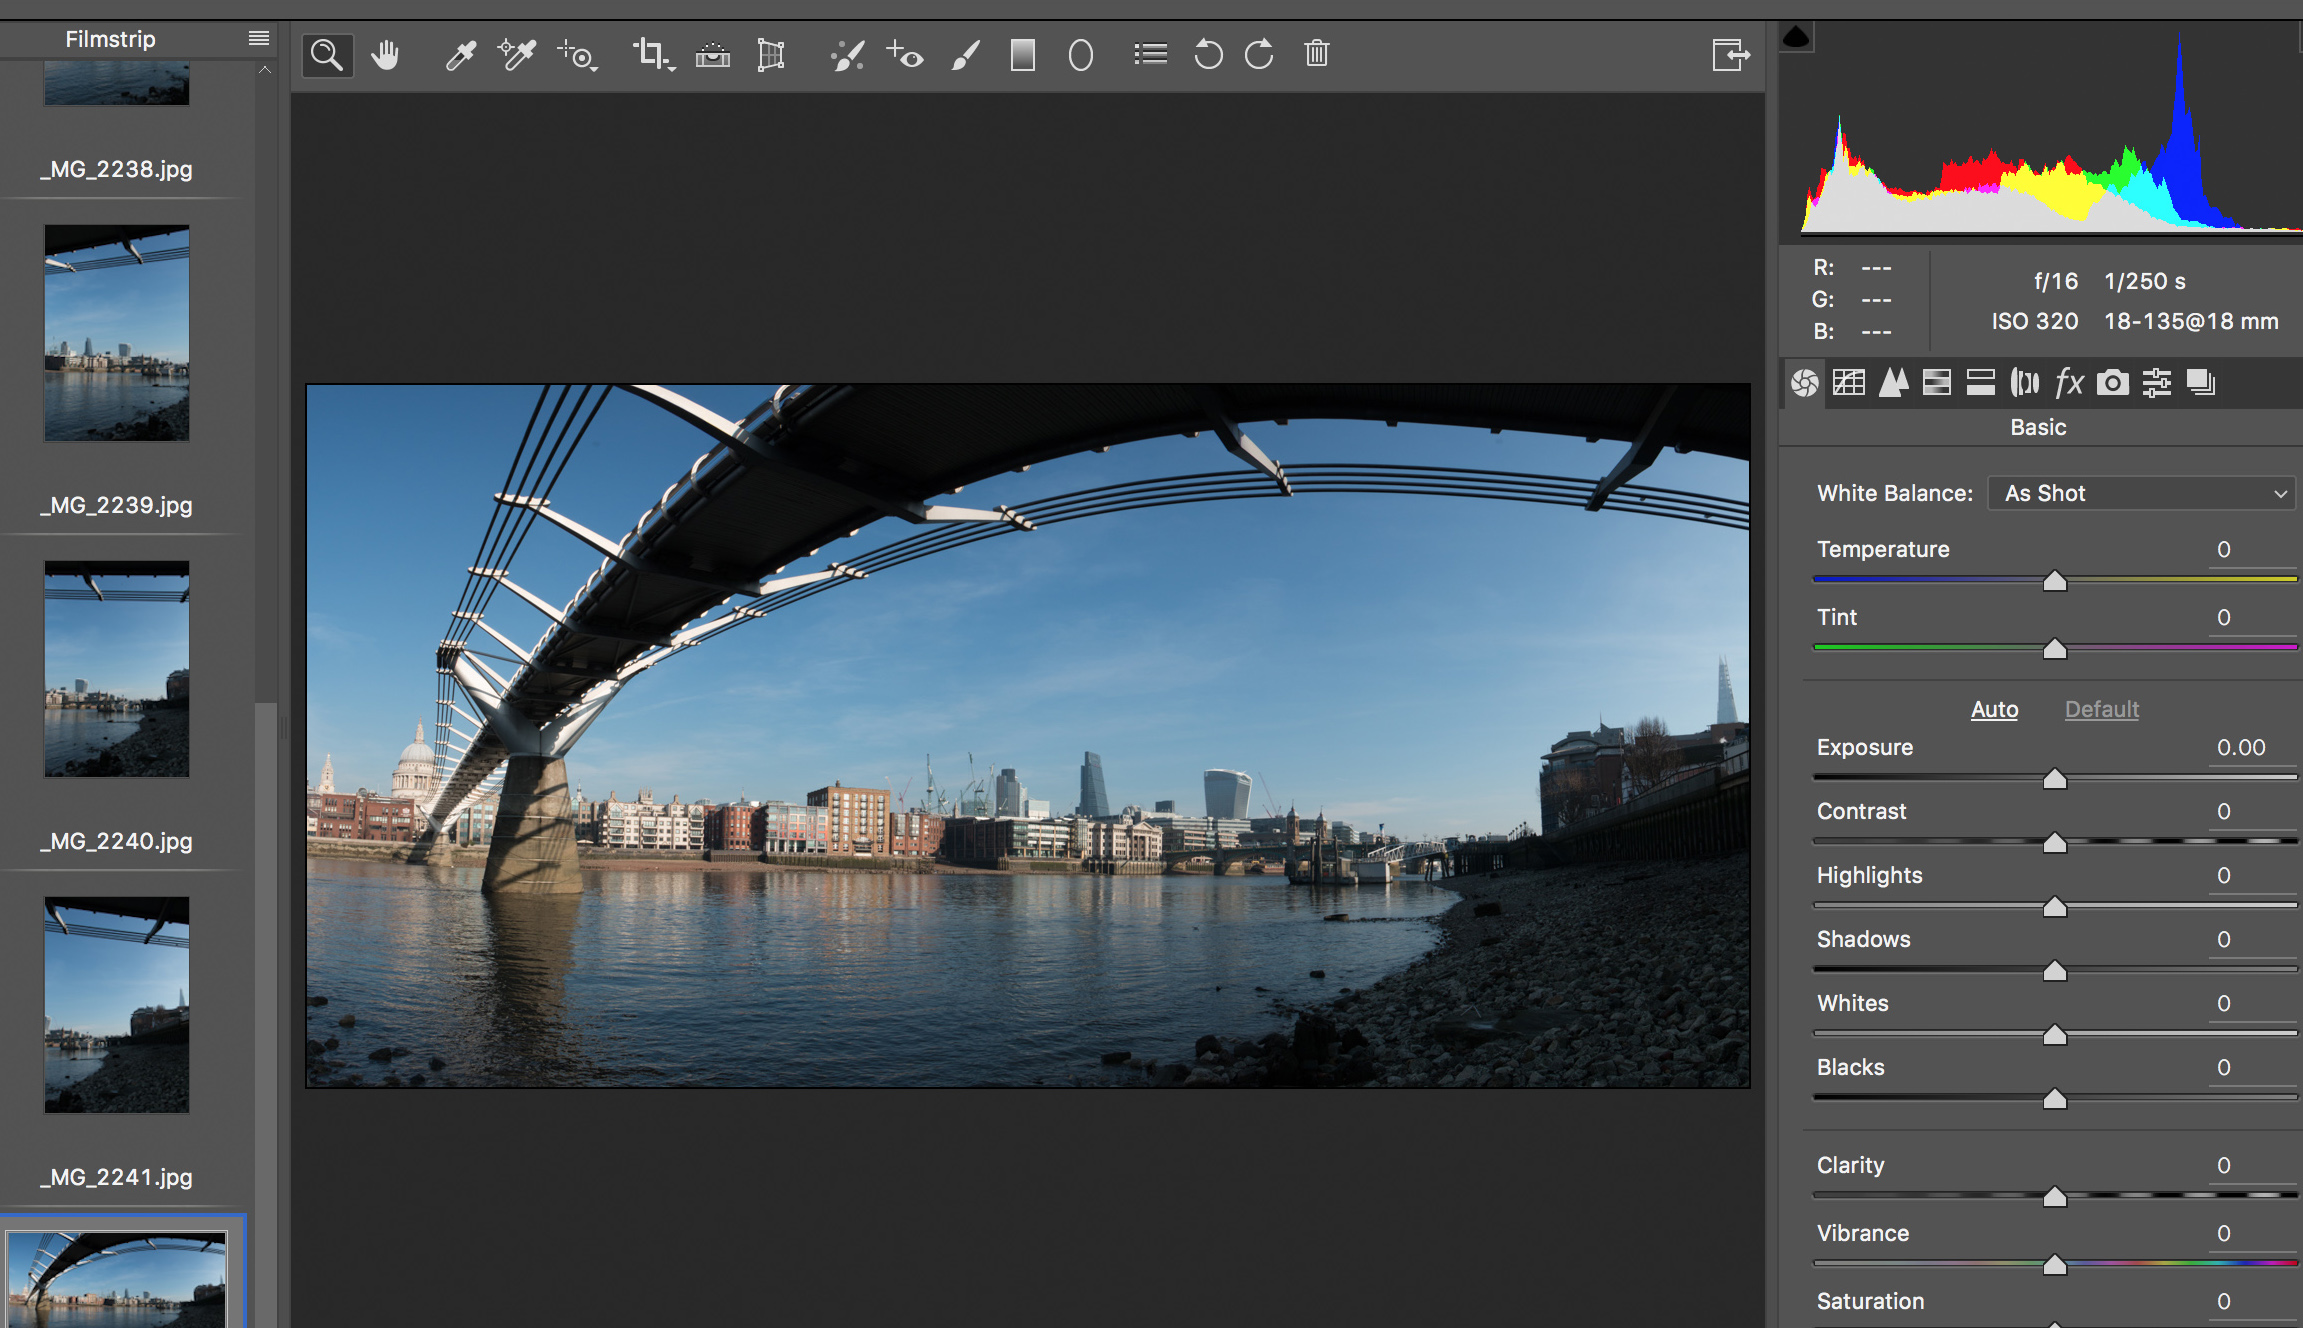
When you’re happy, click the Merge button in the top-right corner. When the merge process is finished, a new merged DNG file appears in the Camera Raw filmstrip (even if you started with JPEGs). You can now open this in Photoshop or simply save it out as a new file.
Get the Digital Camera World Newsletter
The best camera deals, reviews, product advice, and unmissable photography news, direct to your inbox!
N-Photo: The Nikon Magazine is a monthly publication that's entirely dedicated to Nikon users. As a 100% independent magazine, you can be assured of unbiased opinion from a trustworthy team of devoted photography experts including editor Adam Waring and Deputy Editor Mike Harris.
Aimed at all users, from camera newcomers to working pros, every issue is packed with practical, Nikon-specific advice for taking better photos, in-depth reviews of Nikon-compatible gear, and inspiring projects and exciting video lessons for mastering camera, lens and Photoshop techniques.
Written by Nikon users for Nikon users, N-Photo is your one-stop shop for everything to do with cameras, lenses, tripods, bags, tips, tricks and techniques to get the most out of your photography.
