To photograph a classic car with a single flashgun
Time: Half a day
Skill level: Intermediate
Kit needed: D-SLR, tripod, monopod, flashgun, flash bracket mount, wireless triggers, softbox, car or other vehicle
You don’t need lots of specialist kit to shoot cars like the pros.
By combining shooting techniques and a bit of Photoshopping, you can highlight the shoulder line of a classic sports car to create a photo with some real class.
Your lone flashgun and softbox won’t give the coverage of a pro lighting set-up, so to get your finished image, you’ll need to take several shots of the car, lighting it from above, and, with each frame, moving the flash a bit further along the car.
Then you’ll need to take the flash closer in and highlight the wheels and other details. After that, it’s just a matter of combining the images in Photoshop.
We shot our car in a garage because it was raining, but you can do this shoot outside in low light or at night time (the darker the ambient light, the easier it is to under-expose the background for that mean and moody look).
If you’re not a fan of heavy post-production work, you could be forgiven for asking, “Why use this technique?” Well, because it saves you from hiring the massive overhead lights that the pros use for car shoots, where the costs can run into tens and sometimes hundreds of thousands of pounds.
Also, you get to hang around and gawp at beautiful works of engineering – not bad for a day’s shooting! So, let’s see what you need to do.
On location: Get the light right

1. Wireless trigger
We used Yongnuo YN622N wireless triggers – they trigger the flash remotely when the shutter button is pressed. We kept the flash in manual mode.
2. Softbox
The softer the light, the better – ideally the car would be in a giant light-tent-like set-up, but for our budget version, you just need to diffuse the light.
3. Monopod
By putting the flash and softbox on a monopod, you can reach over the car and light the front of the chassis while staying out of sight in the shadows.
4. Dark garage
A dark location is essential. It means fewer distractions within the frame and, more importantly, fewer reflections in the car’s shiny surfaces.
Setting up: Essential prep
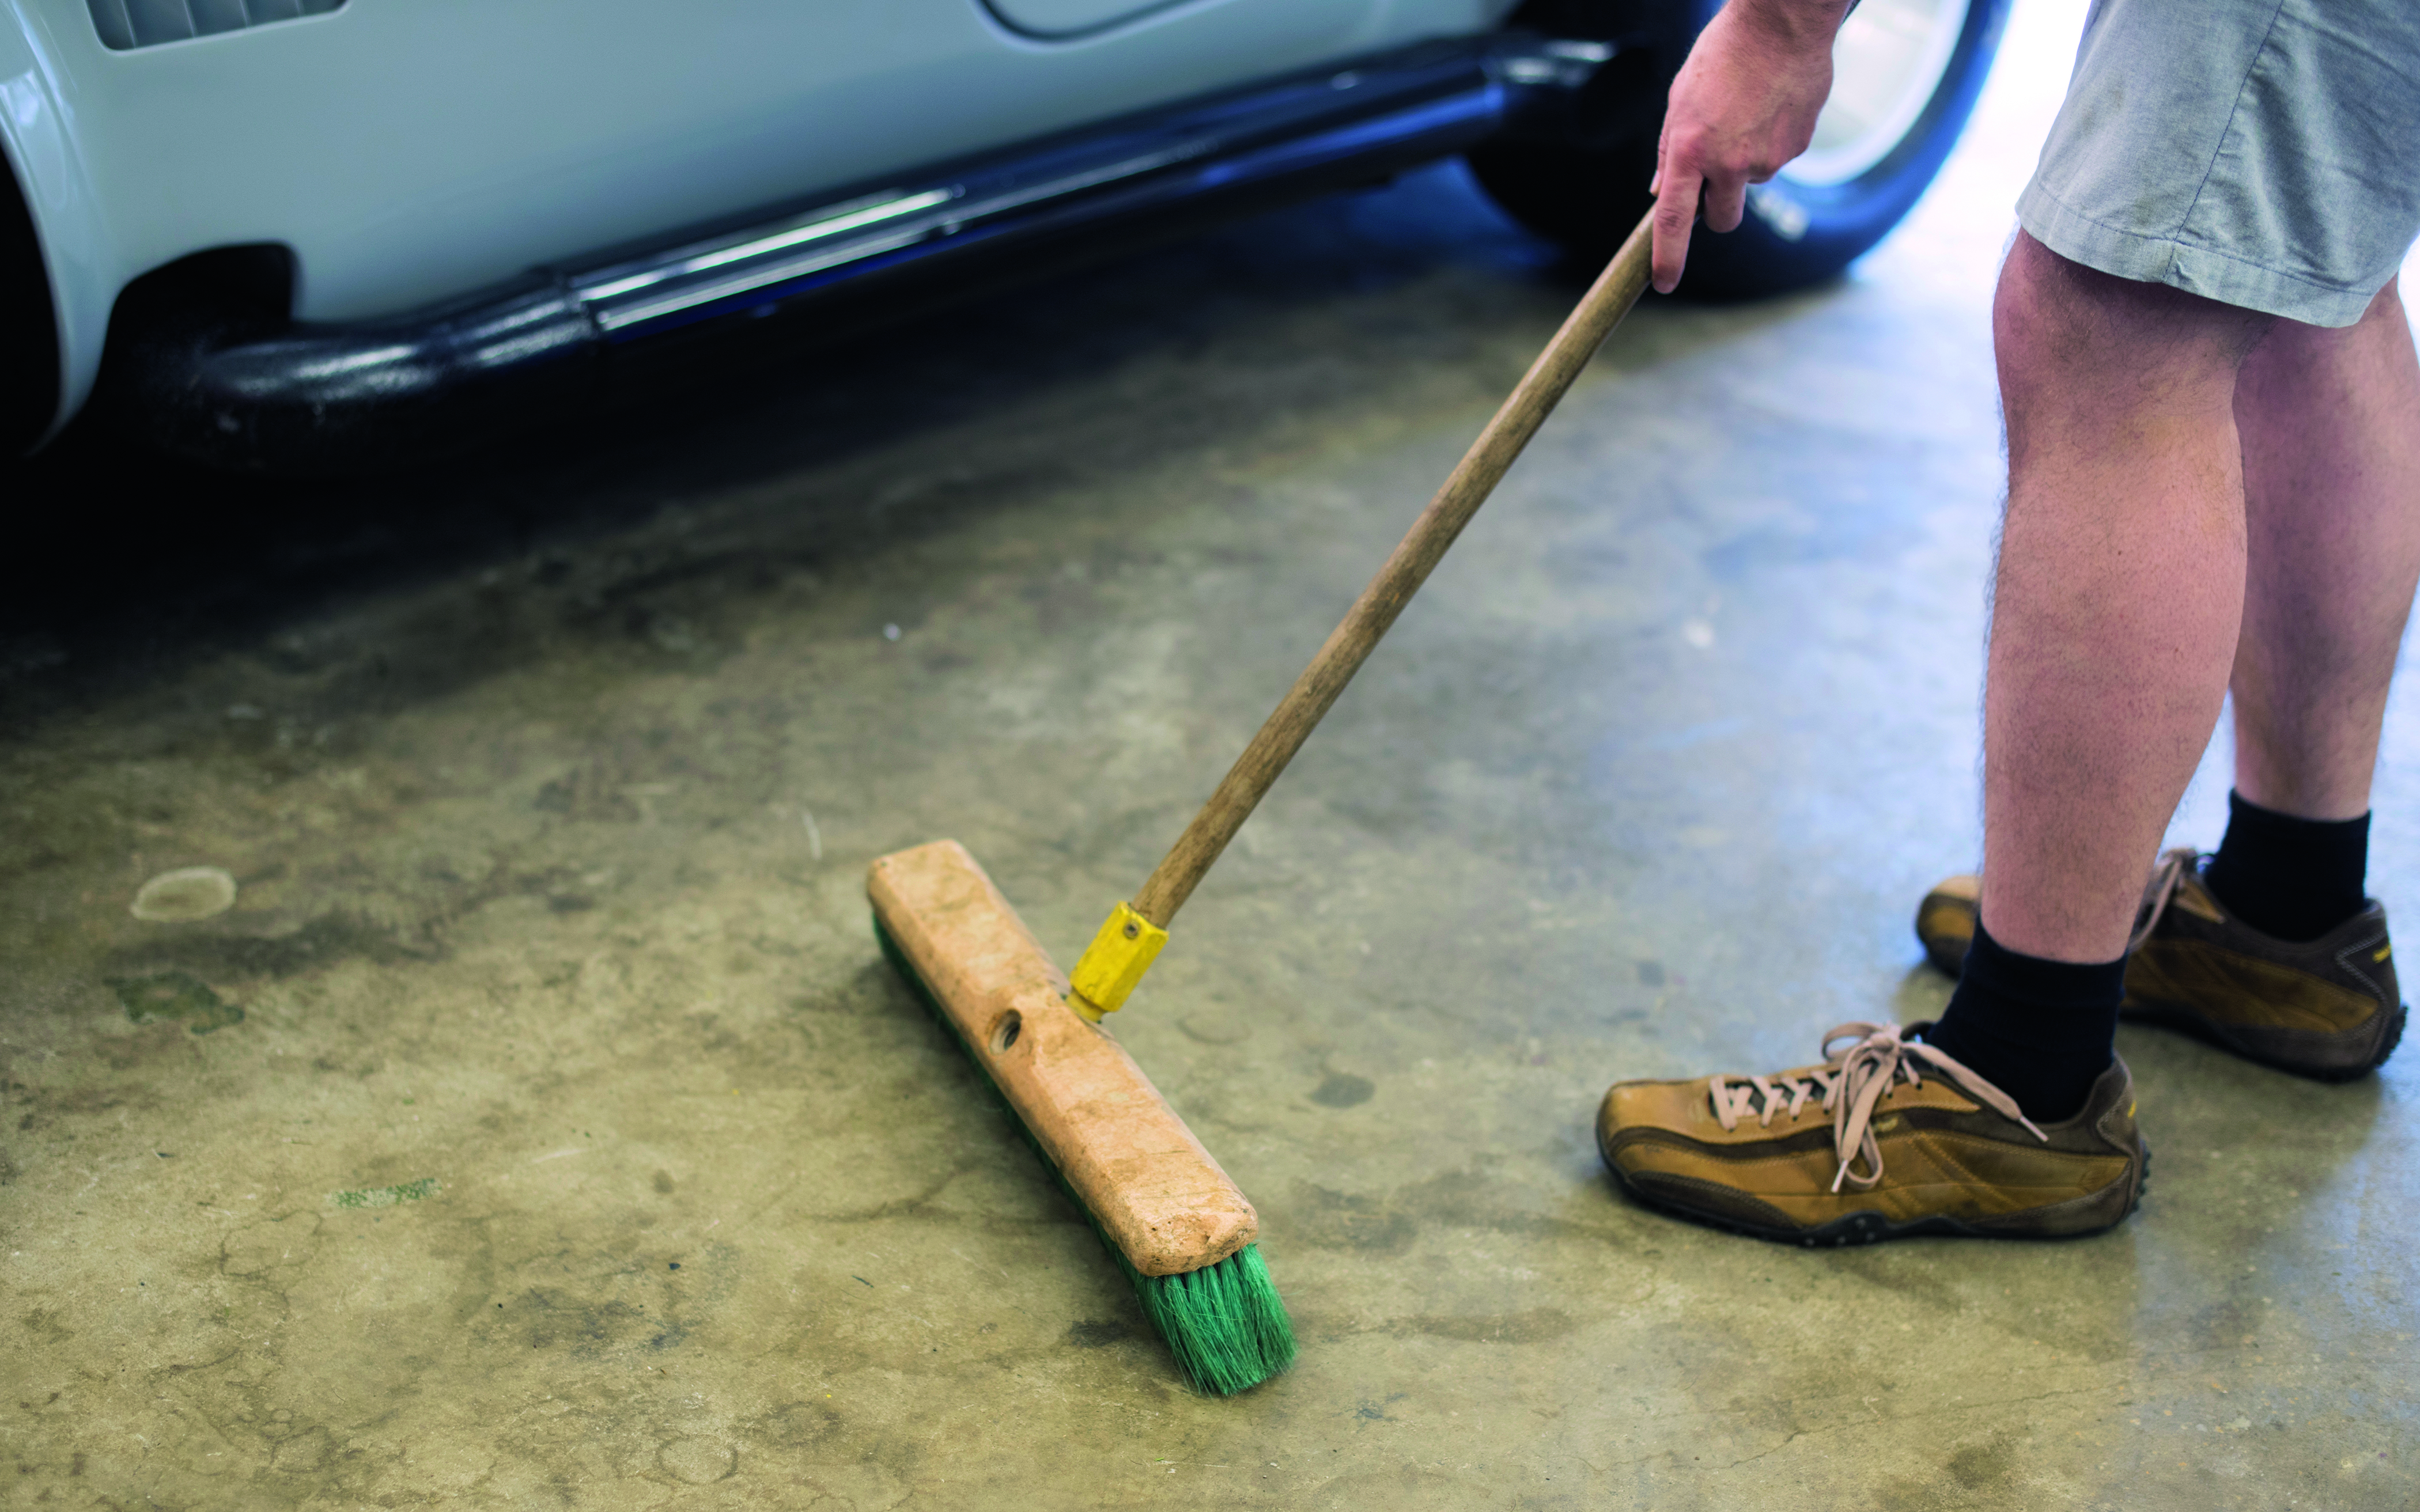
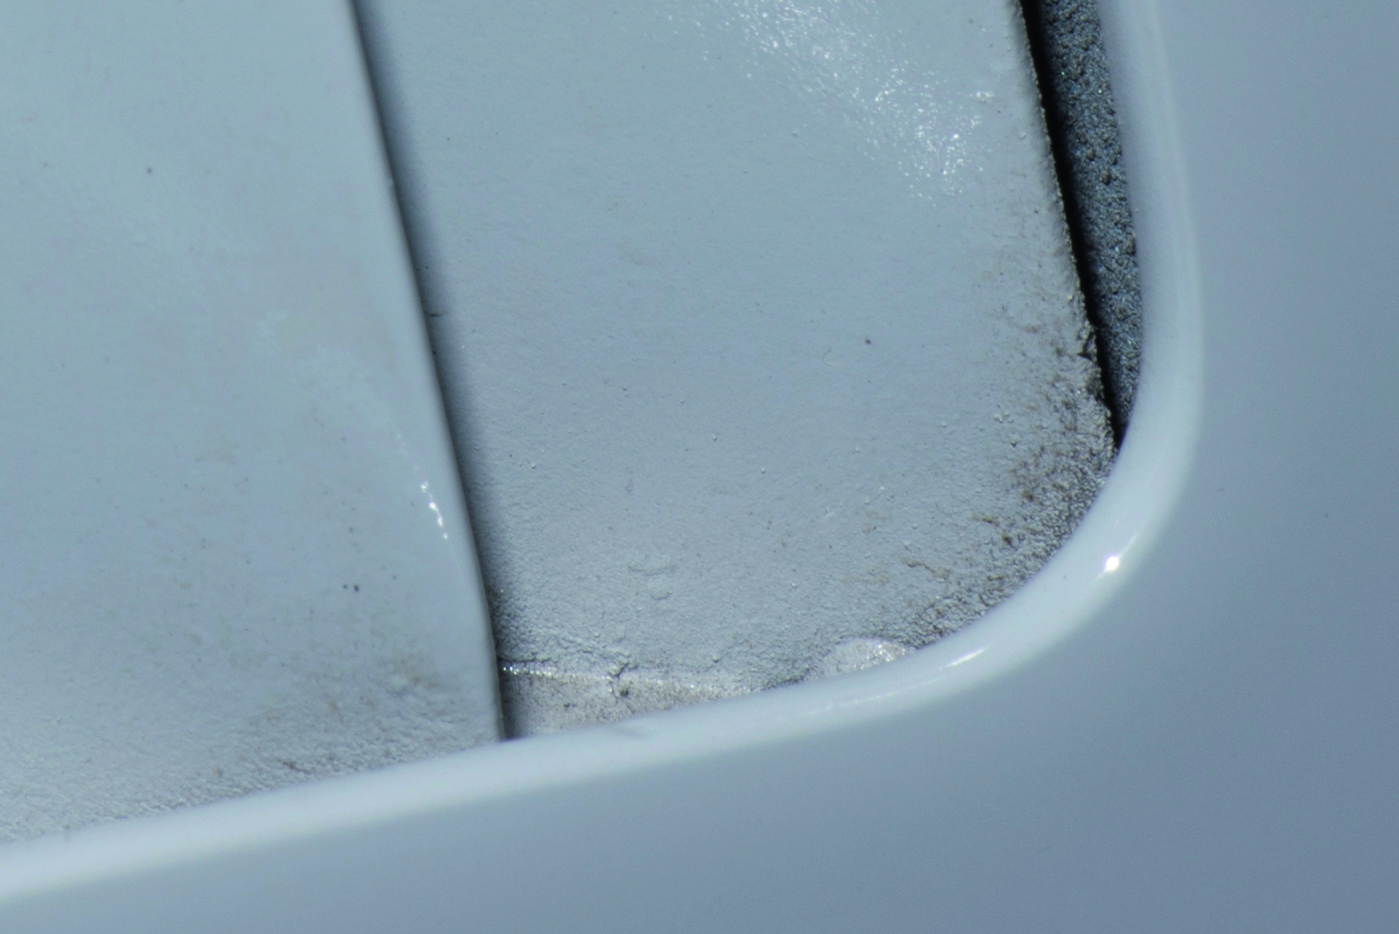
Have a microfibre cloth and a chamois to hand to wipe down the surface of the car. Cars are extremely hard to photograph because they’re highly reflective and any dust and rain shows up in photographs.
1. Tidy up
First, brush the floor and tidy away any objects around the car, then move the car side-on (if you can) so you’ll have enough space between the camera and car to frame up. Shooting the side of the car enables you to create a beautifully highlighted shoulder line.
2. Find the centre point
Next, pace out the length of the car and find its centre, then move backwards from the centre point to find the right place to set up your camera. This way you’ll keep both sides the same distance away from the camera, and so both ends of the car will be in proportion.

Step by step: Do a quick lap
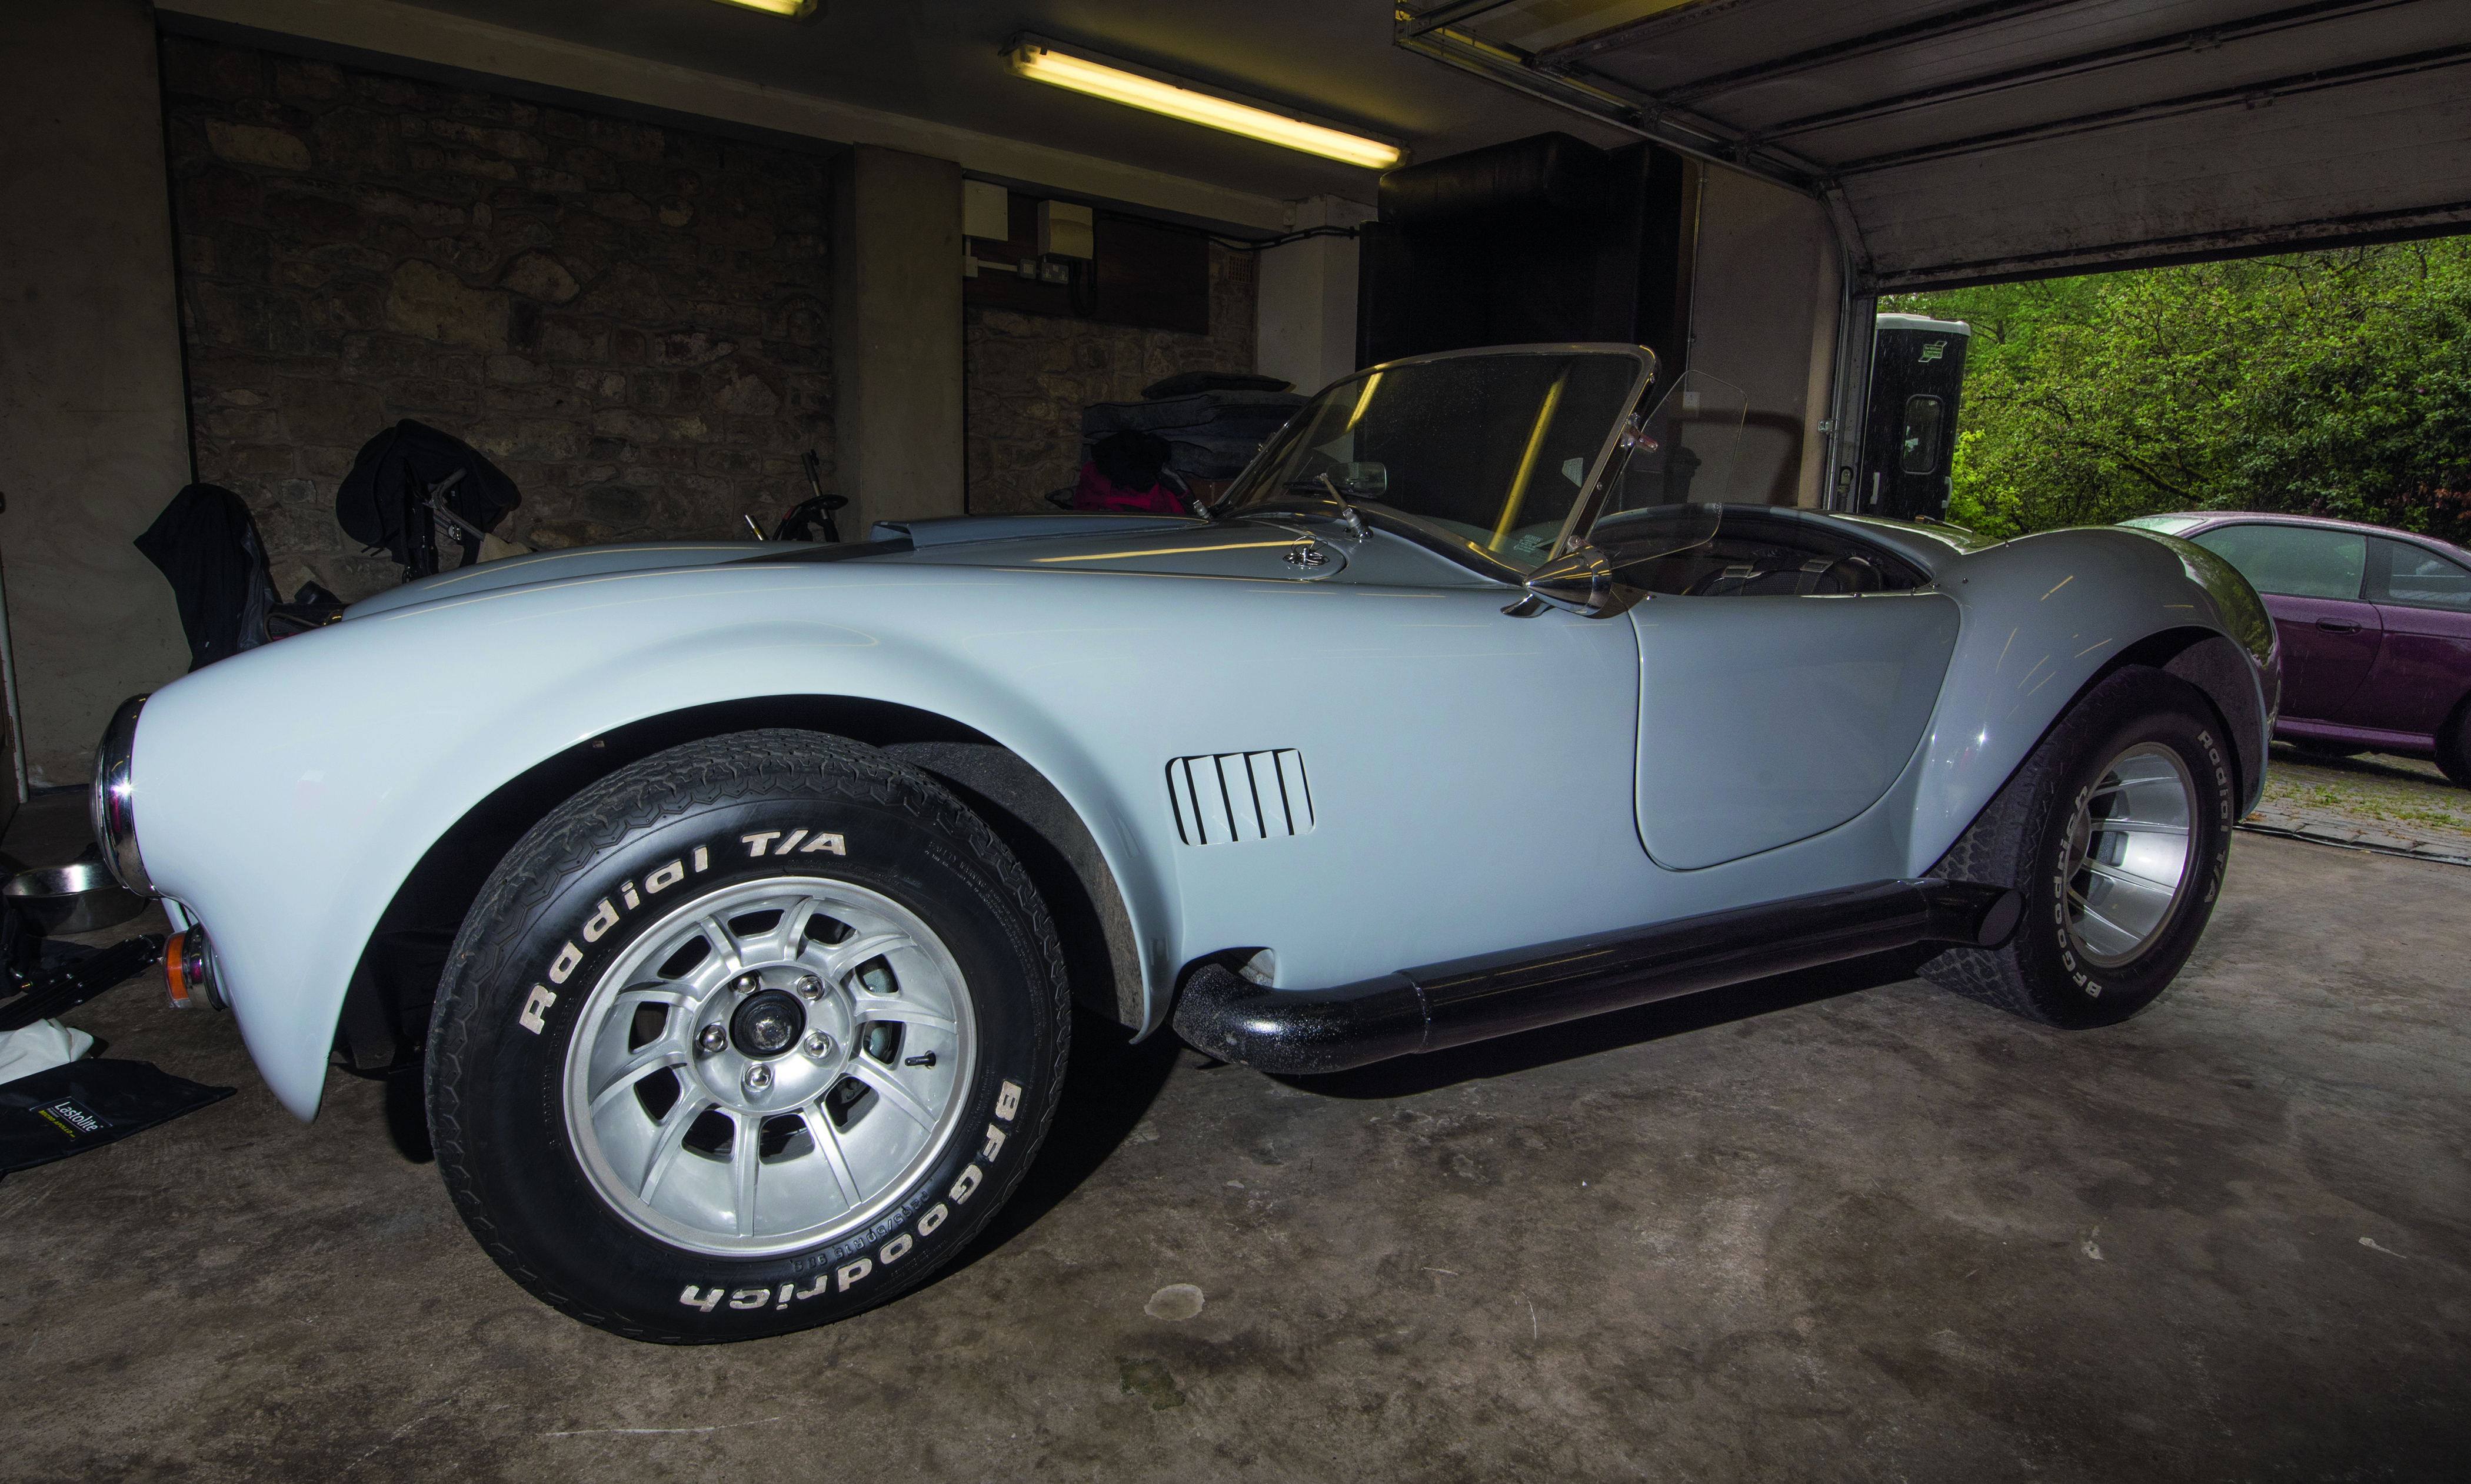
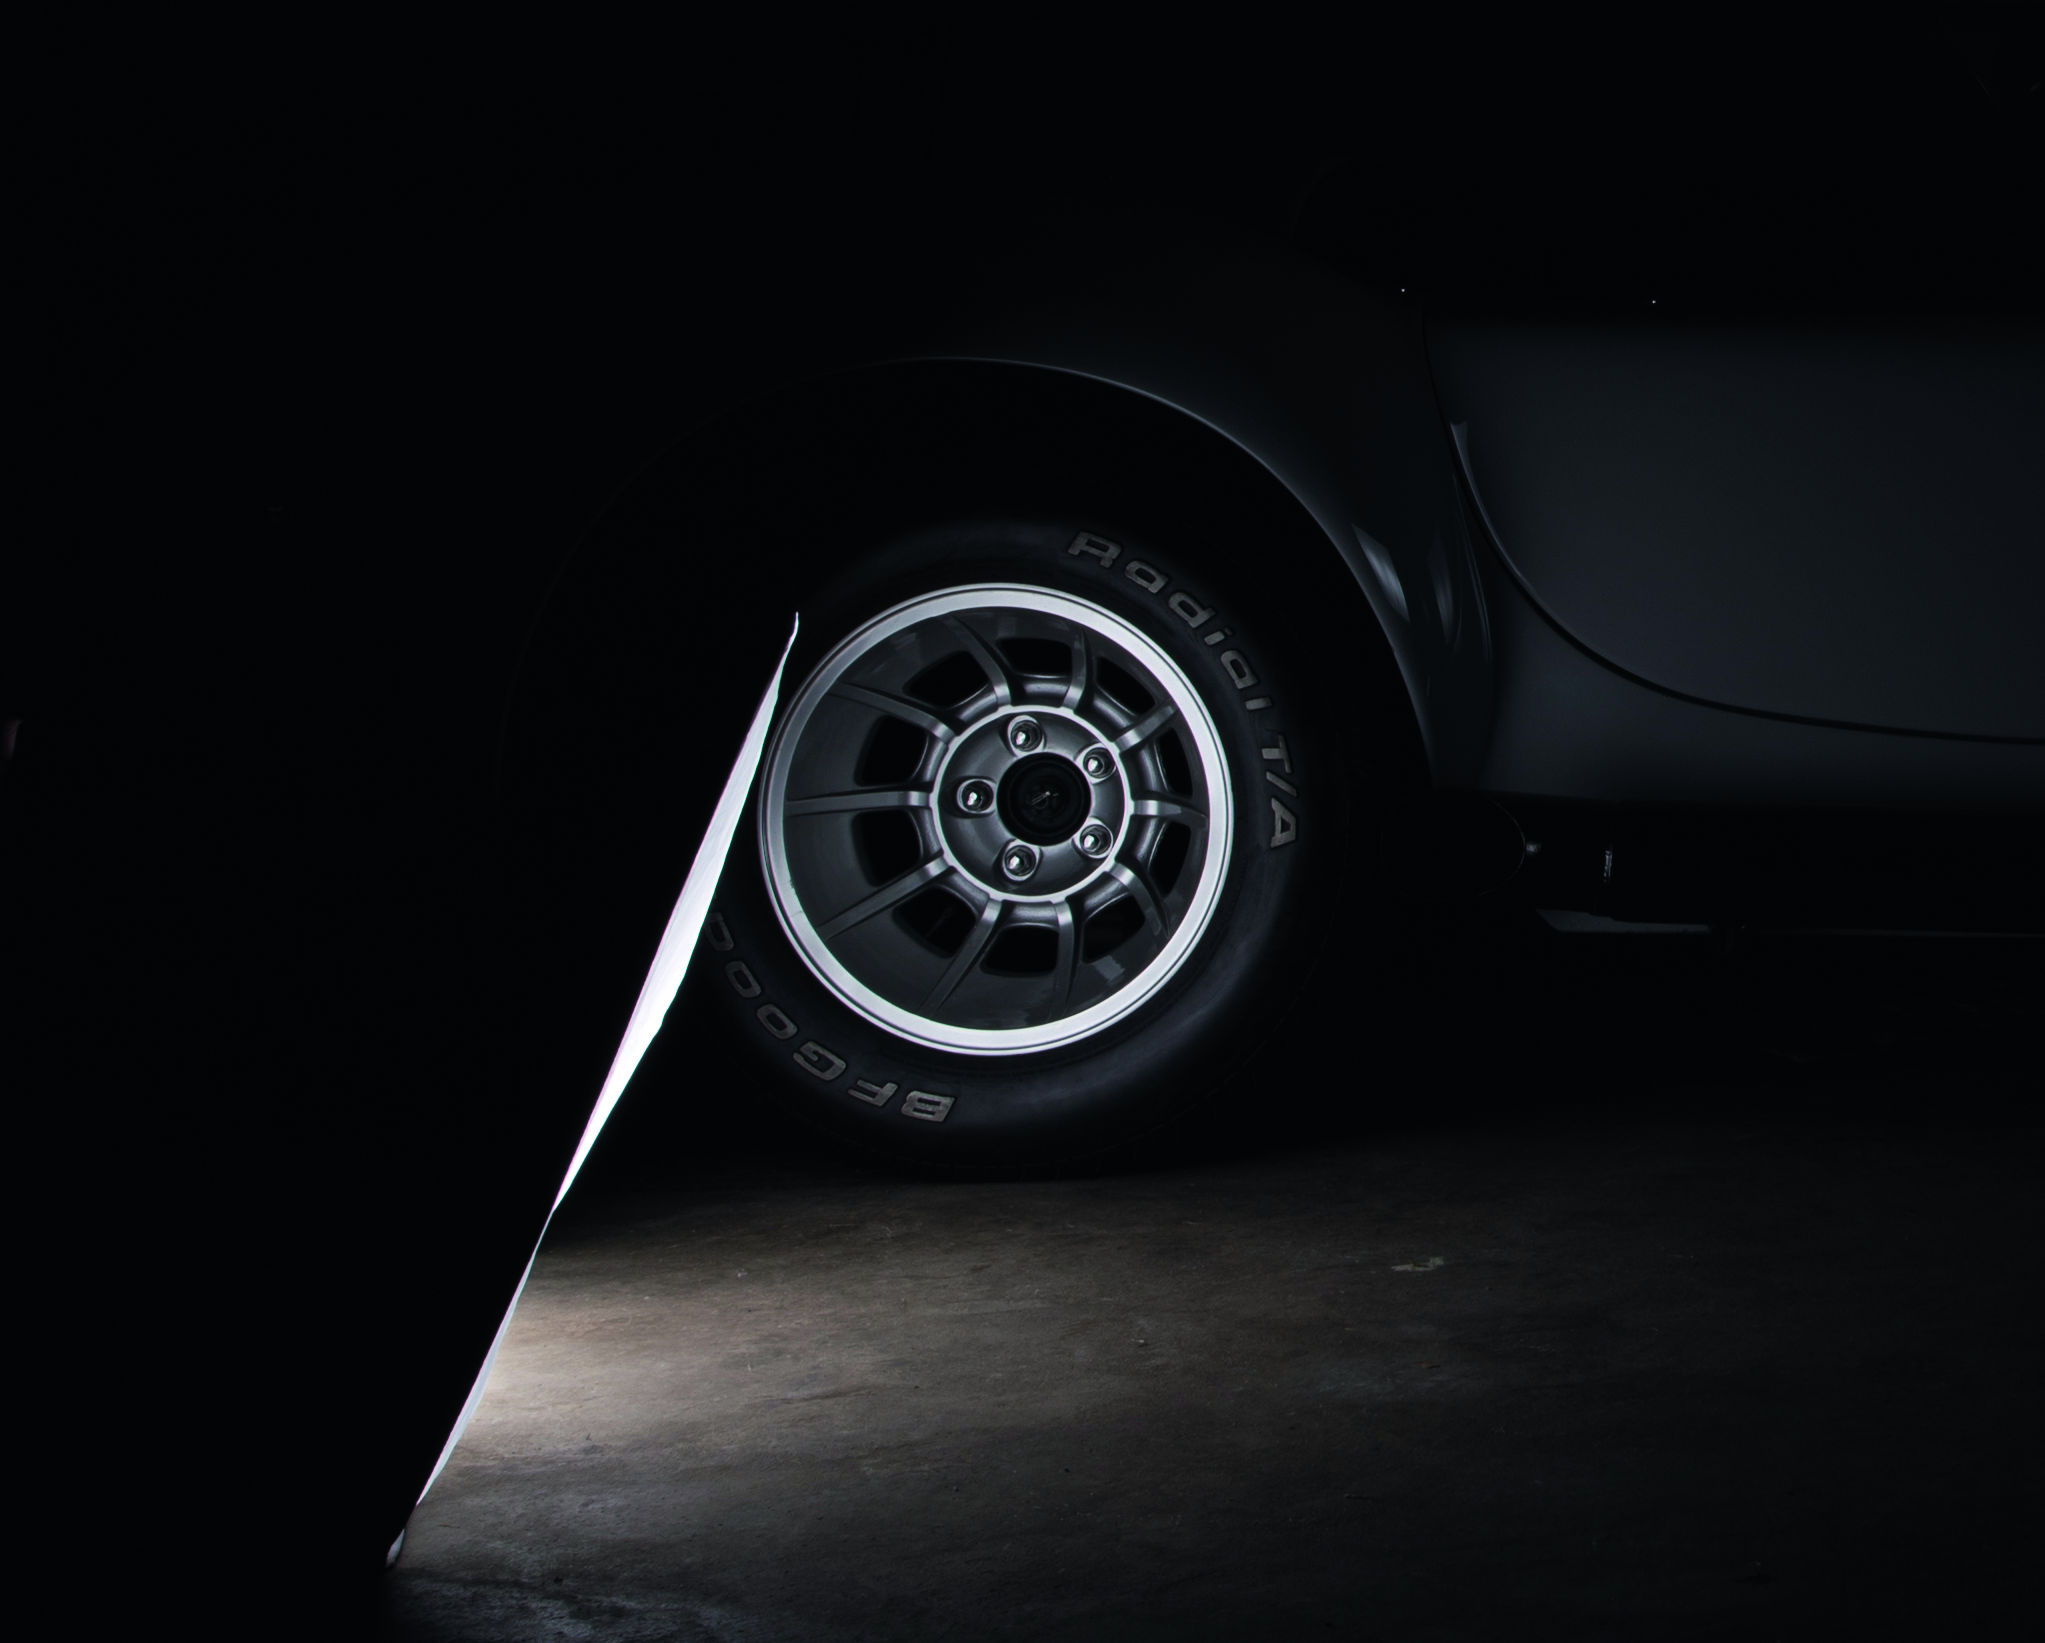
You can highlight the spokes of the wheels or any other details by moving the light round to the front side of the car and holding it close to the feature. If your softbox is too big and obscures the car too much, fix a smaller softbox or another flash diffuser, like an umbrella, to your flash.
1. Lock the focus
Put your camera on a tripod and raise the legs to the height of the car door. Turn on autofocus and lock on to the centre of the car with single-point AF. You won’t move your camera, so once the focus is locked, switch to manual focus to prevent the focus point from changing.
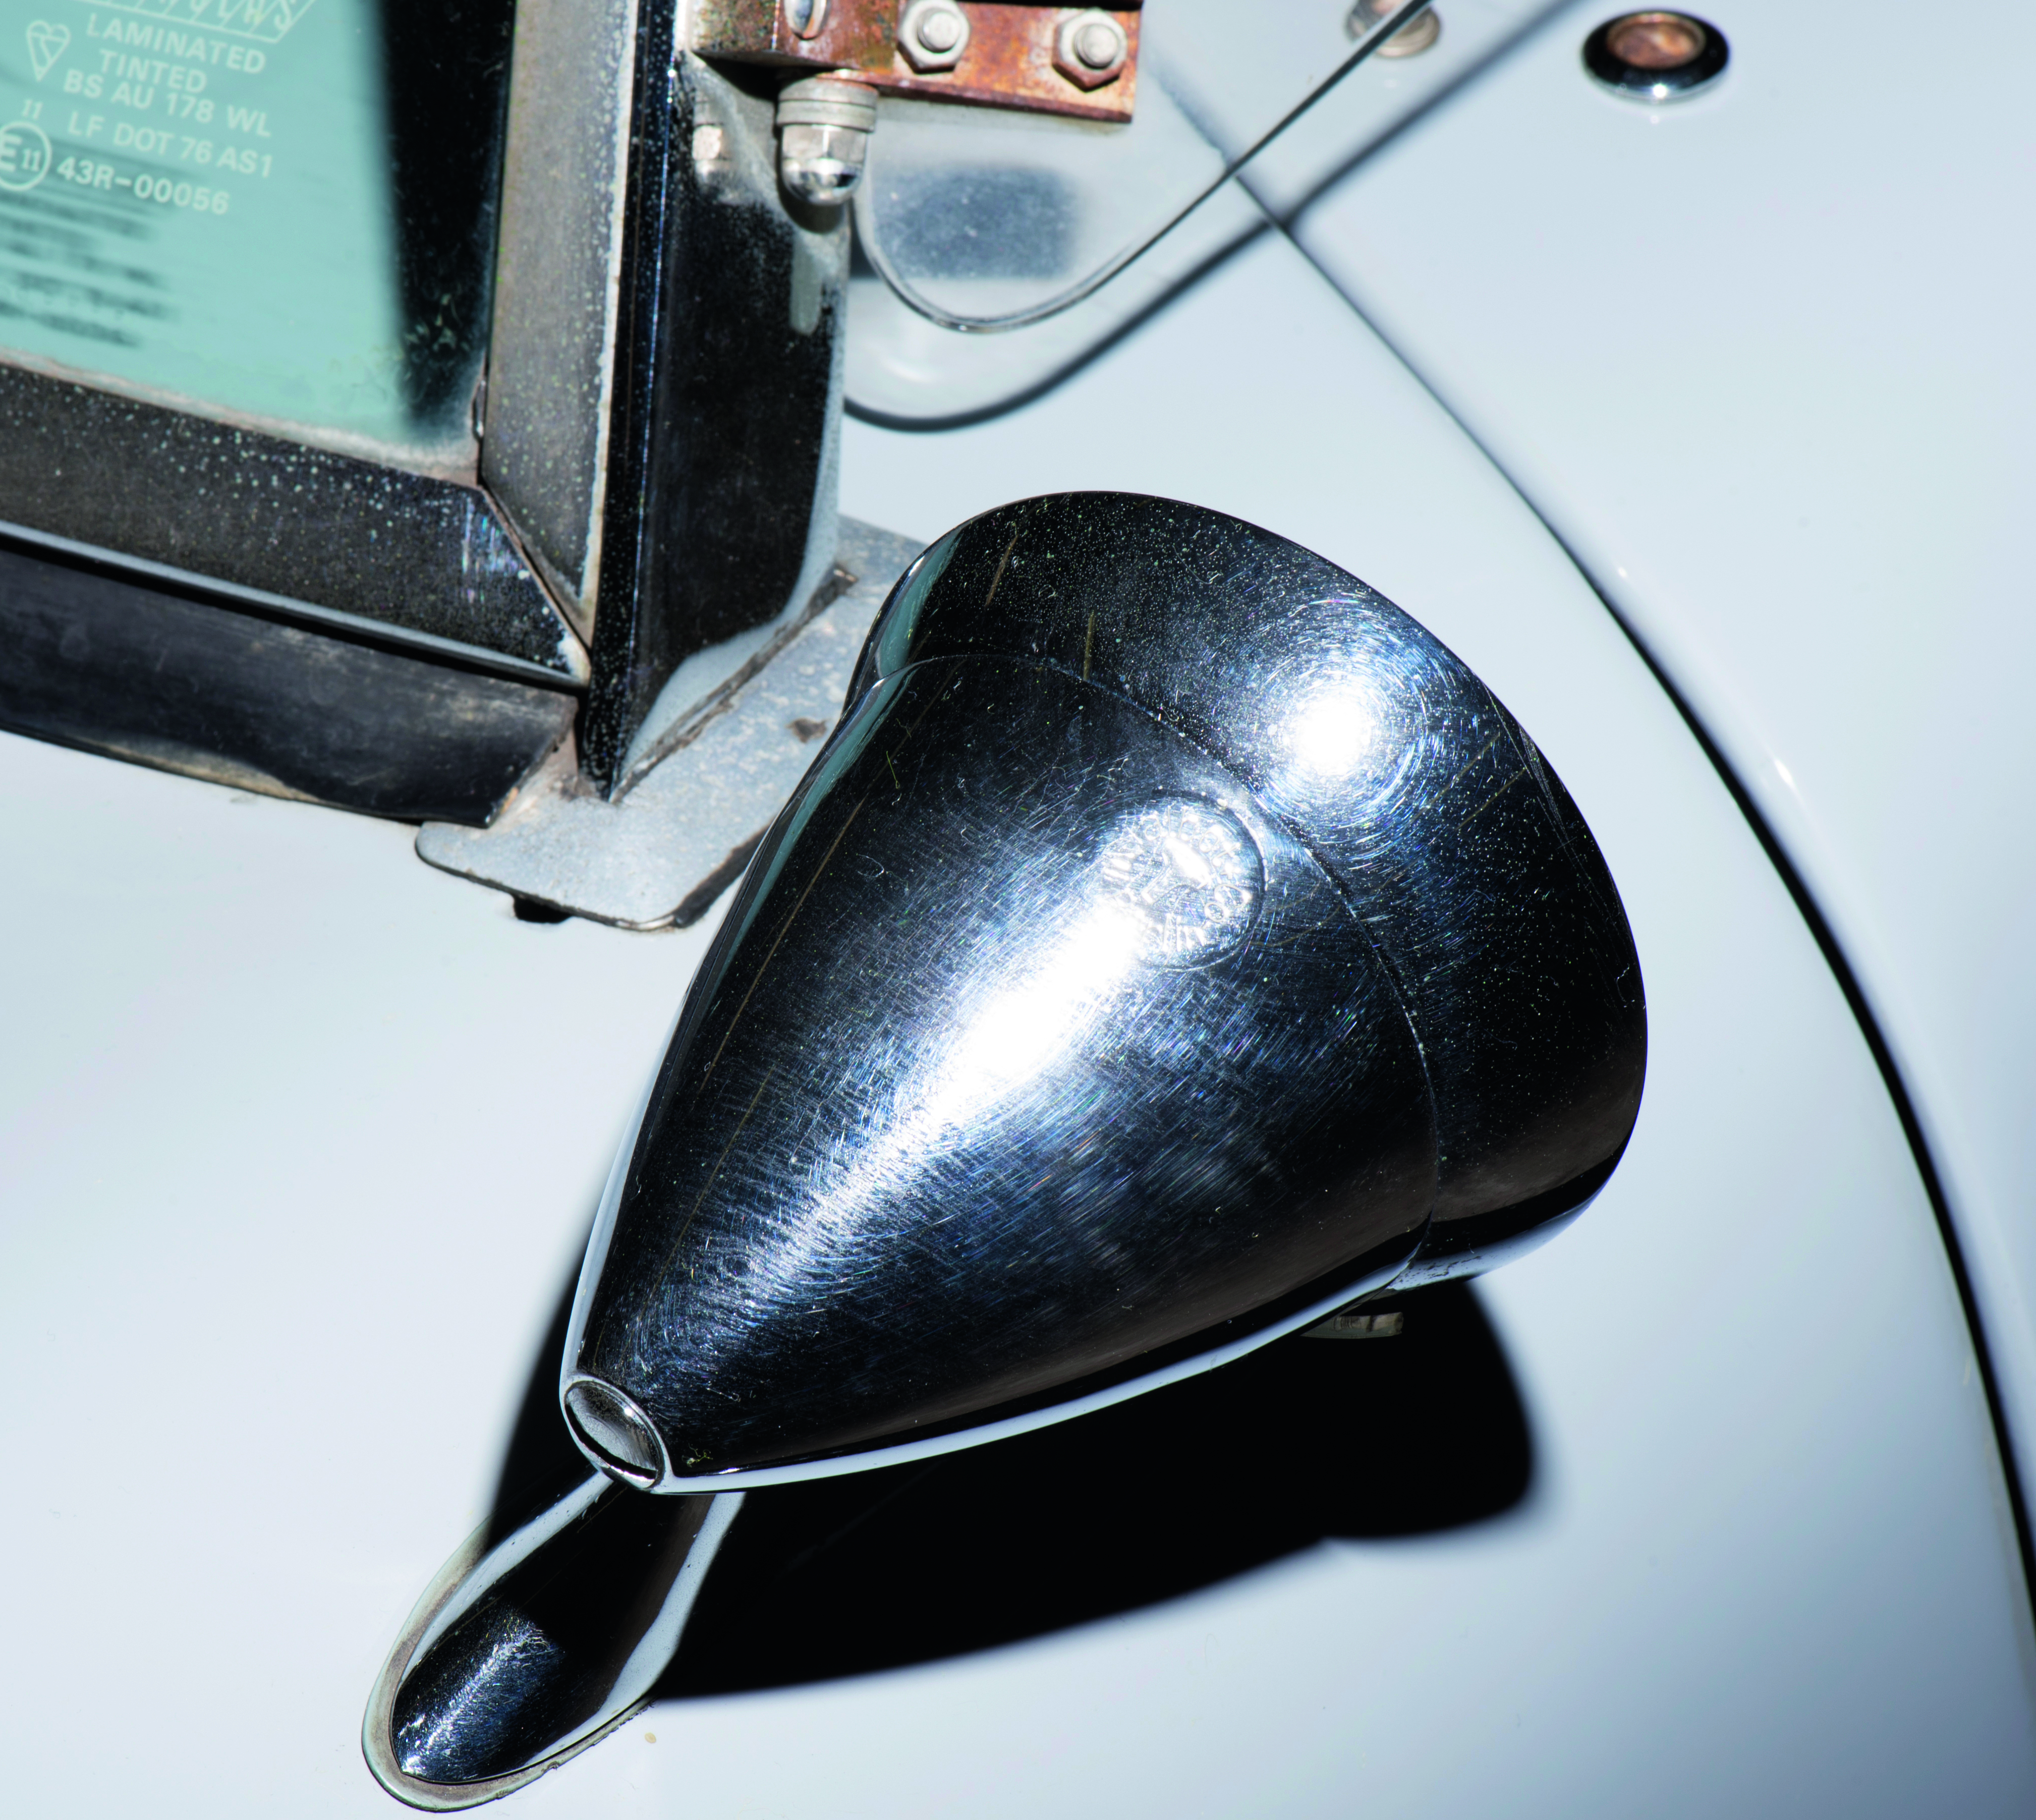
Don’t take any shots without the light being diffused in some way, whether it’s with a softbox or another type of diffuser. A bare light will introduce a bright, specular highlight and accentuate any dirt and texture on the surface of the car – two things you don’t want on this shoot.
2. Set up the camera
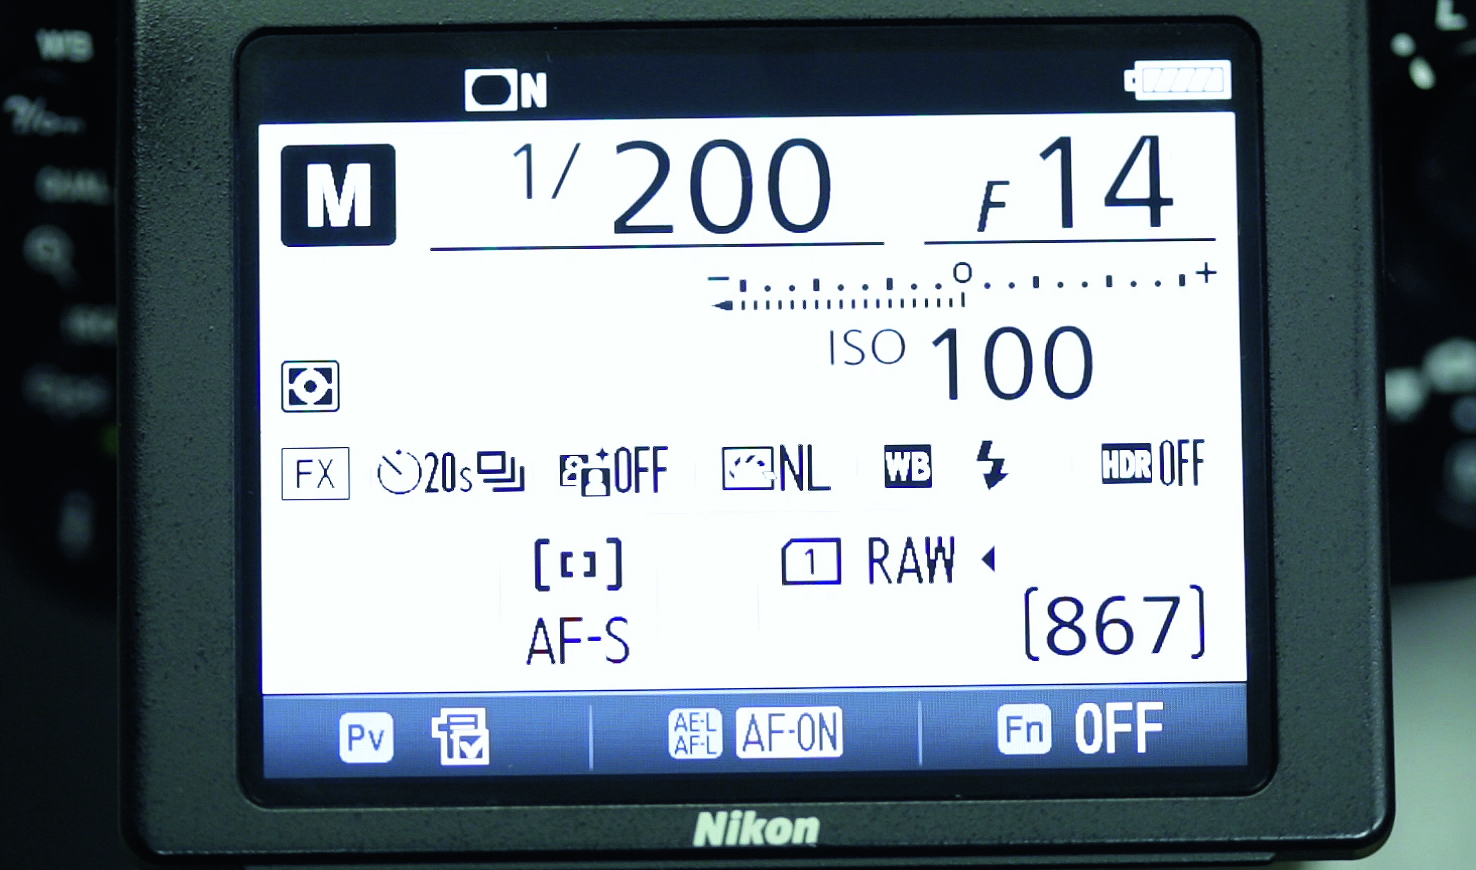
Set an aperture of f/14, a shutter speed of 1/200 sec (to match the sync speed of the flash), and ISO100. Set a self-timer of 20 seconds, with the maximum number of frames (nine) and maximum interval time of 3 secs to give yourself time to move the light between frames.
3. Prepare the flash
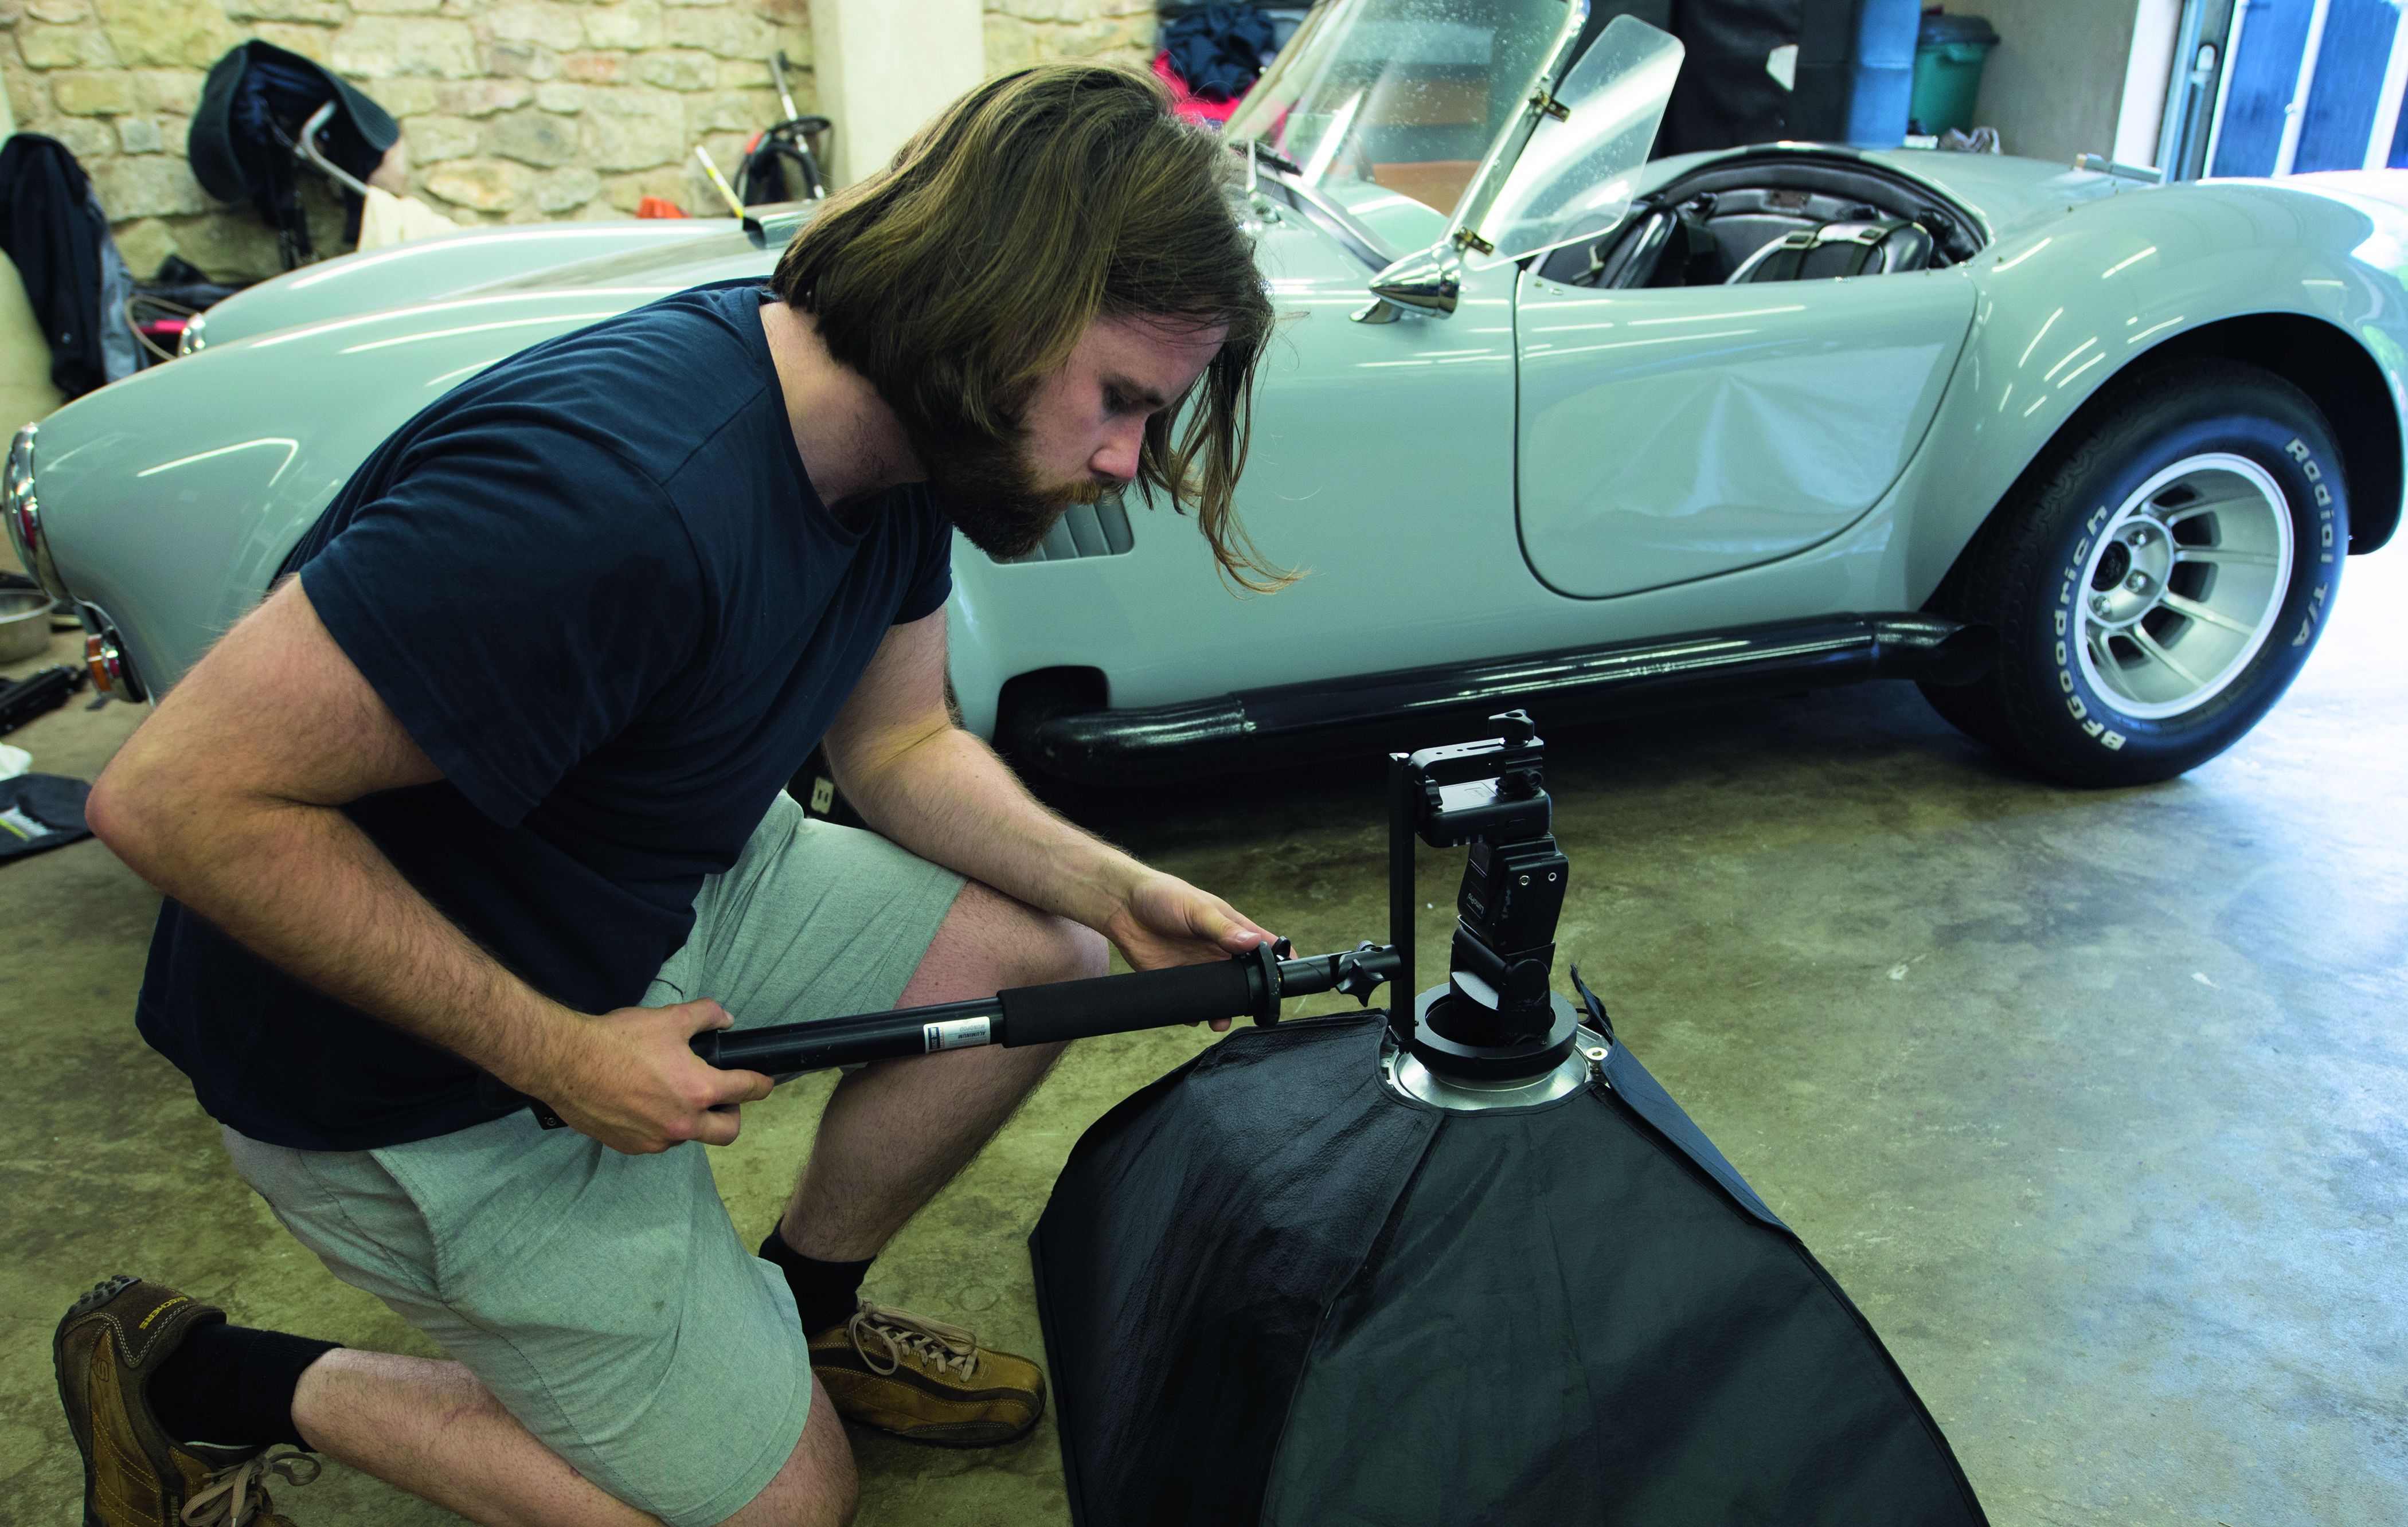
Put the wireless triggers on your flash and camera, fix the flash and softbox to the flash bracket mount, then screw the mount onto the monopod. In Manual mode, set your flash power to ¼ power – any higher and it will over-expose the highlights.
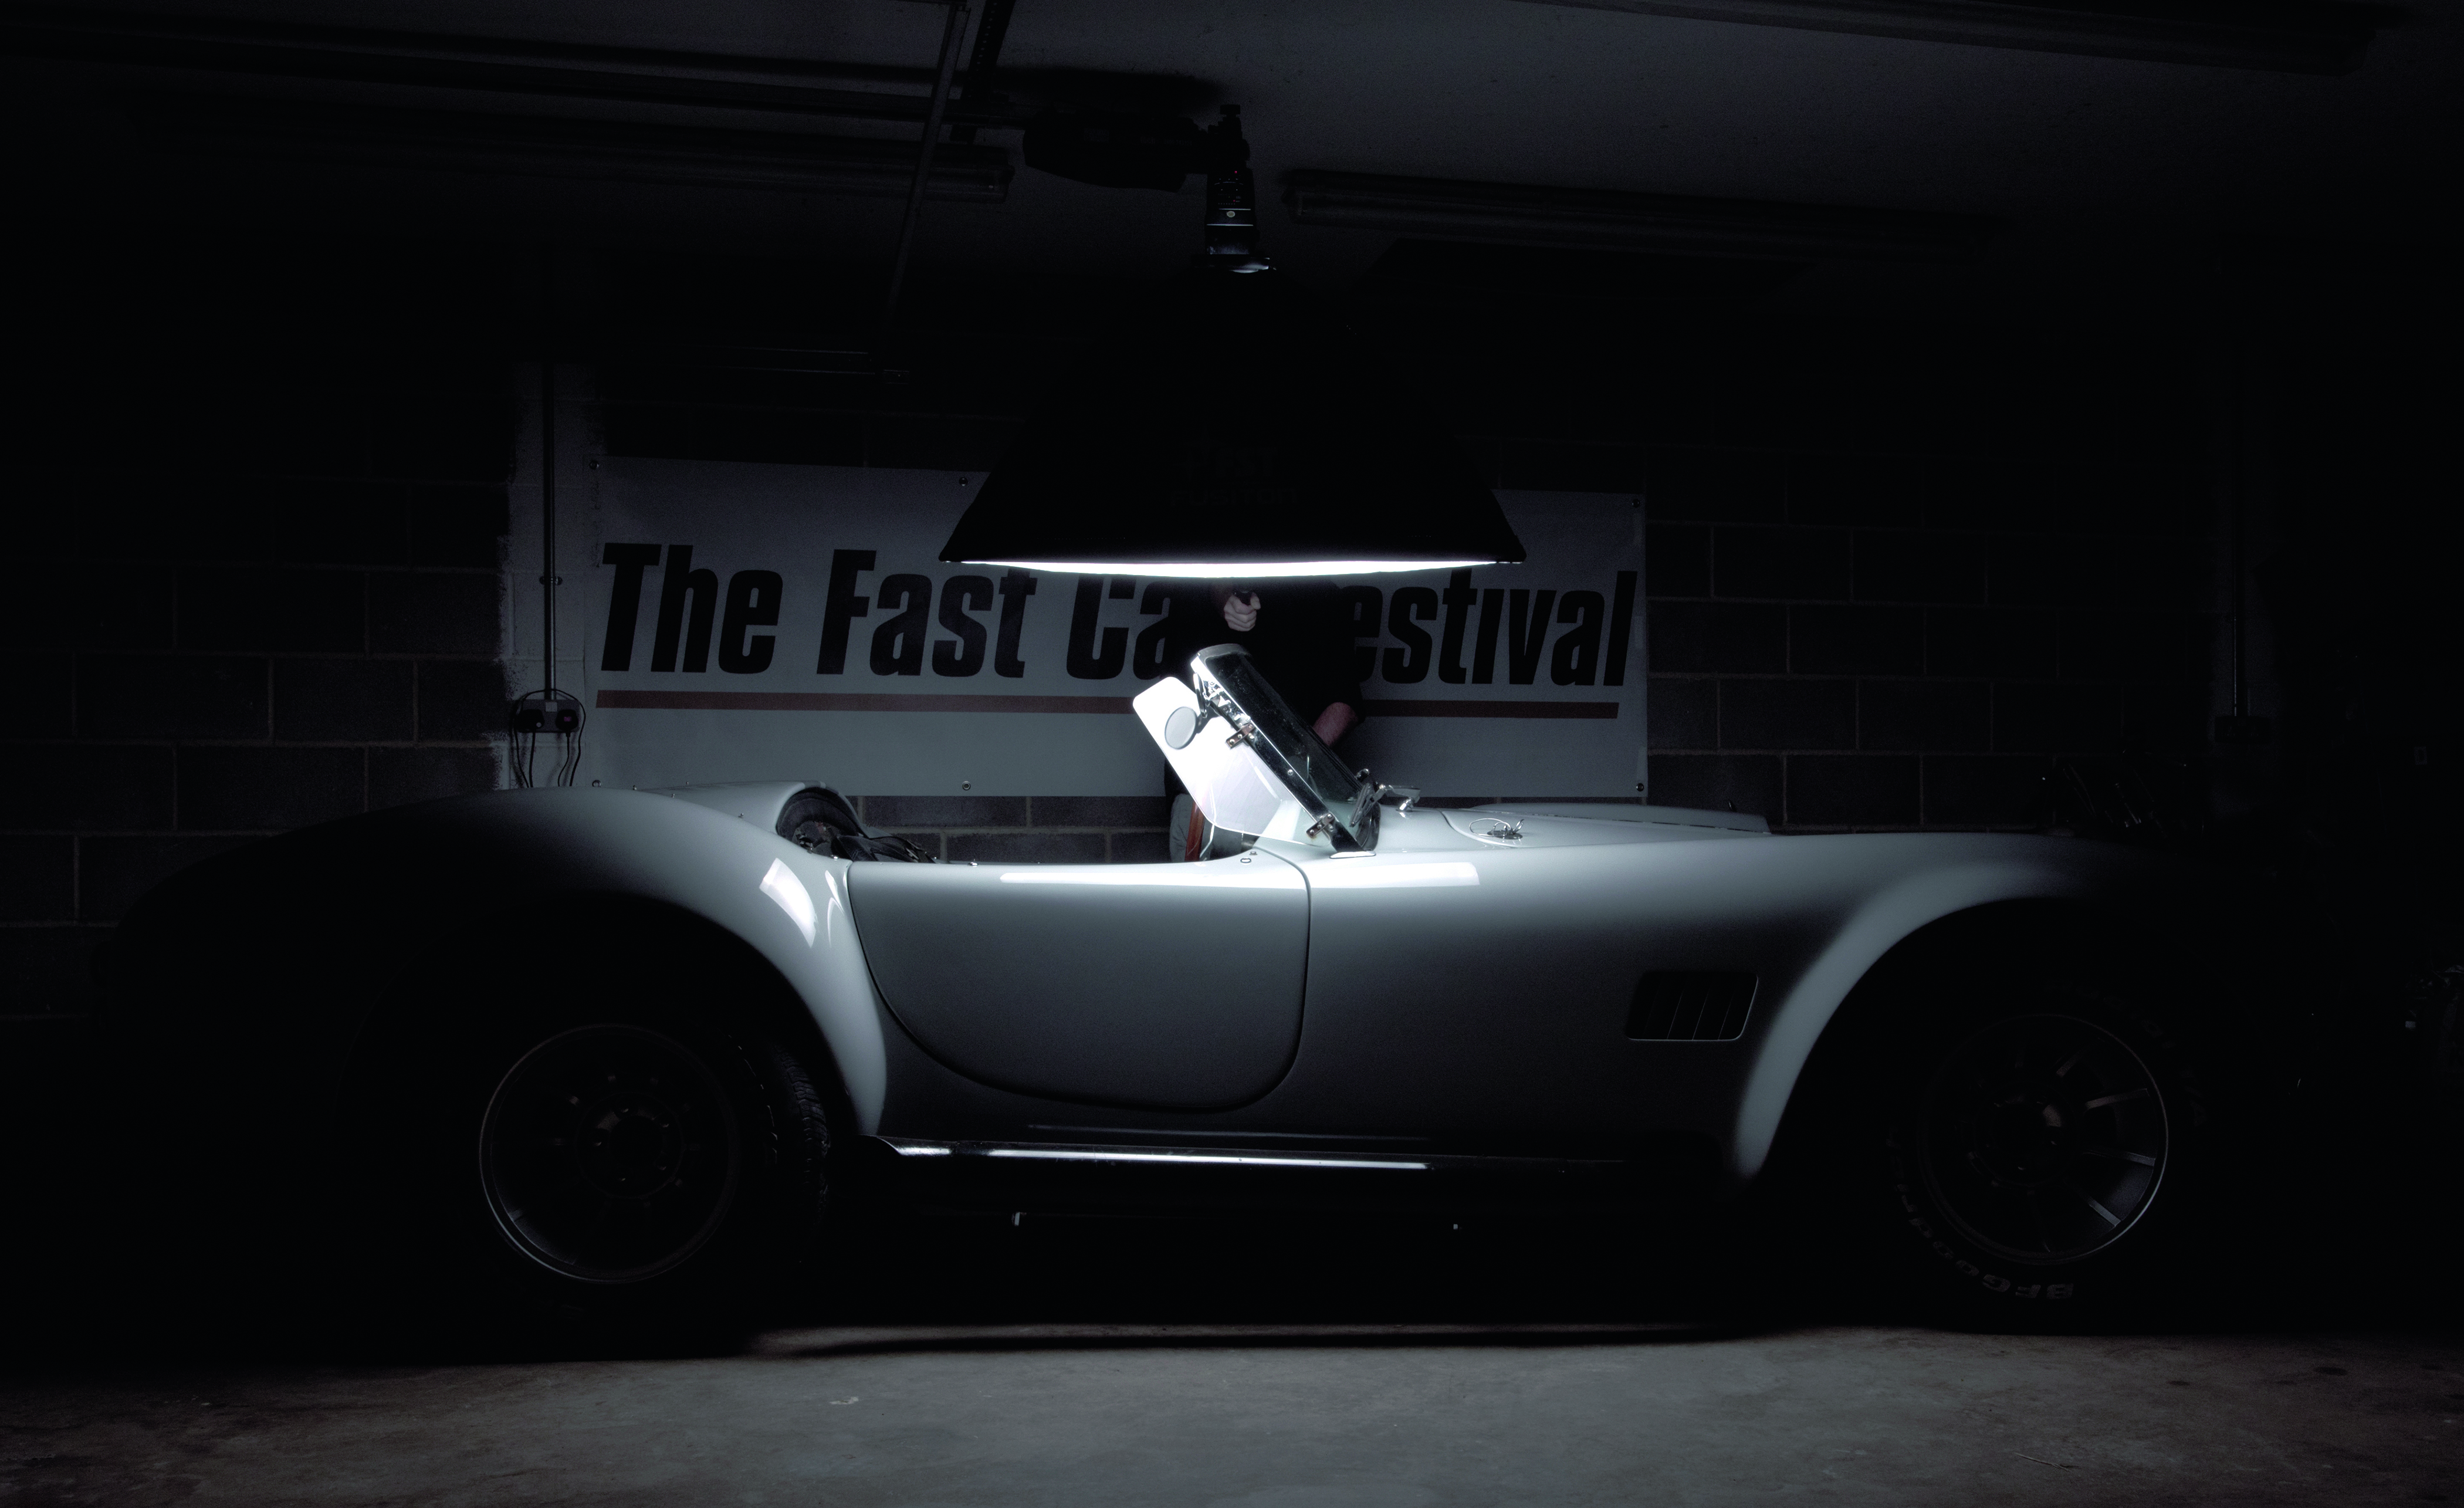
4. Shoot to thrill
Finally, engage your camera’s self-timer and run into position behind the back end of the car, holding the flashgun out over the top of the car. You need to angle the monopod so the softbox leans out over the camera-facing side of the car, where you want the light to hit.
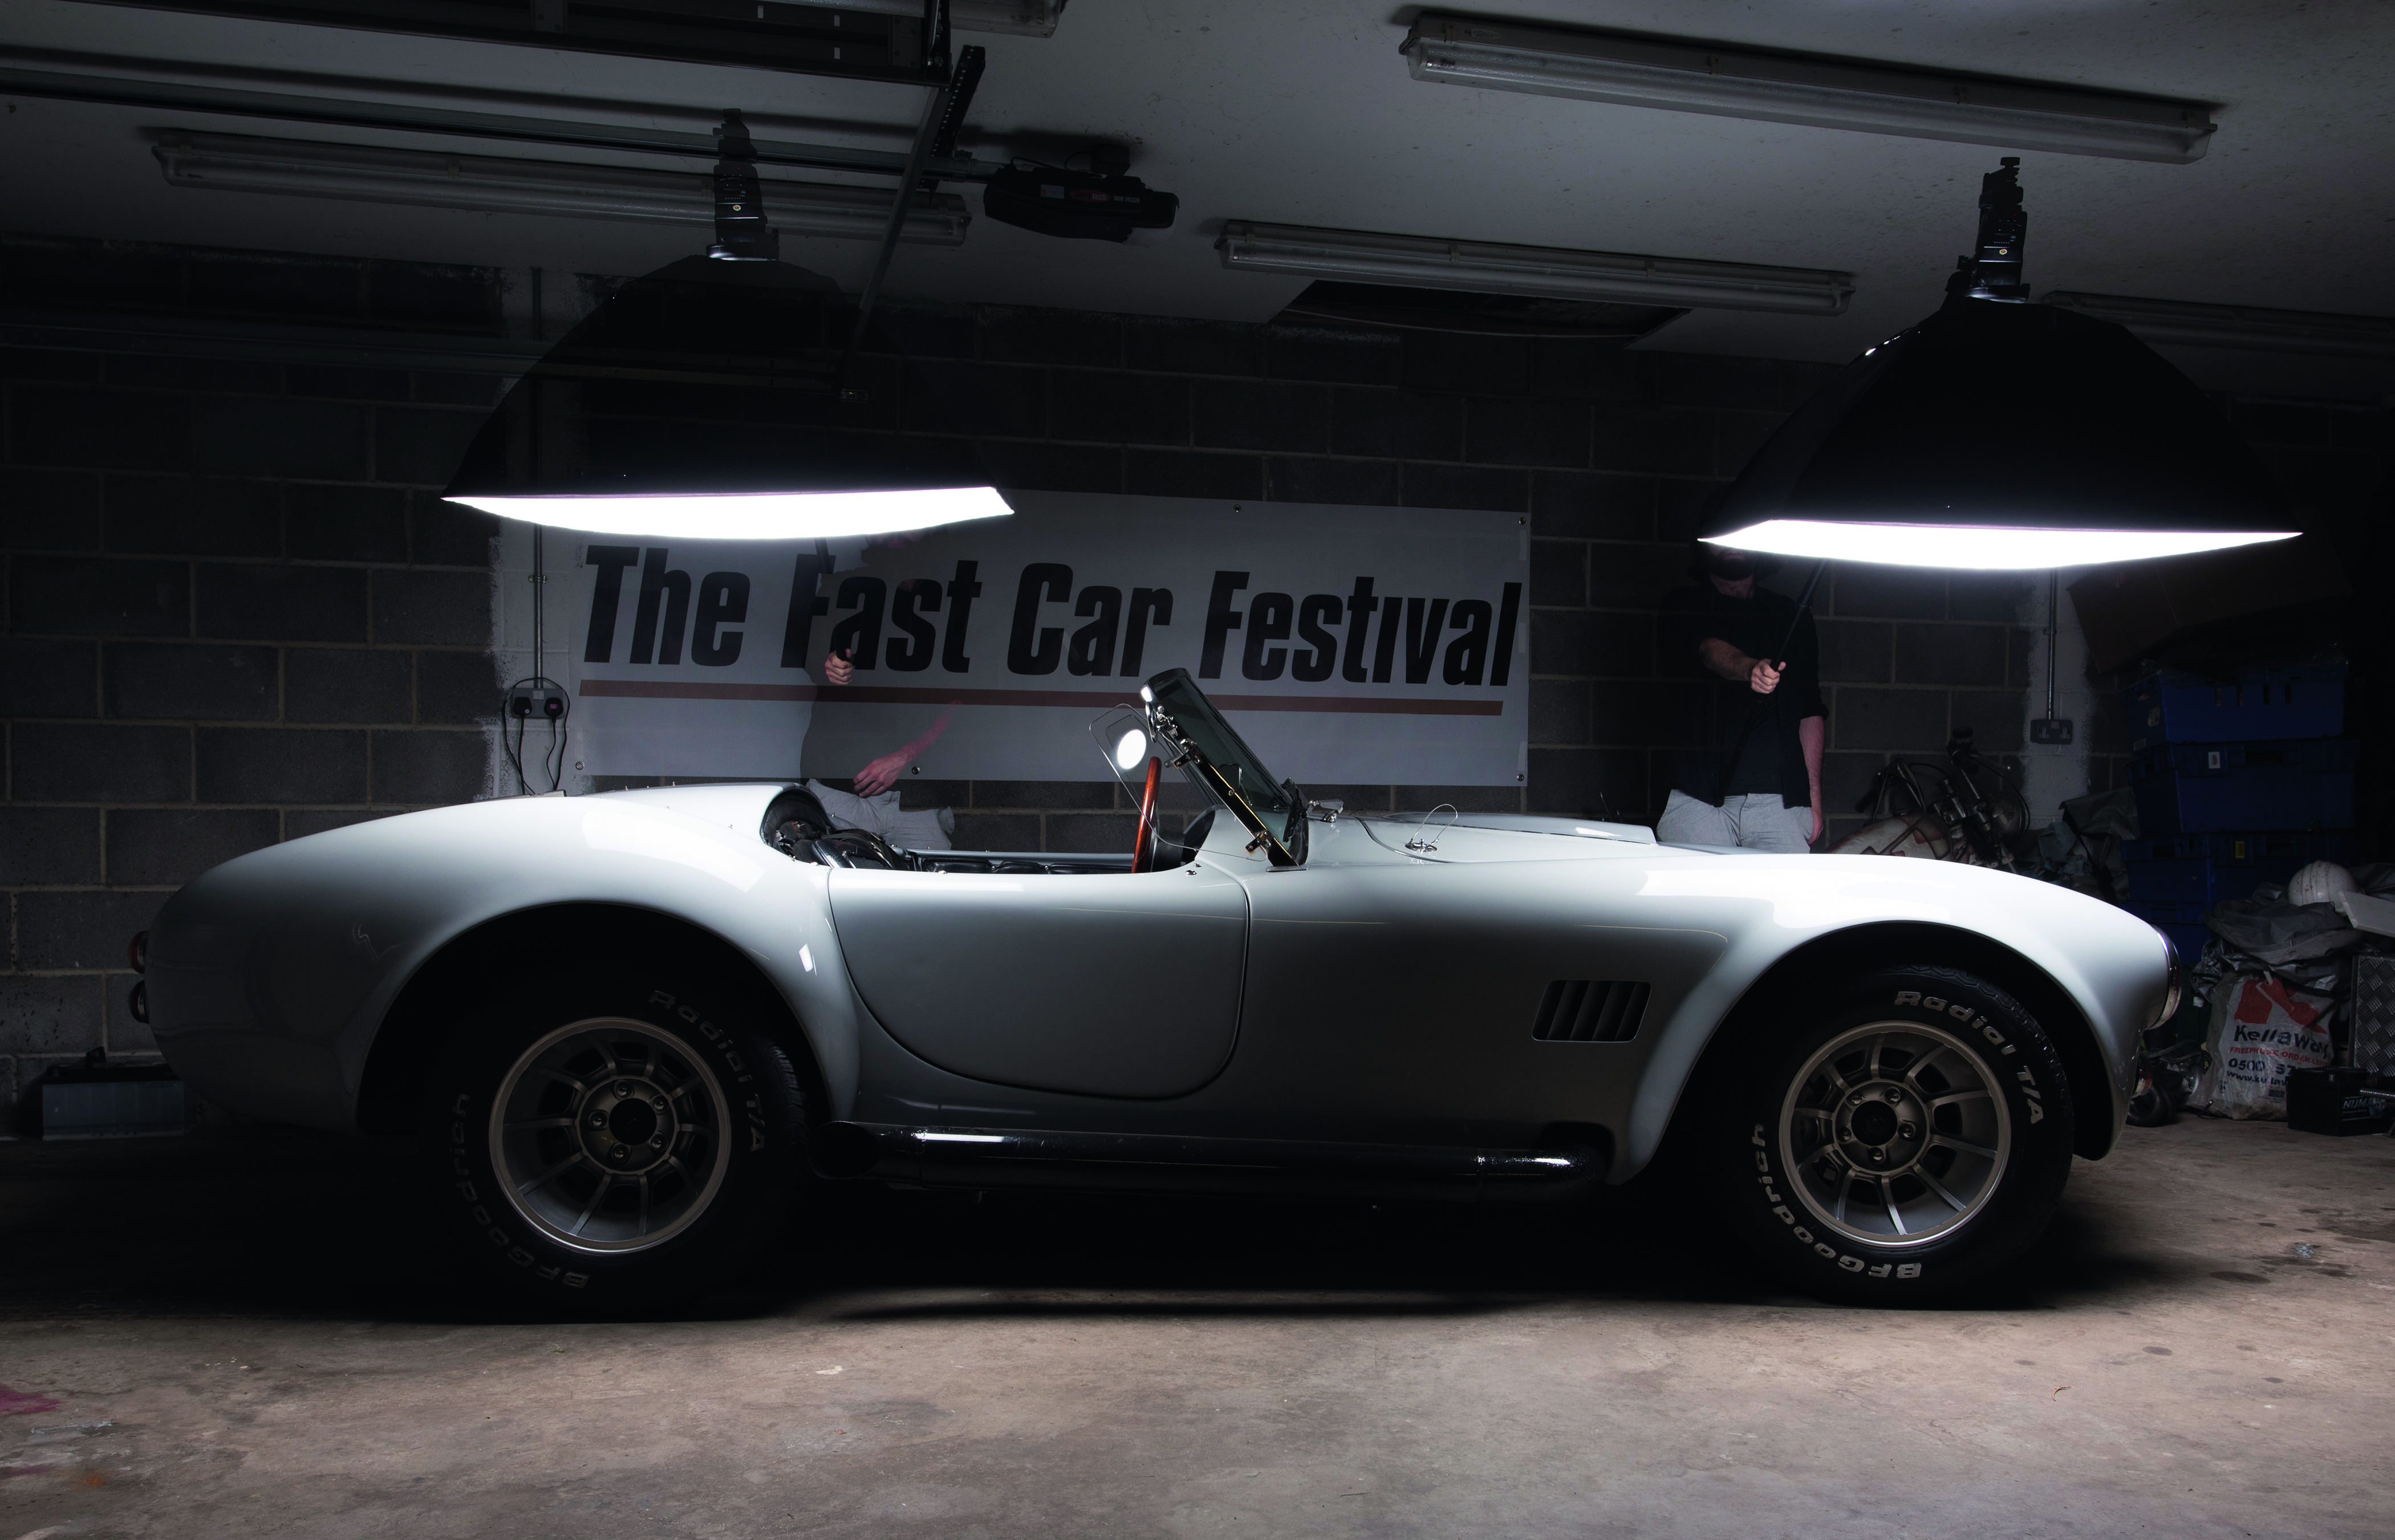
5. Make a move
As soon as the camera has taken a shot, move a metre or so towards the front of the car to take another shot. Make sure you don’t leave large gaps in your placement of the flash as you shoot; you want a long, clean line of light along the shoulder of the car.
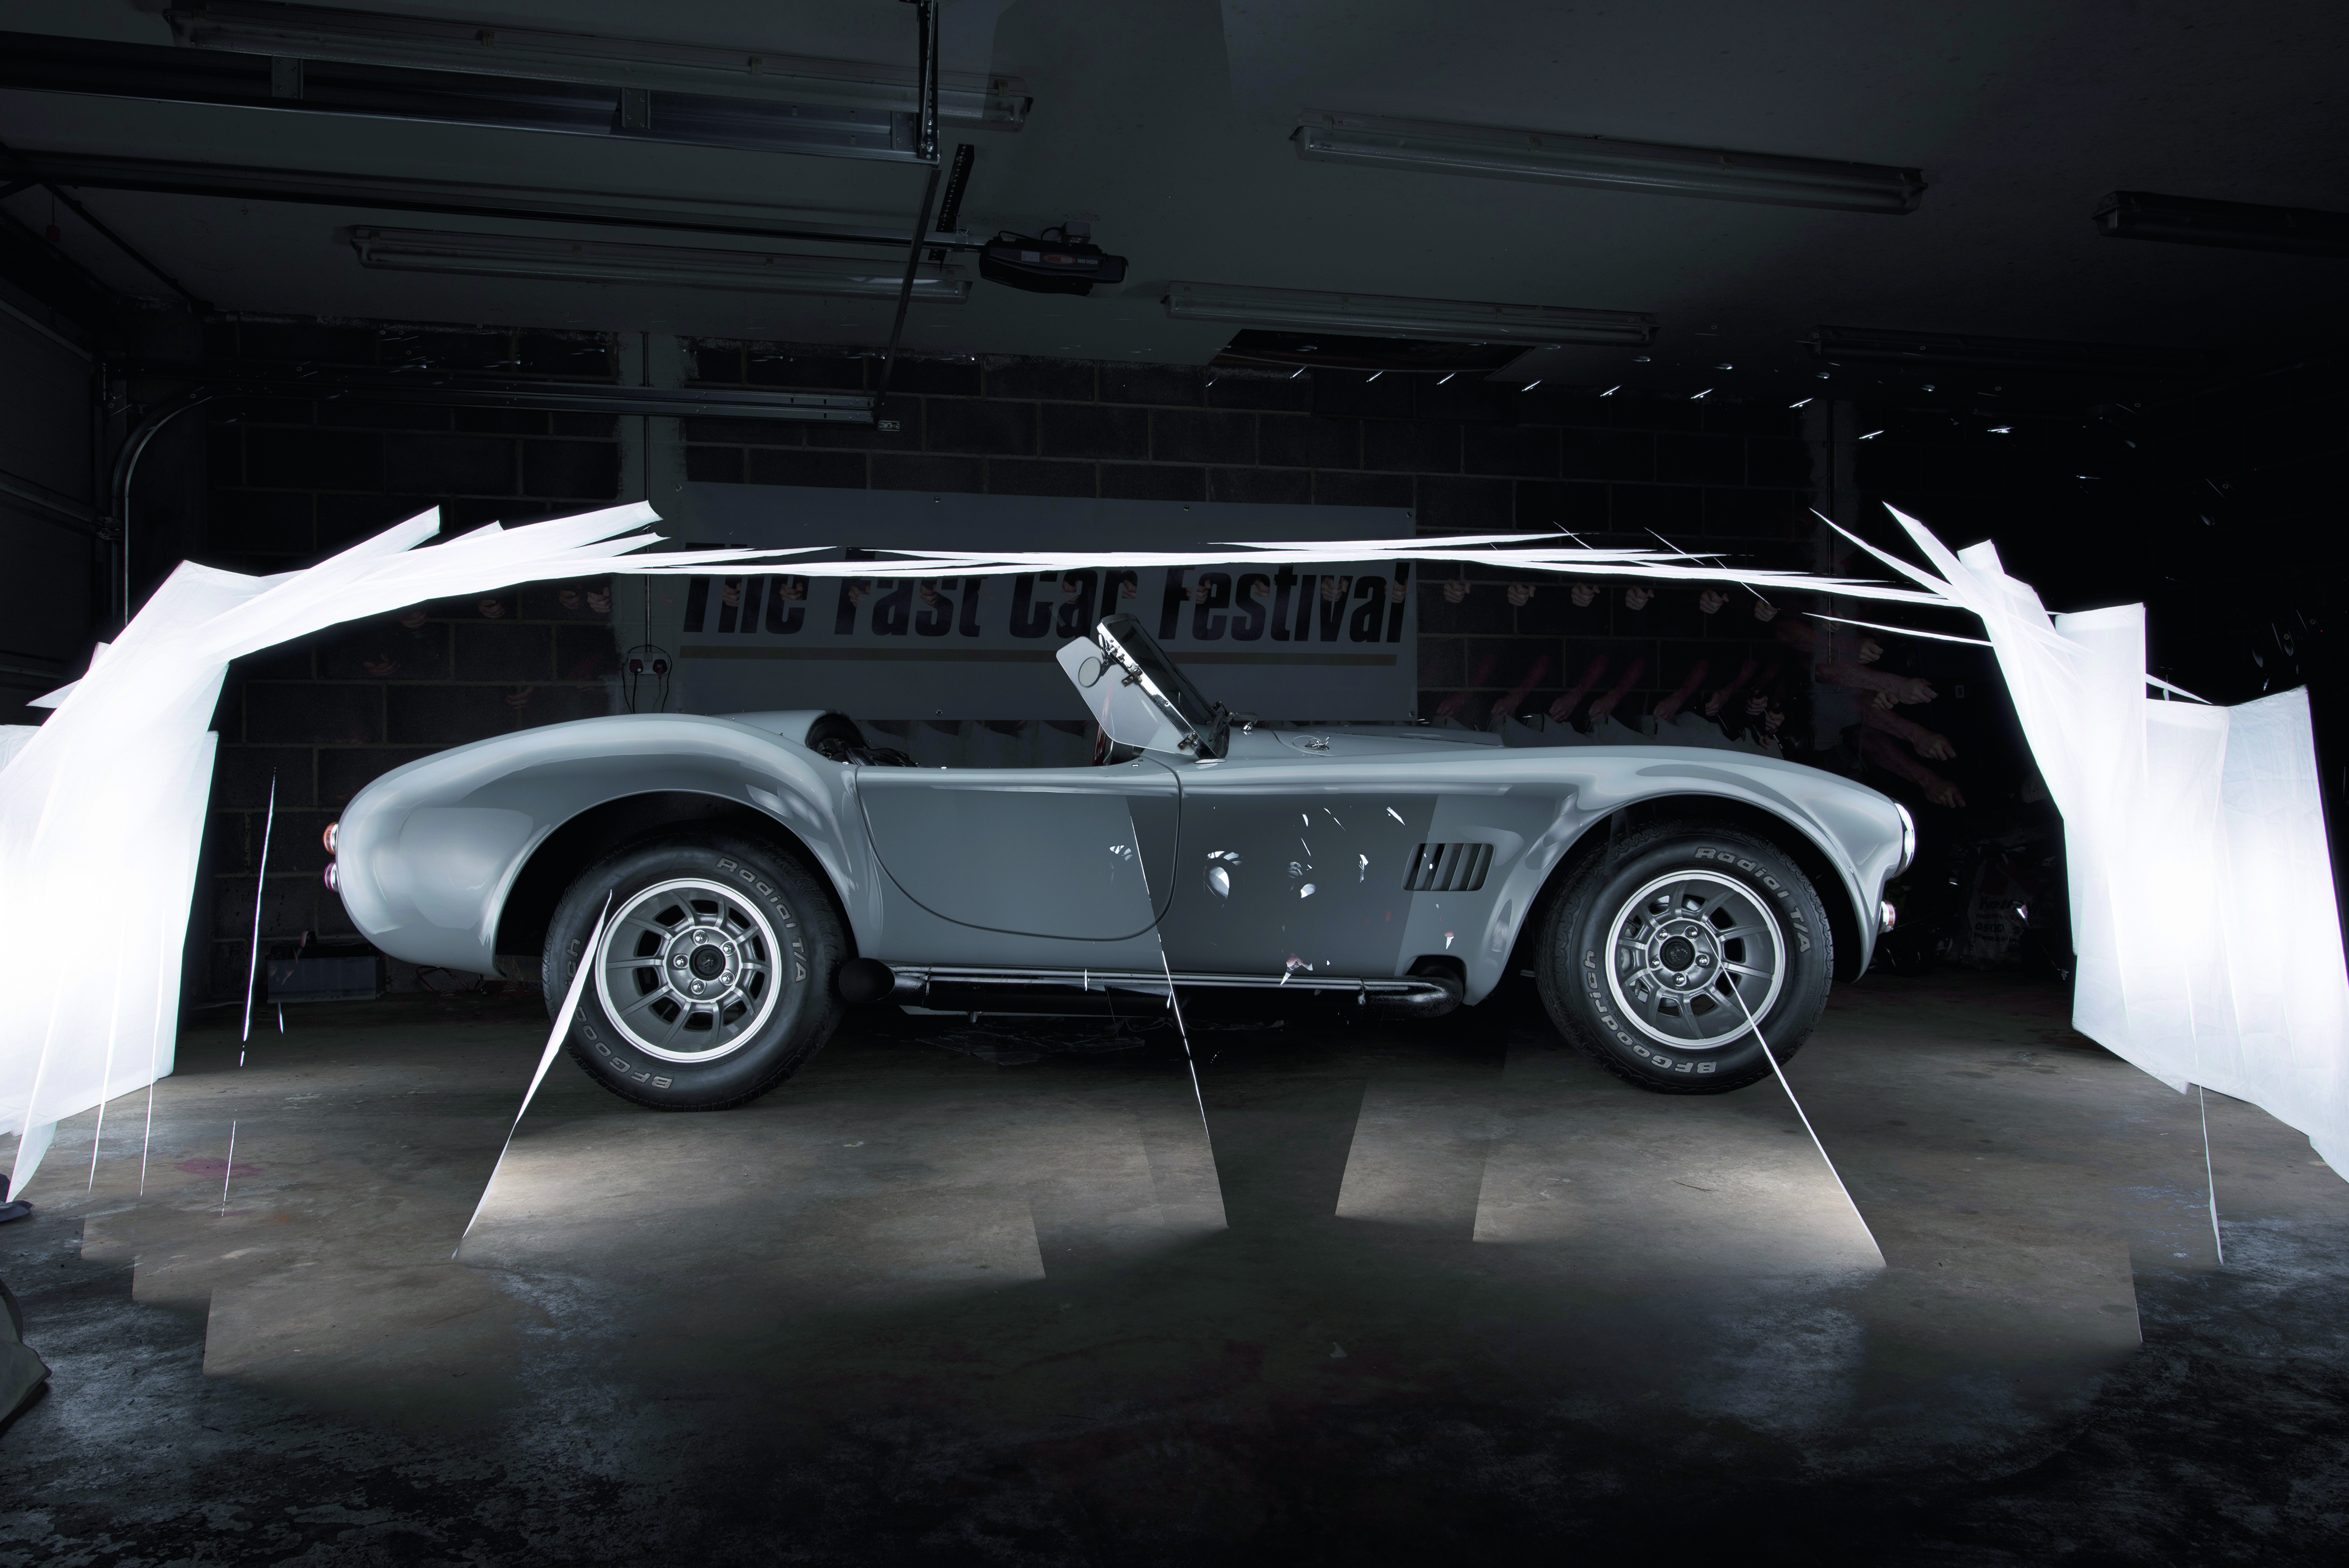
6. Shoot multiple photos
We ended up shooting 54 photos to create our final image, but you don’t need to shoot that many. We’d recommend you start with about nine photos: five with the light above the car, one with it on the front, one on the rear and one for each of the visible wheels.
Step by step: Build your dream car
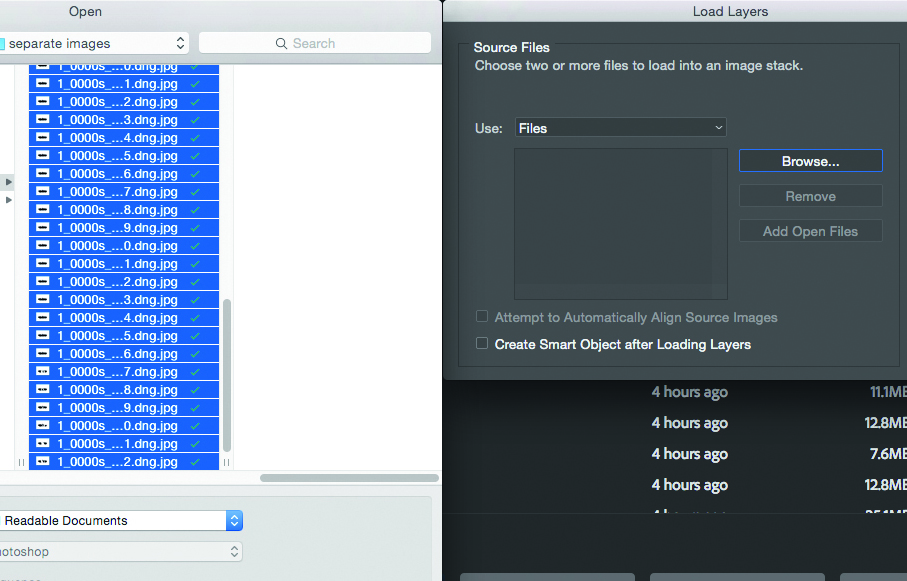
1. Load your images
Open Photoshop and go to File>Script>Load Files into Stack. Browse to and select all of your car shots, and click on Open. Click on OK in the window that appears and you should see all of your selected photos stacked in the Layers palette in a single document.
2. Blend them together
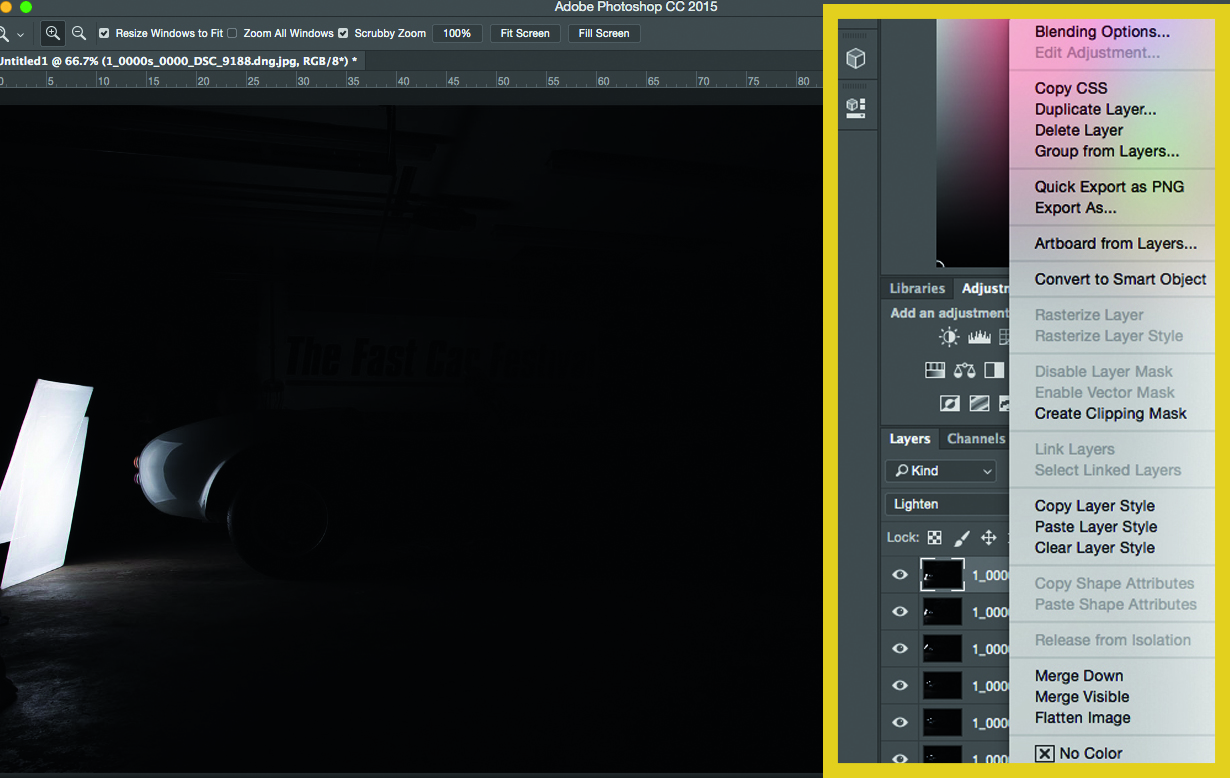
To begin the process of merging your images, change the top layer’s blending mode to Lighten, then right-click on that layer and choose Copy Layer Style. Hit shift and right-click on the bottom layer to select all the layers, then right-click on any layer and choose Paste Layer Style.
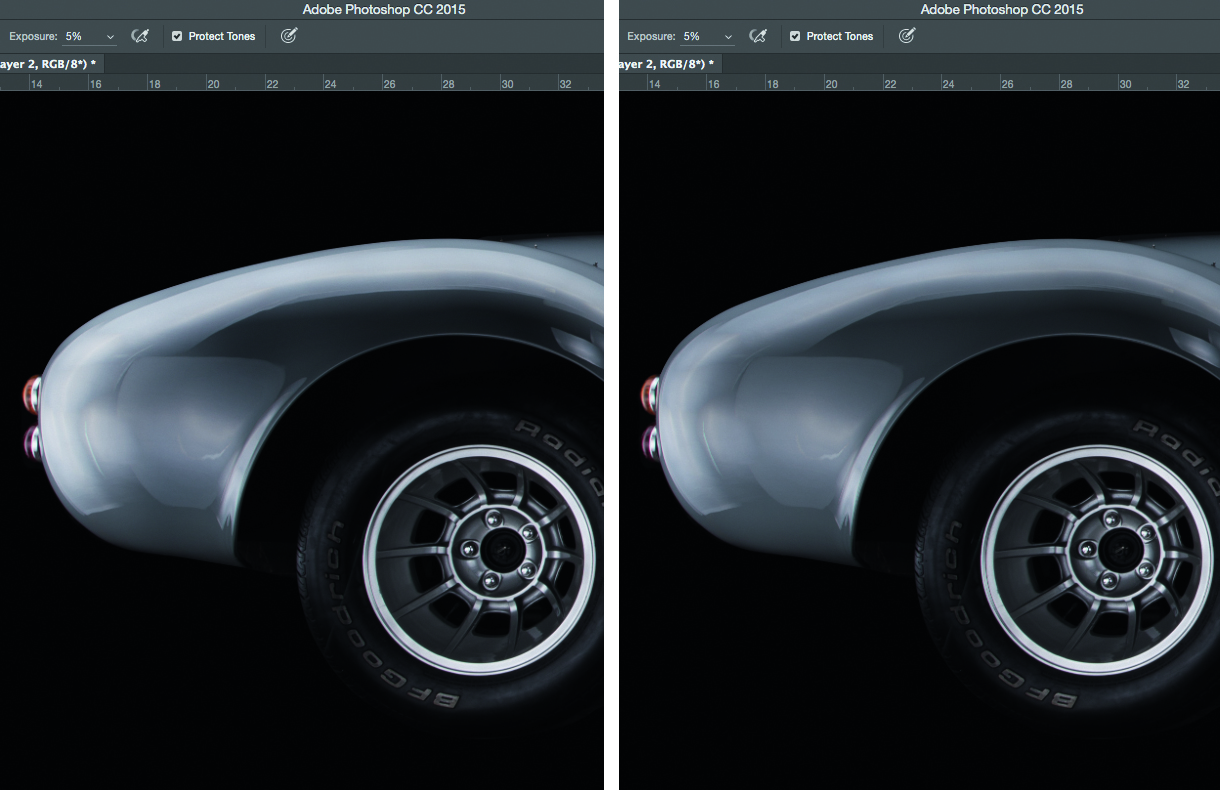
Use the dodge and burn tools with a soft feather on the brush to enhance the softness between the highlights and shadows on the car body.
3. Mask out distractions
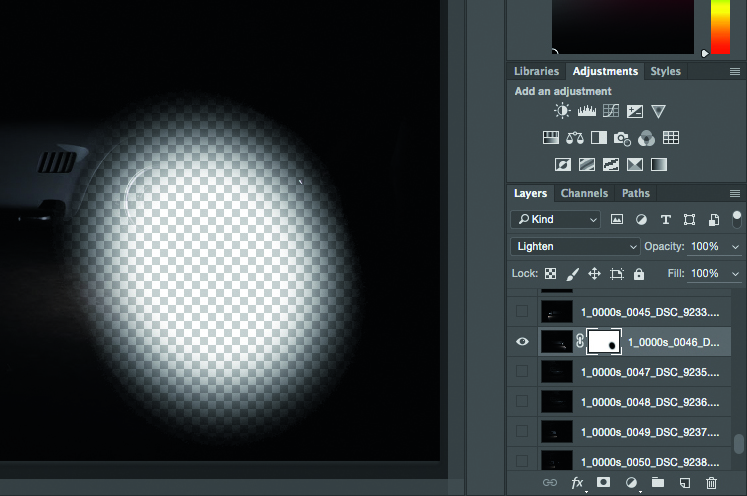
To mask out unwanted items in a layer (flashgun, softbox or photographer), left-click on its layer thumbnail and hit the Add layer mask button at the bottom of the Layers palette. Click on the newly added mask and paint with black using the brush tool (B) to remove distractions.
4. Add some polish
To make the highlights bright and shadows dark, add a Levels adjustment layer: left-click on the Create new fill or Adjustment layer button at the bottom of the Layers palette, then drag the highlight arrow to the left and the shadow arrow to the right to increase the contrast.
5. Minimise reflections
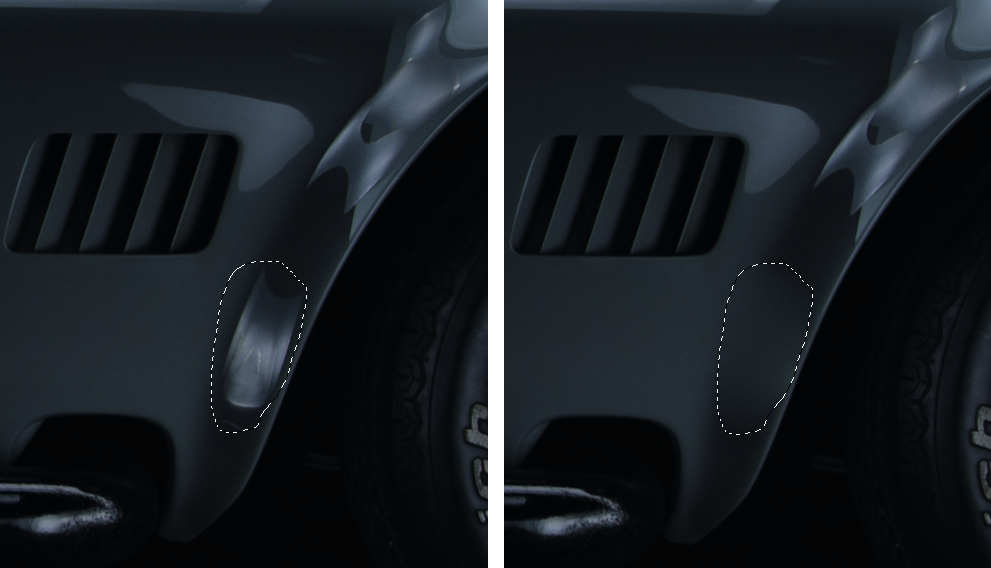
Use the Patch tool to improve the look of reflections. Make a selection around a reflection, then click and drag it to a more desirable-looking area to resample the texture and smooth any imperfections. Use this plus some clone stamping to make the car gleam.
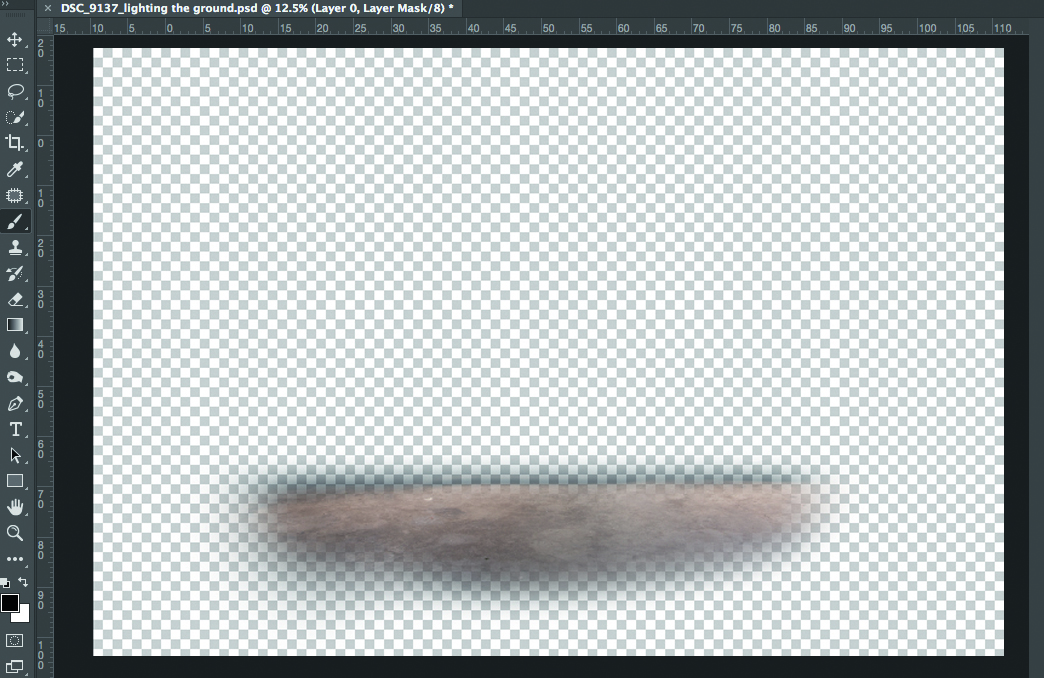
6. Light the floor
Grab two shots where the light was hanging over the car (ensure the light is hitting the ground in front of the car) and follow steps 2 and 3 again for them. Now you should have your ground below the car – make sure your mask doesn’t extend past the front or rear of the car.
With thanks to Peter Hall for providing the Arntz Cobra and location
Get the Digital Camera World Newsletter
The best camera deals, reviews, product advice, and unmissable photography news, direct to your inbox!
N-Photo: The Nikon Magazine is a monthly publication that's entirely dedicated to Nikon users. As a 100% independent magazine, you can be assured of unbiased opinion from a trustworthy team of devoted photography experts including editor Adam Waring and Deputy Editor Mike Harris.
Aimed at all users, from camera newcomers to working pros, every issue is packed with practical, Nikon-specific advice for taking better photos, in-depth reviews of Nikon-compatible gear, and inspiring projects and exciting video lessons for mastering camera, lens and Photoshop techniques.
Written by Nikon users for Nikon users, N-Photo is your one-stop shop for everything to do with cameras, lenses, tripods, bags, tips, tricks and techniques to get the most out of your photography.

