How to reduce blur from camera shake
Photoshop Elements 14’s Shake Reduction tool
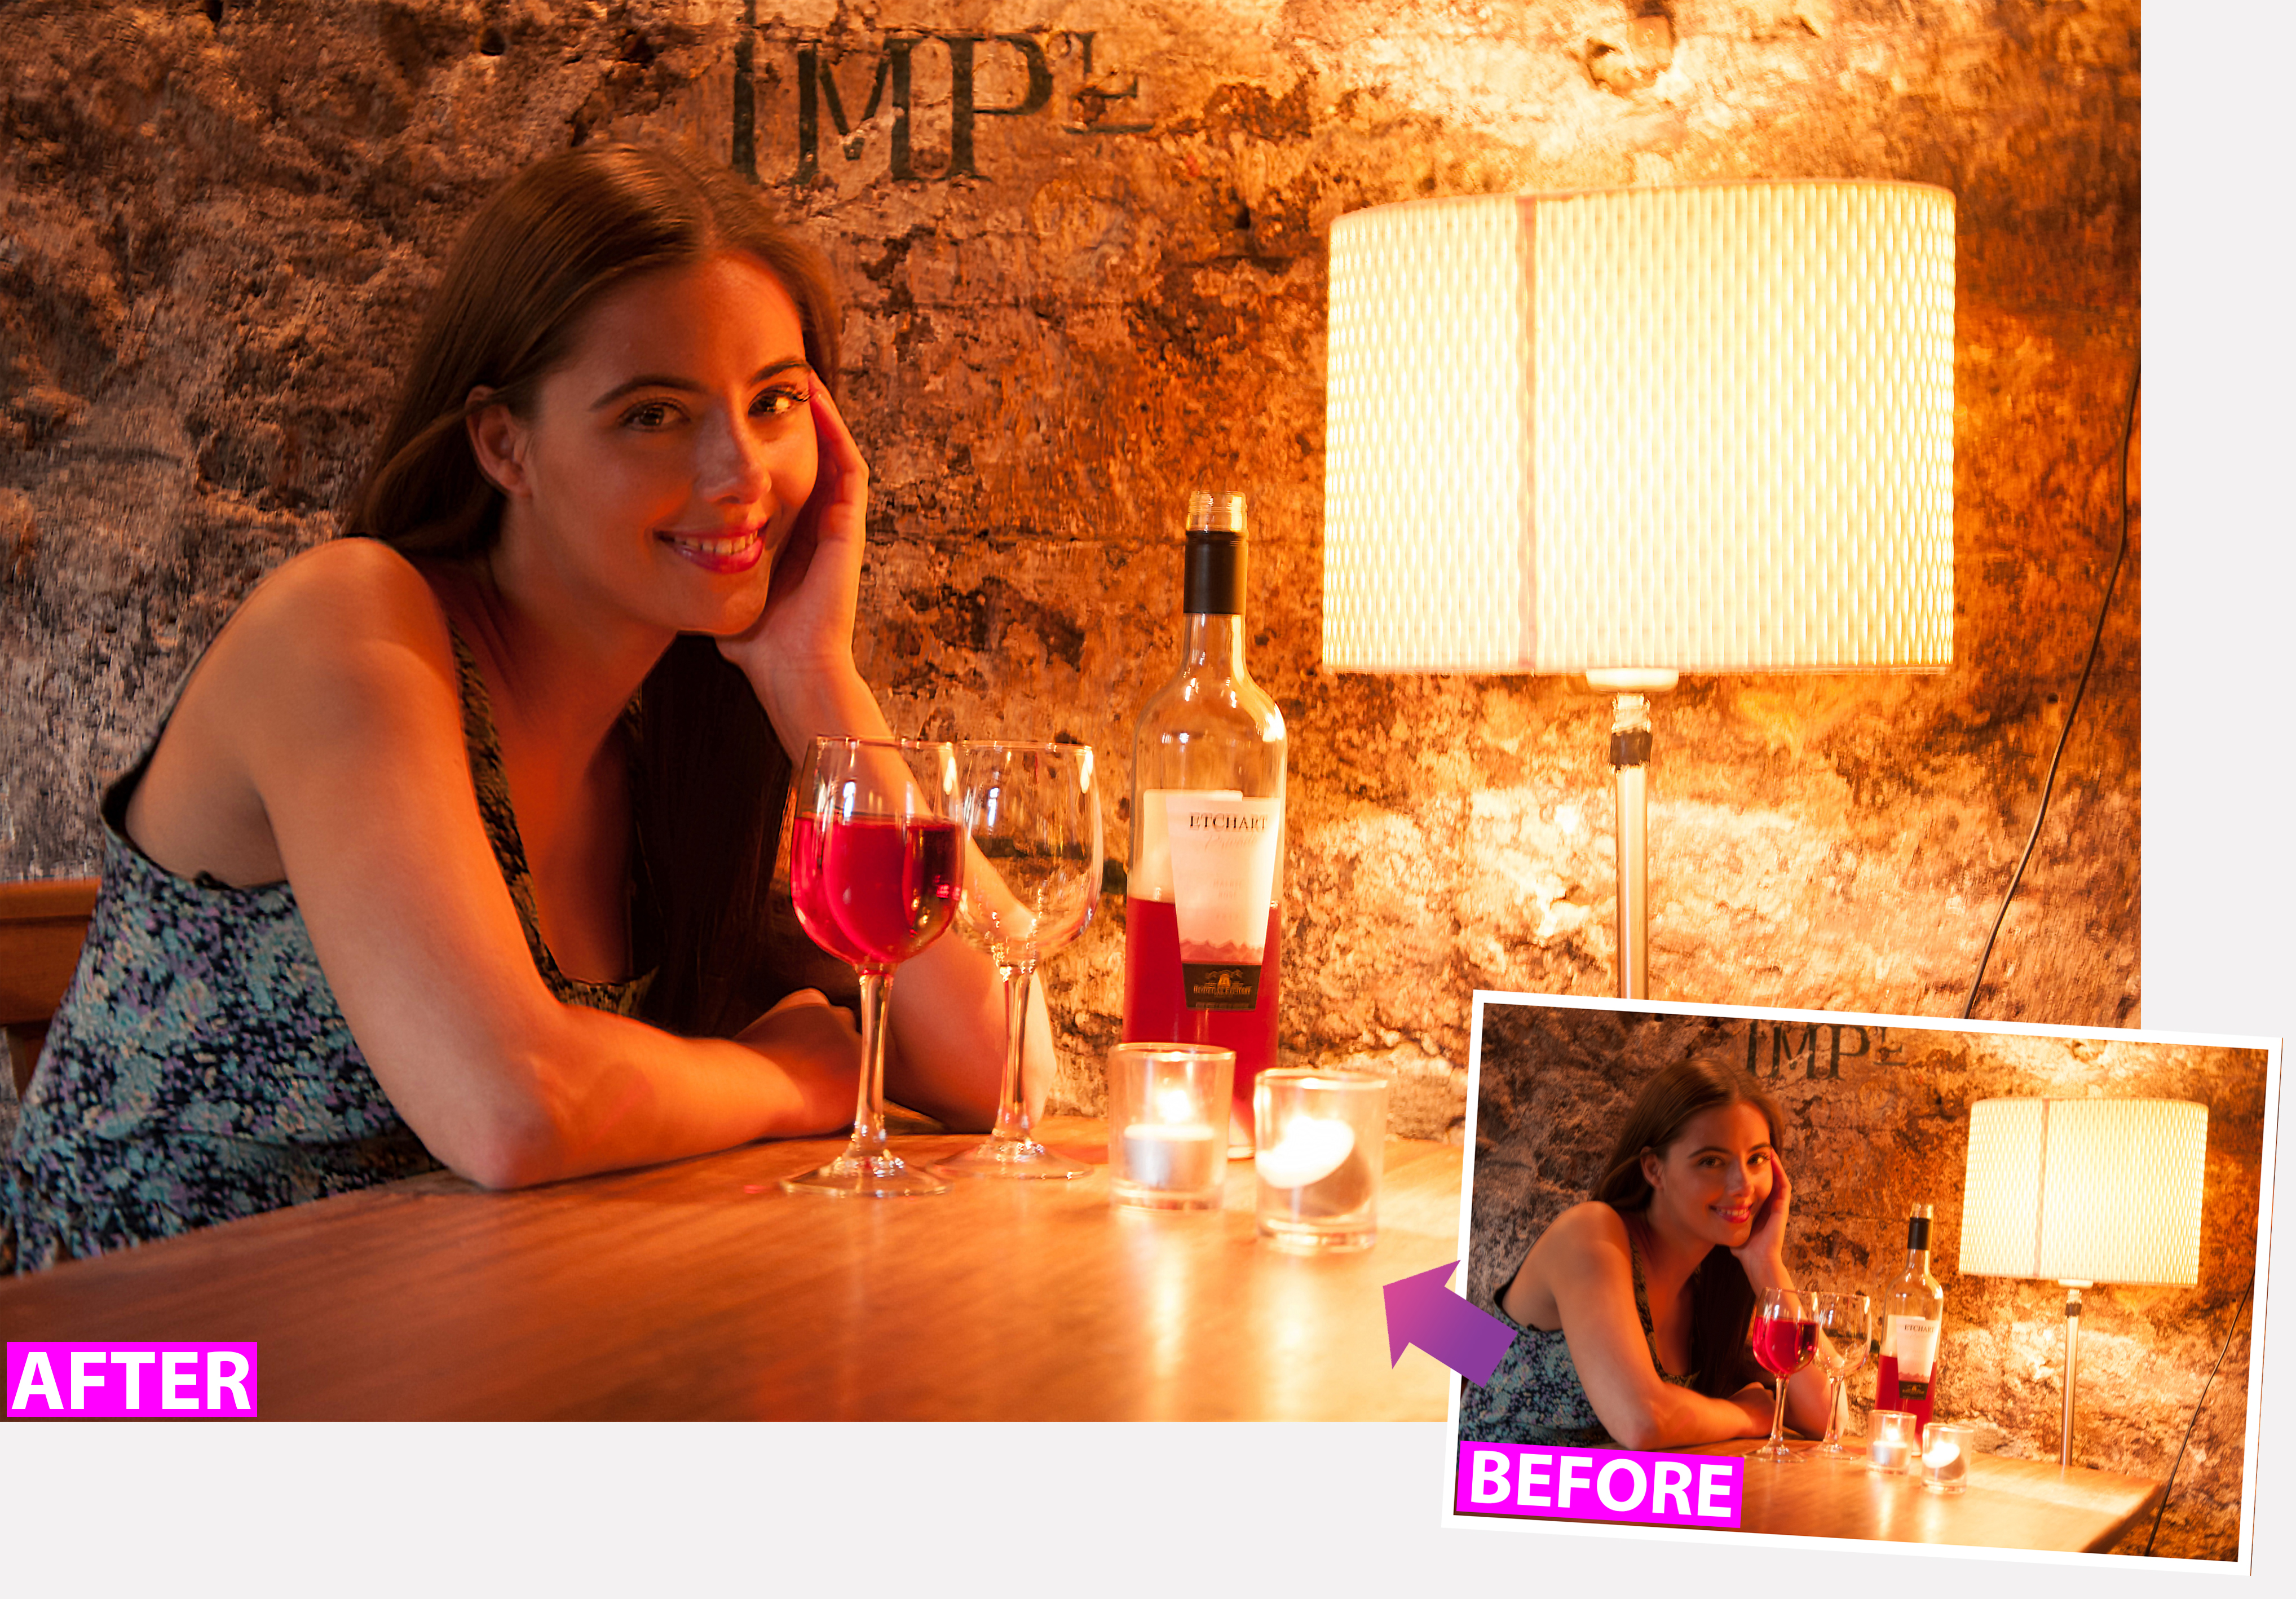
Download project files to your computer from: http://downloads.photoplusmag.com/pp120.zip
Learn how to use the Shake Reduction tool to reduce blur
Time needed: 10 minutes
Skill level: Beginner
Kit needed: Photoshop Elements 14
Camera shake is one of the biggest bugbears for photographers. It happens when the camera moves during the exposure, so it’s closely tied to shutter speed. The slower the shutter speed, the greater the danger of shake. We’ve all experienced this frustrating problem after not keeping a close enough eye on our shutter speed in low light conditions, and there’s nothing worse than bagging what looks like a great shot and then, on closer inspection, realizing it’s not quite pin-sharp.
We can also relate this issue to the focal length of the lens – telephoto lenses magnify any shake to make it appear a whole lot worse. You need to watch out for camera shake when you’re shooting indoors or in low light, because this is when the camera will have to use a slower shutter speed. Normally, you’d counteract this by increasing the camera’s ISO setting to force the shutter speed back up again, and that’s what we should have done here. Instead, we used a low ISO, which resulted in a slow shutter speed of just 0.4 sec – no wonder the details are blurred!
In this tutorial we’re going to show you how a handy tool, that was introduced with version 14 of Photoshop Elements, can help. It’s called the Shake Reduction tool and, as the name suggests, it does exactly that, reducing camera shake caused by any movement from the photographer. With a click of a button you can remove the effects of camera shake from your images, however, for the best results, take full control by delving into the additional options in the tool to tweak your image for more accuracy.
STEP BY STEP: Sharpen your images
Discover the Shake Reduction tool to remove signs of camera shake with ease
When positioning the Shake Region box, if a warning triangle appears it means that the area cannot be analysed, so you will need to move it or enlarge the region until it can. Click-drag the handles of the box to resize or move it around using the central pin.
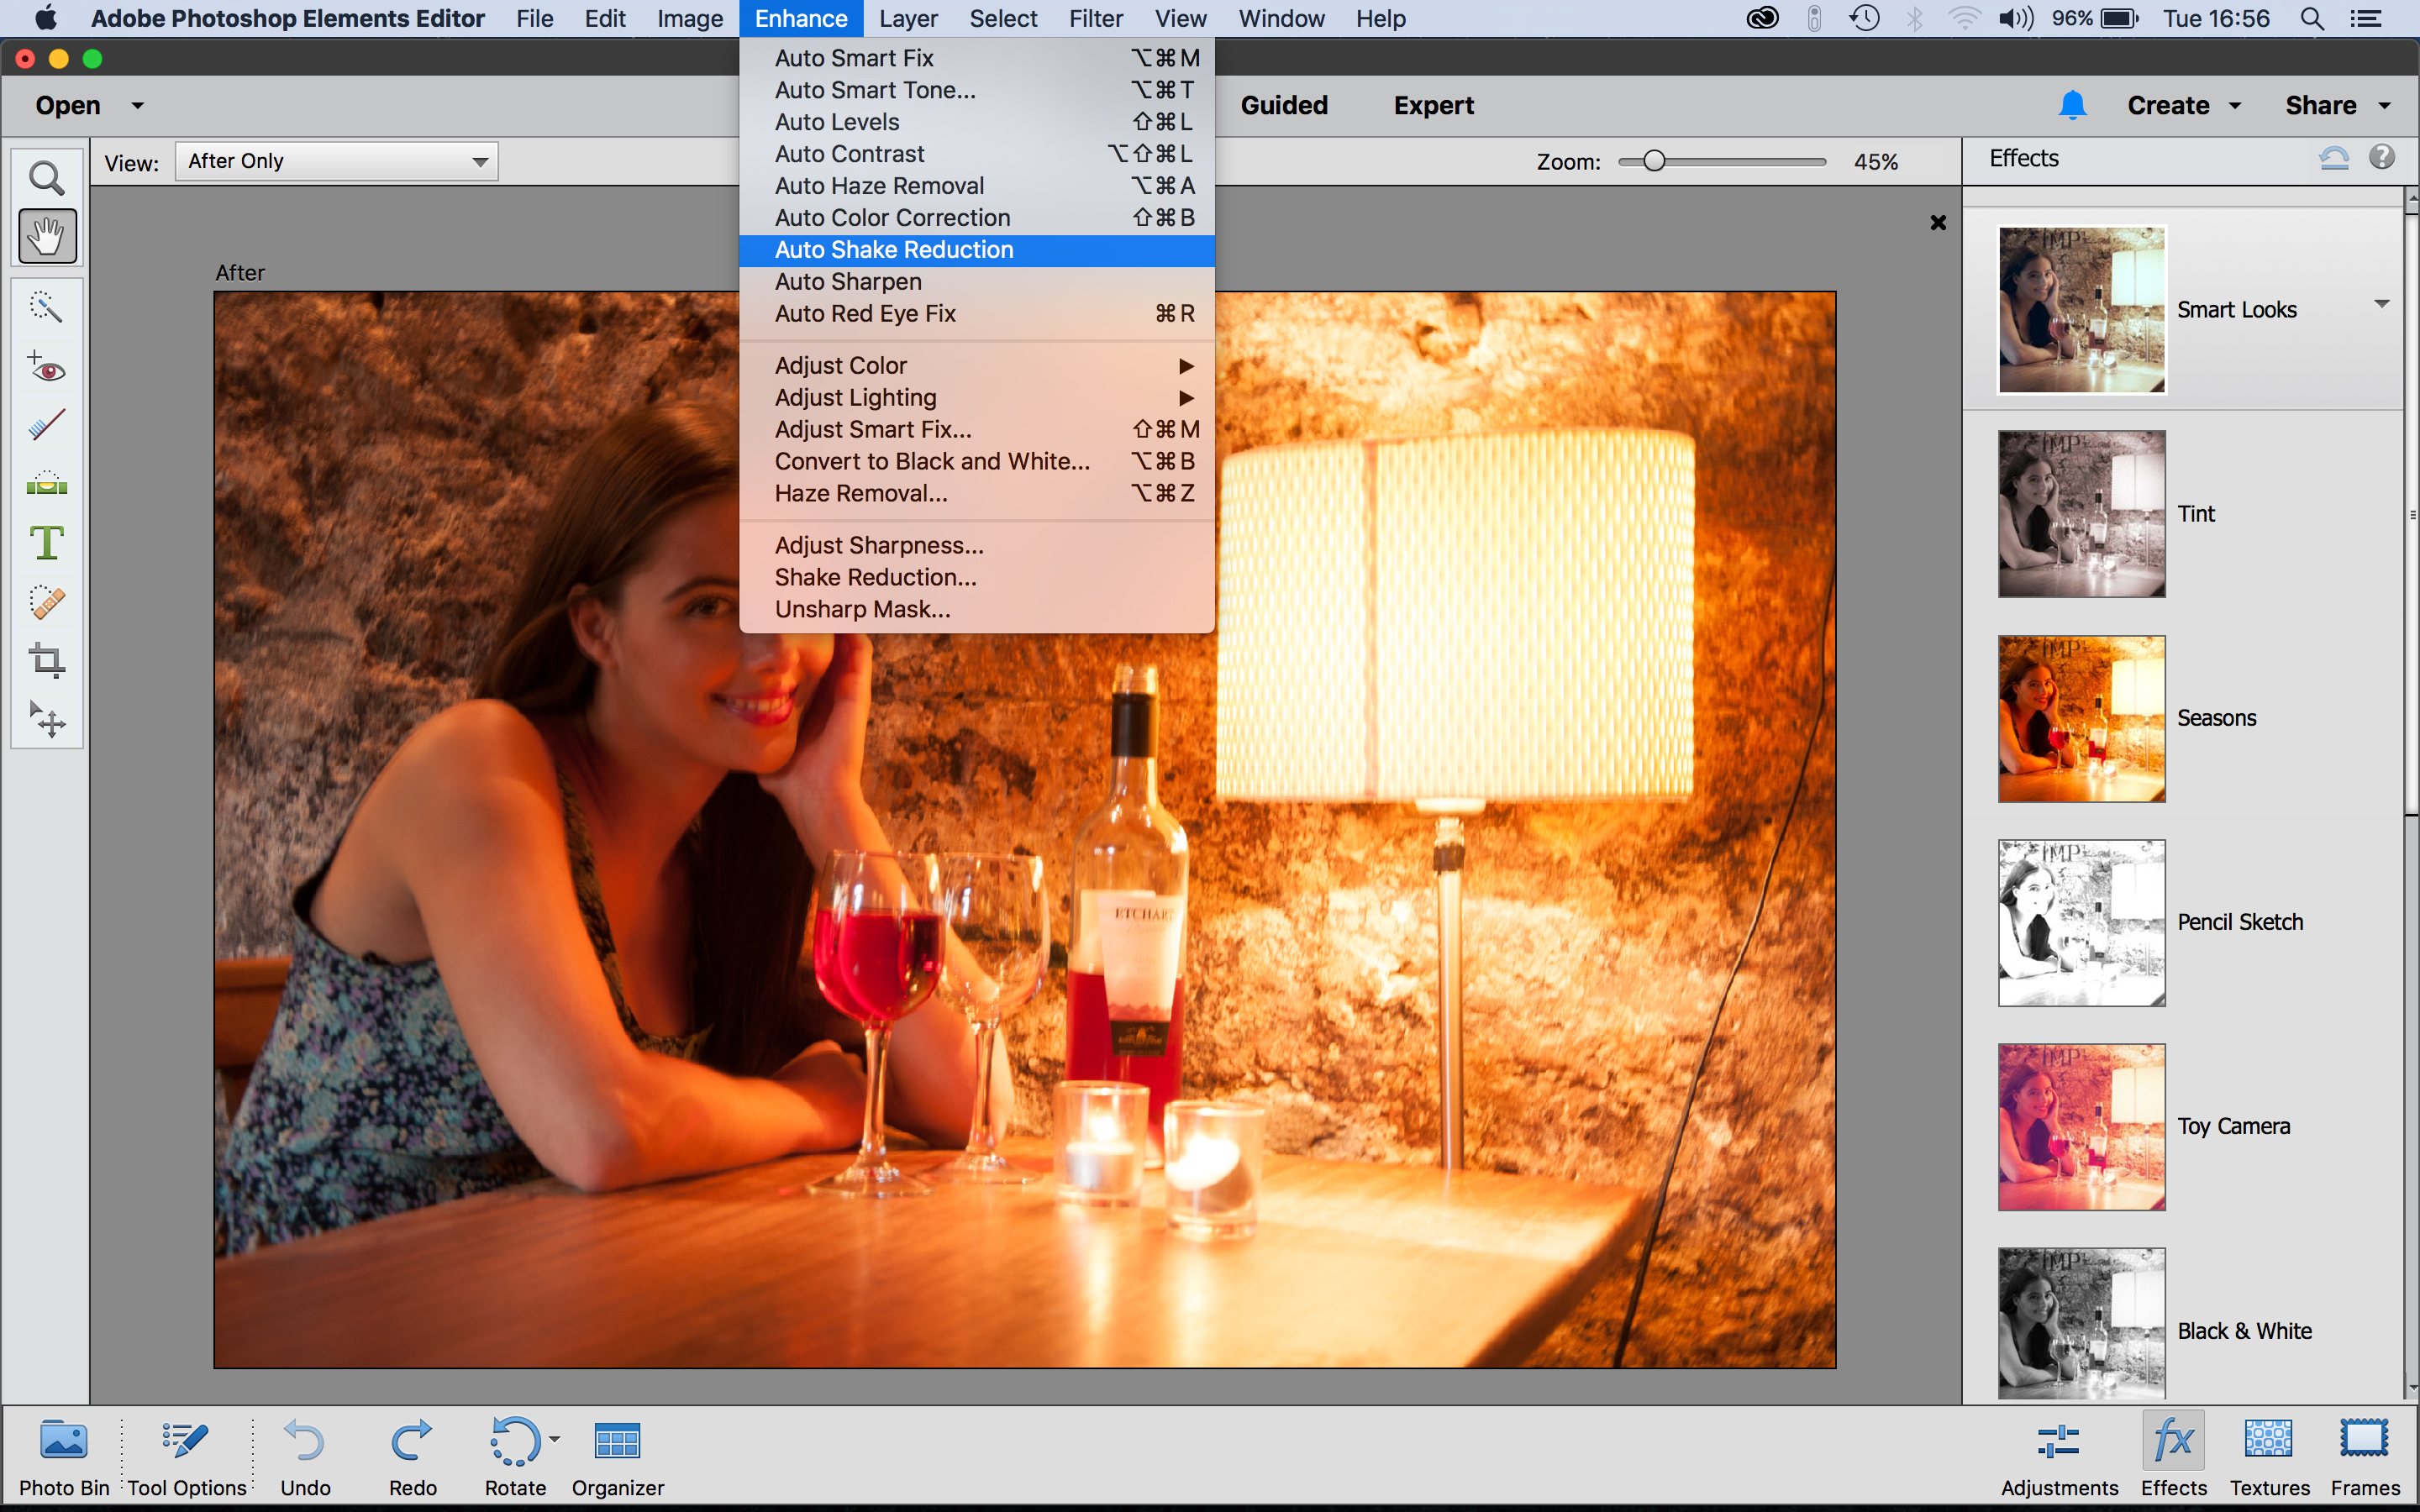
01 WHERE TO FIND SHAKE REDUCTION
The Shake Reduction tools are found in the Enhance menu, and you can use them in both the Quick and Expert modes. The top section of this menu is where you’ll find all the ‘Auto’ options, but you get much more control if you choose the manual Shake Reduction option, further down.
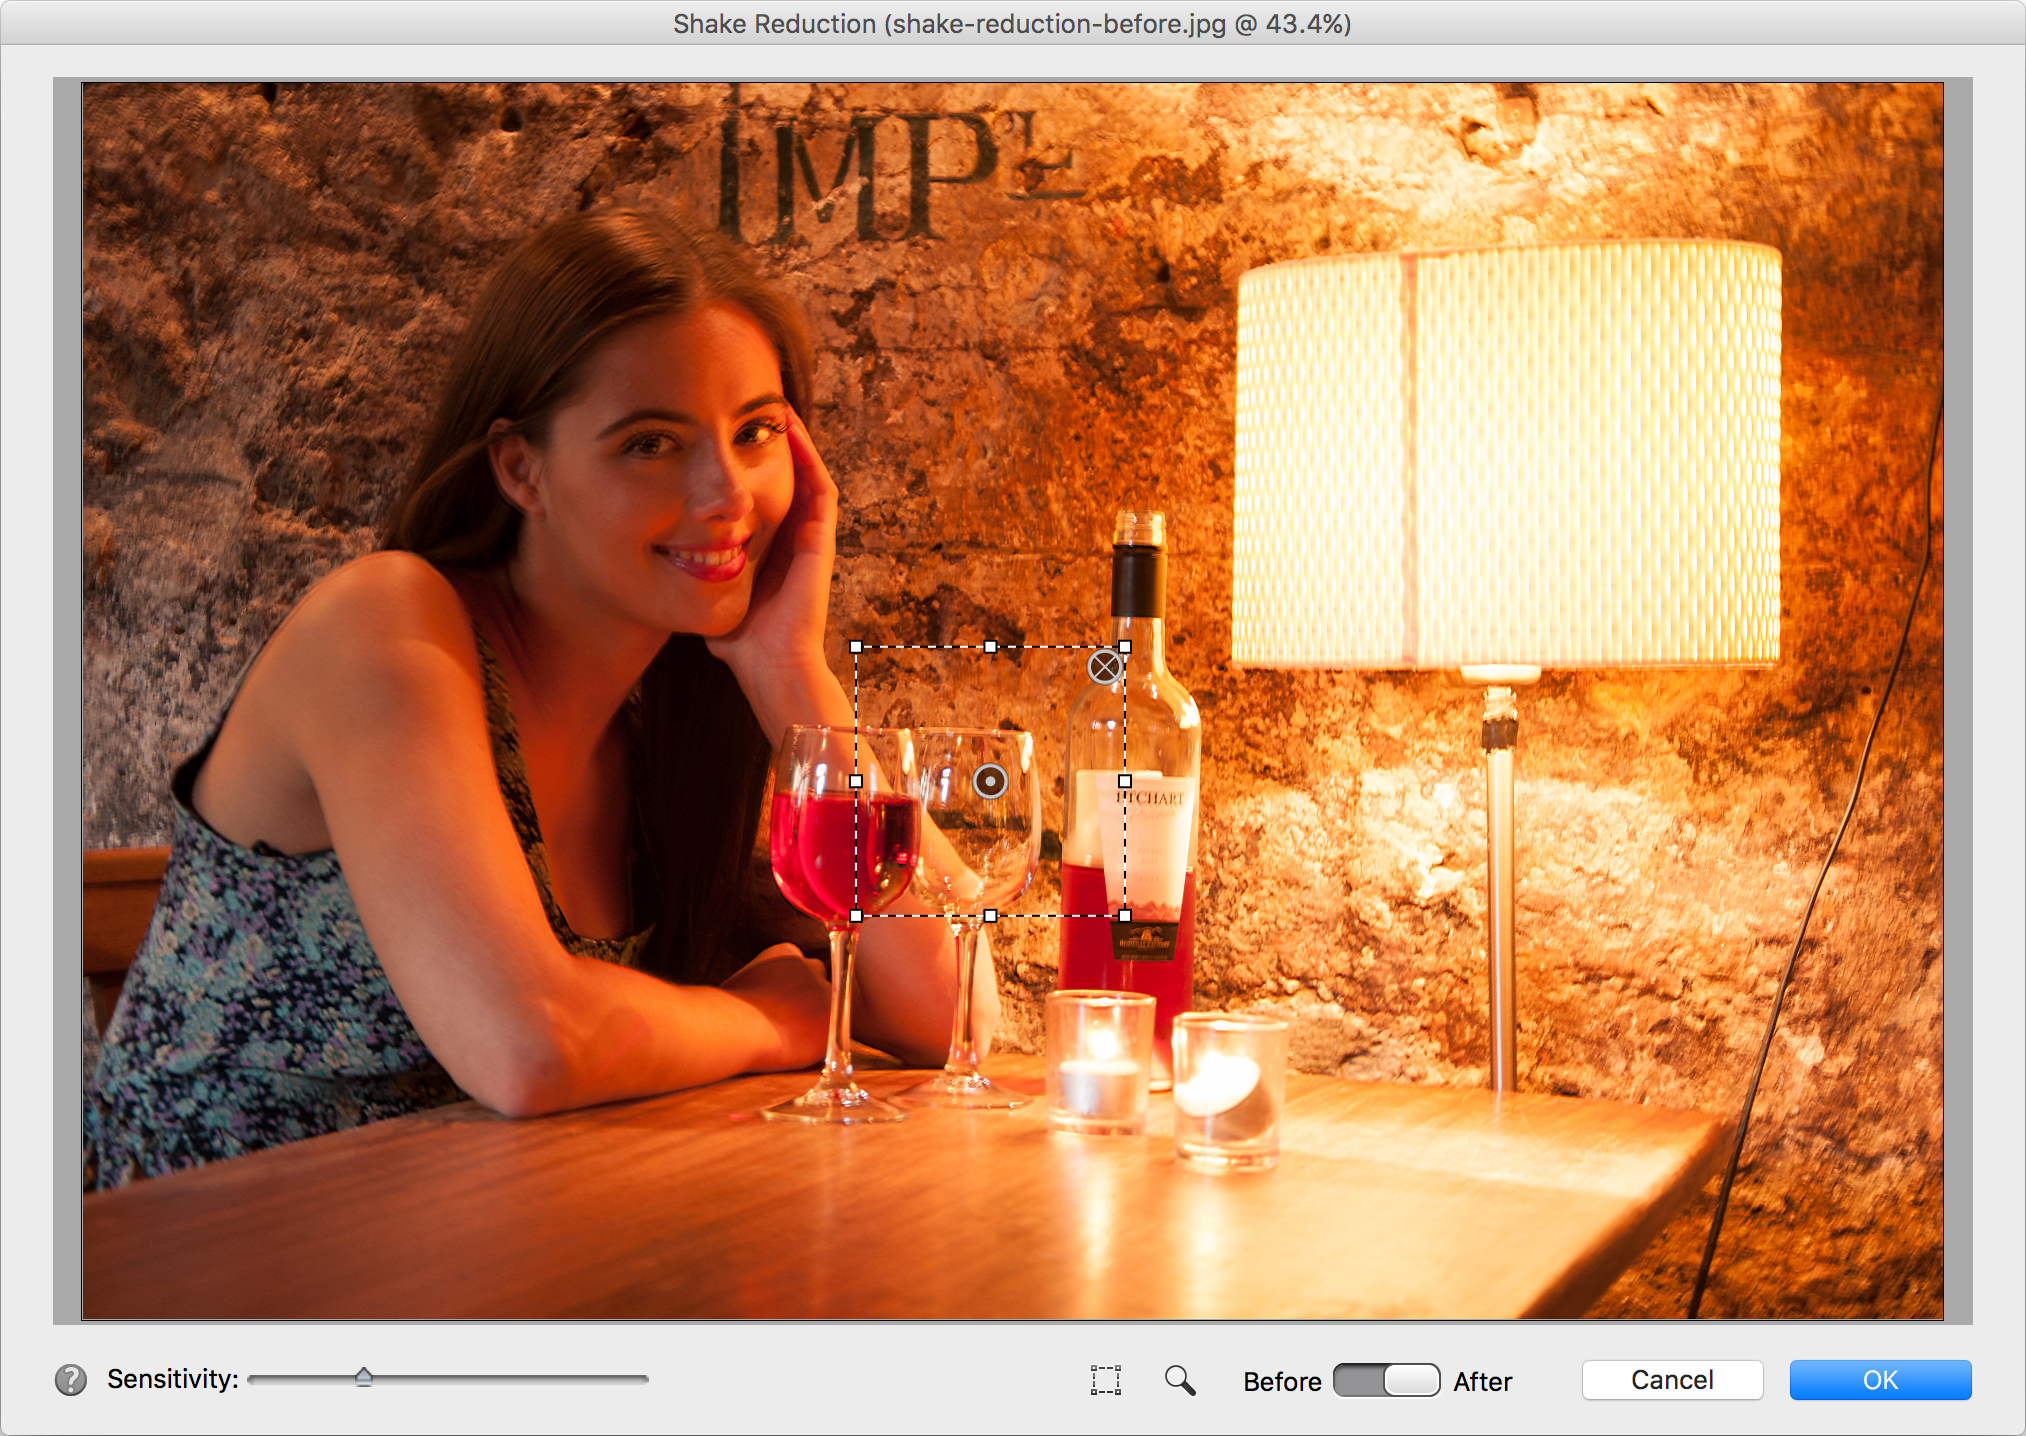
02 SHAKE REGIONS EXPLAINED
The first thing you’ll notice is the default ‘Shake Region’, the area of the image analysed for movement. This is used to work out the shake correction needed, which is then applied to the whole image. You move the Shake Region to a more suitable location by dragging the centre.
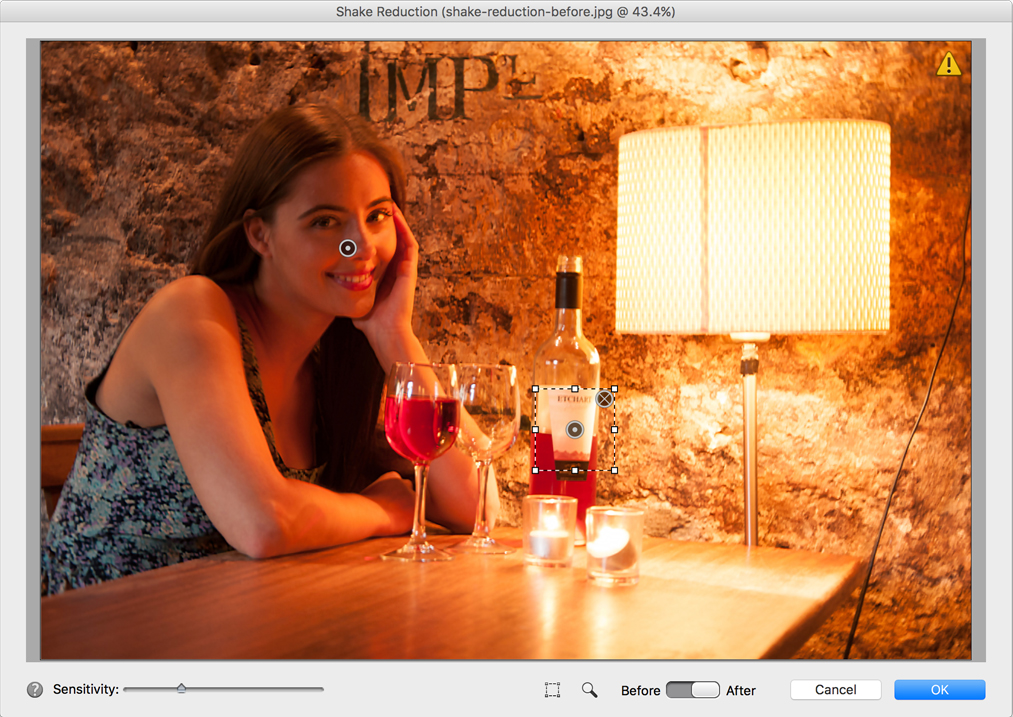
To turn your adjustments off and on, toggle the Before/After switch
03 MORE SHAKE REGIONS
Here, we’ve positioned the first Shake Region over our model’s face, since this is where we want the best shake correction. But we can add another Shake Region for another key area by clicking the tool at the bottom of the window and dragging out another selection marquee.
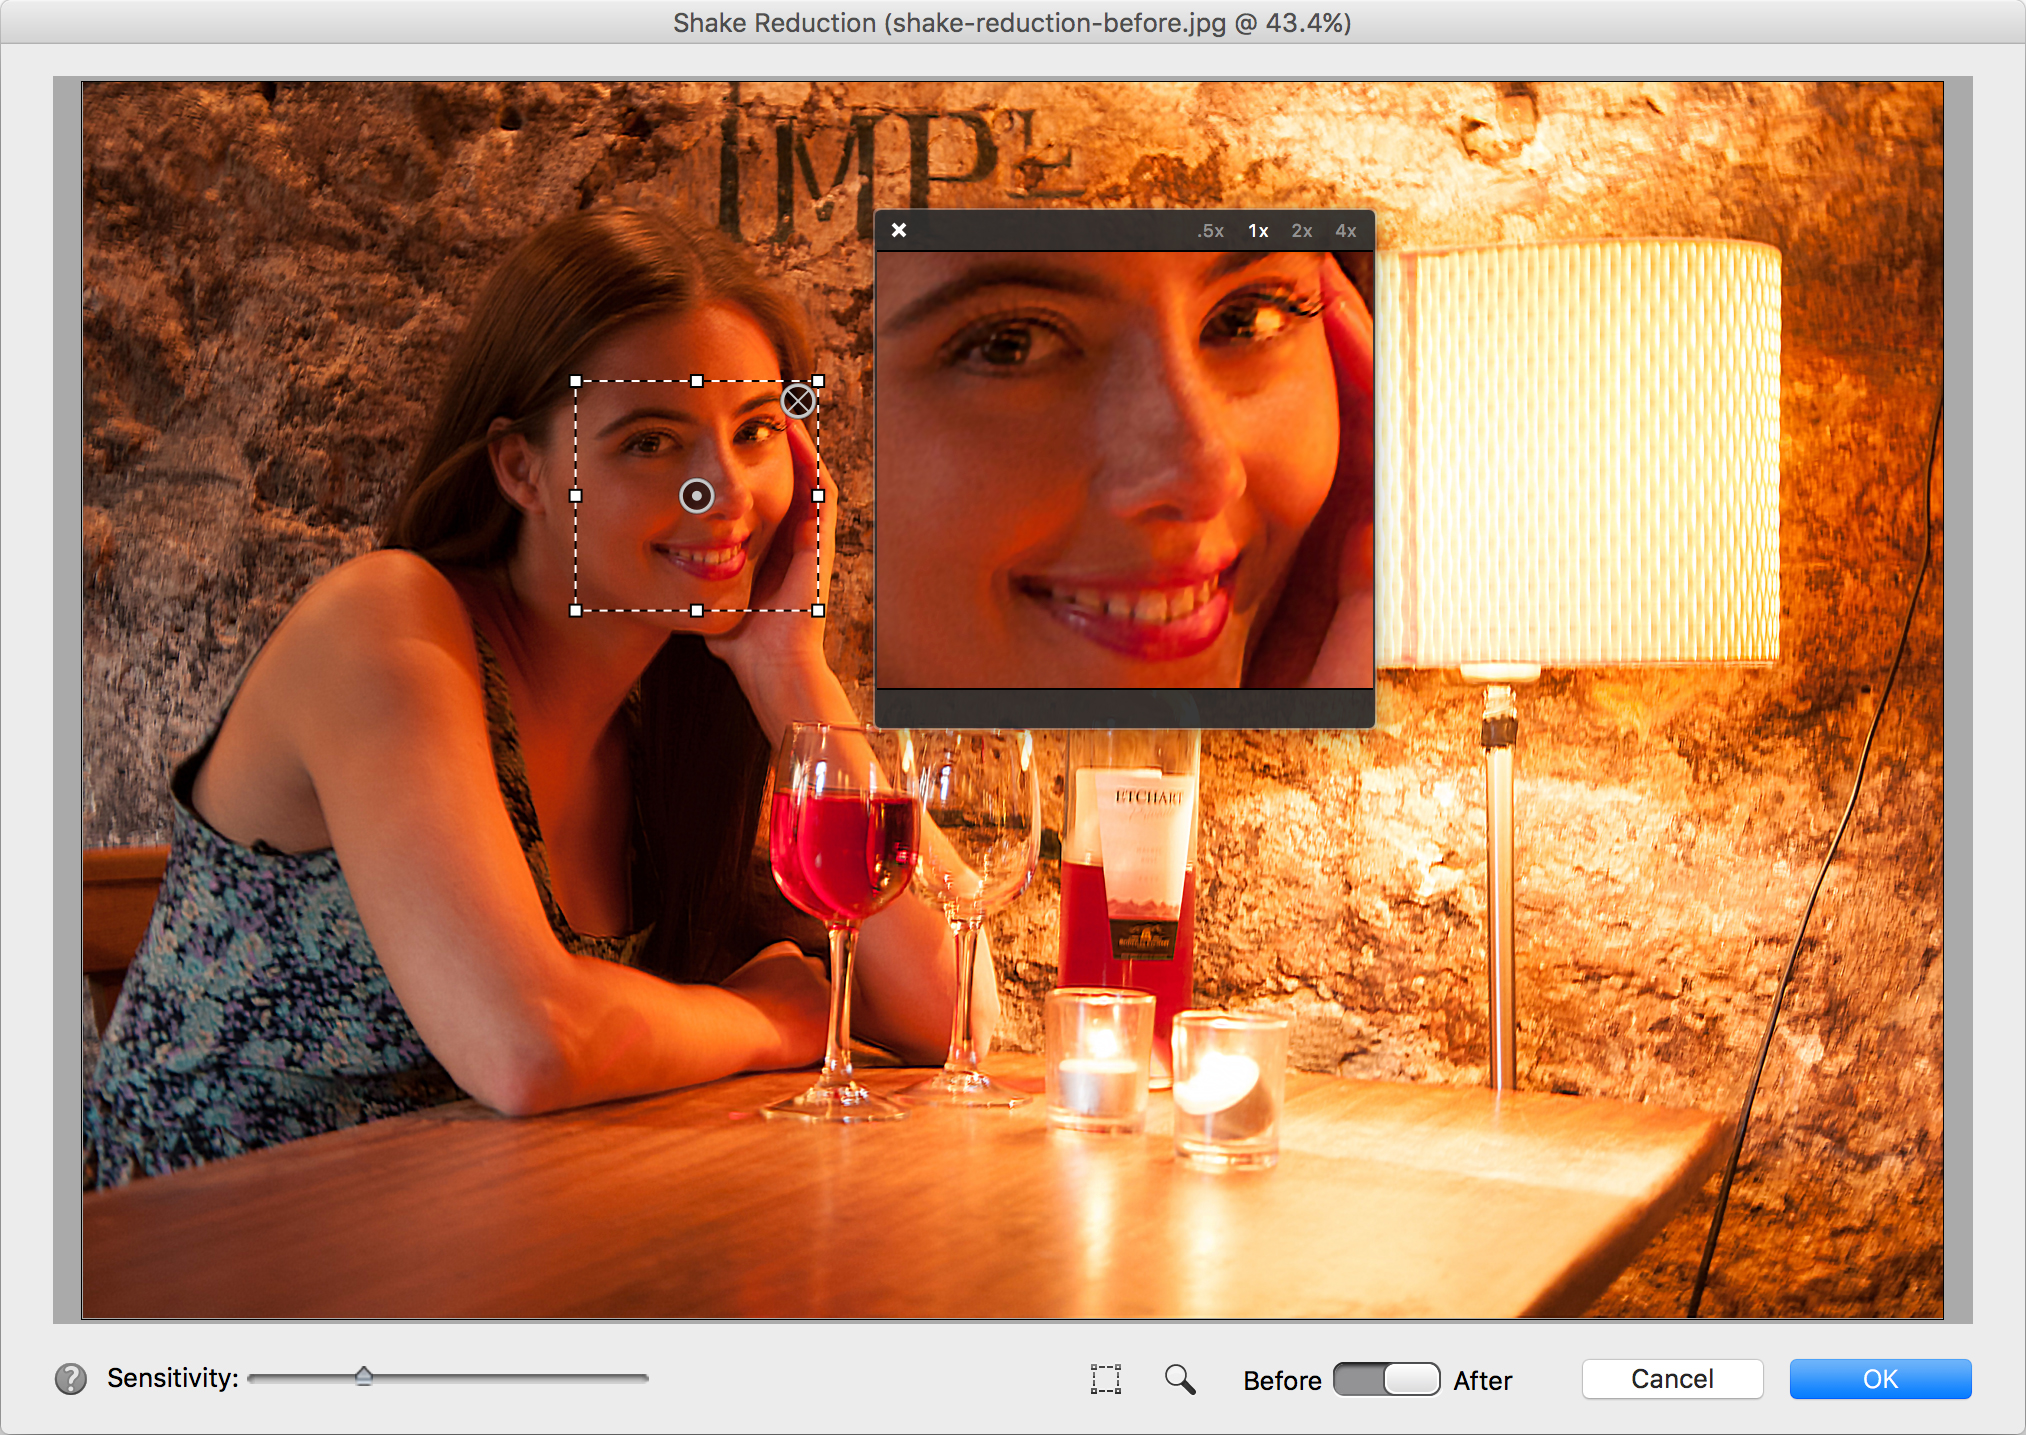
04 ZOOM IN TO CHECK
You can check the effectiveness of the Shake Reduction tool before you commit to processing the image. If you click the zoom button at the bottom of the window, you’ll get a square ‘loupe’ which you can drag around the picture to check how well the details are being rendered.
Get the Digital Camera World Newsletter
The best camera deals, reviews, product advice, and unmissable photography news, direct to your inbox!

Rod is an independent photography journalist and editor, and a long-standing Digital Camera World contributor, having previously worked as DCW's Group Reviews editor. Before that he has been technique editor on N-Photo, Head of Testing for the photography division and Camera Channel editor on TechRadar, as well as contributing to many other publications. He has been writing about photography technique, photo editing and digital cameras since they first appeared, and before that began his career writing about film photography. He has used and reviewed practically every interchangeable lens camera launched in the past 20 years, from entry-level DSLRs to medium format cameras, together with lenses, tripods, gimbals, light meters, camera bags and more. Rod has his own camera gear blog at fotovolo.com but also writes about photo-editing applications and techniques at lifeafterphotoshop.com
