I got rid of stubborn chromatic aberration or color fringing with this easy Photoshop hack
Lens corrections not quite doing the job? Here’s a neat trick that will remove even the toughest chromatic aberration stains!
Photography project inspiration
• Create a perfect posterized portrait blend in Affinity Photo
Photo editing shopping list
• The best photo-editing laptops
• The best tablet for photo editing
• The best monitors for photo editing
• The best iPads for photo editing
Watch video: How to remove chromatic aberration in Photoshop
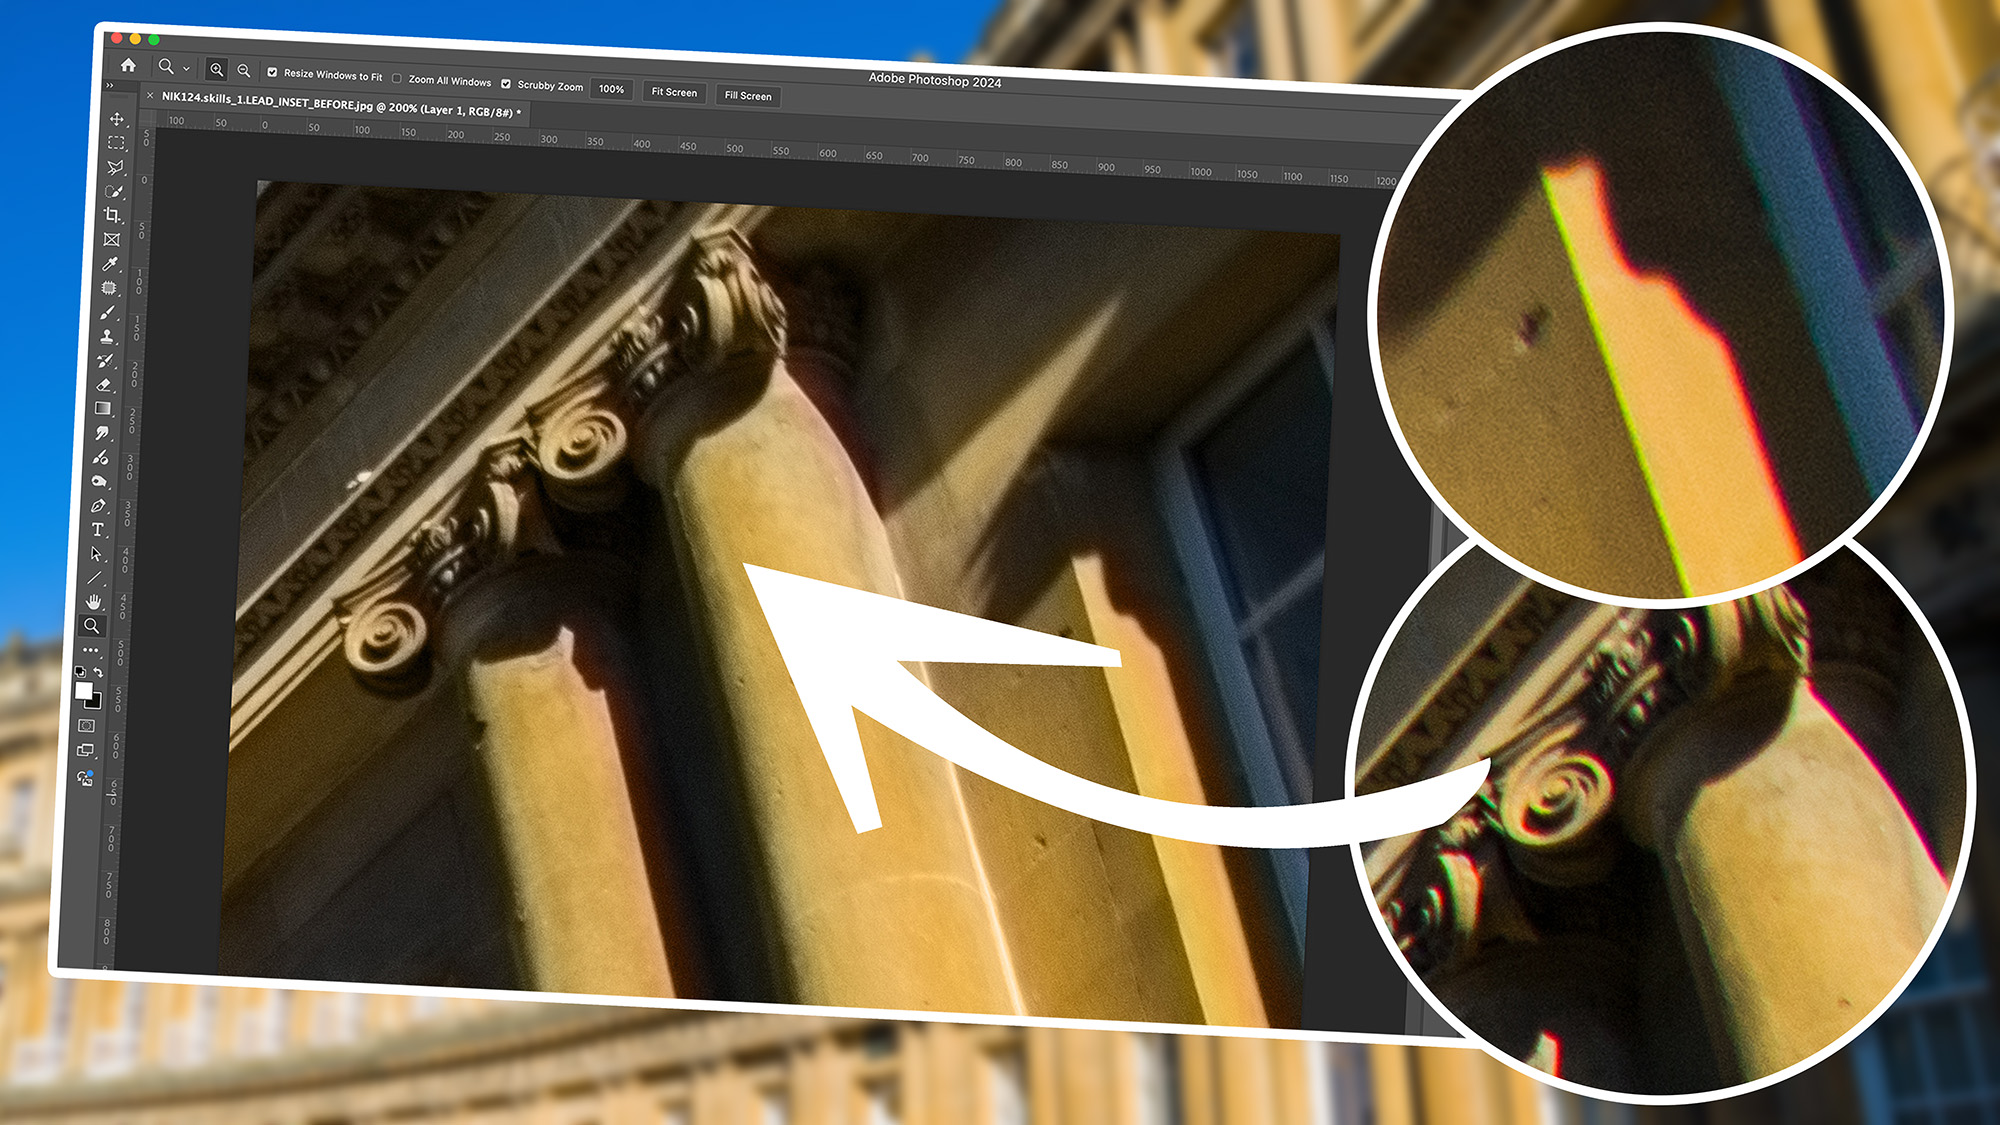
I’ve taken plenty of photographs I’ve been happy with over the years, only to notice unsightly rainbow-colored halos in post-production. This is an optical distortion called chromatic aberration. Chromatic aberration is something all photographers must contend with occasionally. Once you know what chromatic aberration or color fringing in photography is, you’ll understand that it’s really nothing to worry about.
However, usually, you can fix it with the click of a button in Adobe Camera Raw or Lightroom Classic’s Lens Correction tab, but sometimes, it can prove a little more stubborn. That’s why I’m going to show you a neat manual solution in Adobe Photoshop CC that’s almost guaranteed to rid badly affected images of color fringing once and for all. Best of all, I’ll be using layer masks so it’s non-destructive, meaning, if you go too far with your chromatic aberration removal, you can effortlessly backtrack with no harm done.
Here’s how to do it…
How I banish stubborn chromatic aberration in Adobe Photoshop

1. Bit of a blur
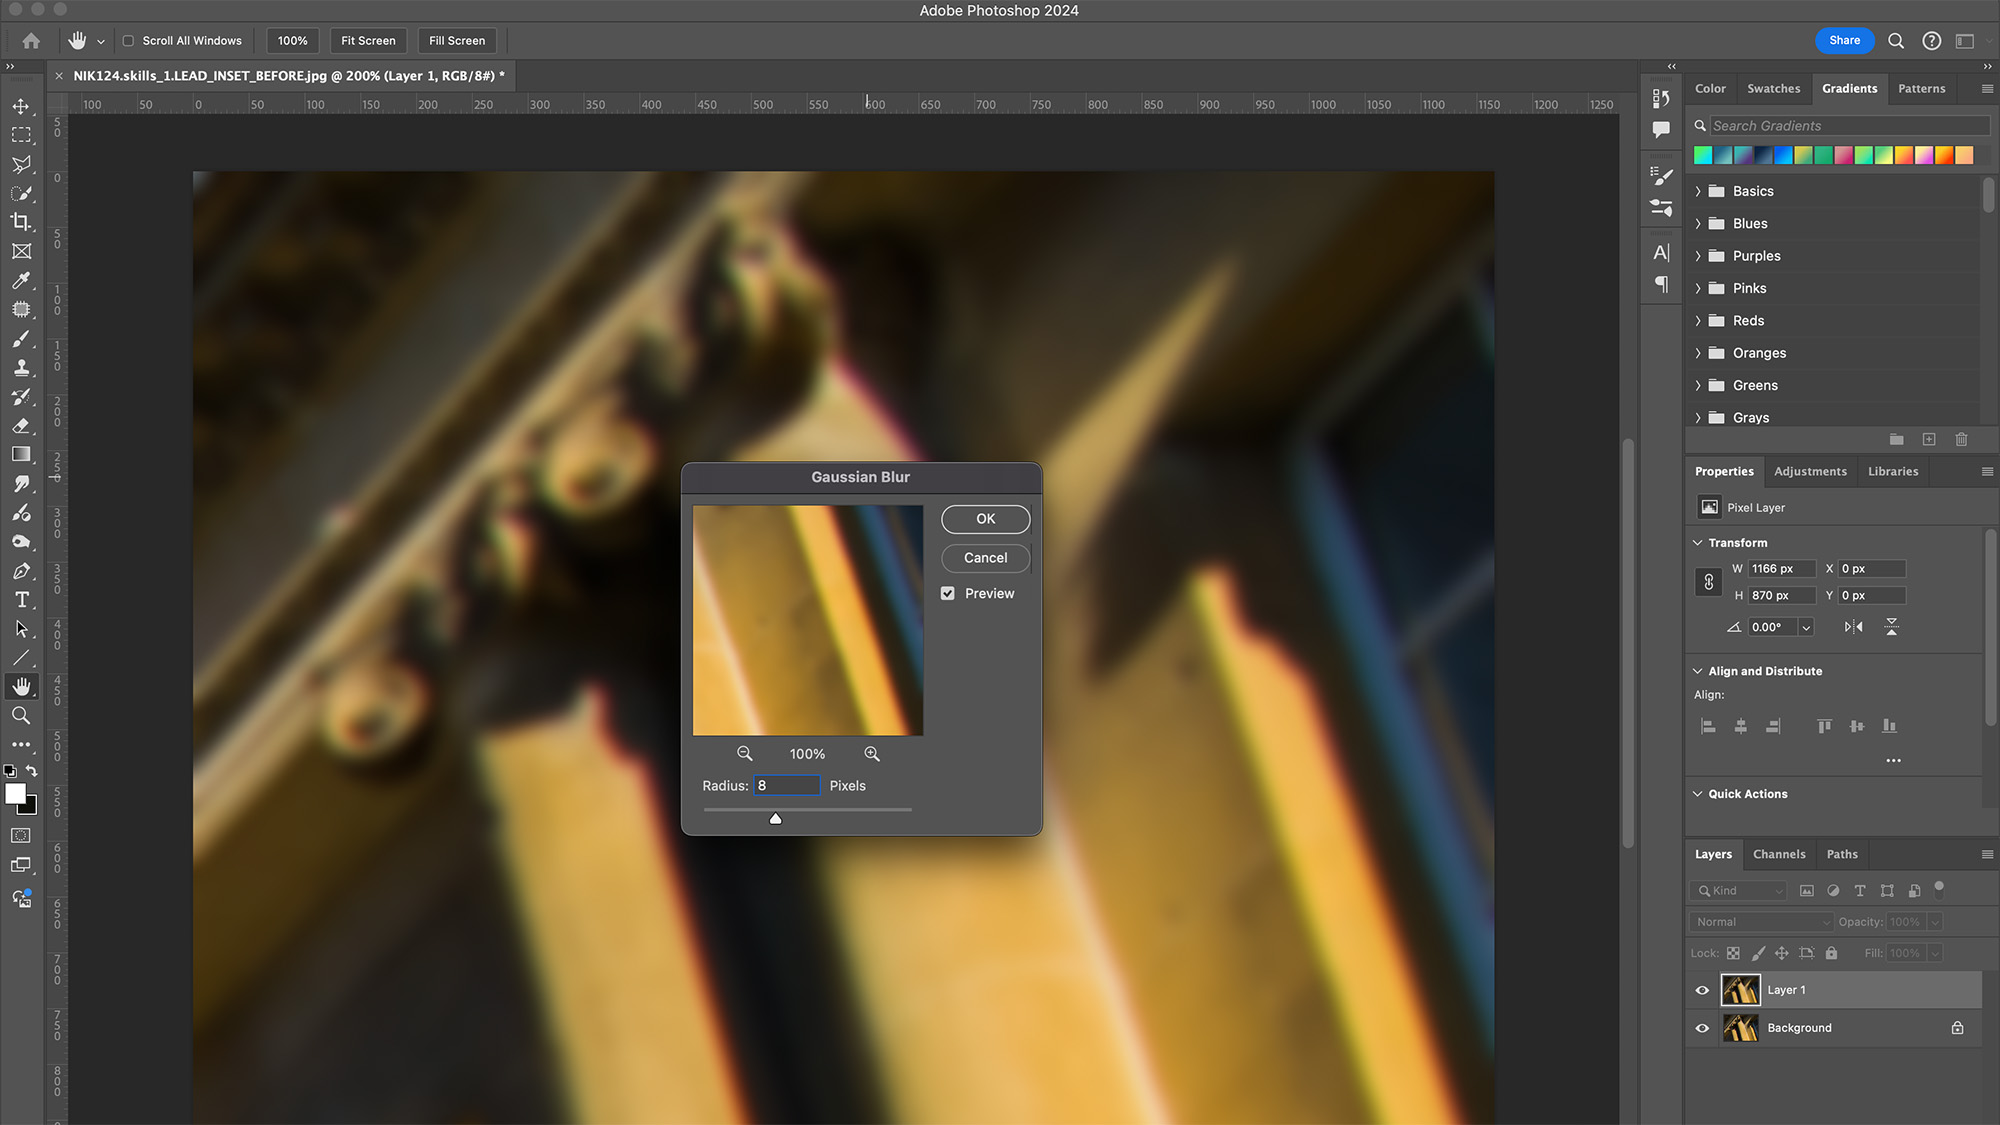
Open your image in Photoshop and duplicate the ‘Background’ layer with Cmd/Ctrl + J. Select your duplicate layer in the Layers panel and navigate to the top toolbar. Click Filter > Blur > Gaussian Blur to bring up the Gaussian Blur window. We set our Radius to 8.0 pixels, but this will depend on the size of your image.

2. Blending modes
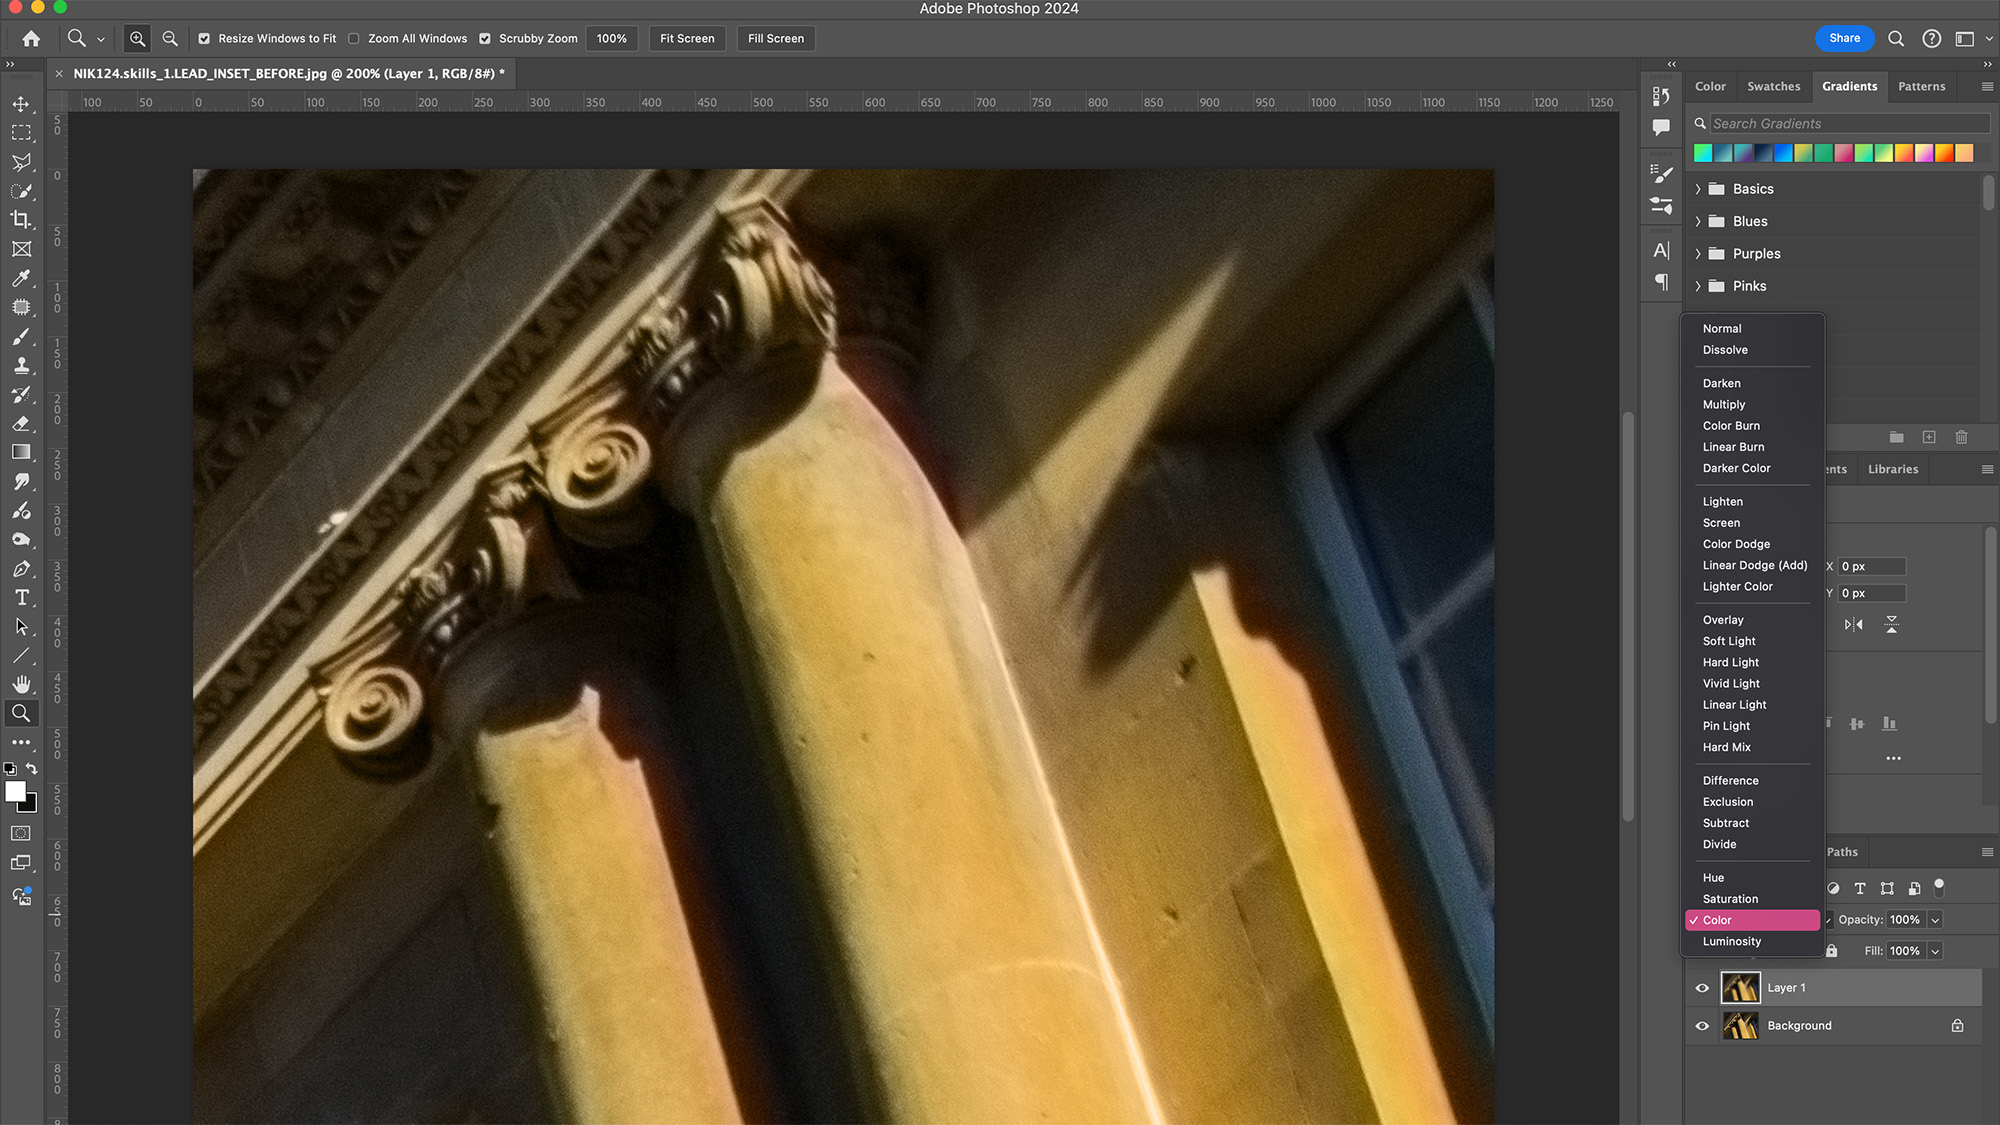
Ensure your blurred layer is still selected and click the Blending Modes dropdown menu in the Layers panel. This will be set to Normal by default, but you’ll want to select Color. Your image will now look sharp again and the chromatic aberration will either be gone or appear considerably less saturated.

3. Make a mask
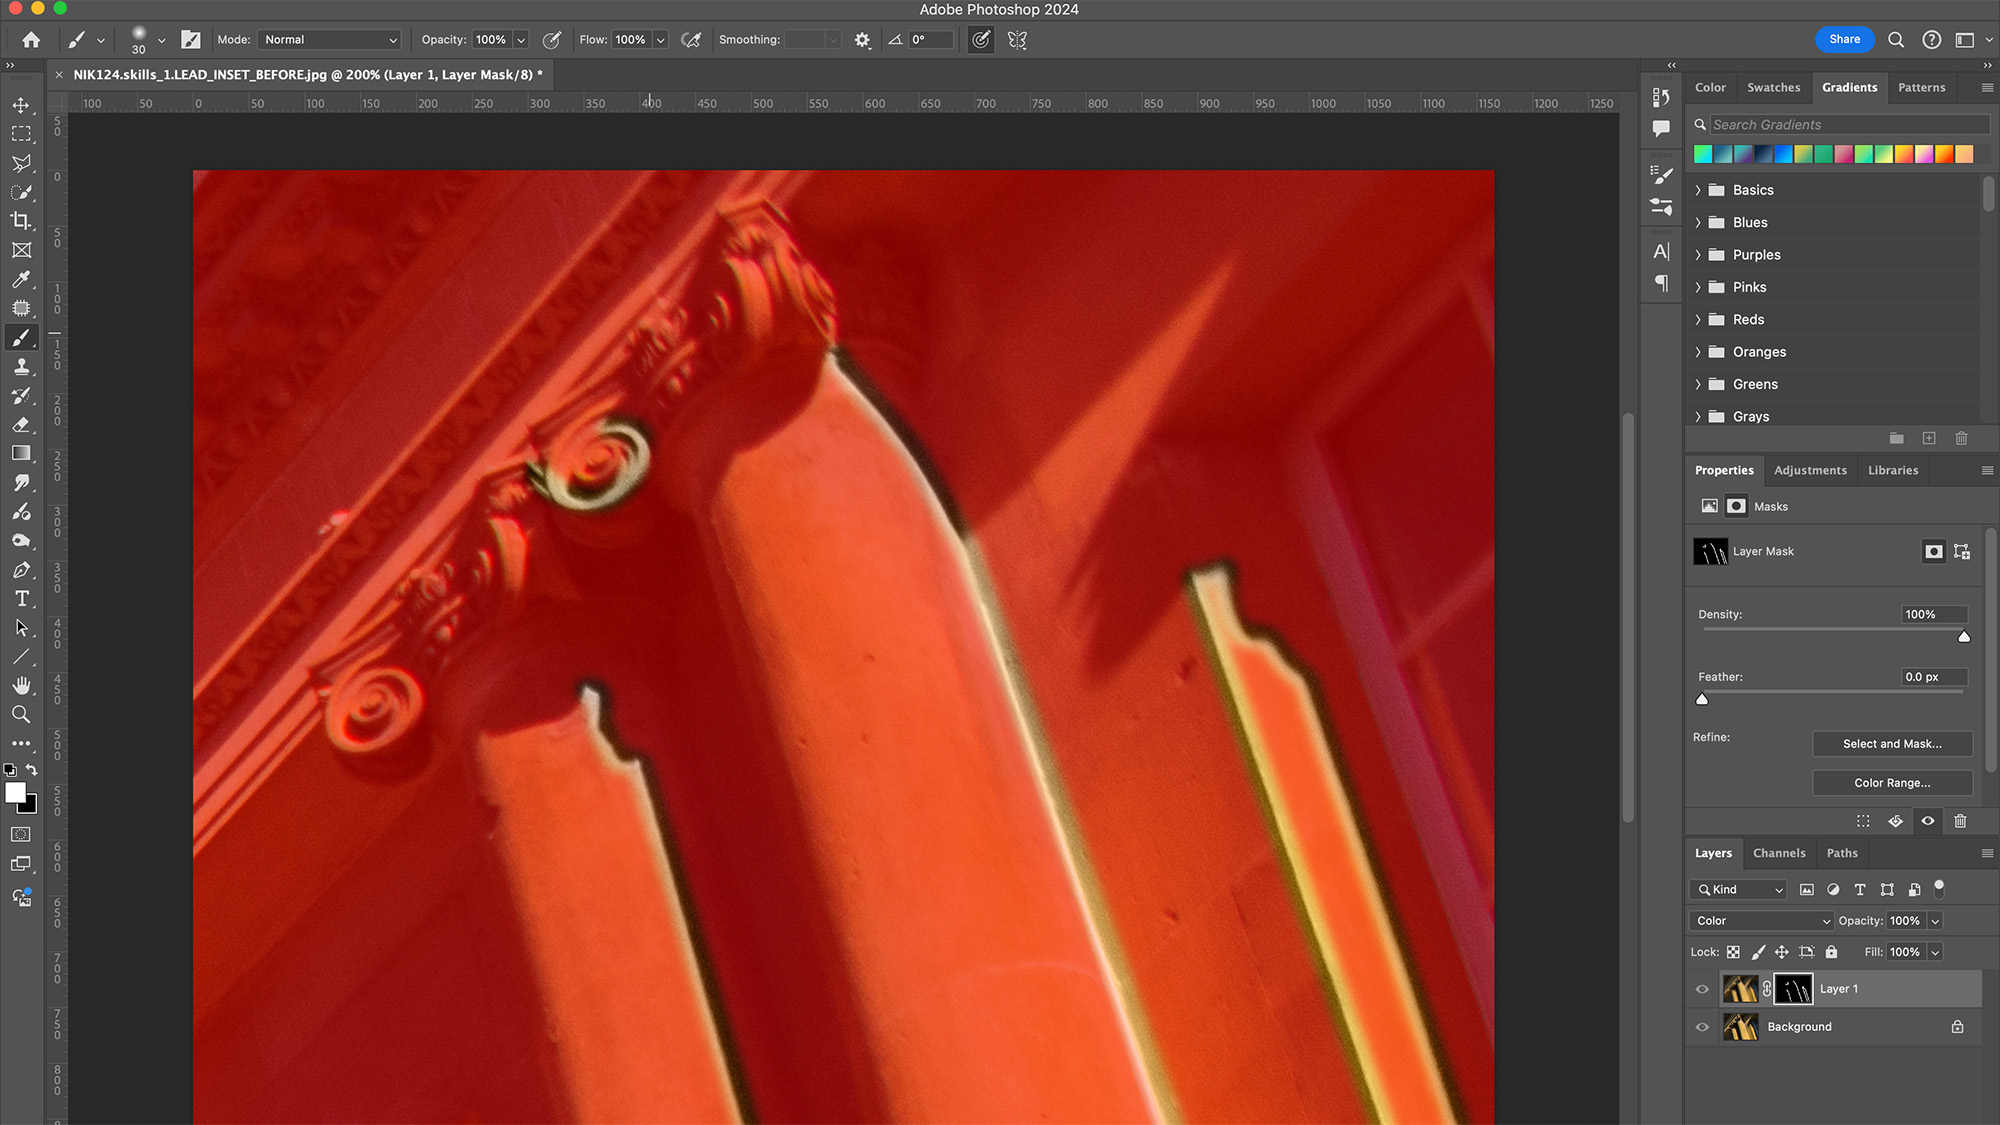
Unfortunately you may find the saturation of other parts of your image has been reduced. The best way to combat this is to mask the layer and selectively remove the color fringing. Do this by selecting the Add layer mask icon at the bottom of the Layers panel and invert it with Cmd/Ctrl + I.

4. Brush it away
Select the Brush tool and choose a soft white brush. You can now paint over areas of chromatic aberration to reveal the Color blending mode layer beneath. If you stray too far off course, simply change the colour of your brush to black and paint to restore your original layer.
You might also like...
If you don't want to commit to a Creative Cloud subscription, check out the best Photoshop alternatives.
Alternatively, take a look at Adobe Photoshop Elements 2025.
Get the Digital Camera World Newsletter
The best camera deals, reviews, product advice, and unmissable photography news, direct to your inbox!

Mike is Digital Camera World's How To Editor. He has over a decade of experience, writing for some of the biggest specialist publications including Digital Camera, Digital Photographer and PhotoPlus: The Canon Magazine. Prior to DCW, Mike was Deputy Editor of N-Photo: The Nikon Magazine and Production Editor at Wex Photo Video, where he sharpened his skills in both the stills and videography spheres. While he's an avid motorsport photographer, his skills extend to every genre of photography – making him one of Digital Camera World's top tutors for techniques on cameras, lenses, tripods, filters and other imaging equipment – as well as sharing his expertise on shooting everything from portraits and landscapes to abstracts and architecture to wildlife and, yes, fast things going around race tracks...
