How to restore and repair old photographs
Learn how to repair and revive faded, damaged old photographs with these four simple techniques
Restoring damaged or faded old photos is a rewarding task. Many of us have collections of treasured photographs which, over the years, have become torn, faded and ripped. The good news is that old photographs can be repaired digitally using Photoshop and other image-editing tools.
In this tutorial and video, we'll show you how to fix some of the more common problems with old photos, restoring them to their original form - or as near as possible.
It also needn’t take too long. In Photoshop there are several ways to speed up the process. First, it helps if you can quickly zoom into and out of different areas, so get used to using the Ctrl/Cmd+Space shortcut, which – combined with dragging the mouse – is the best way to zoom.
While the majority of retouching work is done with the Clone and Heal tools, there are a few filters that might help. The Dust and Scratches filter can be useful for improving large and otherwise clean areas.
Sharpening filters like Unsharp Mask and Smart Sharpen are also very useful for improving fine details. However skilful the retouching, things can sometimes look a little patchy, but a little fine grain can help to mask this.
Improve faded colors
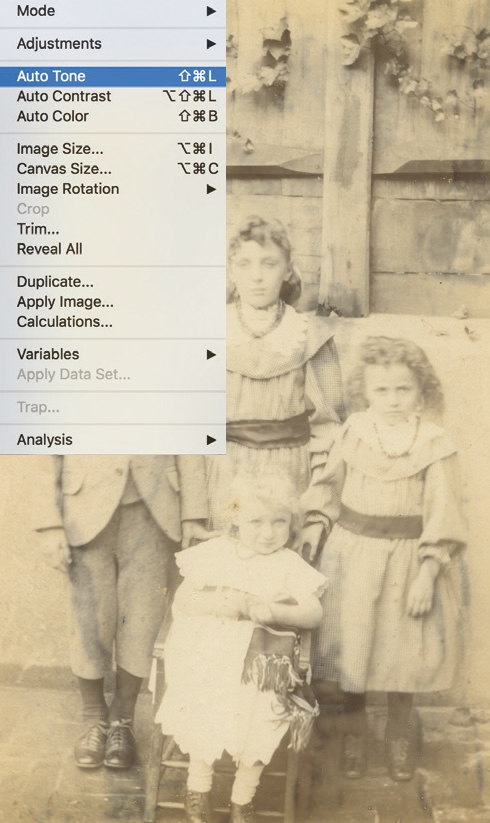
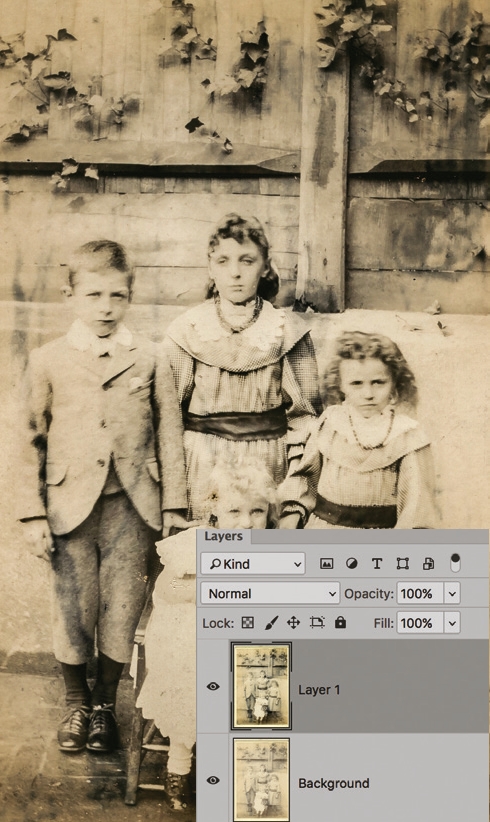
Often old prints will become faded and bleached out after time. A good place to start is the Auto-Color and Auto- Tone commands, found under the Image menu. If these don’t fix the problem, try dodging and burning to add depth to the tones over the faces. Duplicate the background layer then grab the Burn tool and set it to Range: Shadows, Exposure 5% in the tool options. Zoom in close to the faces and burn the darker details to make them stand out.
Rebuild broken prints
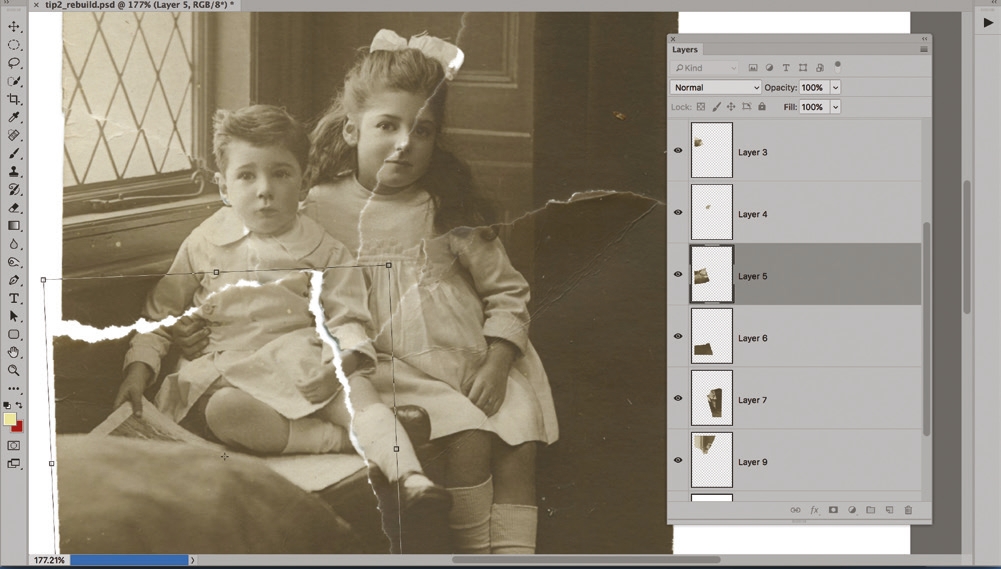
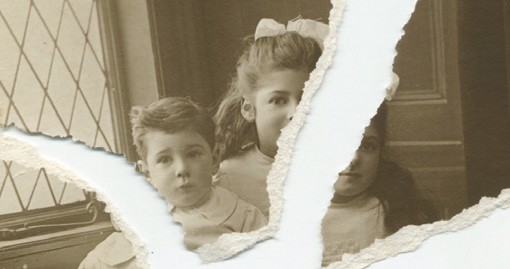
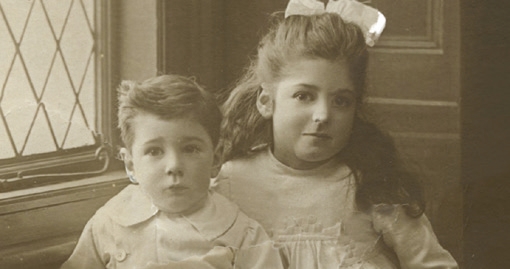
If a print is broken into pieces, grab the Quick Selection tool and begin by deleting a segment, then press Ctrl/Cmd+J to copy it to a new layer. Highlight the bottom layer and repeat to select and copy the next piece. Once all the pieces are on separate layers, press Ctrl/Cmd+T to transform each piece, using the arrow keys to nudge them into position with each other. Once done, make a new layer at the top. Set the Spot Healing Brush to Sample All Layers, then heal over the seams between the pieces.
Fix scratches and creases
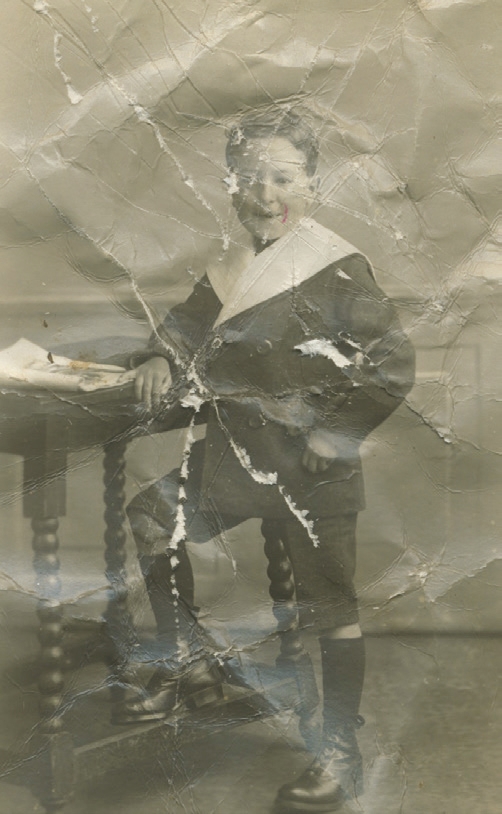
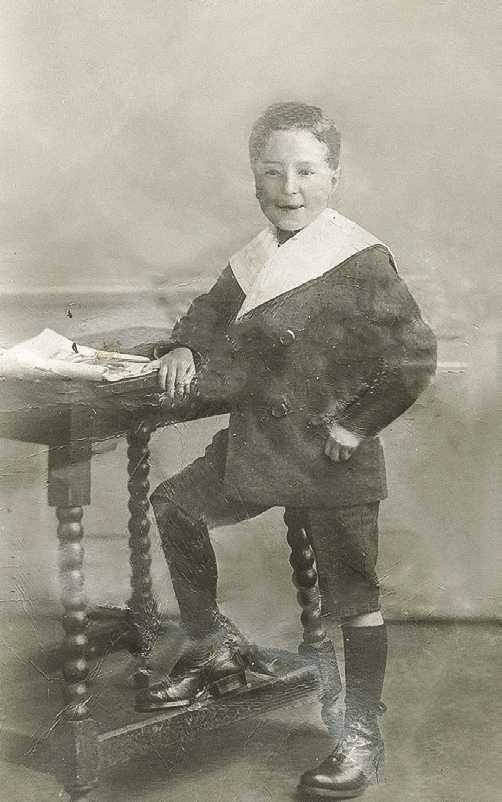
Even a horribly damaged print like this can be salvaged with a combination of the Heal and Clone tools. Begin by making a new layer, then grab the Spot Healing Brush tool. Set it to Sample All Layers and paint to remove the bigger scratches. Next make another new layer and grab the Clone tool. Again set it to Sample All Layers, then clone to rebuild the finer details. The Clone tool can also be used at a lower opacity to smooth out rough patches and creases in the print.
Hand-color old photos
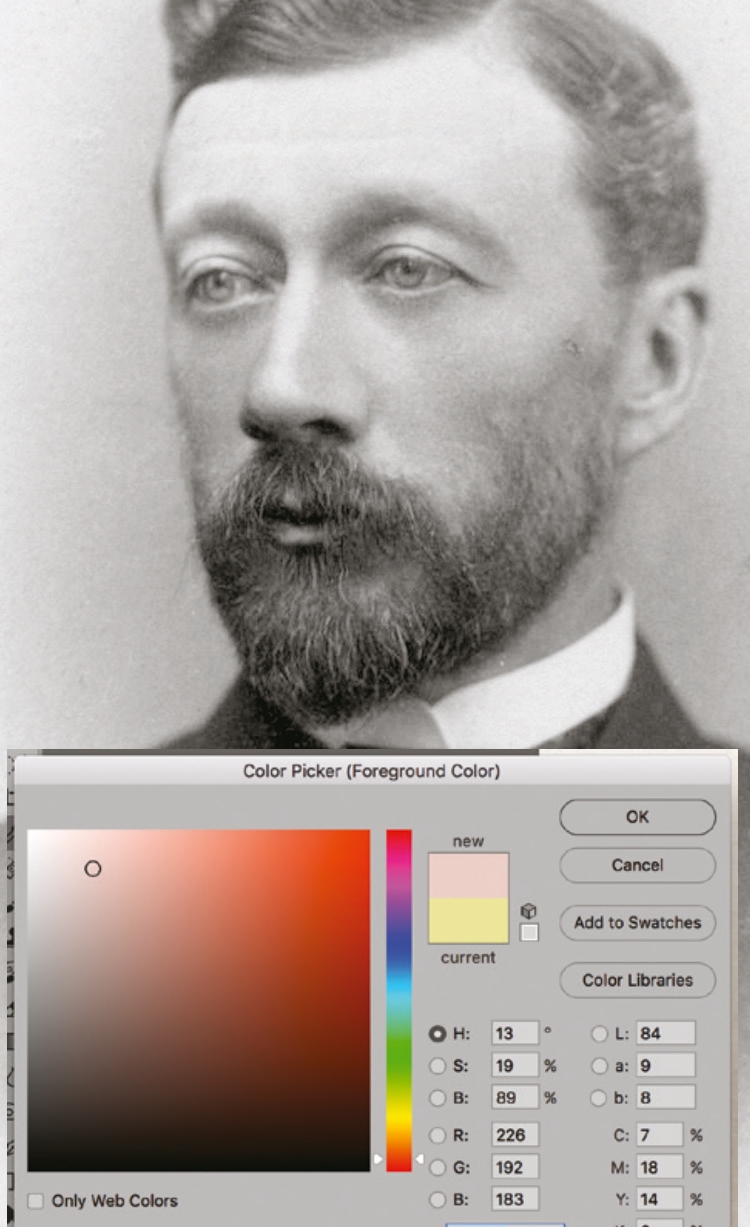
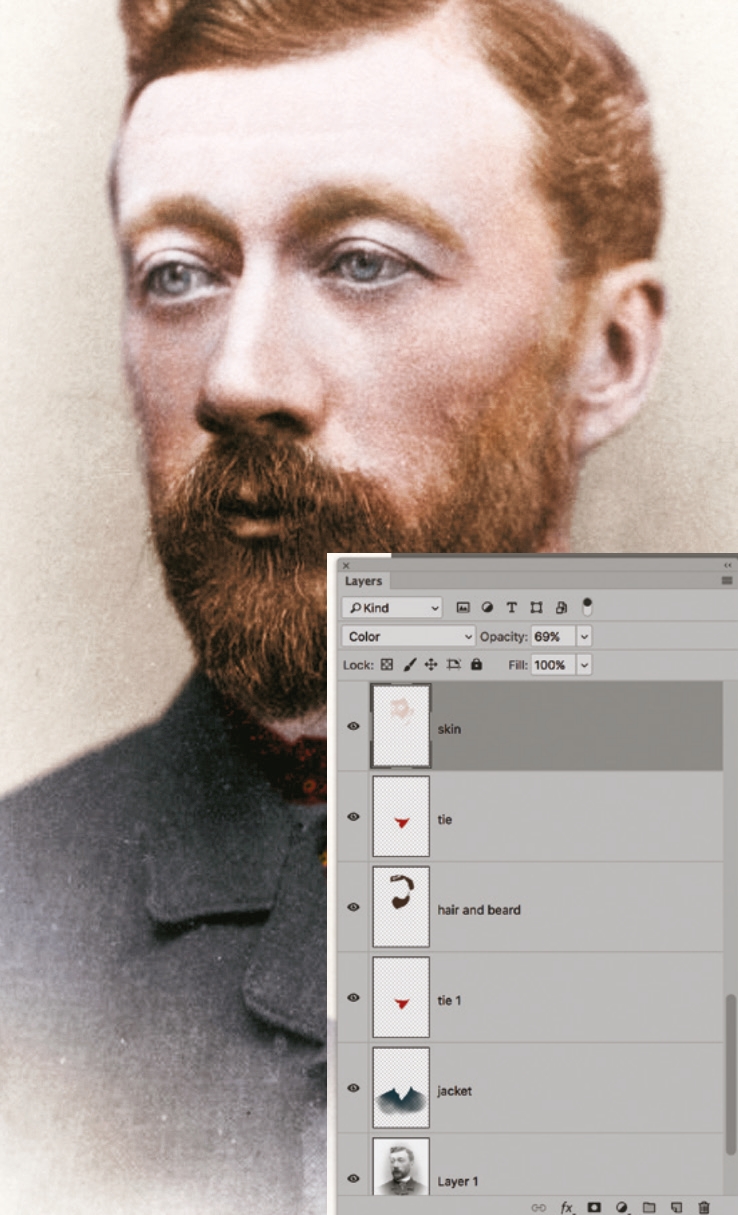
To get the hand-colored look, begin by selecting a portion of the face or clothes with the Quick Selection tool then make a new layer. Click the foreground color box and choose a tone for the area, then press Alt+Backspace to fill the selection with the foreground color. Go to the Layers panel and set the Blending mode to Color, then lower the layer opacity until it looks right (or press Ctrl/Cmd+U if you want to tweak the Hue). Repeat to add more color layers in the same way for other parts of the face or body.
Read more:
How to retouch photographs with Photoshop Elements
How to remove and replace a sky in Photoshop
Get the Digital Camera World Newsletter
The best camera deals, reviews, product advice, and unmissable photography news, direct to your inbox!
The sister print publication to this website, Digital Camera Magazine is Britain's best-selling photography publication – and it can also be purchased outside the United Kingdom as Digital Camera World.
Digital Camera Magazine is packed with more expert advice and more inspirational images than any other title, with the sole aim of helping you become a better photographer. Every issue we also bring you a selection of great gifts which are designed to help you get more from your photography – everything from tips cards and cheat sheets to free software and bookazines.
In addition to inspirational images, interviews, projects, mini tests and tutorials, each issue is packed with news, reviews and comparisons, as well as photographer vs photographer shootouts and head-to-head challenges using the best photo editing software.
The magazine is captained by Editor Niall Hampton.

