How to retouch skin in Photoshop CC with just a few easy clicks
Learn how to retouch skin in Photoshop CC with a combination of clever tools and filter effects for beautiful results
Watch video: How to retouch skin in Photoshop CC
The most successful portrait retouching tricks are those that enable you to enhance the subject – so that they look their best – without resulting in hyperreal or unnatural effects.
In this tutorial we’ll look at how to boost your portraits with a simple technique in Photoshop CC for smoothing out skin tones. A cunning combination of filters and blend modes is employed to create the effect, and the best thing about it is that the results are not over-the-top.
• How to download Photoshop CC and try for free
Plastic-looking skin, devoid of detail and texture, is one of the worst sins of retouching. With this technique, we can avoid this by smoothing out blotchiness while retaining the natural texture.
The other good thing about this technique is that it doesn’t take an age to apply. It may not be as finessed as more involved skin-enhancing tricks (like frequency separation or pixel-level retouching), but it makes up for this by being quick and relatively easy.
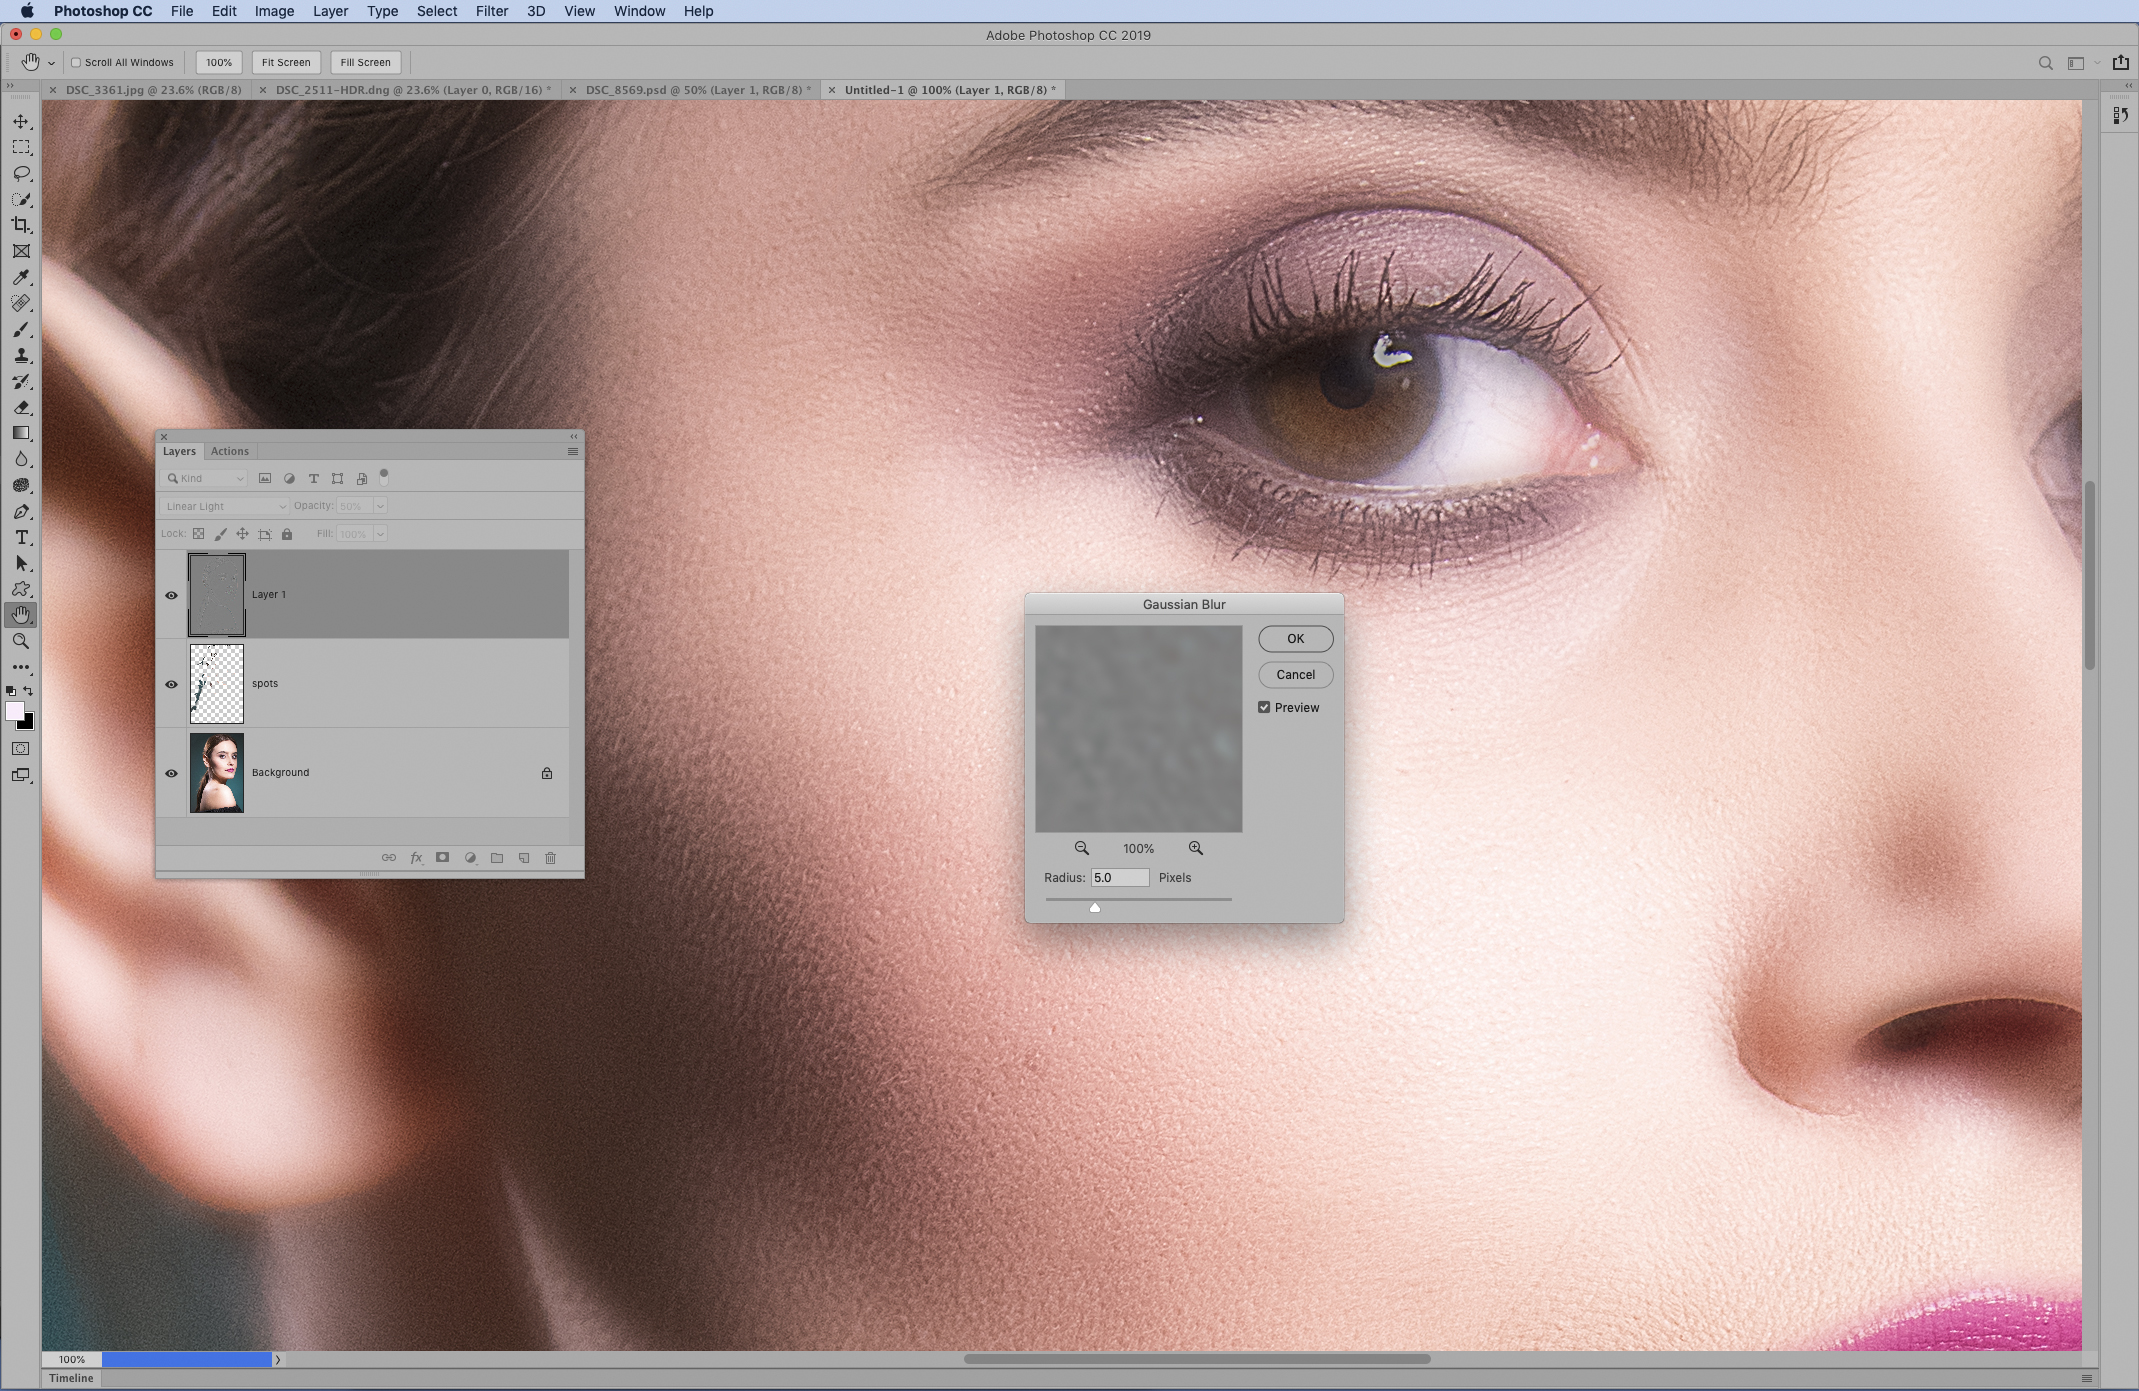
We begin by using the Spot Healing Brush tool to retouch any obvious spots or pimples, then go on to use the High Pass Filter to blur the details, then the Gaussian Blur filter to retain some sharpness in the blurred areas.
The best camera deals, reviews, product advice, and unmissable photography news, direct to your inbox!
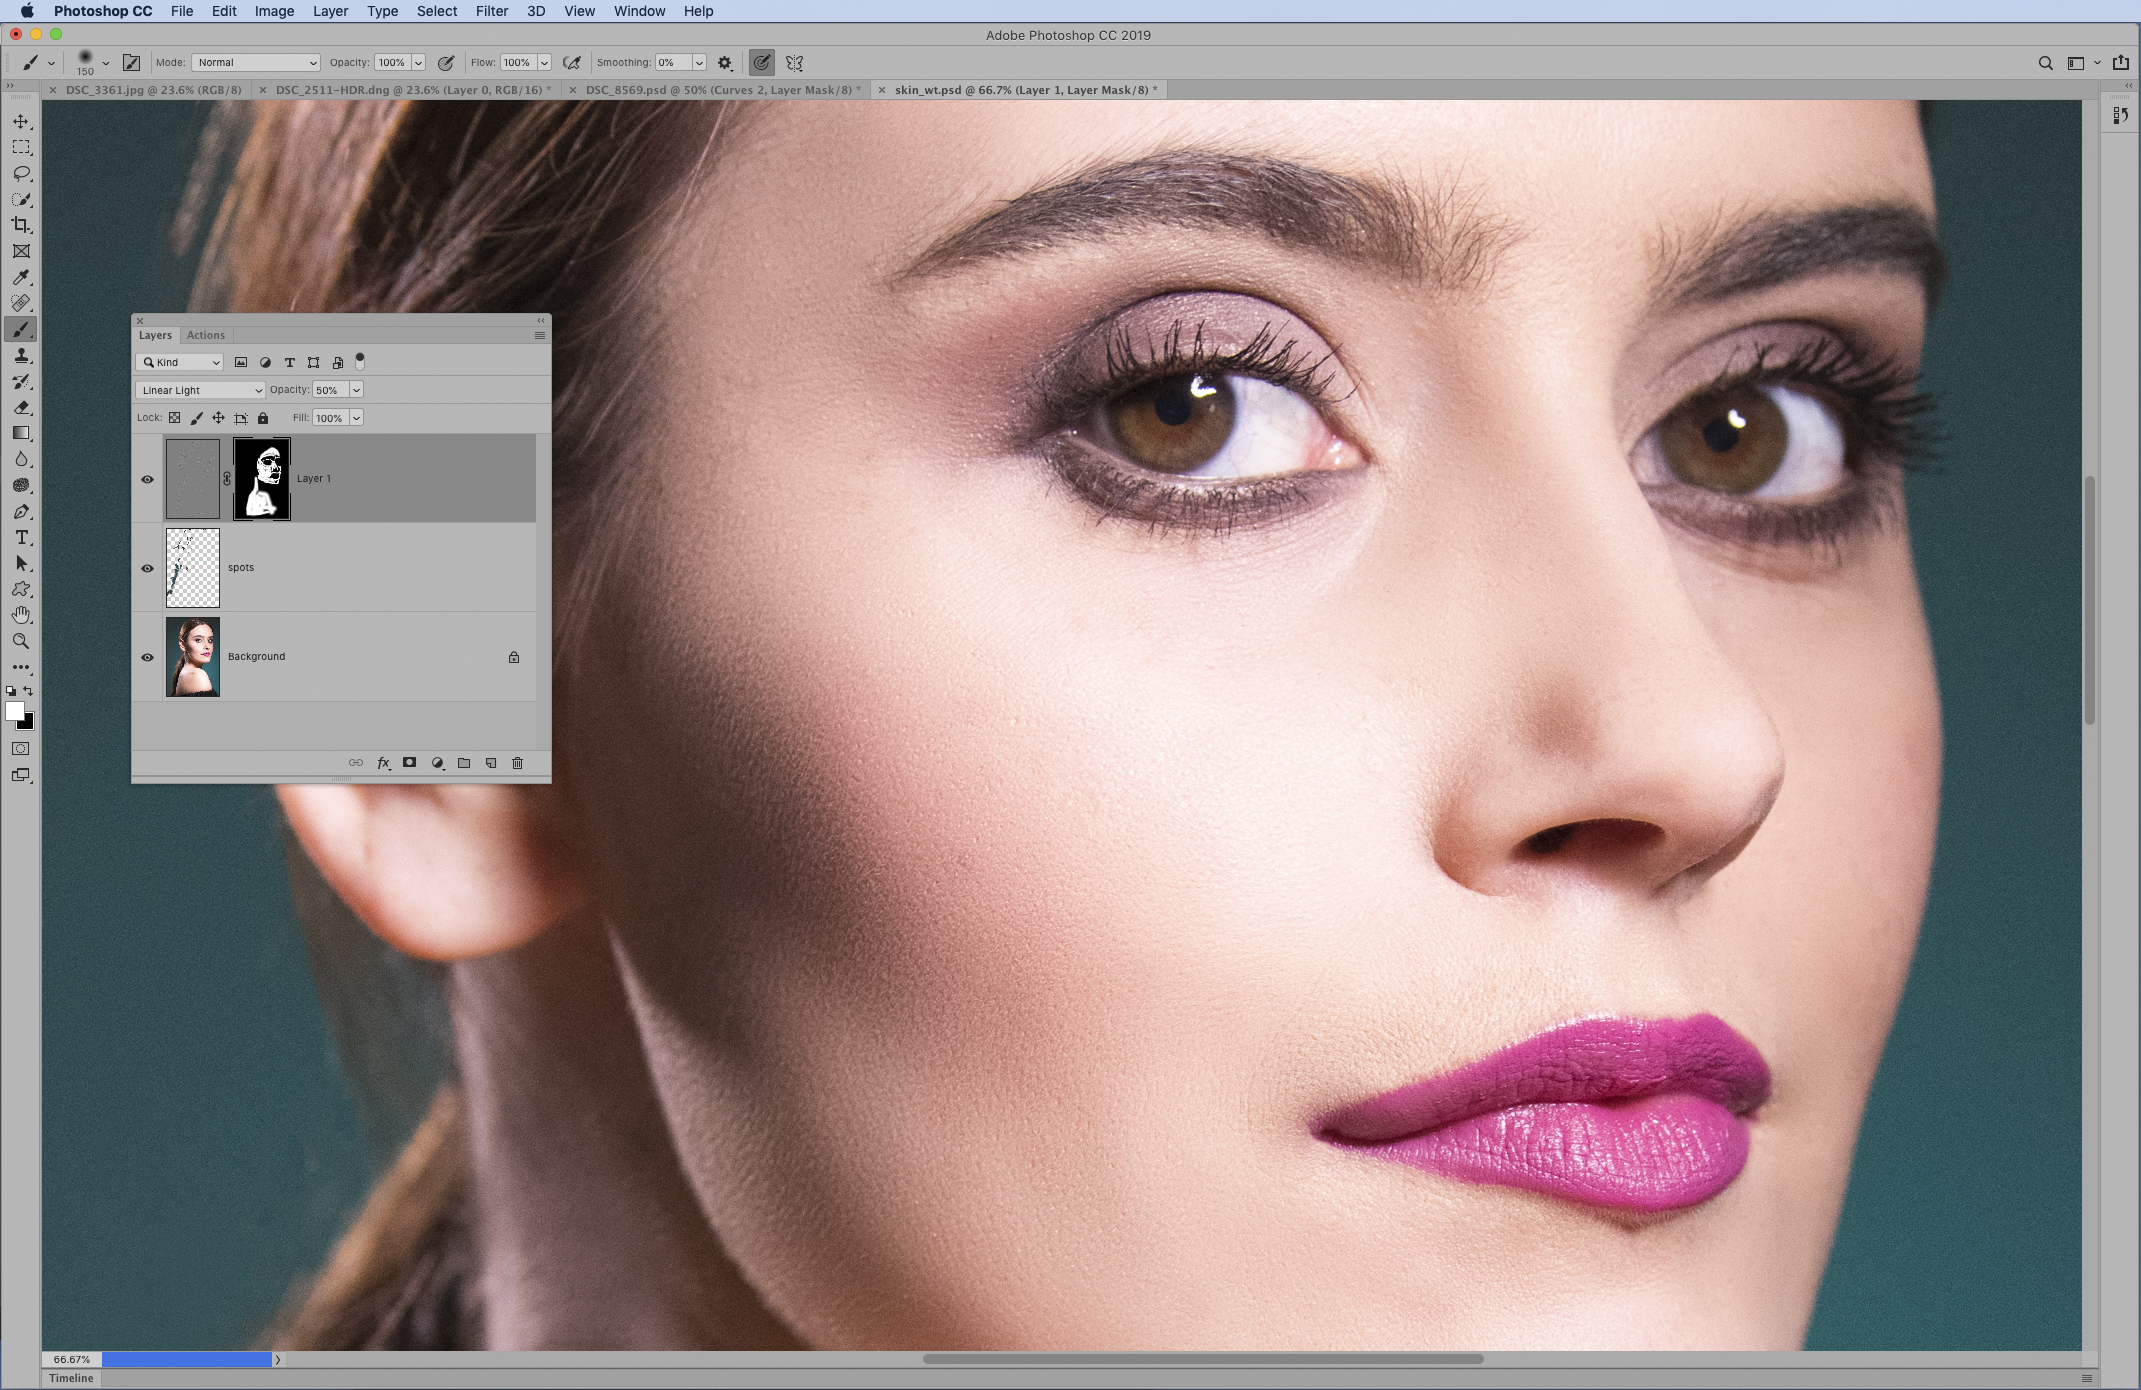
If this sounds like the opposite of what should be happening – High Pass usually sharpens and Gaussian Blur softens – then it’s because we apply our filters to an inverted layer set to the Linear Light Blend Mode. To finish off, a layer mask enables us to restrict the effect just to the skin.
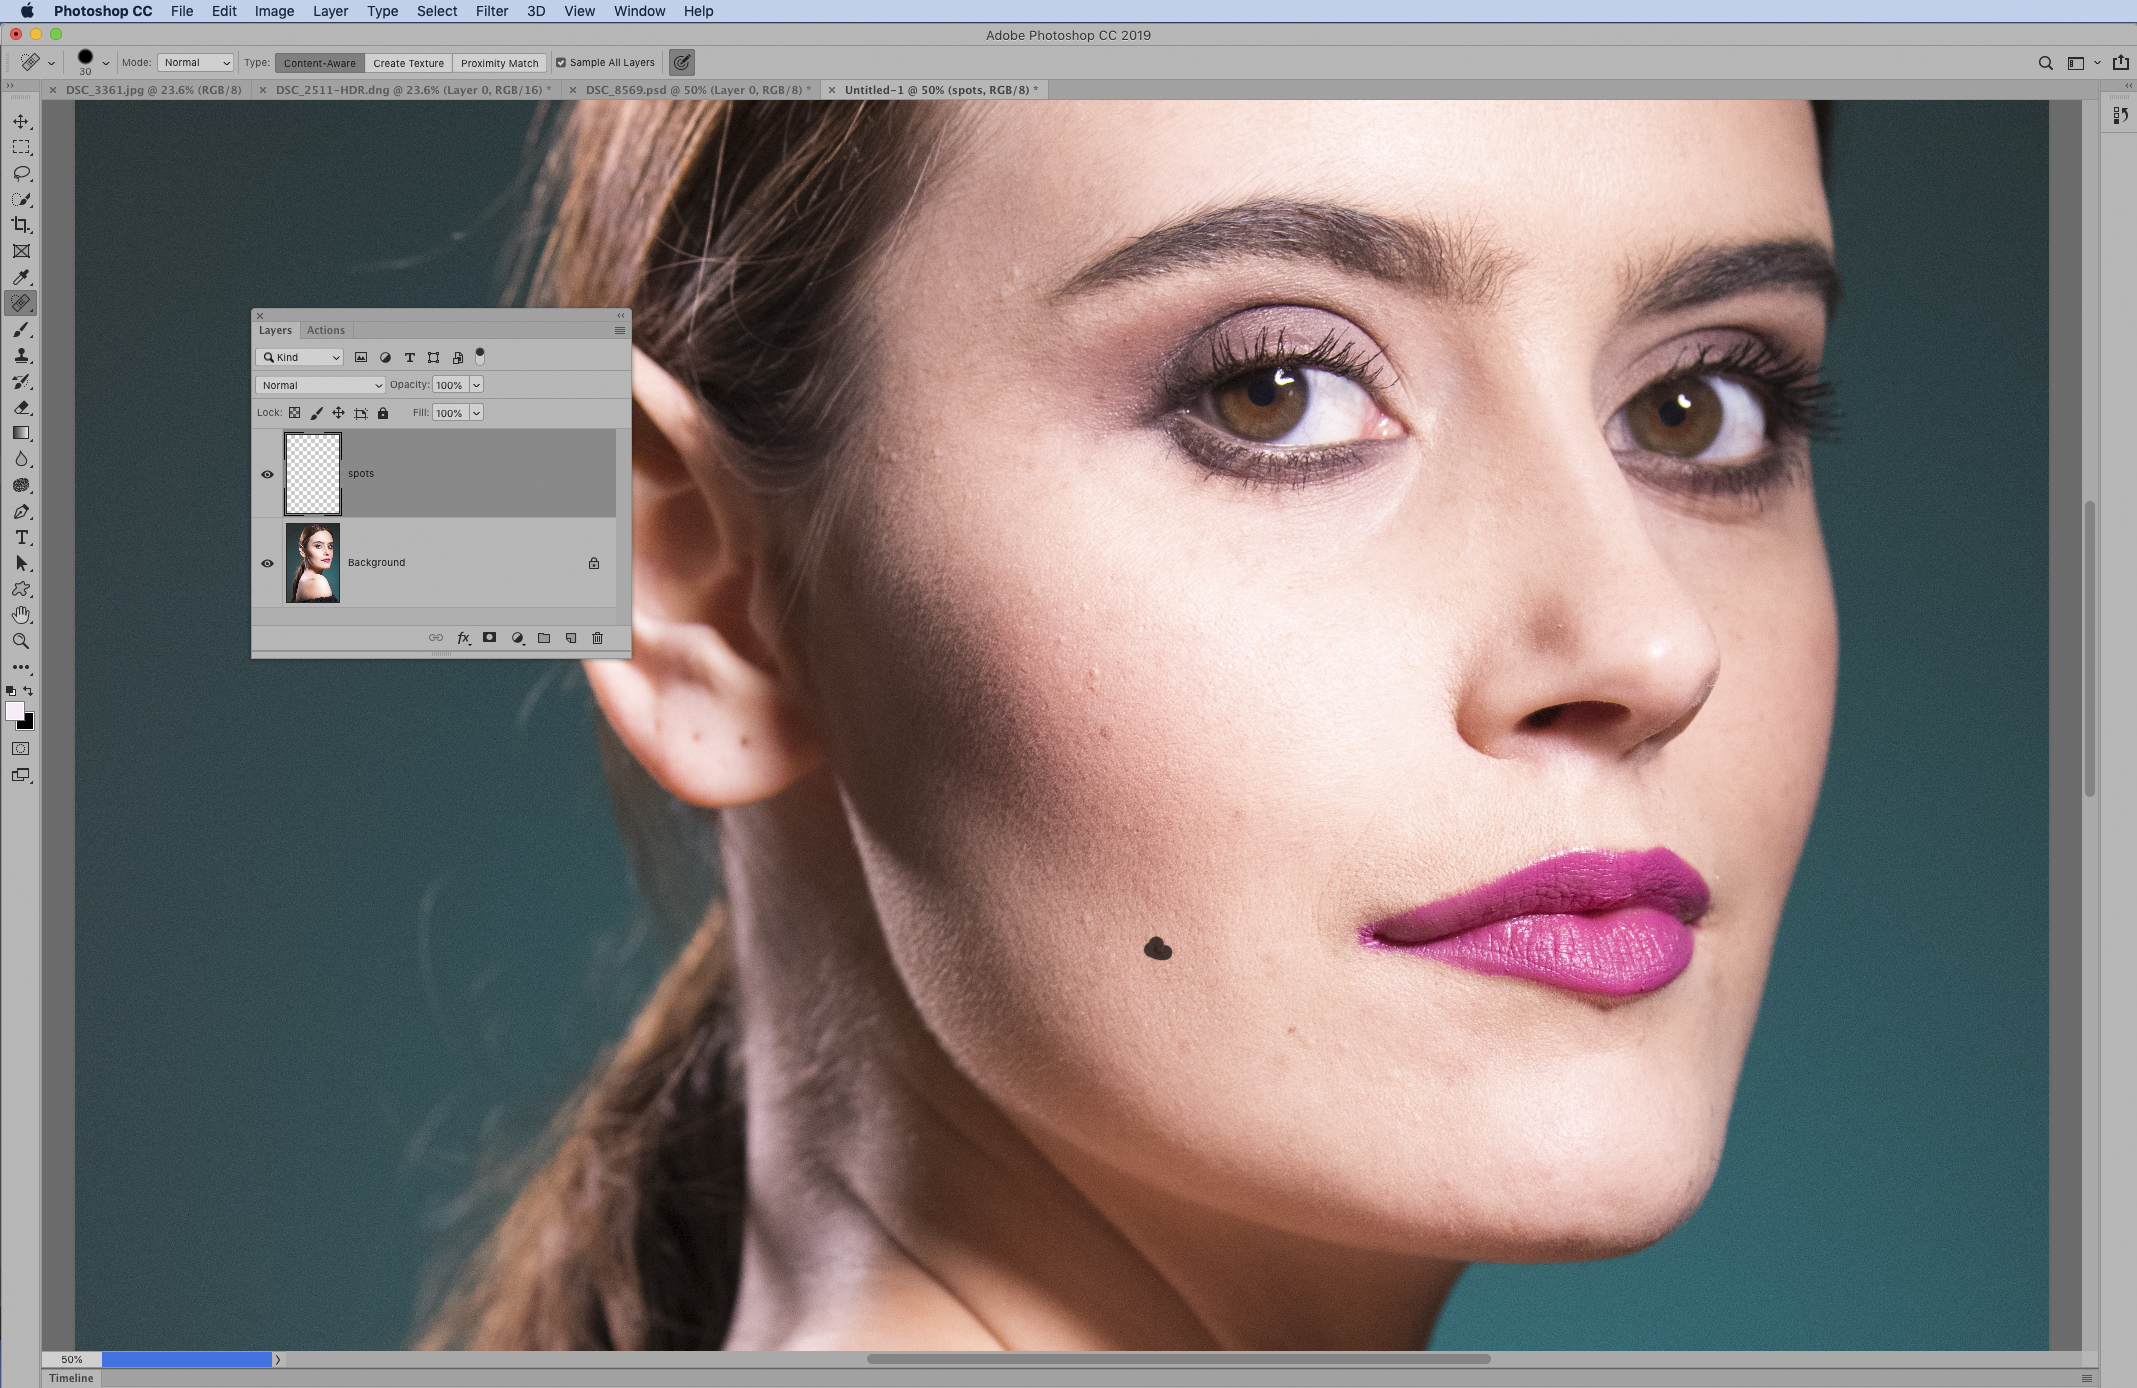
01 Remove spots and marks
Open your image into Photoshop, then go to the Layers panel (Window > Layers) and click the New Layer icon. Grab the Spot Healing brush from the toolbar and check ‘Sample All Layers’ in the tool options. Paint to remove marks and blemishes over the skin.
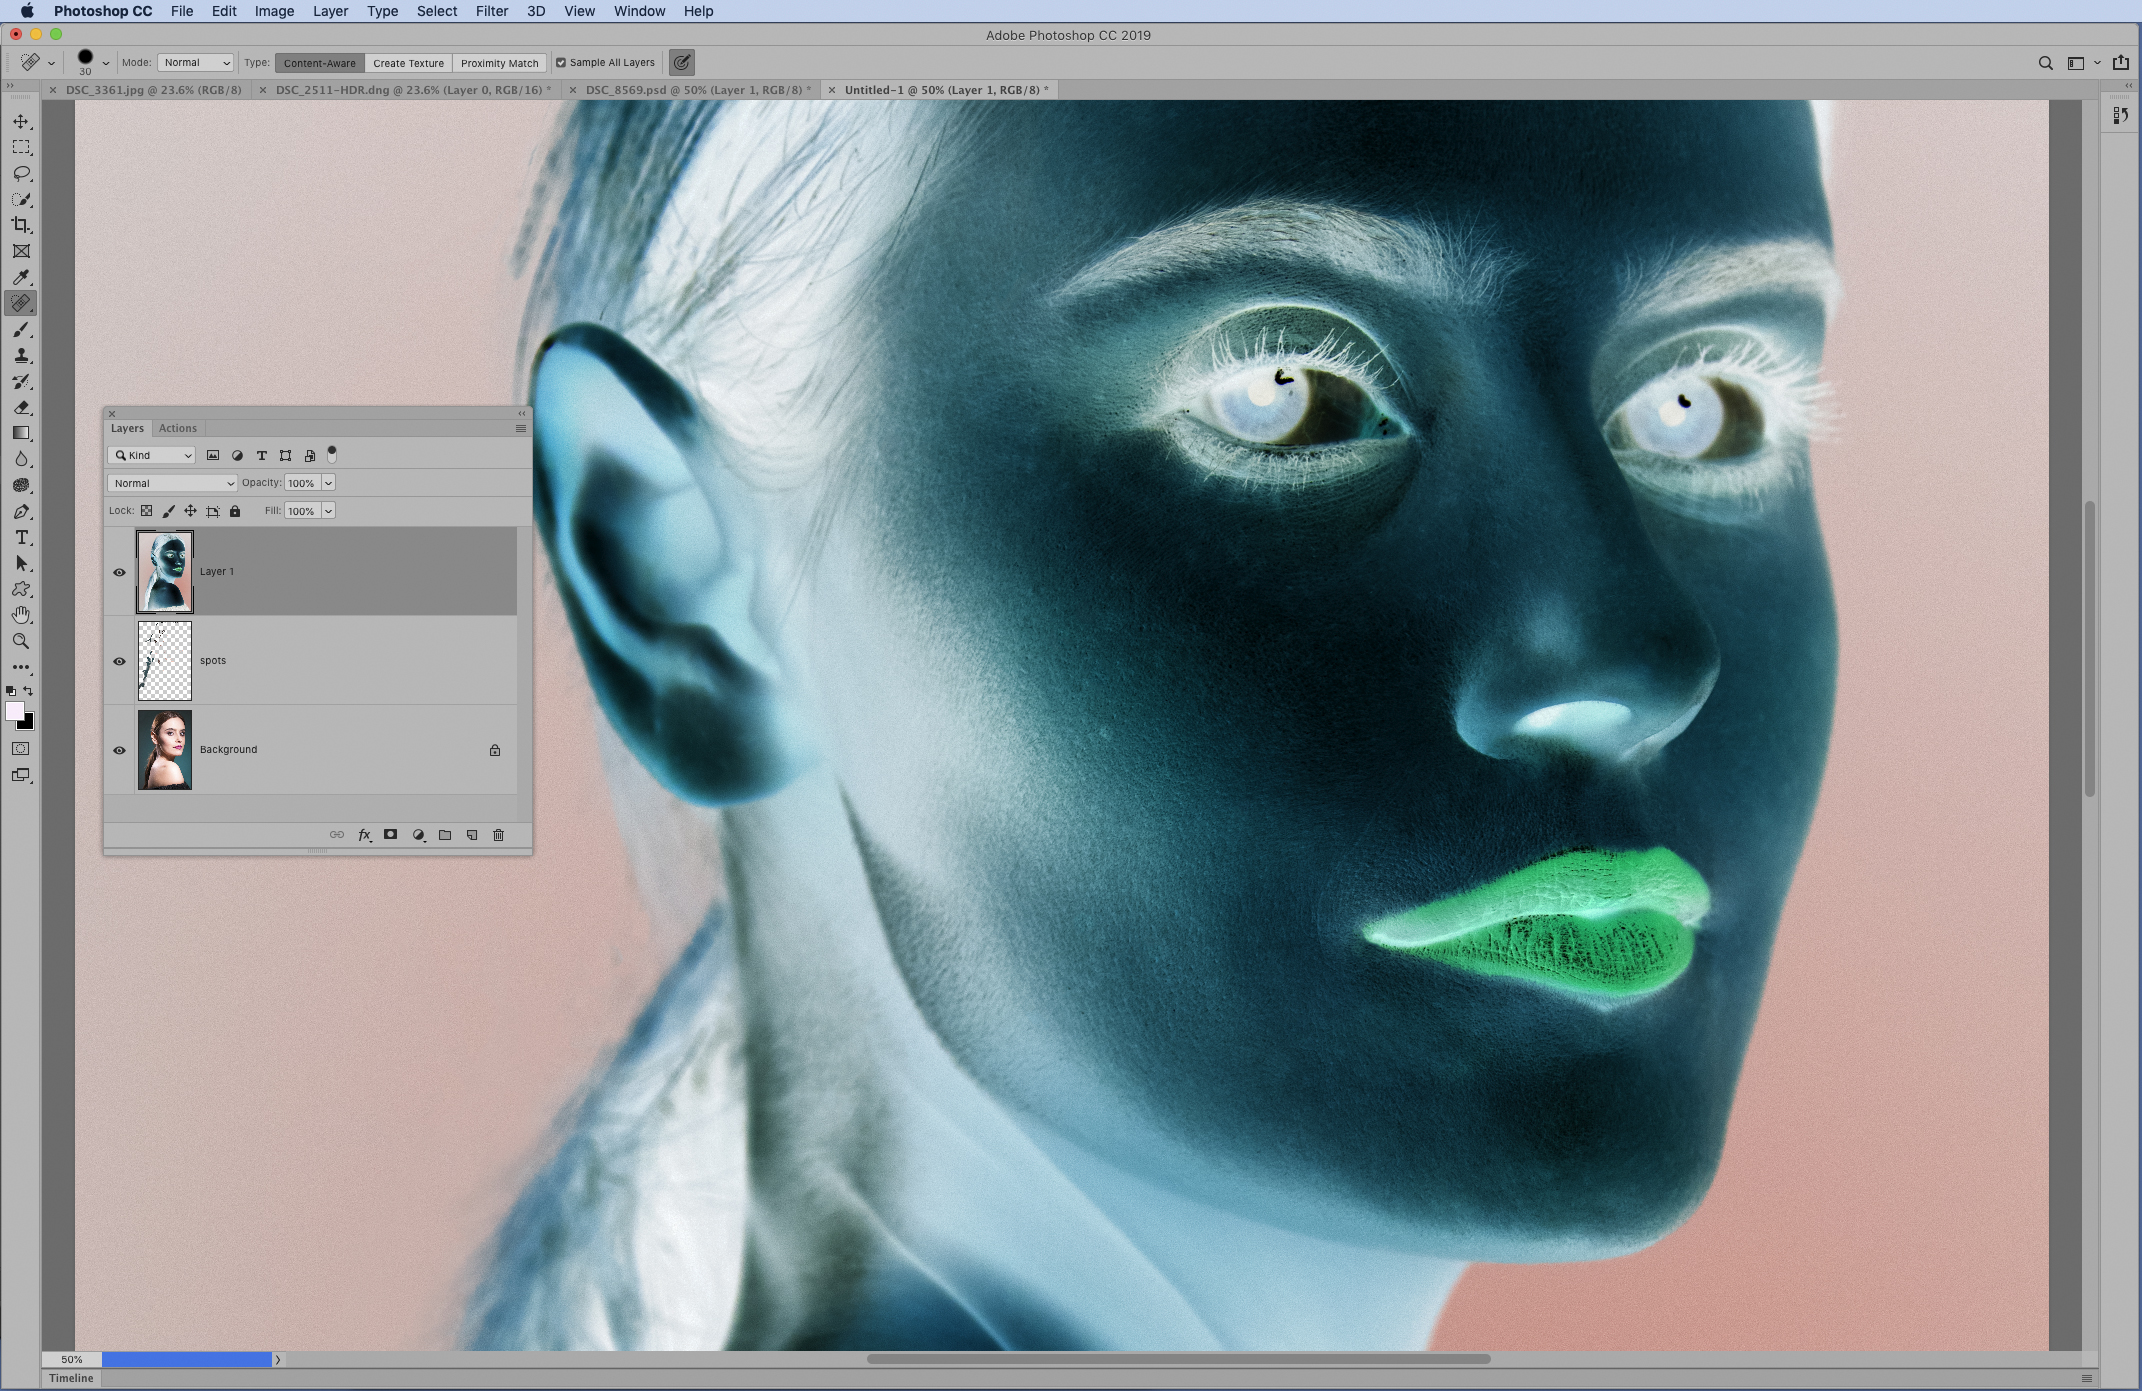
02 Invert the image
Continue painting over the skin to remove marks, using the ] and [ keys to resize your brush as needed. Next press Cmd/Ctrl + Shift + Alt + E to merge a new layer then go to Image > Adjustments > Invert to invert the tones, creating a negative of the image.
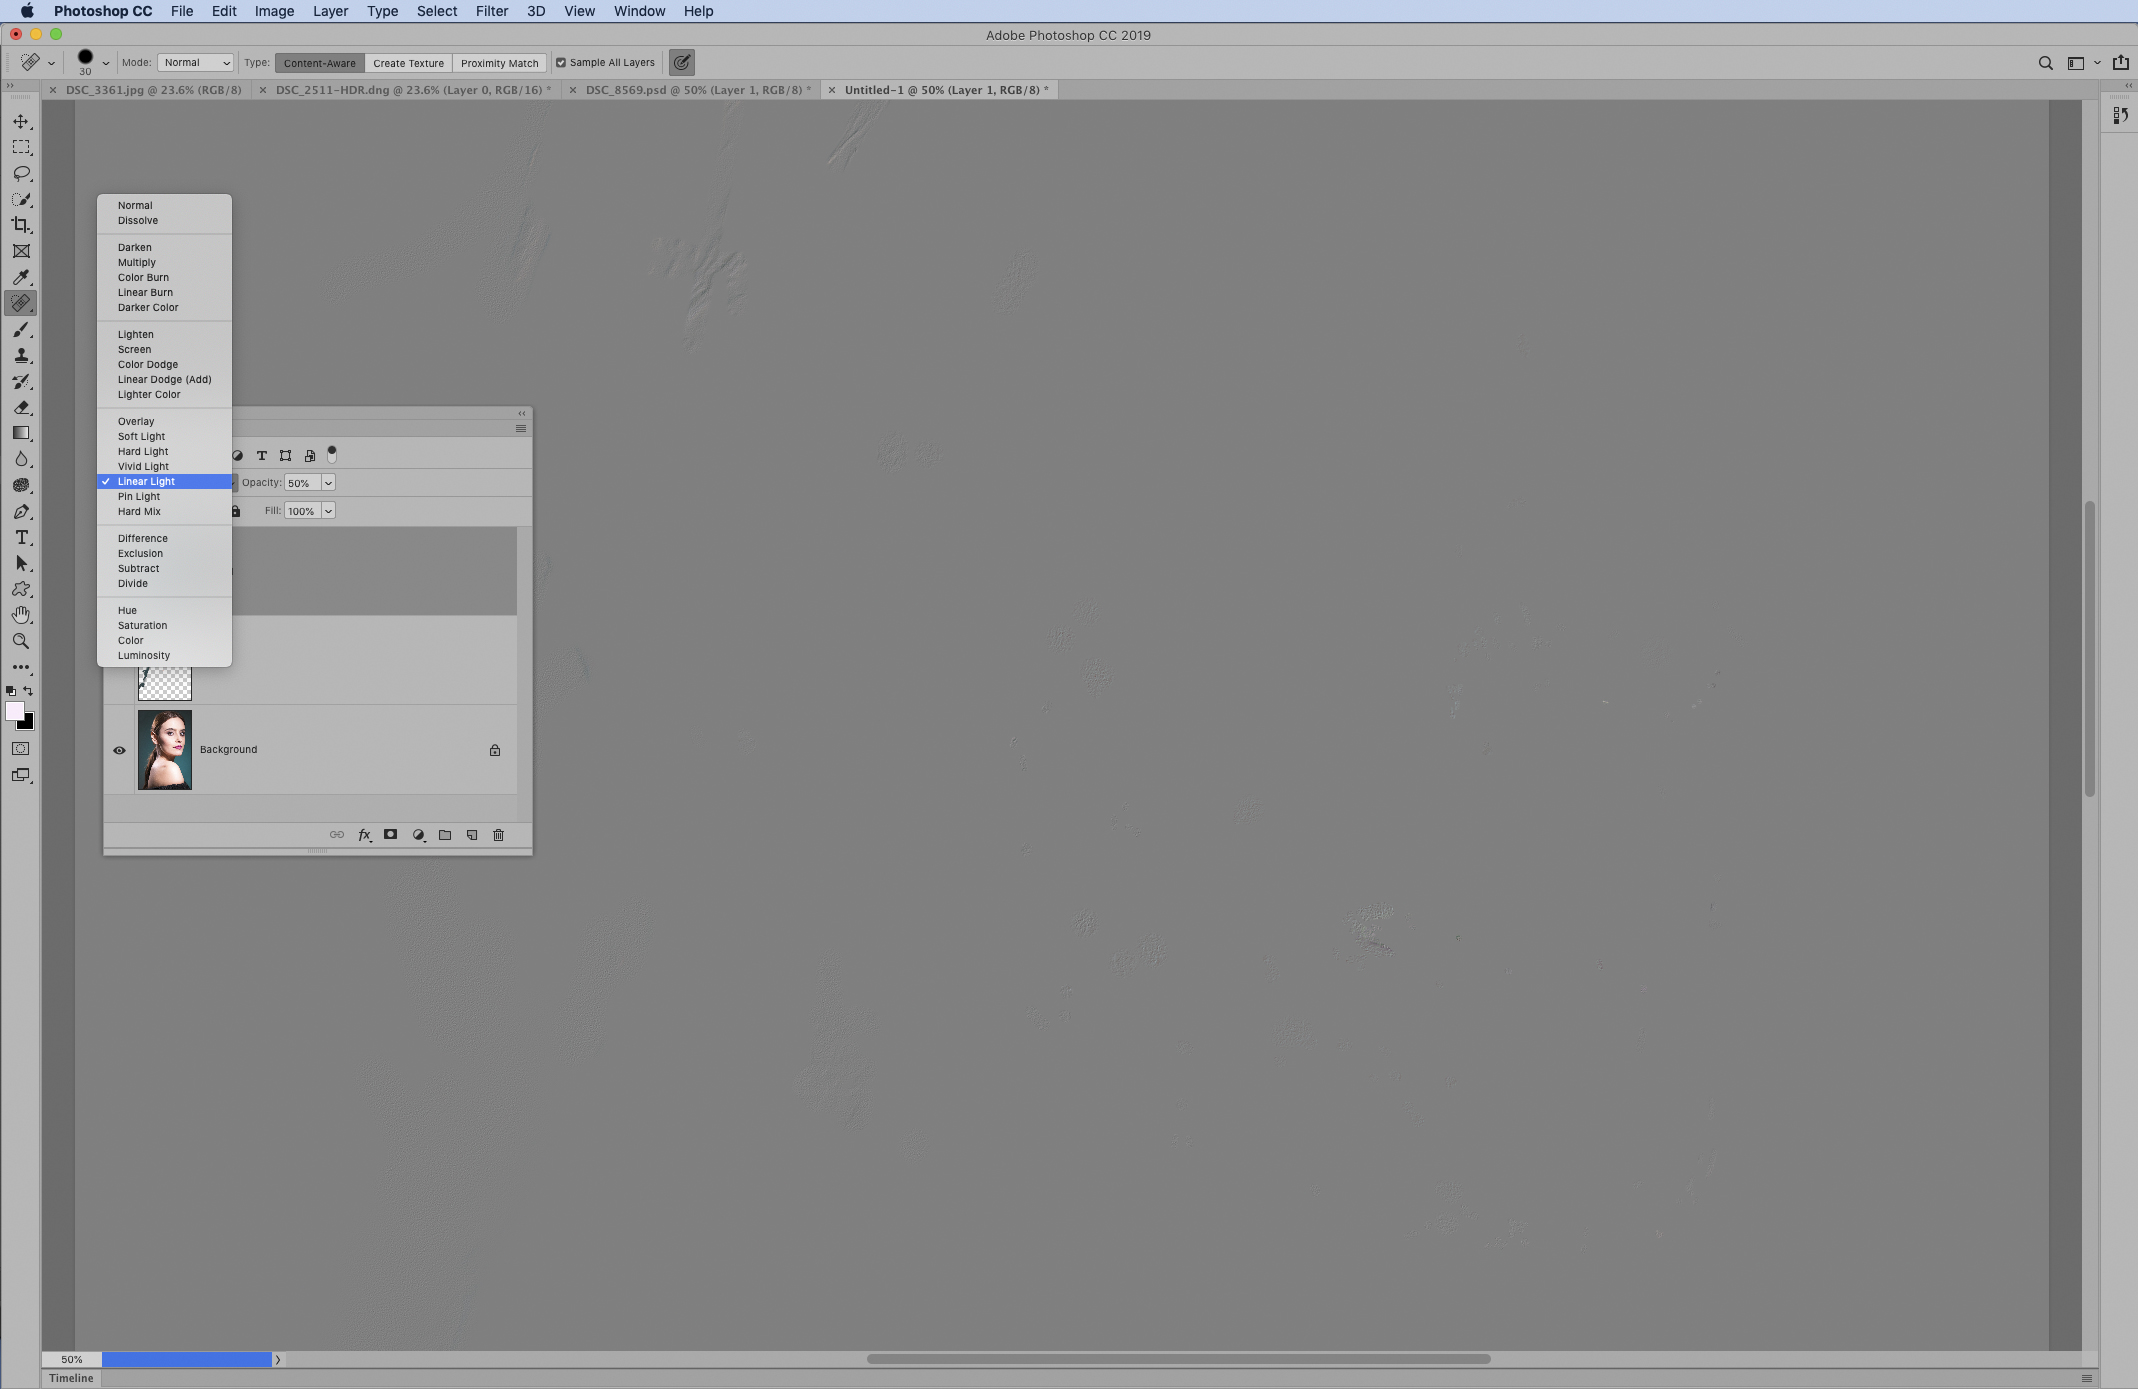
03 Change the Blending mode
Go to the Layers panel and click the Blend Mode dropdown at the top then change it from Normal to Linear Light. Next go to the Opacity slider at the top of the Layers Panel and lower the opacity to 50%. This will give you a completely grey image.
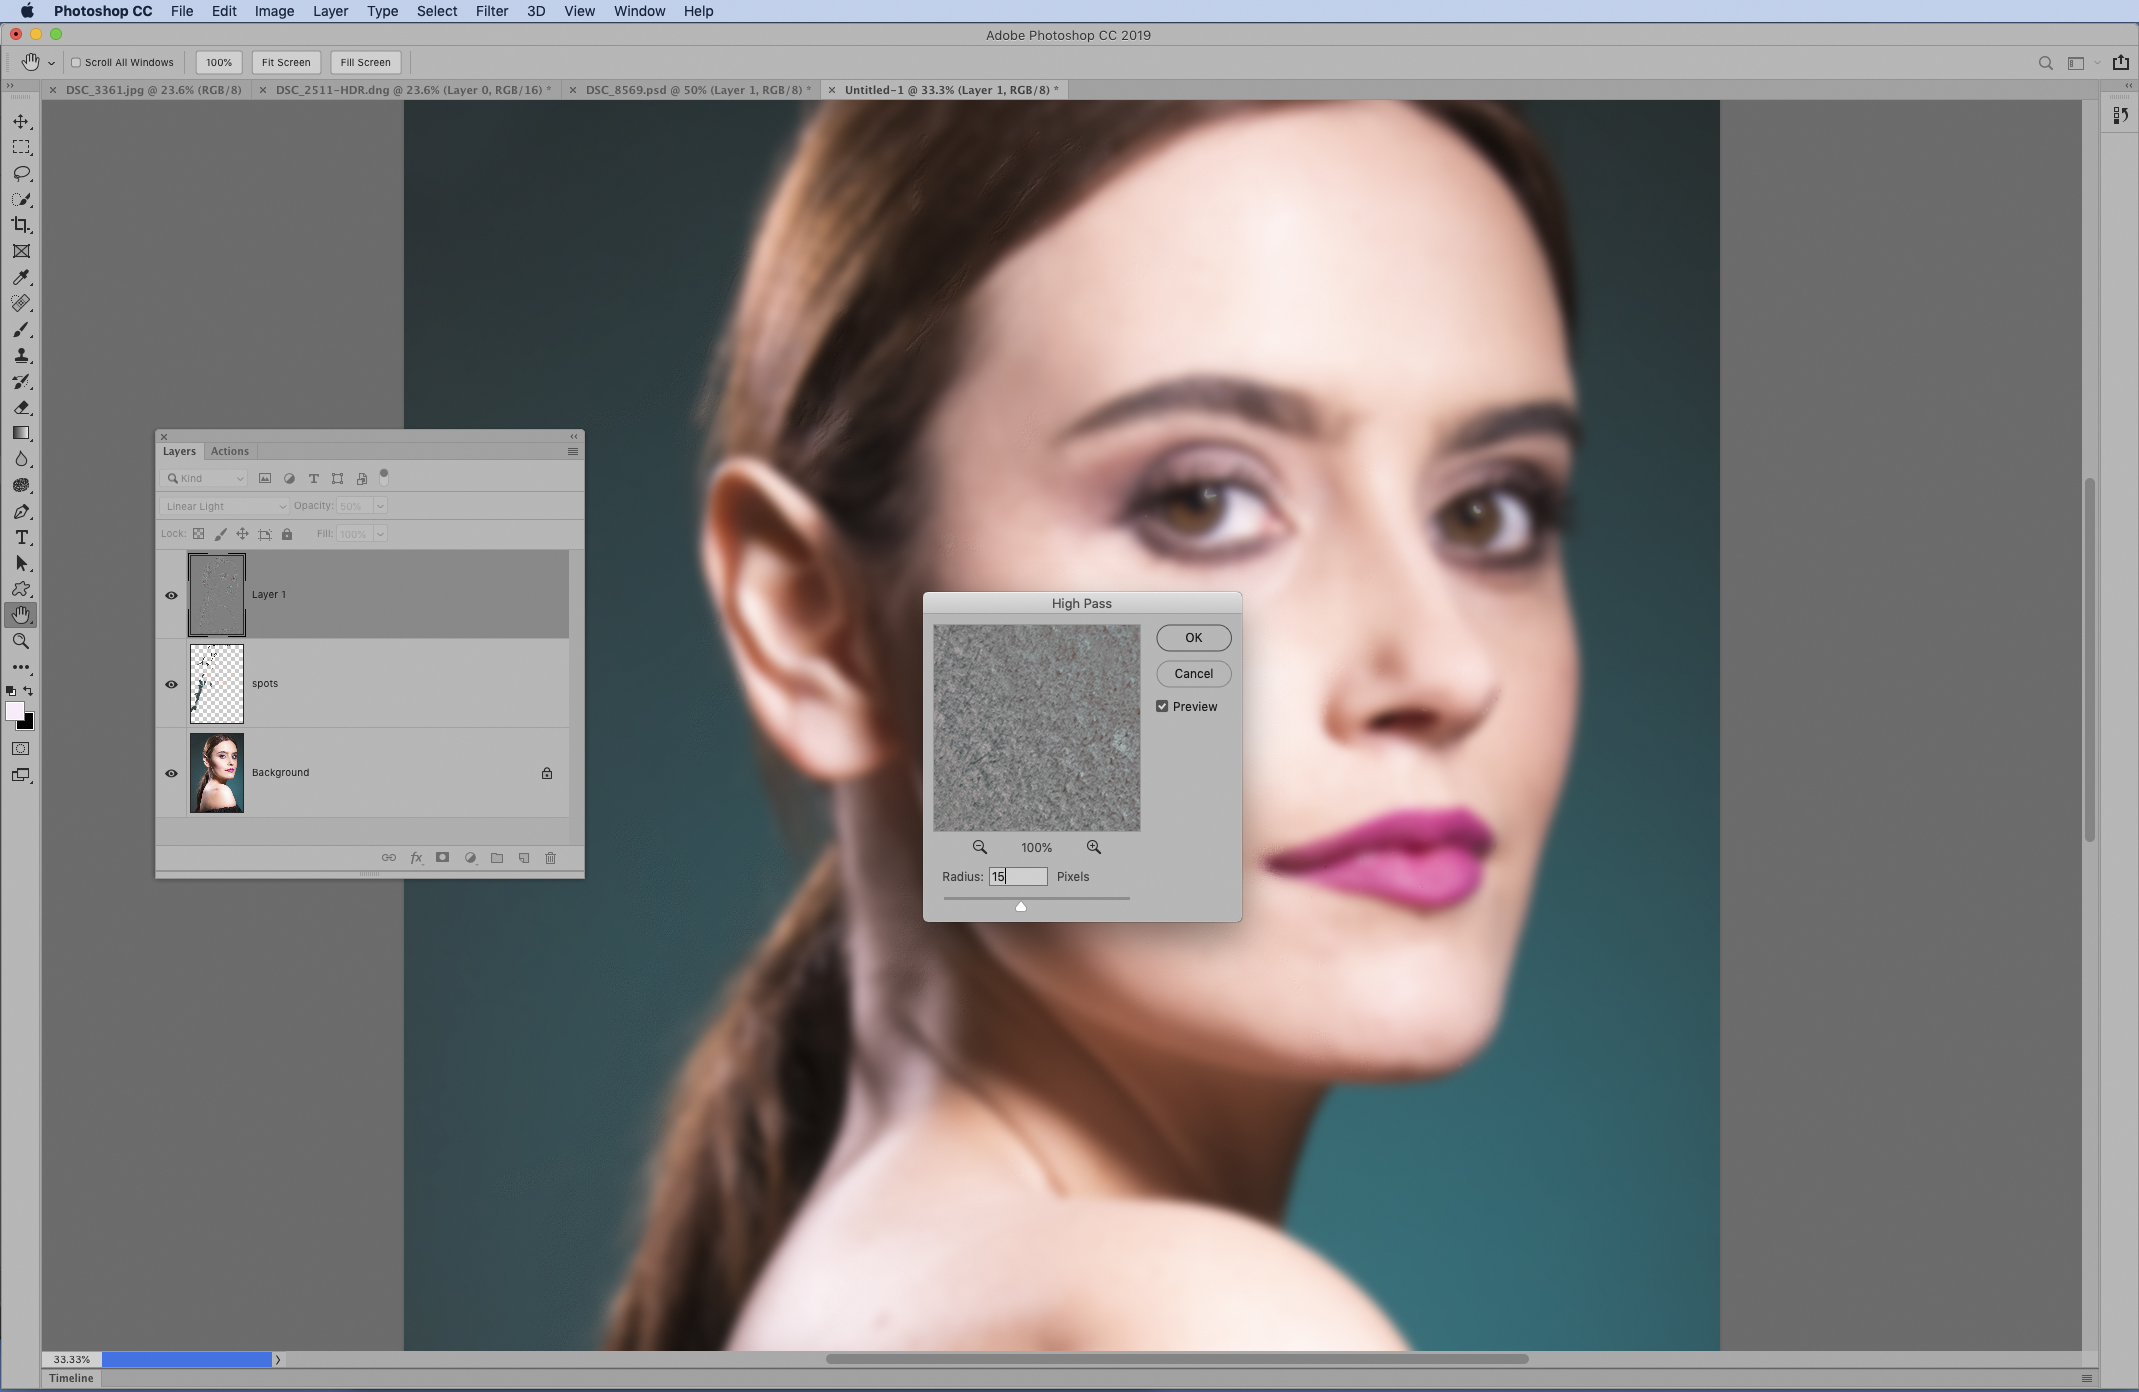
04 Use a High Pass filter
Go to Filter > Other > High Pass. Adjust the Radius slider until you have an amount that blurs the blotchiness in the skin. The right amount will depend on the resolution of your image, and how large the subject is in the frame, so experiment with the setting.
05 Apply a Gaussian Blur filter
Go to Filter > Blur > Gaussian Blur. Tweak the low value that reveals texture in the skin. This is usually around a third of the value used for the High Pass. Hit OK. Next, hold Alt and click the Add Layer Mask icon the Layers panel to add a black mask, hiding the effect.
06 Confine it to the skin
Grab the Brush tool and hit D to set the colour to white, then paint over the skin to reveal the smoothing effect, being careful not to go over fine details like the eyes. If you go wrong and need to erase parts of the effect then hit X to switch to black and paint to hide it.
PhotoPlus: The Canon Magazine is the world's only monthly newsstand title that's 100% devoted to Canon, so you can be sure the magazine is completely relevant to your system.
Read more:
100 Photoshop tips
The best photo editing software: image editors for novices through to pros
The best photo-editing laptops: top laptops for photographers
10 best online photography courses – from beginner guides to masterclasses
The lead technique writer on Digital Camera Magazine, PhotoPlus: The Canon Magazine and N-Photo: The Nikon Magazine, James is a fantastic general practice photographer with an enviable array of skills across every genre of photography.
Whether it's flash photography techniques like stroboscopic portraits, astrophotography projects like photographing the Northern Lights, or turning sound into art by making paint dance on a set of speakers, James' tutorials and projects are as creative as they are enjoyable.
He's also a wizard at the dark arts of Photoshop, Lightroom and Affinity Photo, and is capable of some genuine black magic in the digital darkroom, making him one of the leading authorities on photo editing software and techniques.

