How to set up a virtual hangout: the easy way to get people together on Zoom
Need to set up a virtual hangout for your camera club, photography friends or clients? Here’s how to do it on Zoom
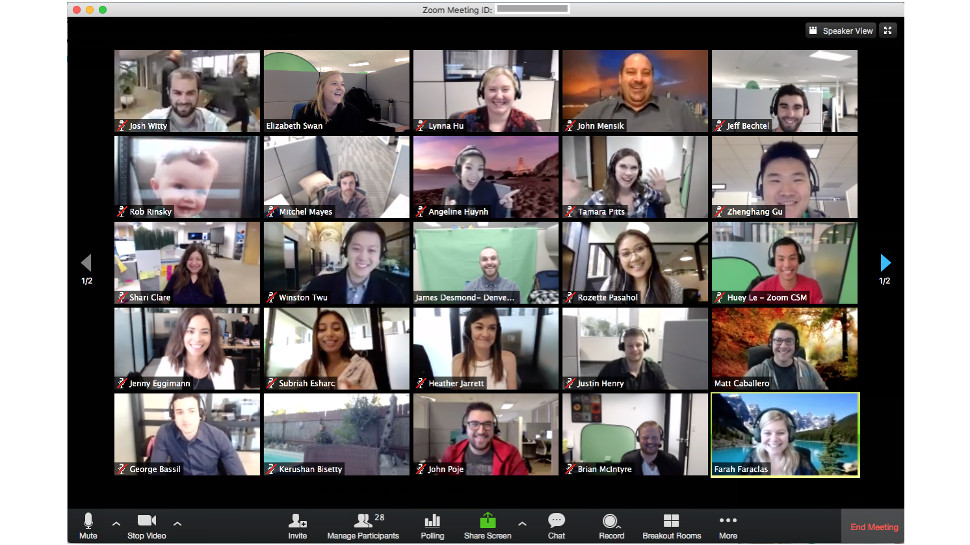
Though we may be in enforced isolation right now, that doesn’t mean you have to forsake getting together with your fellow shooters to talk about all things photography! You just have to get a little creative with how you do it.
Most of us have heard of Google Hangouts, but there are better ways to stay in touch with your friends, colleagues and customers. Here’s how to set up a virtual hangout on Zoom, which is just about the best virtual conferencing tool there is right now.
• Digital Camera World's coronavirus commitment
• Stuck at home: 11 fantastic photo projects to try indoors during the Covid-19 crisis
• The best webcam for home working
• Everything photographers need to work from home: computers, monitors, more
• The best video conferencing and hangout tools right now
You may have already seen our list of the best video conferencing apps – these are a great way to set up a virtual hangout. A virtual hangout allows everyone to dial into a meeting with video and audio, providing the next best thing to meeting up in person and allowing you all to converse in real time.
Many of the best video conferencing apps have extra features like gallery view so you can see everyone at the same time, a speaker-highlight function to easily single out who’s talking, and some even offer fun backgrounds and emoticons to give your conversations a little sparkle. Grab a beer from the fridge and you might as well be in the pub debating the merits of dropping a few hundred quid on the best lens for your DSLR!
Some video conferencing apps are free, while others cost money. For this step-by-step guide, we’ve chosen the top app from our buying guide, Zoom, which offers both a free service and a paid-for upgrade with extra features. We’ll go over the main differences in this guide as we explain to you, step by step, exactly how to set up a virtual hangout on Zoom.
1. Sign up for an account
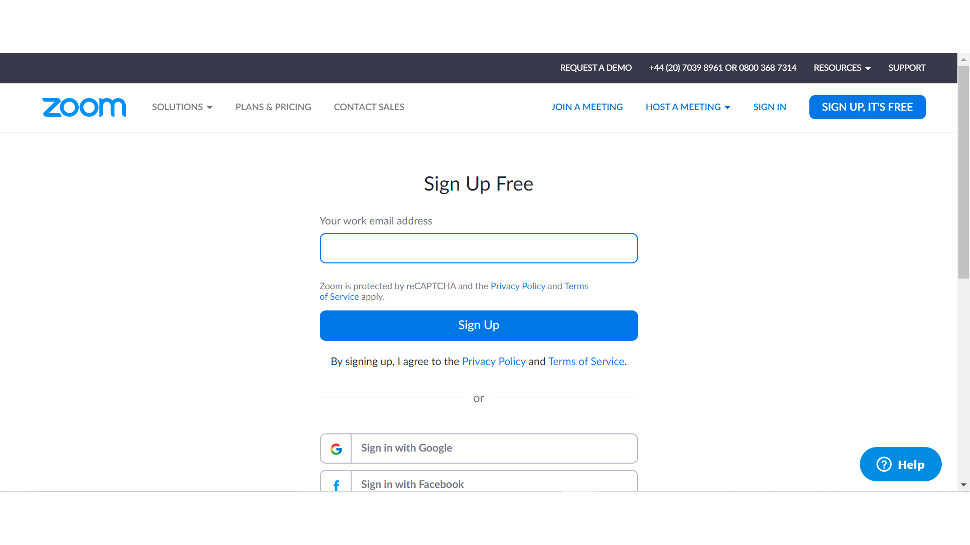
While not everyone who joins a Zoom meeting needs to have an account, if you’re going to host one, you do. Navigate to the Zoom website and click the “Sign up” button to get this done – simply enter your email address, and click the confirmation email that lands in your inbox to get set up.
2. Choose your plan
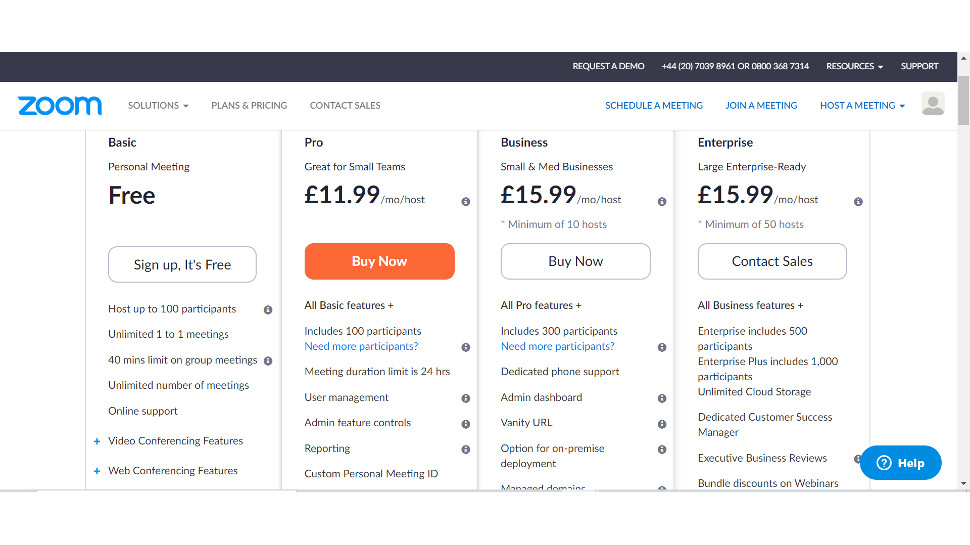
Zoom offers four levels of service, the most basic of which is free.
Note: If you’re not too confident about using video conferencing software and simply want something that works, choose the Free tier – it’ll do everything you need it to – and skip straight to the next step.
For those who want more detail, here’s a quick overview of the four tiers:
Free: You can have up to 100 participants on a meeting and unlimited one-to-one conversations. However, group conversations are capped at forty minutes. This is more an annoyance than a real hindrance, as you can always just exit the call and restart if needs be, but if you plan to host a lot of meetings, or are planning on using Zoom for professional connections, you may want to consider shelling out for another option.
Pro: Costs £11.99 per month. All the functionality of Free, but with the meeting time cap removed. There’s also Skype integration, and up to 1GB of MP4 or M4A cloud recording, allowing you to record your meetings and keep them stored without clogging up your hard drive.
Business: Costs £15.99 per month. You get everything you do with Pro, but with maximum participants upped to 300 and more comprehensive support from the team at Zoom, as well as greater administrative control over your meetings that allows you to track participants’ attention/behaviour on the call. Unless you run a large company or are a frankly psychopathic control freak over the behaviour of your meetings attendees, it’s unlikely you’ll need this option. It also requires a minimum of ten hosts.
Enterprise: Costs £15.99 or more, depending on various options, and allows up to 500 participants, or 1000 with Enterprise Plus. Comes with a dedicated “Customer Success Manager”. You definitely don’t need this.
3. Set up your first meeting
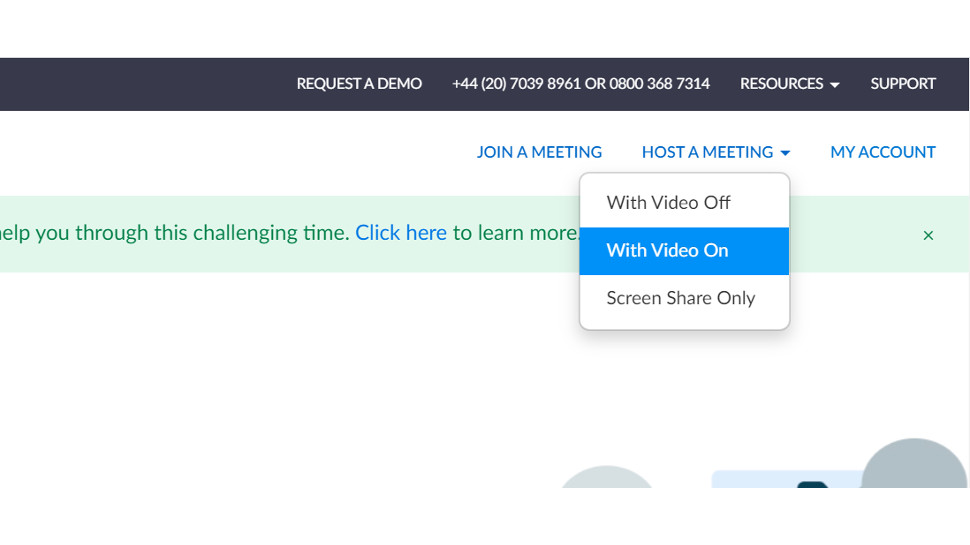
With just a couple of short steps, you’re already on your way to hosting your meeting! Click the Host a Meeting button in the top right and you’ll get the option to host a meeting without video, with video, or do a screen-share only broadcast. We’ll assume you want to host a video meeting, so click that option.
You have already been prompted to do this, but if not, at this point Zoom will ask you to download, install and run its proprietary software. Follow all the instructions you see on your screen – it shouldn’t take more than a couple of minutes. Once this is done, you’re ready to go.
4. Test speaker and microphone

Once the program has launched, you’ll immediately be confronted with the image of your own face, which you may or may not find to be a pleasant experience.
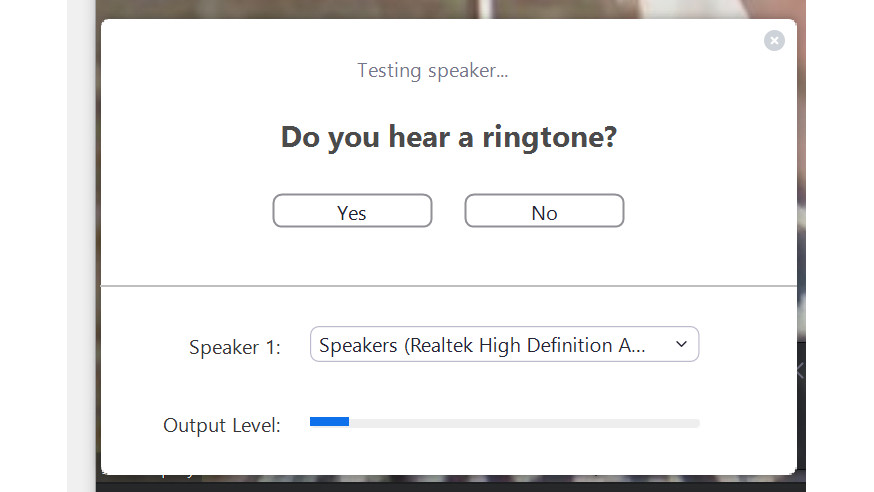
If you haven’t done this already, the software will prompt you to make sure your speaker and microphone are working correctly. It’s important to make sure everything is up and running – there’s nothing worse than starting a virtual hangout and then realising you’ll have to abandon it due to a technical fault.
5. Invite participants
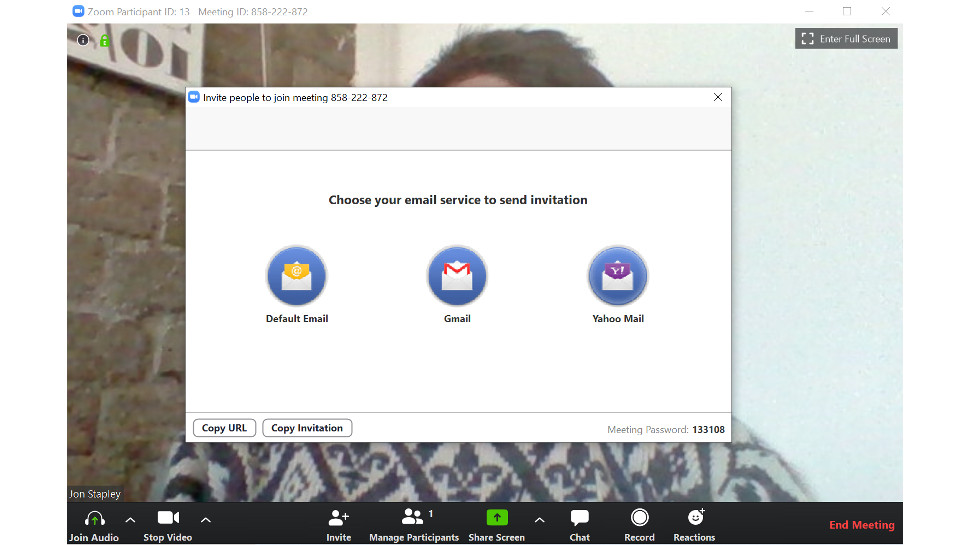
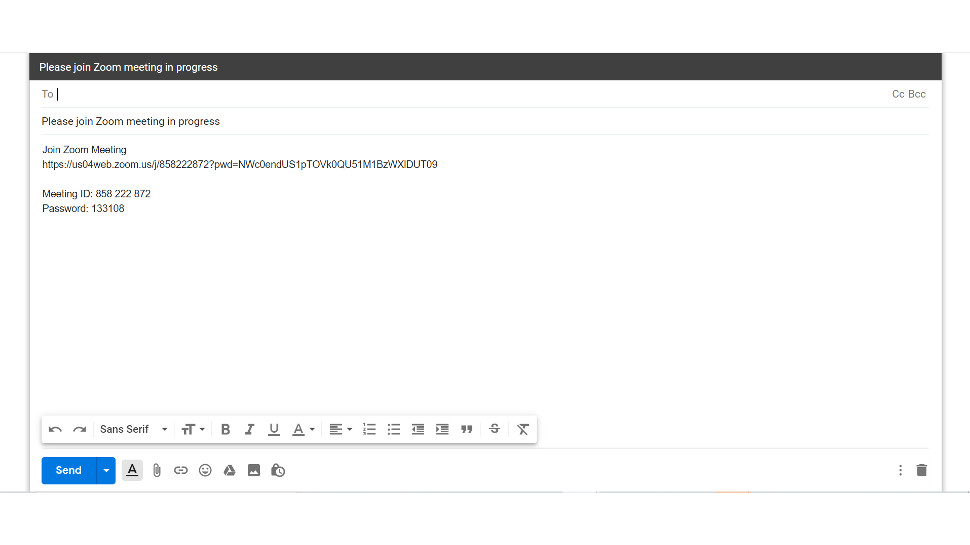
It’s not much of a virtual hangout if you’re the only person there! Click the “Invite Participants” button and you’ll get prompted to open your email client. From there, you can send an invite out now to everyone you want to join the meeting. They’ll receive the URL for the video meeting, as well as a unique meeting ID that can also be used to access it. They’ll have to click to download and run the software if they haven’t already; however they do not need to sign up for an account.
6. Manage the meeting
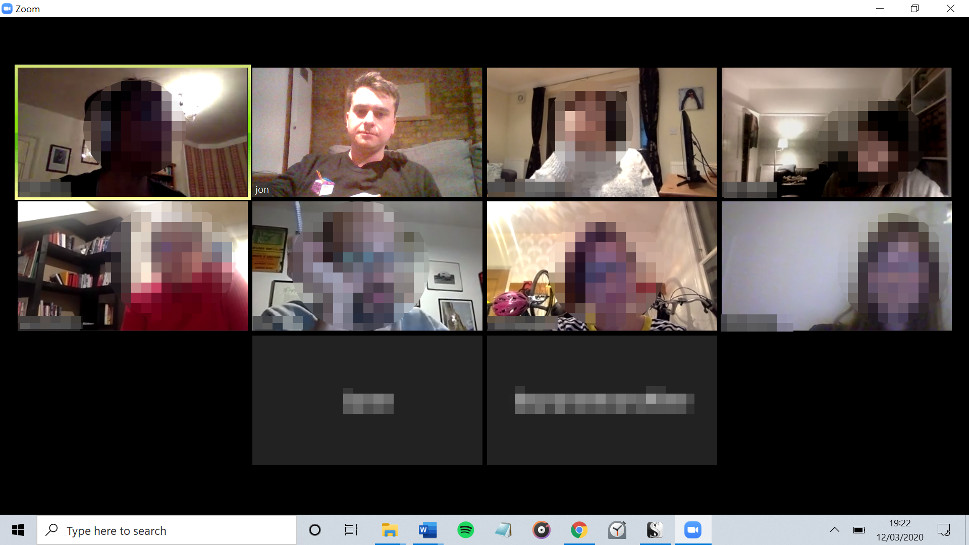
Once people have joined, you can start your hangout! The window will automatically minimise and remain on screen if you move away, so you can multi-task if needs be. If you want to share your screen, click the green button at the bottom.
While the meeting is in progress, as the host you can manage certain aspects to streamline the experience. You can mute/unmute participants and allow them to do so themselves – useful if one person has a lot of background noise, and you can also toggle enter/exit chimes on and off. You can also remove a participant, should the need arise.
In the upper right of the screen you can toggle Speaker View – which full-screens the person currently speaking – or Gallery View, which shows you everyone in a grid. Most users prefer Gallery View, but by all means try both out.
One thing to be aware of if you’re using the free tier is the 40-minute limit. If you hit this and want to carry on, then you’ll need to simply exit the meeting and recreate it, sending out another link to your participants. This can get annoying, so if you’re planning a lot of meetings you may want to consider paying for the Pro version of the program.
When you need to wrap the meeting up, click the red “End Meeting” button. If the meeting is going to carry on without you, you can assign a new host to keep things going (it’ll need to be someone with a Zoom account).
And that’s it! Now when you want to start a meeting, you can open the Zoom client directly and start them from there (the big, obvious orange button).
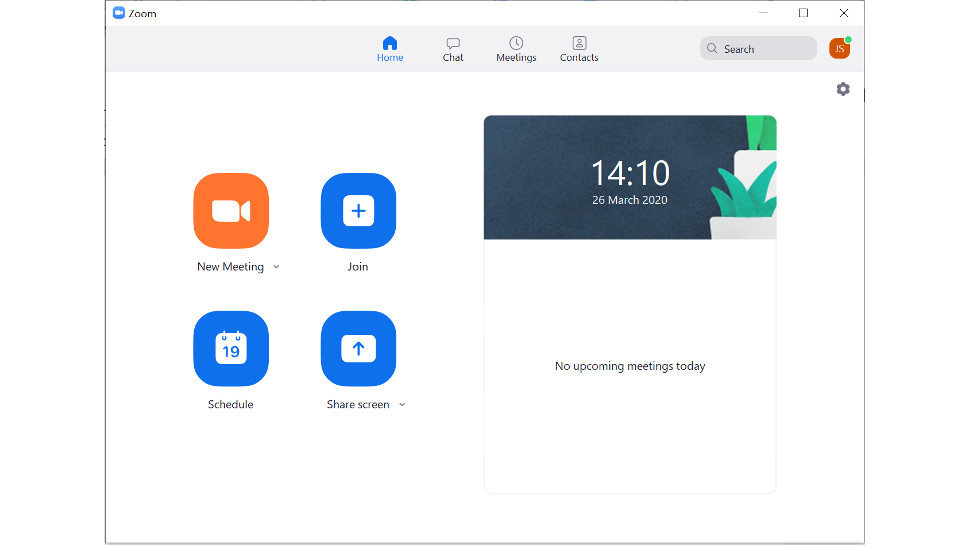
7. Schedule future meetings
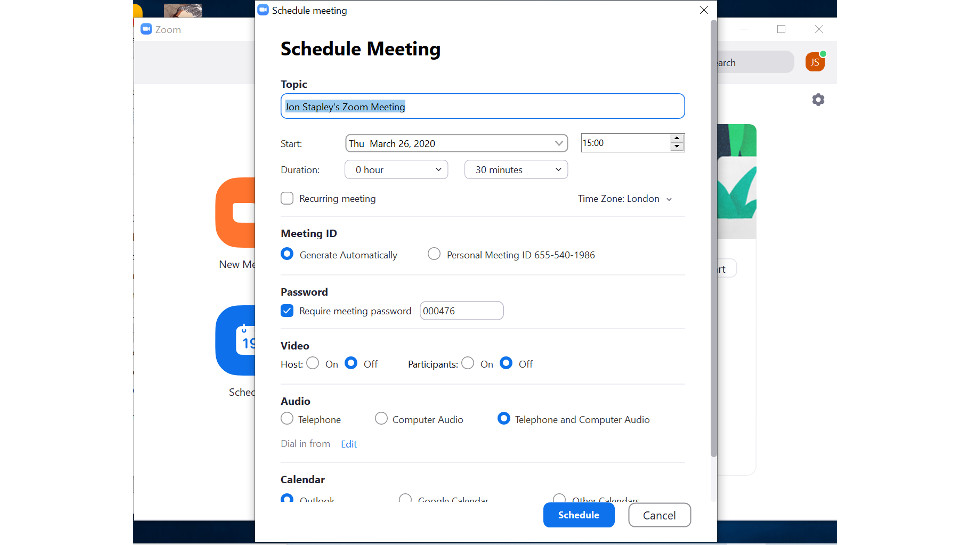
If you want to schedule a meeting for a specific time in the future, open your Zoom client and click the “Schedule” button. You’ll see a list of options you can specify for your meeting – as well as date and time, you can also set a unique ID for your meeting, choose whether to allow participants to join before you arrive, or choose to record the meeting locally on your machine. You can also set a password for the meeting to keep it secure.
Once you’ve finalised your preferences, choose the calendar you want to save the meeting to (defaults include Outlook and Google) and then click “Schedule”. A form-invitation email should automatically be generated in your chosen client, but if not it’s easy to quickly send one out with the meeting ID and a link – click on the meeting in your dashboard, then click the “Copy invitation” button to get it on your clipboard, where it can be pasted into an email, Facebook post or whatever else.
8. Use the mobile app
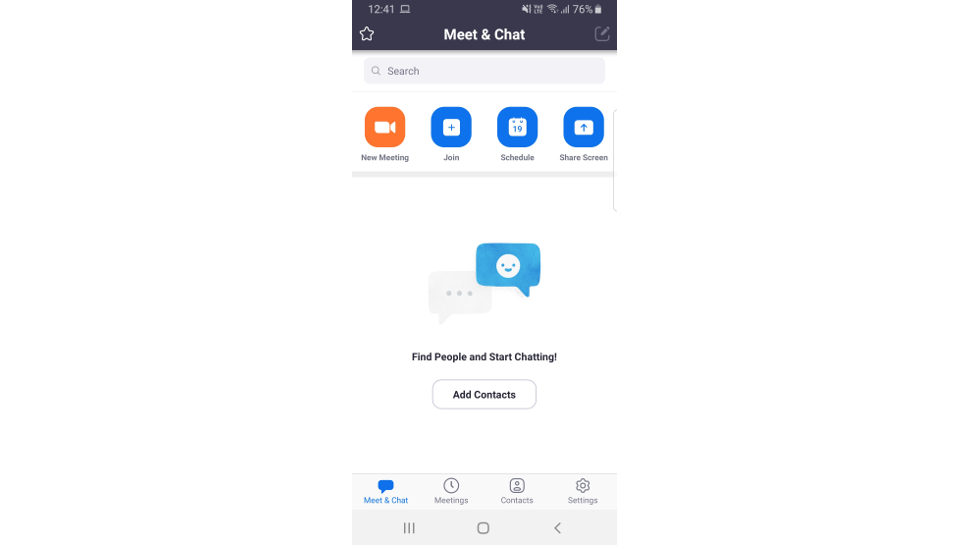
If you’re on mobile, it’s still easy to follow all of these steps – the app contains all the same buttons and functions. Just download it from the Apple or Google Play store and you'll be good to go!
And there you have it! All the steps you need to set up a virtual hangout with your photo friends.
Read more:
• The best webcam for home working
• The best cameras for streaming
• Everything photographers need to work from home: computers, monitors, more
• The best video conferencing and hangout tools right now
Get the Digital Camera World Newsletter
The best camera deals, reviews, product advice, and unmissable photography news, direct to your inbox!
Jon spent years at IPC Media writing features, news, reviews and other photography content for publications such as Amateur Photographer and What Digital Camera in both print and digital form. With his additional experience for outlets like Photomonitor, this makes Jon one of our go-to specialists when it comes to all aspects of photography, from cameras and action cameras to lenses and memory cards, flash diffusers and triggers, batteries and memory cards, selfie sticks and gimbals, and much more besides.
An NCTJ-qualified journalist, he has also contributed to Shortlist, The Skinny, ThreeWeeks Edinburgh, The Guardian, Trusted Reviews, CreativeBLOQ, and probably quite a few others I’ve forgotten.

