How to shoot a blockhead baby photo portrait
James Paterson gets creative with portraits and toy blocks to craft a cheeky composite with some simple Photoshop skills
The best camera deals, reviews, product advice, and unmissable photography news, direct to your inbox!
You are now subscribed
Your newsletter sign-up was successful
The best composites are often those that are photographed specifically with the final result in mind. This means that rather than attempting to merge a disparate array of unconnected images, we can instead combine a set of carefully composed, consistent frames that look like they belong together.
What’s more, the work done in camera makes the Photoshop technique much easier and simpler than you might think.
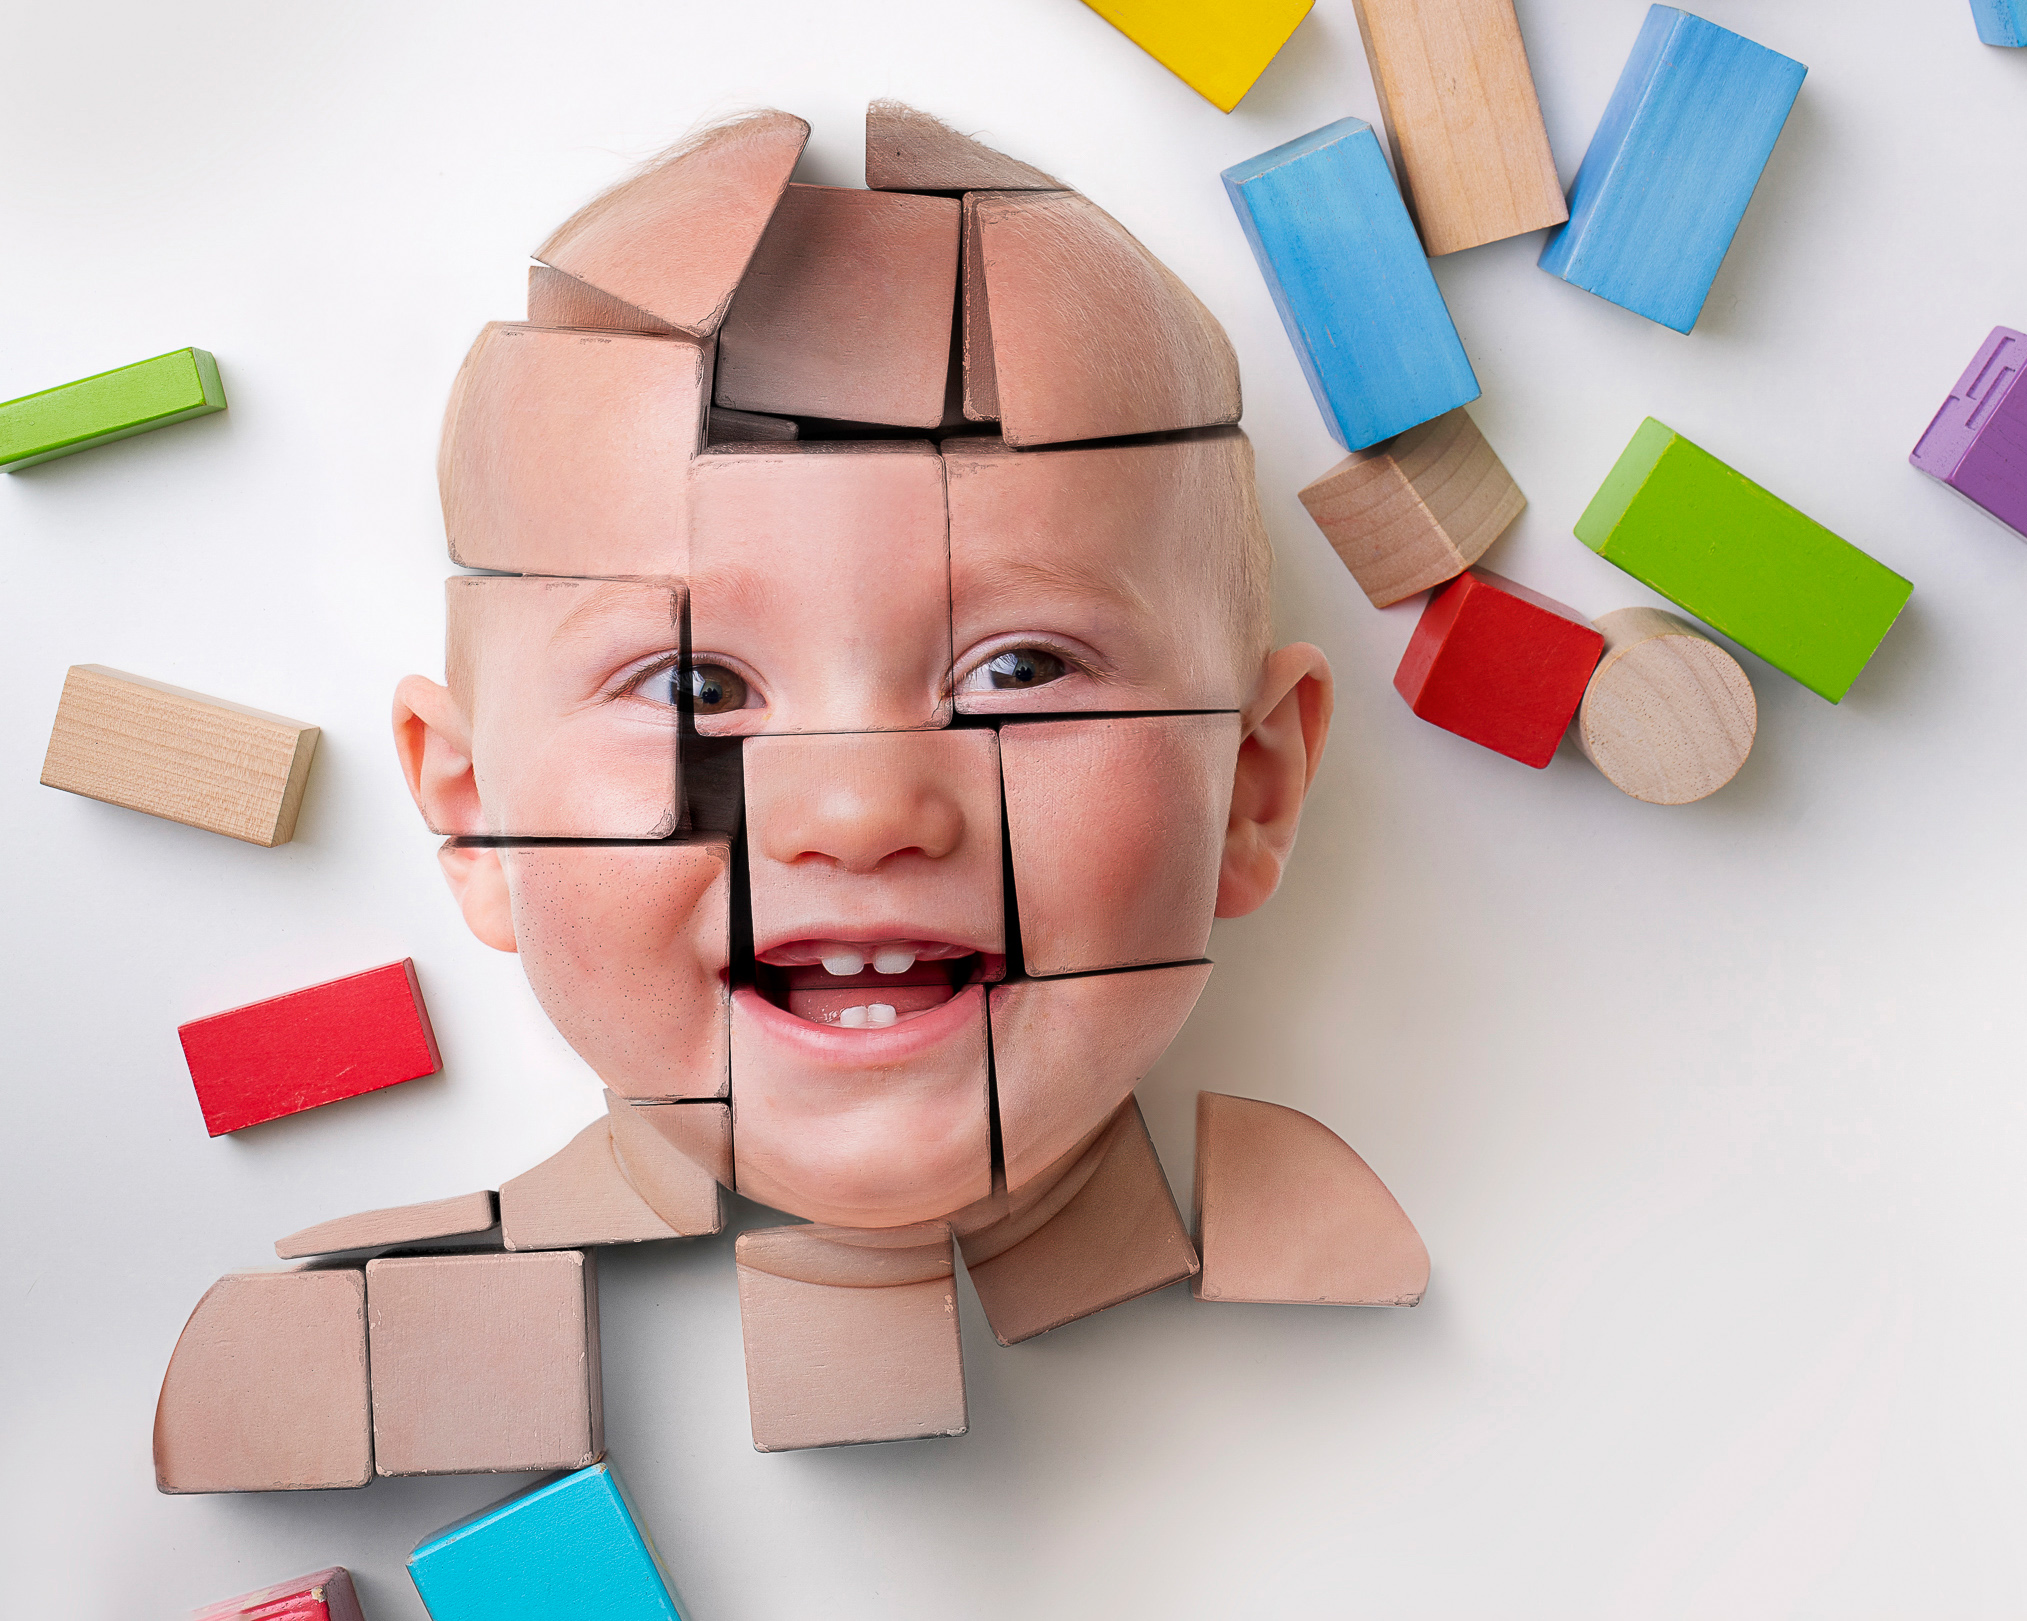
We’ll explain how it works here, with careful lighting and positioning of the different elements that make up our playful block face composite. After photographing the portrait and a pile of toy blocks separately, the images are merged into a seamless whole using a quick and easy Photoshop technique.
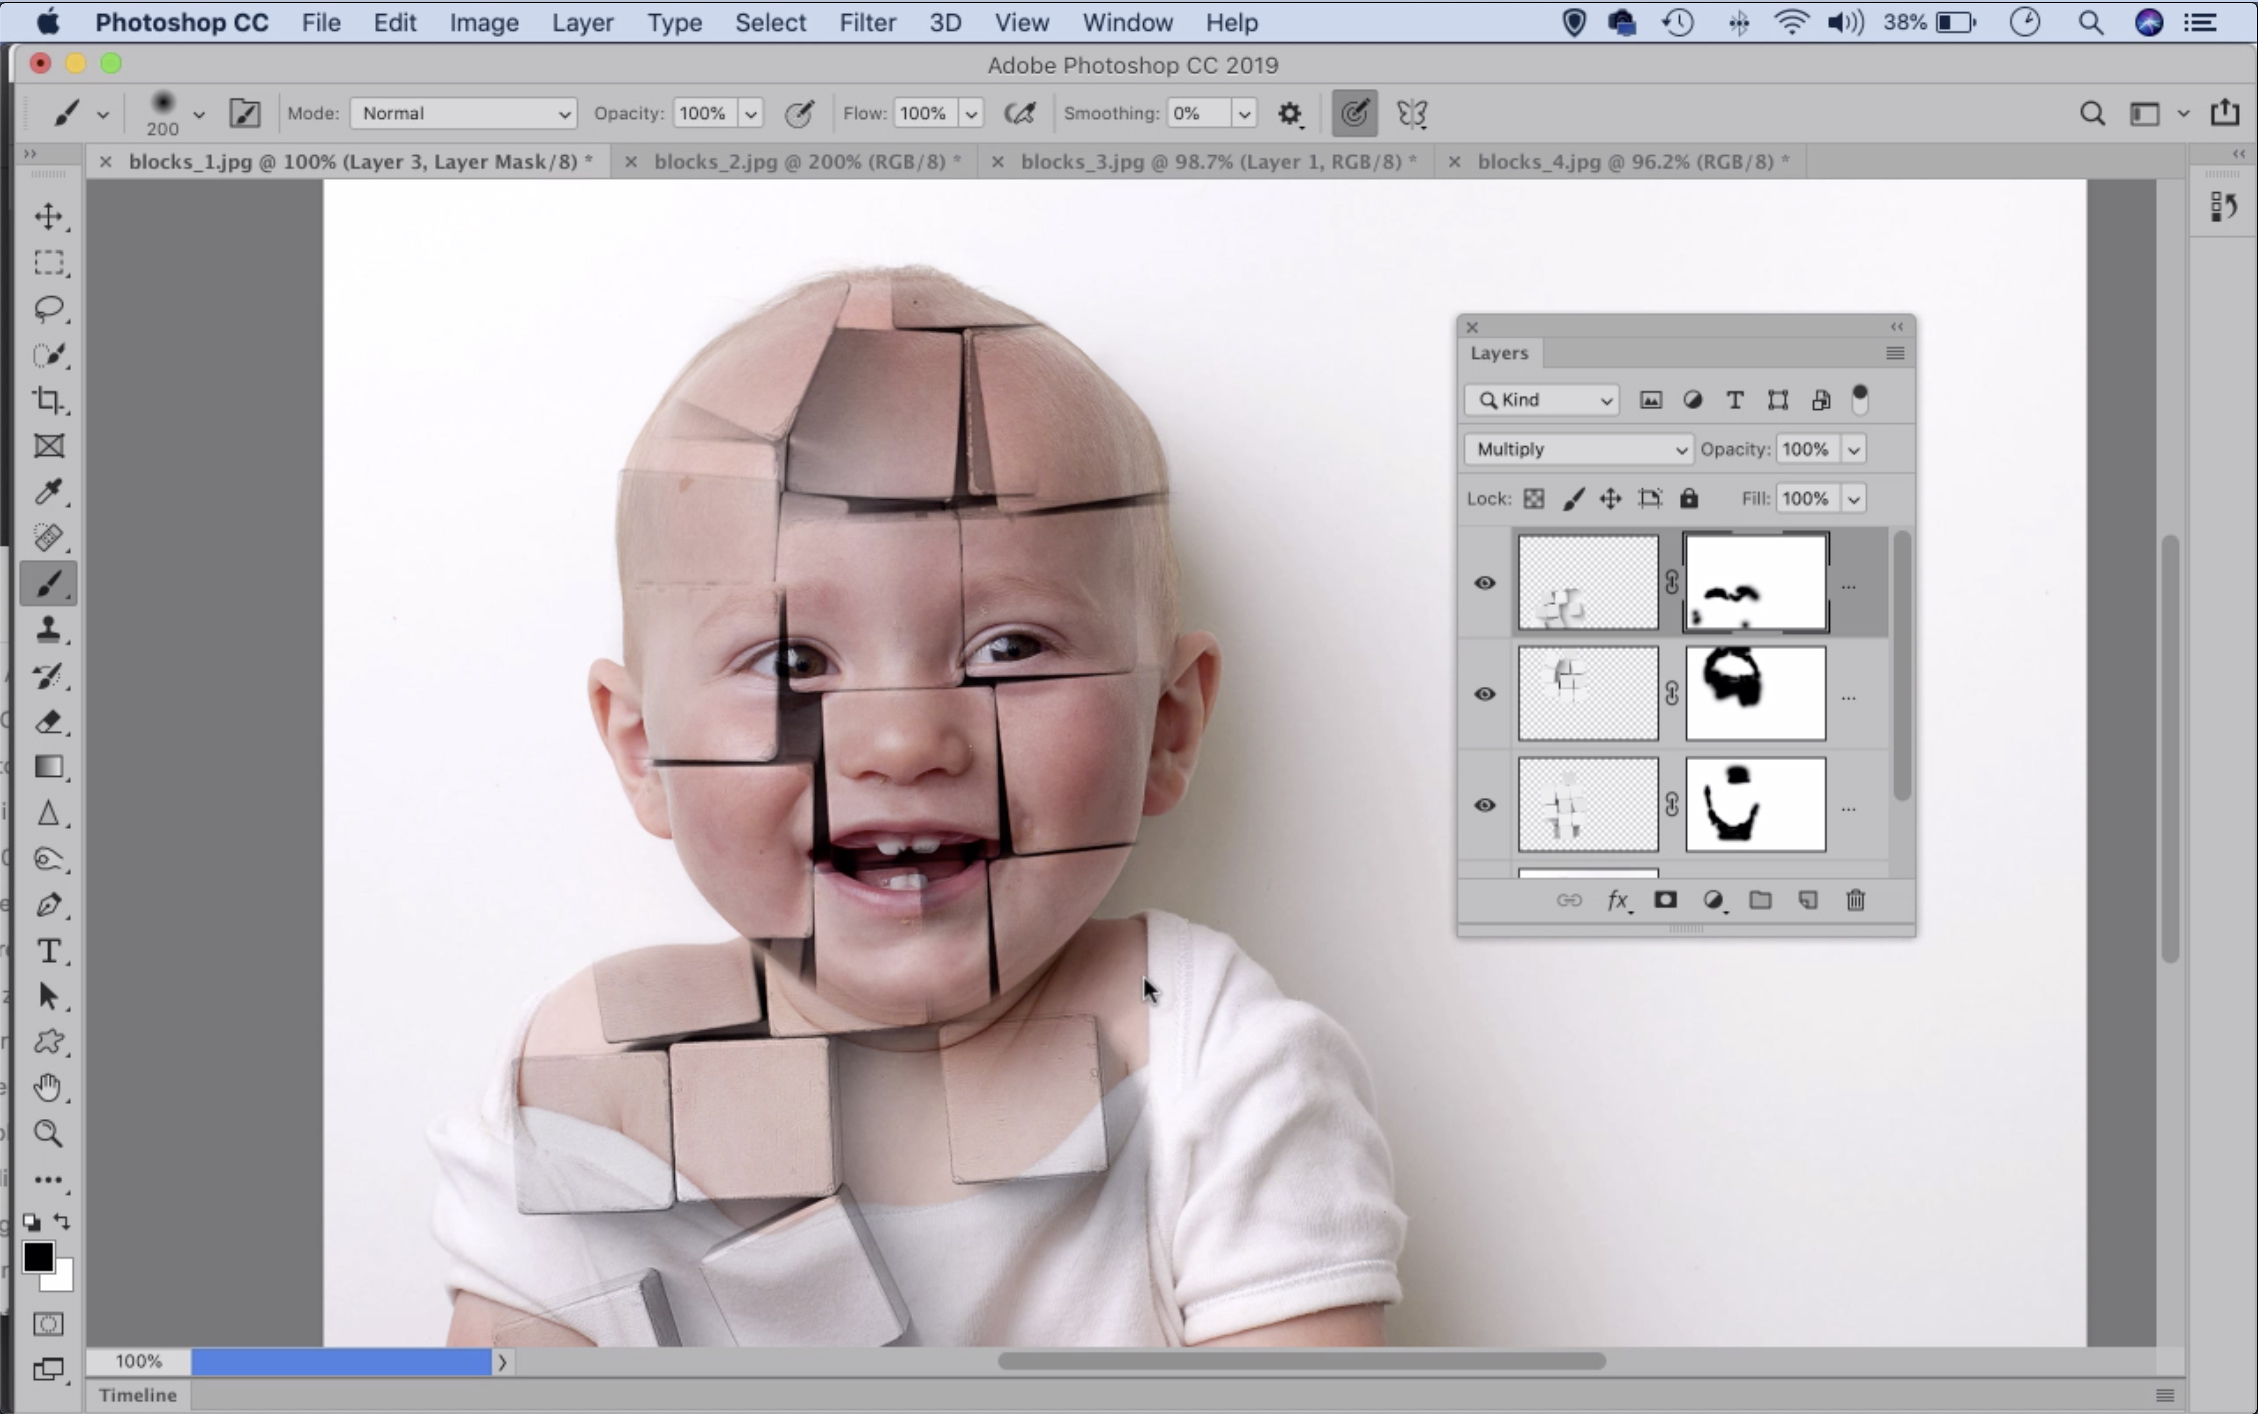
Article continues belowThe blocks are desaturated and overlaid on top of the face then blended using the Multiply layer blend mode. Once done, all that’s left to do is fine-tune which parts of the blocks are visible or hidden by painting a layer mask.
The process also makes it easy to take pieces from different photos and bring them together. Here I used three separate images of toy blocks – for the face, the forehead and the neck – then blended the edges using masks.
This is a key Photoshop skill that can be utilized for all kinds of image editing tasks, from surreal montages, to tonal enhancements. Over the next few pages we’ll look at both the shooting techniques and Photoshop skills required to make conceptual portraits like this. You’ll find a full walkthrough in the accompanying video.
Shooting tips
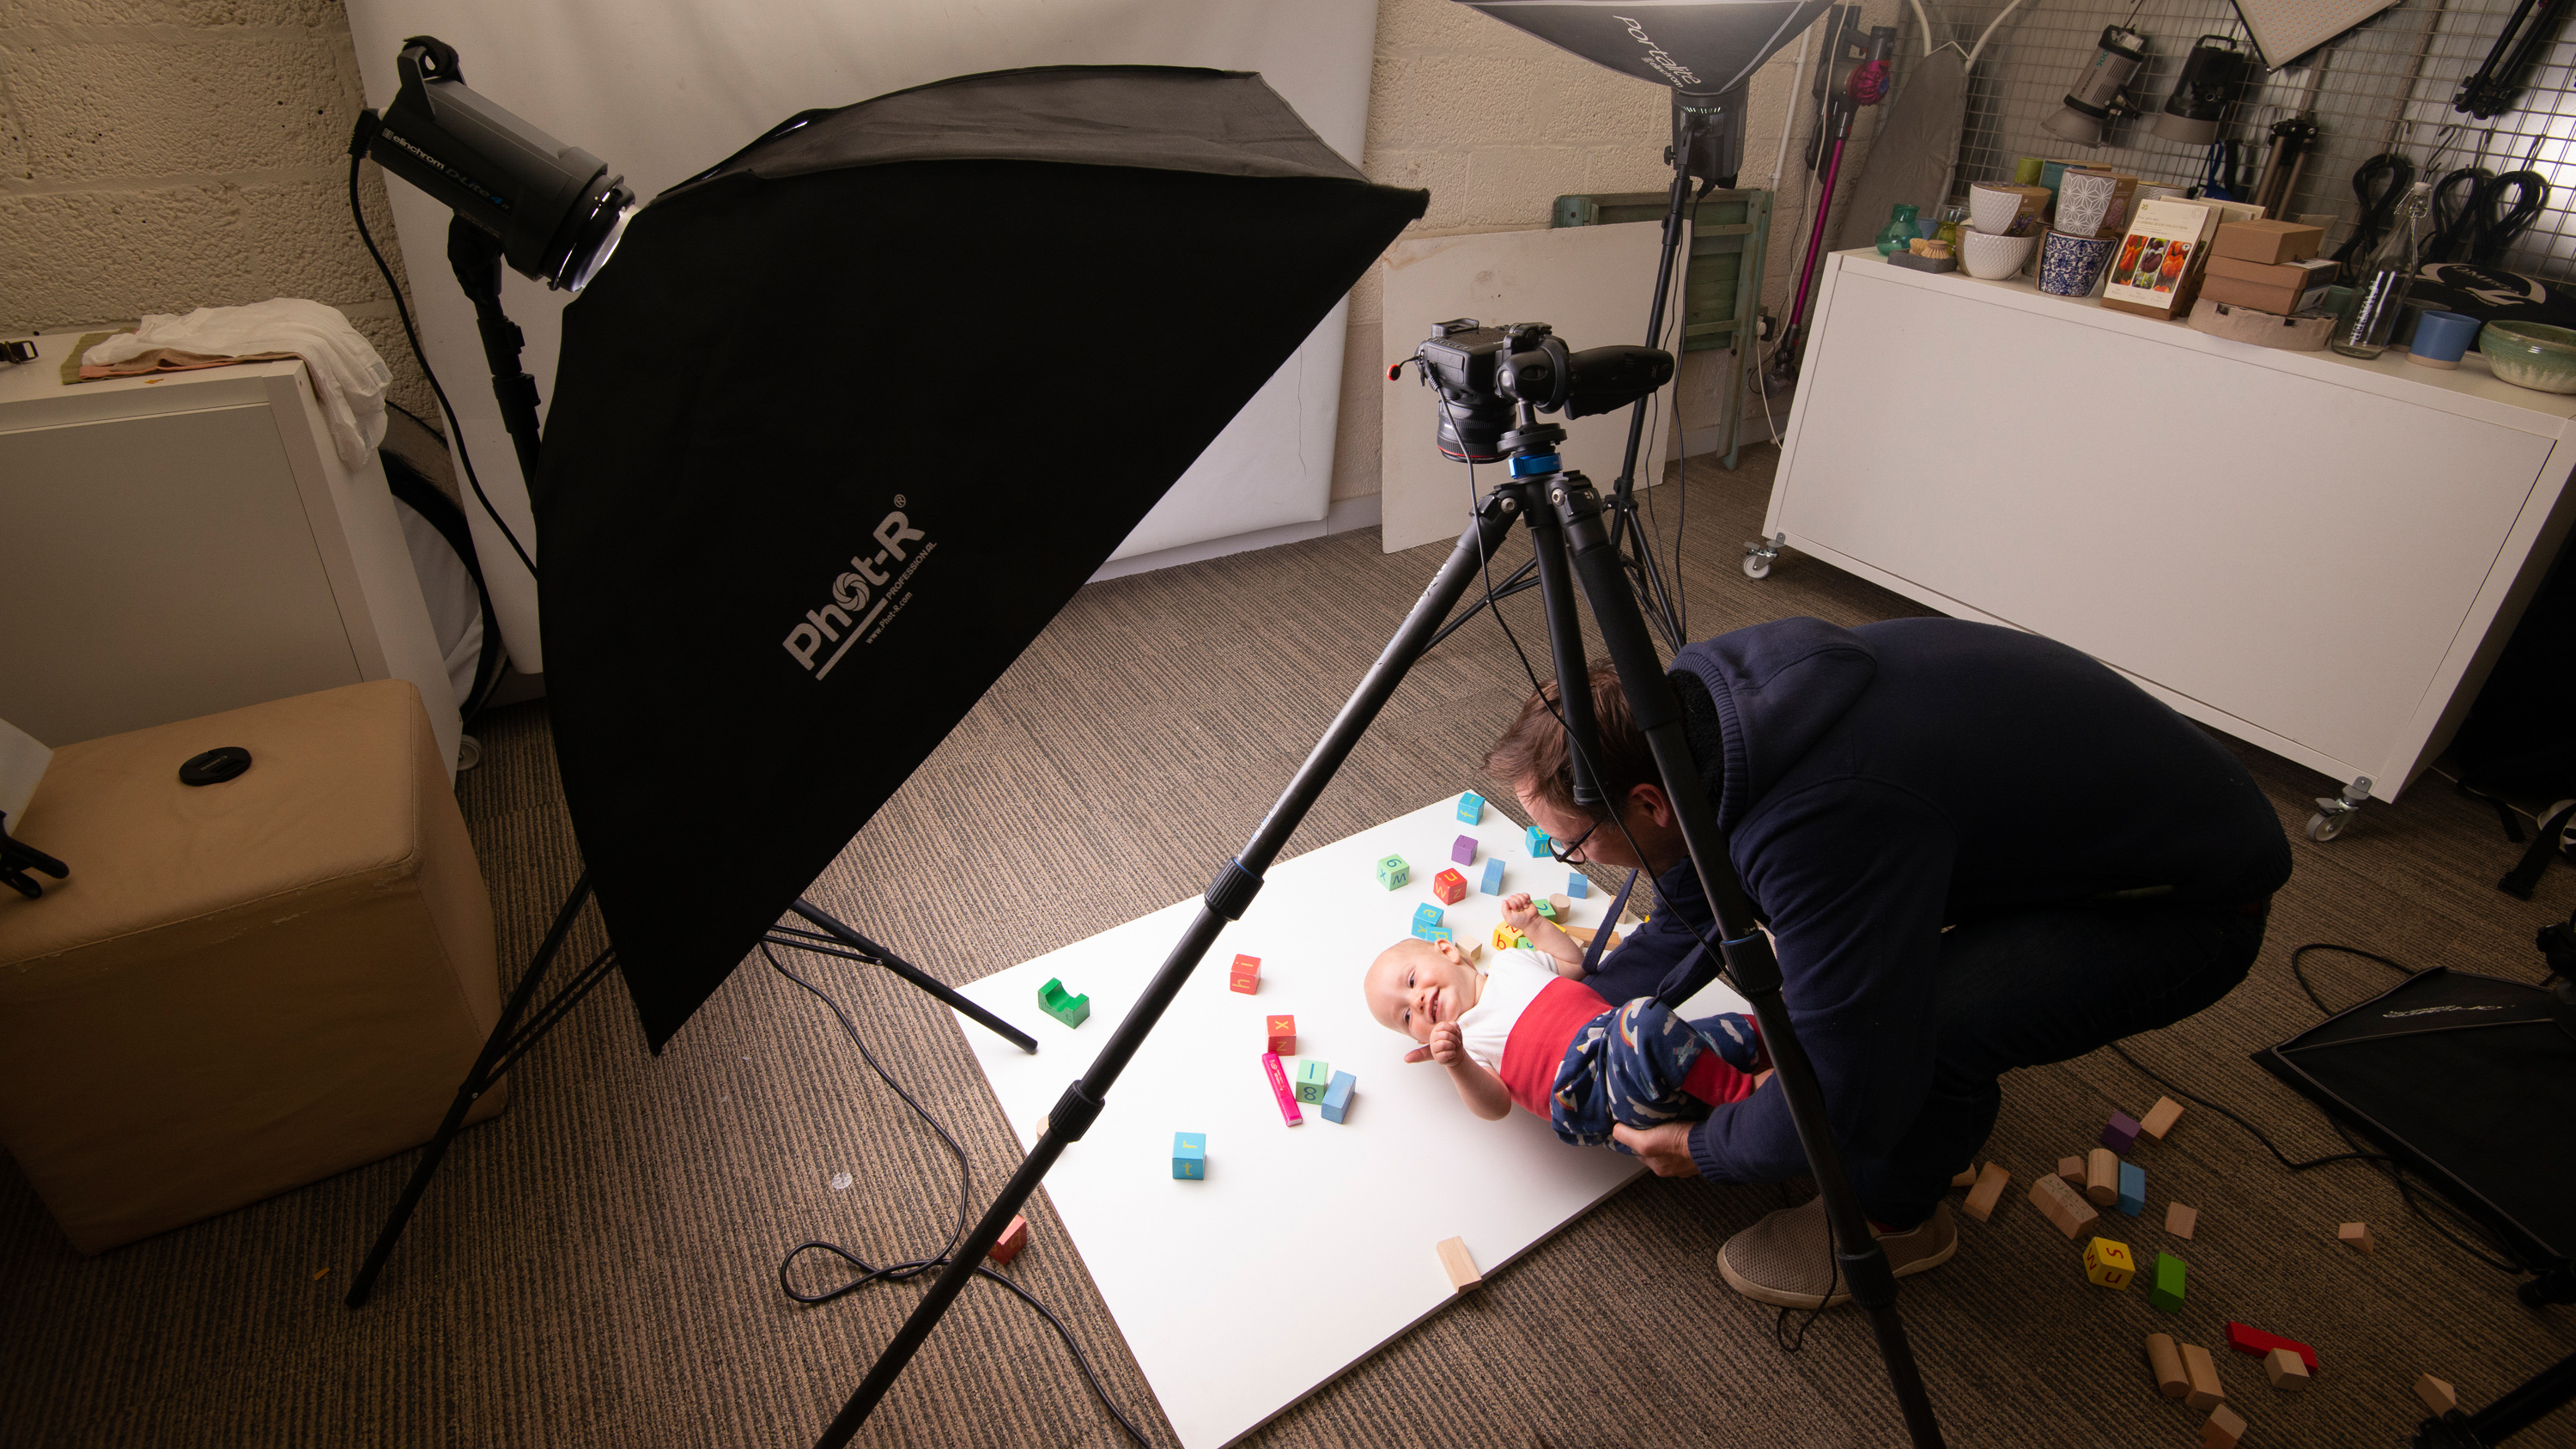
- A plain backdrop is helpful here. Not only does it give our final image a clean feel, it also makes it easier to combine pieces from images into a composite once we begin working on our shots in Photoshop. We used a piece of whiteboard.
- We set up a tripod above the whiteboard, with the camera angled down on the blocks. The tripod helps keep a consistent angle and height. This means the direction of light stays the same, ensuring the separate frames fit together naturally later.
- Our little chap here makes for a playful subject and his lack of hair means it’s easier to blend the head with the toy blocks later. We captured a range of expressions and poses of the head and body. Other subjects could work well – even animals!
- We used two studio flashes to light our scene. One of the heads is linked to the camera with a sync cable, while the other is set to optical slave so that it fires at the same time. If studio lighting isn’t an option then window light can be as effective.
- A large softbox attached to the key light here gives us directional light from the left of the camera. Akin to a large window, a softbox is ideal for portraits as it gently falls off across the face and offers soft-edged shadows.
- Wooden blocks form the base for our effect. We shoot the blocks and the baby separately in roughly the same position on the board, then bring everything together in post. An array of different colors, shapes and sizes gives us plenty of choice.
Editing tips
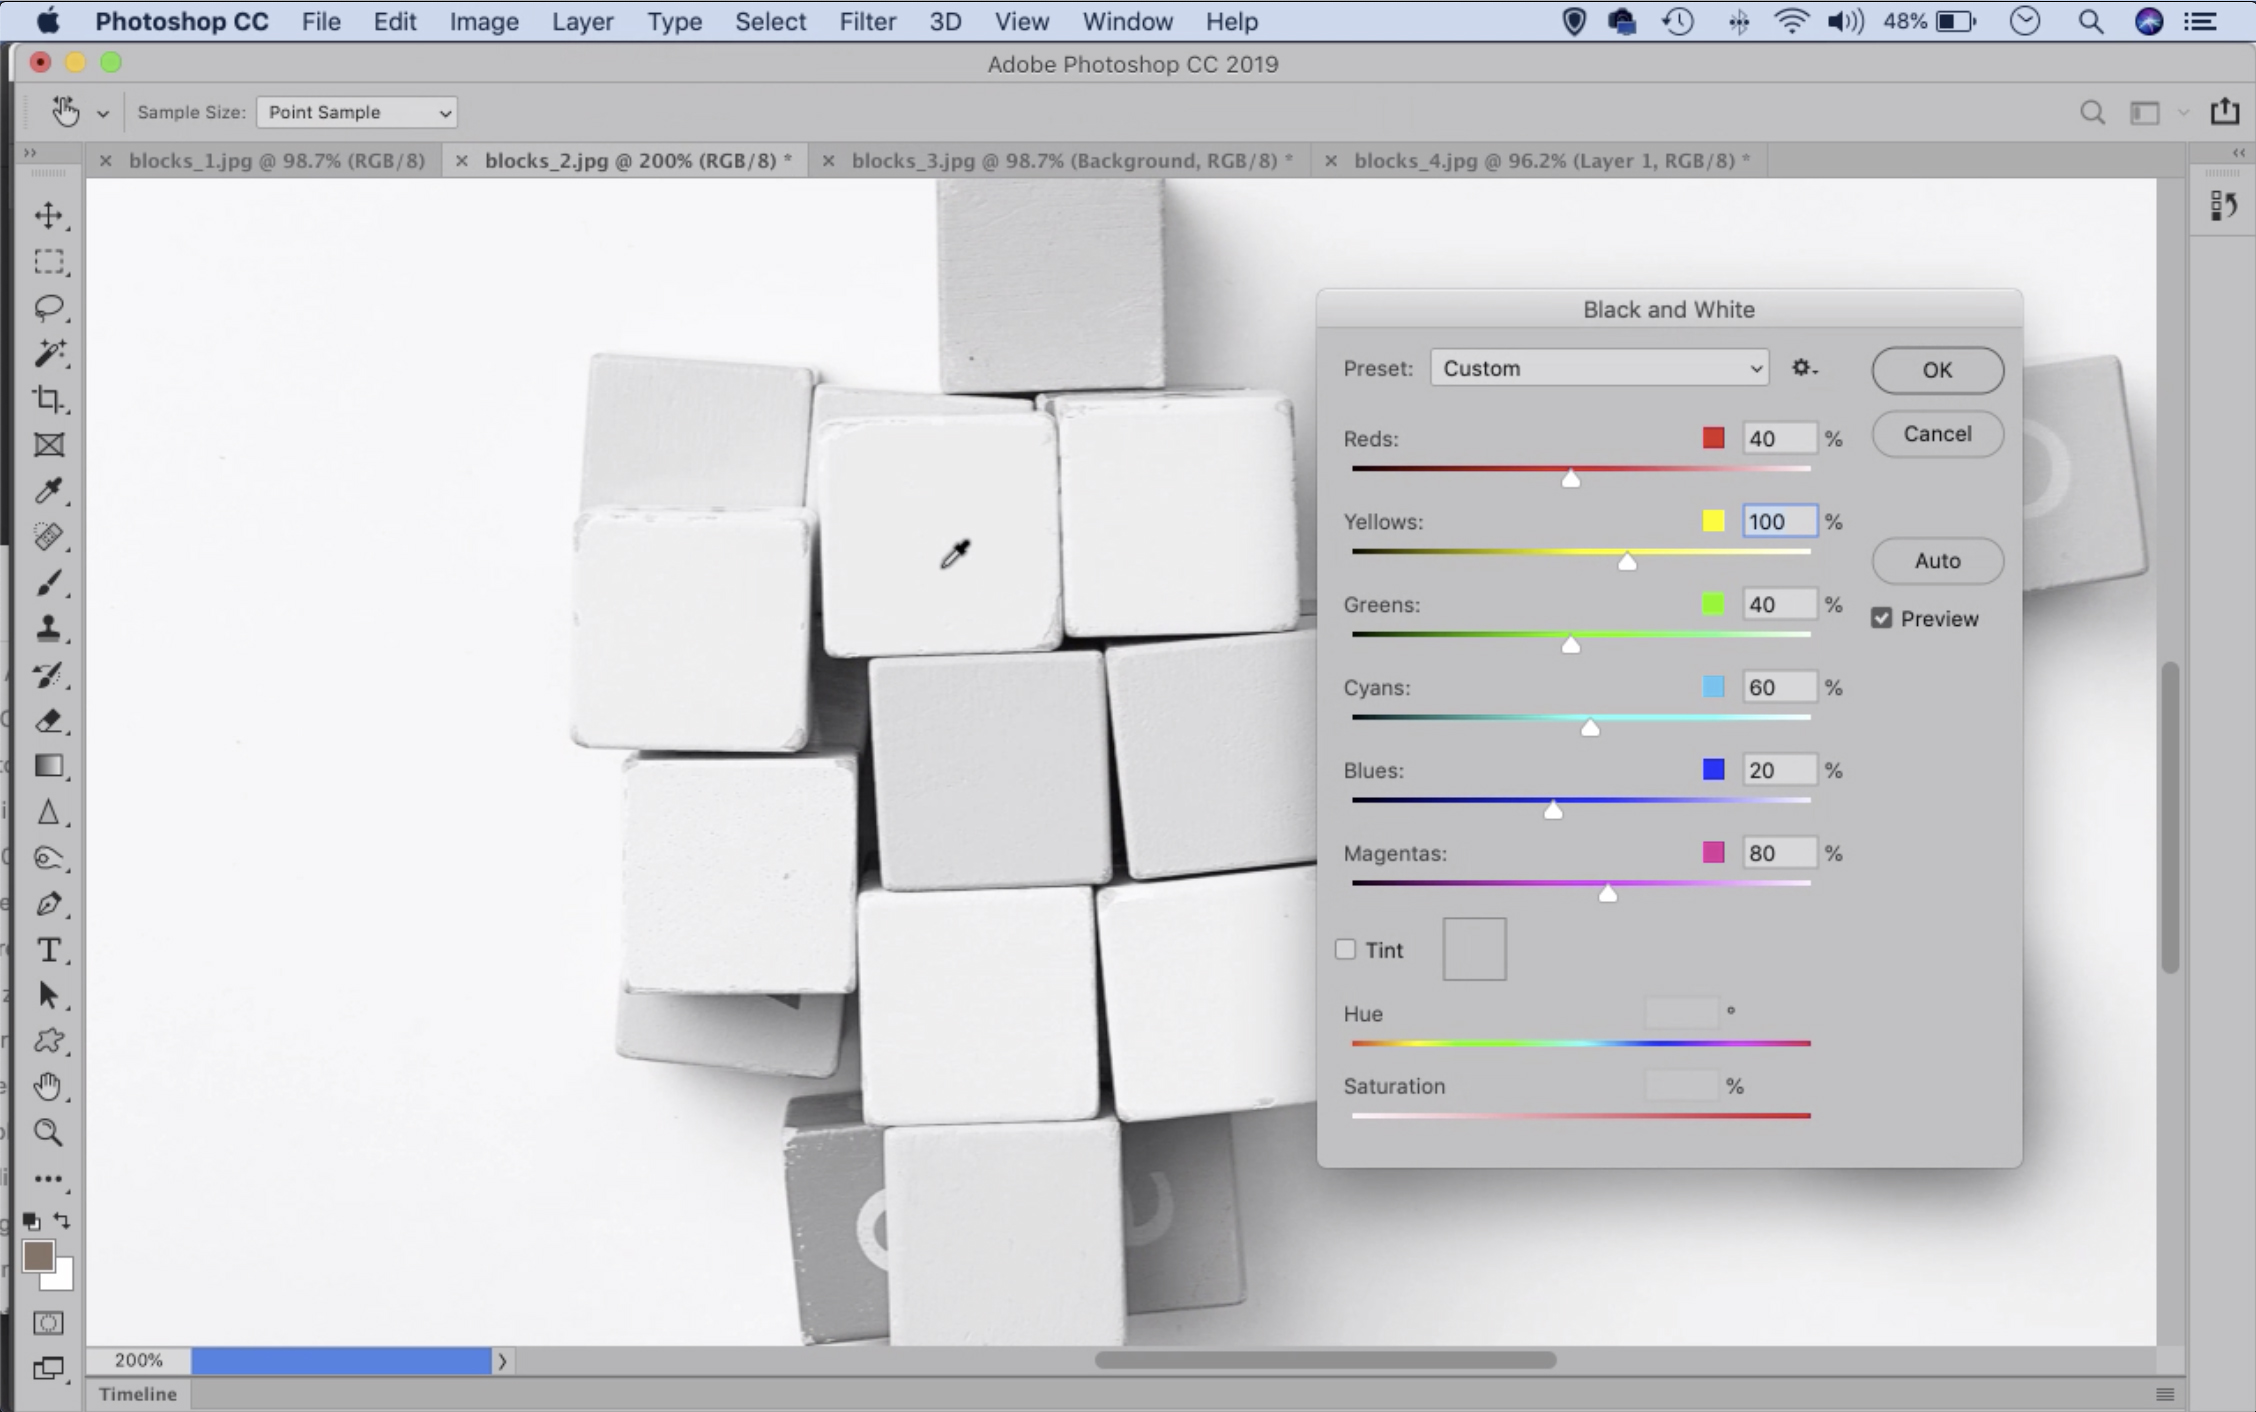
- Open your portrait and block images in Photoshop. To remove the letters from blocks, select them with the Magic Wand and go to Edit>Fill, set Use: Content-Aware and hit OK. Go to Image>Adjustments>Black and White. Drag over the blocks to brighten, hit OK.
- Get the Quick Selection tool and paint over the blocks. Grab the Move tool and check ‘Show Transform Controls’ in the options, then use it to drag the selected area into the portrait. Click the bounding box, resize and position the layer so that it fits over the face.
- Go to the Layers panel and change the Blend Mode to Multiply to blend the blocks with the face. Next click the ‘Add Layer Mask’ icon in the Layers panel, then grab the Brush tool and paint with black over the image to hide the parts of the blocks layer that appear outside the face.
- We need to use the other blocks images to cover the rest of the face. Go to the next image then prepare and convert to black and white as before. Select the blocks and copy them in, then position and mask the layer. We’ve added another layer for the blocks over the neck here.
- Highlight the bottom layer then click the new layer icon, then grab the Brush tool. Hold Alt and click to sample one of the shadowy tones in the plain floor, then – using a large soft brush – paint over the body to hide the parts outside the blocks. Add a mask and use it to fine-tune what’s visible on this layer.
- The blocks along the bottom here look a little messy, so we can sample the skin tones and paint to make them look more uniform. Make a new layer above the background layer then grab the Brush tool. Alt-click to sample the skin then paint over the blocks to make them pink and match the skin tone.
- Open another block image and use the Lasso tool to make a selection of some of the scattered blocks over the floor, then copy into the main image. Set the Blend Mode to Multiply and lighten the layer with Curves (Cmd/Ctrl+M) then mask the edges to blend them in.
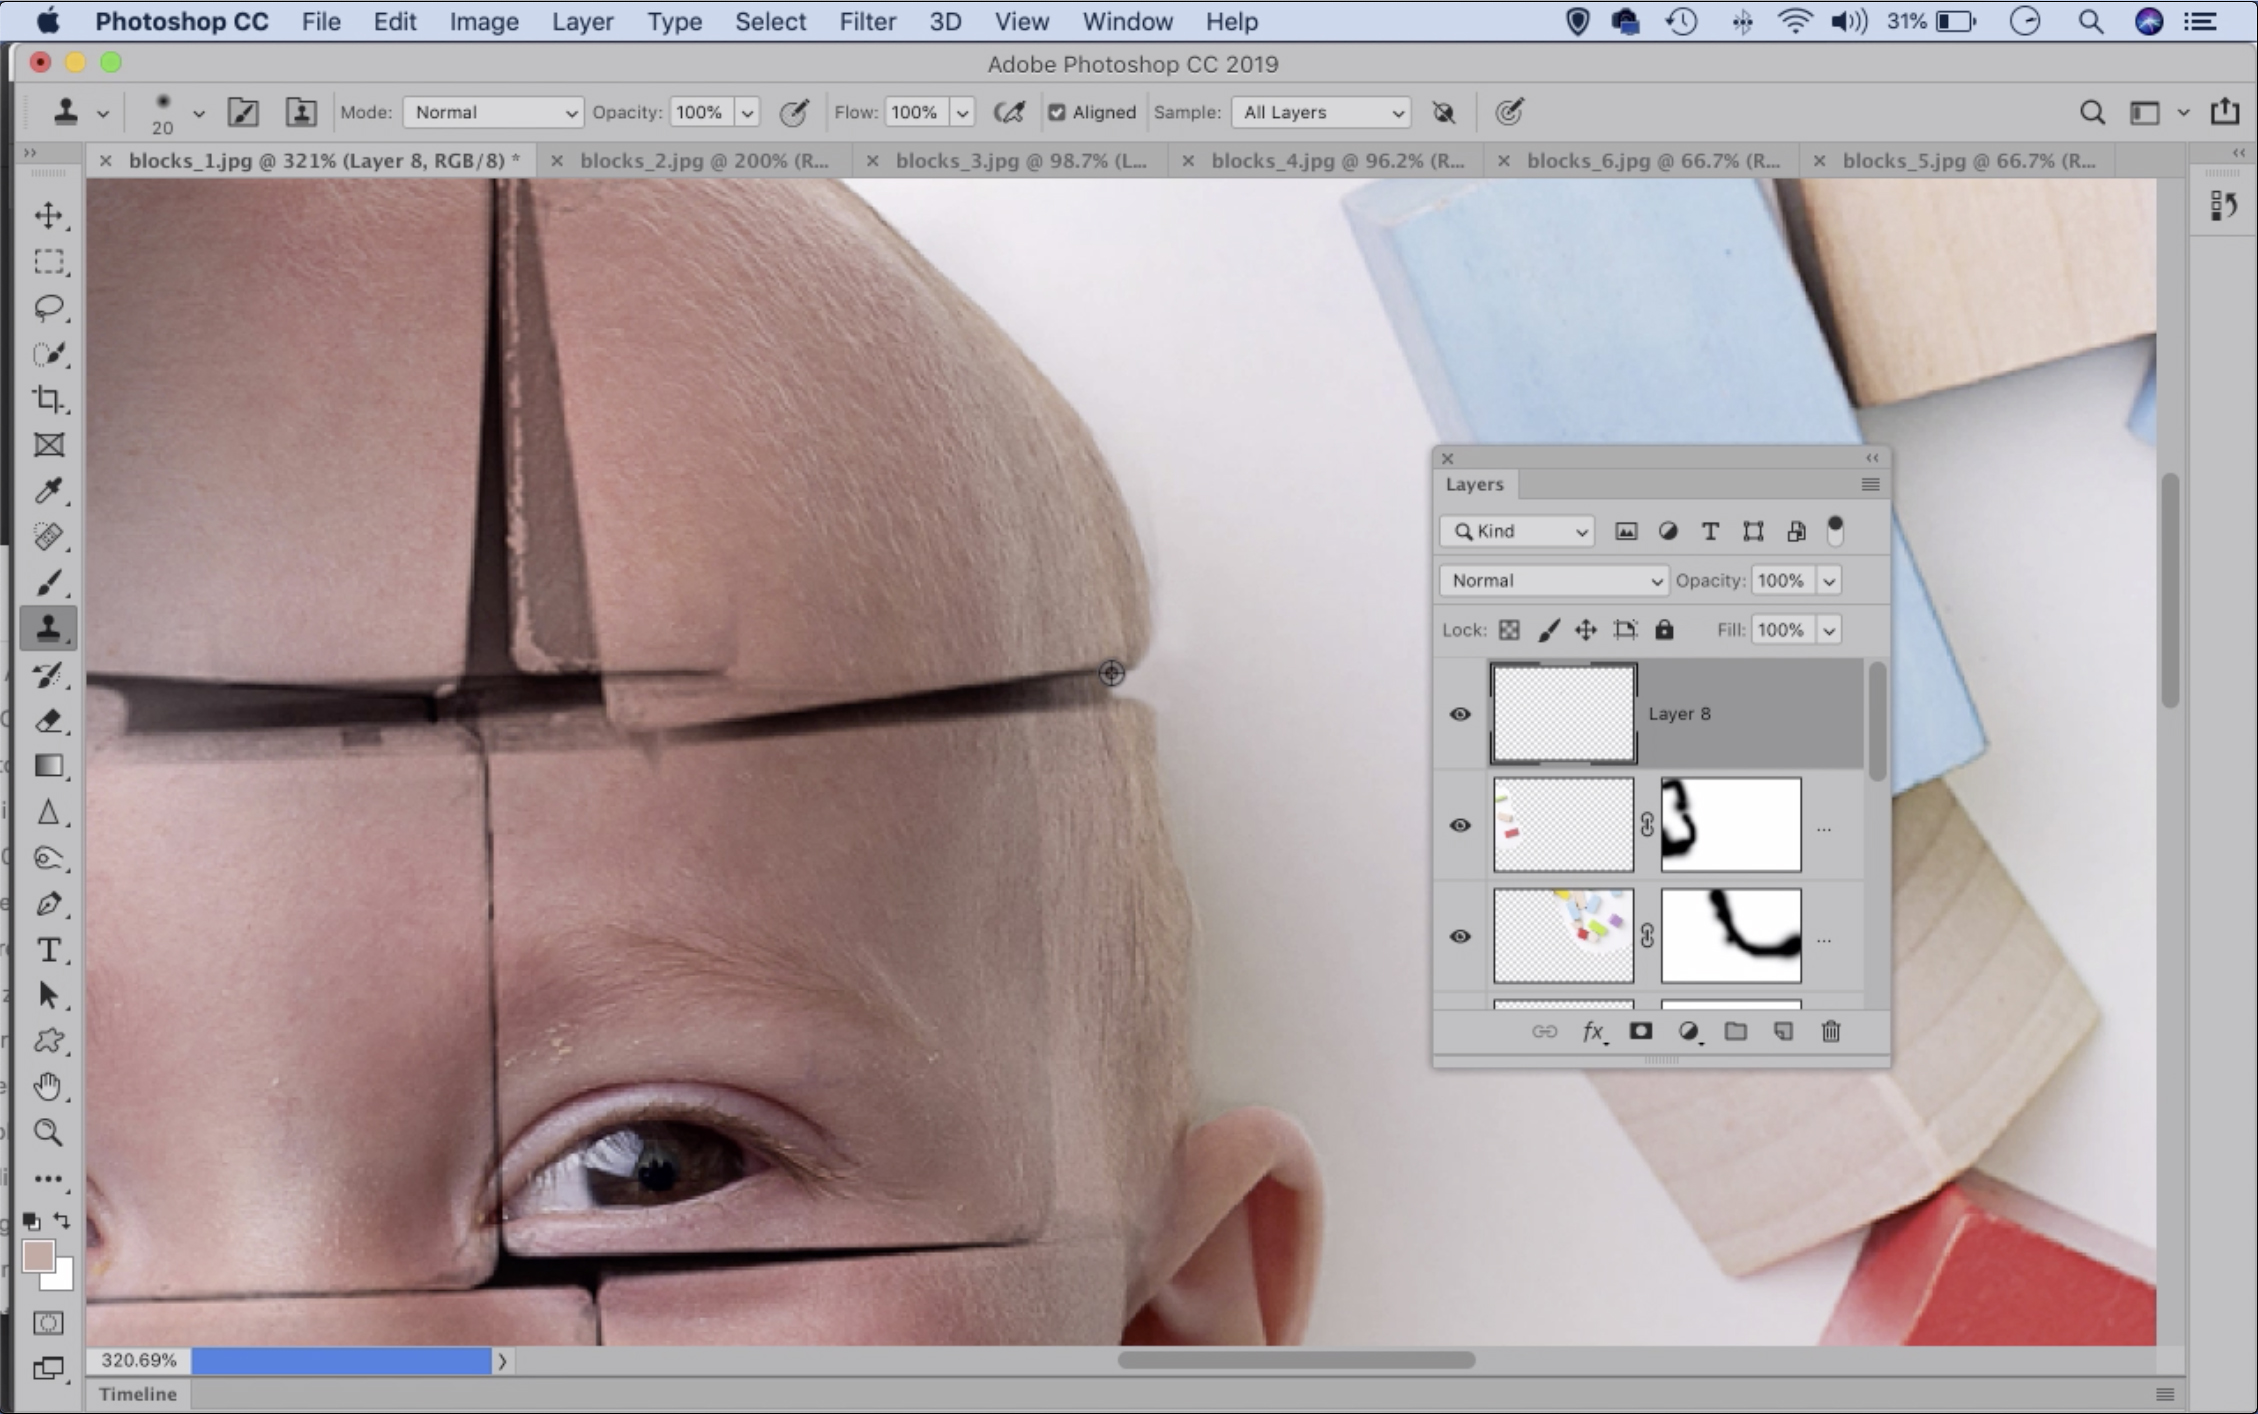
- Make a new layer then grab the Clone tool. Set Sample: All Layers in the tool options then zoom in close and use the Clone tool to tidy messy areas. Hit Cmd/Ctrl+Shift+Alt+E to merge a copy of all layers then go to Filter>Camera Raw Filter for tonal tweaks.
You might also like the best photo editing software: image editors for novices through to pros. These are the 10 best online photography courses – from beginner guides to masterclasses.
The best camera deals, reviews, product advice, and unmissable photography news, direct to your inbox!
The lead technique writer on Digital Camera Magazine, PhotoPlus: The Canon Magazine and N-Photo: The Nikon Magazine, James is a fantastic general practice photographer with an enviable array of skills across every genre of photography.
Whether it's flash photography techniques like stroboscopic portraits, astrophotography projects like photographing the Northern Lights, or turning sound into art by making paint dance on a set of speakers, James' tutorials and projects are as creative as they are enjoyable.
He's also a wizard at the dark arts of Photoshop, Lightroom and Affinity Photo, and is capable of some genuine black magic in the digital darkroom, making him one of the leading authorities on photo editing software and techniques.
