How to shoot a single-frame time-lapse
Adrian Davies shows you how to display the passage of time affecting your subject in a composite image
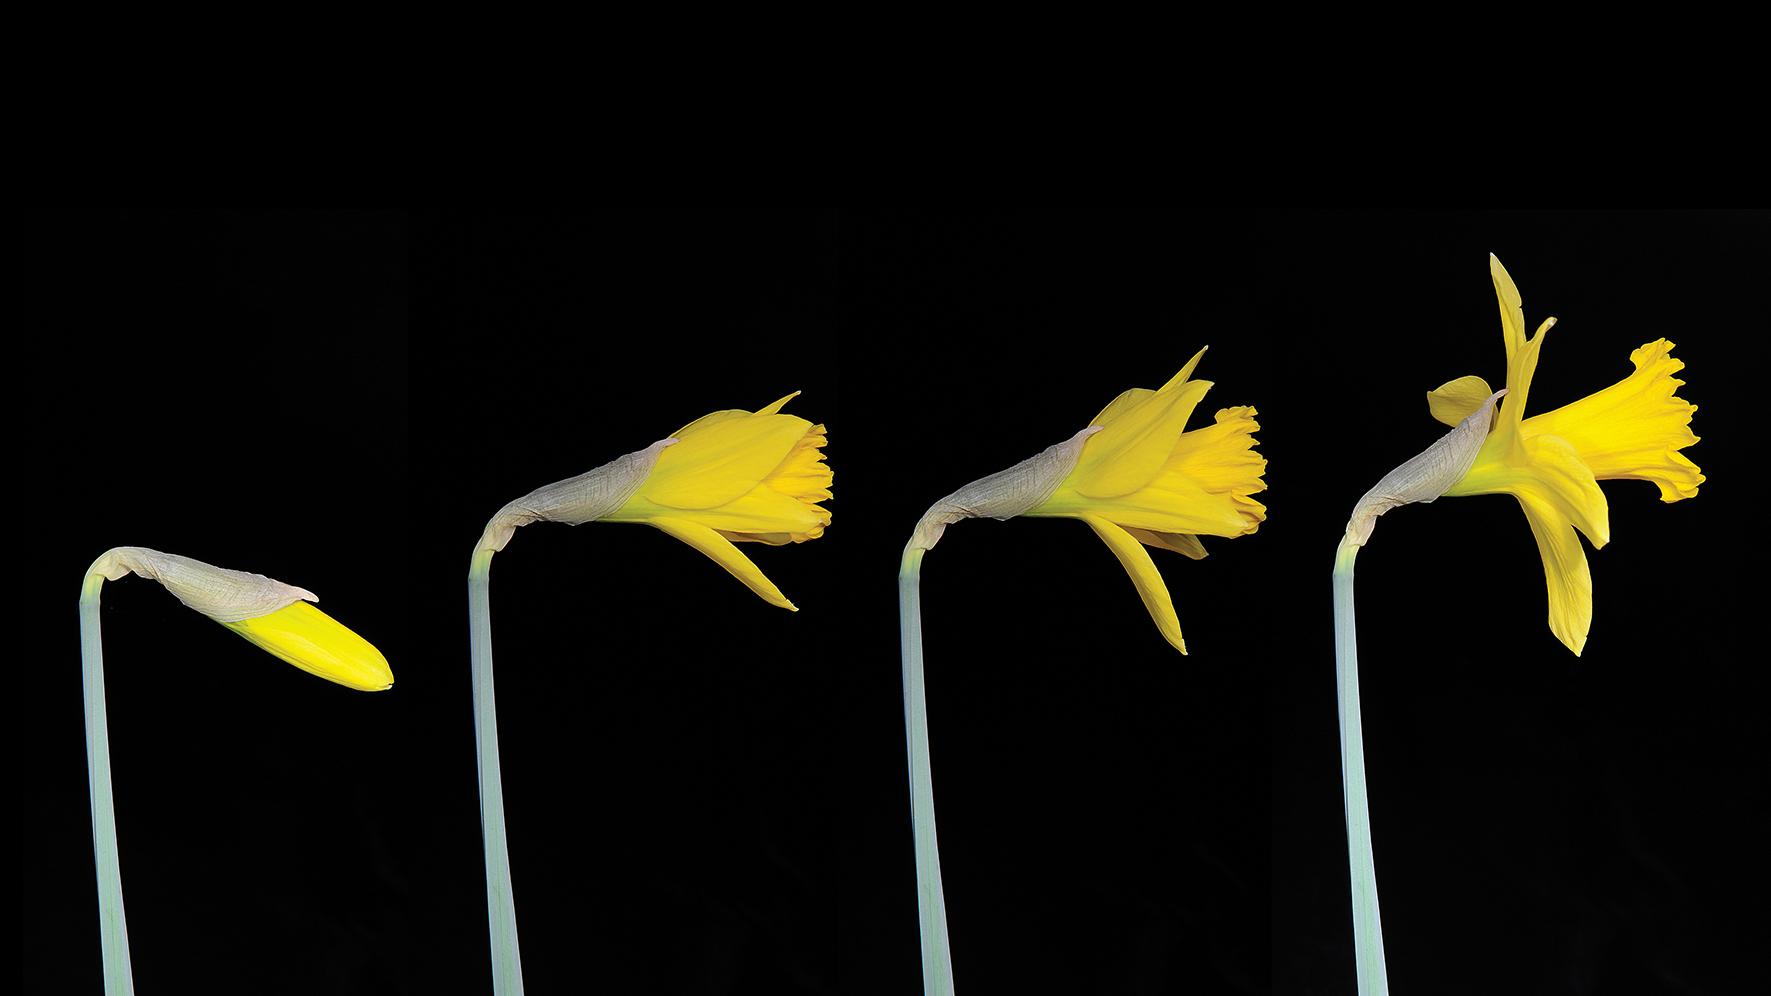
You’ll surely be familiar with the stunning time-lapse sequences seen in wildlife documentaries of plants growing, flowers opening or butterflies metamorphosing.
Many digital cameras now incorporate timers that enable you to shoot time-lapse sequences of this kind, although these are output as video footage. But is possible to produce a similar effect, presenting time-lapse sequences in a single image, albeit of simpler subjects.
By shooting the same subject over a period of time, then incorporating the images into one frame, you can get a good idea of growth or movement. For clarity, it is probably best to limit the number of individual images to no more than five. Try to choose a subject where there is a definite difference between each individual image.
Read more: How to create your first time-lapse video | Best timelapse cameras
The key to success is to keep the subject in the same place for each exposure, so that you are only recording the change, or growth, and also to use the same lighting and magnification for each image.
One of the simplest subjects to start with is a daffodil bud. Place it in a vase with water against a plain background (white or black work best, to make the post-production stitching easier), and clamp it so that it doesn’t move during the photographic session. The camera will need to be mounted on a solid tripod. In the example shown here, the exposures were about three hours apart, but you can simply judge by eye when to shoot the next exposure.
Composite technique 1
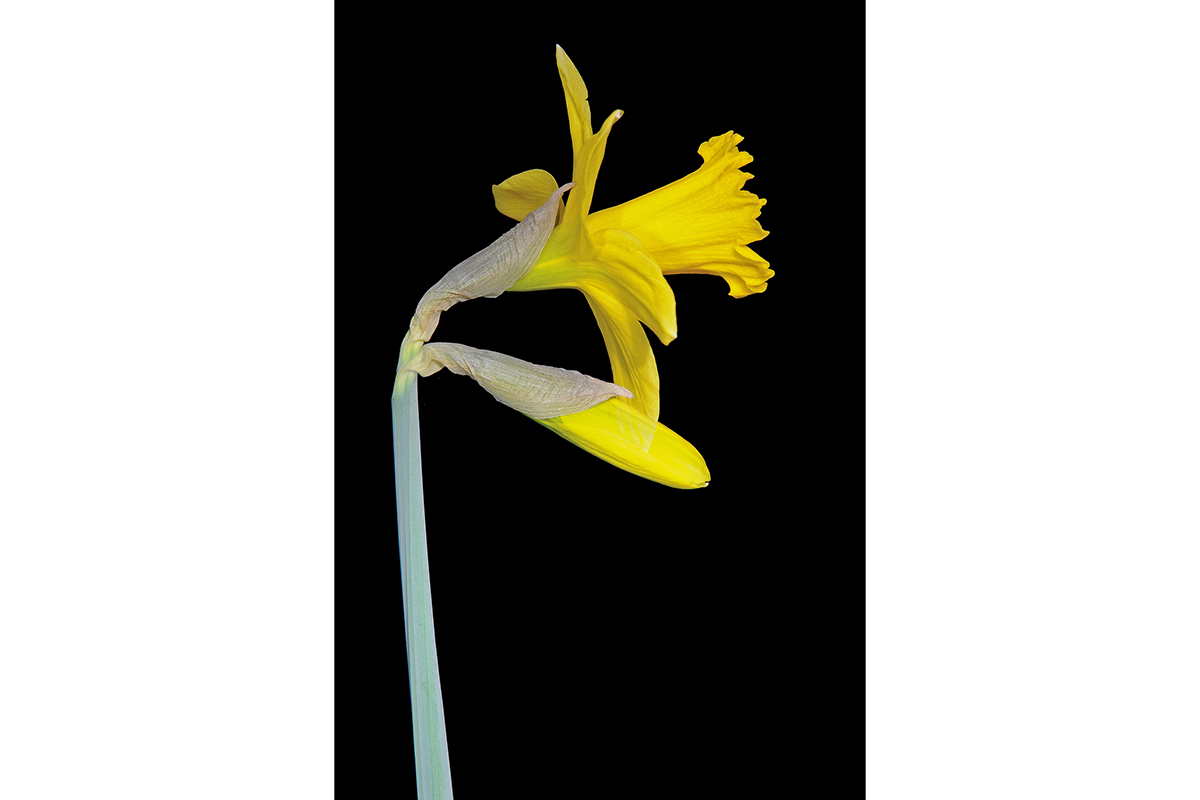
In Photoshop (or another photo editing program with a layers facility), open the first image, and extend the canvas width by 300% (Image > Canvas Size) to fit three images, keeping the colour of the canvas extension colour the same as that of the image (in this case black).
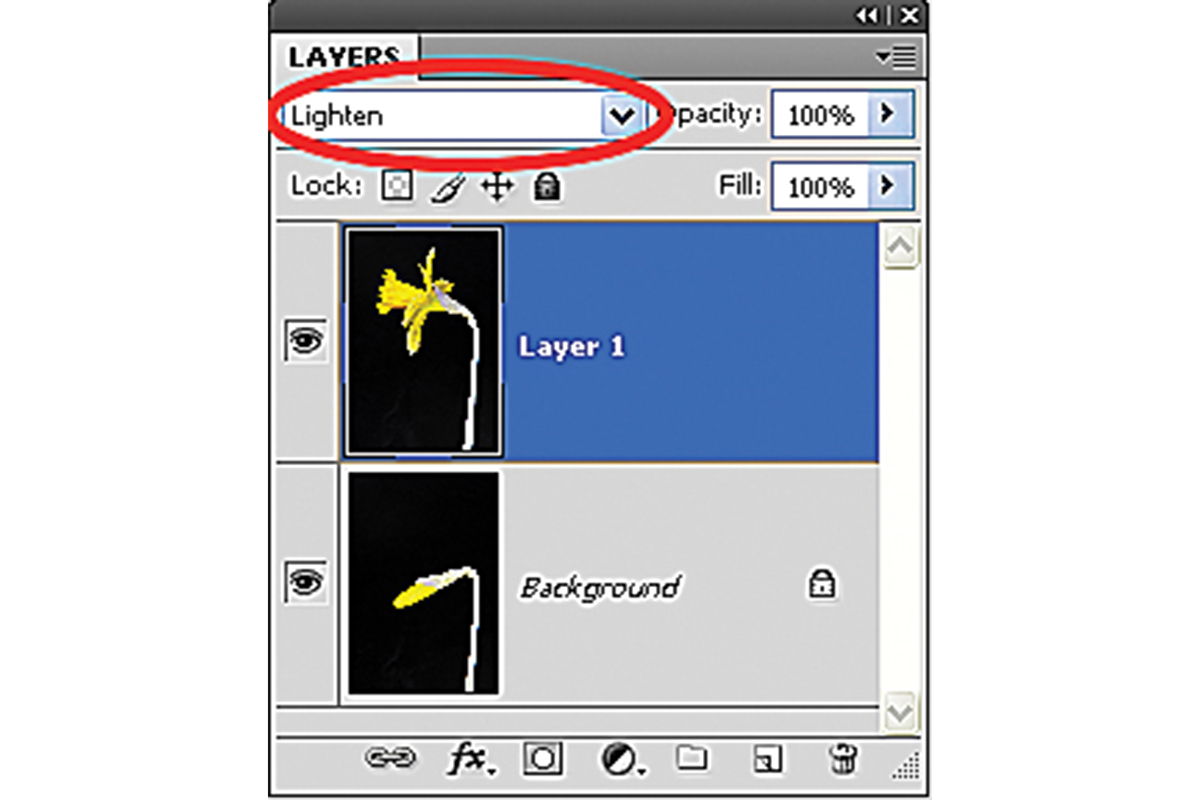
Open the second image, select it, copy it, and paste it into the first image. Use the Move tool to align it perfectly. Now open the third image and repeat the process. Finally, when the composition is completed to your satisfaction, flatten the image layers, and crop any excess background. To emphasise the difference between the first and last images, I superimposed them using the Layers facility in Photoshop, using the Lighten Blending mode.
Composite technique 2
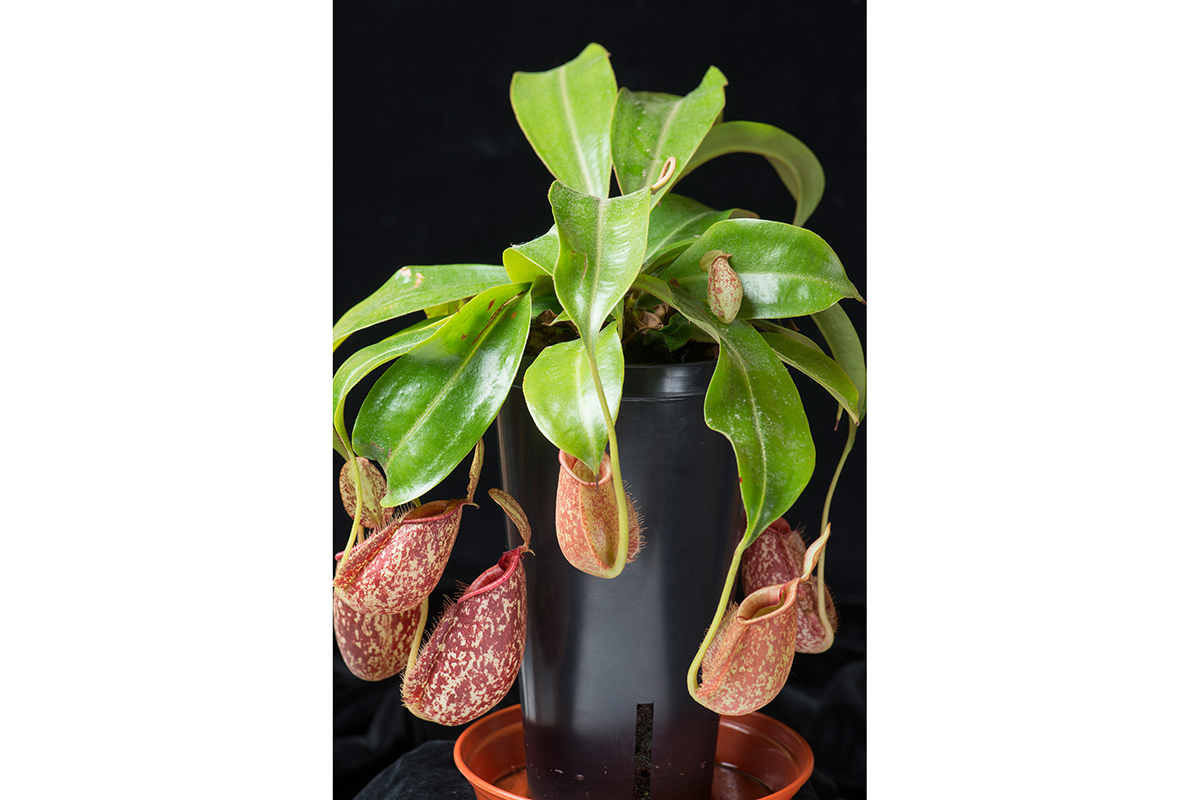
With the carnivorous Pitcher plant (Nepenthes) shown here, I adopted a slightly different technique. The plant had pitchers of different ages on it, so I photographed different pitchers, stitching them together afterwards.
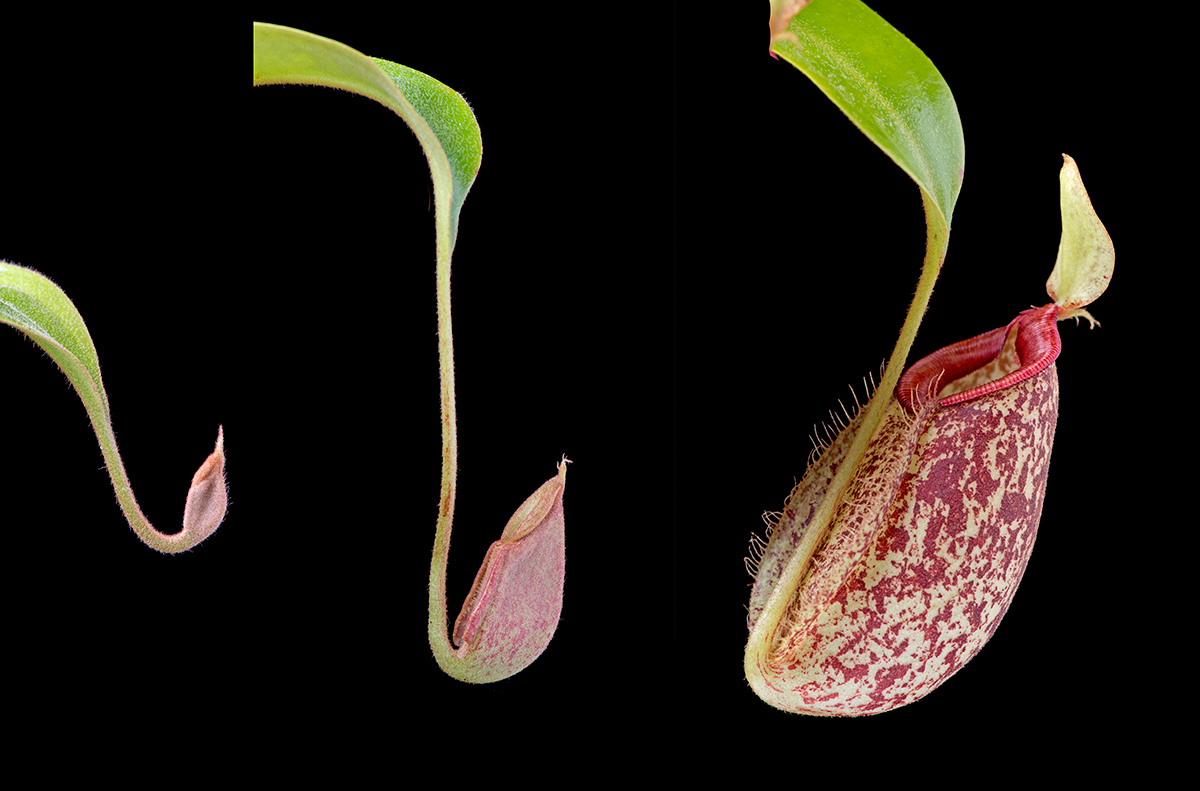
If you adopt this technique, make sure to keep the magnification, orientation and lighting the same for each shot. You may need to paint out extraneous parts of the subject, such as the pot.
Read more: 215 photography tips, techniques and video tutorials
Get the Digital Camera World Newsletter
The best camera deals, reviews, product advice, and unmissable photography news, direct to your inbox!
The sister print publication to this website, Digital Camera Magazine is Britain's best-selling photography publication – and it can also be purchased outside the United Kingdom as Digital Camera World.
Digital Camera Magazine is packed with more expert advice and more inspirational images than any other title, with the sole aim of helping you become a better photographer. Every issue we also bring you a selection of great gifts which are designed to help you get more from your photography – everything from tips cards and cheat sheets to free software and bookazines.
In addition to inspirational images, interviews, projects, mini tests and tutorials, each issue is packed with news, reviews and comparisons, as well as photographer vs photographer shootouts and head-to-head challenges using the best photo editing software.
The magazine is captained by Editor Niall Hampton.

