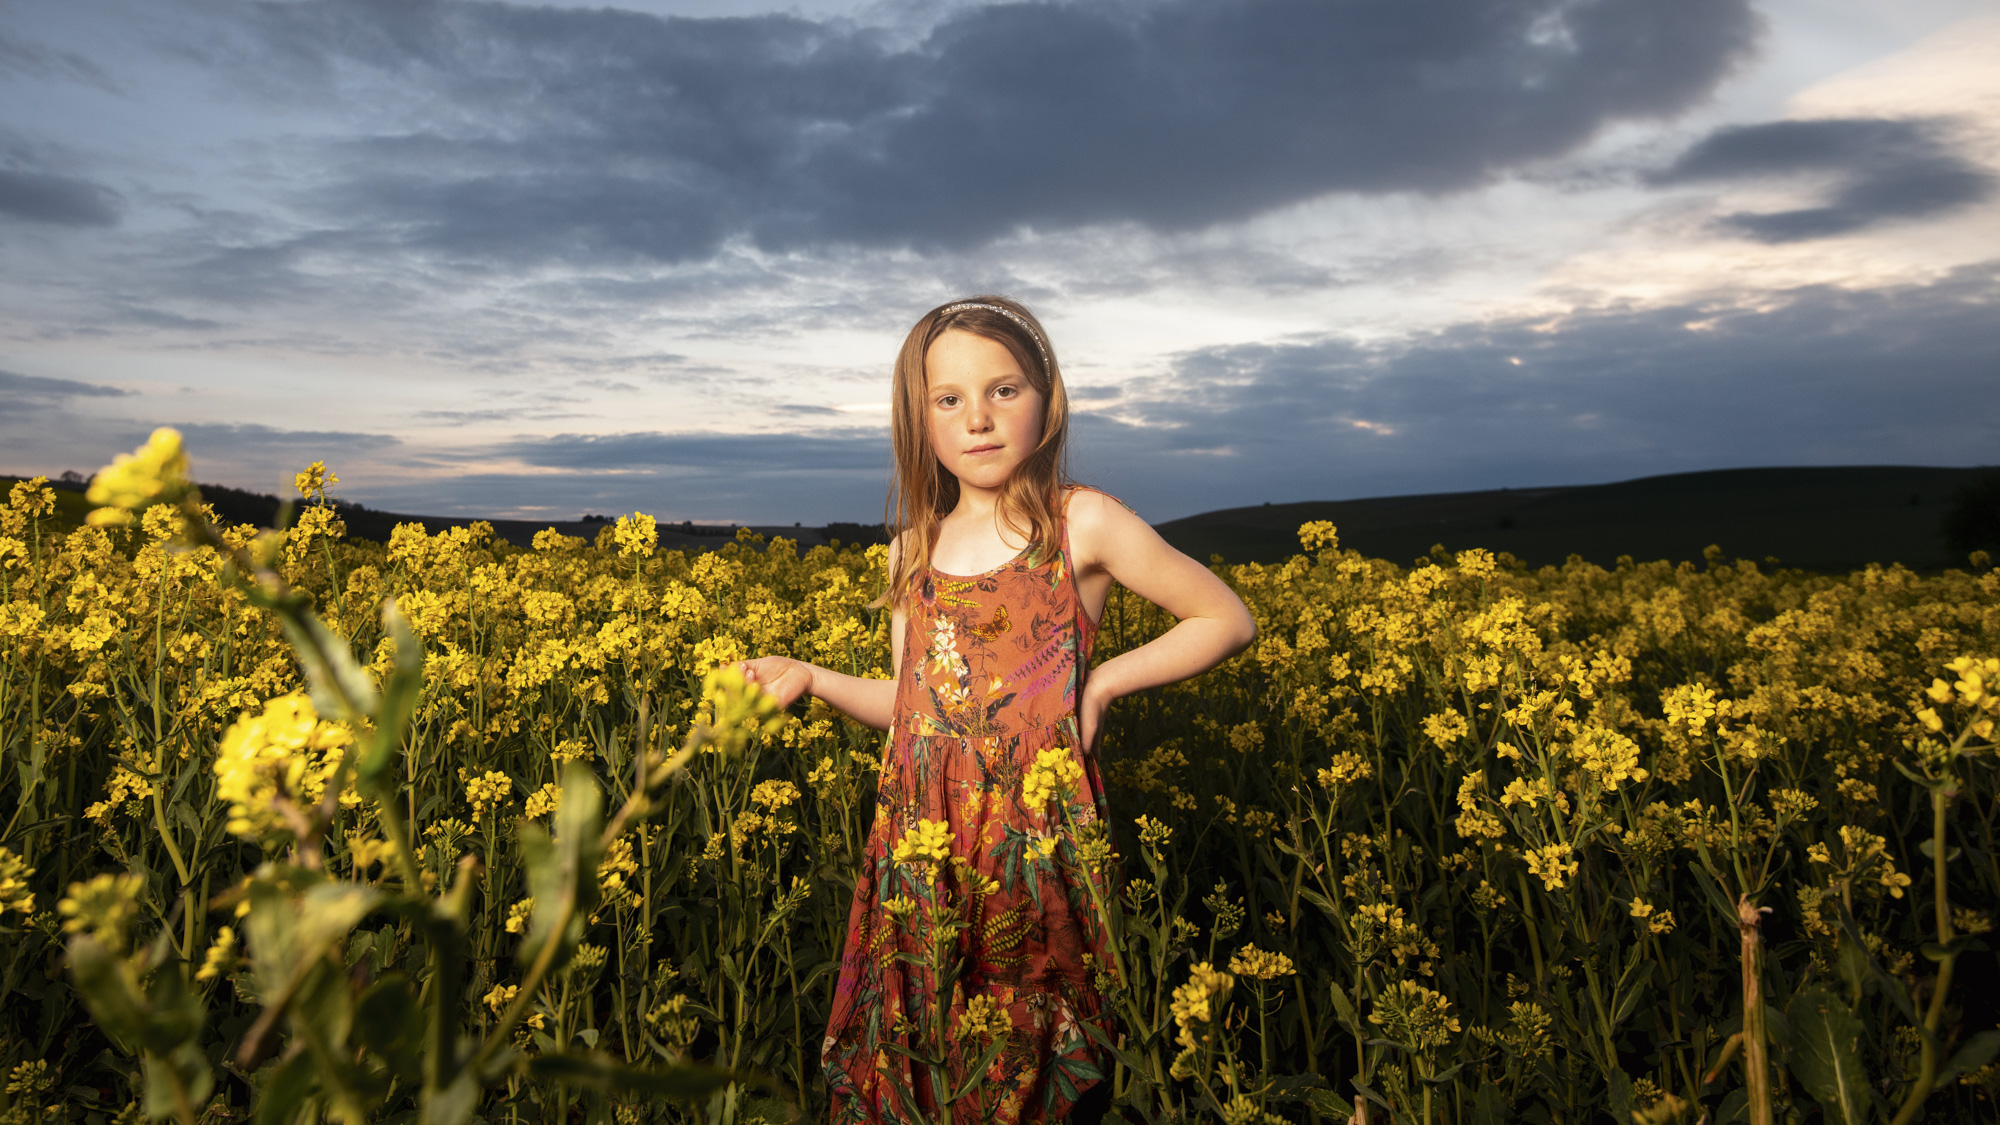
How to take amazing portraits at sunset using natural light and flash
Use flash to create beautifully lit sunset portraits at dusk, even if the sun doesn't appear!
Watch video: Capture brilliant sunset portraits with flash
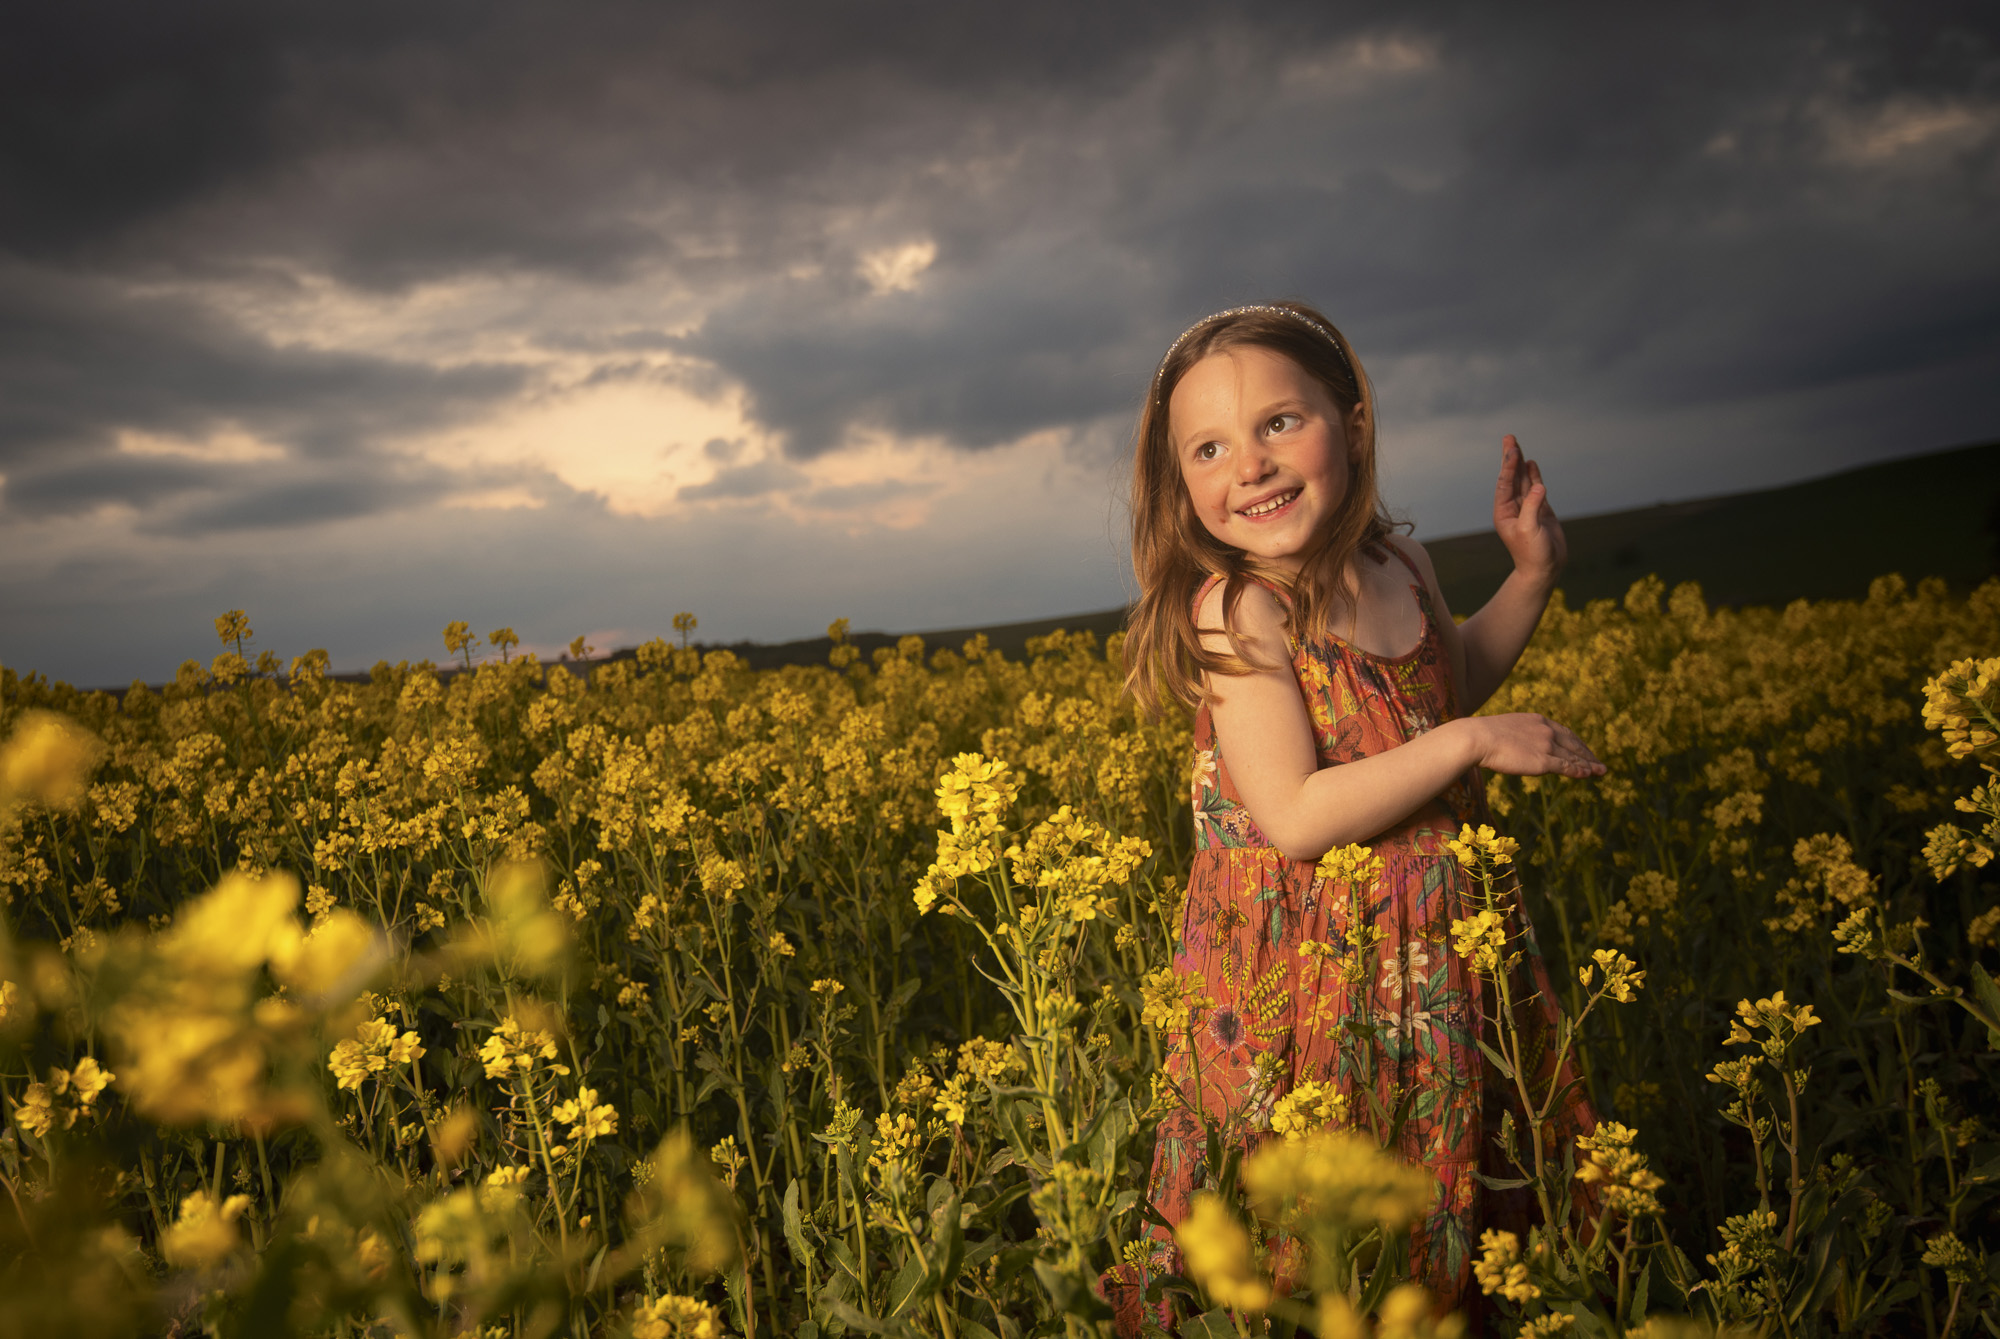
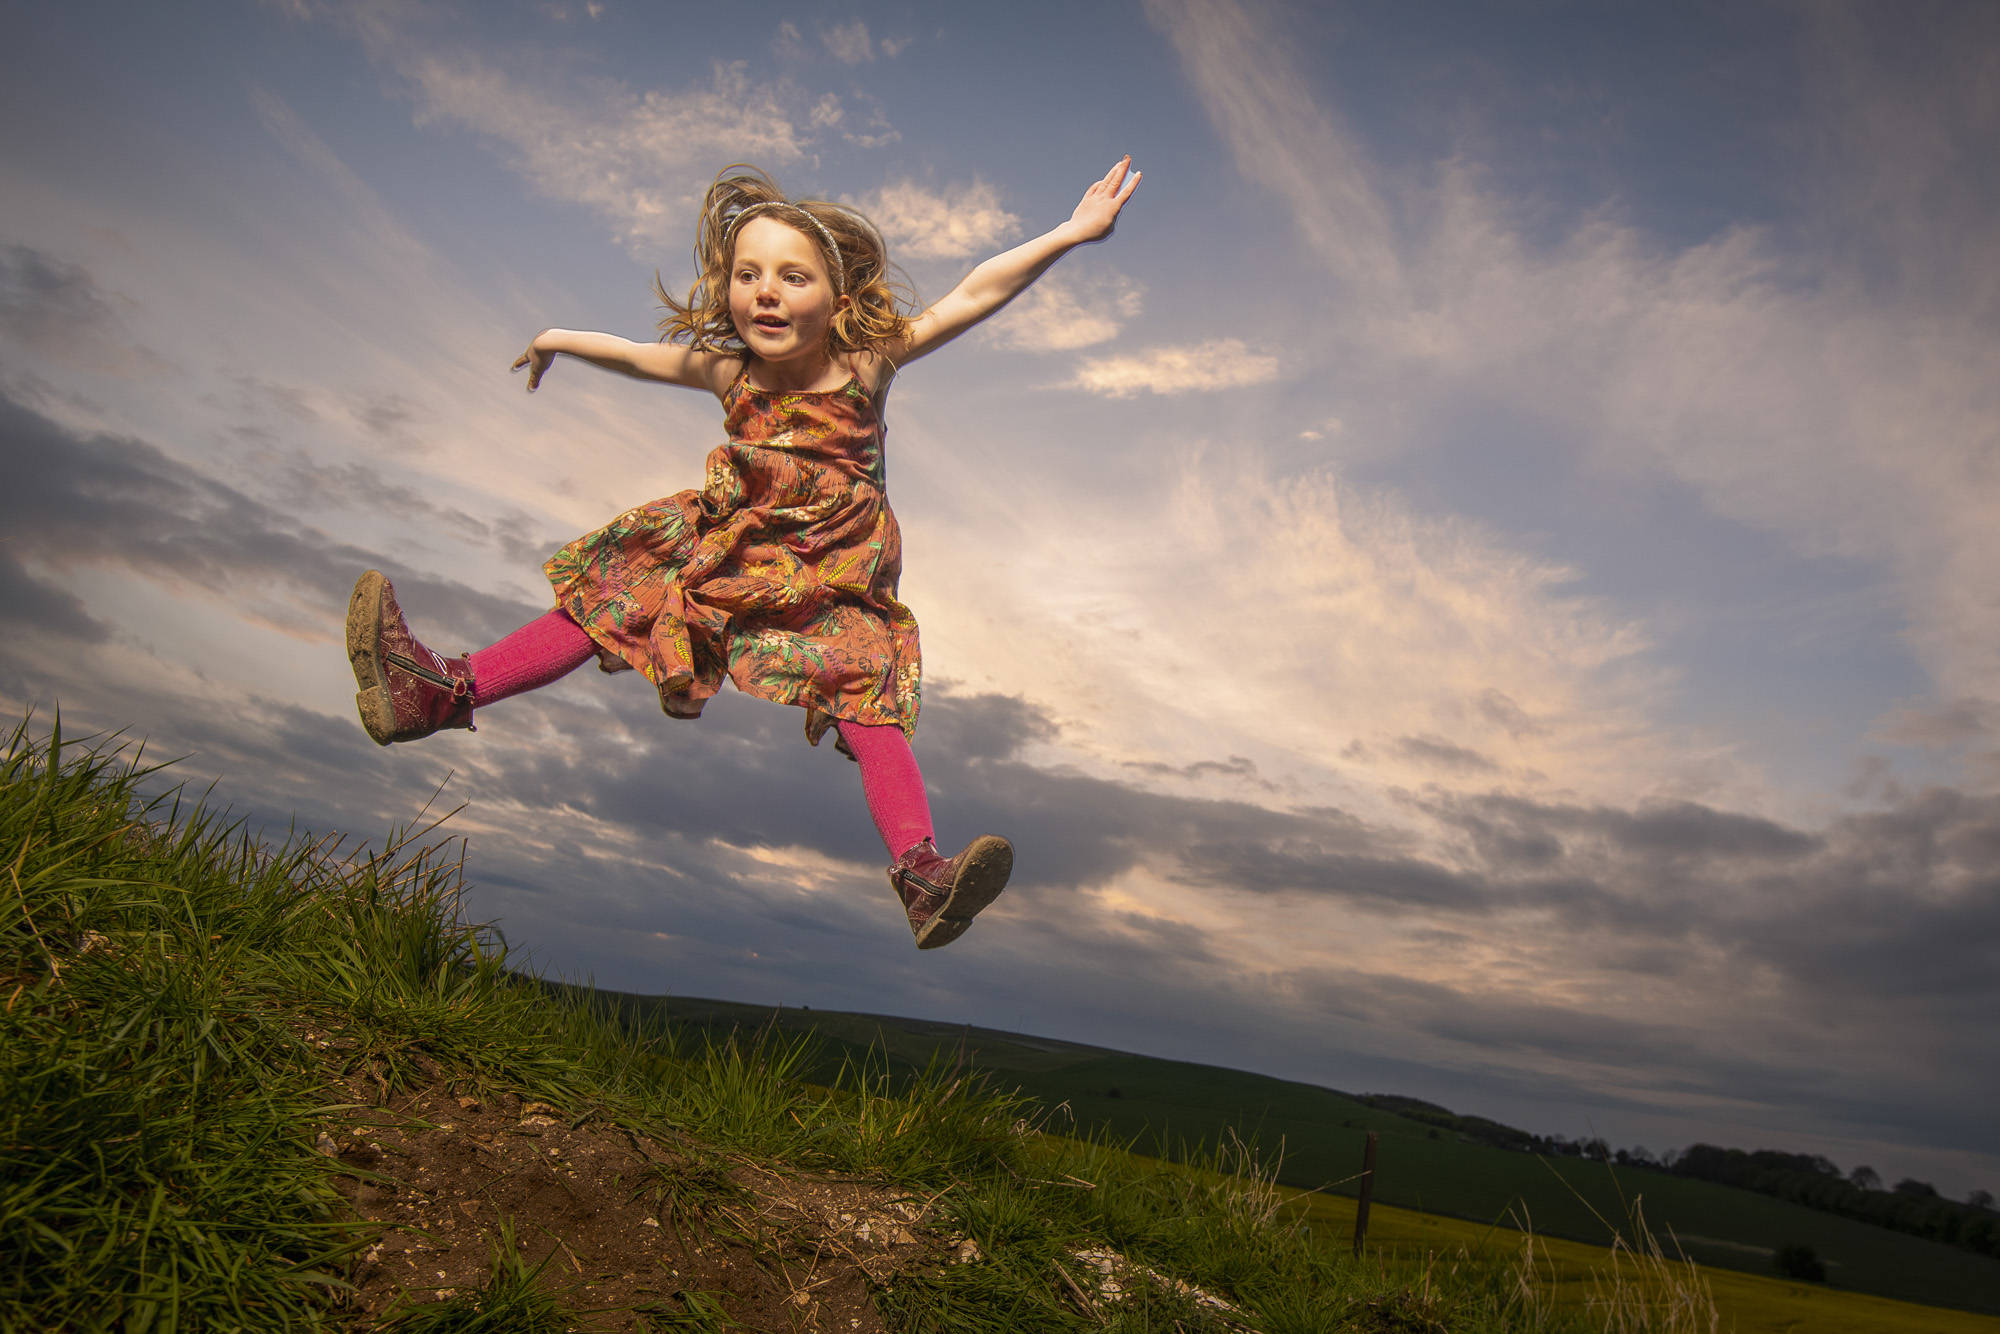
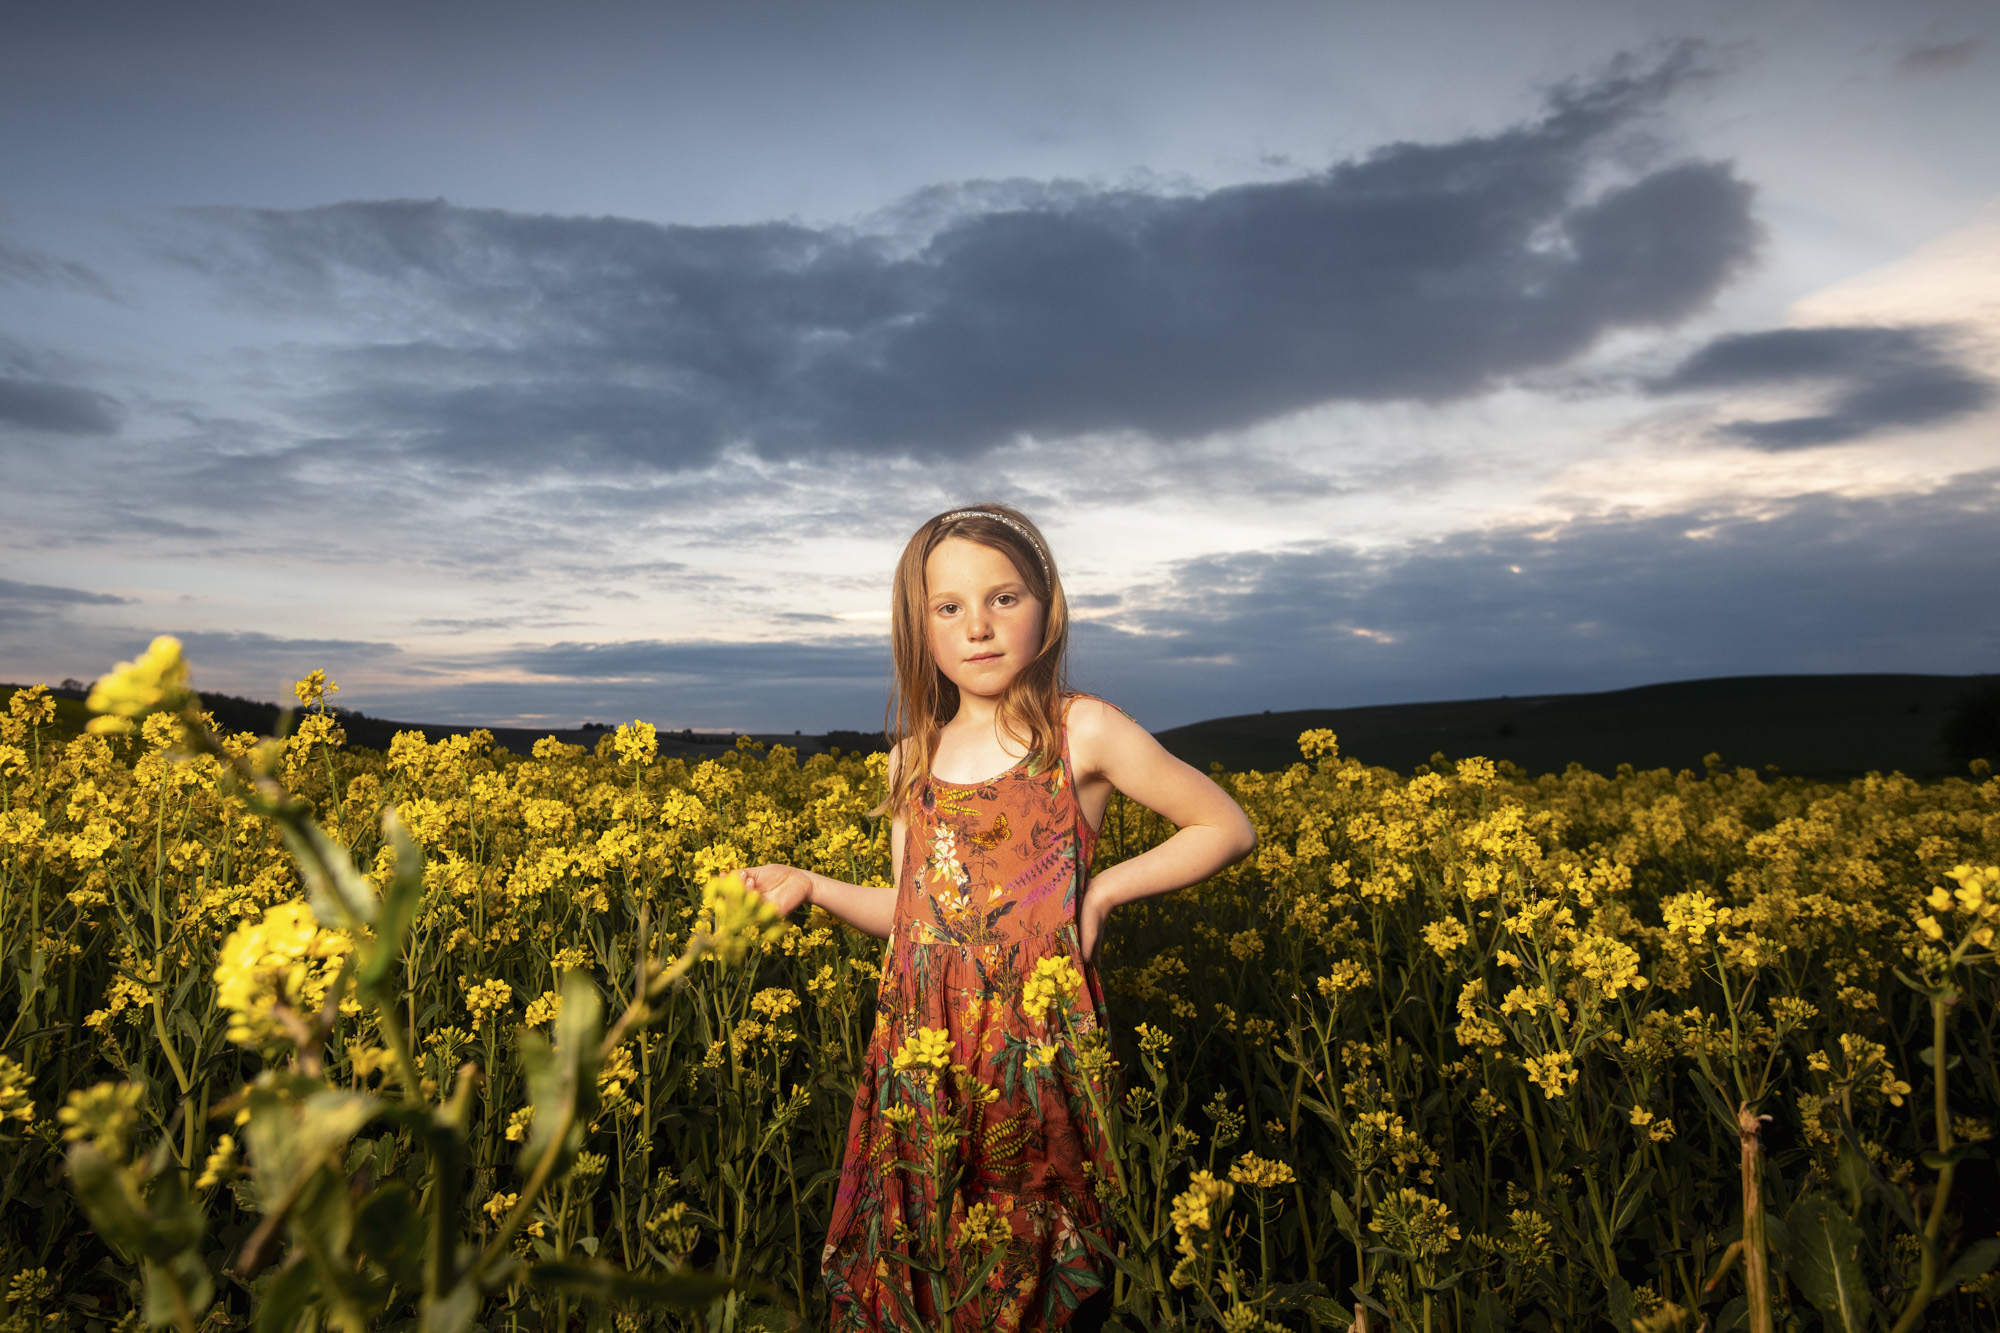
The magic hour has long been known as the perfect time of day to capture gorgeous landscape photos, but it’s being increasingly used by portrait photographers too. As the sun goes down the vibrant colours can create a stunning backdrop for your portraits. And even if the sky doesn’t erupt into colour, it’s still a great time to head out for dramatic clouds and portraits.
The key technical challenge that you have to overcome is the strong backlighting you get when shooting towards the setting sun. This makes it very tricky to get a balanced exposure, because the subject’s front will be in deep shade. If using the natural light alone we could expose for the shade, but this will blow out the sky; or we could expose for the bright sky, but then the subject will be in silhouette. Both options can lead to great portraits, but if we want to record detail in the sky and the subject at the same time we need to supplement the natural light with some of our own. An off-camera flash is ideal.
A pop of light at the right moment will let us balance out the bold clouds with the light on our subject for a stunning sunset portrait. When it comes to choosing the right light you could use a Speedlite for this, but a stand-alone flash unit gives you more control and power.
These kind of outdoor flash heads used to be prohibitively expensive, but these days you can find very reasonable options out there. When we can get our flash working in harmony with the setting sun, the results can be absolutely spectacular.
• Read more: Photography tips
1. Position the flash
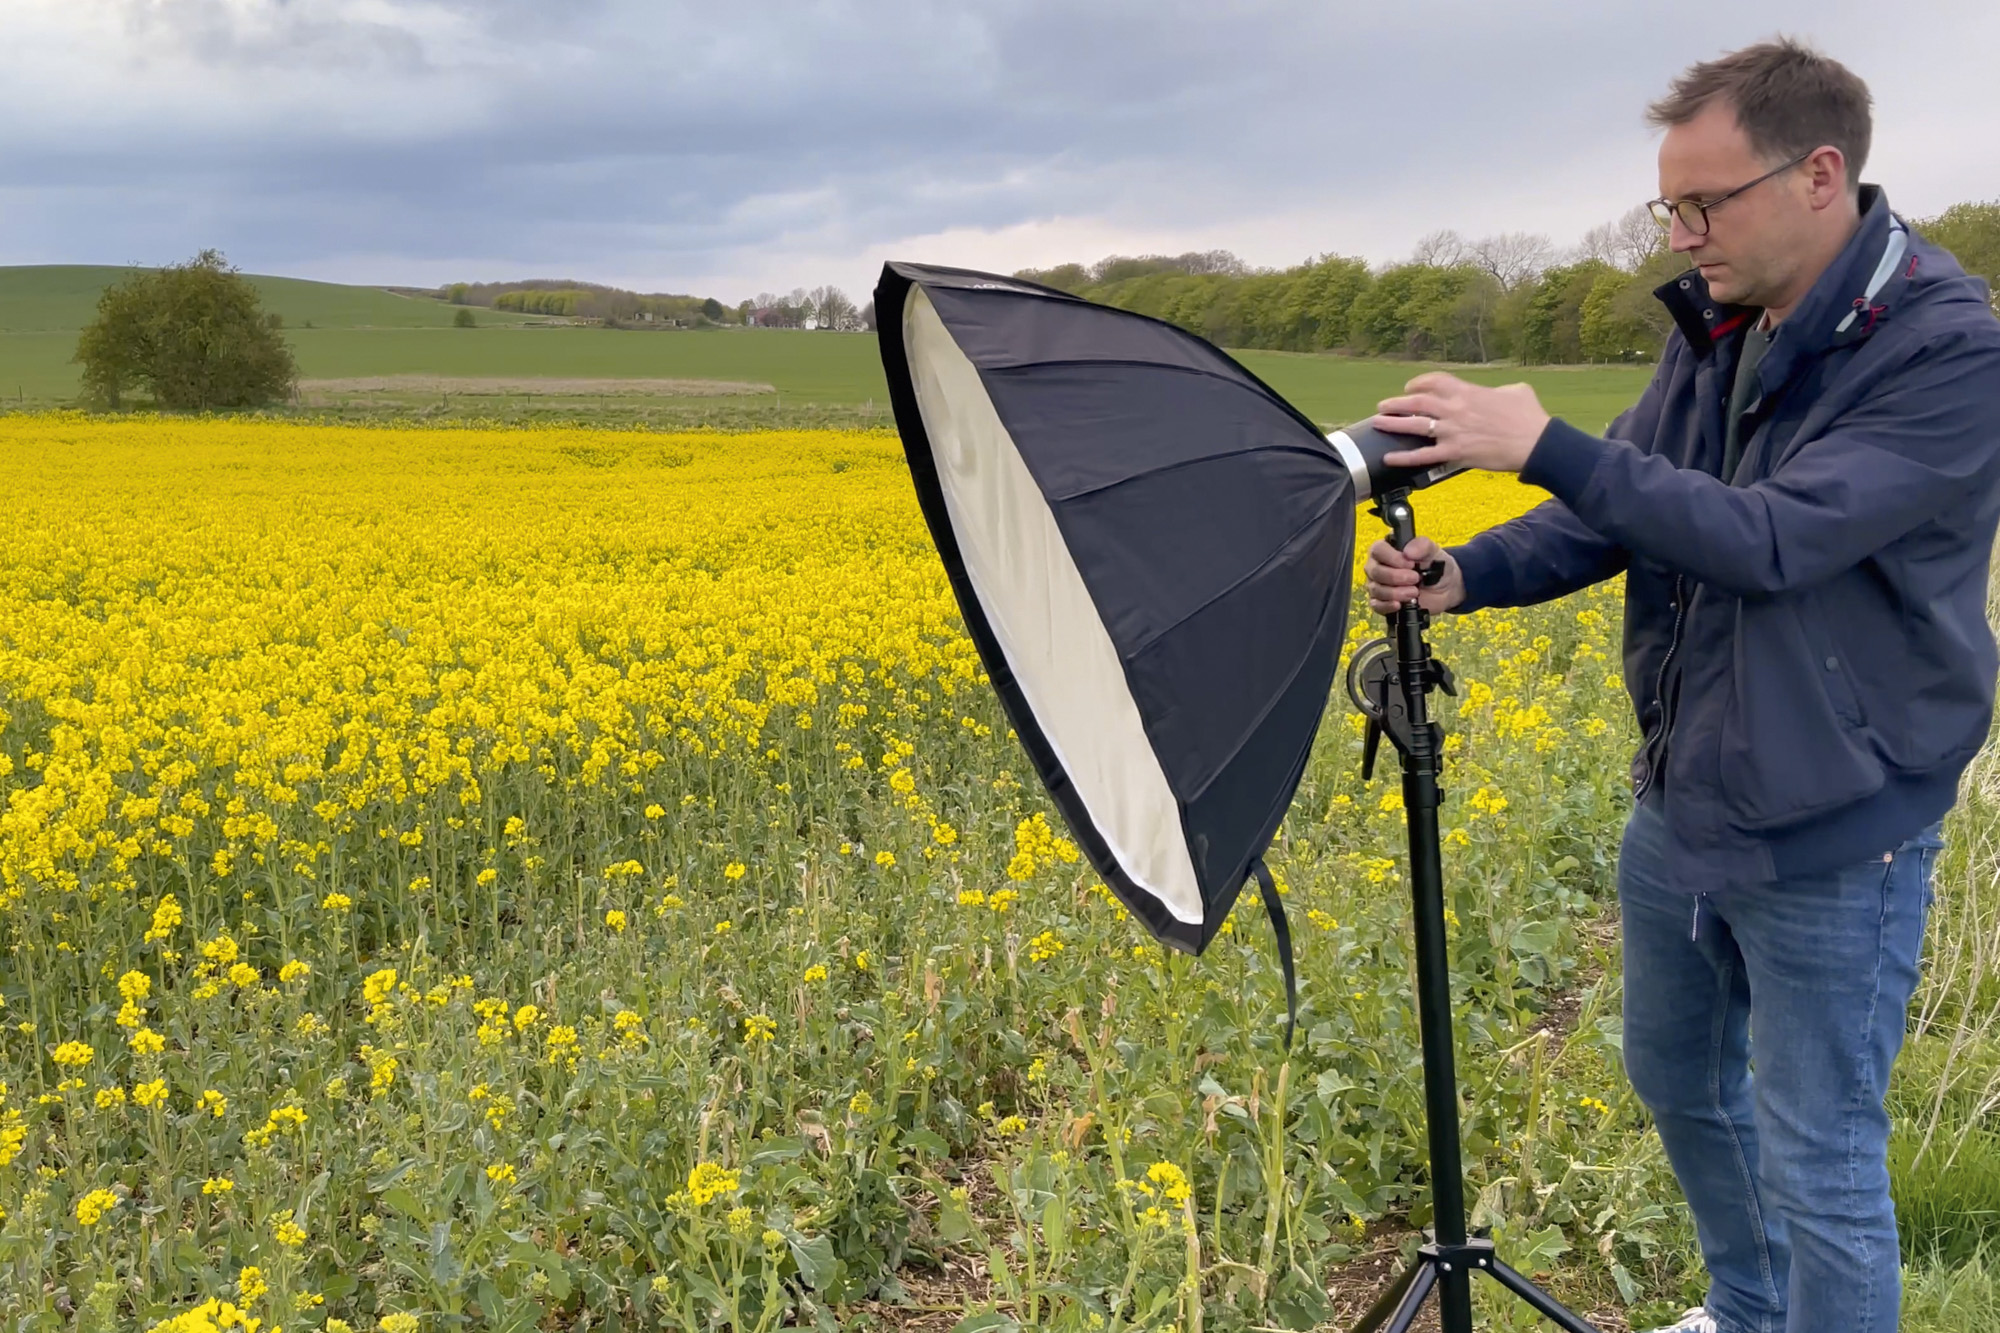
We can place off-camera flash wherever we like. You can put it to one side of subjects for strong directional light that complements the backlighting from the sun. Try feathering the flash so that it’s angled across the front of the subject. This gives more even light.
2. Expose for the ambient light
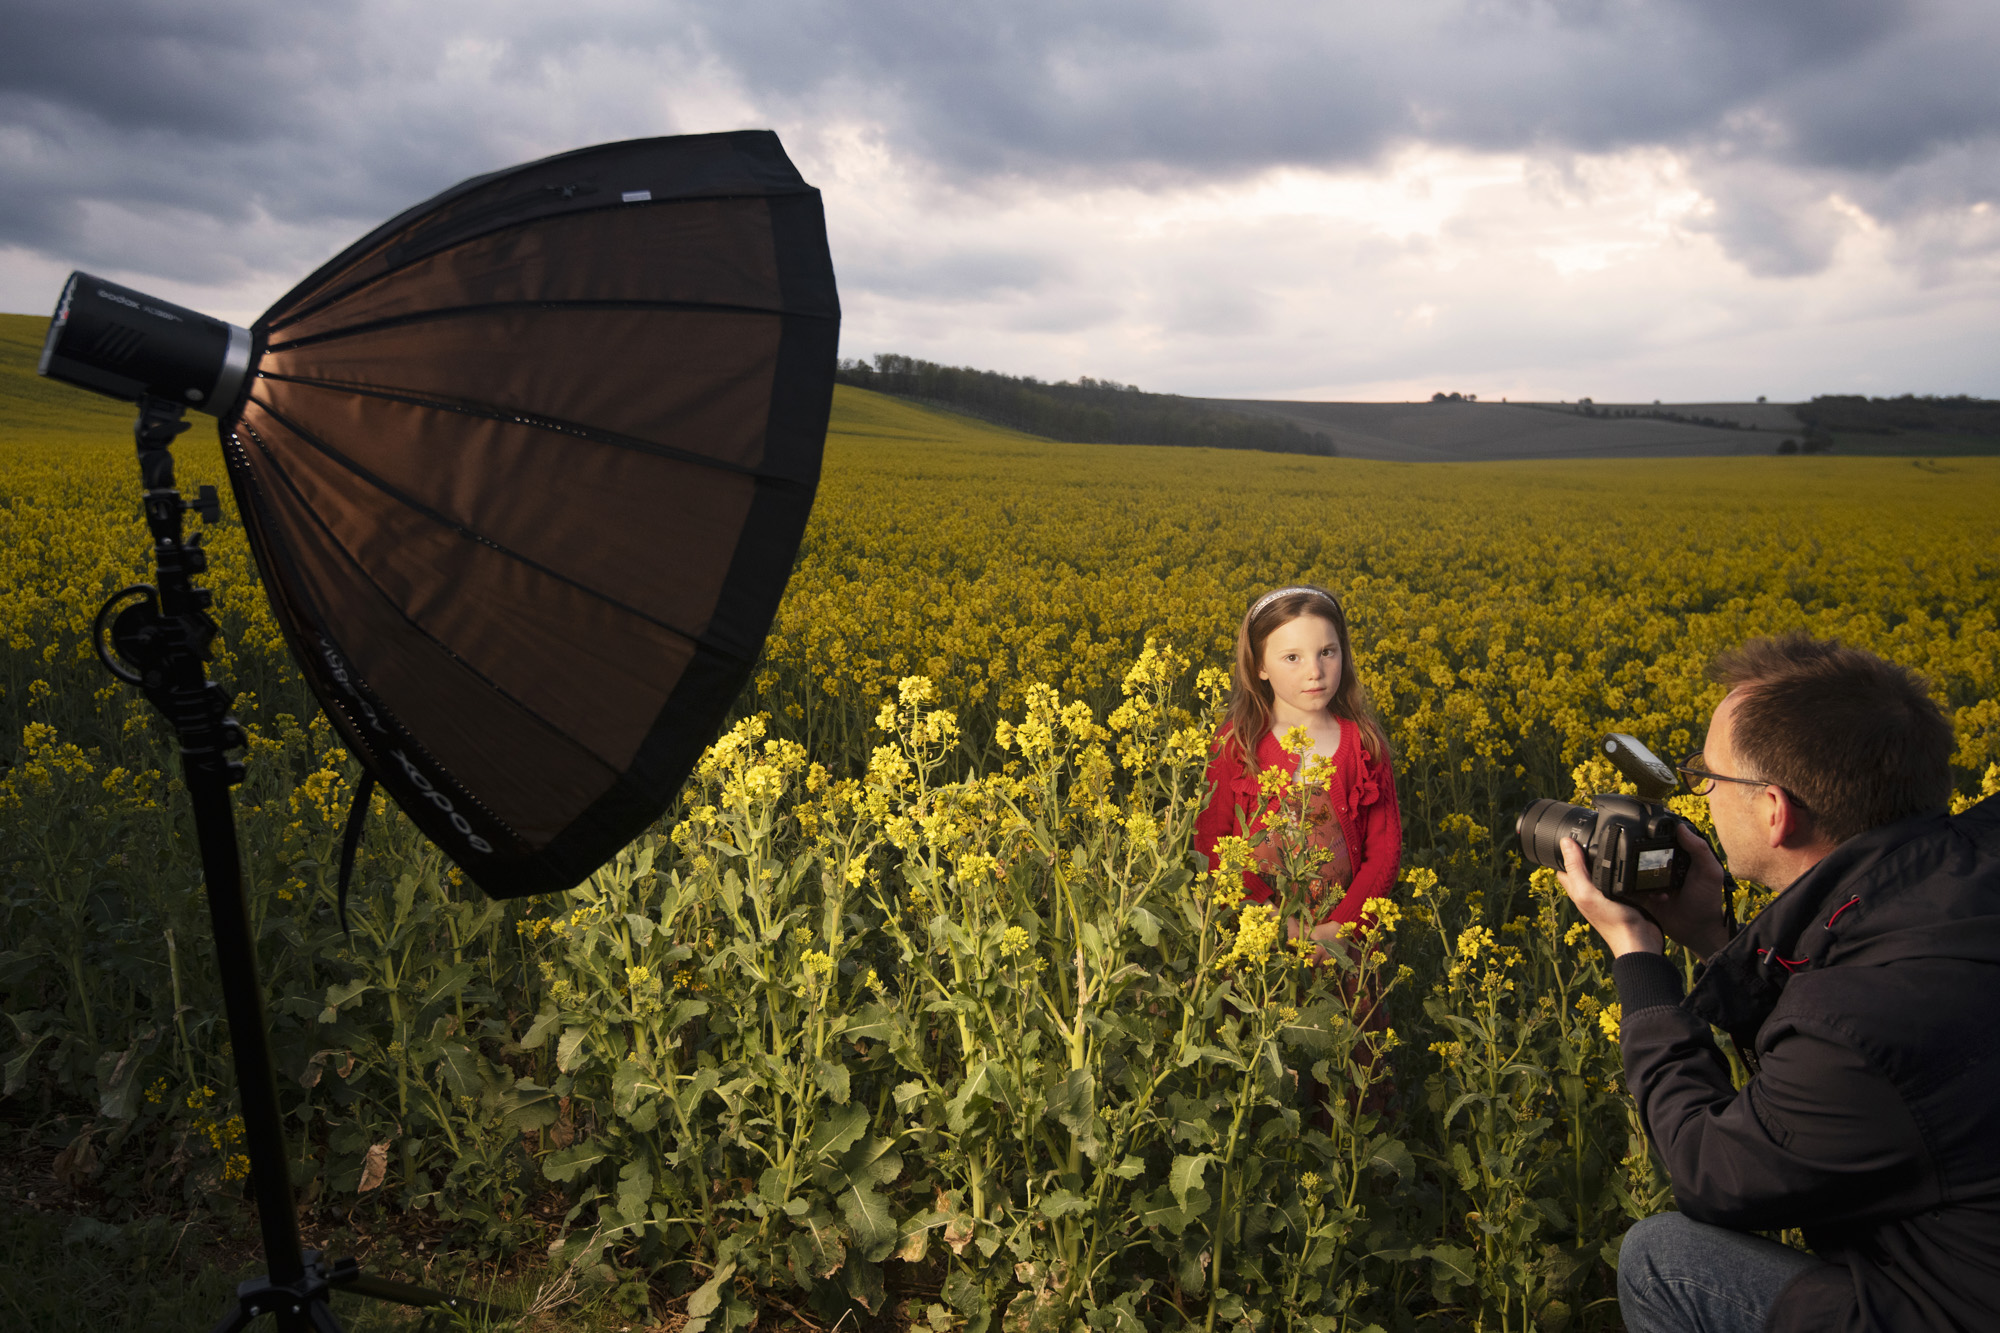
Before turning on the flash we work out an exposure that best captures the sky. Set your camera to Manual with shutter speed at 1/200 sec and ISO100. Start with an aperture around f/8 then take a test shot and vary it, until the sky looks right. Our aperture is f/5.6.
3. Turn on the flash
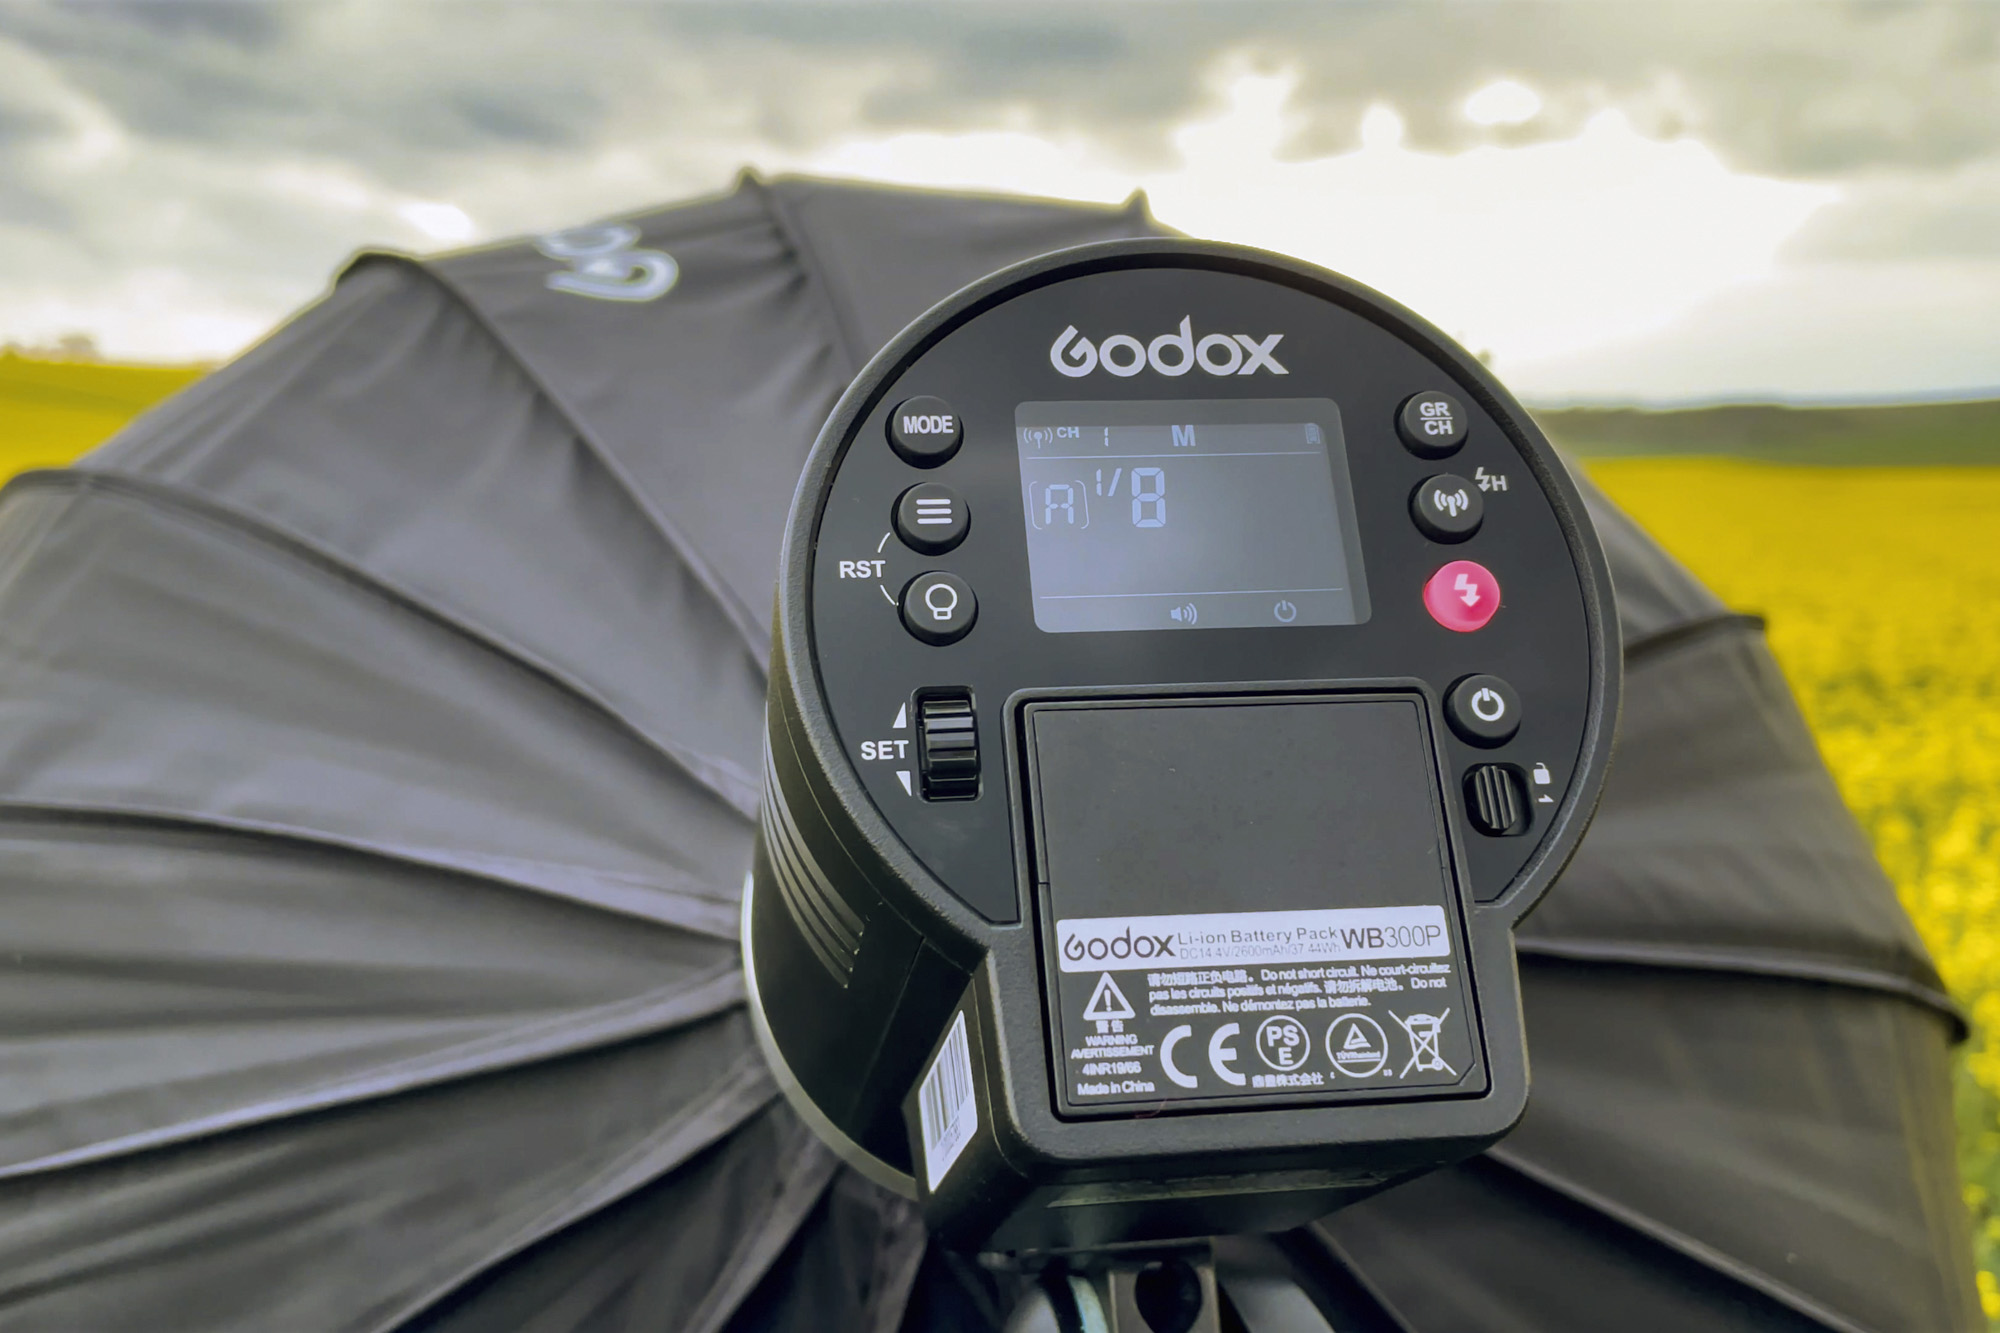
Next, turn on the flash and trigger, then take a few test shots to work out the best angle for the flash. We can adjust the strength of the light from the flash either by tweaking the power settings, or by moving the flash in closer or further from our subject.
4. Lift the subject
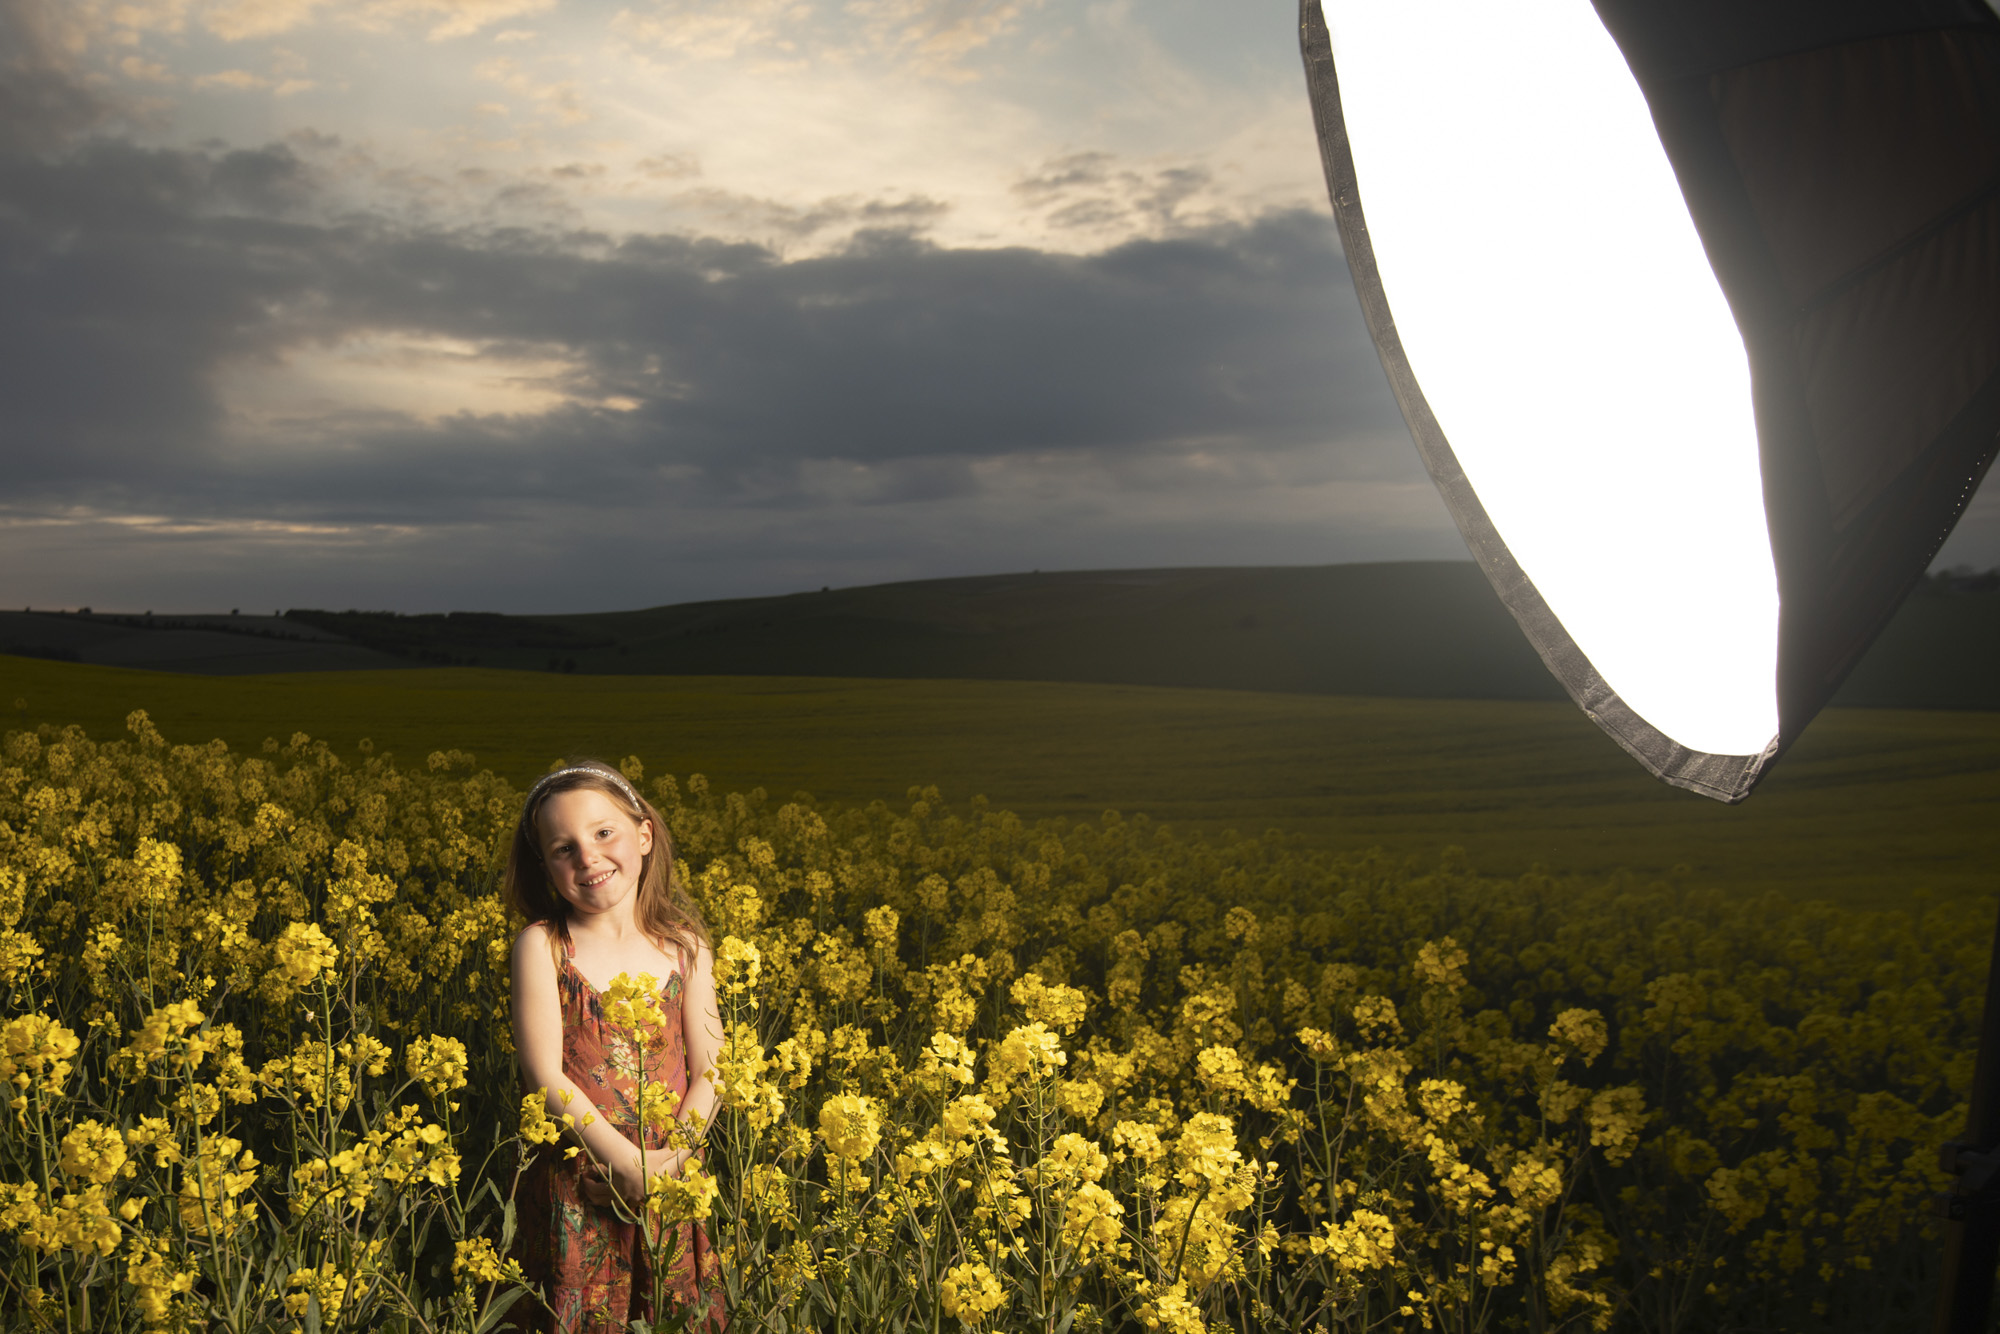
Leave the exposure settings as they are and adjust the strength of the flash until you find the right balance for your subject. You may want to position the subject so they block the sun, or perhaps have it peeking around the edge of the subject to create atmospheric flare.
05 Balance with fading light
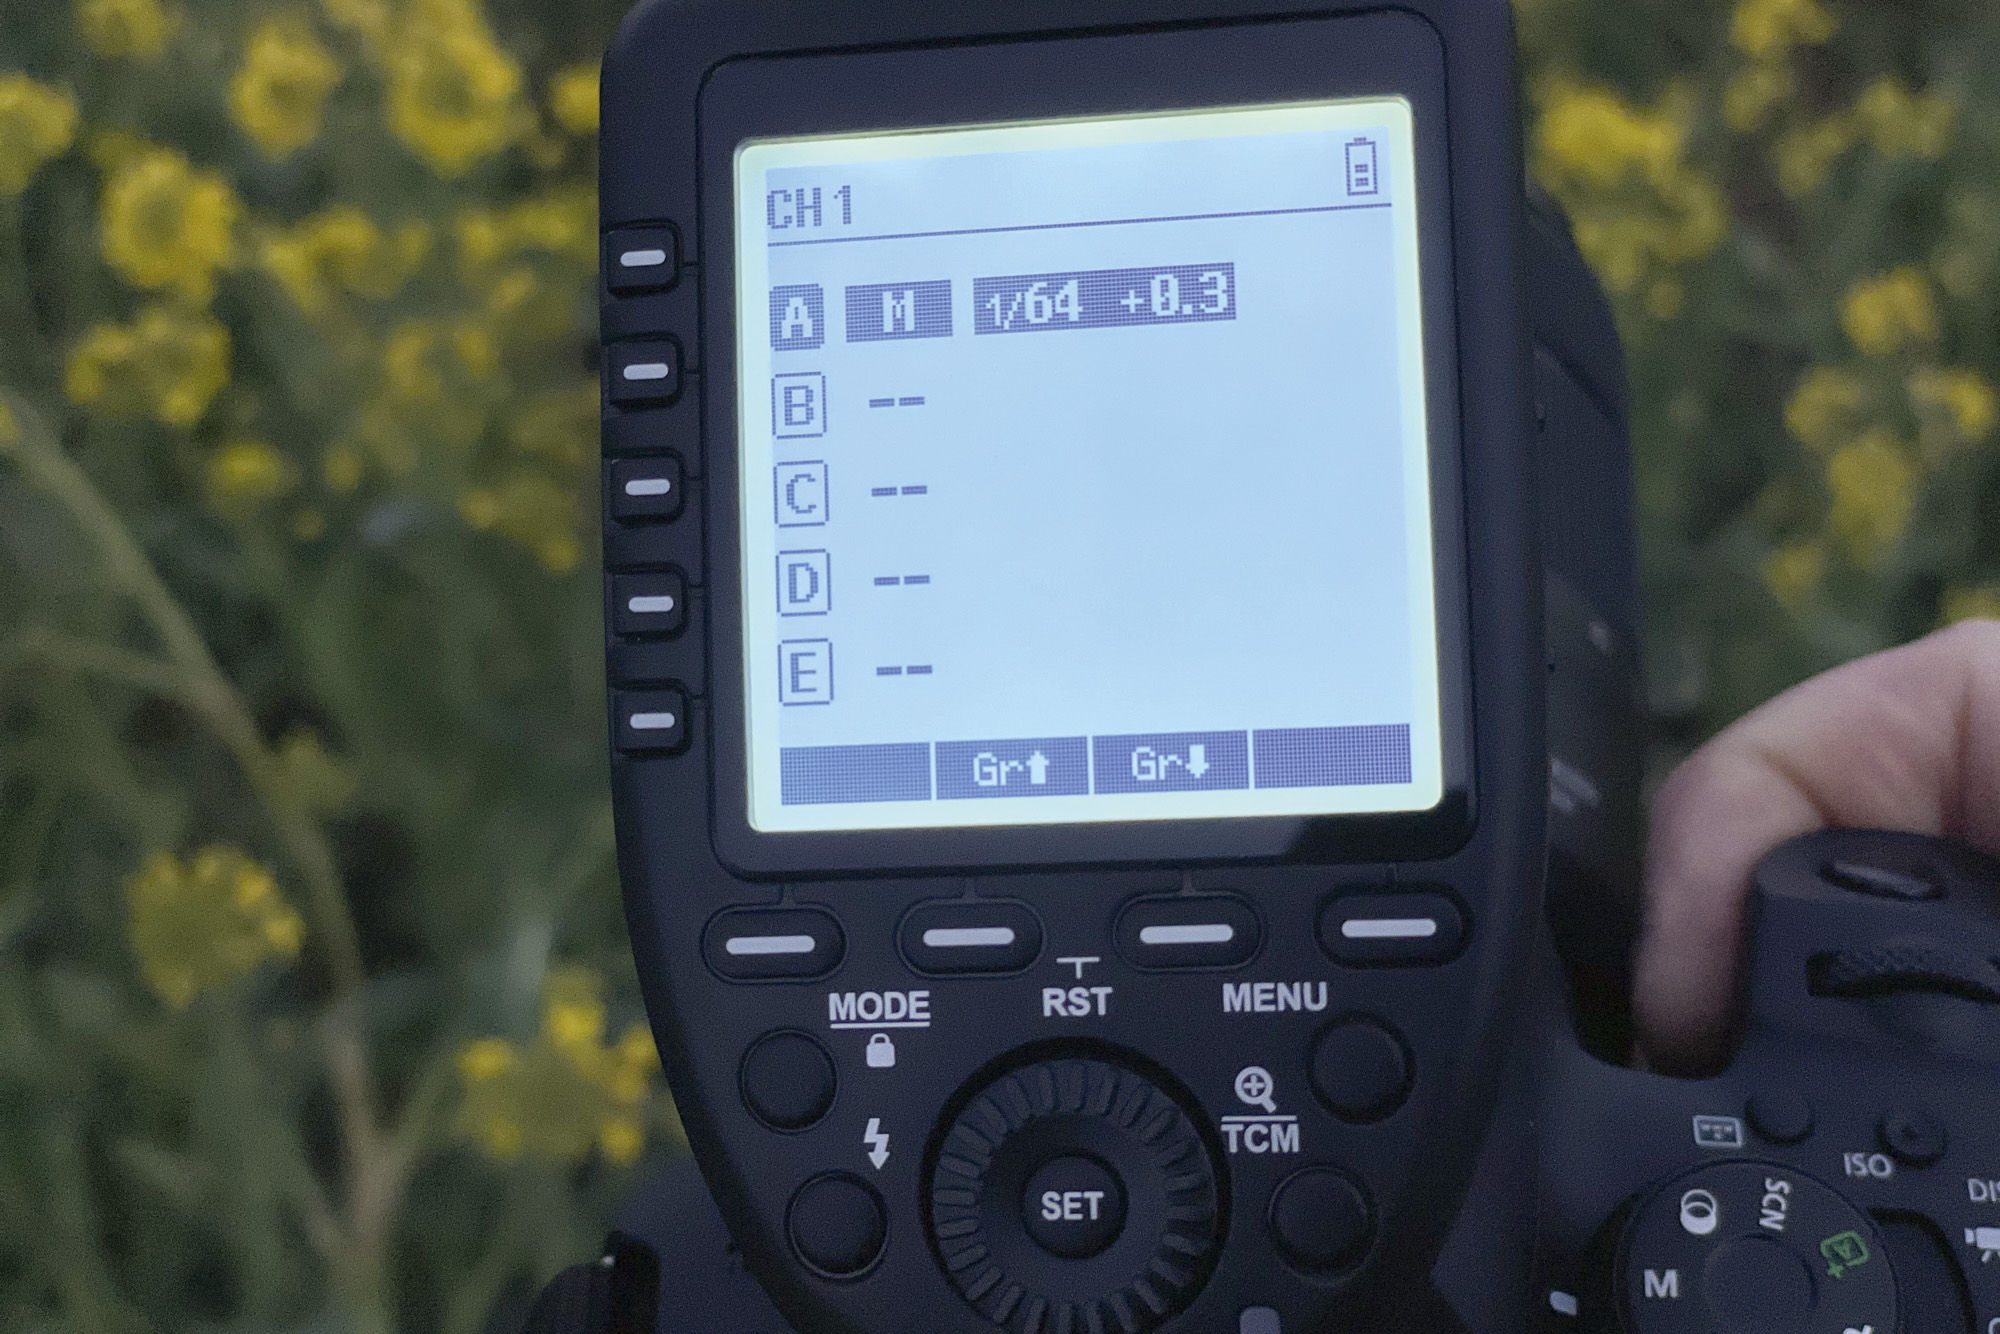
As the sun goes down the ambient light levels will too, so we may need to increase our ISO to account for the fading light and also drop the flash power to balance it out with the daylight. A compatible wireless trigger can be useful for tweaking the flash power on the fly.
06 Distance from the subject
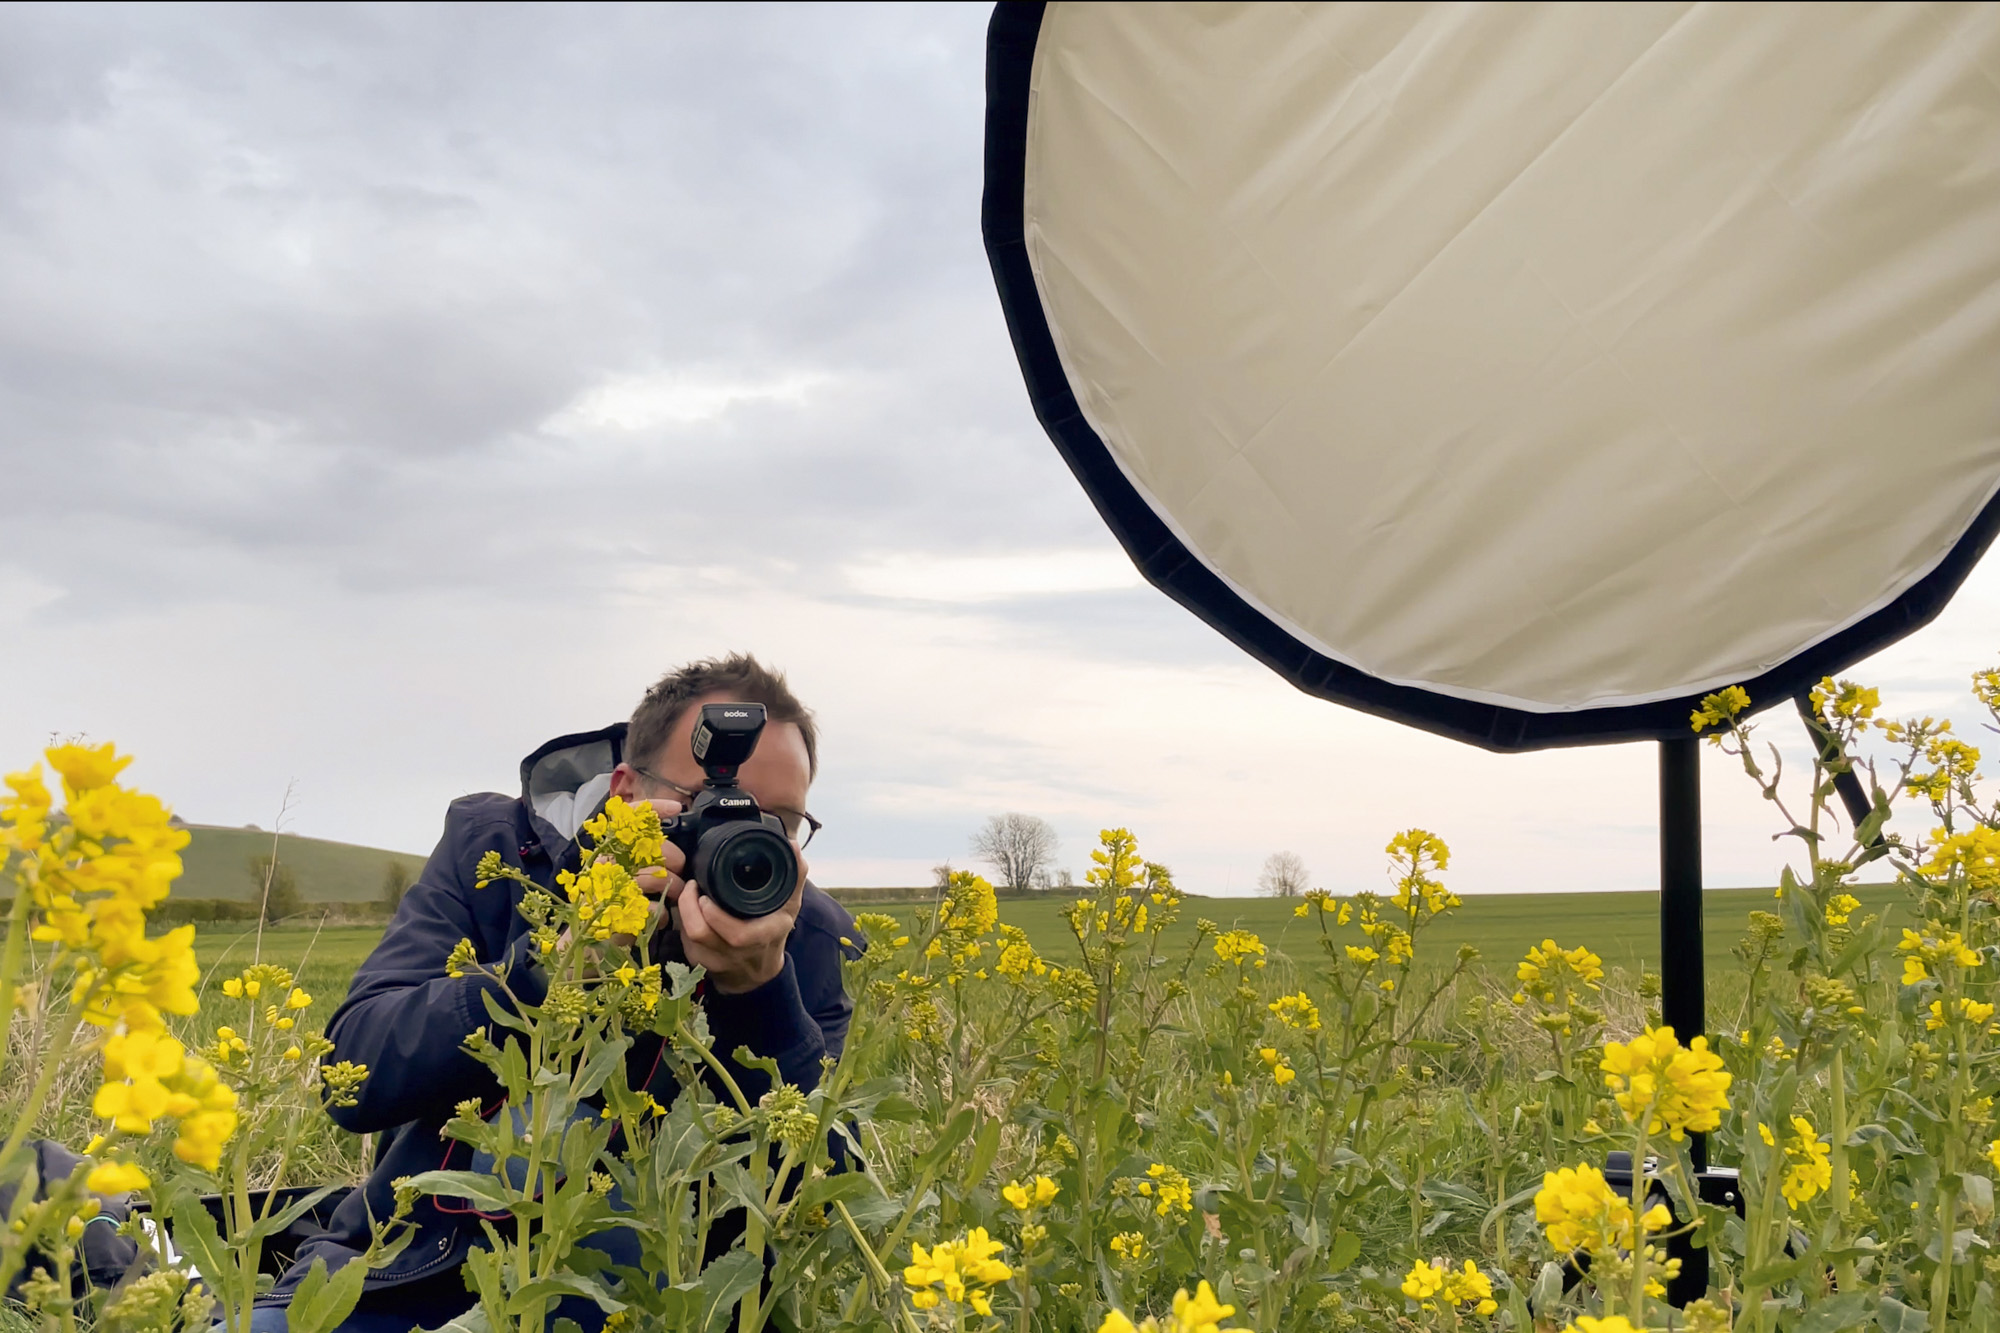
The distance between flash and subject has a bearing on the softness and strength of the light. Bringing the softbox close will make for softer light over the face, as the light source will be larger in relation to the subject. Close light will also need less output to light the subject.
07 Target colours when editing
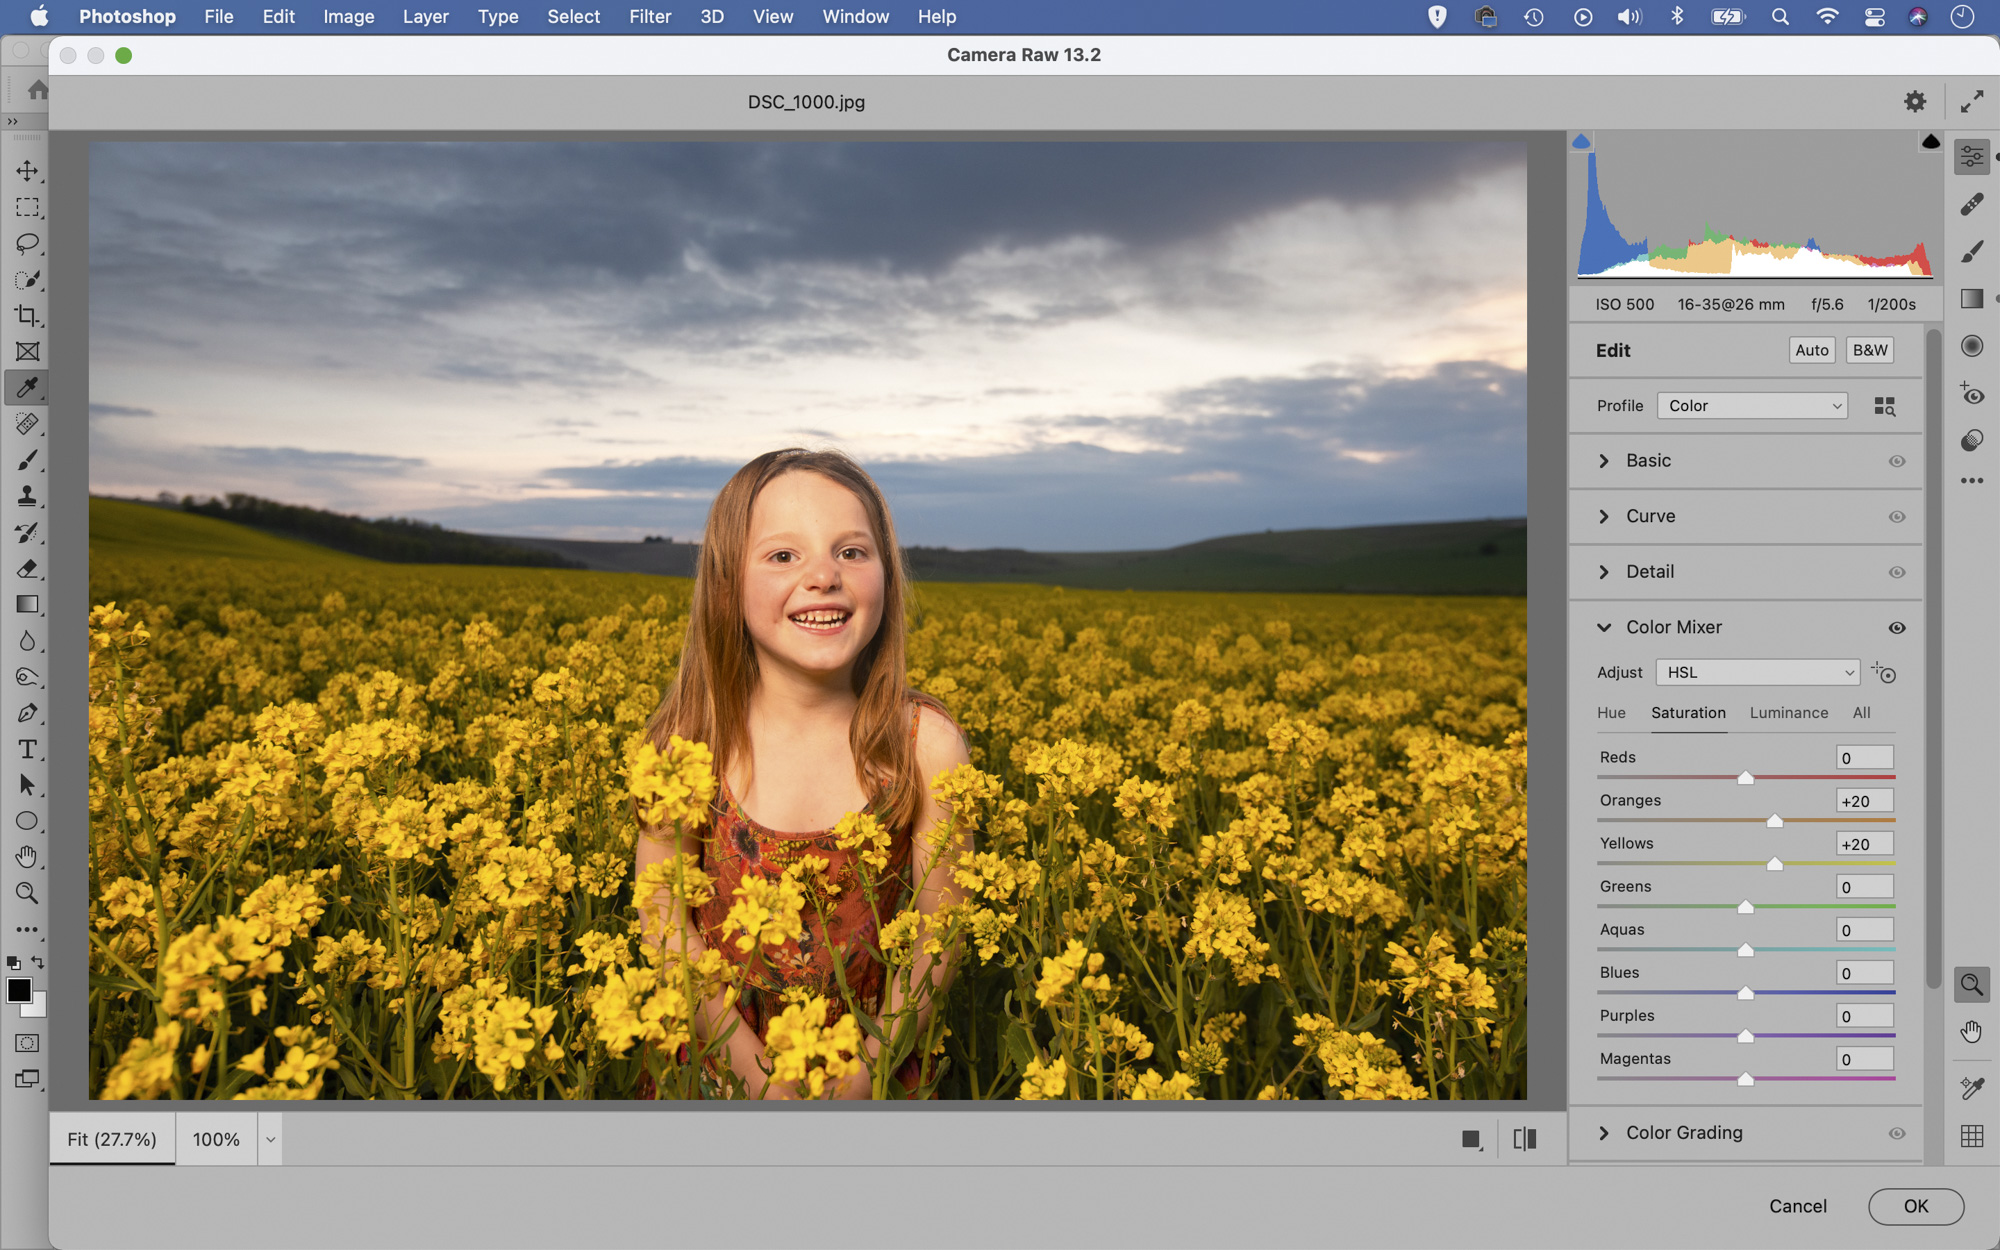
The Color Mixer panel in Lightroom and ACR is useful for targeting and enhancing different colour ranges. Go to the panel, click the Saturation tab then drag left or right over colours in the image to change the saturation of the colours. It’s useful for boosting oranges and yellows in sunsets.
08 Select the sky
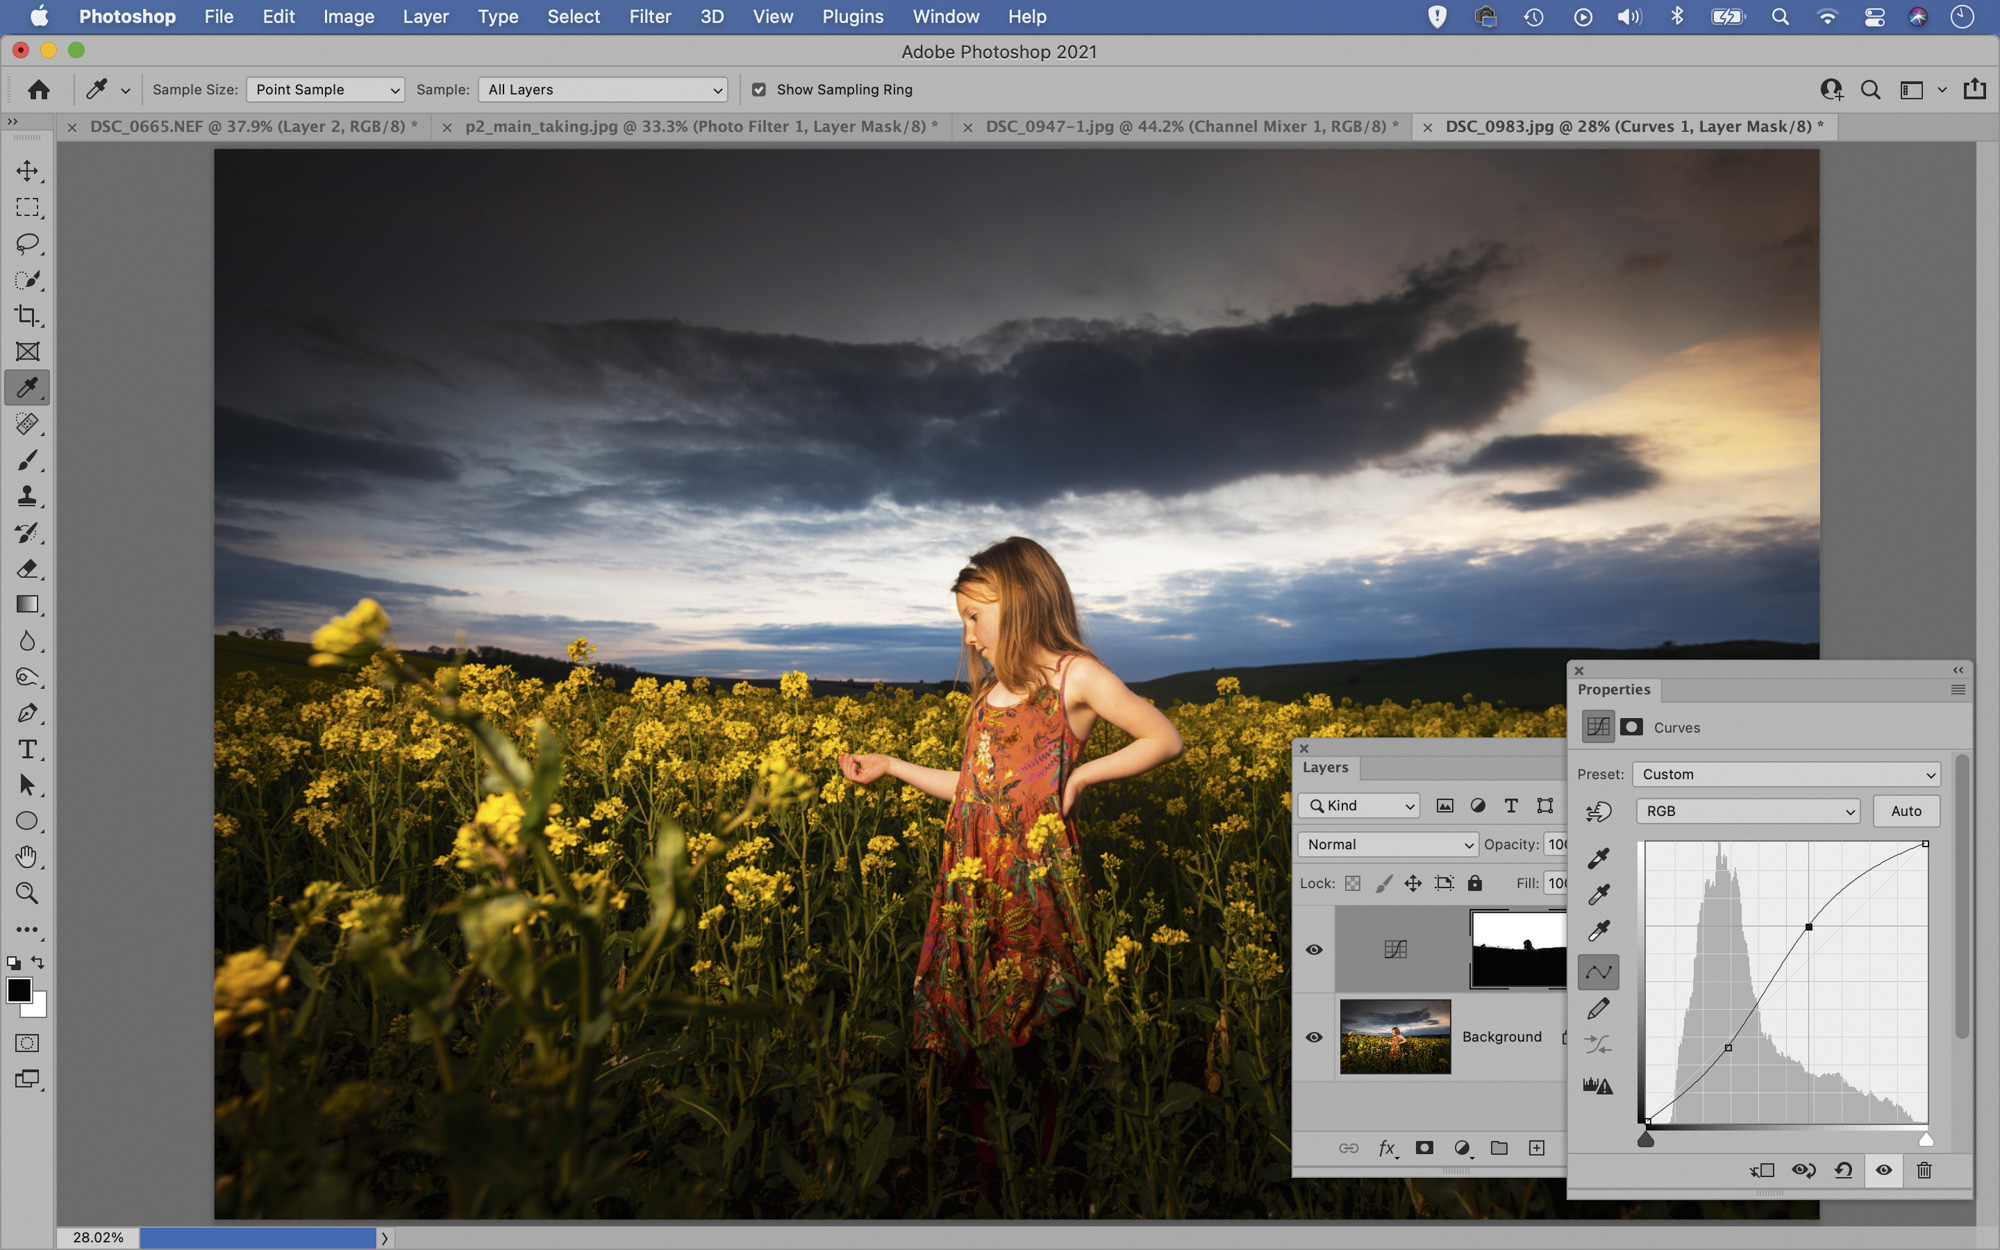
You can boost the colours selectively in the sky using an Adjustment Layer. First go to Select>Sky. Then click the Adjustment Layer icon in the Layers panel and choose your adjustment – try Hue/Saturation to boost the colour intensity, or Curves to add contrast to the sky.
09 Use the Channel Mixer
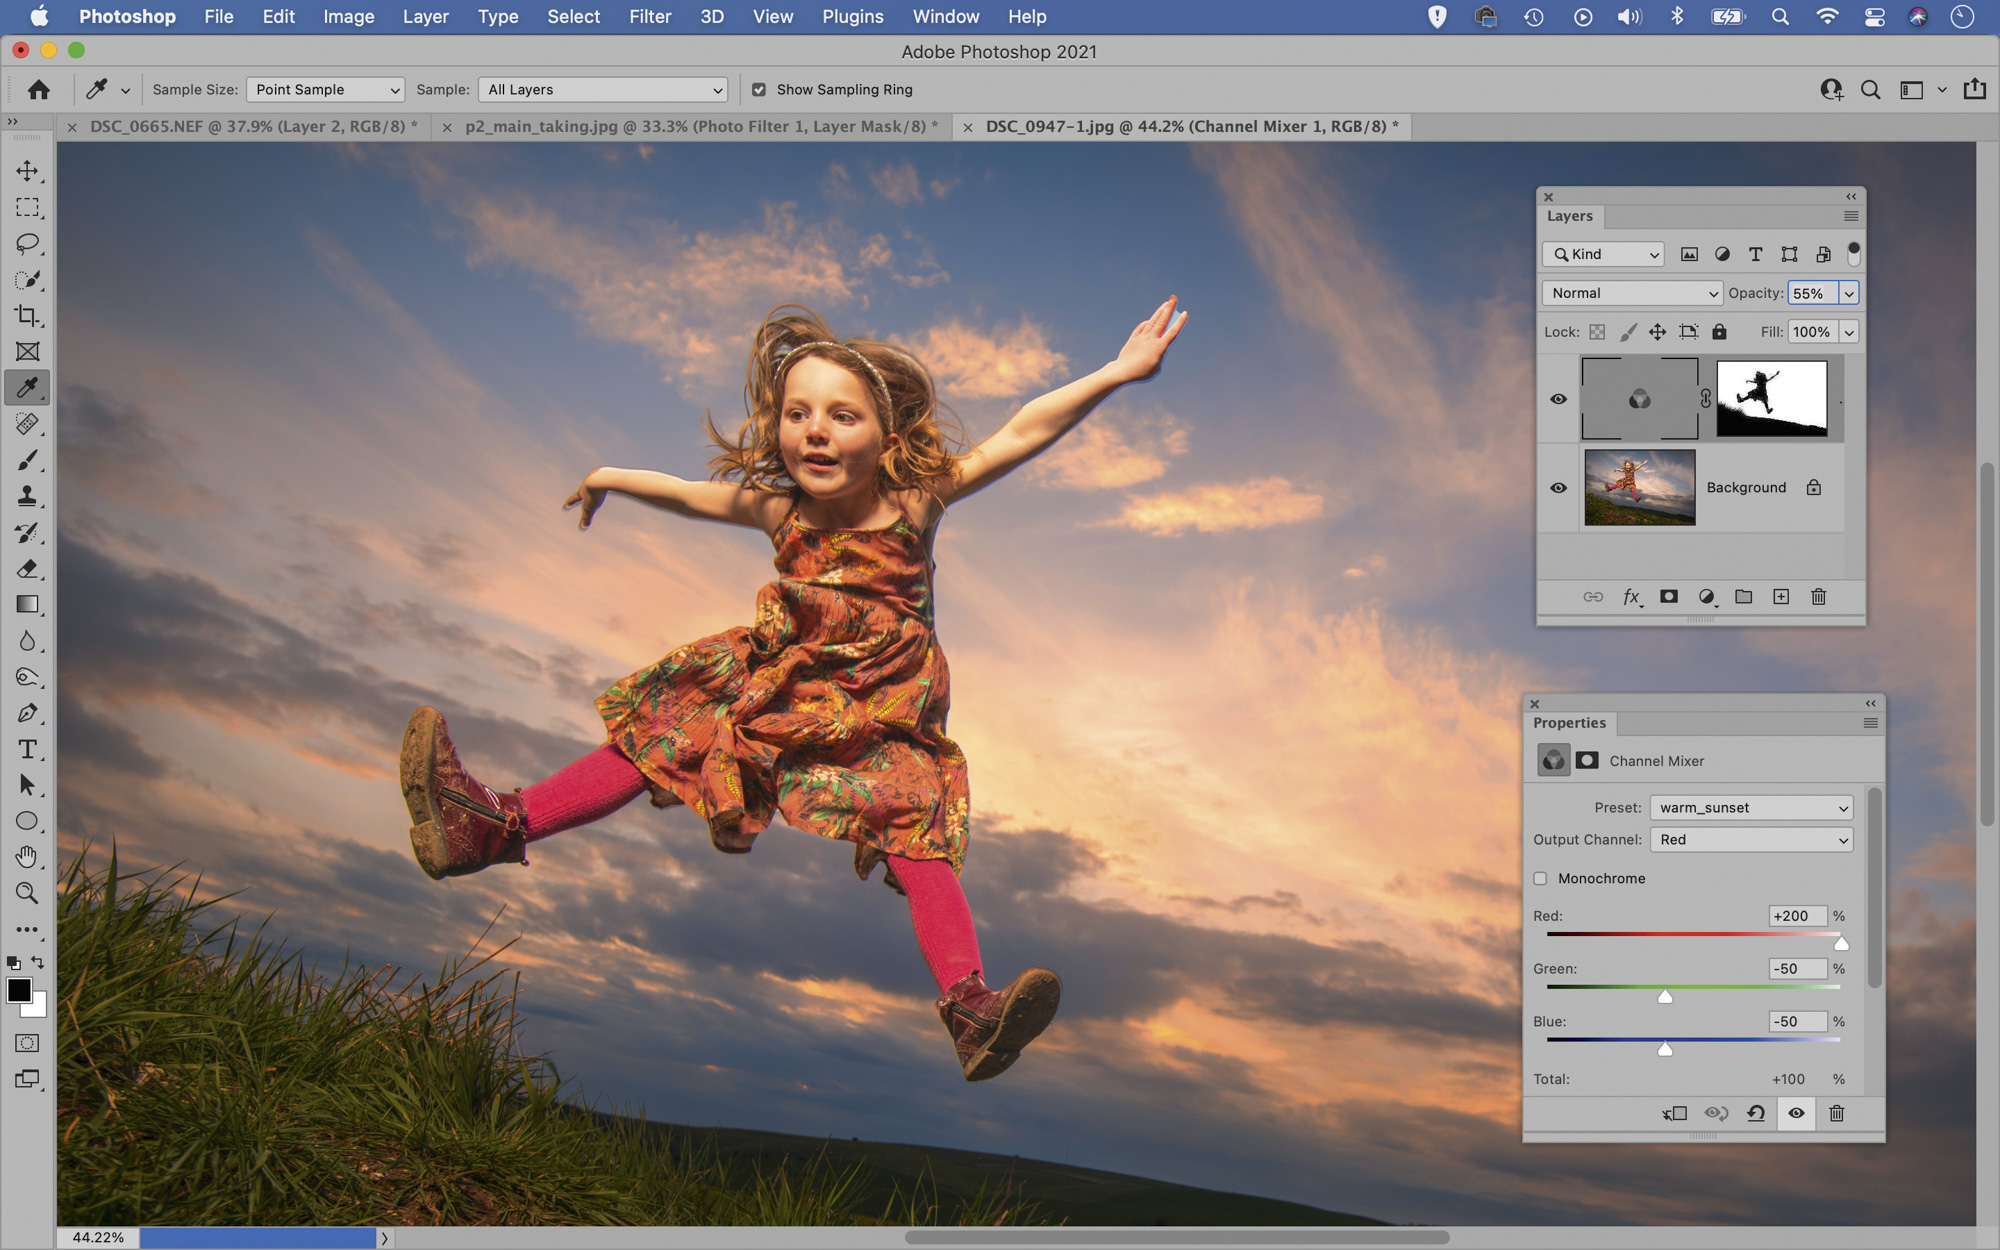
Here’s a quick tip for boosting sunset colours. Add a Channel Mixer Adjustment Layer. Set Output Channel: Red then set Red +200, Green -50, Blue -50. Set Output Channel: Blue and set Blue +200, Red -50, Green -50. Adjust the strength by altering layer opacity.
More videos:
Best camera for product photography
Photography tips and techniques videos
The best macro lenses: how to get great close-up pictures
5 tips and tricks for using macro lenses
Related articles:
• Best flashguns
• Best lighting kits
• Best lighting modifiers
• Best LED lights
• Best tripods
Get the Digital Camera World Newsletter
The best camera deals, reviews, product advice, and unmissable photography news, direct to your inbox!
PhotoPlus: The Canon Magazine is the world’s only 100% Canon-focused title on the newsstand. Launched in 2007, for 14 years it has delivered news, reviews, buying guides, features, inspirational projects and tutorials on cameras, lenses, tripods, gimbals, filters, lighting and all manner of photography equipment.
Aimed squarely at enthusiast photographers who use the Canon DSLR or mirrorless camera systems, all content is tailored to Canon users – so everything from techniques to product tests are tailored to those using the EOS camera system.
Editor Peter Travers brings 14 years of experience as both a journalist and professional photographer, with Technique Editor Dan Mold shoring up the magazine with his 6 years of expertise.

