How to use a macro focusing rail for a focus-stacked close-up
Alistair Campbell uses a macro-focusing rail from Nisi to stack multiple subjects for a deeper depth of field
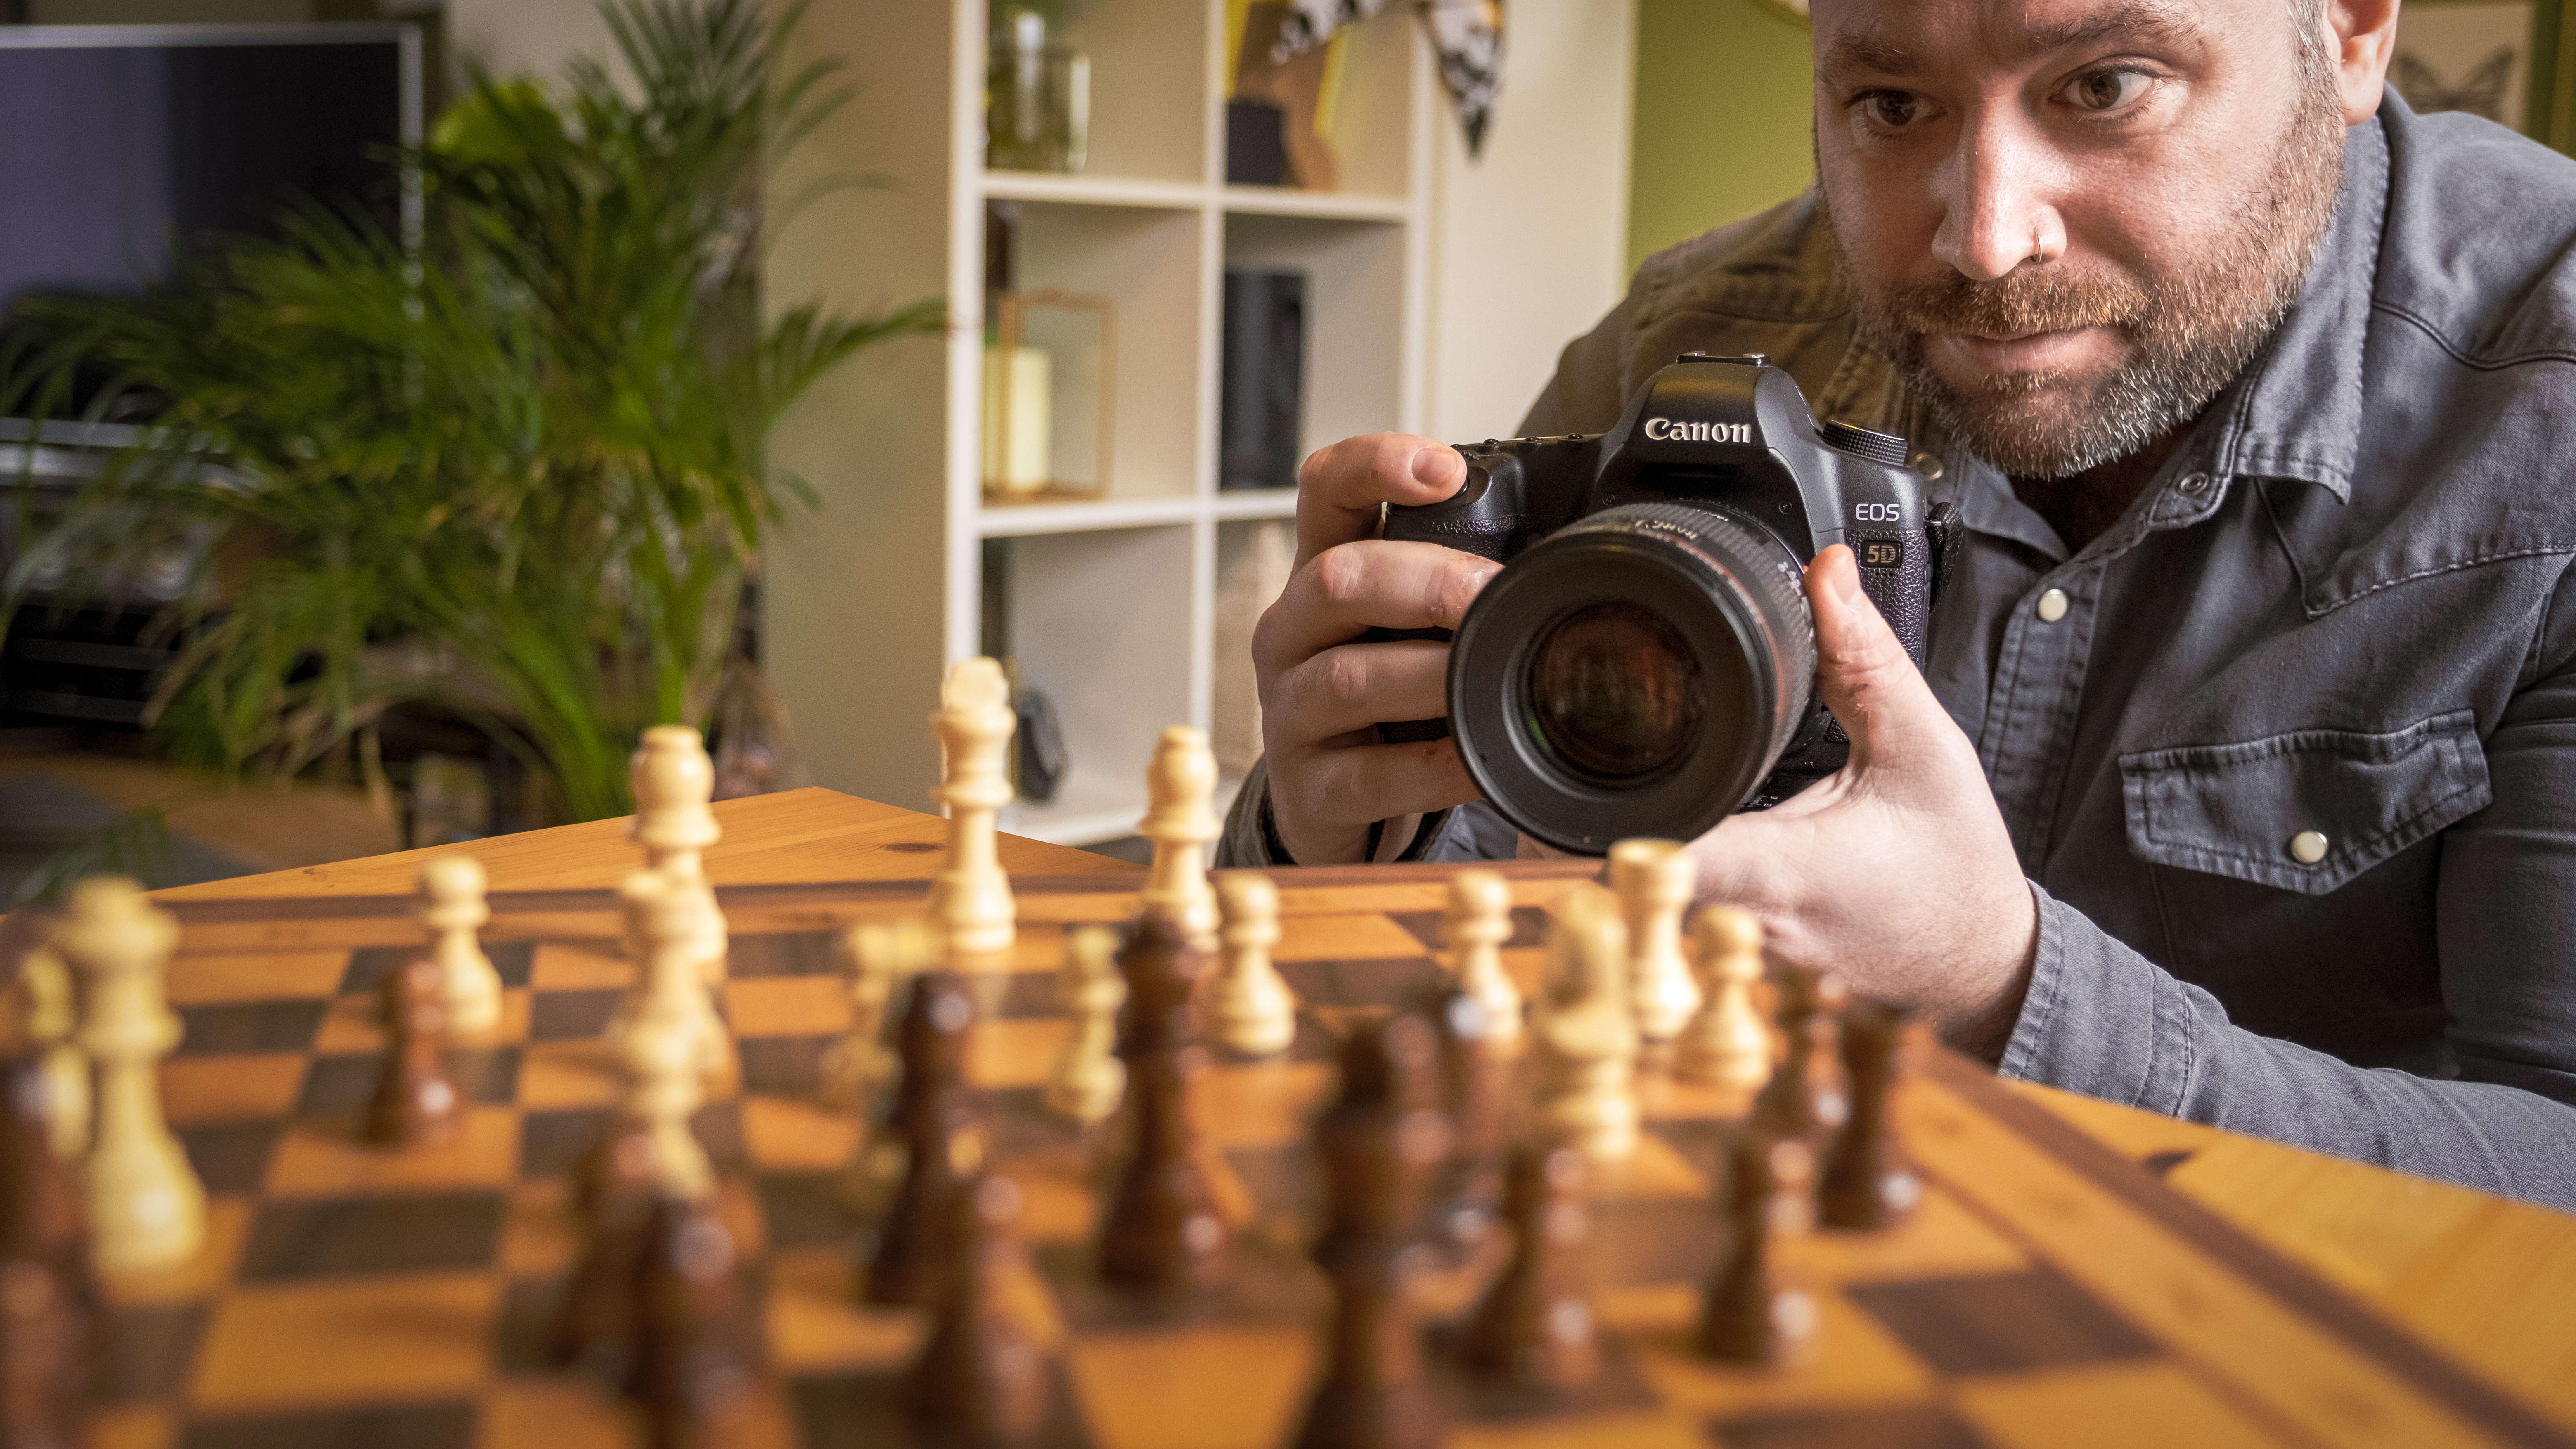
It’s time to take the stalemate out of your macro photography with some focus stacking. One of the more challenging aspects of macro photography is working with a shallow depth of field afforded to you by macro lenses and close working distances.
For this project, we’ve borrowed a Nisi Macro Photography Focusing Rail (NM-180) with a 360˚ rotatable clamp, which gives you the ability to accurately adjust your camera when shooting smaller subjects in any direction. The rail itself is only 180mm long but that’s plenty of length to shoot enough images for the final blend.


Focus stacking refers to an image that is made up of multiple shots with different focus points. Each one has the same exposure and aperture – all you’re doing is moving the focus along a little at a time. We’re using a dedicated macro lens: Canon’s EF 100mm F/2.8L IS USM Macro. Focus stacking is a two-part process – first there is the shooting stage, and then you merge your images together on your computer.
10 steps to shooting and editing focus stacked images
1. Set up your focusing rail
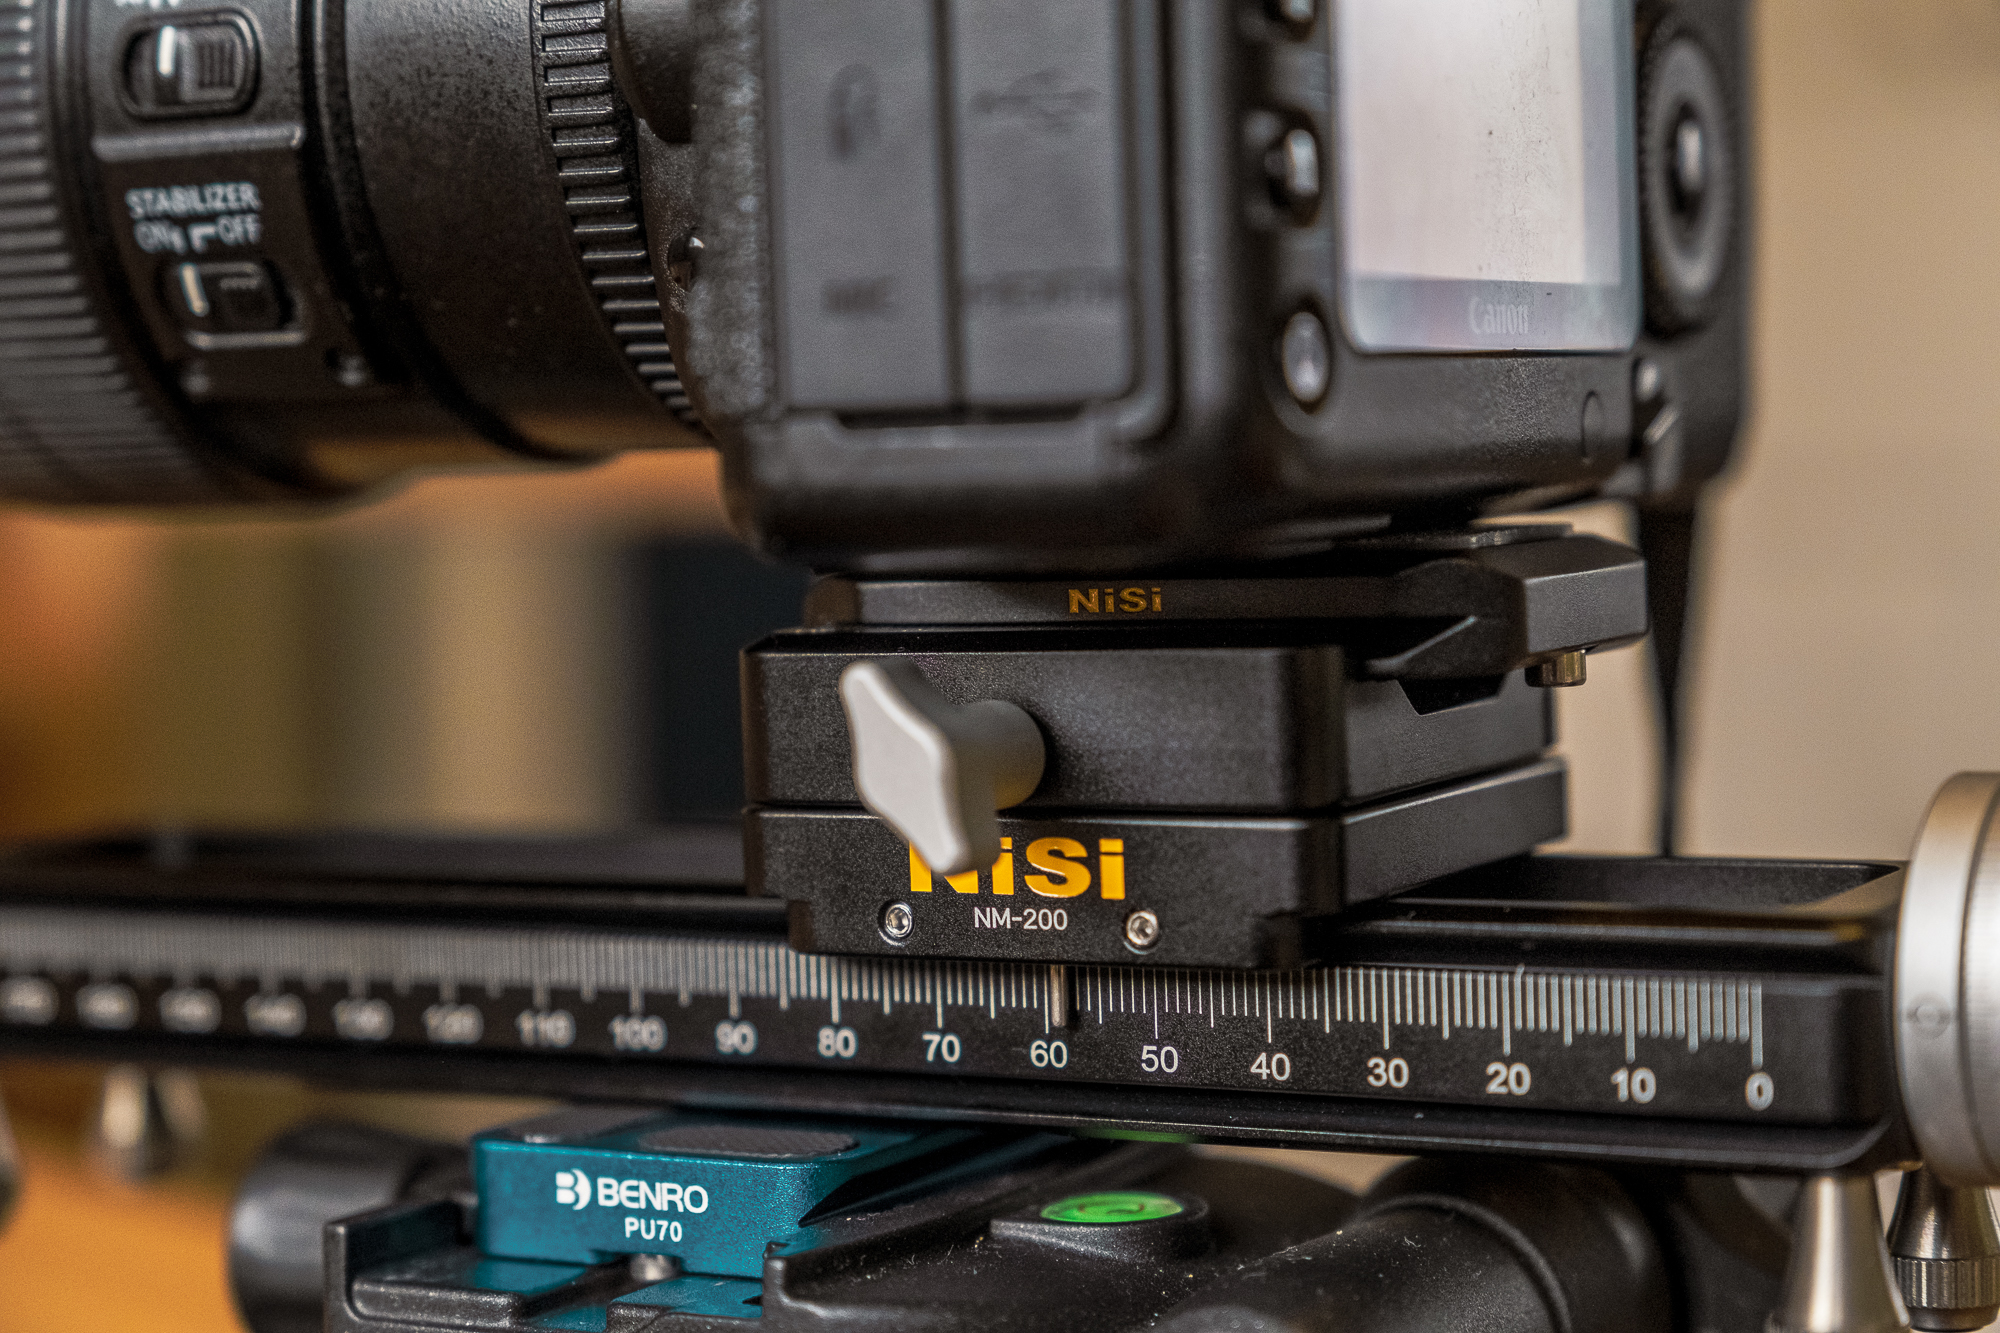
To begin, set up your tripod and mount the focusing rail on top. You want to be moving towards your subjects and through the focus plane rather than parallel to the scene. Think of it as a door you need to walk through to see what’s on the other side. Ideally, you want to be level with the subjects rather than looking down or up at them.
2. Shoot in manual focus
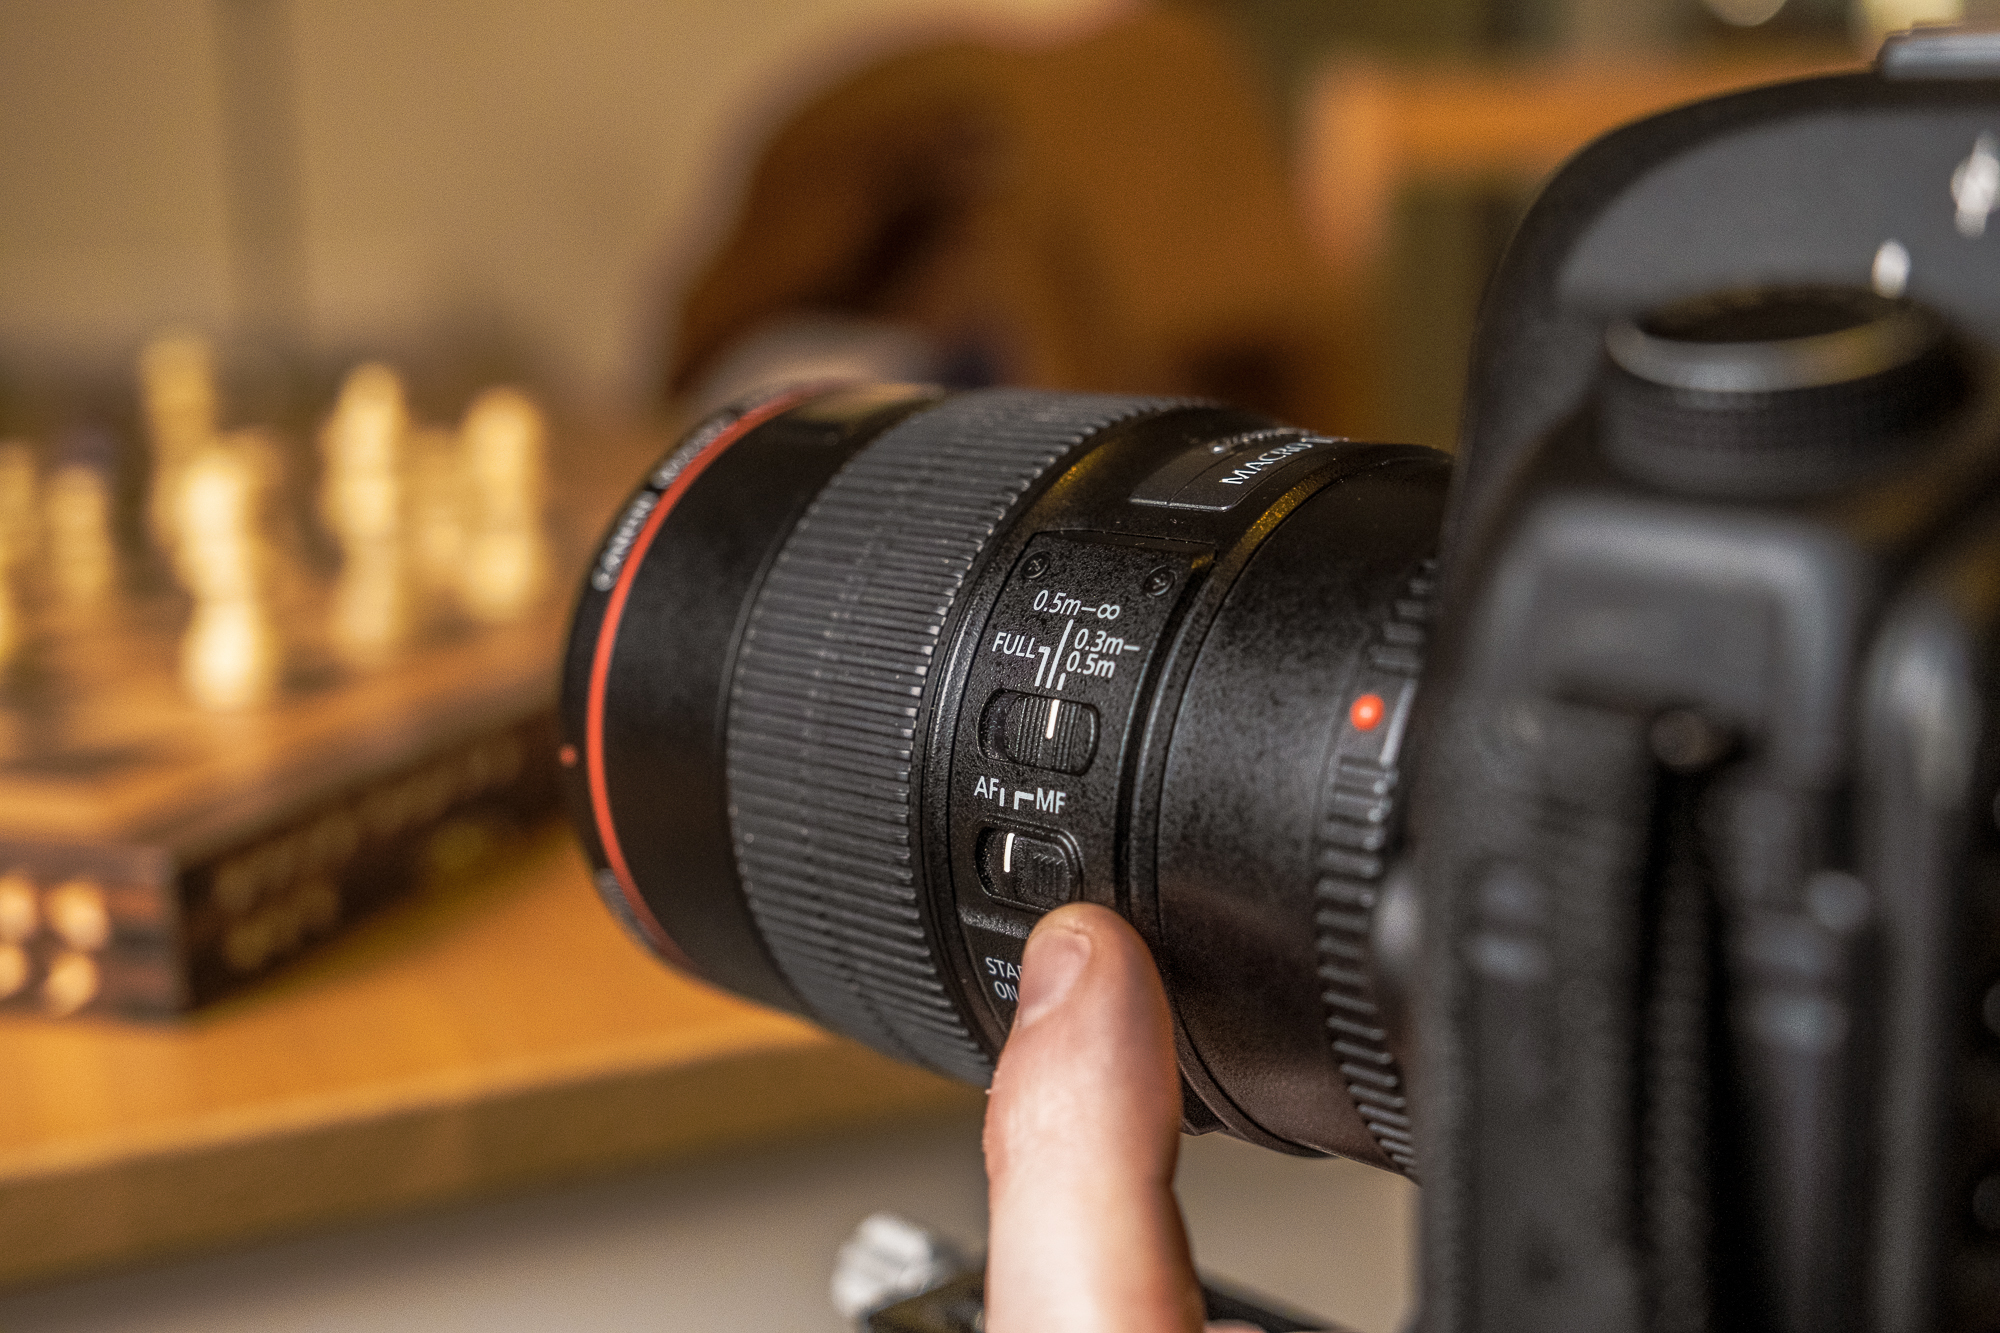
Setting your camera and lens to manual is imperative for the process to work. Set your focus manually to be pin-sharp on the chess piece in the foreground, and do not re-focus again. Moving your camera forwards while also focusing each time in a new place simply won’t work.
3. Dial in your ISO, aperture and shutter speed
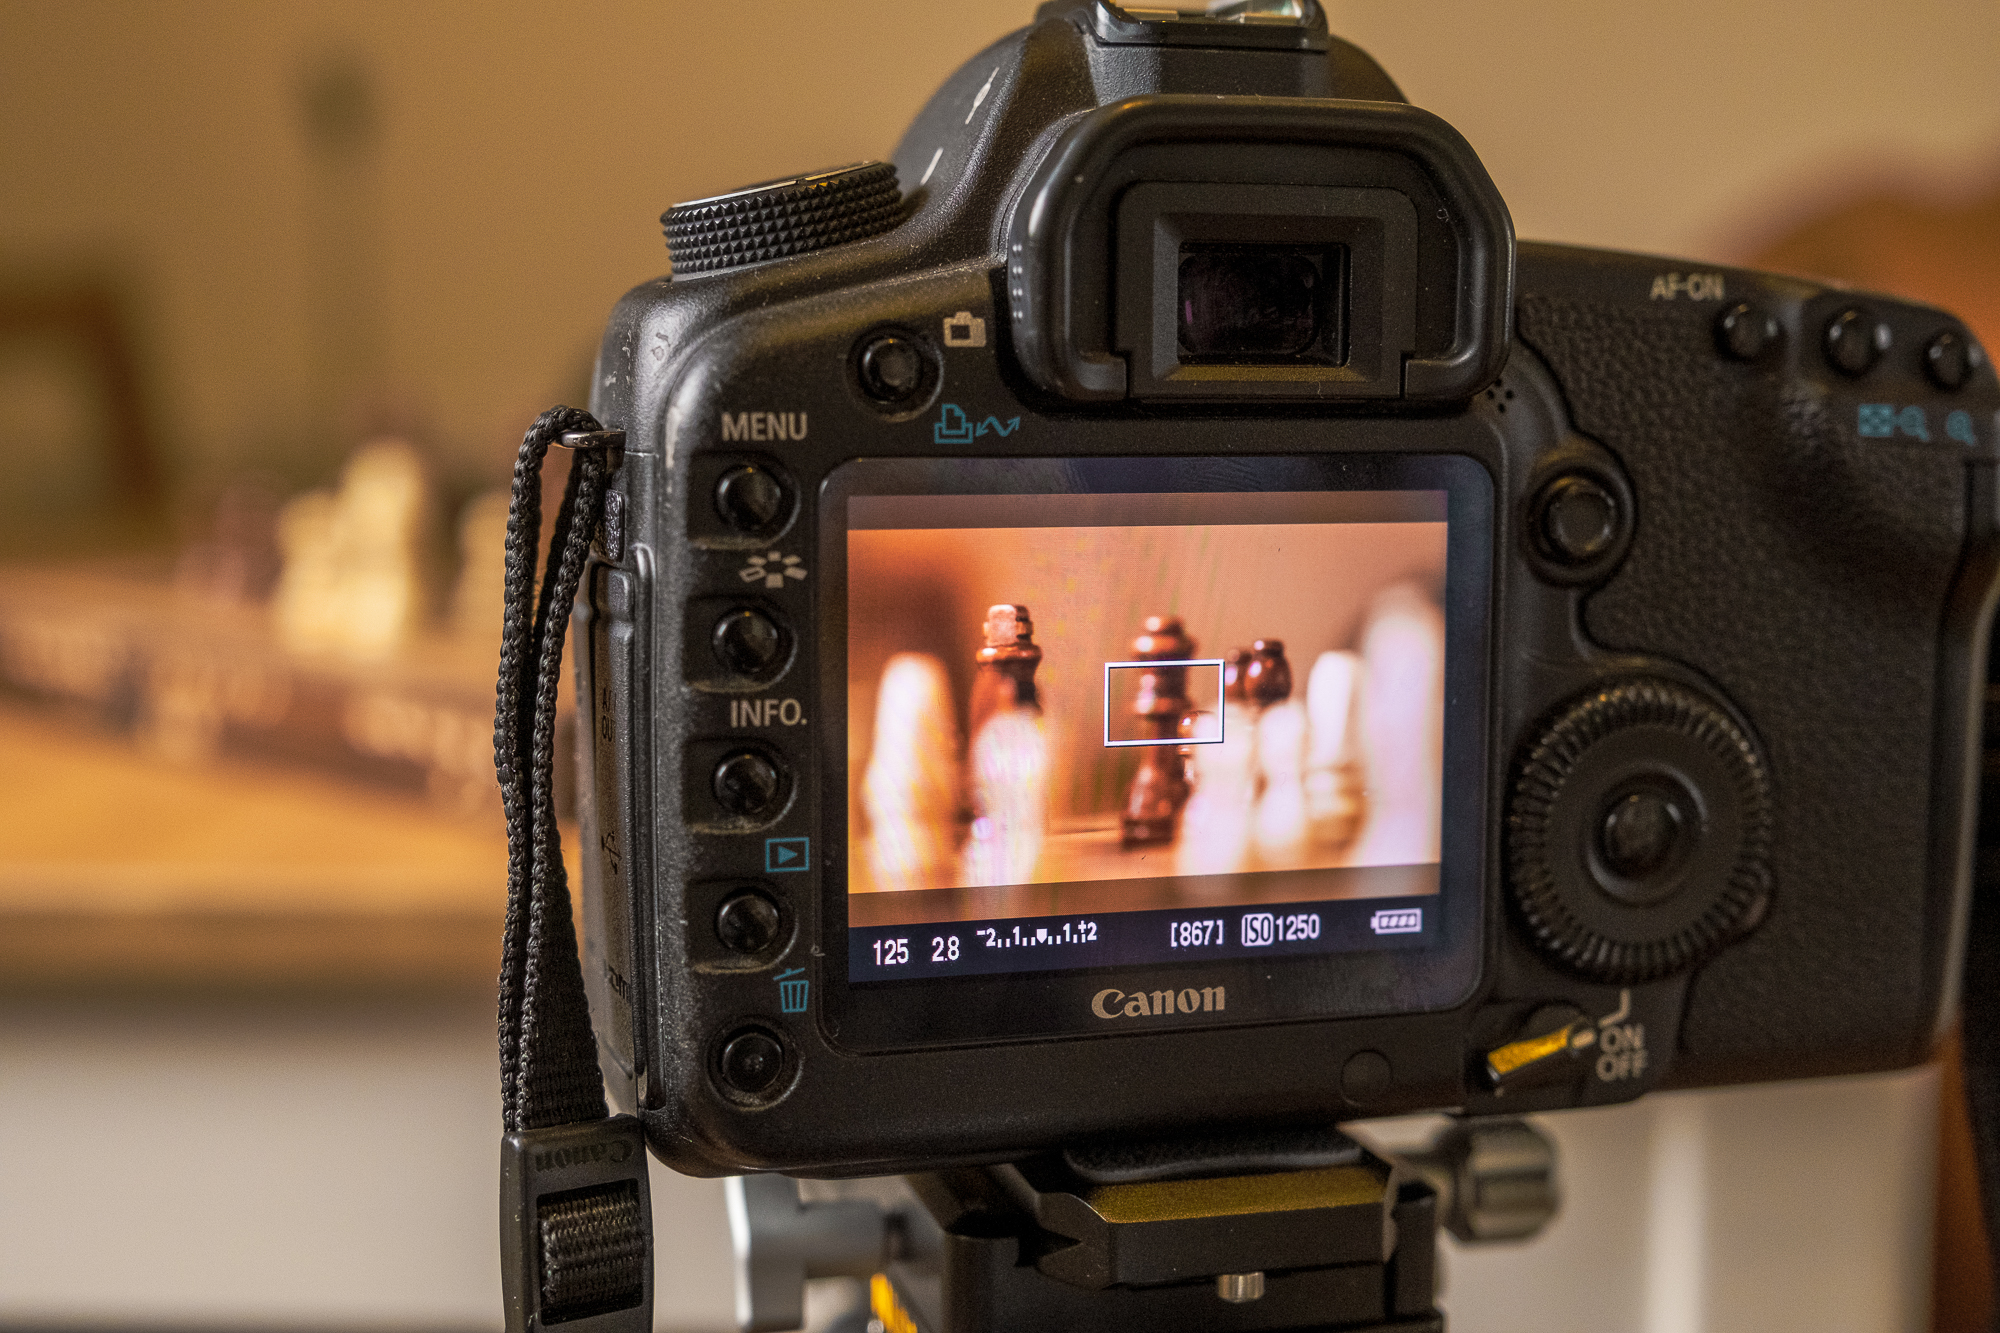
As you can’t change it during the shooting process, it’s important with light and dark subjects that you check the exposure of your first and final shot before deciding on an exposure that works well throughout.
4. Get your camera moving
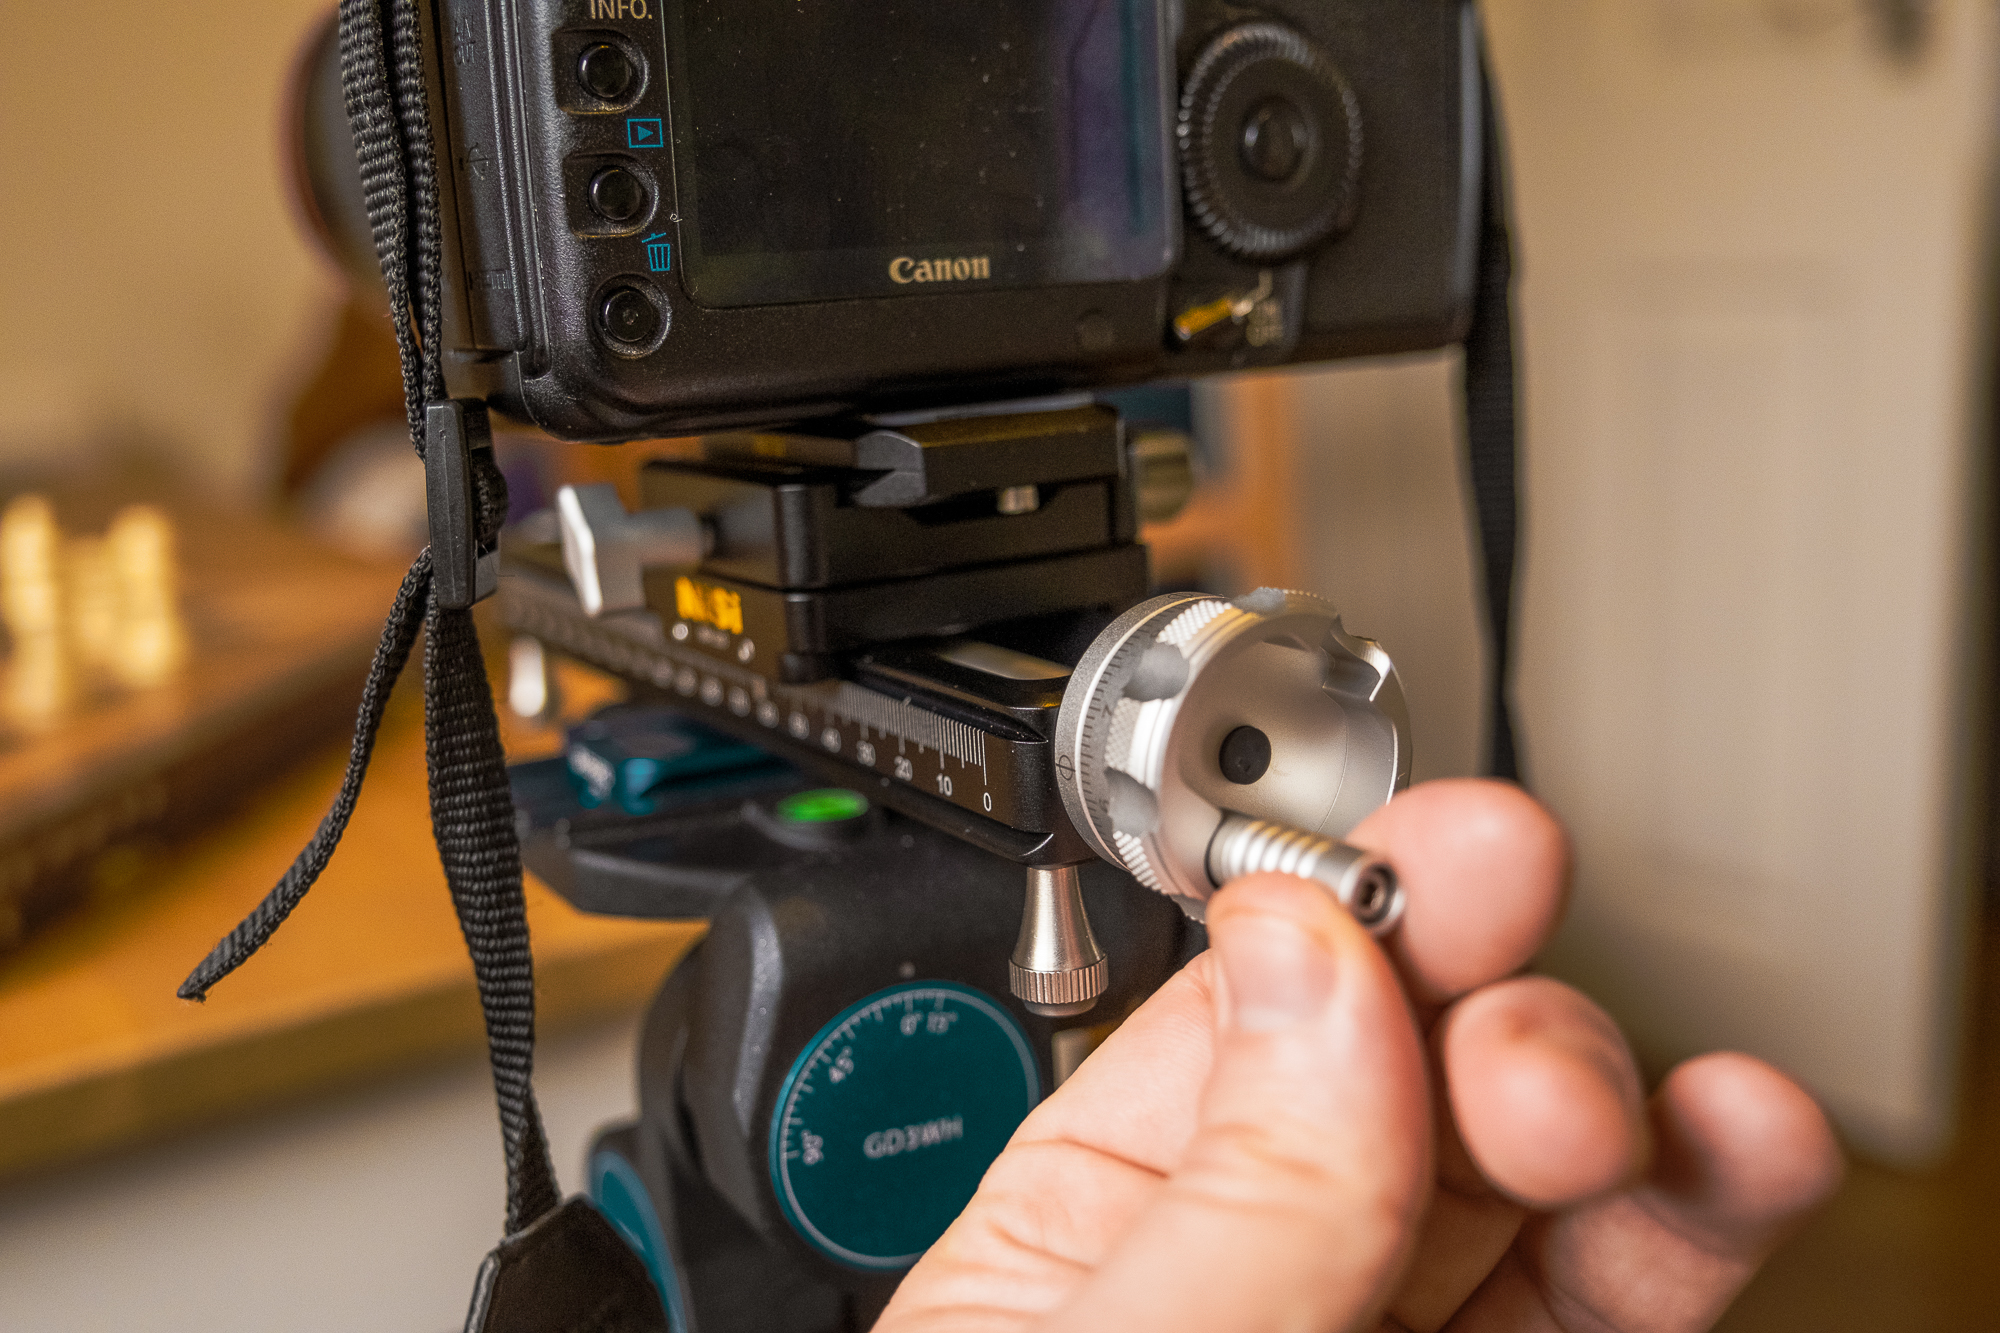
This Nisi rail comes with a small crank fitted to the end, allowing you to make very small movements along the rail with ease and precision. It’s accurate, enabling you to move just 1mm if you like, and avoids having to touch your camera or the rail itself.
5. Shooting your images
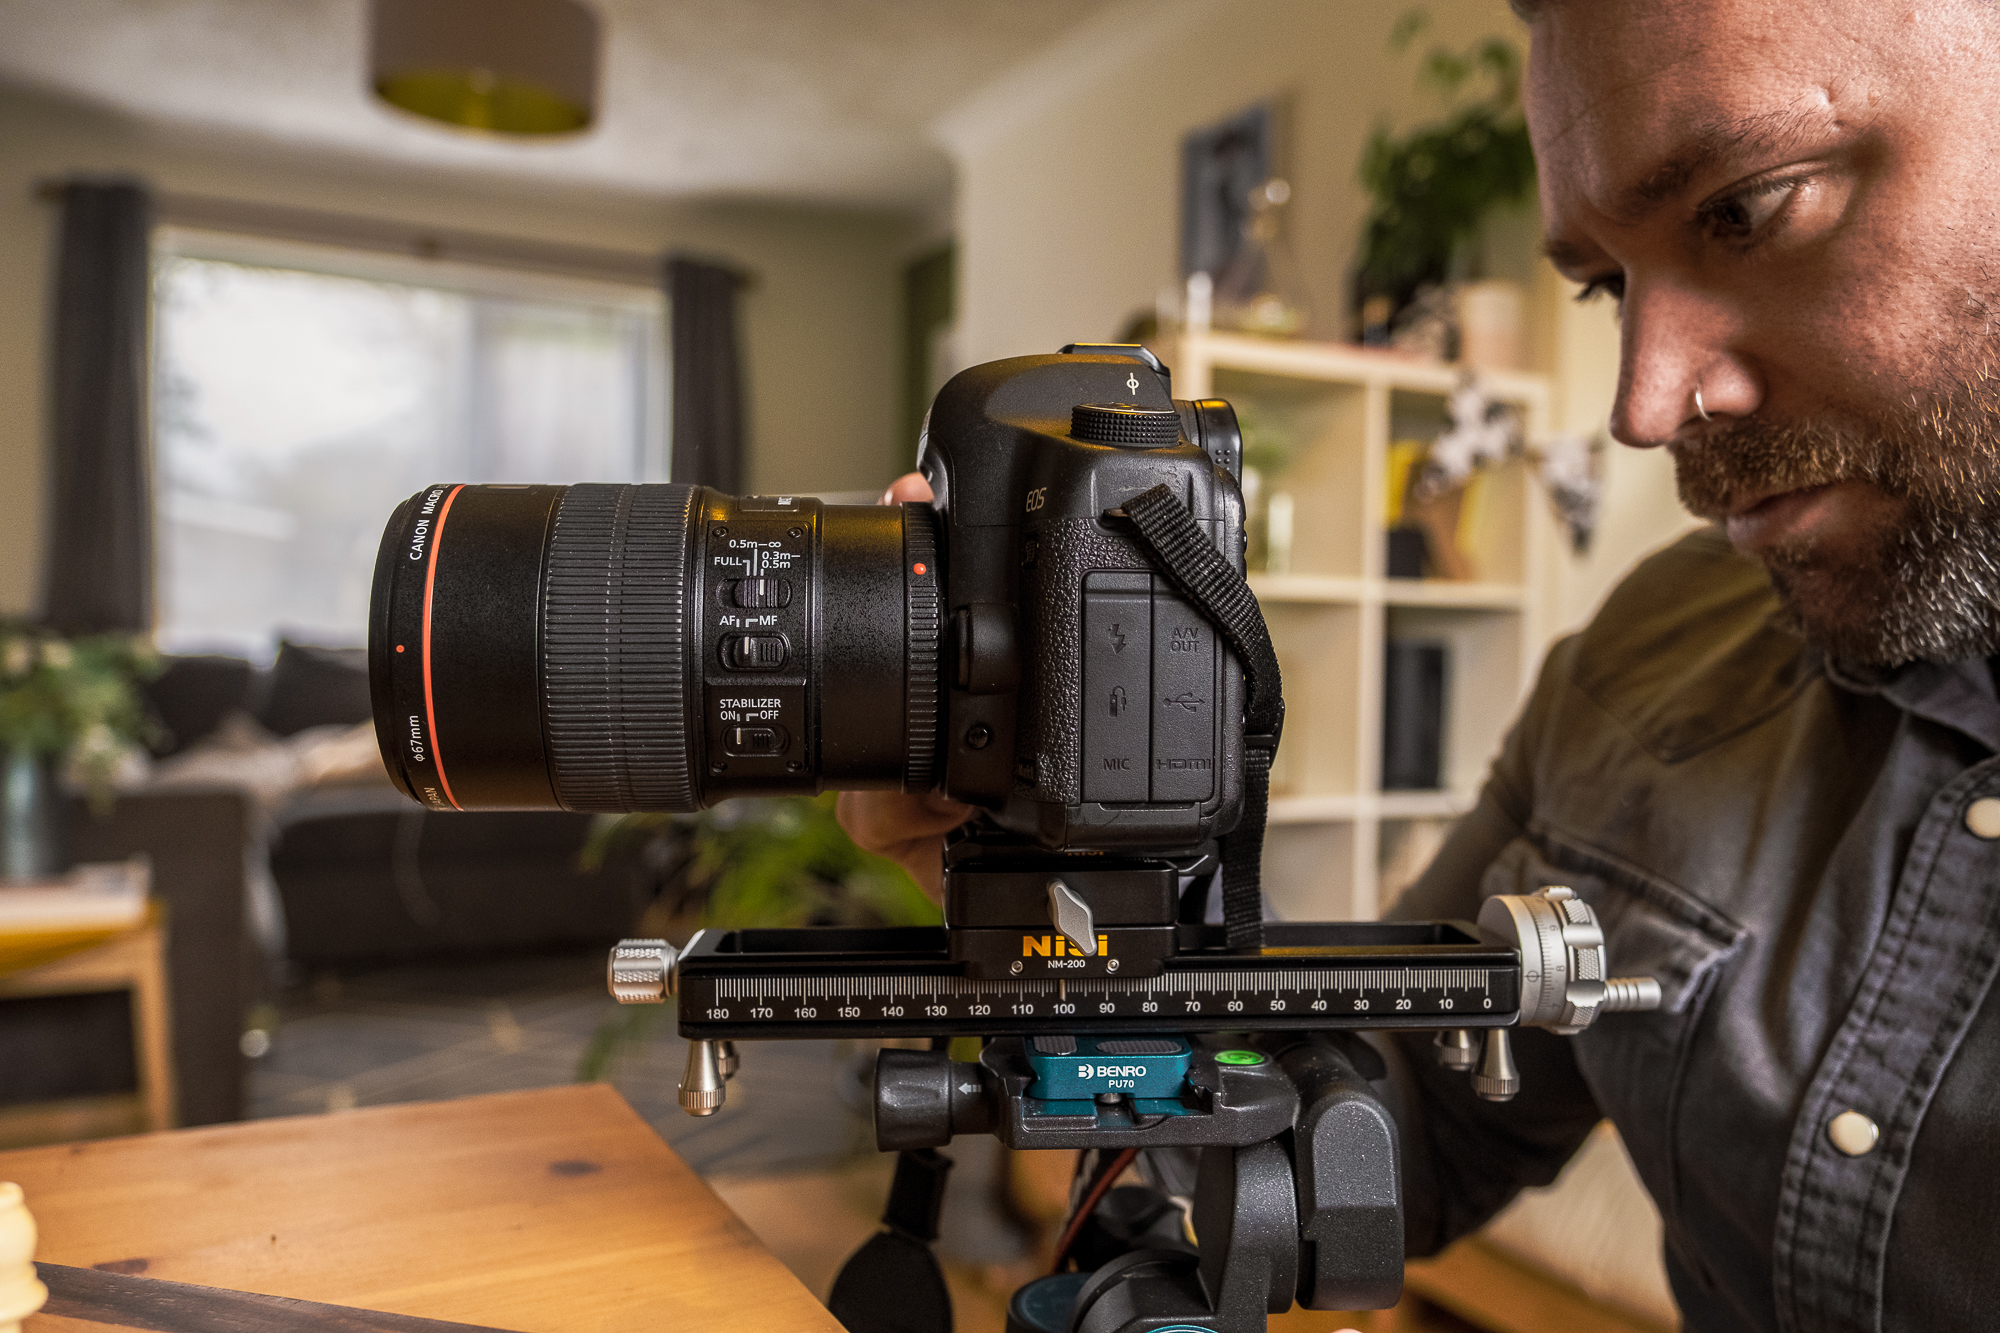
It’s vital that you check the first frame and more importantly the last one, too. You want to have enough space and headroom around all the pieces to enable easier merging later. Starting at 80mm, I took around 20 images (one every 5mm), finishing at 180mm
Stacking your images together in post-processing
Now we have shown you how to shoot a focus-stacked image using a focusing rail (Nisi NM-200). This section shows you how you can edit your multiple images together using a combination of Lightroom and Photoshop. The goal is to take as many in-focus slivers as you can and then merge them together for a far more in-focused composite image which is sharper, has a deeper depth of field, and crisper lines than you would ever get in the camera with a single image alone.
6. Begin your edit in Lightroom
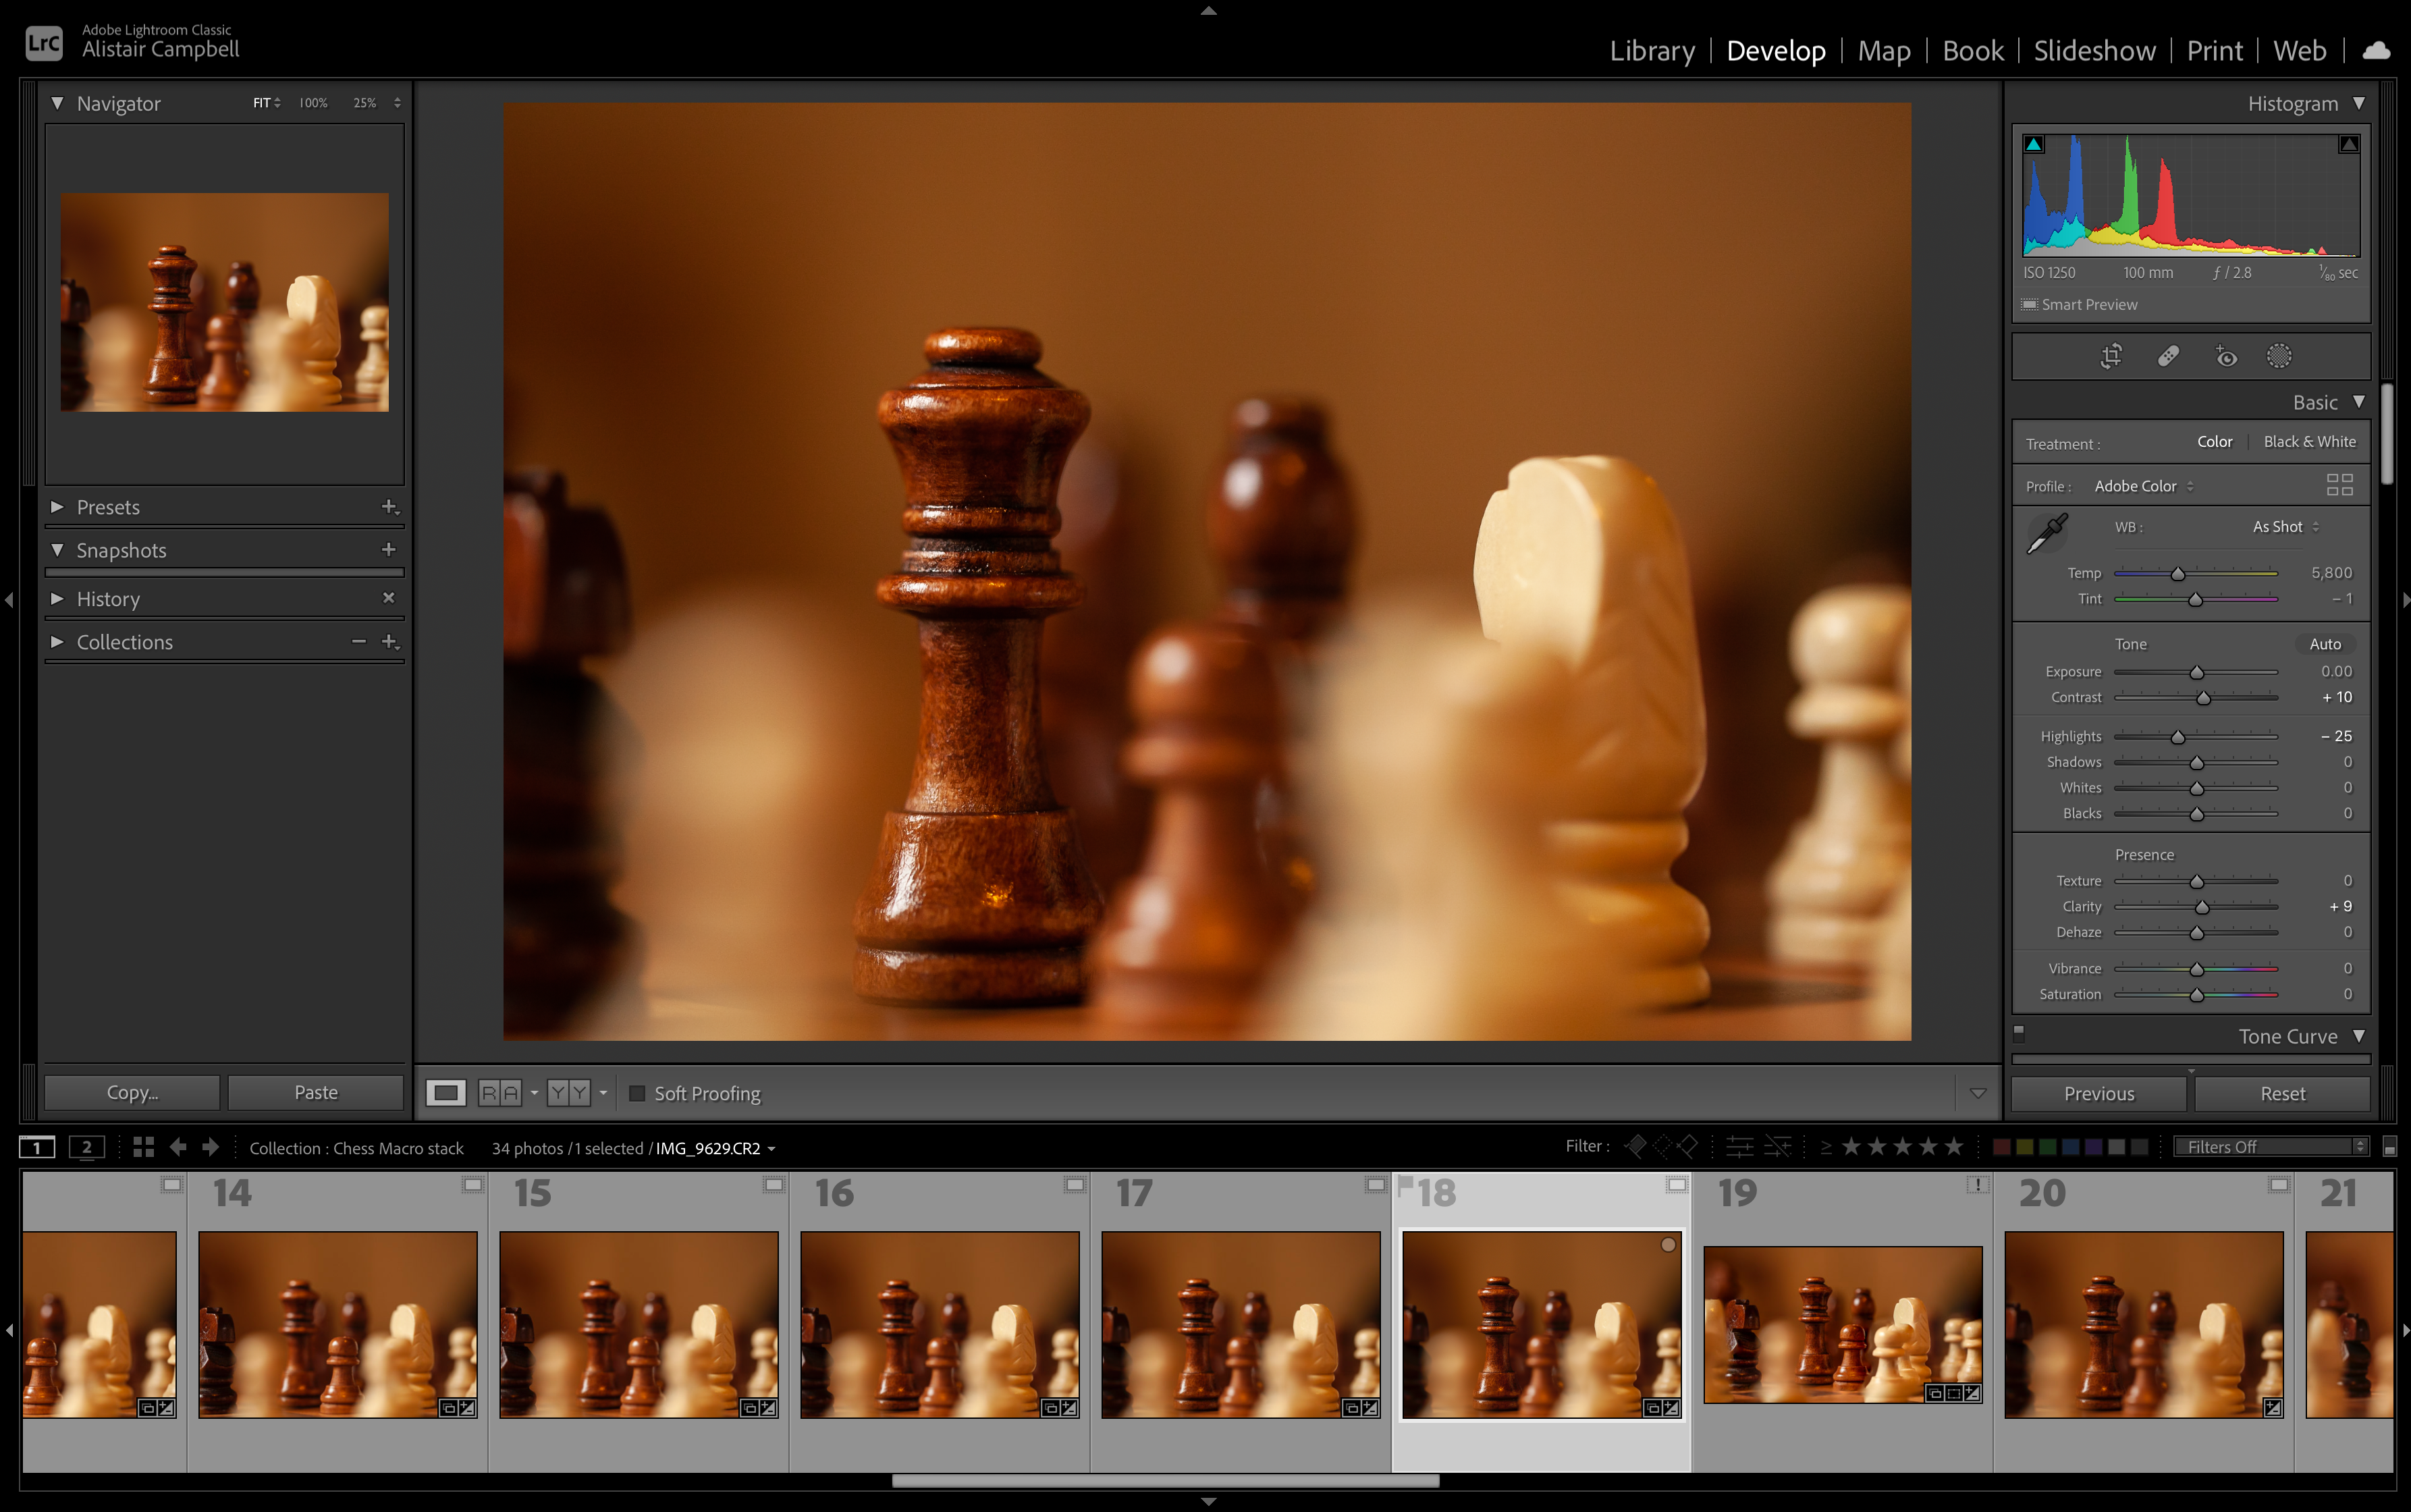
Import your images to Lightroom and do the basic edits like improving contrast, adjusting shadows and highlights, tweaking clarity and vibrance, and so on. It’s better to edit the first image, copy the settings, and apply them to the other two images to maintain consistency.
7. Open as layers in Photoshop

Go to the Develop module, and select all three photos. Then, go to Photo > Edit In > Open as Layers in Photoshop. If your images are in RAW format, this step converts them into a compatible format for Photoshop and opens them as layers.
8. Align the layers
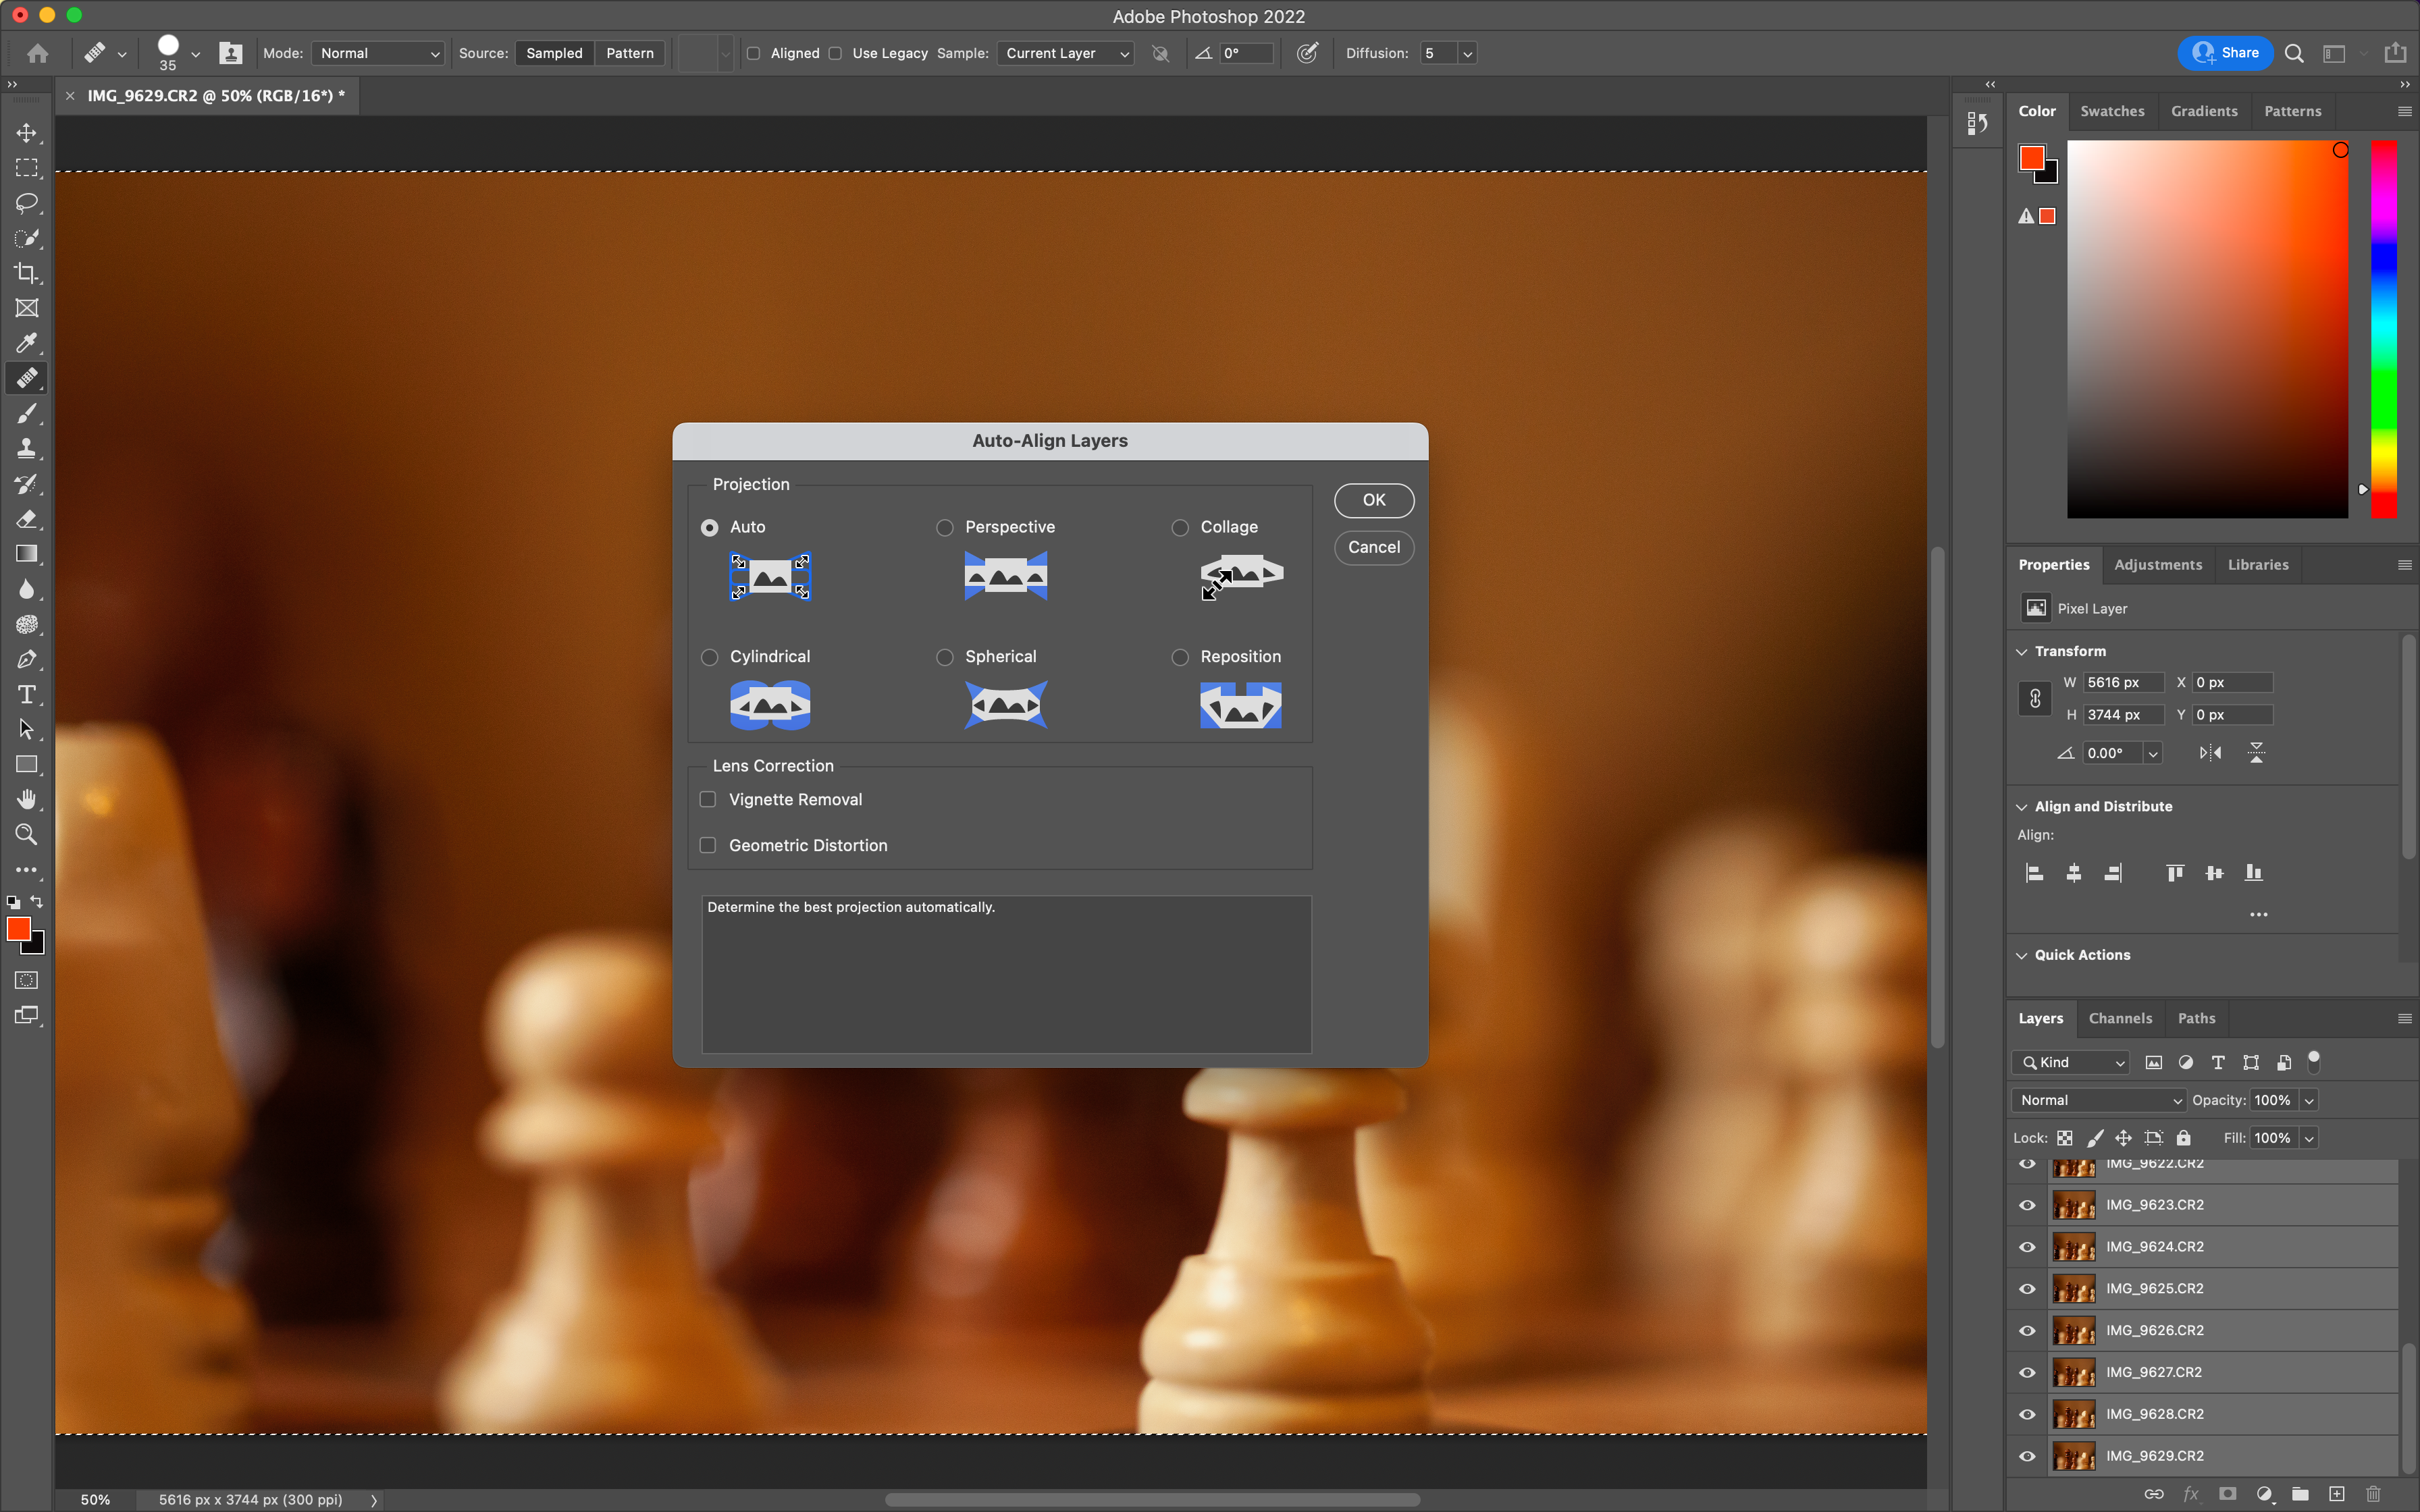
In Photoshop, select the three layers and go to Edit > Auto-Align Layers. In the pop-up box, choose Auto under Projection. Under Lens Correction, leave the Vignette Removal and Geometric Distortion boxes unchecked. This step merges your images based on the content.
9. Blend the layers
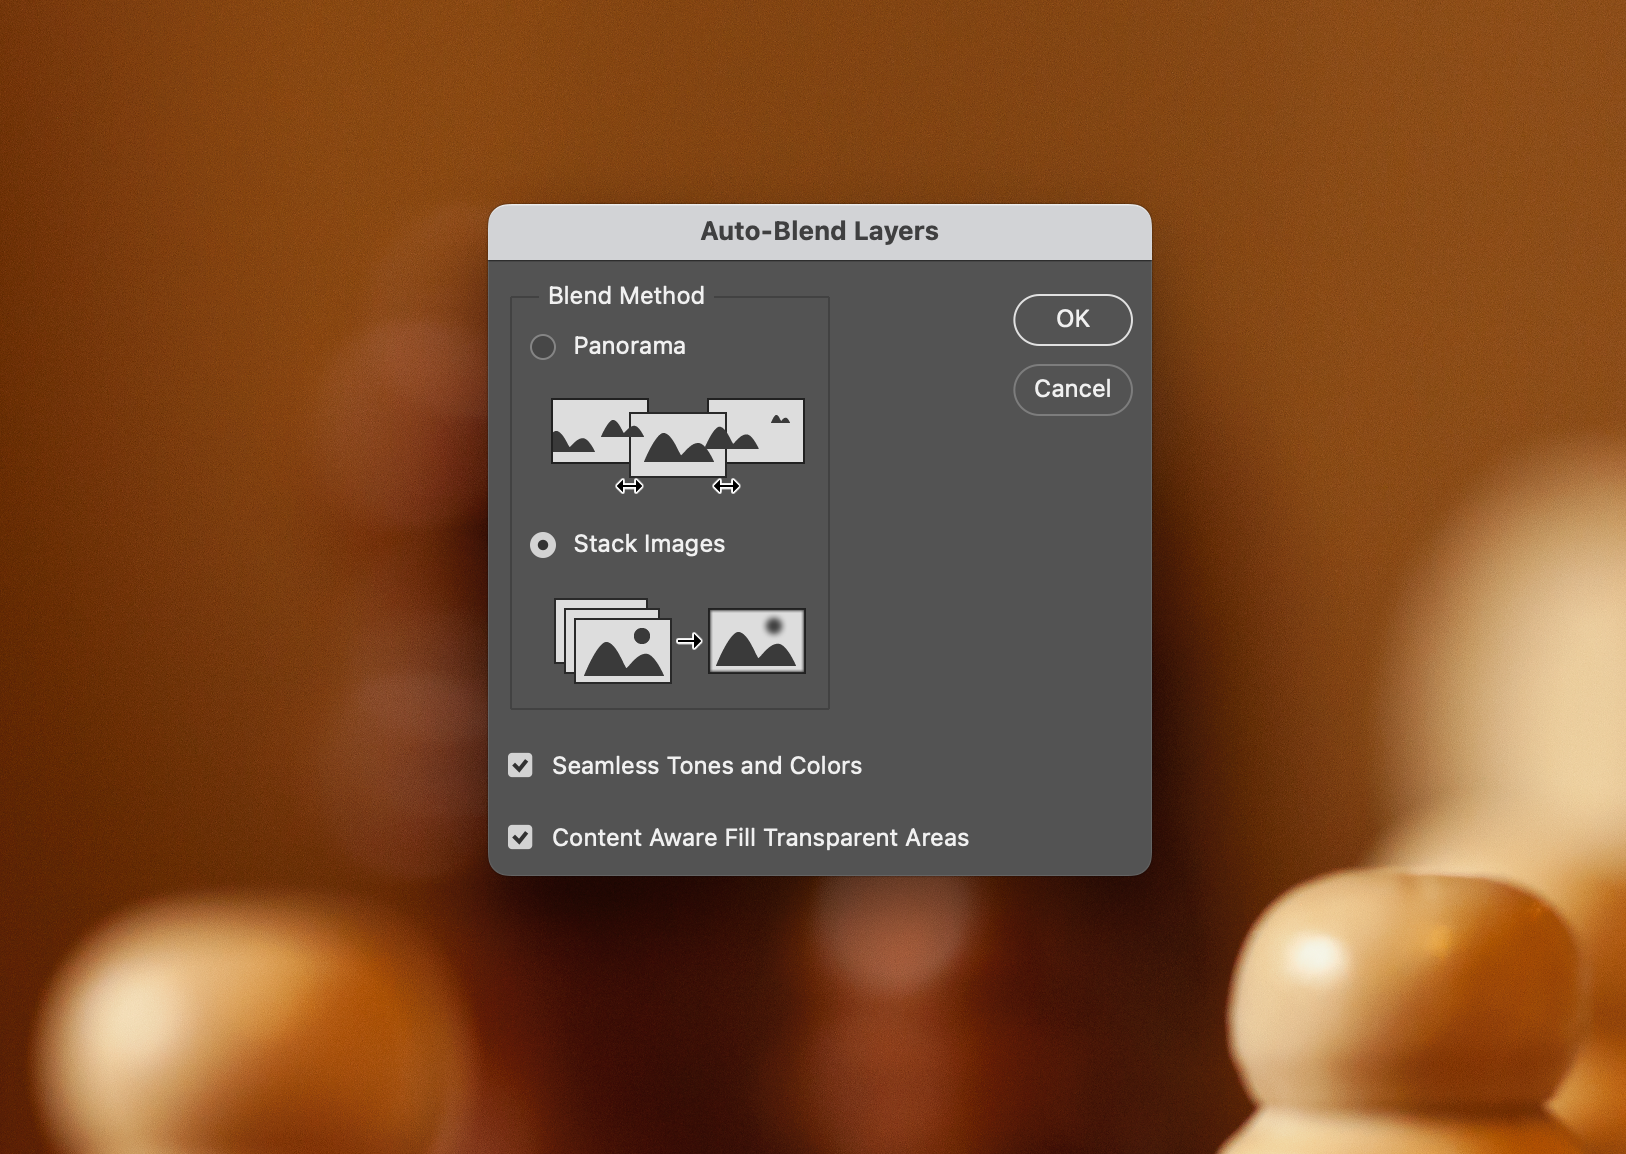
Go to Edit > Auto-Blend Layers. In the pop-up box, choose Stack Images under Blend Method. Check the Seamless Tones and Colours and Content Aware Fill Transparent Areas boxes. This step creates layer masks and blends your images together. Finally, you will get the stacked photo with all the areas in focus.
10. Save the file
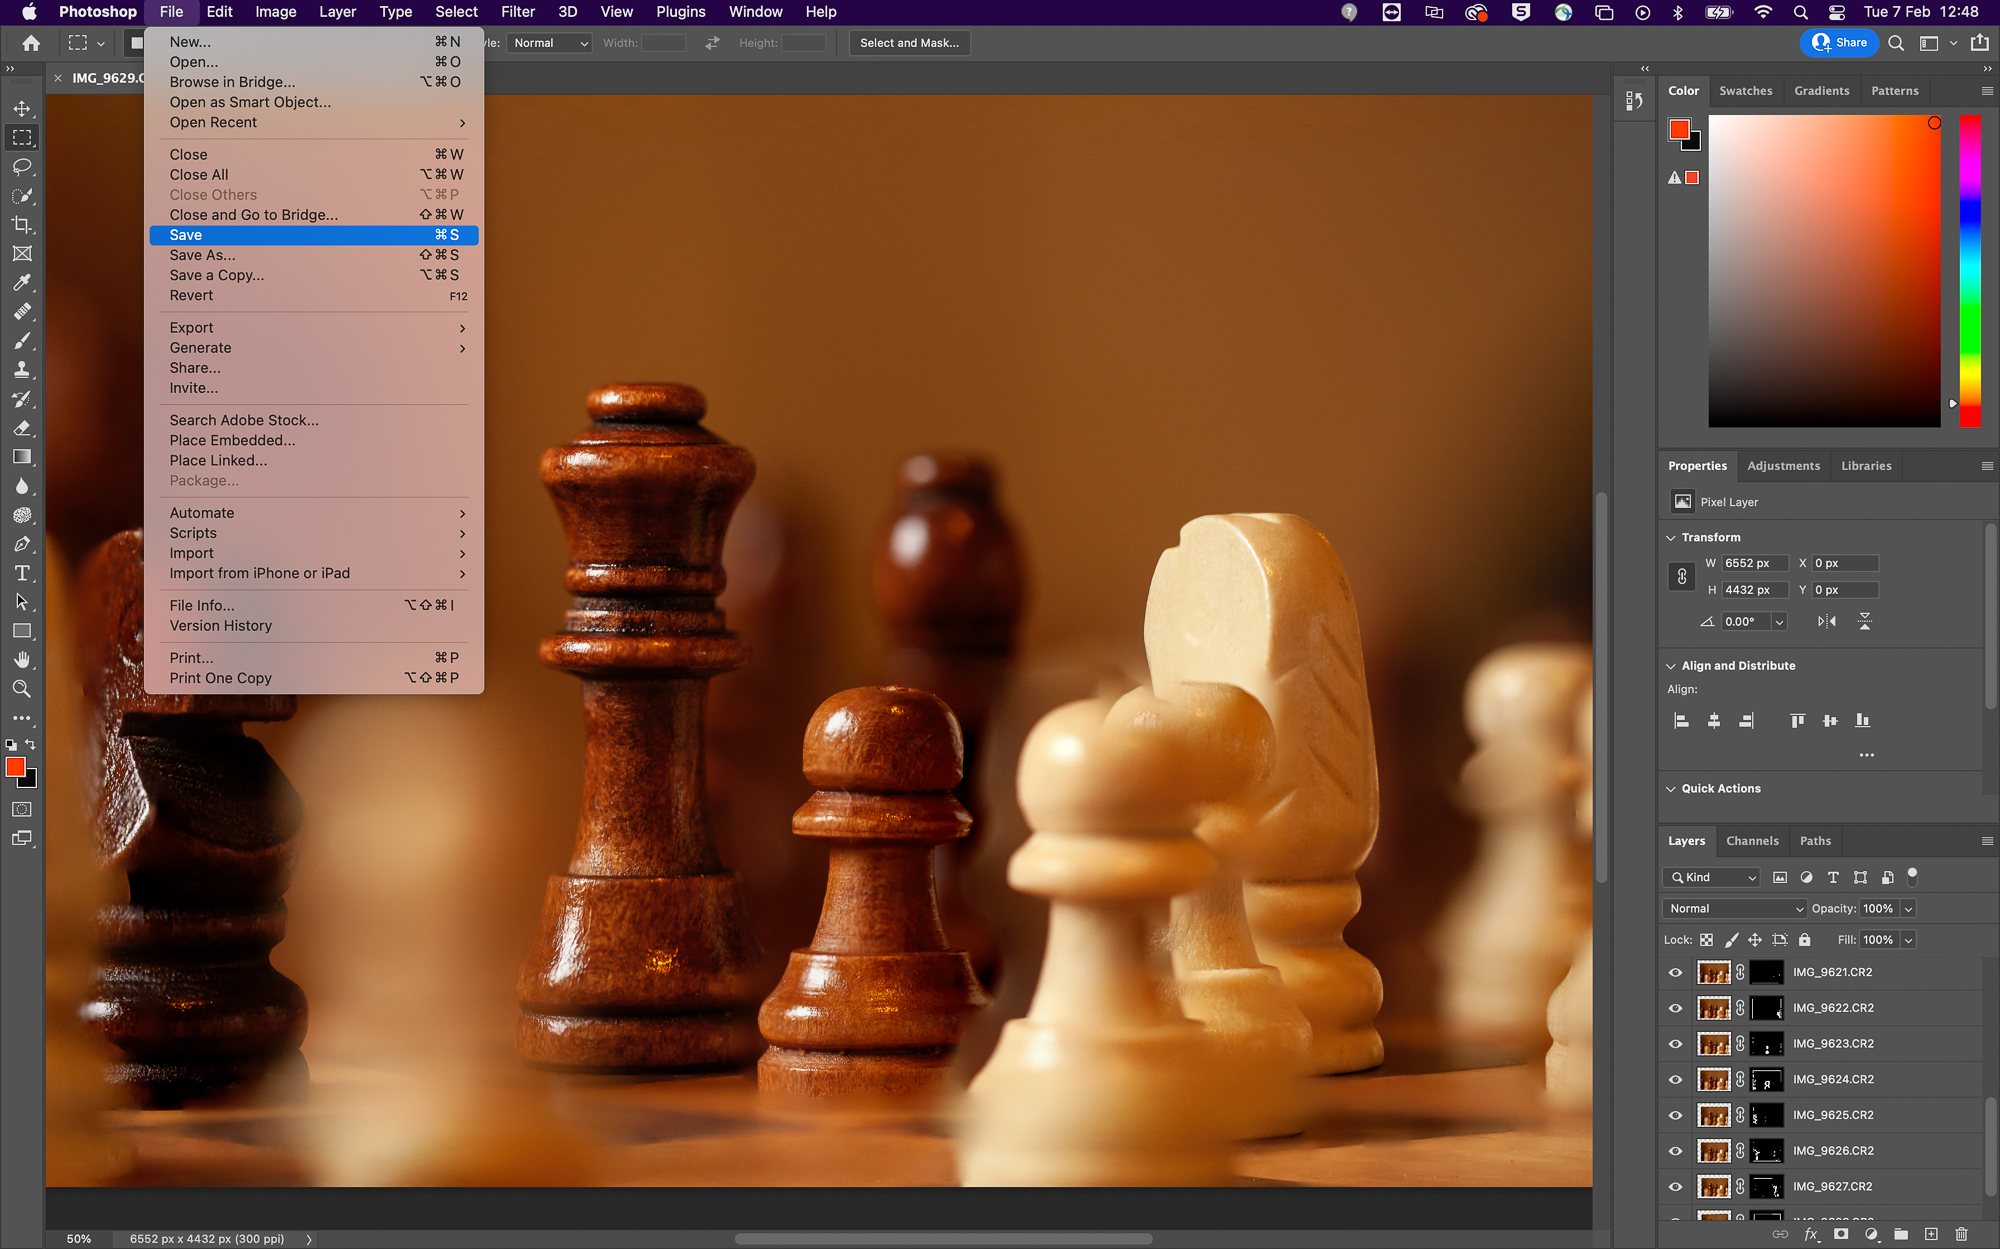
Once you save your photo in Photoshop, it will open as a TIFF file in Lightroom. You can tweak your image further or export it as a JPEG image right away. And, that’s it. You’ve finished your first focus-stacked image.
These are The best macro lenses in 2023, and we've also got more home photography ideas.
Get the Digital Camera World Newsletter
The best camera deals, reviews, product advice, and unmissable photography news, direct to your inbox!
Alistair is the Features Editor of Digital Camera magazine, and has worked as a professional photographer and video producer.
