How to use clipping masks to blend images and text
Striking designs in minutes
Download project files to your computer from here
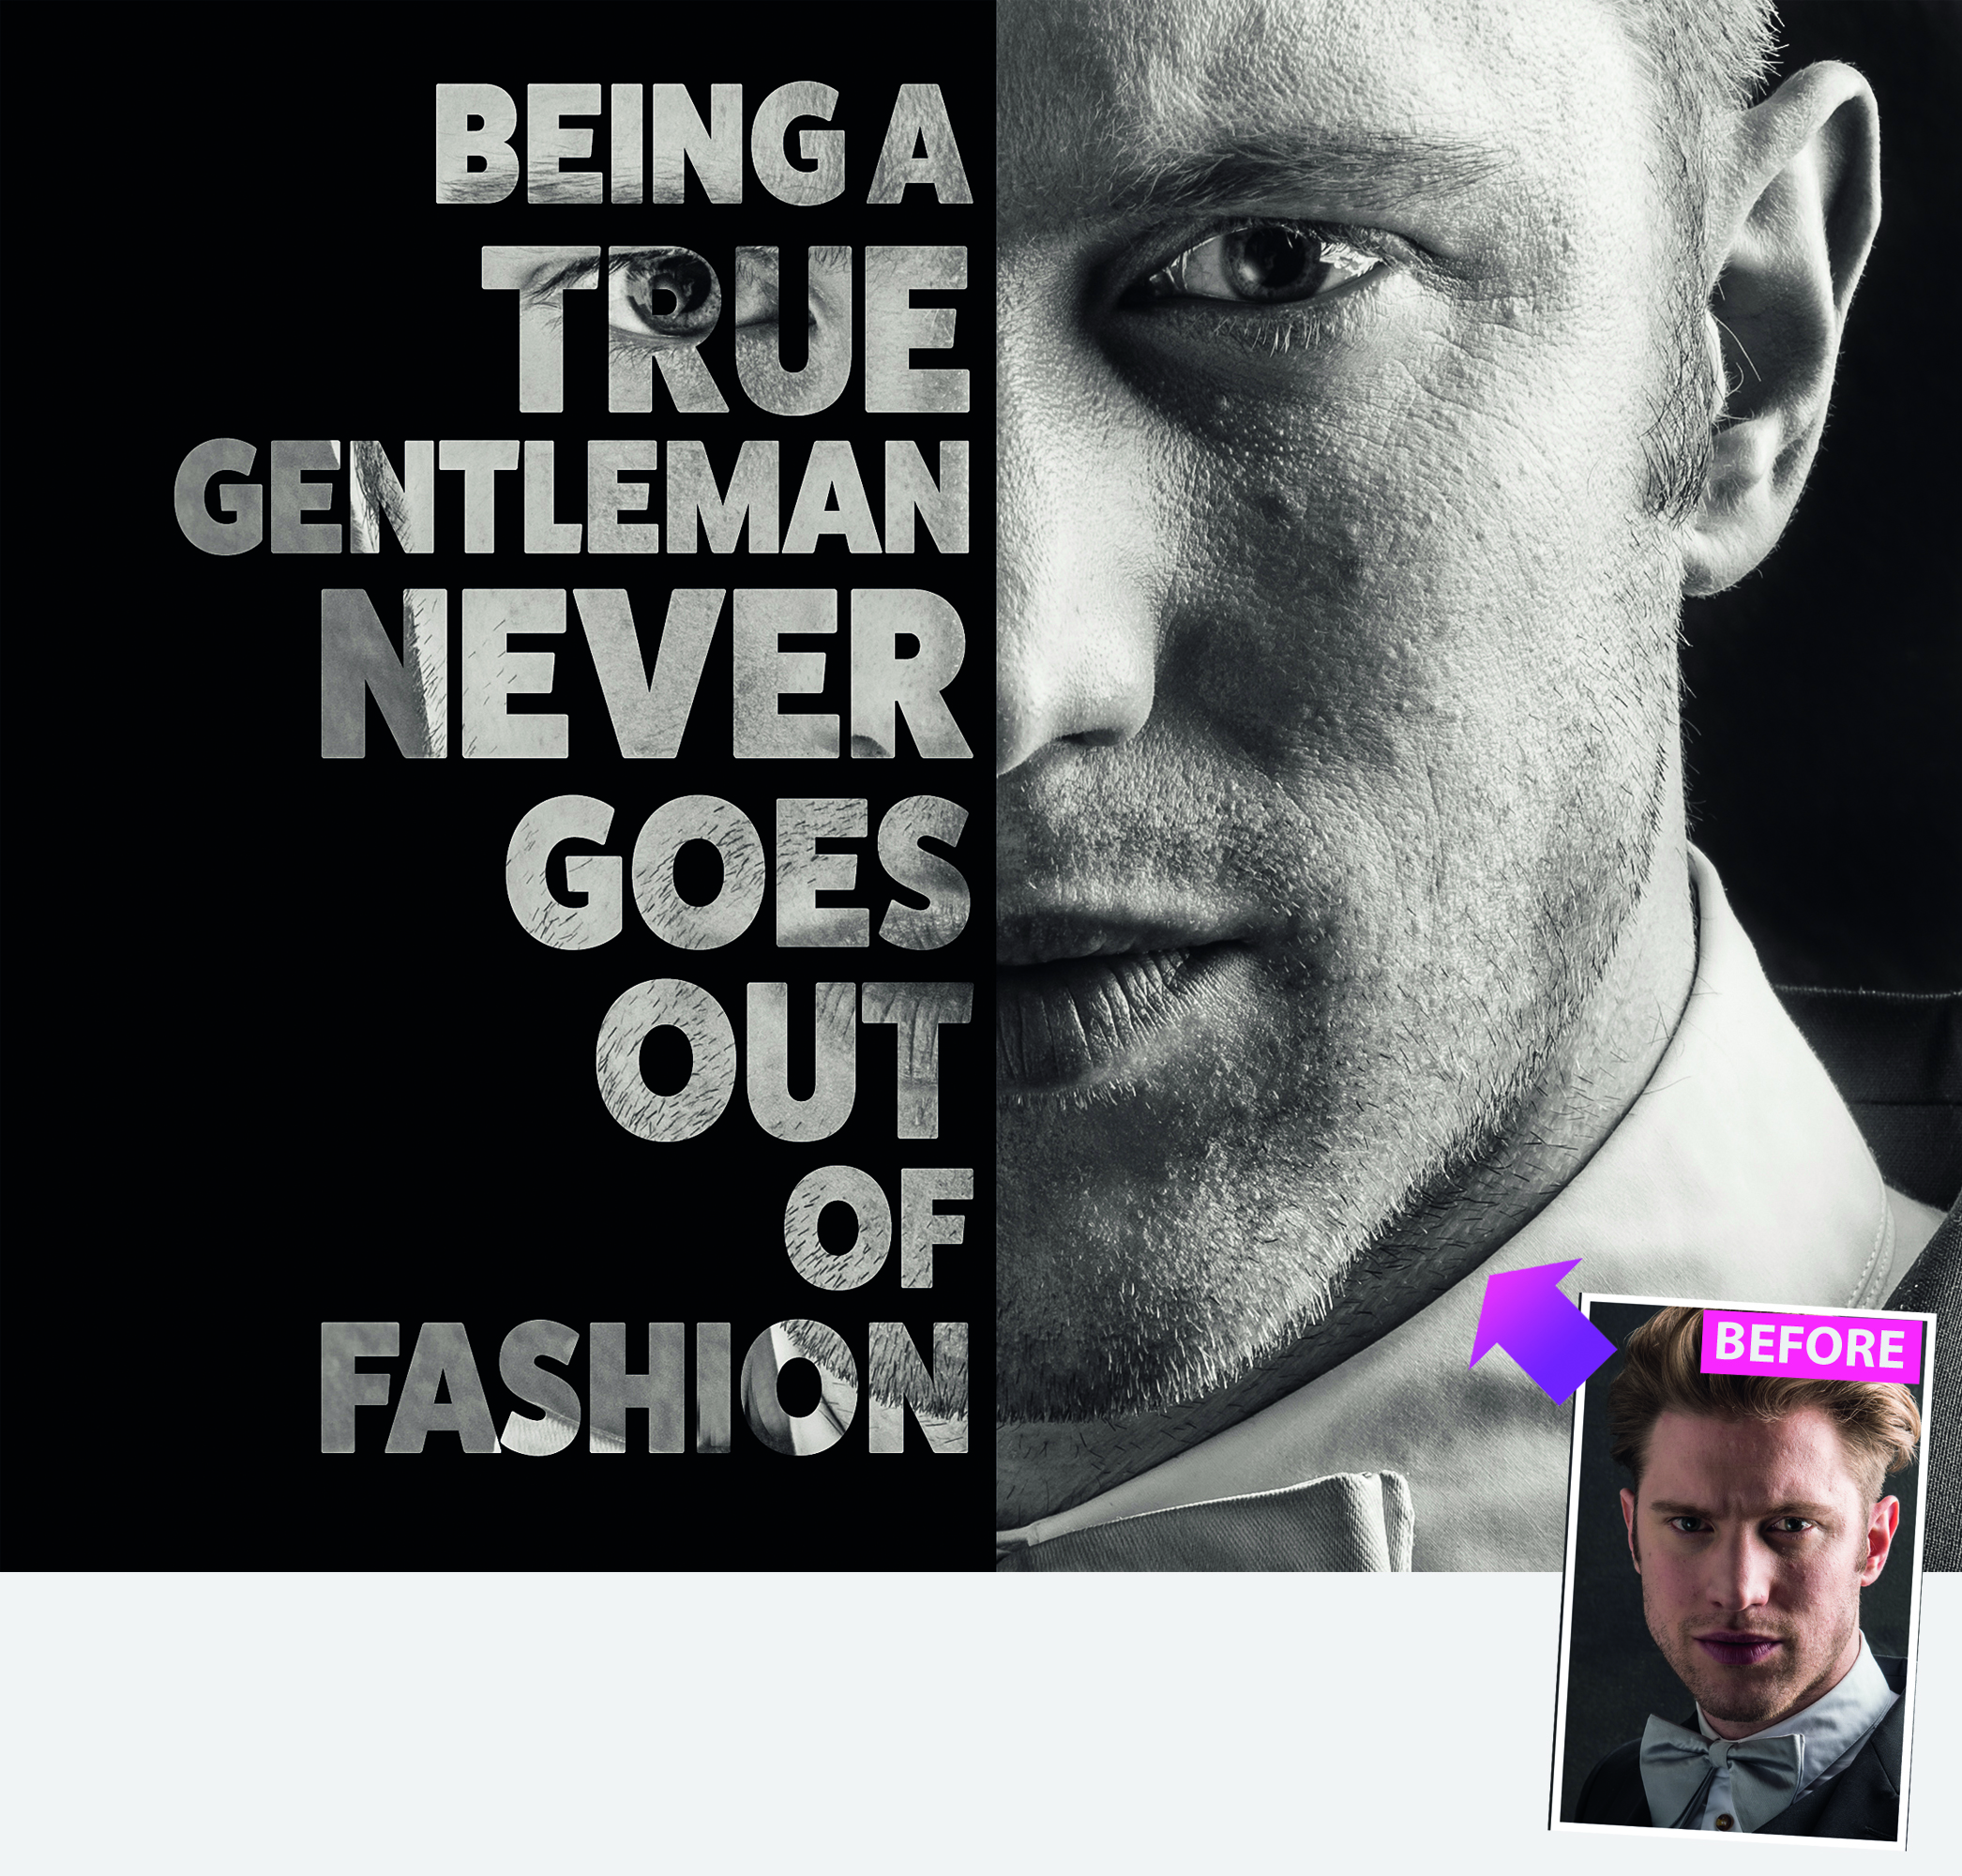
Learn how to use clipping masks to blend images and text creatively
Time needed: 10 minutes
Skill level: Beginner
Kit needed: Photoshop CC
Should you be looking for interesting ways to combine text and images, why not give this Photoshop technique a go?
Blending a word, phrase or quote with an image could have all sorts of uses, from stylish poster designs to internet memes. What’s more, the method offers a good introduction to Photoshop clipping masks.
Although it’s primarily an image editor, Photoshop has a huge variety of tools for designers, including excellent type tools and controls. Using a combination of the Type tool and Character panel, we can style up our words and fine-tune the sizing until they work with the image. That’s where clipping masks come in.
Clipping masks work by confining the contents of one layer to the shape of the layer below. They let you instantly blend images with text and other shapes, which comes in handy for all kinds of creative designs.
But clipping masks aren’t just for designers; they also prove very handy when used in combination with adjustment layers. These types of layer normally work by filtering all the layers below them in the stack, but if you ‘clip’ the adjustment it only affects the layer directly below, which means you can apply non-destructive tonal changes to individual layers in a document without affecting everything else.
Step by step: Blend words and images
Learn how to use type controls and clipping masks to create fantastic designs
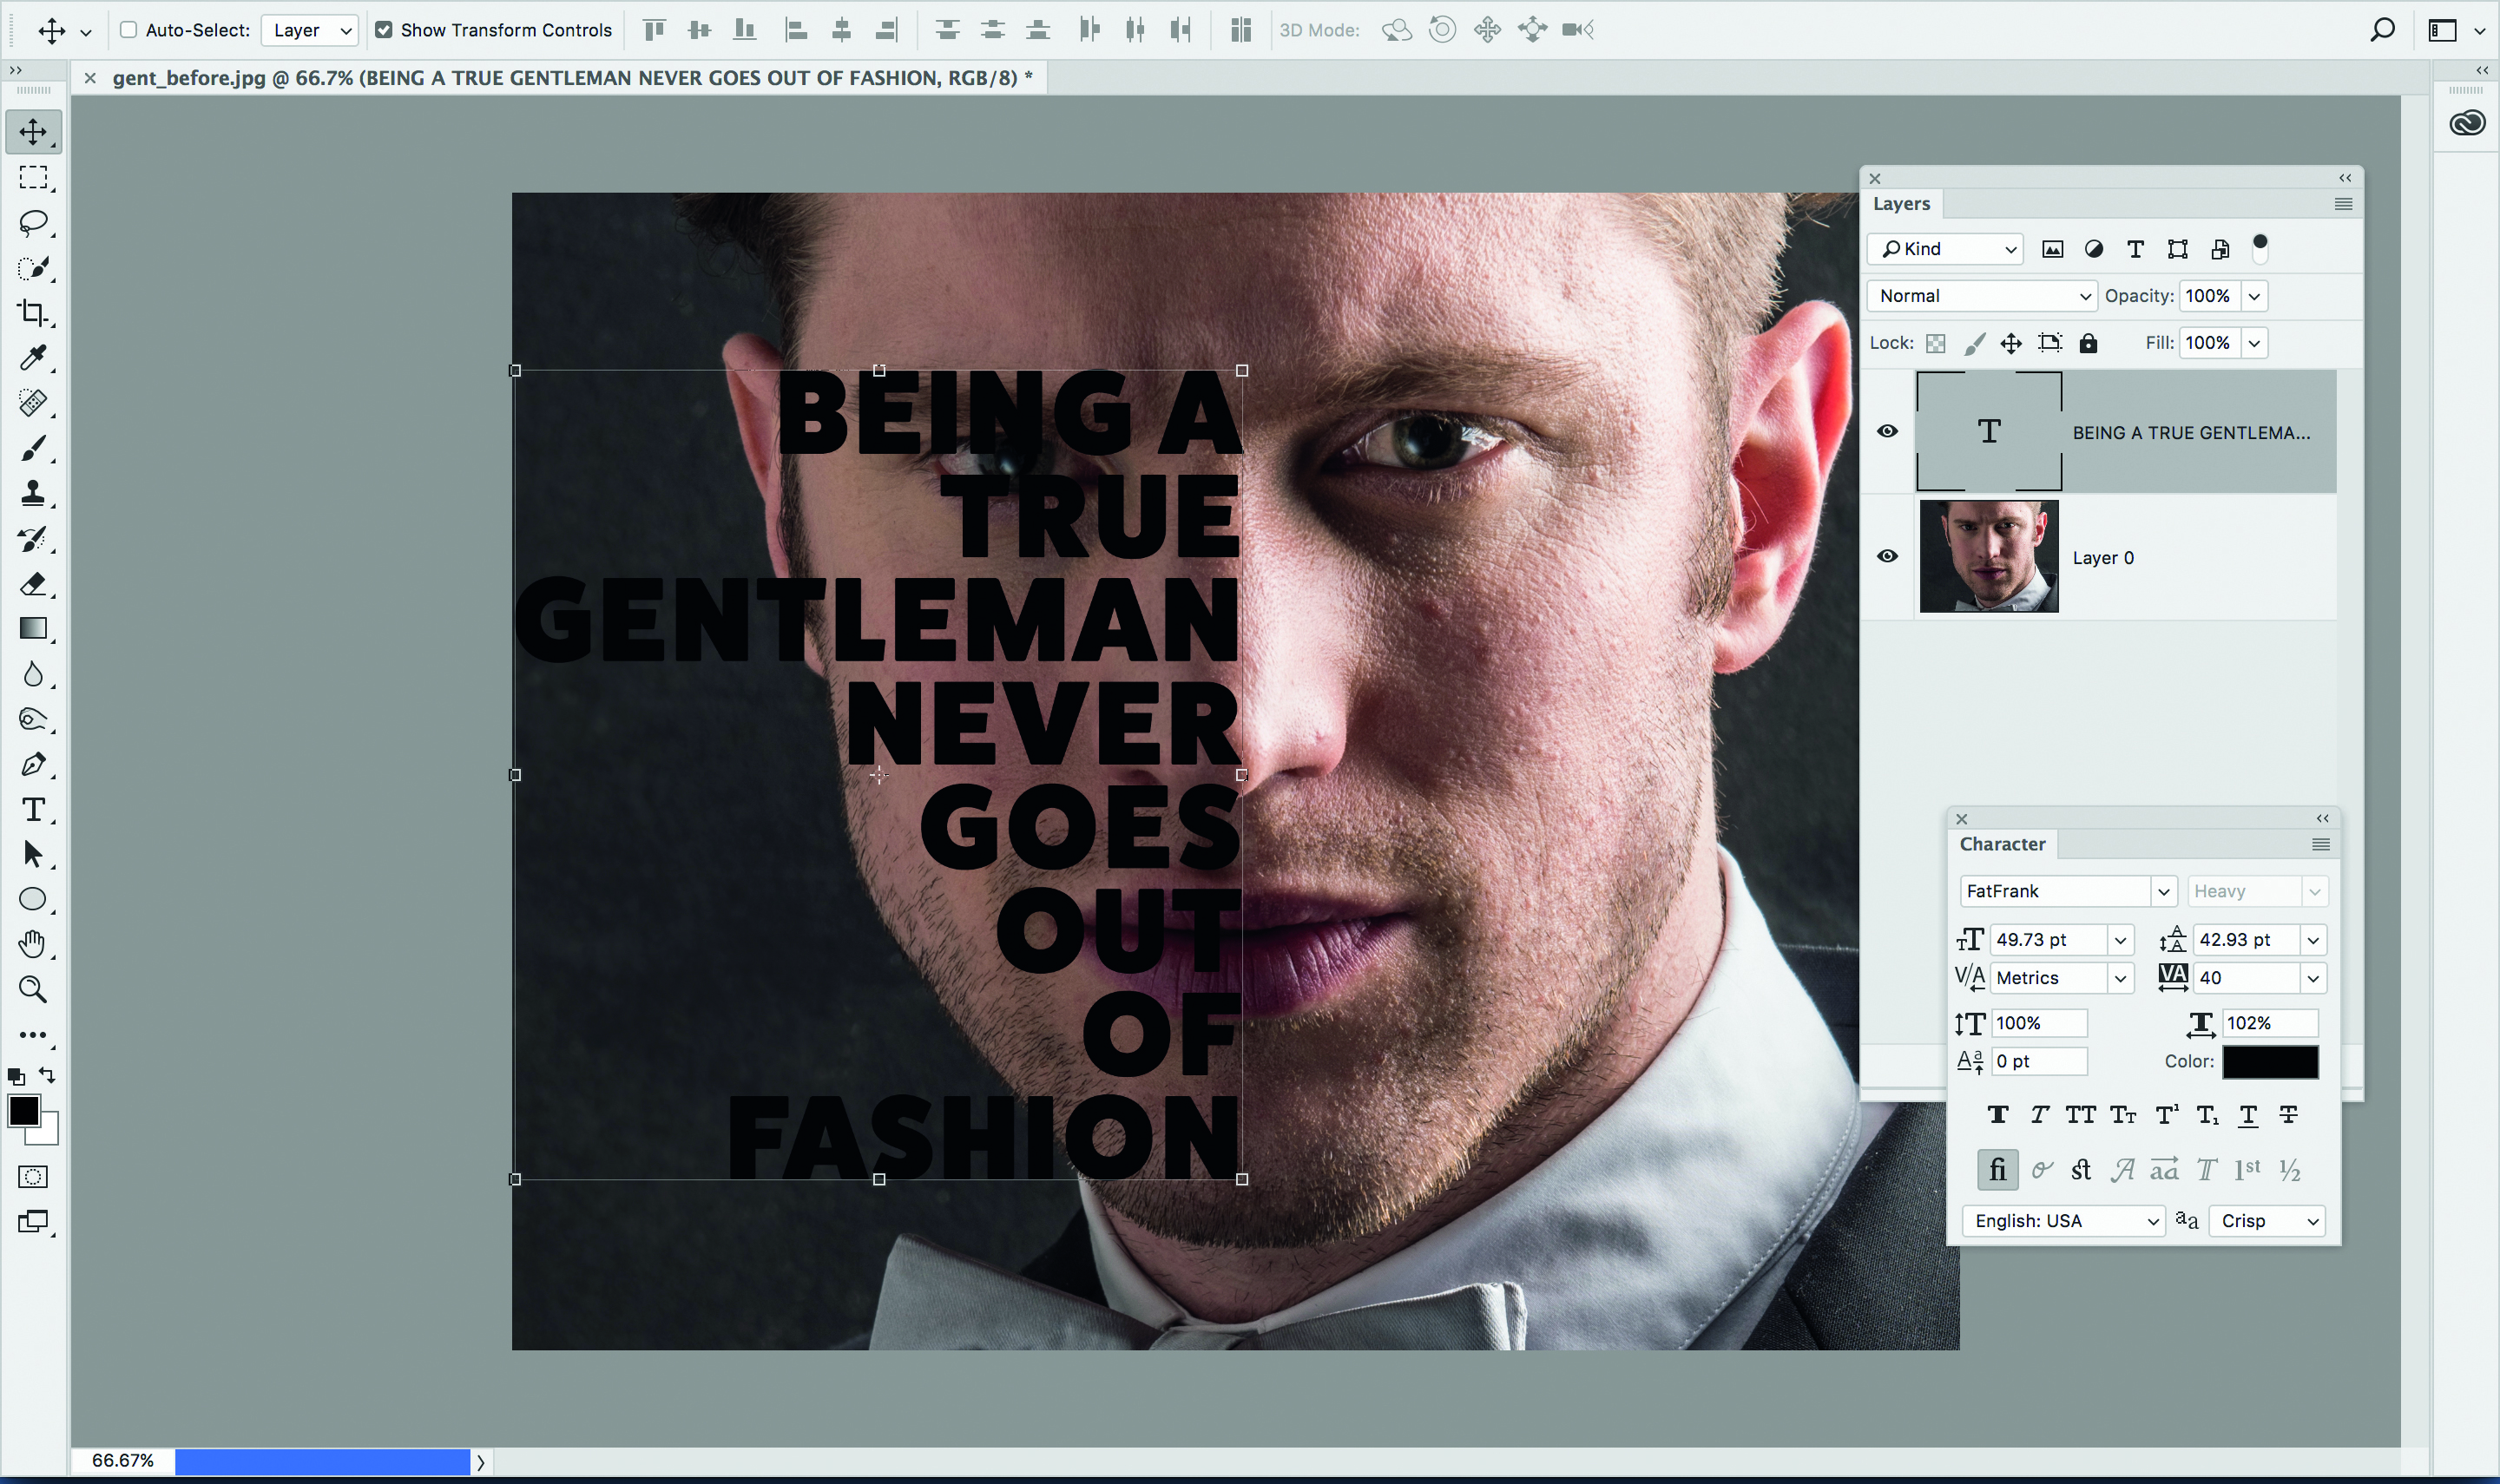
Photoshop has a powerful type engine with some very useful controls, especially for CC subscribers. Photoshop CC links with Adobe Typekit, which brings you a huge library of font styles to choose from (go to Type>Add fonts from Typekit).
1. Make the text
Open your starting image. Click the Type tool, choose a bold, blocky font, then type your words. Experiment with the font size and line breaks using the Character panel (Window>Character) so that the words roughly cover half the face. Crop in tighter to the face.
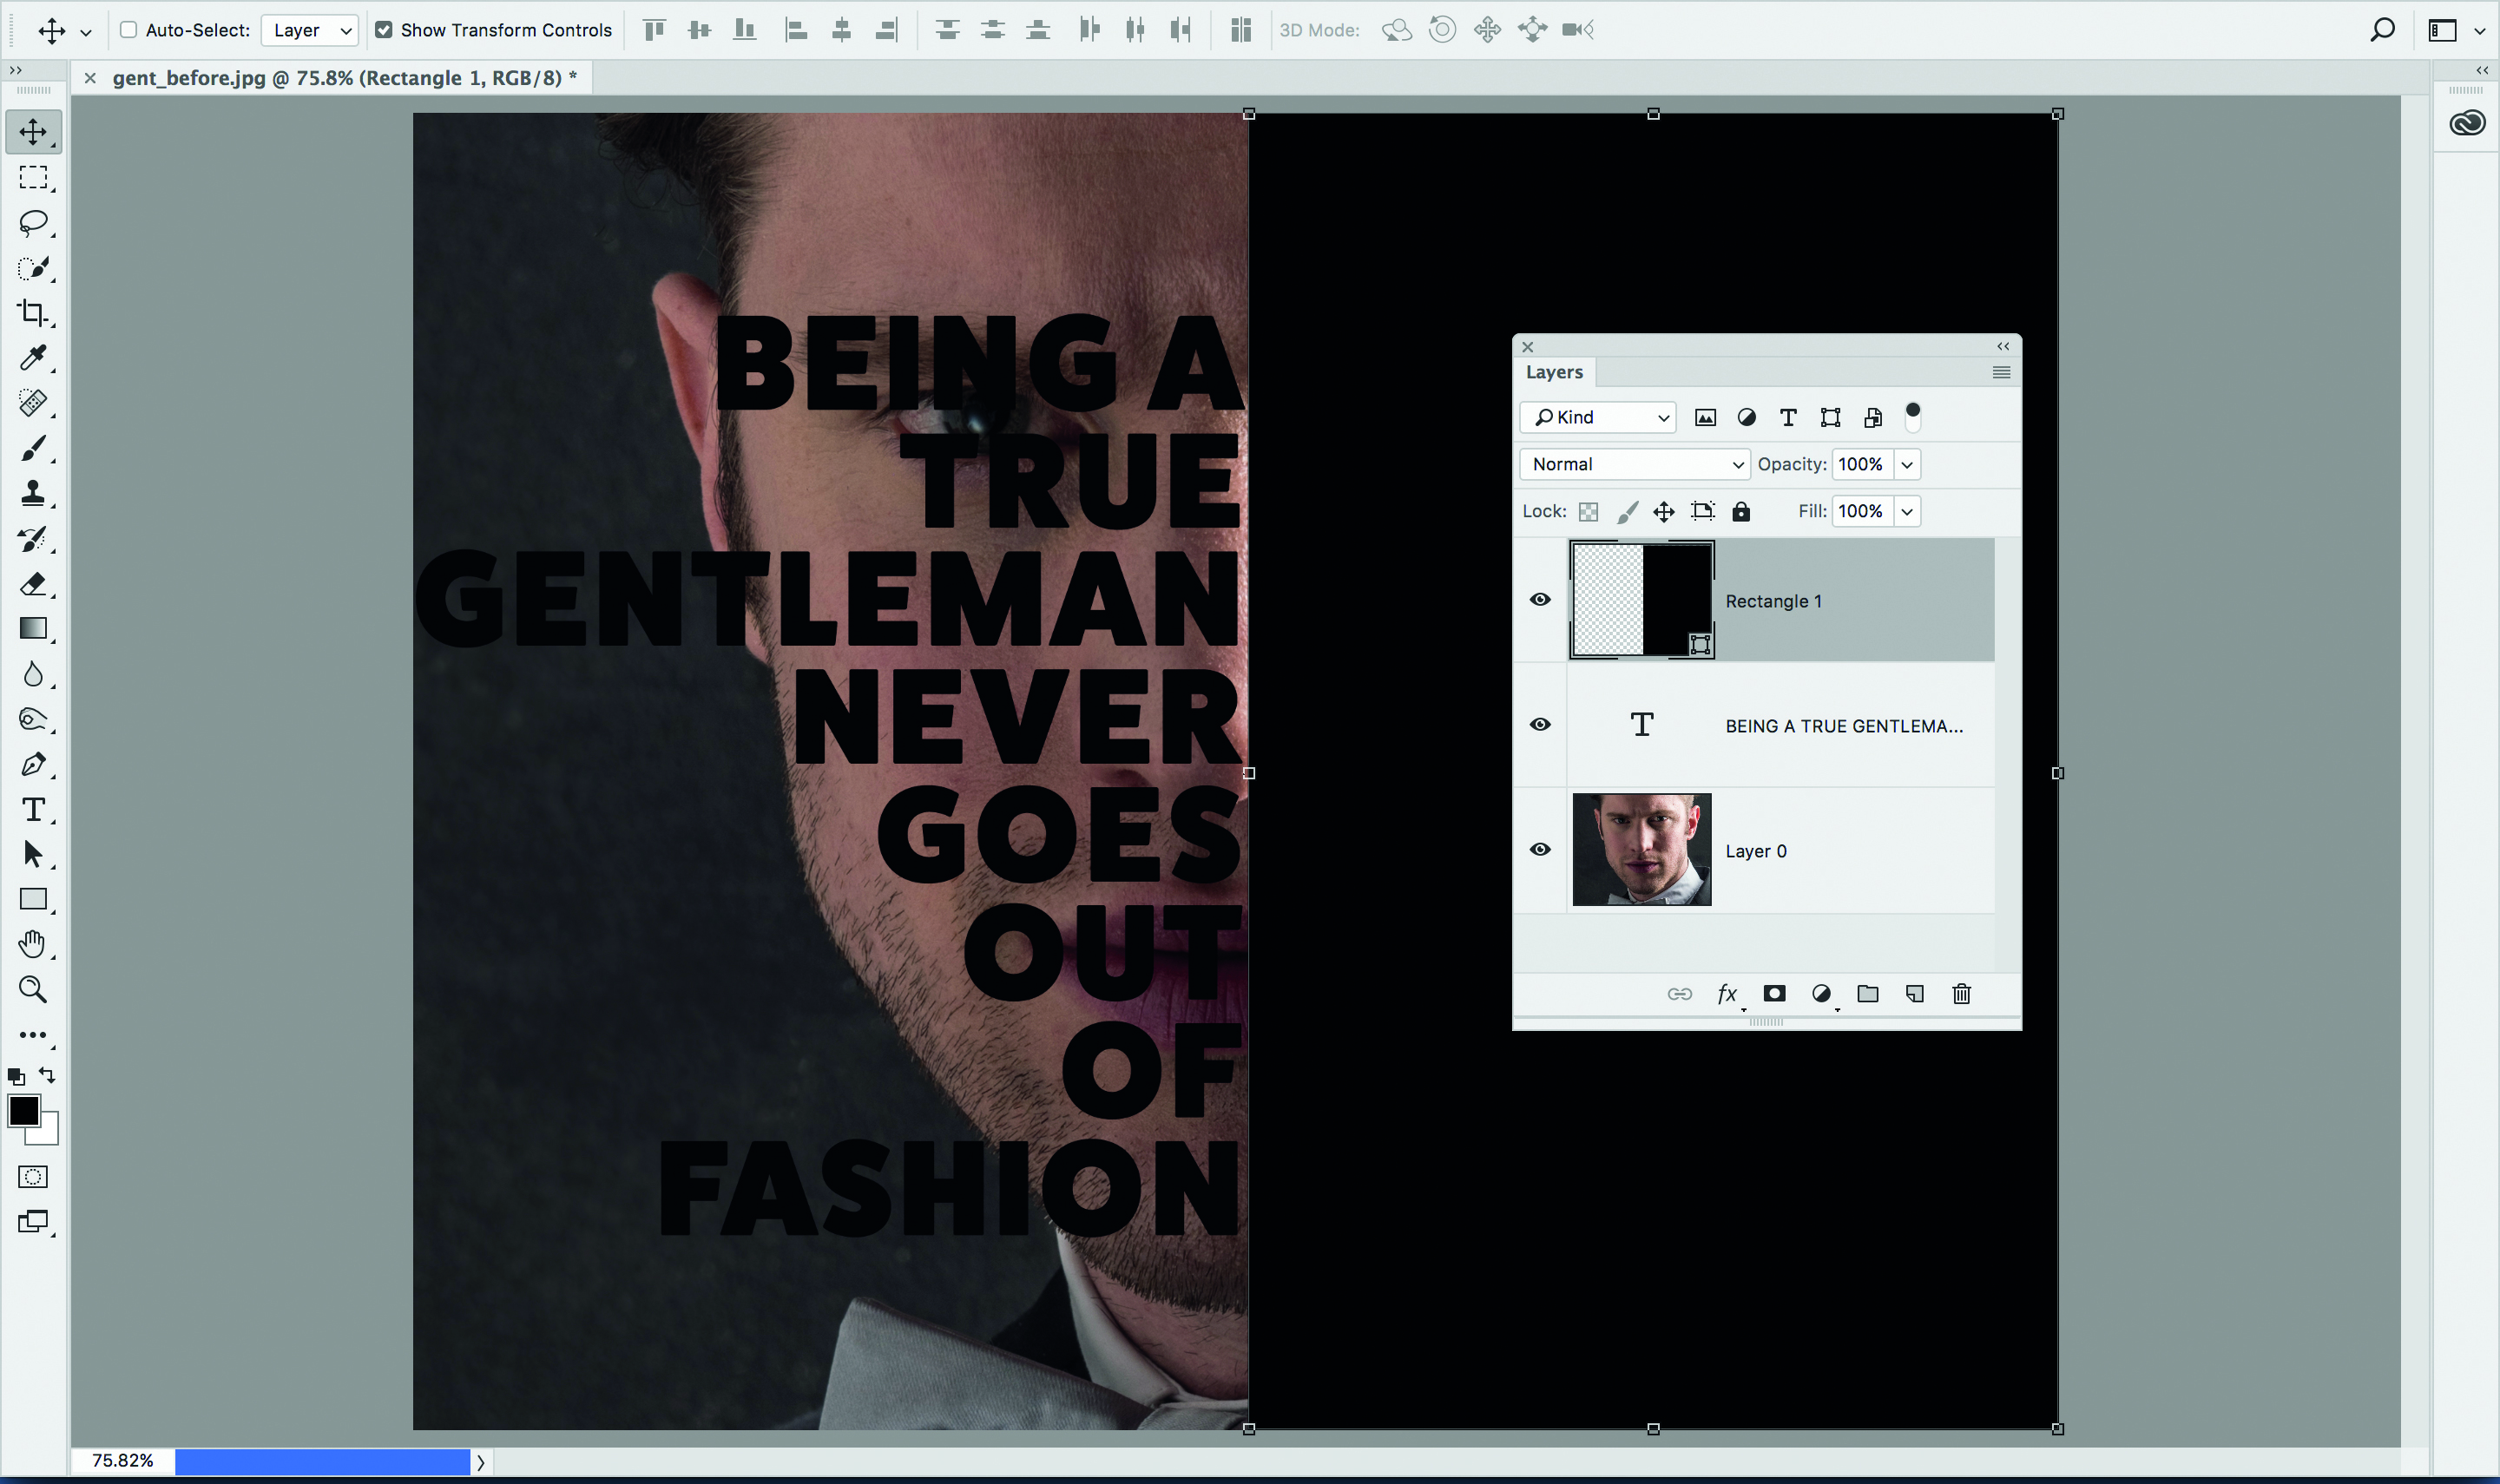
2. Add a block
Go to the Tools panel and choose the Rectangular Shape tool. Choose ‘shape’ in the tool options at the top, then drag a box to cover other half of the face. Use the arrow keys to fine-tune the position. The colour of the box doesn’t matter.
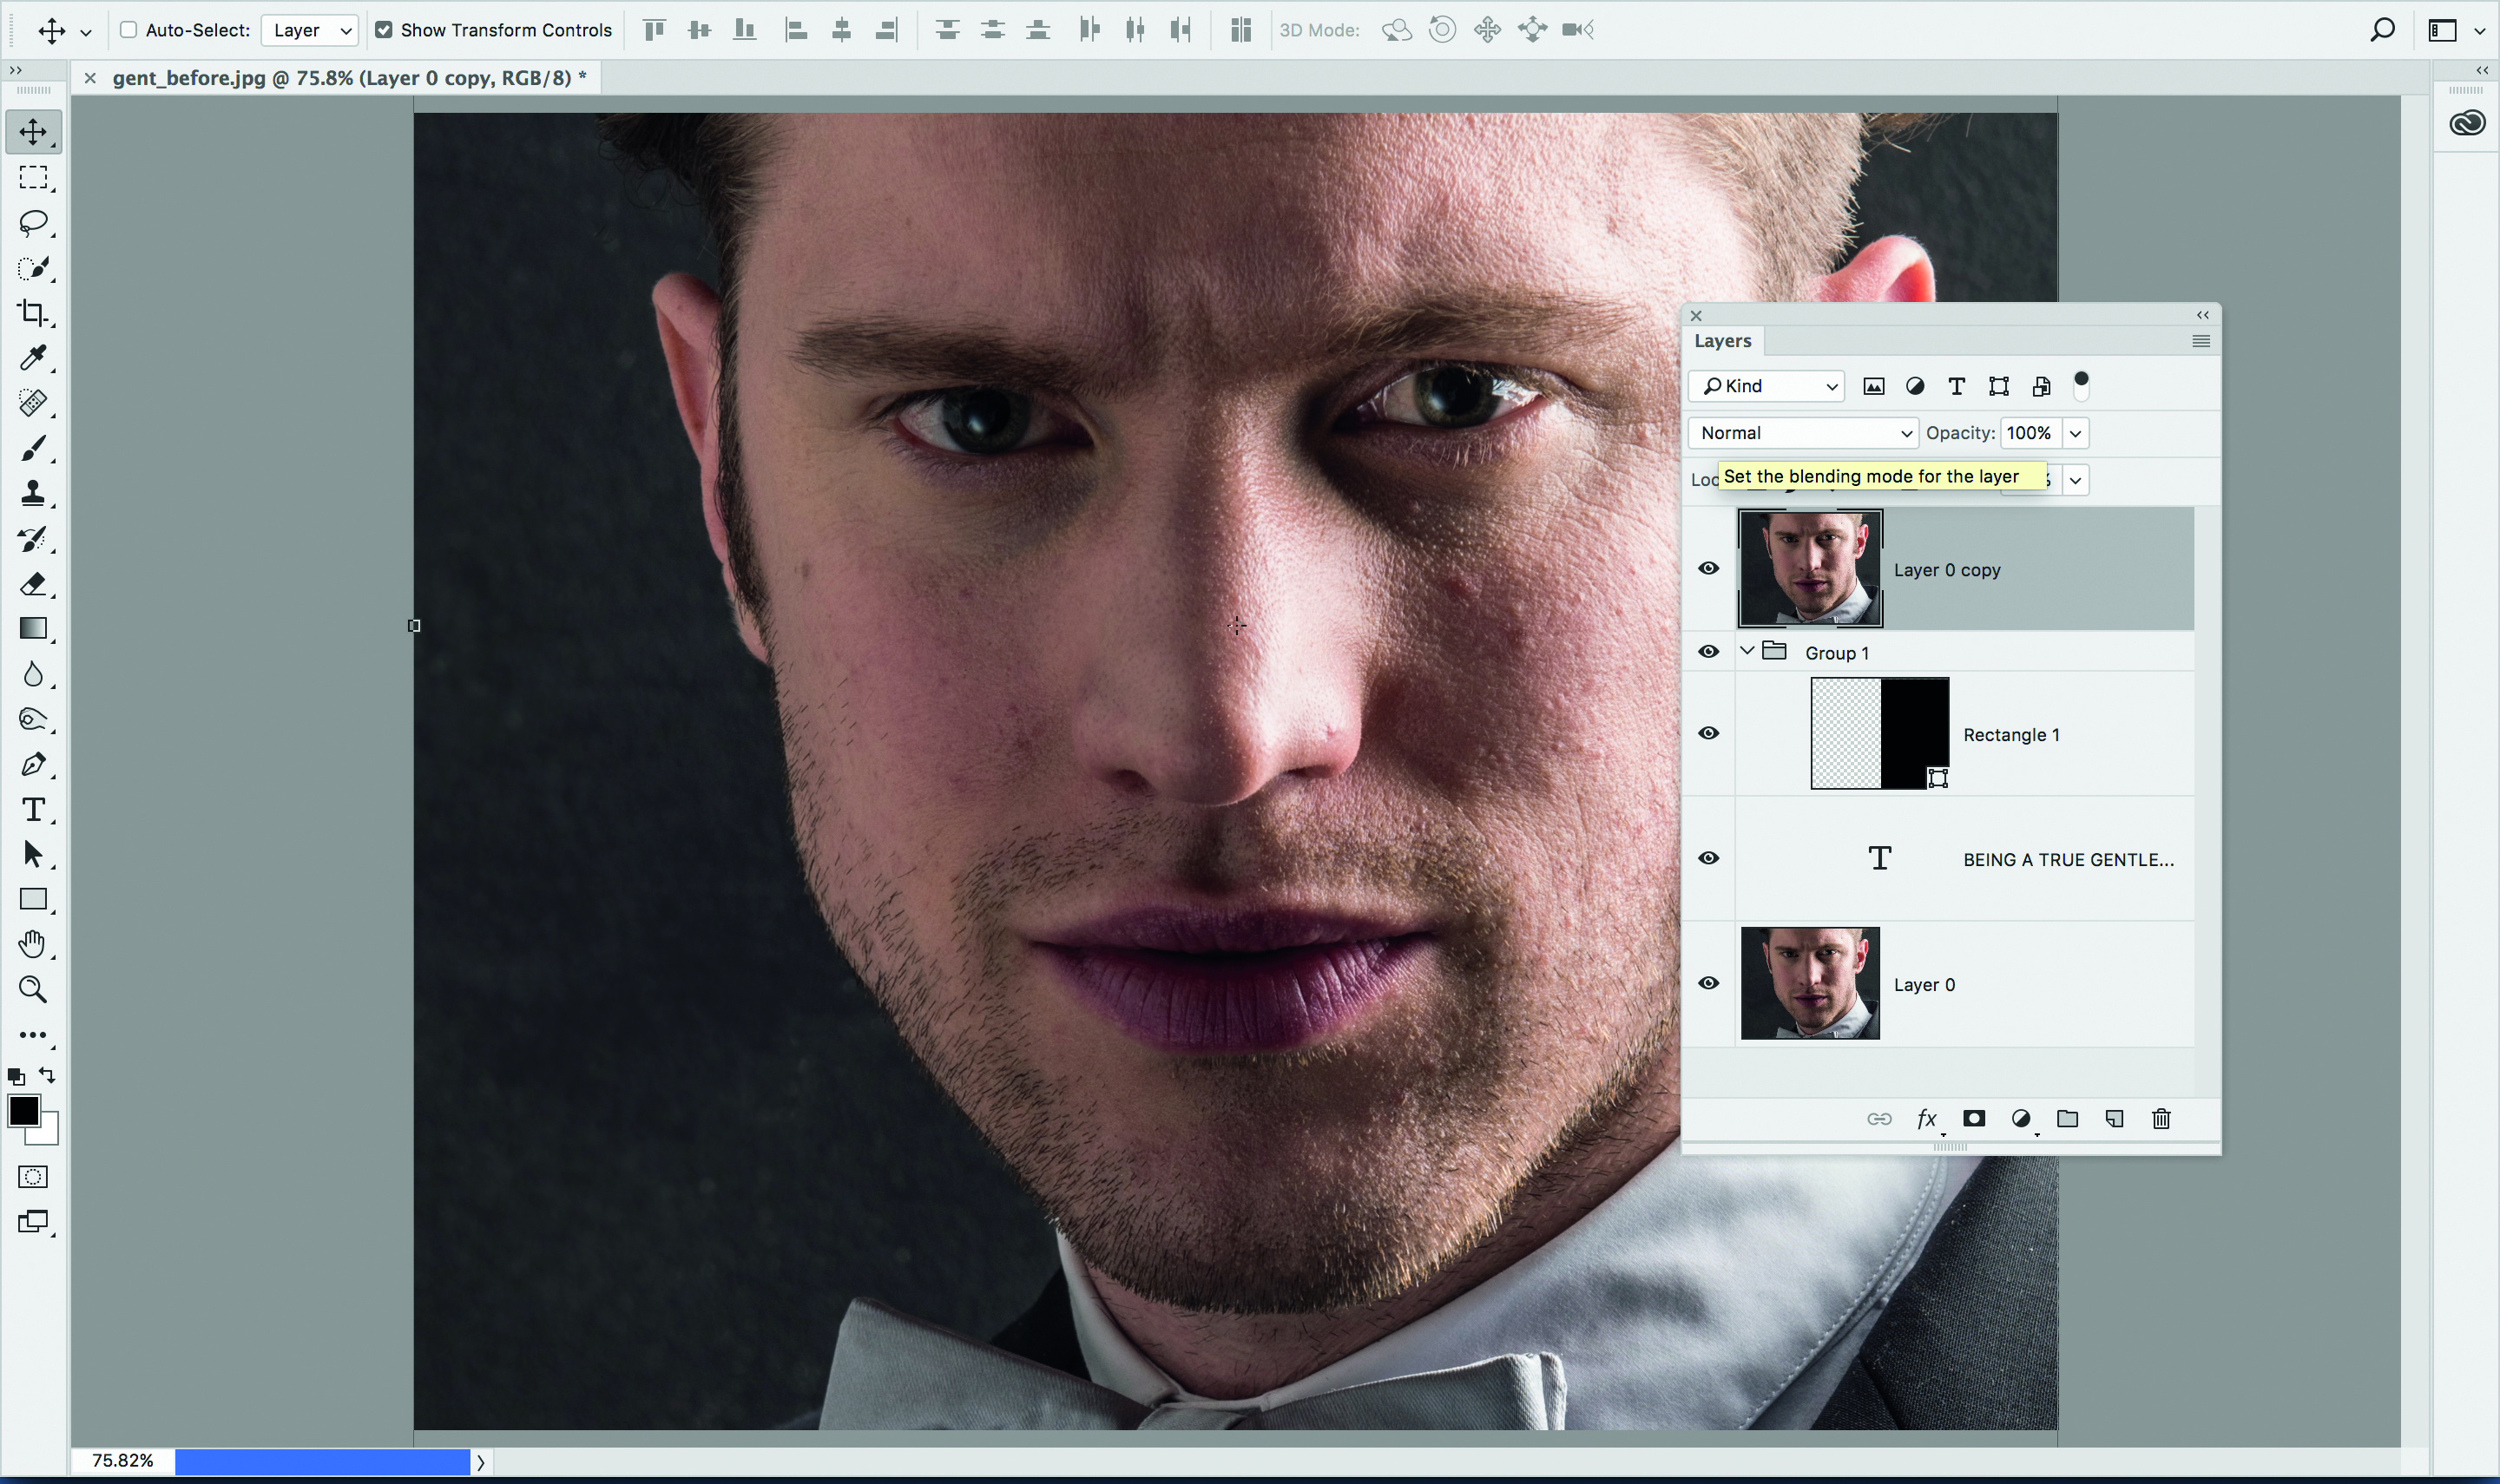
3. Group the layers
Hold Ctrl and click on both the text layer and the shape layer to highlight them both, then press Ctrl+G to group the layers. Highlight the bottom layer and use Ctrl+J to copy the layer, then drag the copy to the top of the stack above the group.
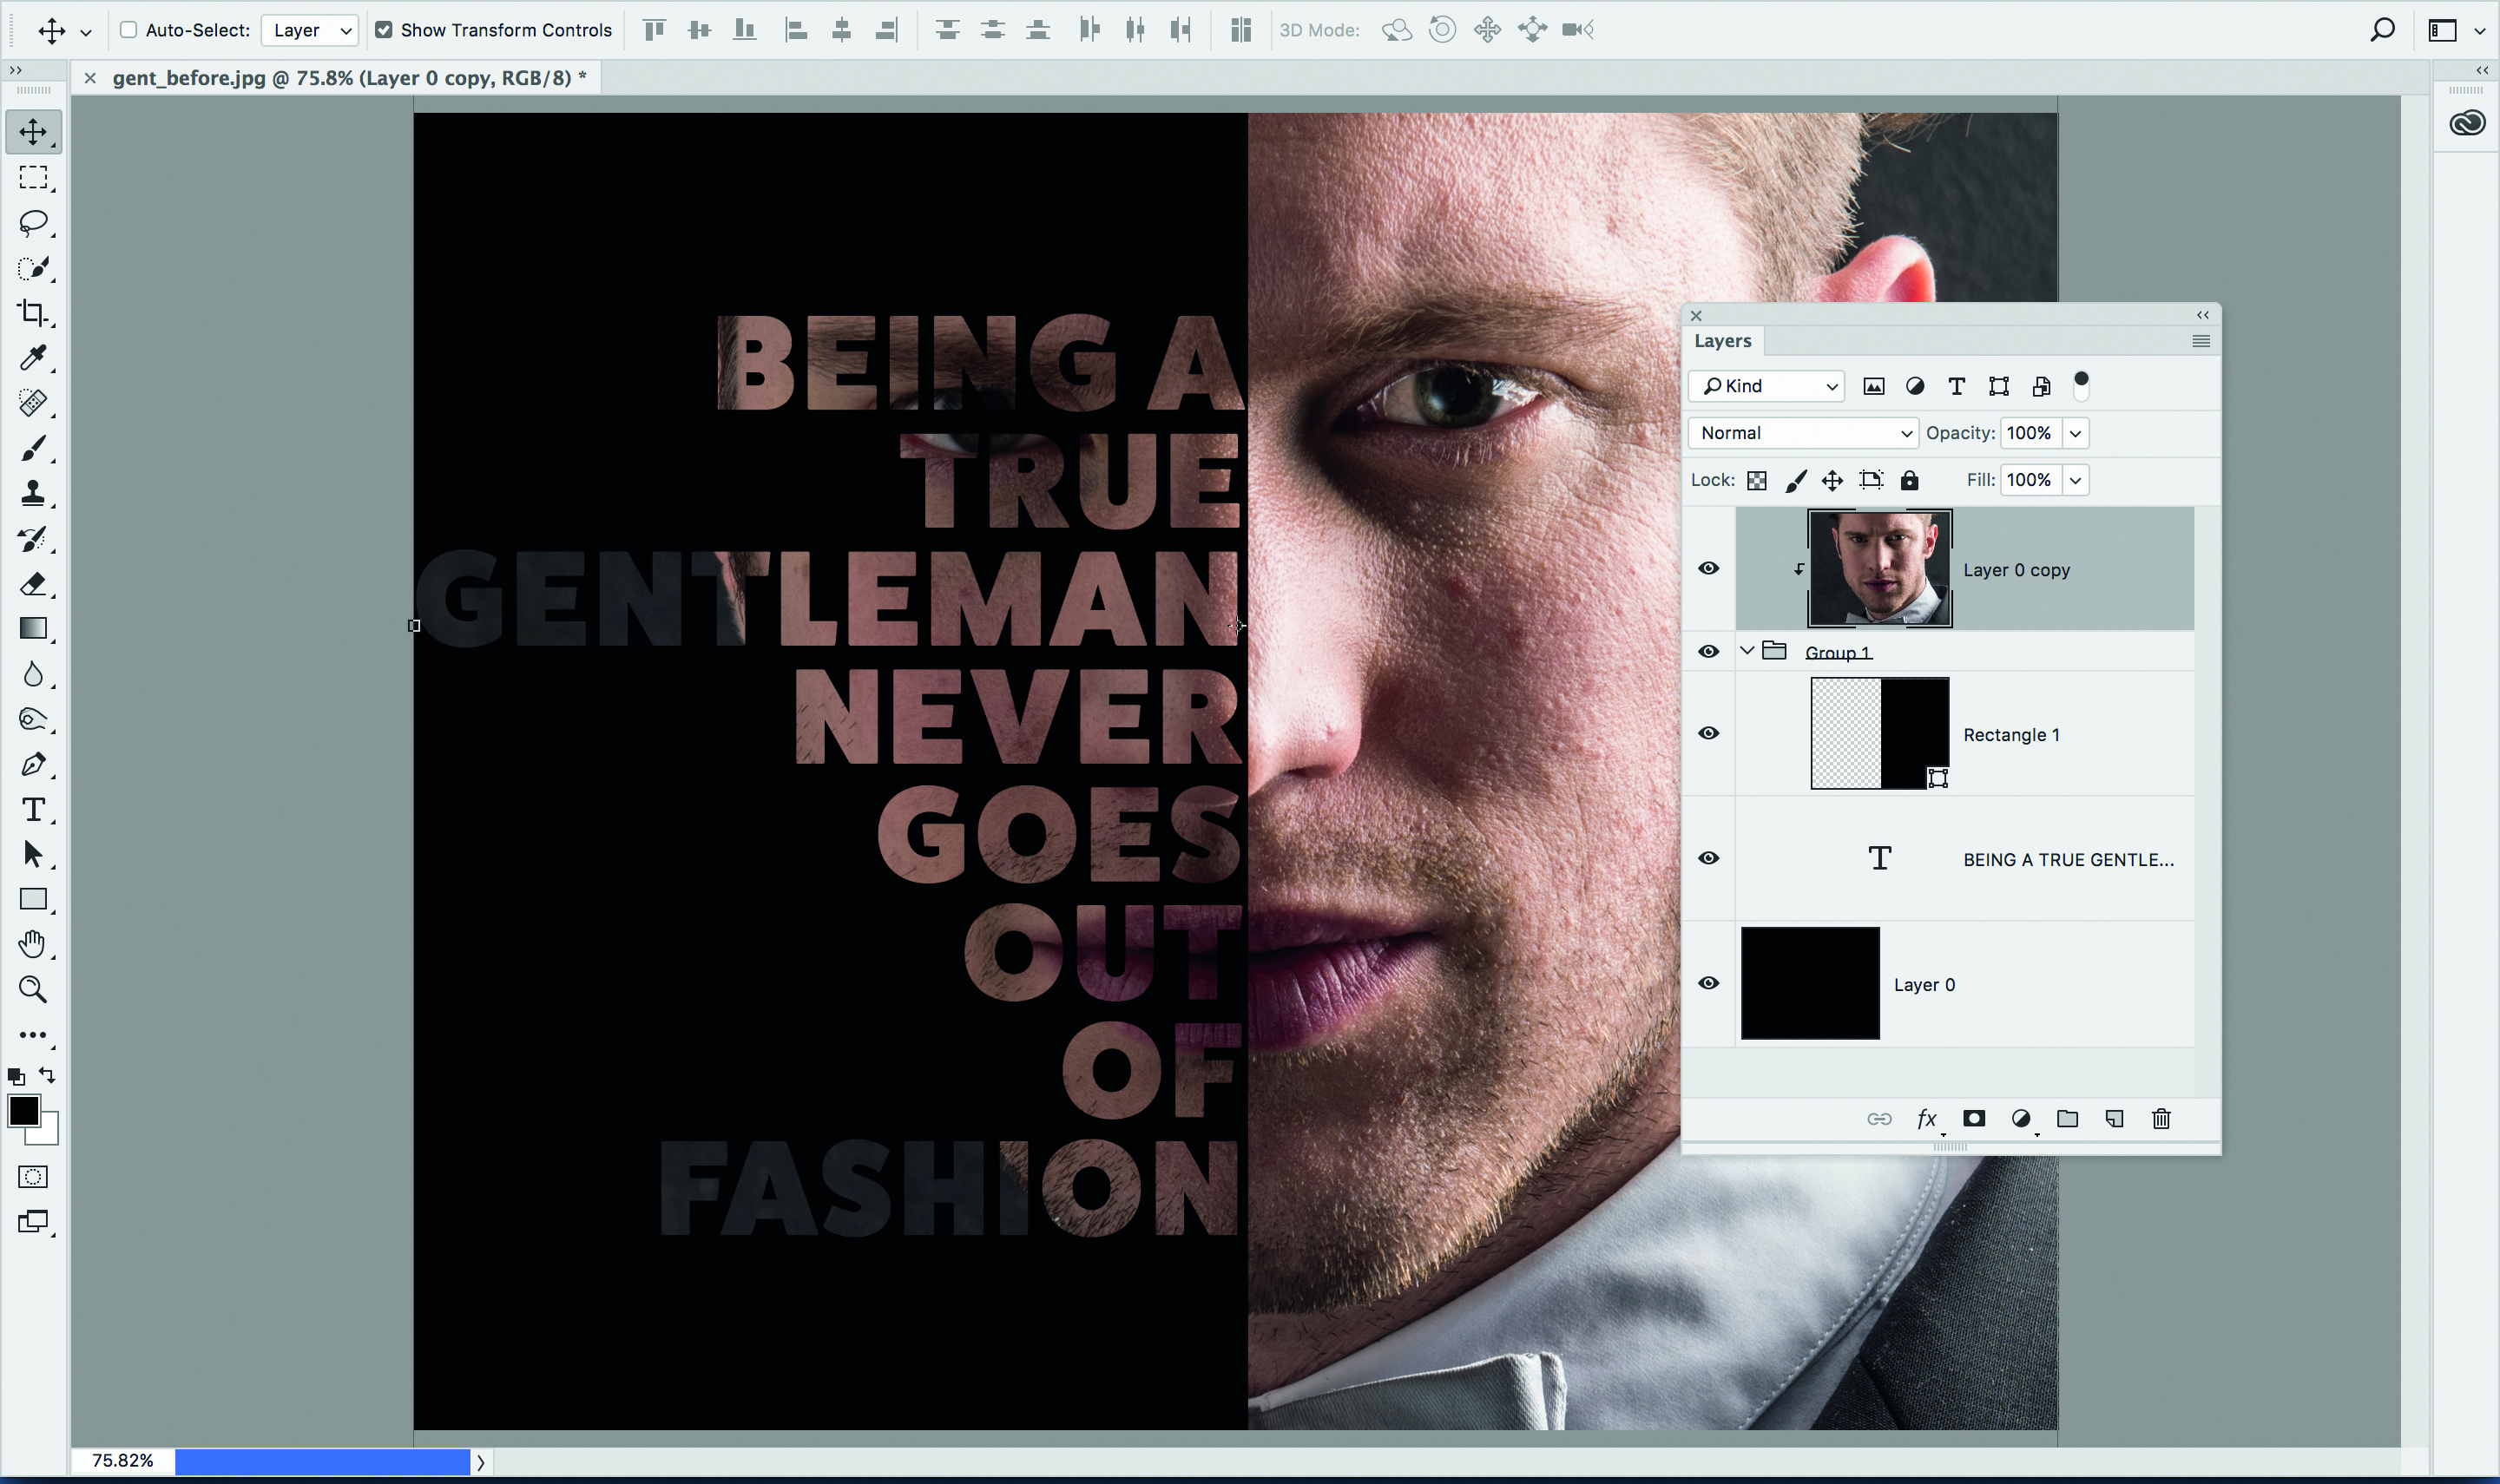
The shortcut to make a clipping mask is simple – hold Alt and click the line between two layers in the Layers panel
4. Clip the image
Highlight the background layer. Go to Edit>Fill. Choose Contents: Black and click OK. Next right-click the top layer and choose ‘Create Clipping Mask’. Doing this means the image is fitted to the shape of the words and rectangle.
5. Tweak the words
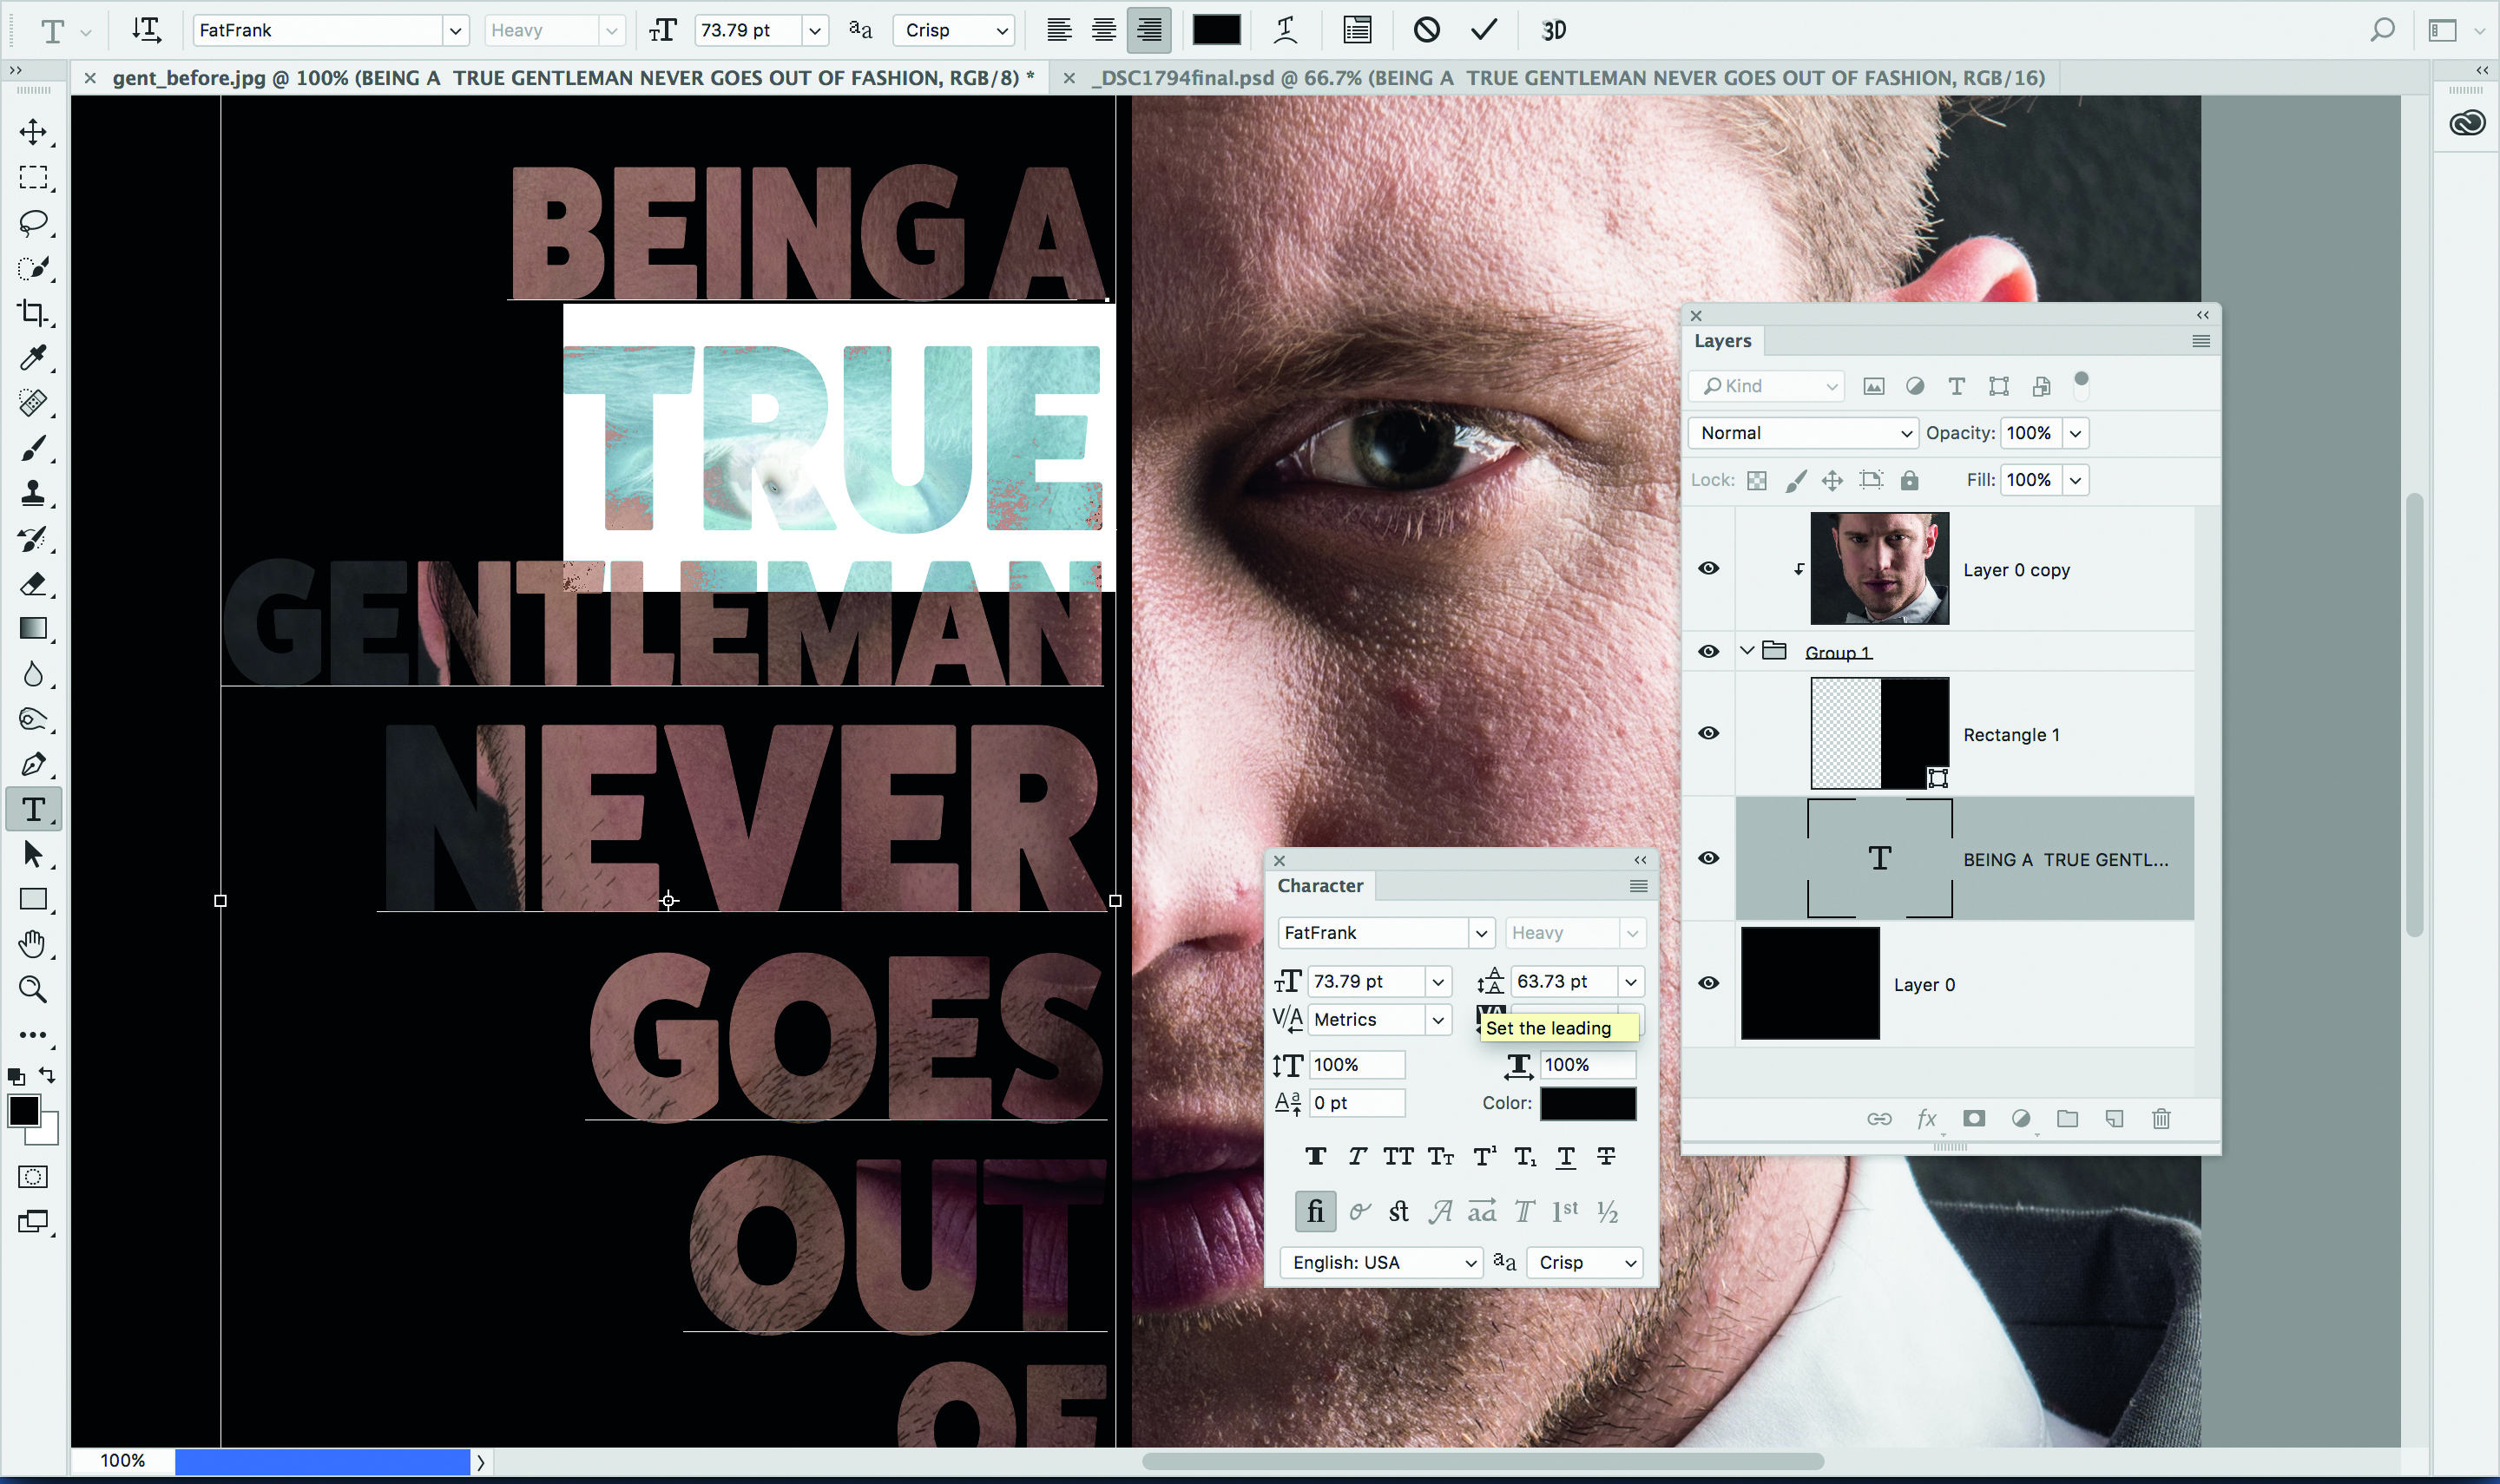
The great advantage to clipping masks is that everything stays editable, so you tweak away until everything fits together the way you want. Use the Type tool to highlight words then experiment with sizing and alignment options in the Character panel.
6. Convert to mono
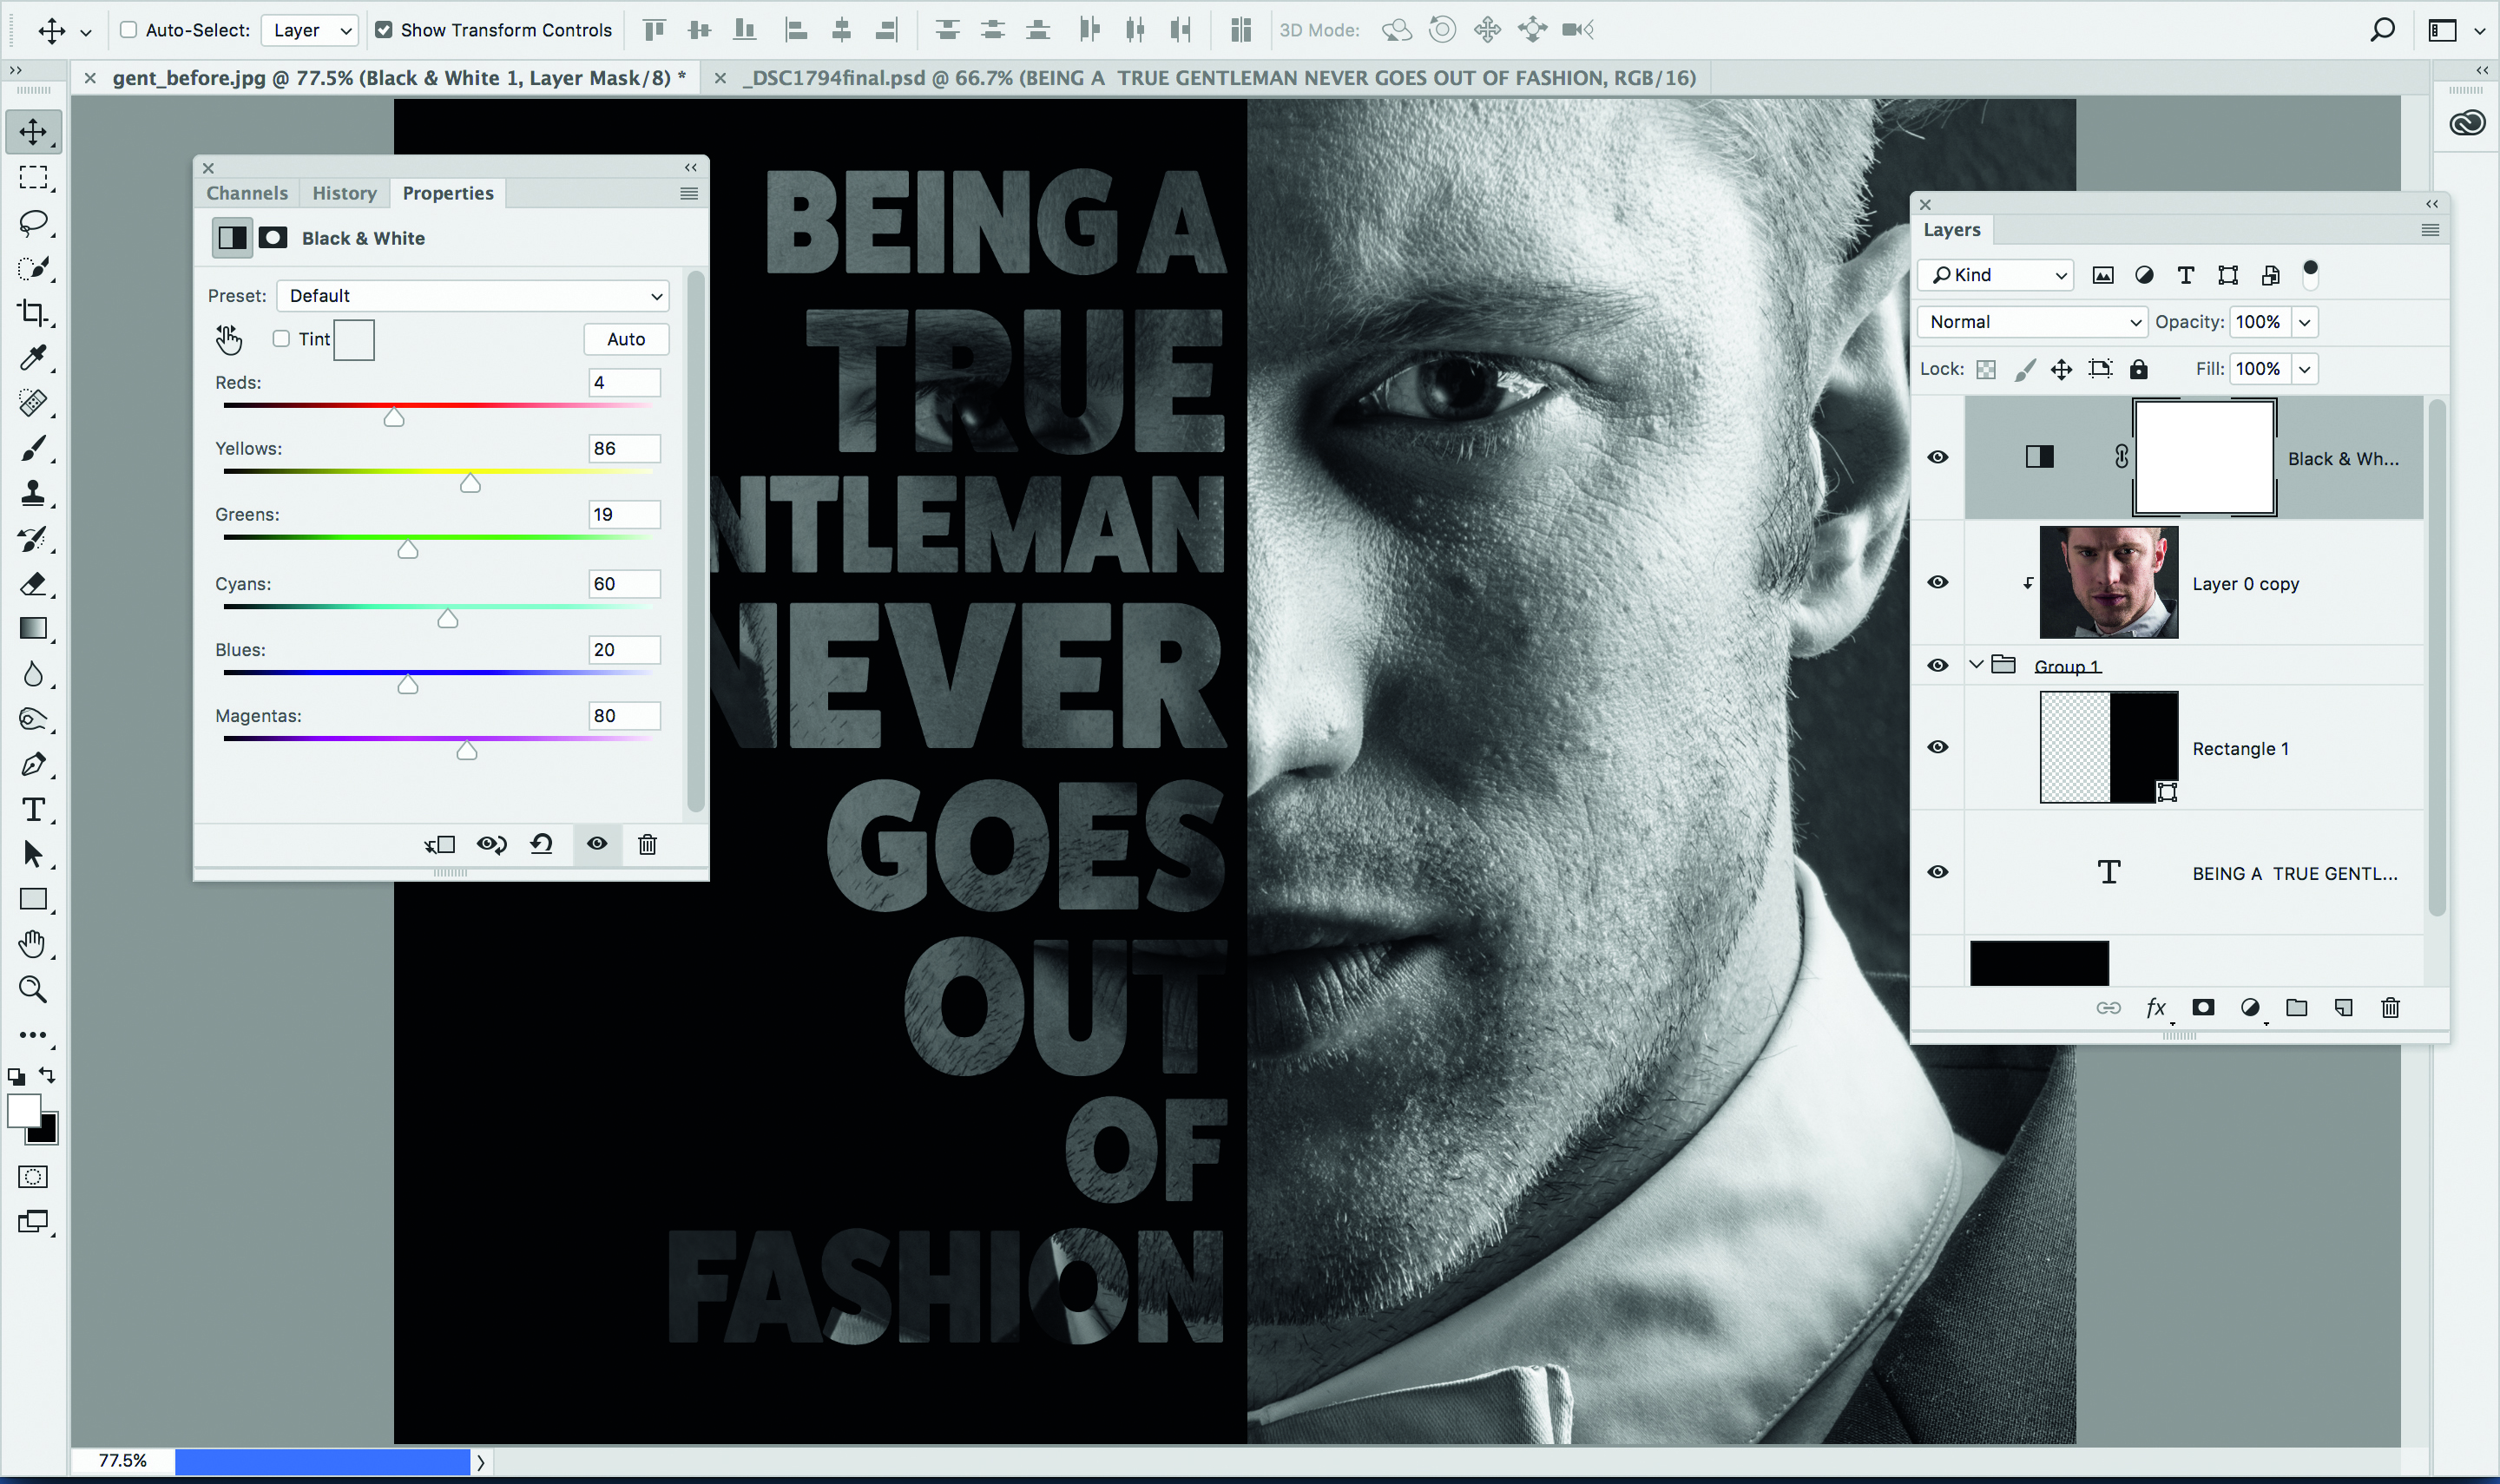
Click the Create Adjustment Layer icon in the Layers panel and choose Black and White. Make any other changes you like to improve the tones. We made a copy of all layers (Ctrl+Shift+Alt+E) then used Filter>Camera Raw Filter to apply finishing touches.
Get the Digital Camera World Newsletter
The best camera deals, reviews, product advice, and unmissable photography news, direct to your inbox!
The lead technique writer on Digital Camera Magazine, PhotoPlus: The Canon Magazine and N-Photo: The Nikon Magazine, James is a fantastic general practice photographer with an enviable array of skills across every genre of photography.
Whether it's flash photography techniques like stroboscopic portraits, astrophotography projects like photographing the Northern Lights, or turning sound into art by making paint dance on a set of speakers, James' tutorials and projects are as creative as they are enjoyable.
He's also a wizard at the dark arts of Photoshop, Lightroom and Affinity Photo, and is capable of some genuine black magic in the digital darkroom, making him one of the leading authorities on photo editing software and techniques.

