To balance ambient and flash light in photos of lit subjects
Time: One hour
Skill level: Intermediate
Kit needed: DSLR, tripod, flashgun, light stand, flash diffuser, wireless flash trigger
Missed the earlier parts of this feature?
- How to use flash: Part 1
- How to use flash: Part 2
- How to use flash: Part 3
- How to use flash: Part 4
- How to use flash: Part 5
- How to use flash: Part 6
- How to use flash: Part 7
- How to use flash: Part 8
When something’s too dark, simply pop a trusty flashgun on your camera and it becomes well-exposed, right? Well, not always. If you’re shooting an object with its own light source, there’s a little more to think about than usual.
When photographing subjects that light up themselves, it can be easy to run into all sorts of problems. One of the pitfalls you need to avoid is destroying the light of the subject in favour of brightly exposing the image with flash light. Here, we’ll show you how you can balance the ambience of the subject that’s lit up with the power of the flash light for a brilliantly exposed photograph.
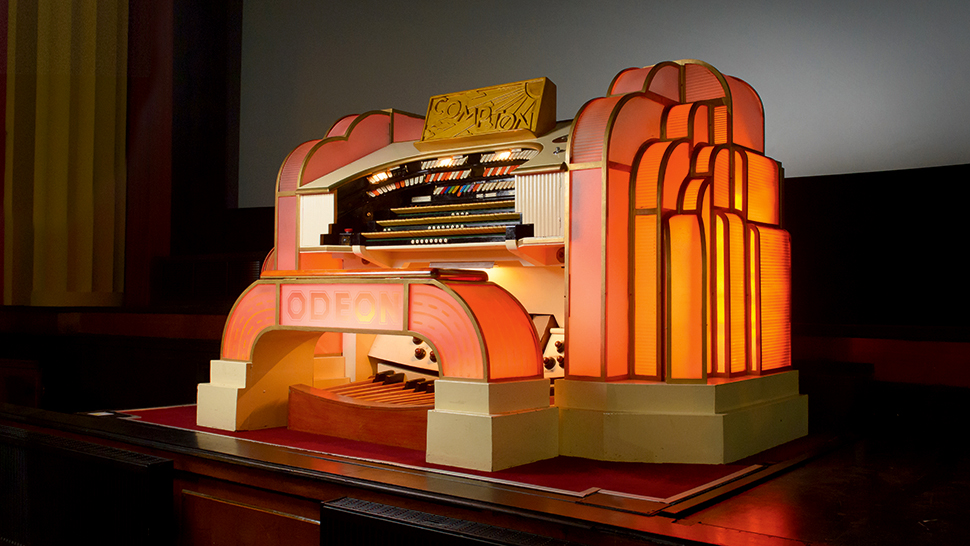
We went to the Odeon cinema in Weston-super-Mare to shoot the original, and still functioning, 1930's Compton theatre pipe organ. The organ is enveloped in cascading, colour-changing lights that look beautiful to the naked eye, but it's tricky to balance the exposure of the flash and ambient light.
If you can’t get to Weston-super-Mare, you can apply this technique to any subject you’re photographing that lights up, including toys, models and lighting fixtures. Let’s see what we need to do.
Step by step: Strike a balance

1. Read the meter
Set your camera on a tripod and put it in the Manual exposure mode. Frame up your shot and take a meter reading by looking through your viewfinder – or alternatively, by using live view.
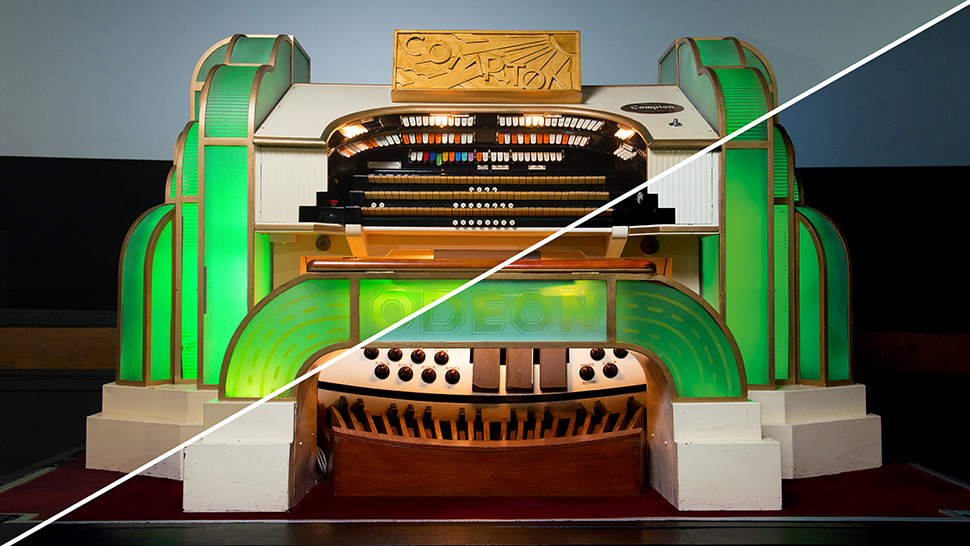
2. Set the speed
At 24mm, an aperture of f/5.6 kept the organ in focus from front to back in this scene. Set your aperture to a figure that will provide you with the depth of field you think you'll need. Now, starting at your camera's flash-sync speed – 1/200sec in our case – decrease the shutter speed until you get the light meter reading the correct exposure. During the shoot we experimented with speeds of 1/125-1/20sec.
3. Light it up
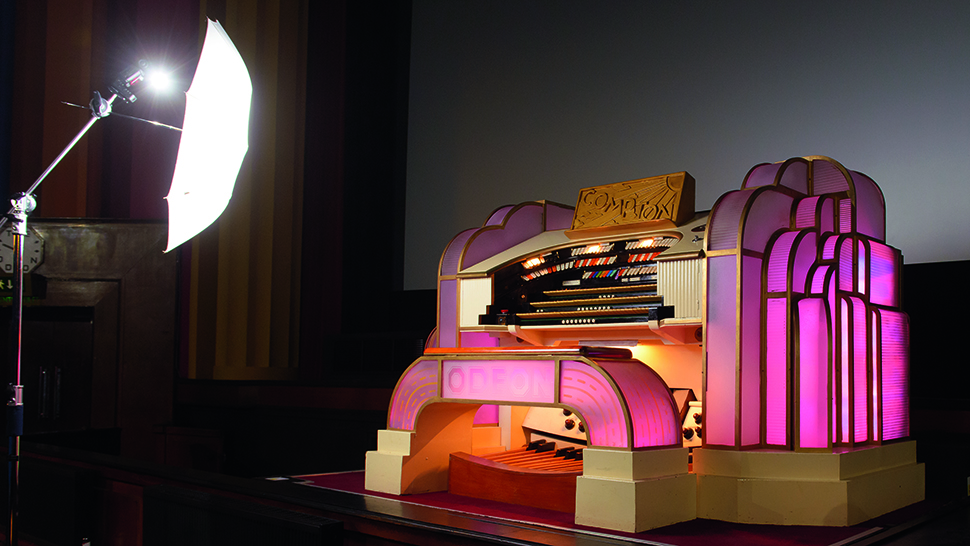
Put a flash trigger on your camera and your flashgun. Put the flashgun on a light stand and set the power to 1/32 power. Put a diffuser on the light to spread it over the entire subject. If it’s not bright enough, turn up the flashgun power, but don’t touch the camera settings.
4. Move it around
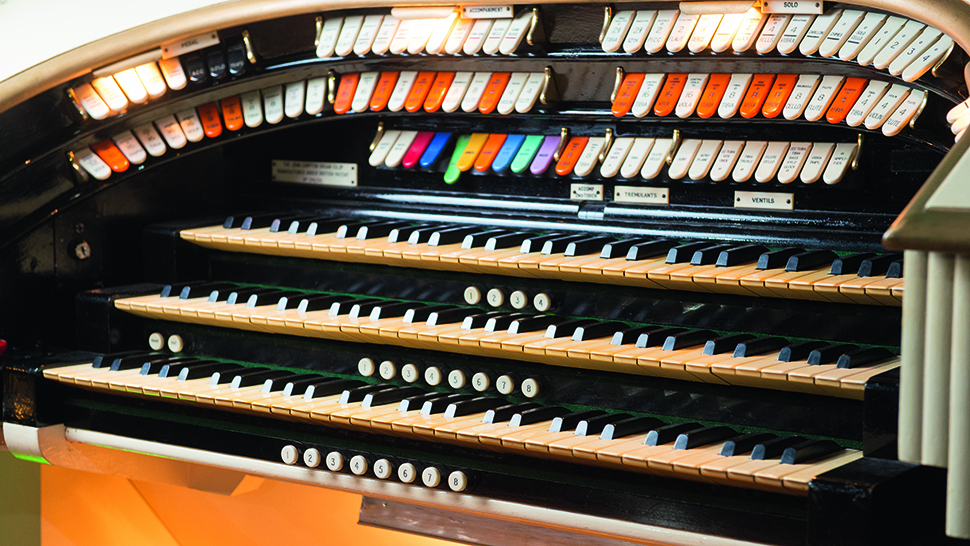
Move the flash around to get different looks and frame it so you can still see the lighting underneath. We side-lit the keys and turned the camera side-on to the keys to get that shine on the front of the black keys. Because the light was diffused by an umbrella, the keys were lit evenly.
5. Frame your shot
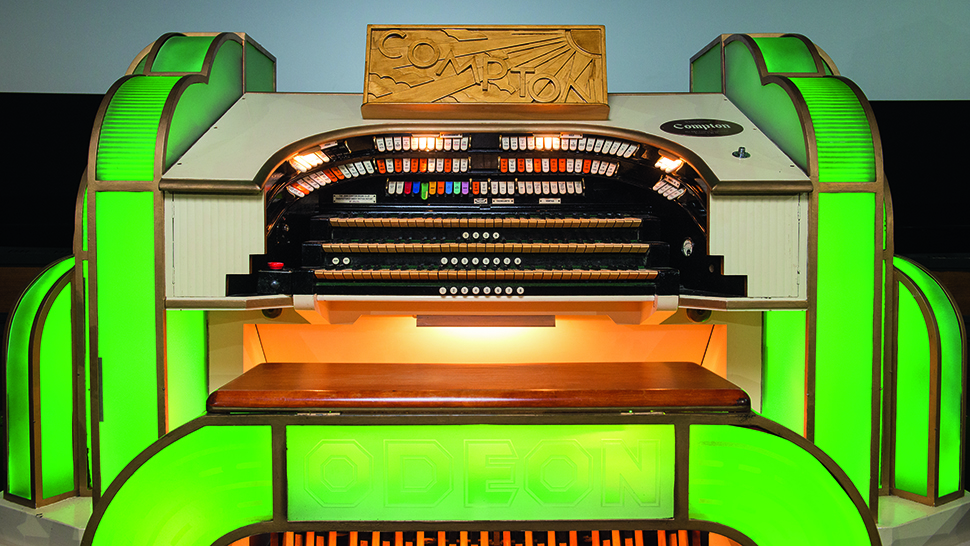
Try out some compositional tricks to see what works for your subject. If you’re shooting a symmetrical subject, frame up to emphasise that symmetry. By framing the console straight-on you can see the butterfly switches bowing around the horseshoe shape at the edge.
6. Add a model
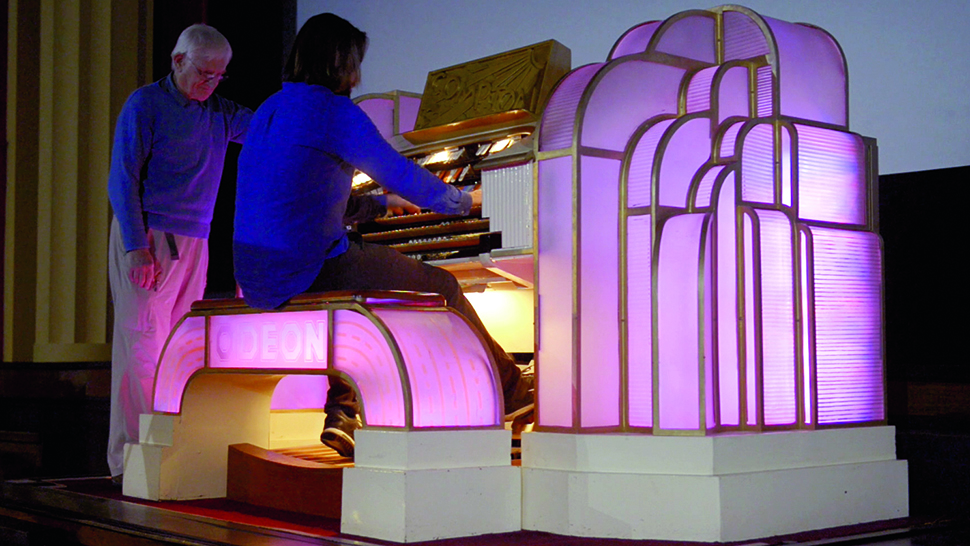
Use a model to bring your subject to life and to add a sense of scale. If your subject is something that can be played or used in some way, then capture it being used. Jason is actually a theatre organist, so he jumped up on the bench and ran the organ through its paces for a few shots.
With thanks to: Dawn at The Odeon Cinema, Weston-super-Mare, and Fred Smedley and all at the West of England Theatre Organ Society.
Get the Digital Camera World Newsletter
The best camera deals, reviews, product advice, and unmissable photography news, direct to your inbox!
N-Photo: The Nikon Magazine is a monthly publication that's entirely dedicated to Nikon users. As a 100% independent magazine, you can be assured of unbiased opinion from a trustworthy team of devoted photography experts including editor Adam Waring and Deputy Editor Mike Harris.
Aimed at all users, from camera newcomers to working pros, every issue is packed with practical, Nikon-specific advice for taking better photos, in-depth reviews of Nikon-compatible gear, and inspiring projects and exciting video lessons for mastering camera, lens and Photoshop techniques.
Written by Nikon users for Nikon users, N-Photo is your one-stop shop for everything to do with cameras, lenses, tripods, bags, tips, tricks and techniques to get the most out of your photography.

