How to use Lightroom Classic: polish your portraits to perfection
Learn how to use the Spot Removal tool to polish skin to perfection with Lightroom Classic CC
Watch video: Use the Spot Removal tool in Lightroom Classic CC
There’s plenty of great opportunities to catch beautiful portraits this summer. And, if you want to enhance your images, one of the best skills you can learn is how to retouch the skin. Luckily there’s a method in Lightroom that is fast, effective, and surprisingly simple.
The Spot Removal tool in Lightroom Classic is an easy way to edit out flaws such as blemishes or flyaway hairs. The Spot Removal tool can be a lifesaver when an otherwise amazing portrait has some small imperfections. It's handy for removing sensor dust spots from landscapes, too!
• Read more: Free Lightroom presets
The Spot Removal tool replaces any area that you brush over with a different part of the picture that’s been automatically selected by the software, though you can manually reposition this area if it doesn’t look quite right. Lightroom offers two main options: Clone and Heal, which helps you control the type of selection made. You can also further refine it by adjusting the size, feathering and opacity.
Here, we’ll run through how you can enhance any portrait by removing small flaws and imperfections with relative ease. You can download the same Summer_Portrait.jpg file we’re using here or open up one of your own portrait images into Lightroom Classic CC to follow along.
• See also: Why I dumped Lightroom CC and went back to Lightroom Classic
The best camera deals, reviews, product advice, and unmissable photography news, direct to your inbox!
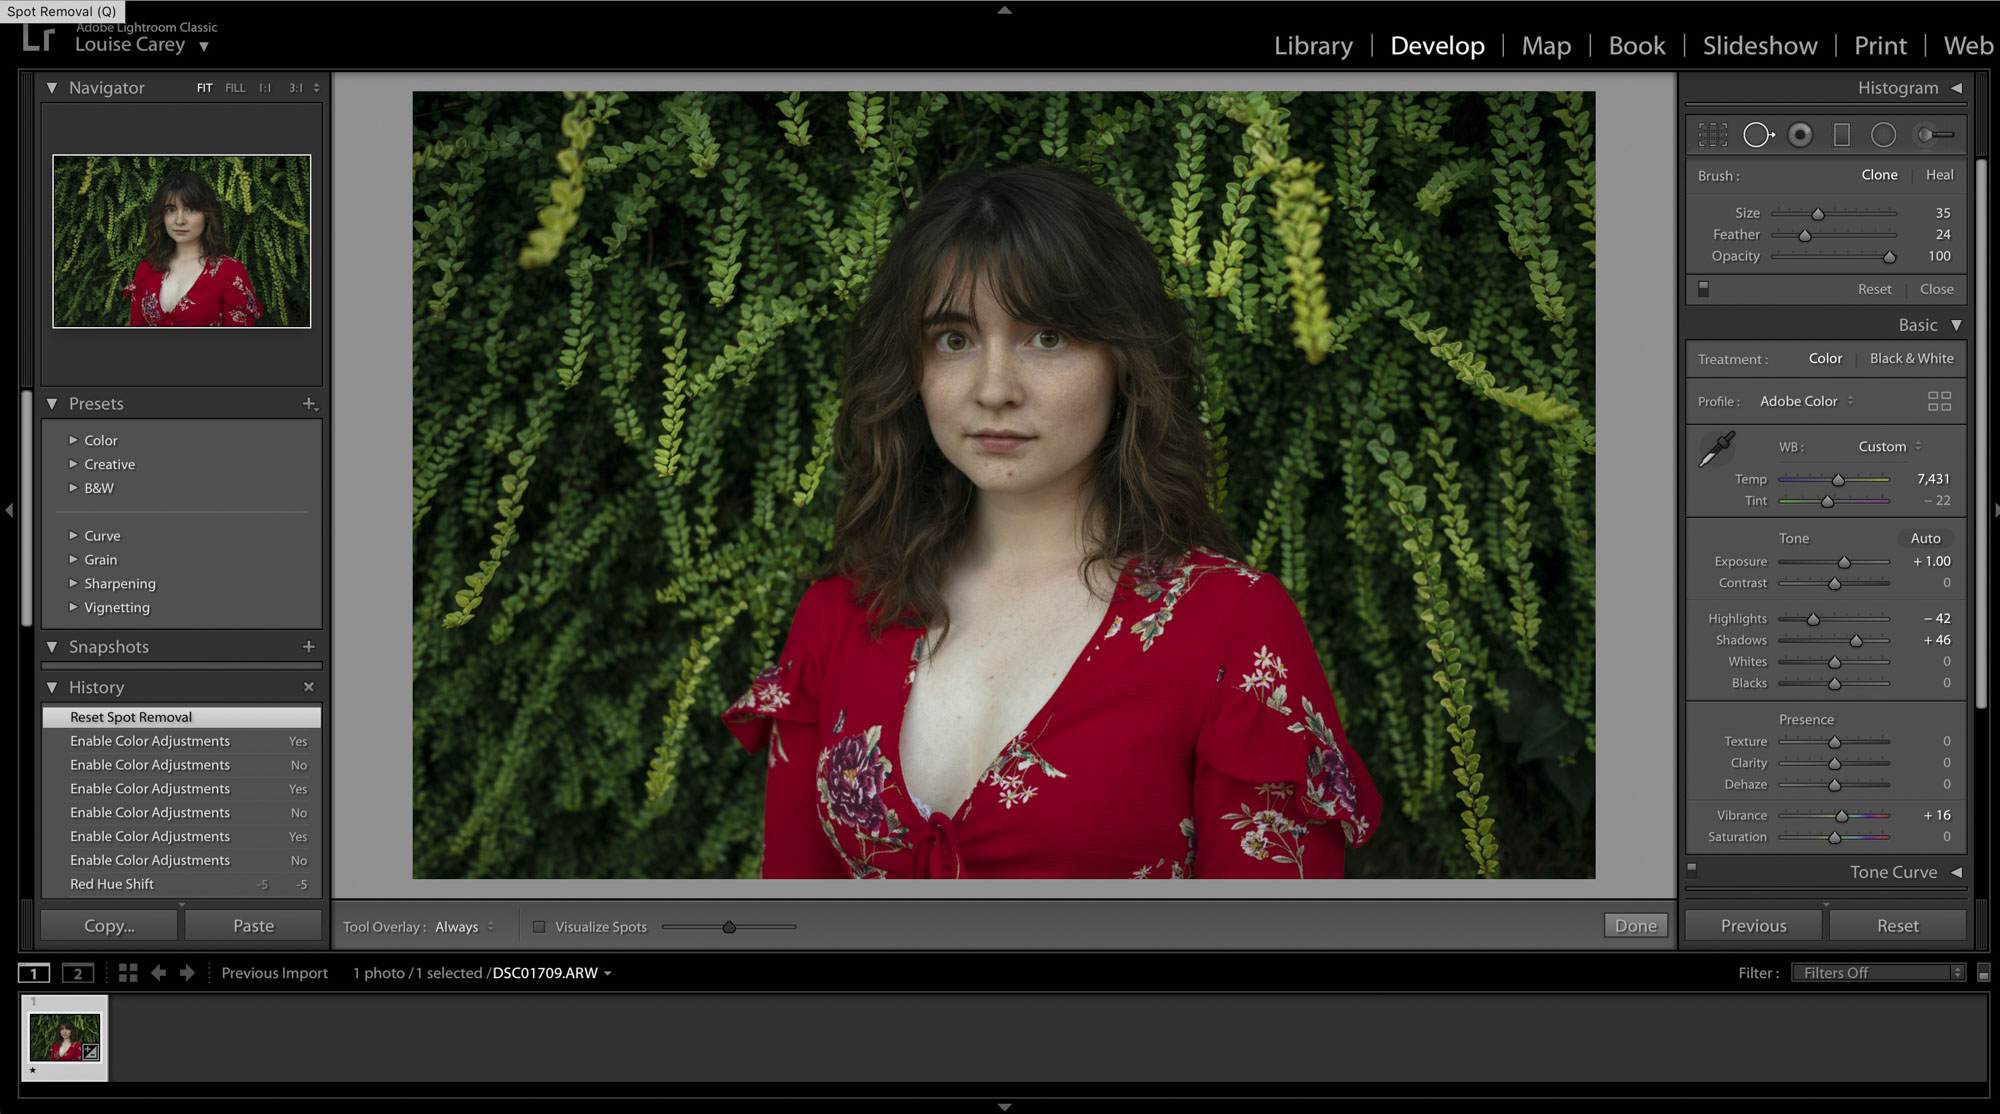
01 Select the spot removal tool
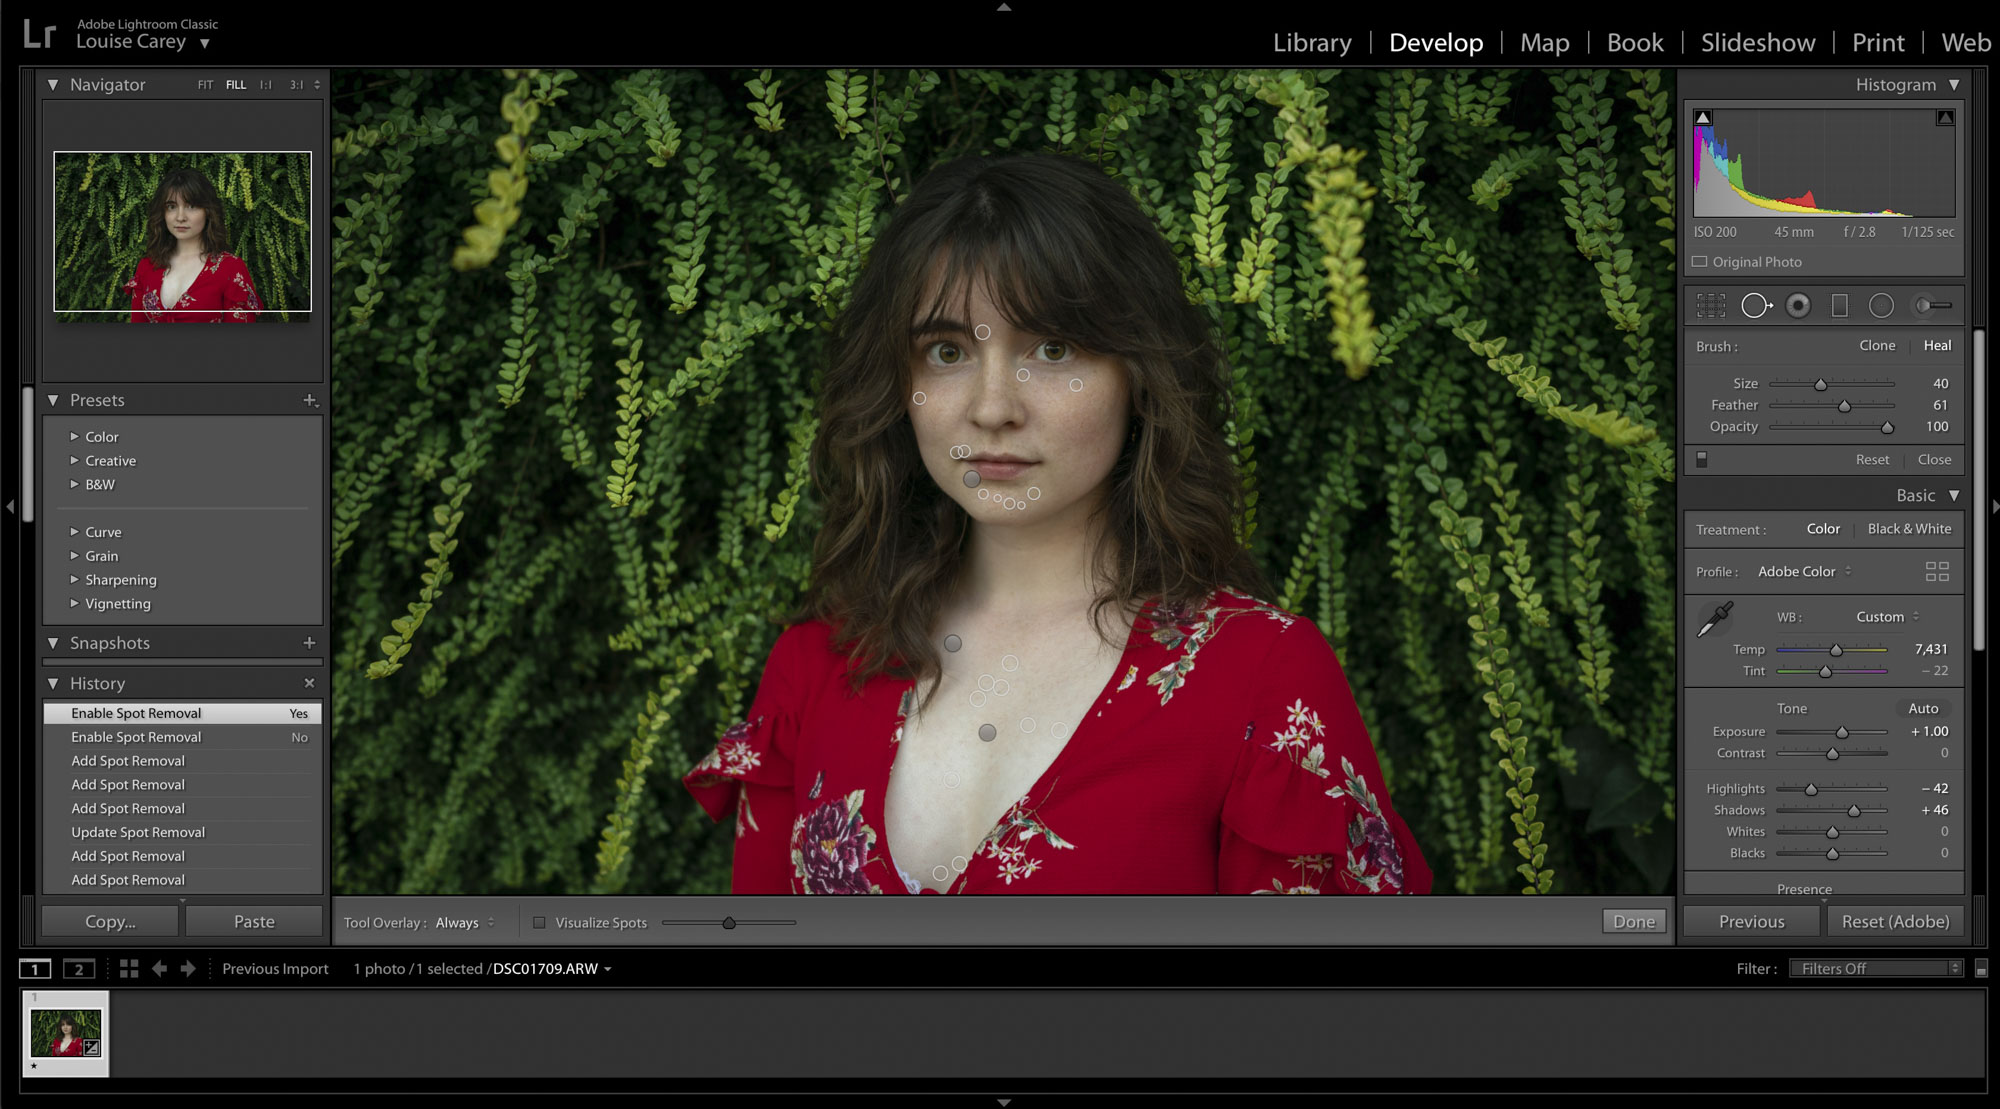
You can find the Spot Removal tool just below the Histogram dropdown menu in the Toolbar. It’s the second tool from the left, just after the Crop tool. Alternatively, you can simply press ‘Q’ on your keyboard to make the tool active instead.
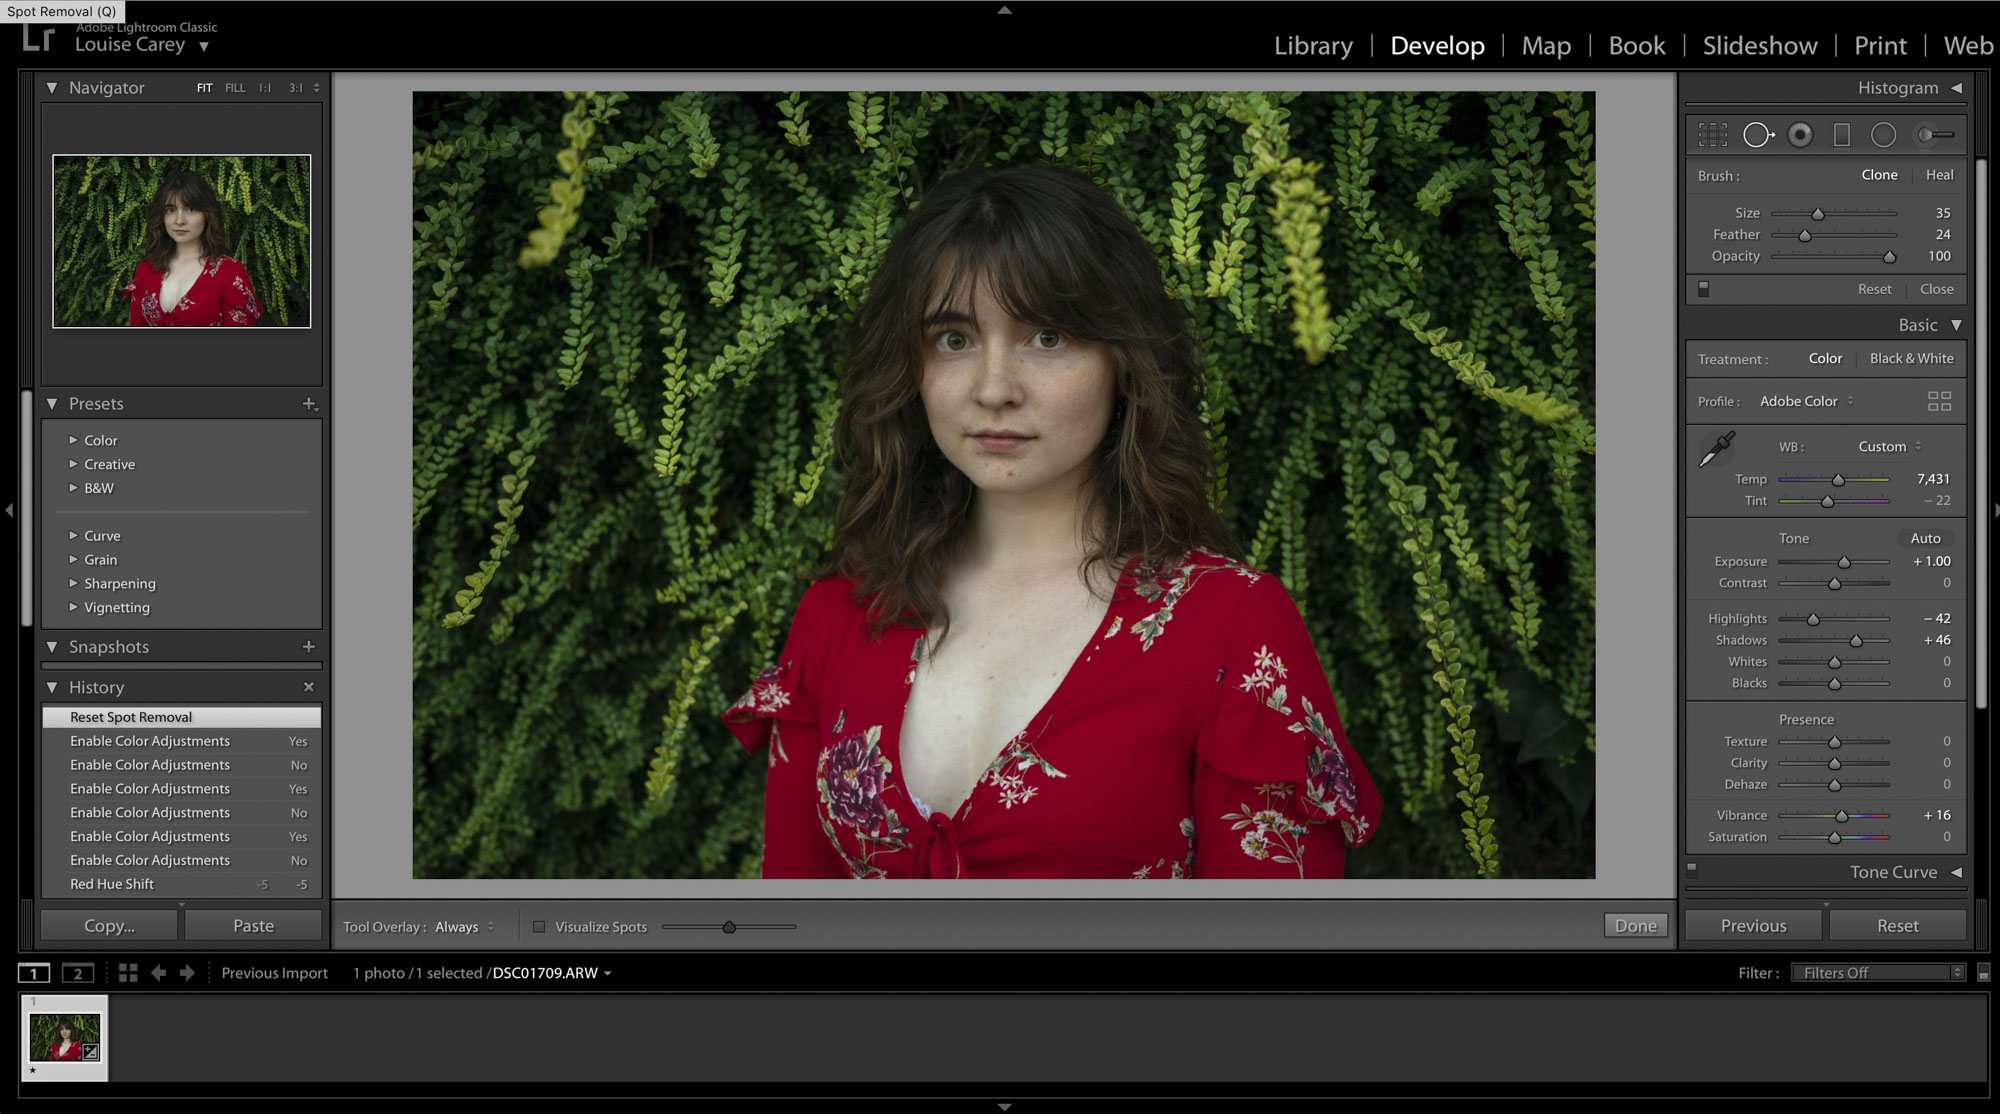
02 Decide whether to Clone or Heal
The Spot Removal tool’s Clone option will exactly replicate an automatically selected area of your photo onto the area you want to fix. Meanwhile, the Heal option will give a more subtle, blended option that will match the color and tone of the surrounding area.
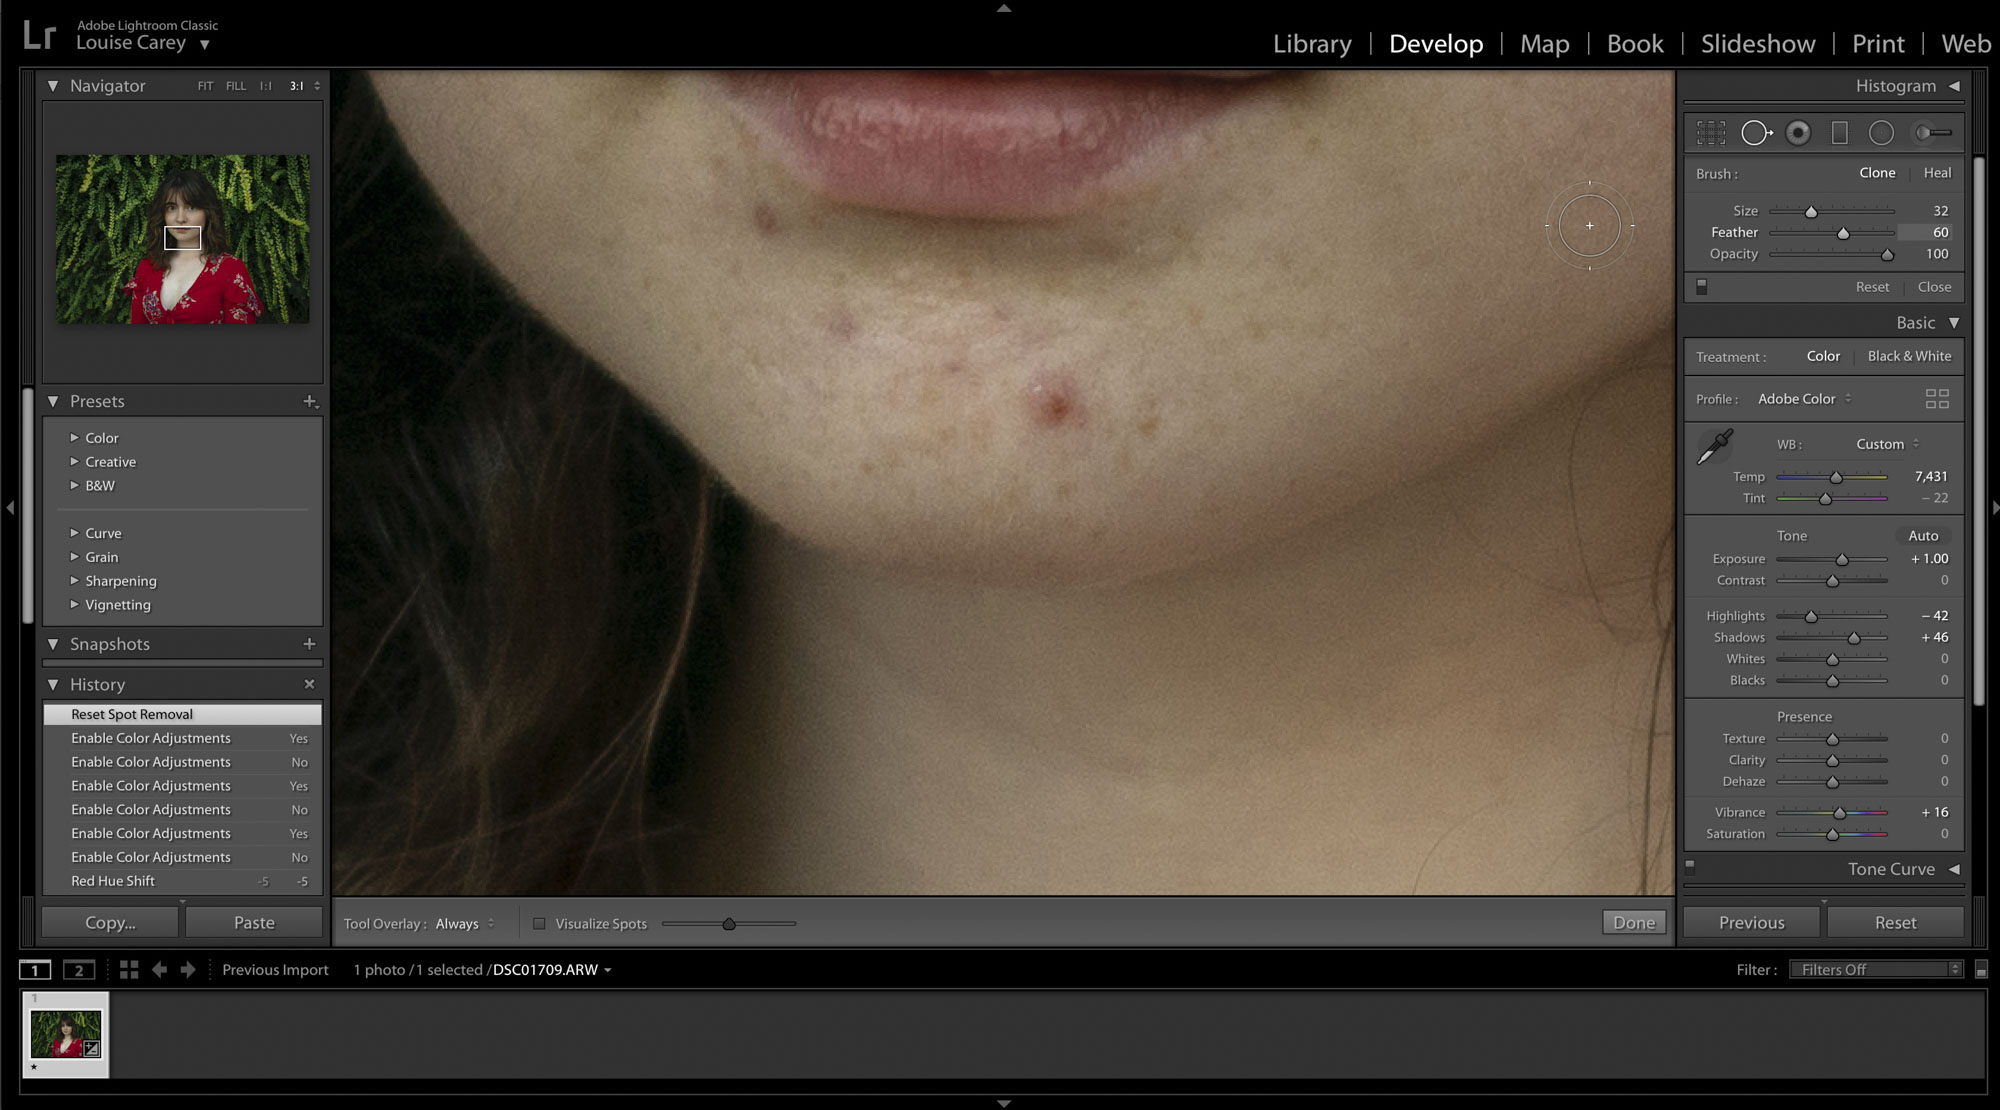
03 Make tool adjustments
Adjust the Size slider of your brush, or use the [ and ] keys to control how large you want the brush to be. The Feather slider will dictate whether you’ll have soft or blunt edges to your selections. The final Opacity slider controls how strong the tool’s effect will be, dropping it down will allow you to be more gradual with your edits.
04 Remove imperfections
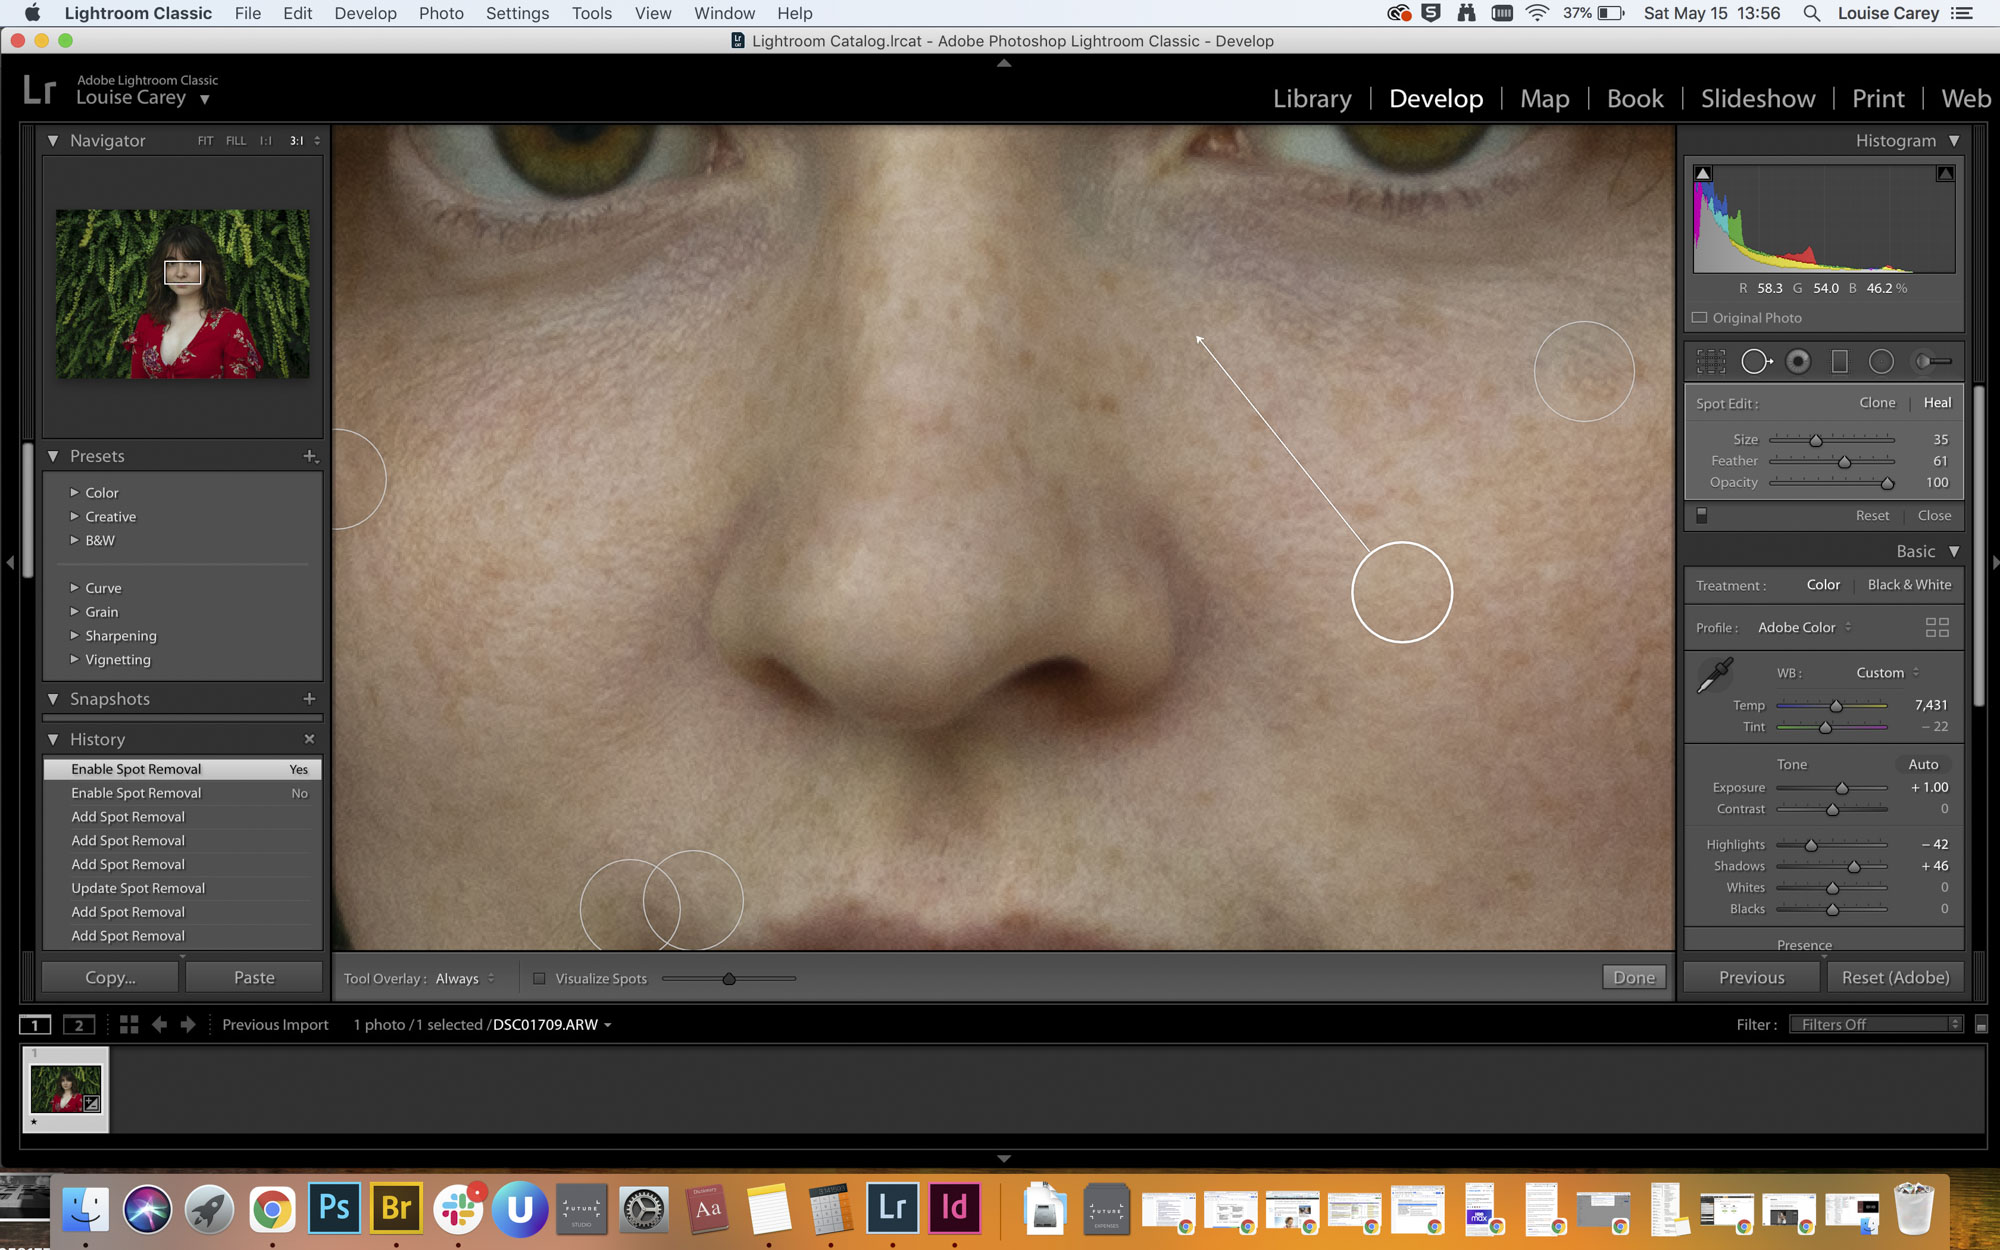
Adjust the Spot Removal tool’s size so that it can comfortably cover the size of the imperfection you want to remove. Once you’ve clicked on that imperfection, the tool will automatically select a replacement texture from a different area of the shot.
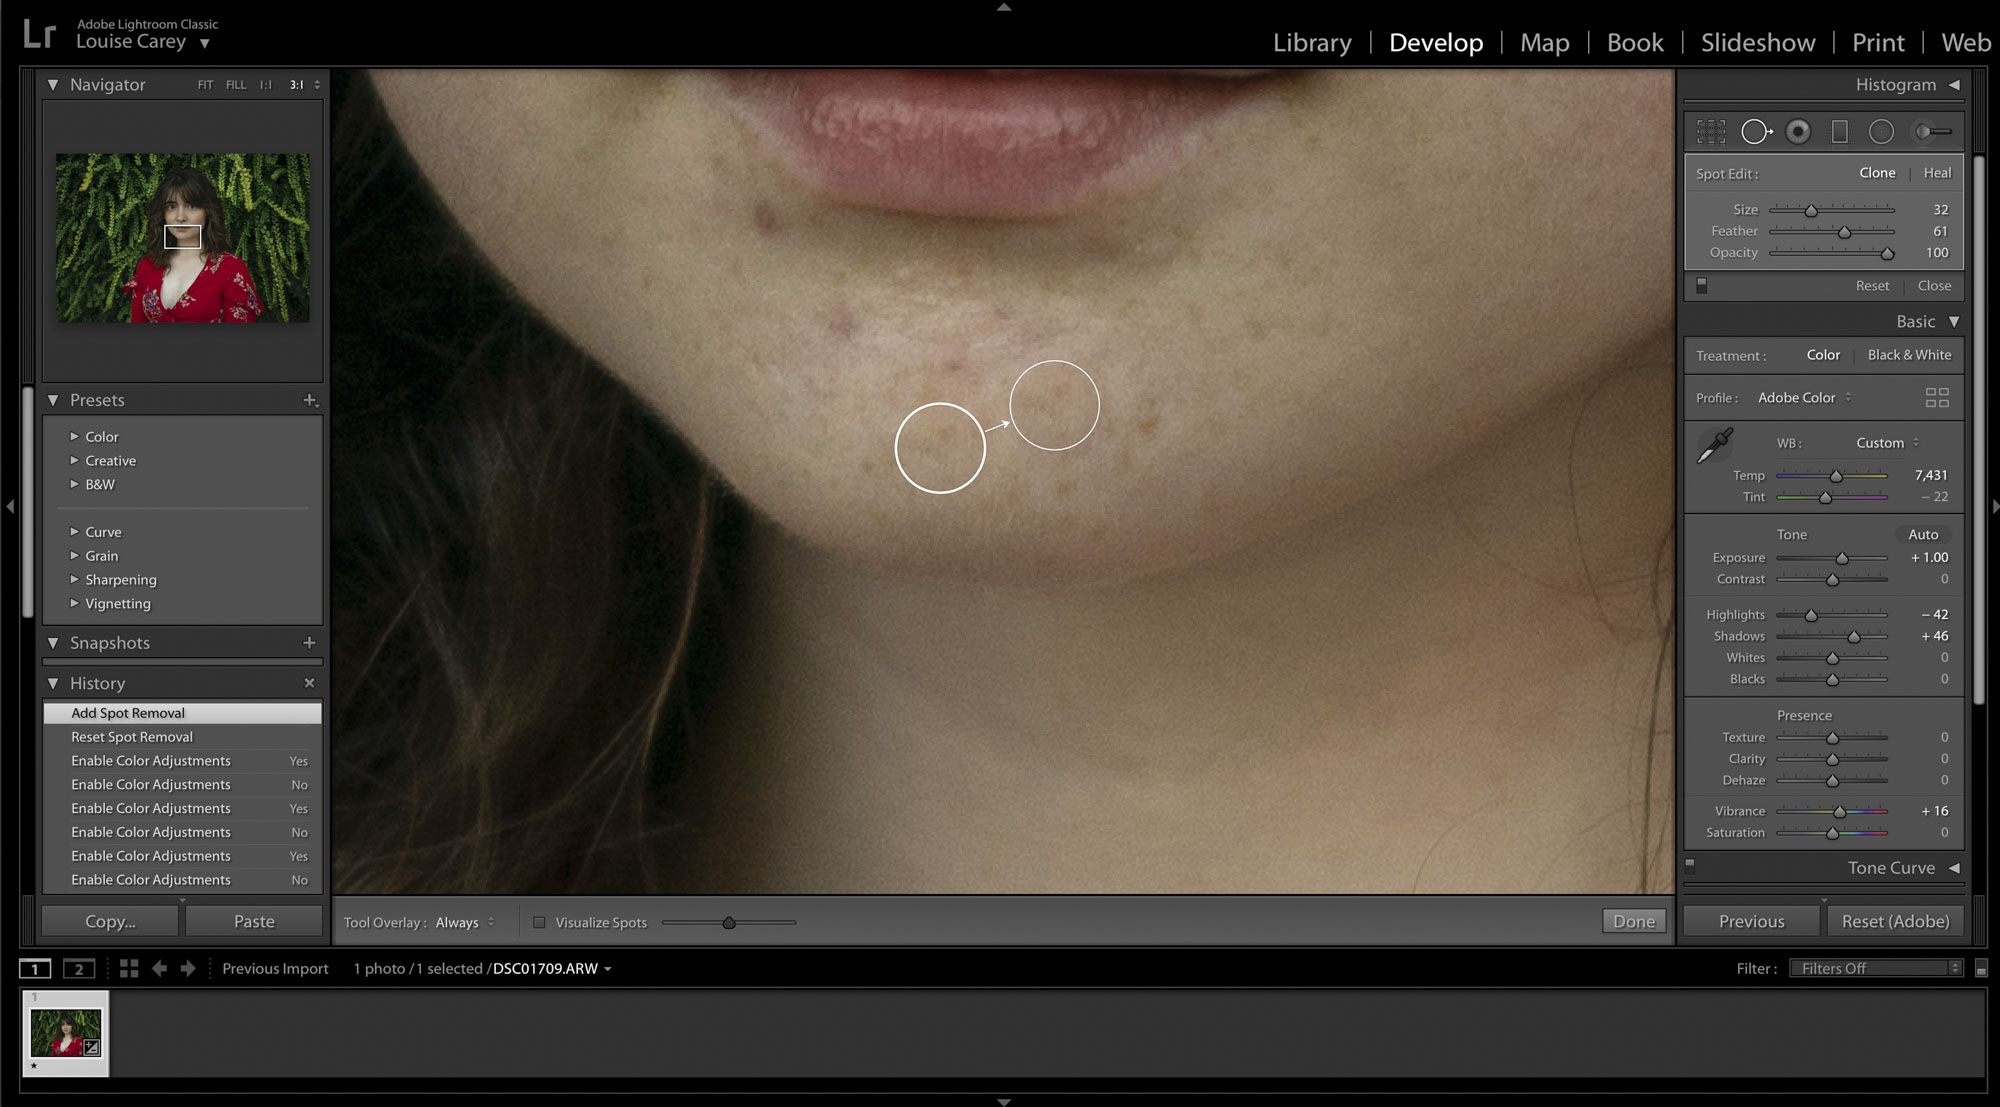
05 Adjust your selection as needed
If you’re unhappy with the automatic selection that the Spot Removal tool has made, you can drag the ‘source’ circle around to find a texture that works better. Avoid any prominent lines or features, such as the edge of a nose or the model’s hairline.
06 Check your progress
Use the On / Off toggle button on the Spot Removal tool box to check your progress. If you want to remove one of your Spot Removal tool edits, just right-click that specific edit and choose ‘Delete’. This will get rid of it and return the area to its original state.
PhotoPlus: The Canon Magazine is the world's only monthly newsstand title that's 100% devoted to Canon, so you can be sure the magazine is completely relevant to your system.
Read more:
The best photo editing software: image editors for novices through to pros
The best photo-editing laptops: top laptops for photographers
10 best online photography courses – from beginner guides to masterclasses
With over a decade of photographic experience, Louise arms Digital Camera World with a wealth of knowledge on photographic technique and know-how – something at which she is so adept that she's delivered workshops for the likes of ITV and Sue Ryder. Louise also brings years of experience as both a web and print journalist, having served as features editor for Practical Photography magazine and contributing photography tutorials and camera analysis to titles including Digital Camera Magazine and Digital Photographer. Louise currently shoots with the Fujifilm X-T200 and the Nikon D800, capturing self-portraits and still life images, and is DCW's ecommerce editor, meaning that she knows good camera, lens and laptop deals when she sees them.
