How to use Lightroom Classic: Reveal incredible detail with a HDR conversion
Tame bright sunshine and reveal detail in dark shadows with a HDR raw conversion in Lightroom Classic CC
The best camera deals, reviews, product advice, and unmissable photography news, direct to your inbox!
You are now subscribed
Your newsletter sign-up was successful
Watch video: Create an HDR photograph in Lightroom Classic CC
You arrived at your epic location and set your sights on a masterful composition. But wait! The harsh sunlight makes a balanced exposure almost impossible! Luckily, this is where high dynamic range photography, also referred to as HDR, comes in.
By simply capturing different exposures of your scene, some overexposed and others underexposed, you can combine them in Lightroom Classic CC to create a stunning photo with a broader dynamic range.
• Read more: Free Lightroom presets
HDR is perfect when dealing with high contrast scenes, as it means you can capture both shadow and highlight detail without any part of your photo being too dark or too light.
You can download the same start images we used here, or your own bracket of exposures and get stuck into the step-by-step below. Don’t forget to watch the accompanying video for more details.
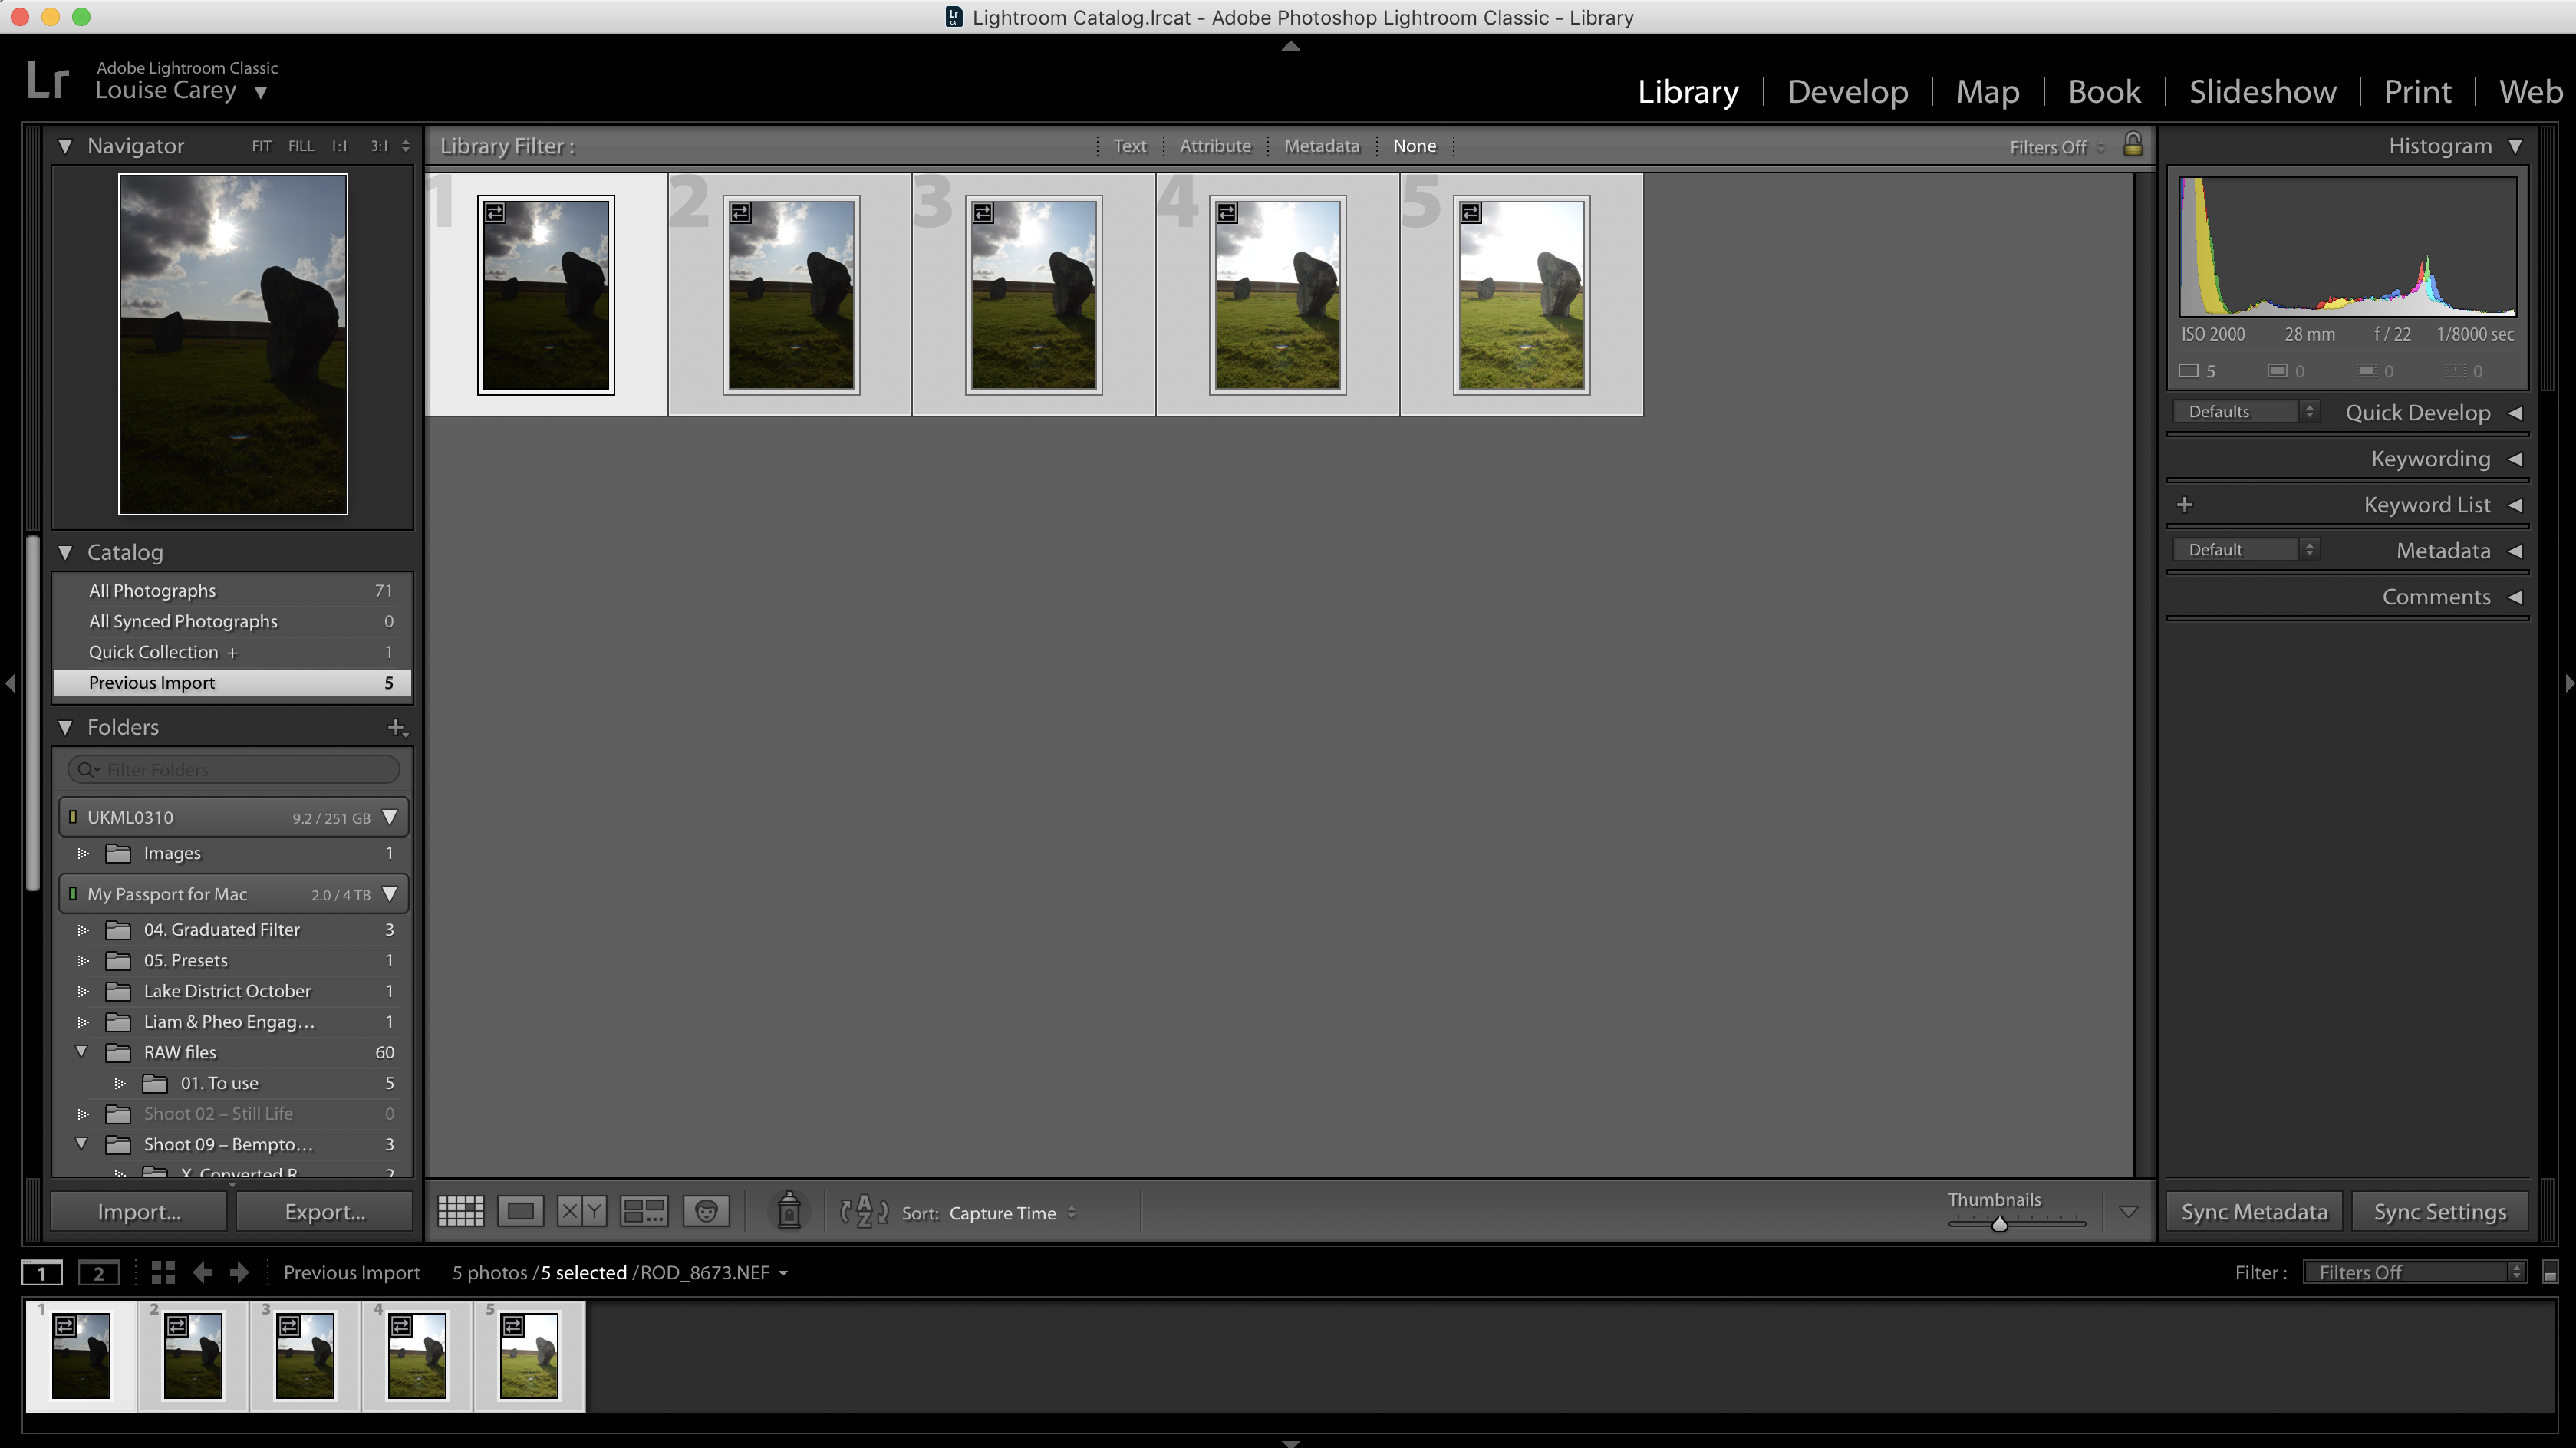
01 Import your images
To create your HDR, you’ll need at least three images, at least two stops apart, though the more exposures the better. Lightroom will be able to extract the best exposure information from each image and combine it all for the best results.
The best camera deals, reviews, product advice, and unmissable photography news, direct to your inbox!
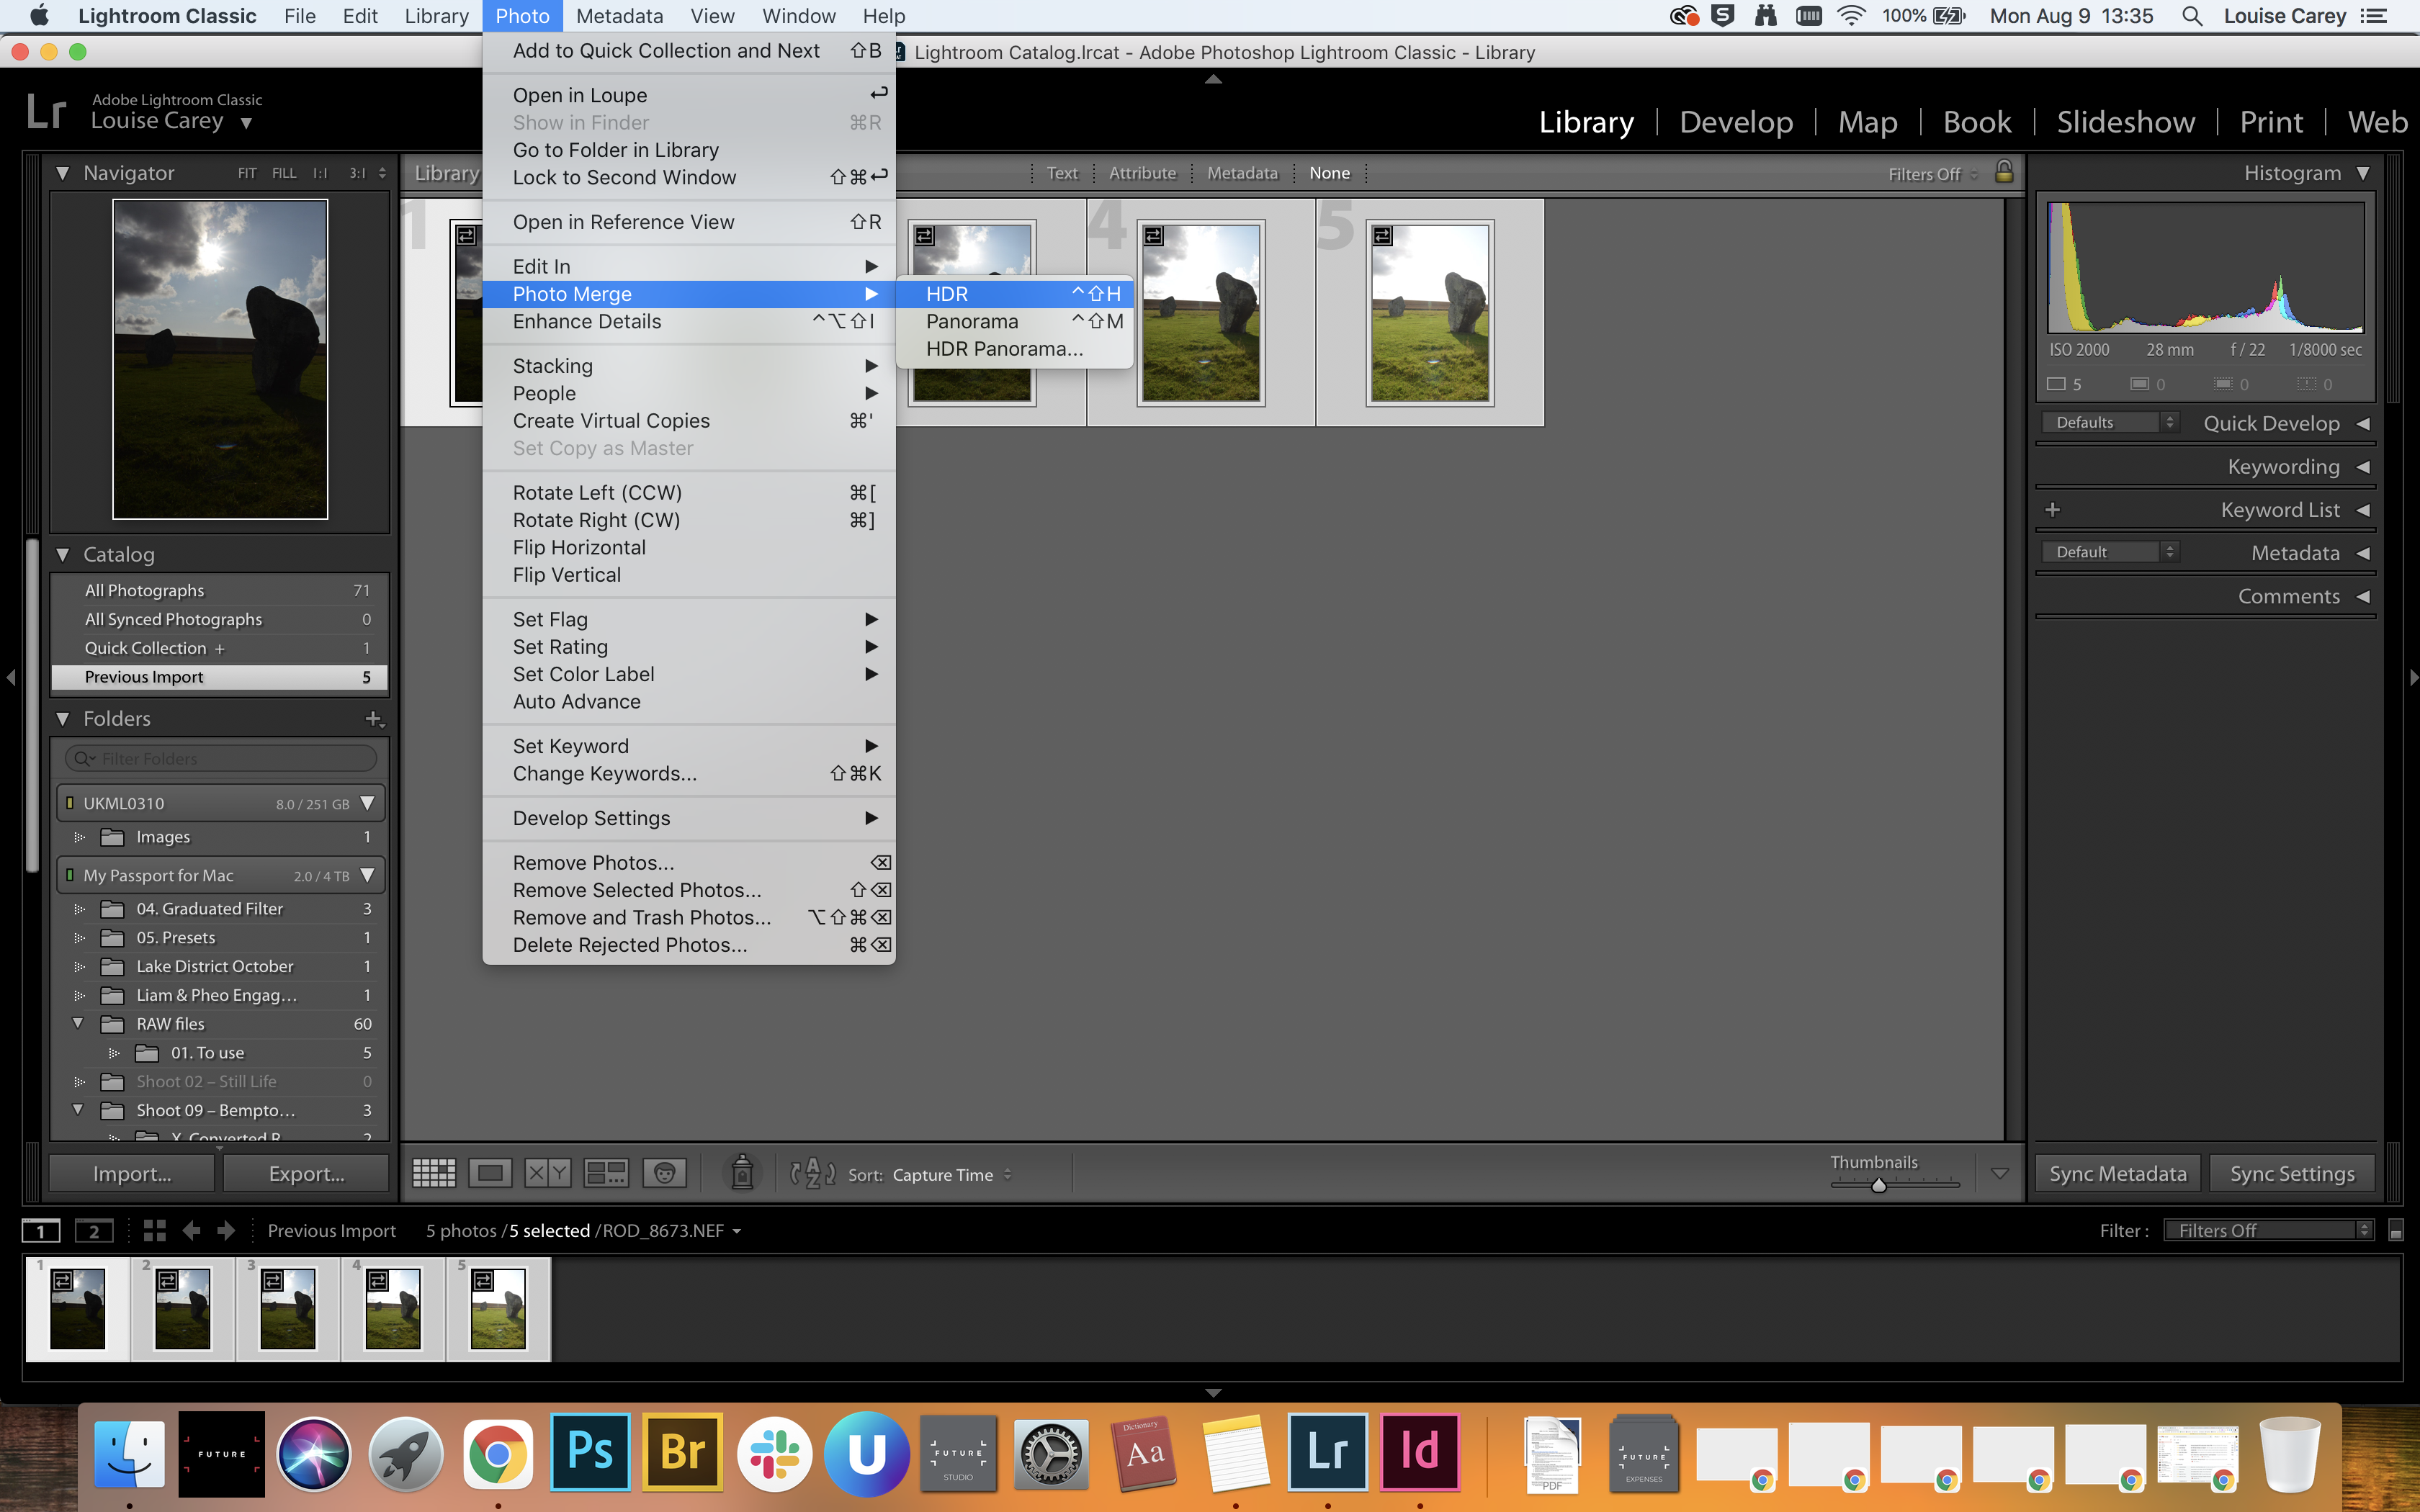
02 Merge the photos
Go to the Develop module and select all of the individual images that you want to combine. Then, go to Photo > Photo Merge > HDR. Depending on the size of your photographs, it might take a little while to load a HDR preview.
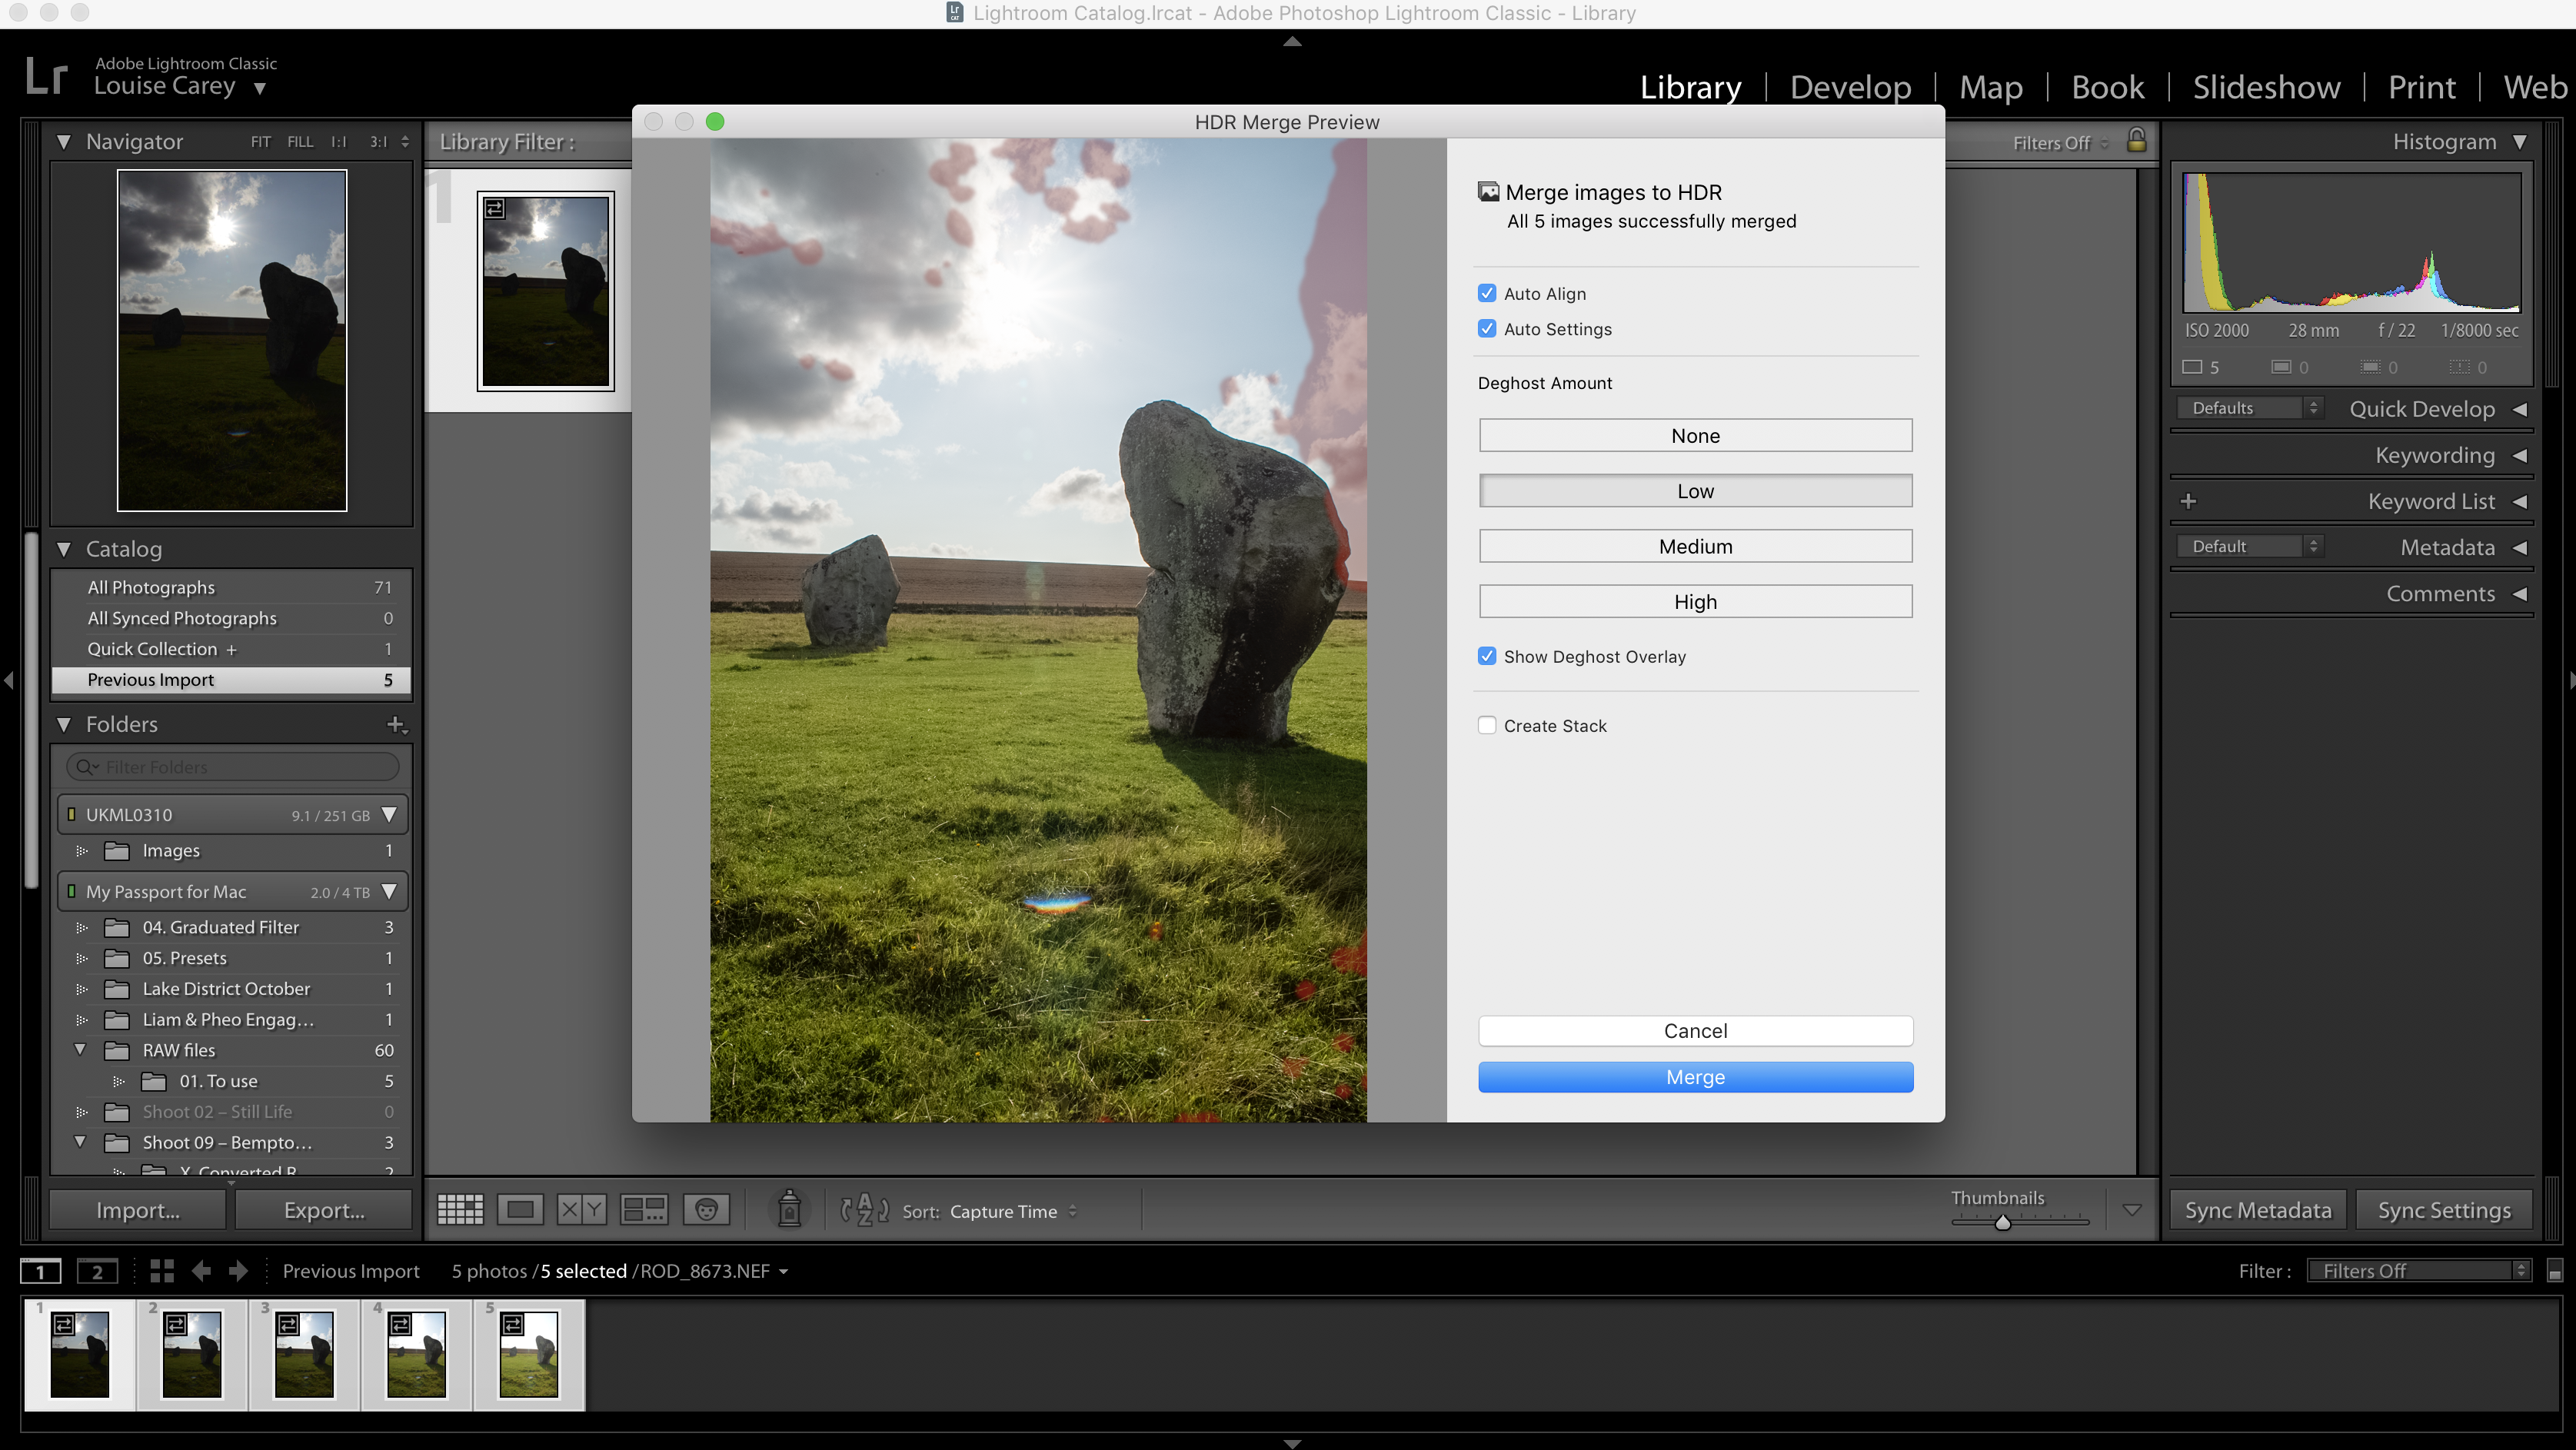
03 choose a deghosting level
If you had moving elements in your landscape, such as clouds, trees or people walking, you might want to choose a low, medium, or high de-ghosting level. This will essentially prevent ghostly blurs in your image for a sharper final result.
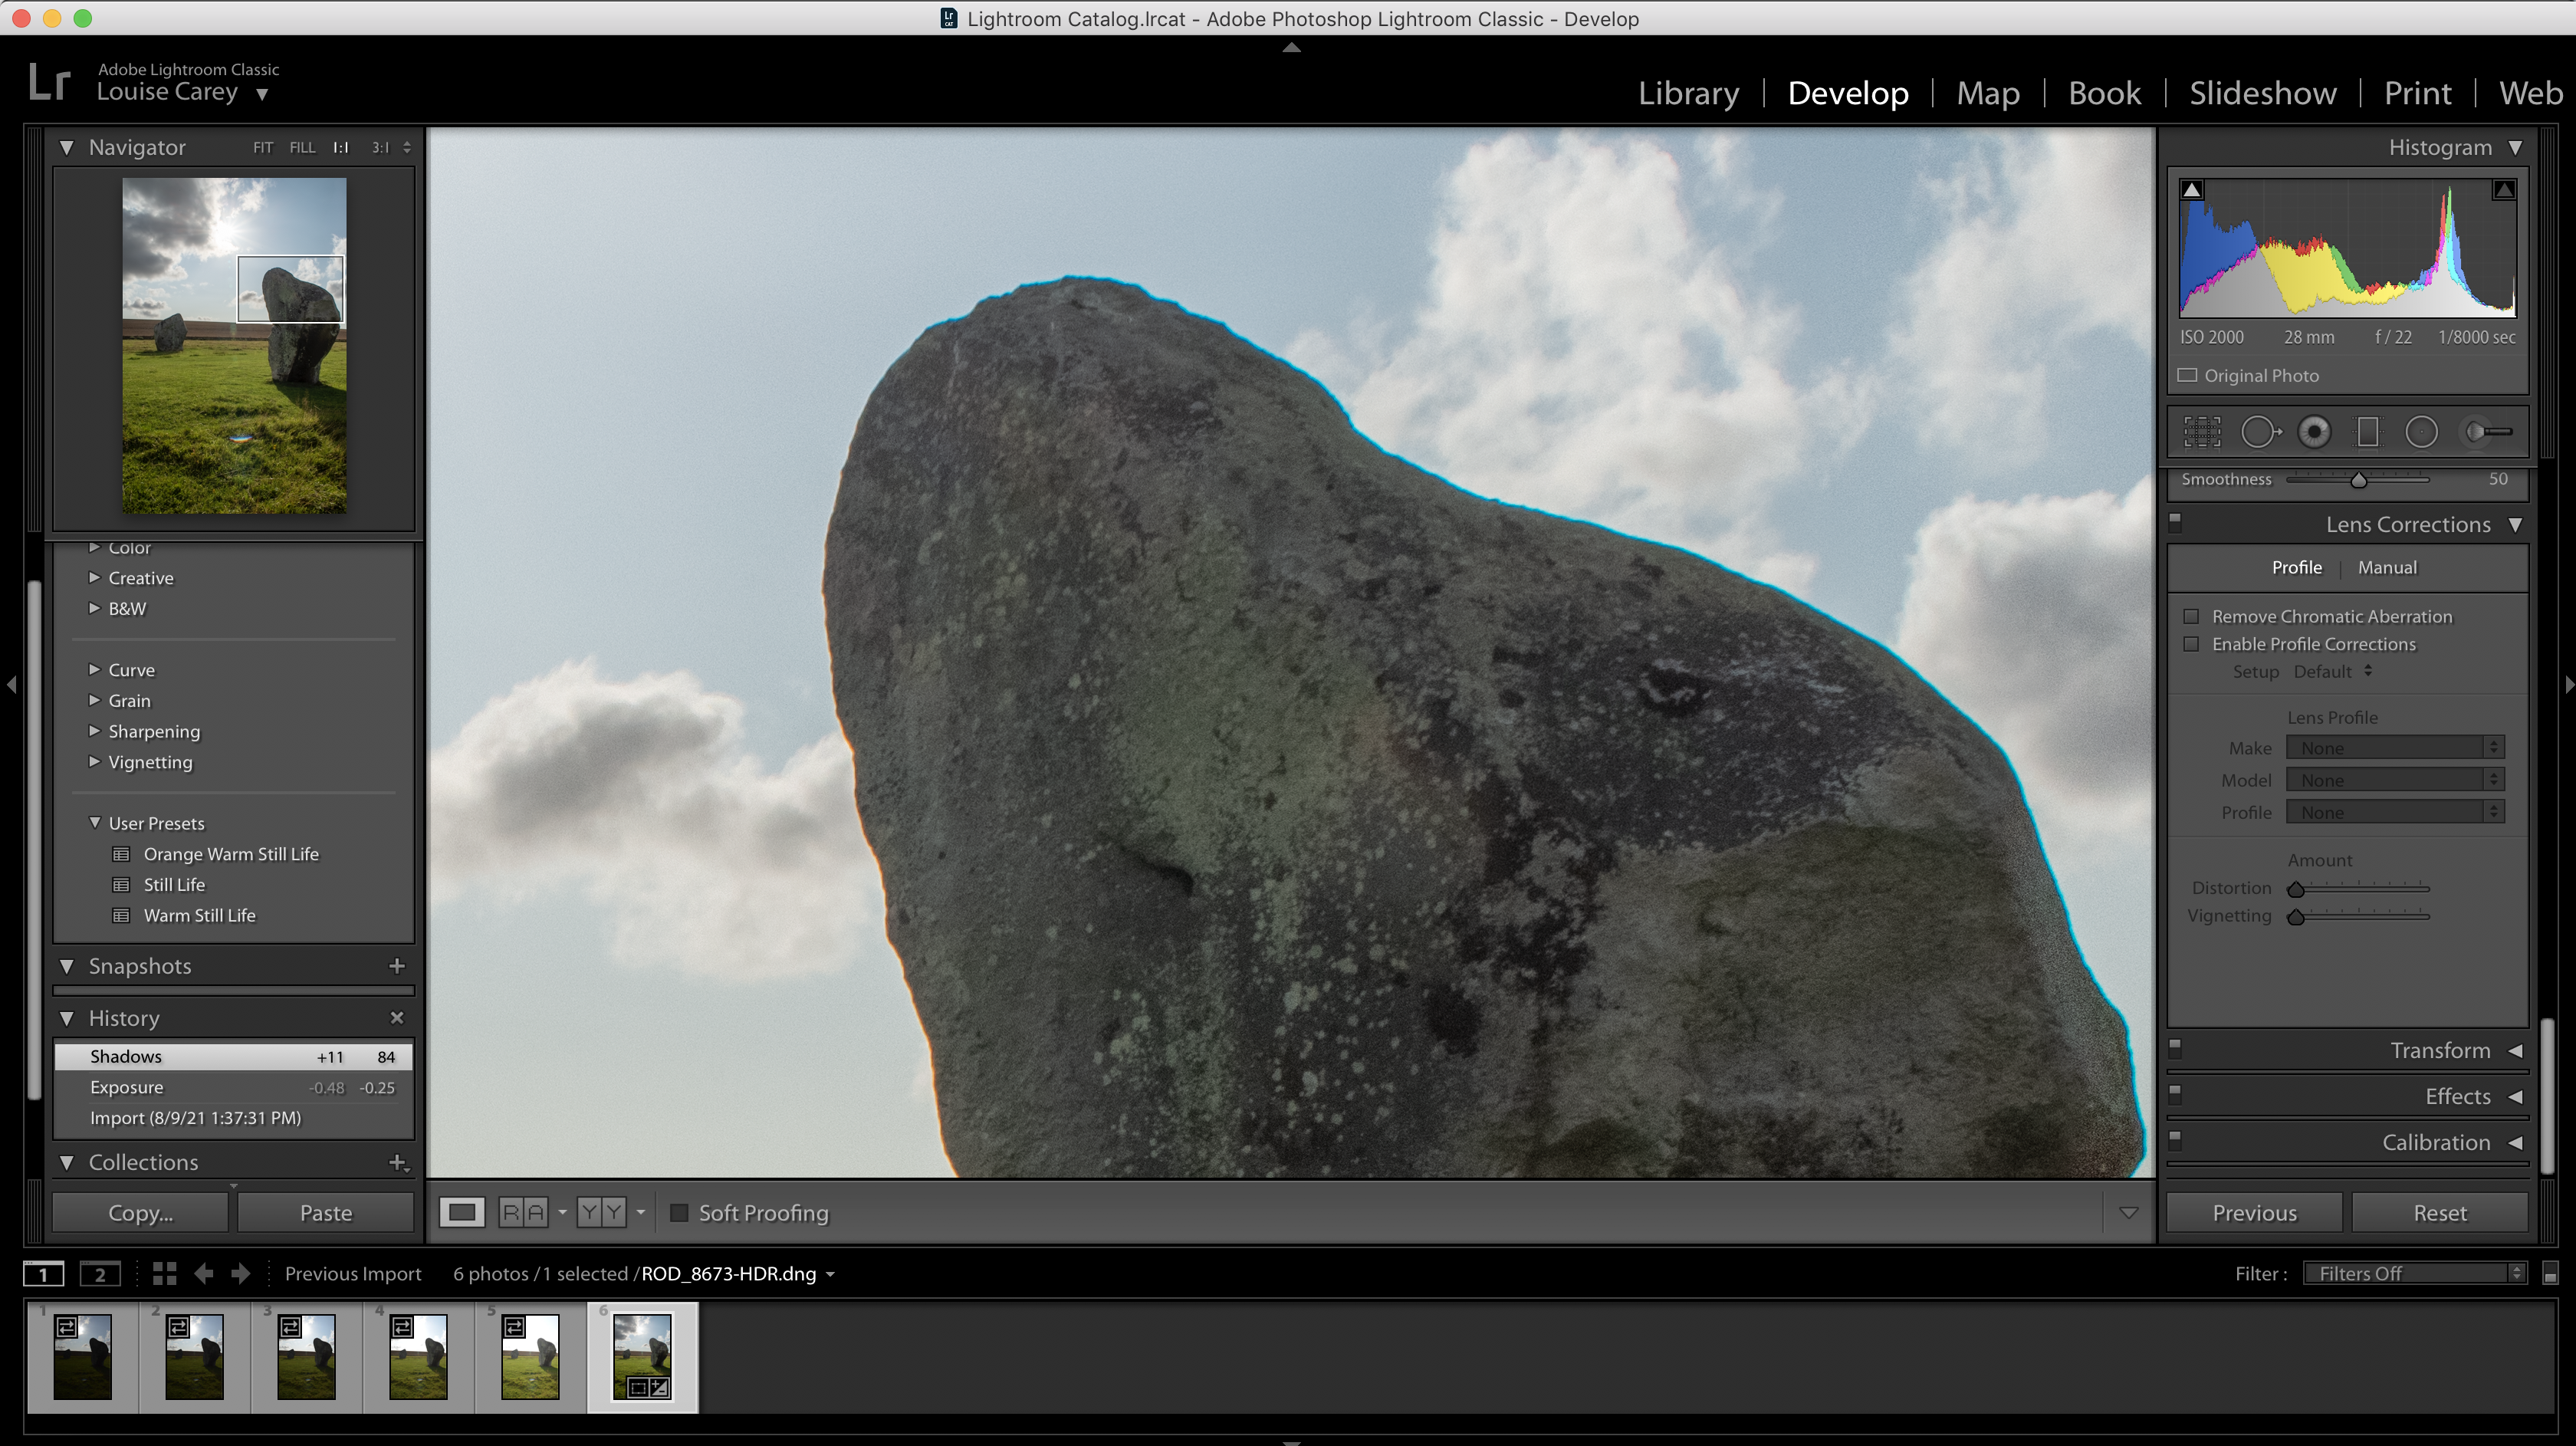
04 Tackle chromatic aberration
Depending on the quality of your lens, shooting directly into the sun can sometimes result in chromatic aberration. This is unfortunate, but easily fixed by going to the Lens Corrections panel and ticking ‘Remove Chromatic Aberration.’
05 Refine your shadows
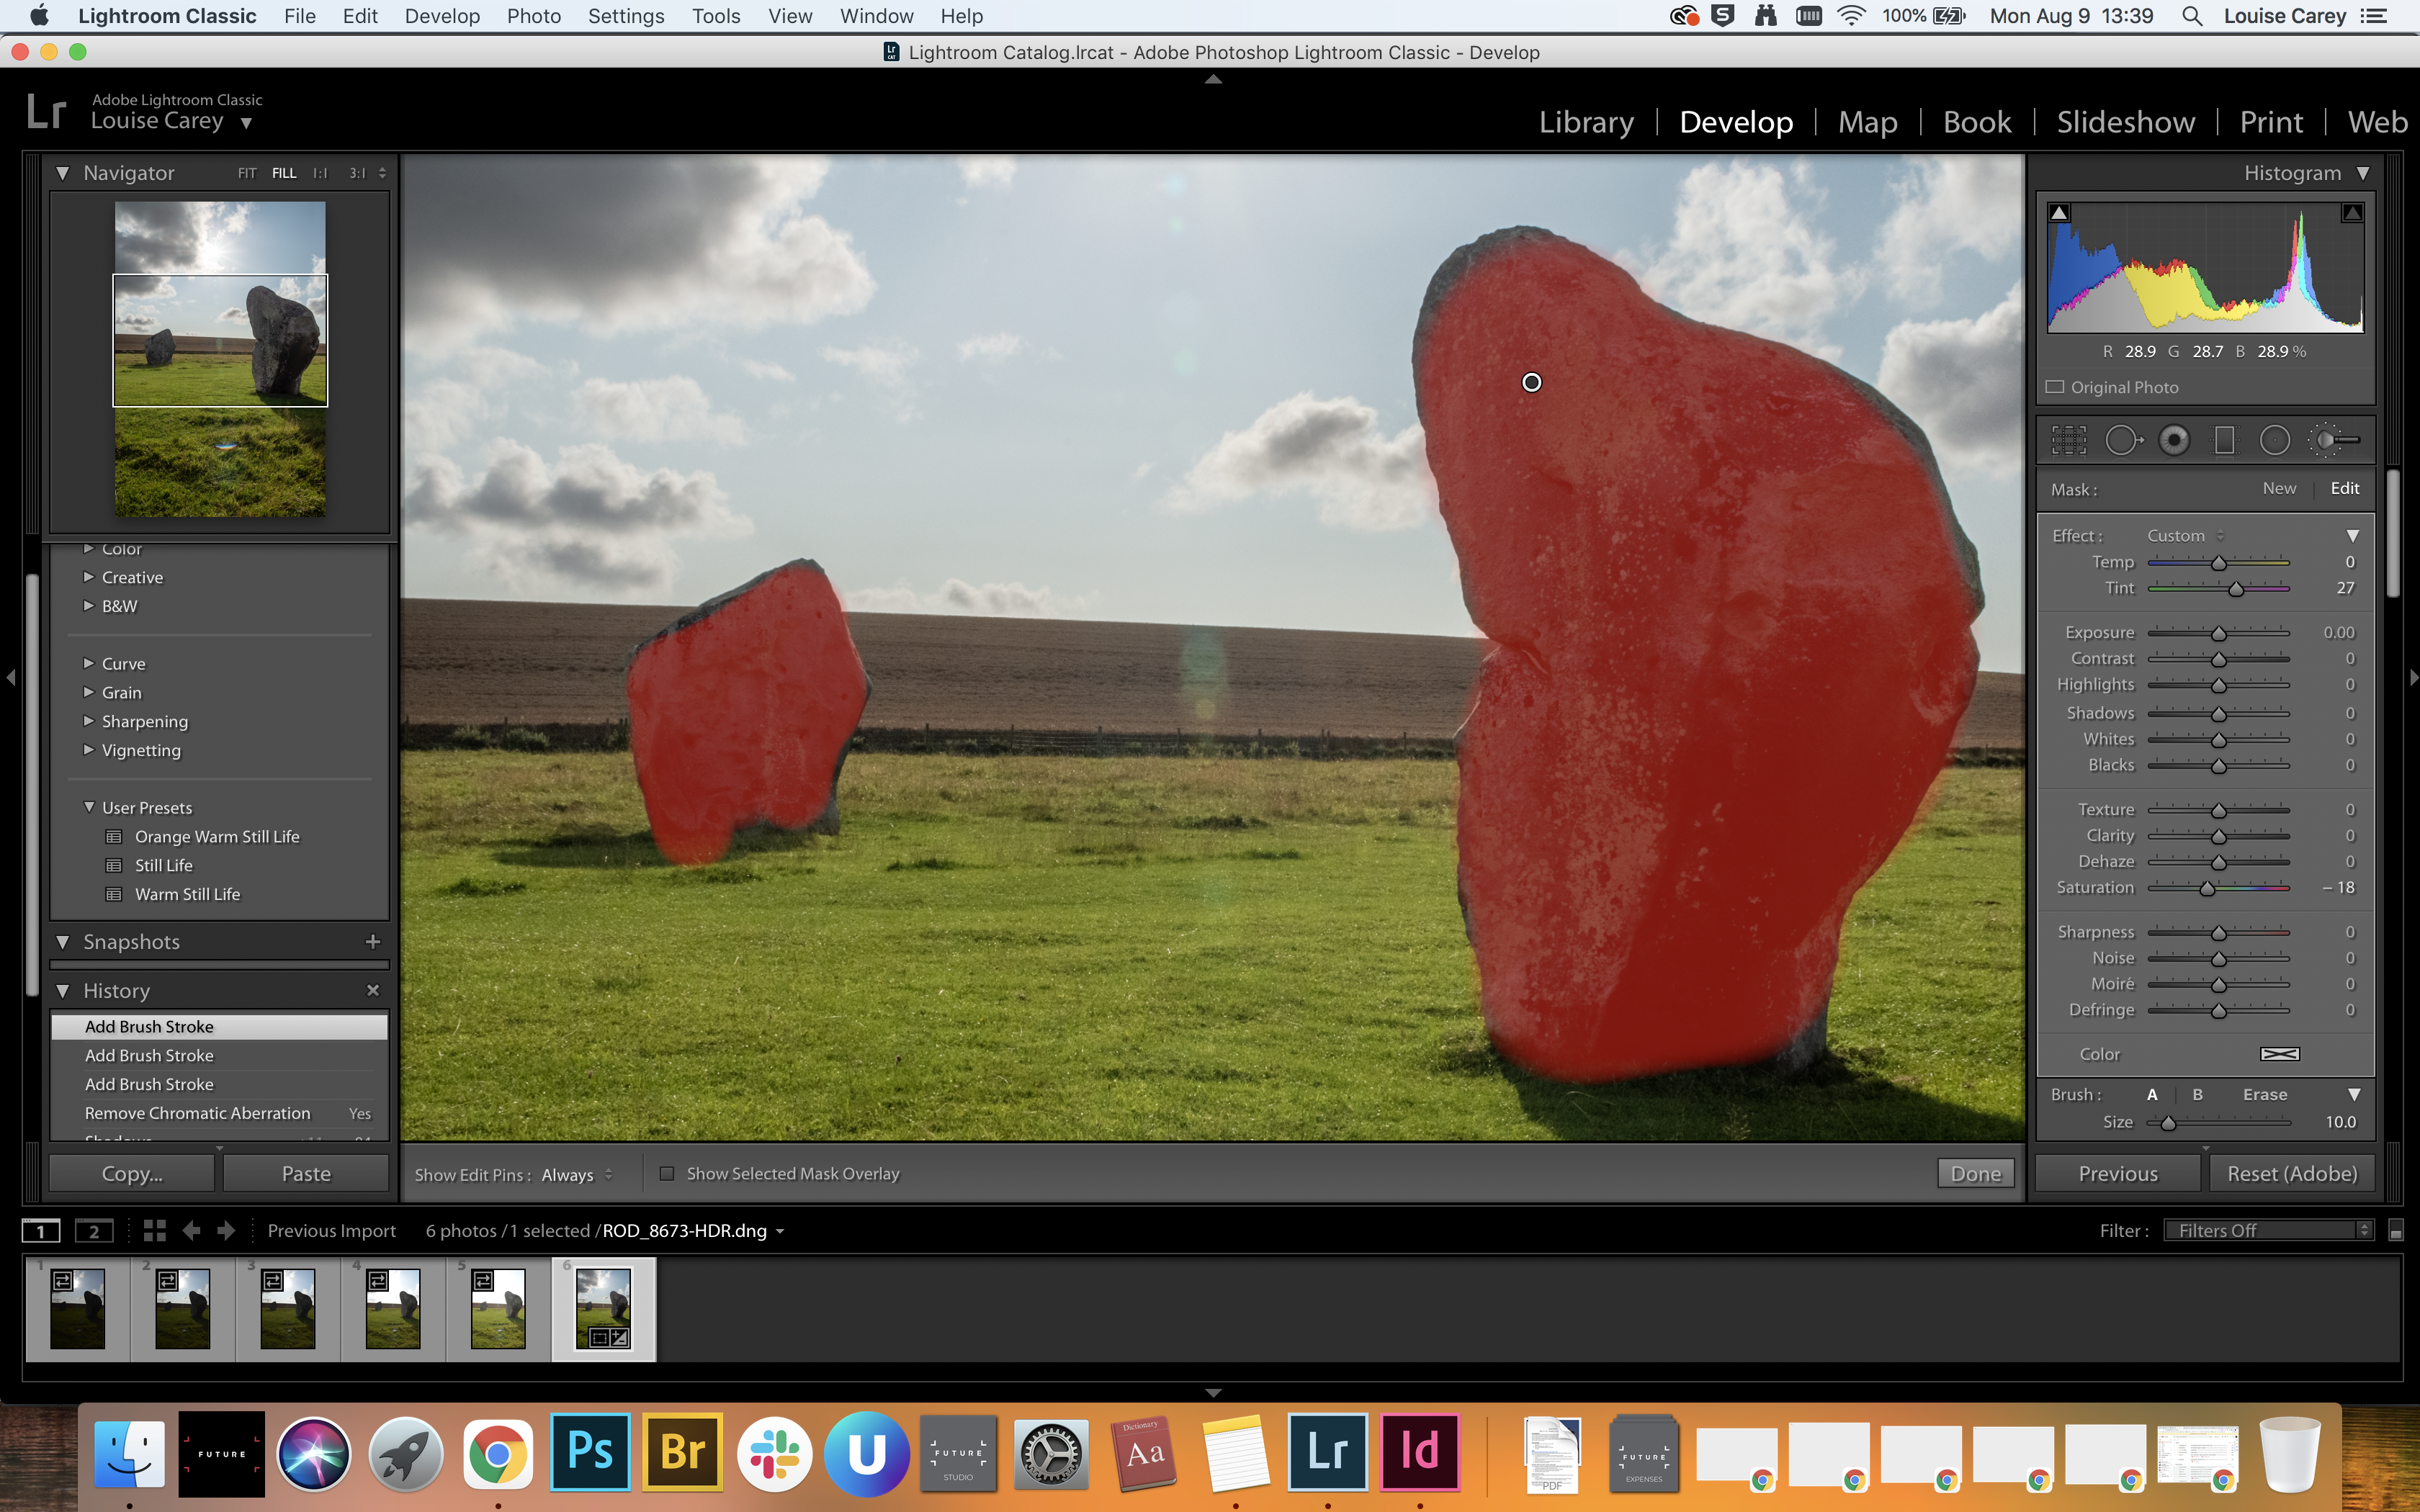
If you find that your shadows have an odd color cast you can use the Adjustment Brush tool to paint over any specific areas that need fixing. We painted over this large boulder and made it more purple with the Tint slider for a more natural finish.
06 Add the finishing touches
HDR photos have a huge amount of info to work with, so play with your exposure and colors. We enhanced the blue of the sky and the green of the grass in the HSL / Color panel, boosting the Saturation slider and darkening the Luminance slider.
PhotoPlus: The Canon Magazine is the world's only monthly newsstand title that's 100% devoted to Canon, so you can be sure the magazine is completely relevant to your system.
Read more:
The best photo editing software: image editors for novices through to pros
The best photo-editing laptops: top laptops for photographers
10 best online photography courses – from beginner guides to masterclasses
With over a decade of photographic experience, Louise arms Digital Camera World with a wealth of knowledge on photographic technique and know-how – something at which she is so adept that she's delivered workshops for the likes of ITV and Sue Ryder. Louise also brings years of experience as both a web and print journalist, having served as features editor for Practical Photography magazine and contributing photography tutorials and camera analysis to titles including Digital Camera Magazine and Digital Photographer. Louise currently shoots with the Fujifilm X-T200 and the Nikon D800, capturing self-portraits and still life images, and is DCW's ecommerce editor, meaning that she knows good camera, lens and laptop deals when she sees them.
