How to use Lightroom Classic: Save hours of editing time with speedy presets
Discover how to use presets to shave hours off your editing time when using Lightroom Classic CC
Watch video: Speed up your edits with presets in Lightroom Classic CC
Editing – it’s either your favorite part of the photographic process, or the bane of your life. Either way, why not make your life easier by creating some Lightroom Classic CC presets?
Presets are essentially a set of pre-programmed adjustments that can affect aspects of your image including exposure, sharpness and color in a pre-determined way. This means that you can quickly transform an image with a single click, potentially saving you hours of editing time.
• Read more: Free Lightroom presets
Making a preset for each and every shooting situation you can think of is incredibly easy – all you need to do is make a series of adjustments and then save them as a preset.
You can download the same Still_Life.jpg start file we’re using, or feel free to import one of your own images in Lightroom Classic CC to follow along – and don’t forget to watch the video lesson above to see how it’s done in real-time.
01 Make your adjustments
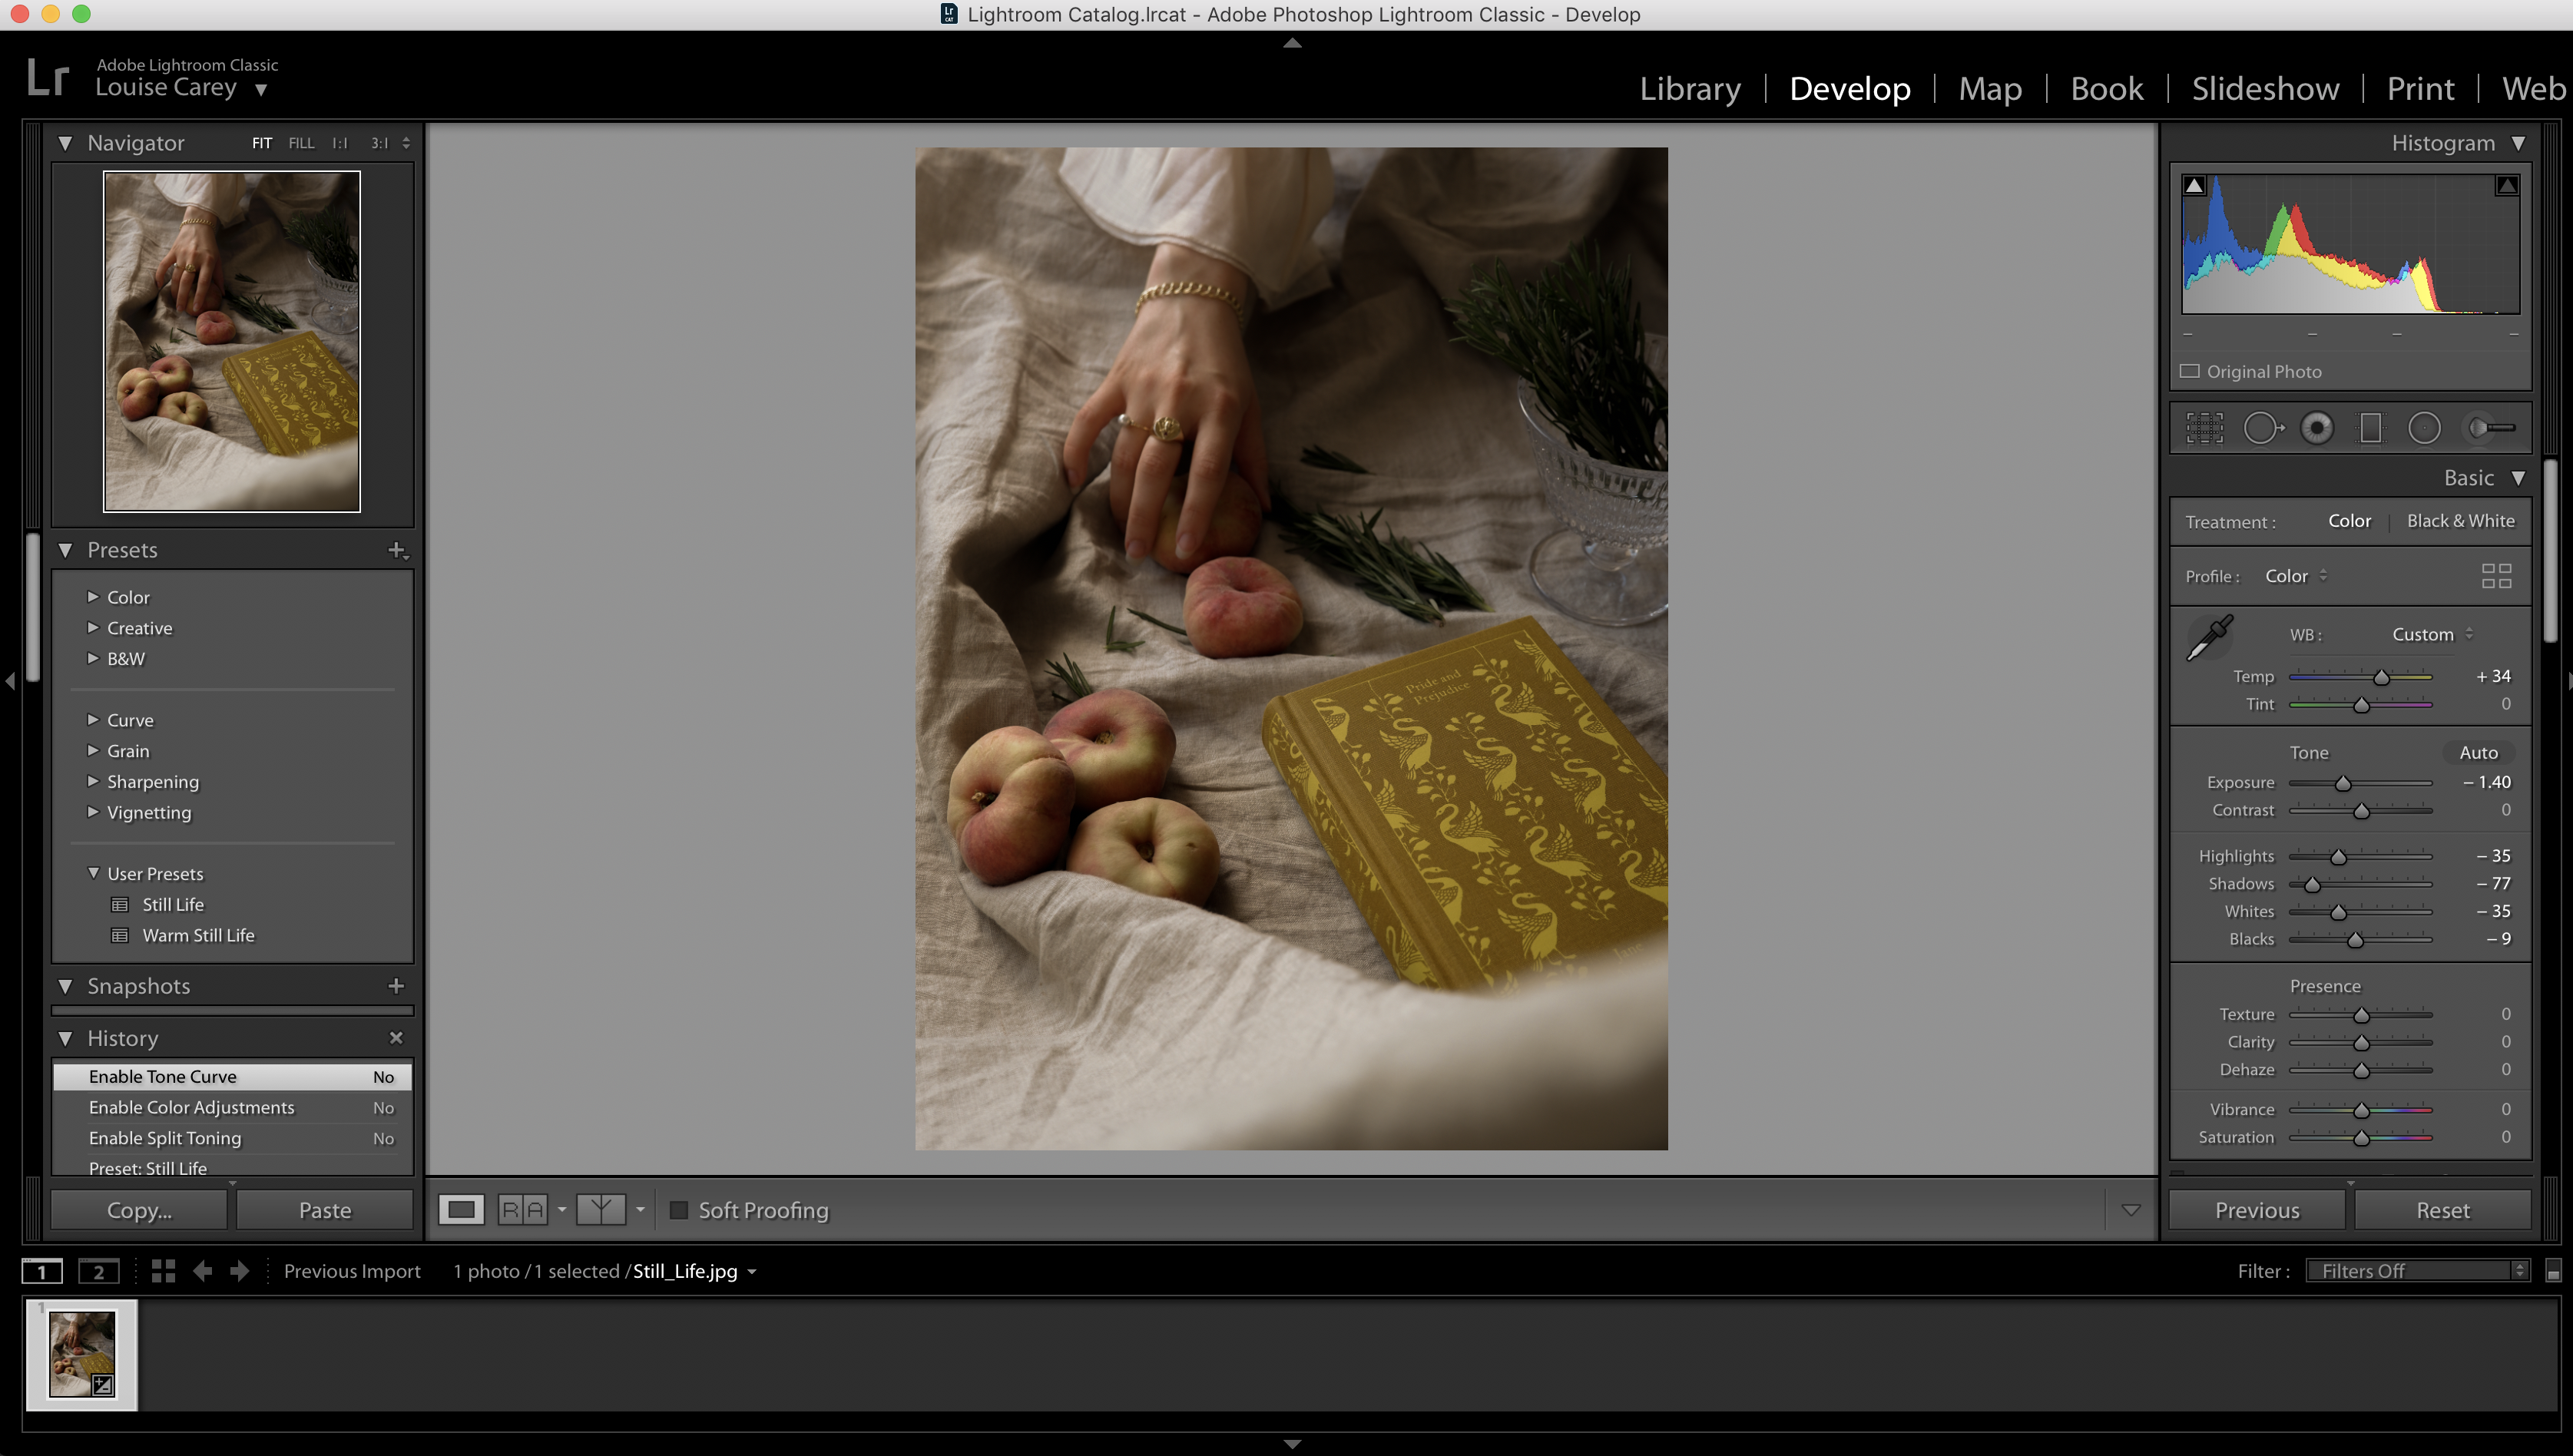
Open an image in Lightroom and navigate to the Develop module. The Basic panel will include sliders that will adjust aspects including your Temperature, Tint, Exposure, Contrast and Saturation. Set your sliders according to your preference.
02 Experiment with the Tone Curve
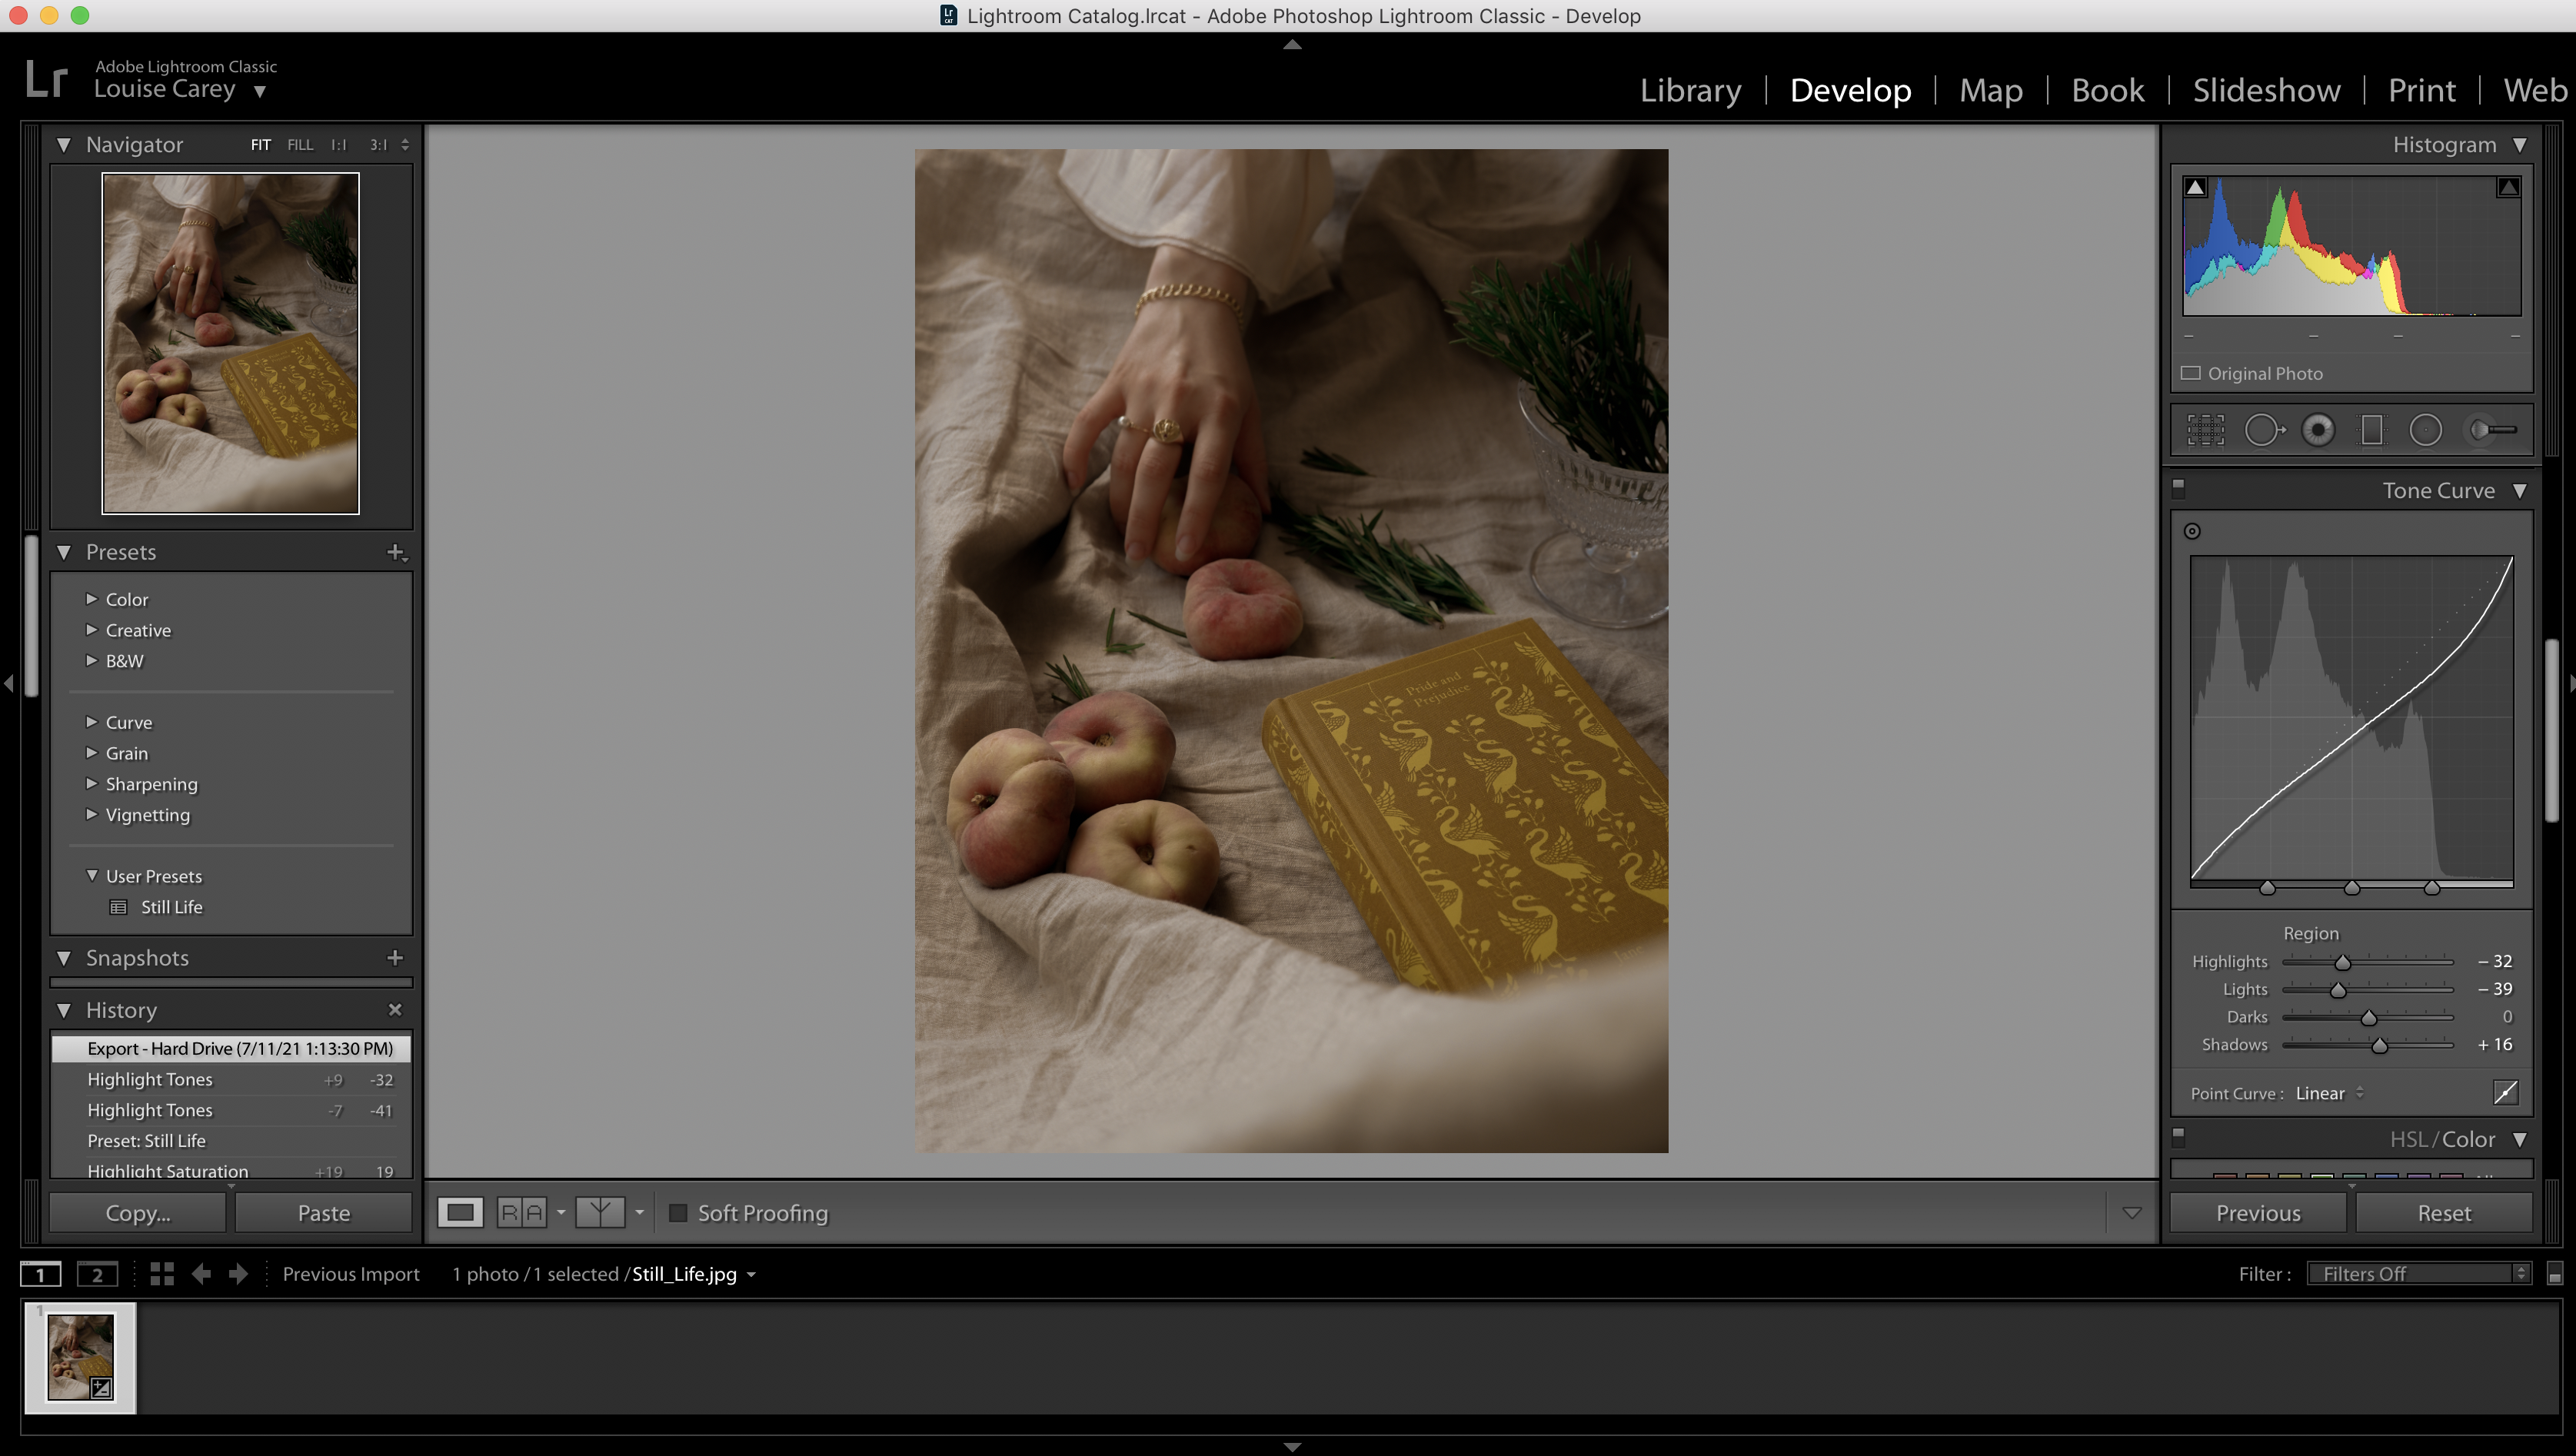
The Tone Curve panel is a more sophisticated way to adjust the exposure of your image. You can either use the panel itself, or the sliders in the Region section underneath. Dragging the Shadows slider to the right to gives it a more muted look.
03 Play with color
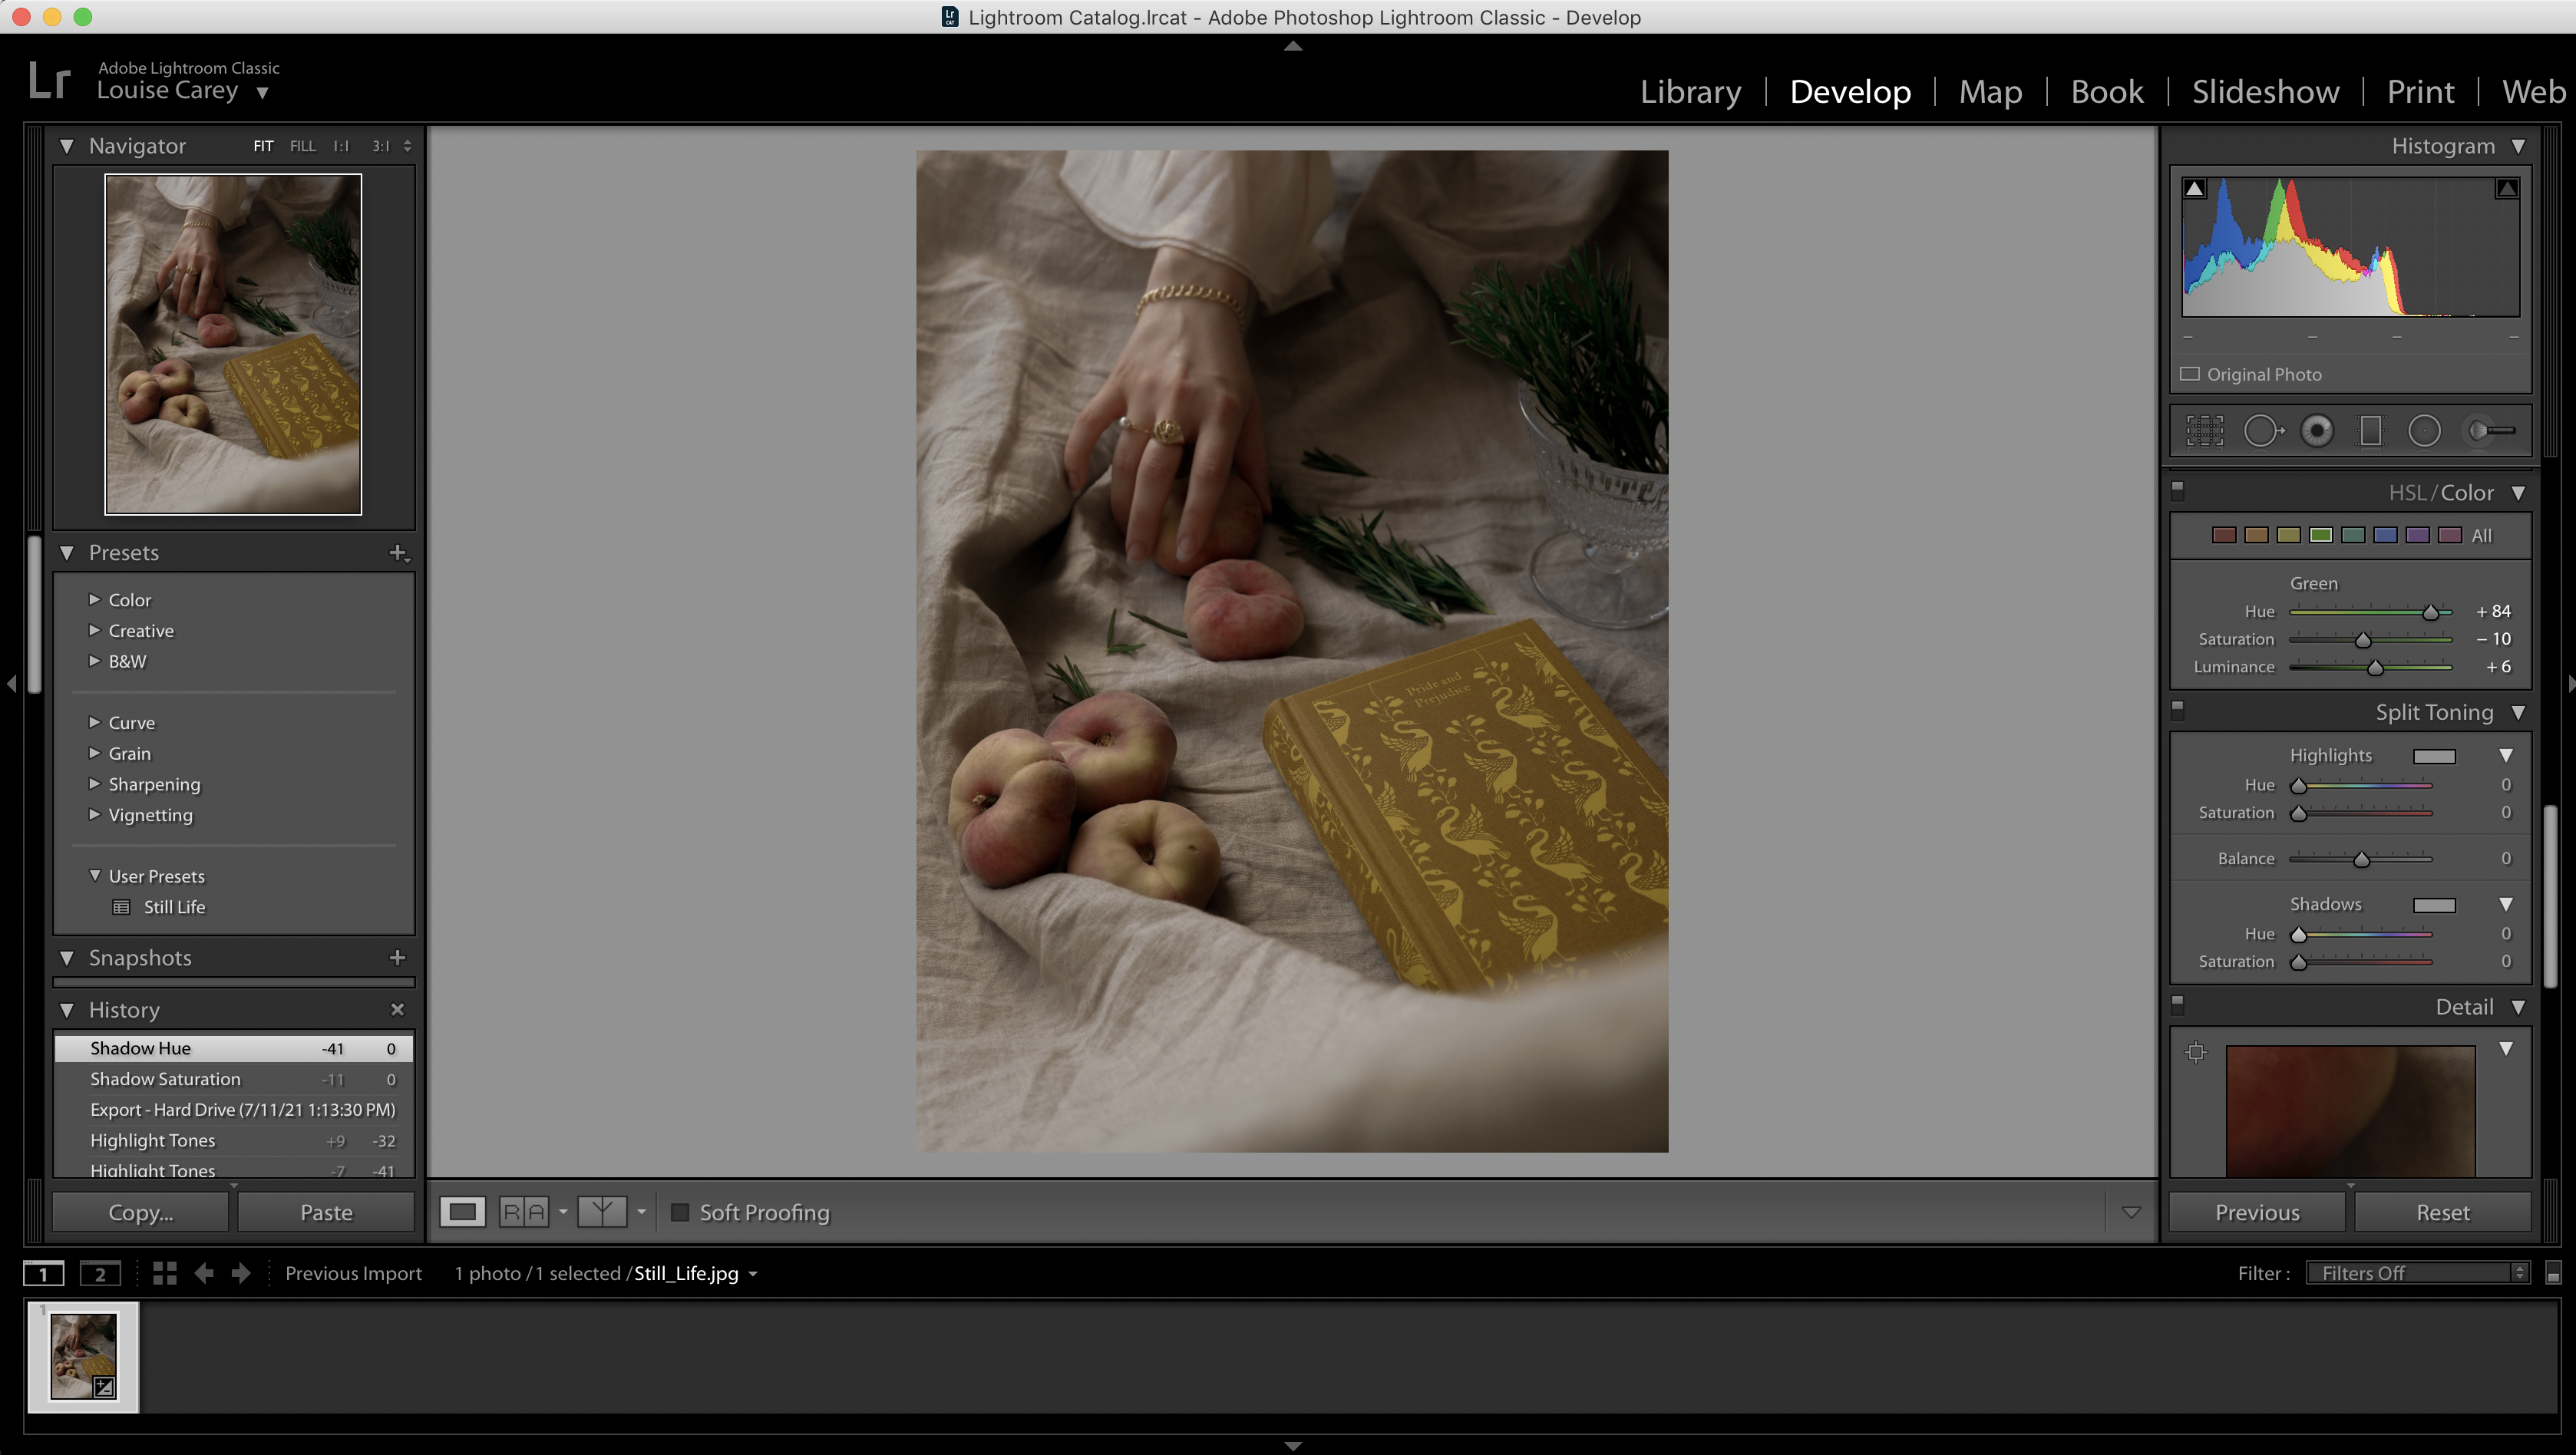
Navigate to the HSL / Color panel to adjust the colors in your image. Pick a color and then use the Hue to shift color, Saturation to adjust the intensity of the colors and the Luminance slider to tweak how bright or dark that color is.
04 Have some fun with Split Toning
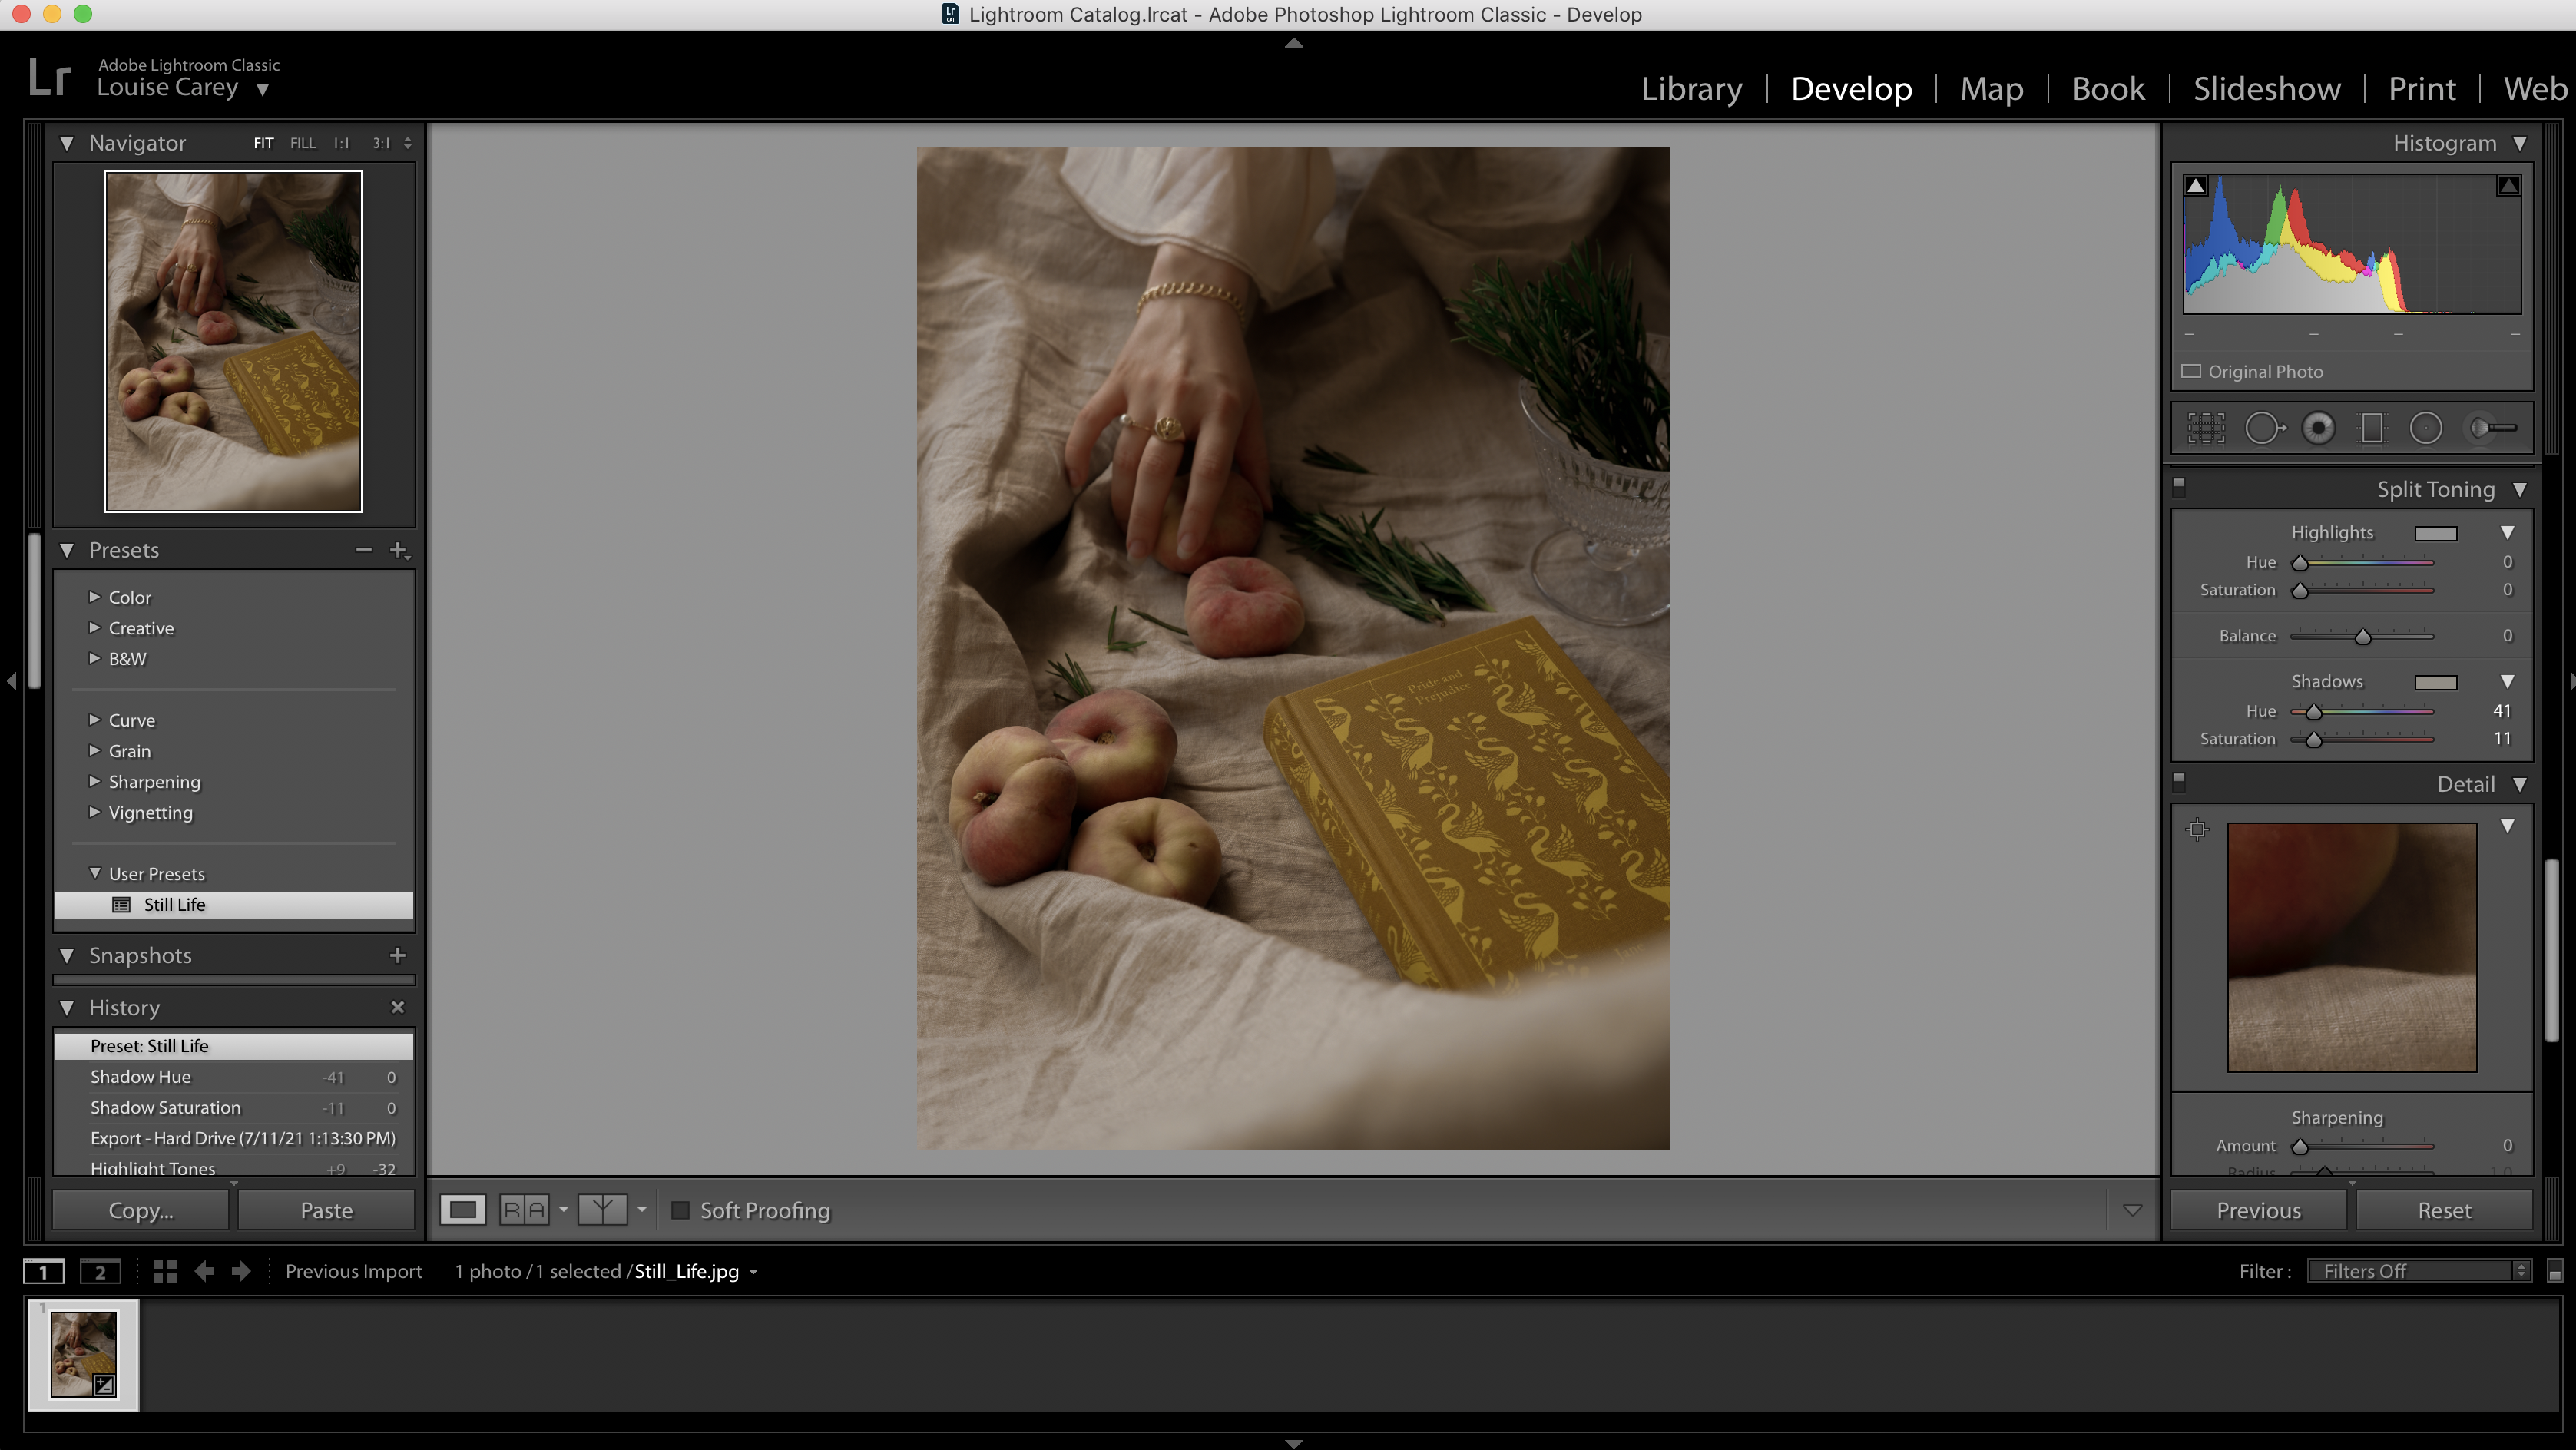
Split toning allows you to allocate one color to the highlights in your shot and another to the shadows, which creates a very pleasing result. Use the Split Toning panel to apply one and use complimentary colors that work well together.
05 Create your preset
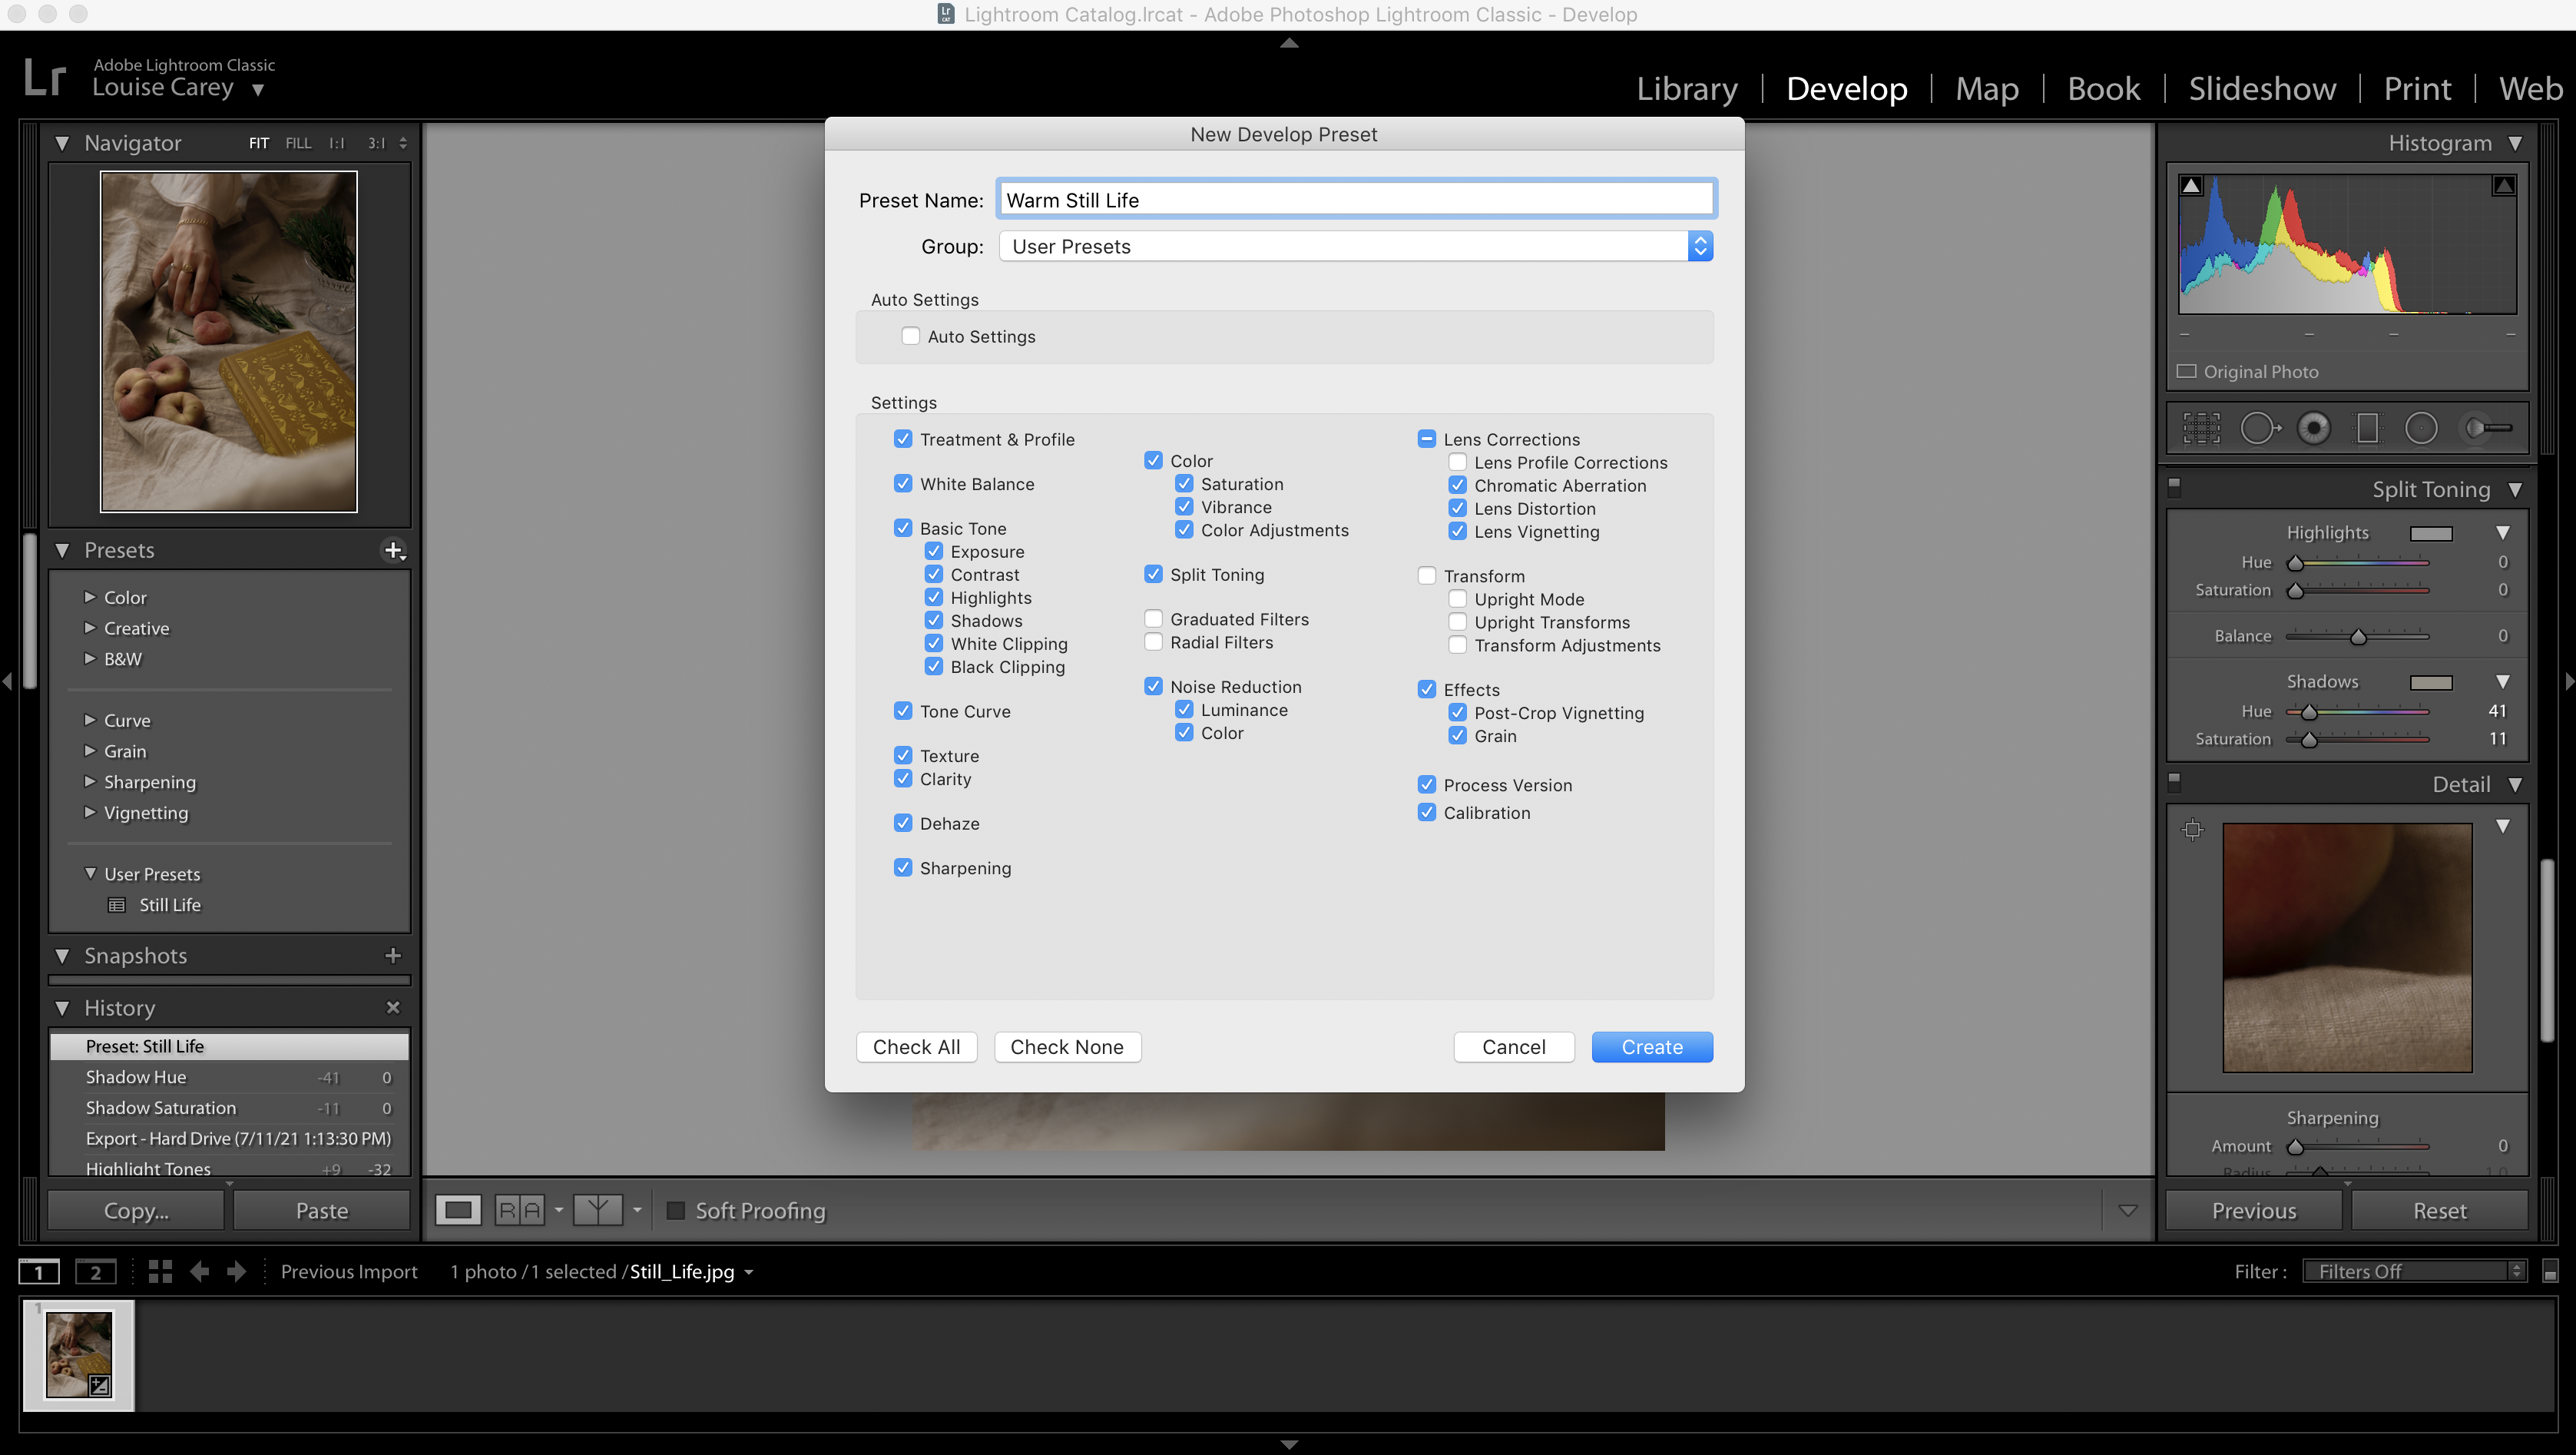
When happy with the edit, go to the Presets drop-down menu on the left of the screen. Click the ‘+’ sign and select ‘Create Preset’. You can then name the preset and decide which adjustments you want to include (uncheck any boxes you want to leave out).
06 Make the final adjustments
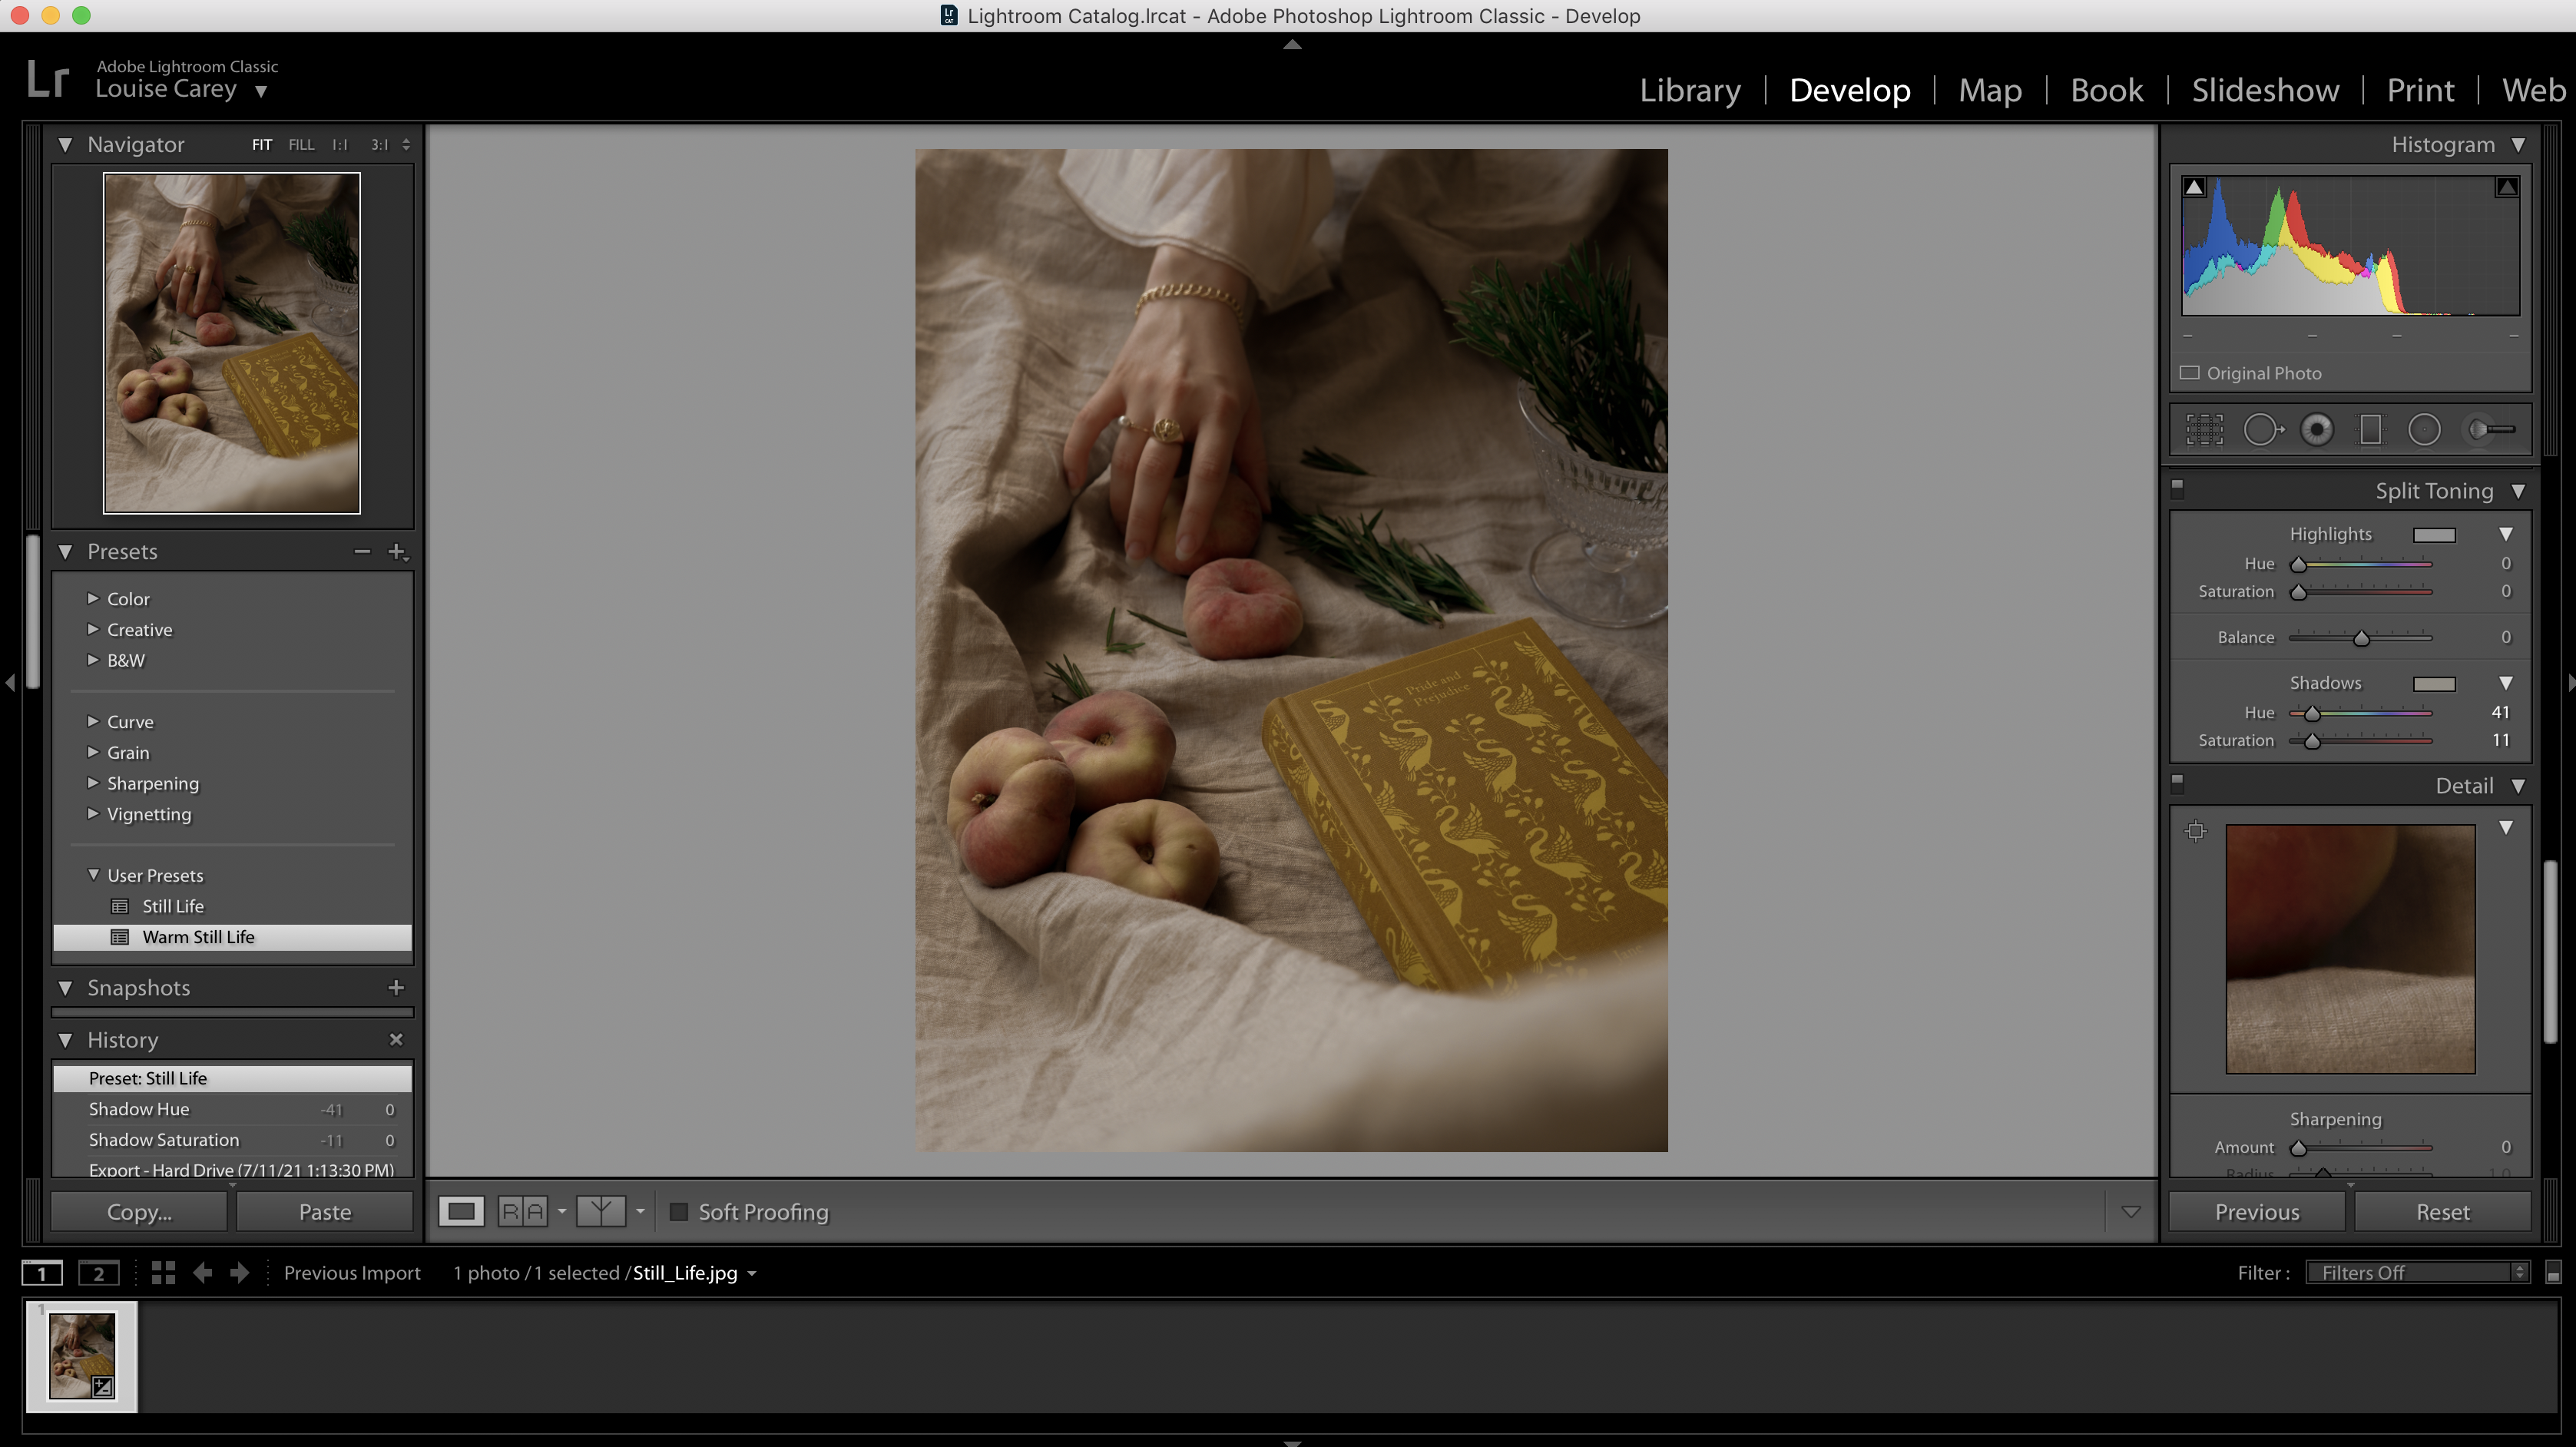
Presets aren’t a one-size-fits-all solution. You’ll occasionally need to make some tweaks. Luckily, this can be easily done by clicking on the preset and going through the individual panels and create brand-new looks by adjusting your original preset.
PhotoPlus: The Canon Magazine is the world's only monthly newsstand title that's 100% devoted to Canon, so you can be sure the magazine is completely relevant to your system.
Read more:
The best photo editing software: image editors for novices through to pros
The best photo-editing laptops: top laptops for photographers
10 best online photography courses – from beginner guides to masterclasses
Get the Digital Camera World Newsletter
The best camera deals, reviews, product advice, and unmissable photography news, direct to your inbox!
With over a decade of photographic experience, Louise arms Digital Camera World with a wealth of knowledge on photographic technique and know-how – something at which she is so adept that she's delivered workshops for the likes of ITV and Sue Ryder. Louise also brings years of experience as both a web and print journalist, having served as features editor for Practical Photography magazine and contributing photography tutorials and camera analysis to titles including Digital Camera Magazine and Digital Photographer. Louise currently shoots with the Fujifilm X-T200 and the Nikon D800, capturing self-portraits and still life images, and is DCW's ecommerce editor, meaning that she knows good camera, lens and laptop deals when she sees them.


