How to use Lightroom Classic: Use the Adjustment Brush to edit specific areas
Selectively enhance overexposed skies with the Adjustment Brush tool in Adobe Lightroom Classic CC
Watch video: Use the Adjustment Brush in Lightroom Classic CC
The brilliant glow of a sun-soaked sky can be the perfect cherry on top of your landscape photography sundae. However, getting the right exposure for both land and sky can be tricky.
Some photographers like to capture multiple exposures and blend them together, but a single raw image contains so much information that there’s actually a far simpler solution.
• Read more: Free Lightroom presets
Lightroom is equipped with the Adjustment Brush tool, found in the Develop module. This tool enables users to selectively brush adjustments onto their image. So, if you find yourself with a beautiful sunset that you just couldn’t expose correctly in-camera, the Adjustment Brush tool comes in very handy.
No matter whether you’re shooting a flat horizon like our beach scene, or a more complicated vista that includes trees, mountains or architecture, the Adjustment Brush tool enables you to paint over specific aspects of your image and edit them without affecting anything else within the frame.
You can download the same Beach_Sunset.jpg start file we’re using here or open up one of your own photographs into Lightroom Classic CC to follow along. Let’s get to it...
• See also: Why I dumped Lightroom CC and went back to Lightroom Classic
01 Make your basic adjustments
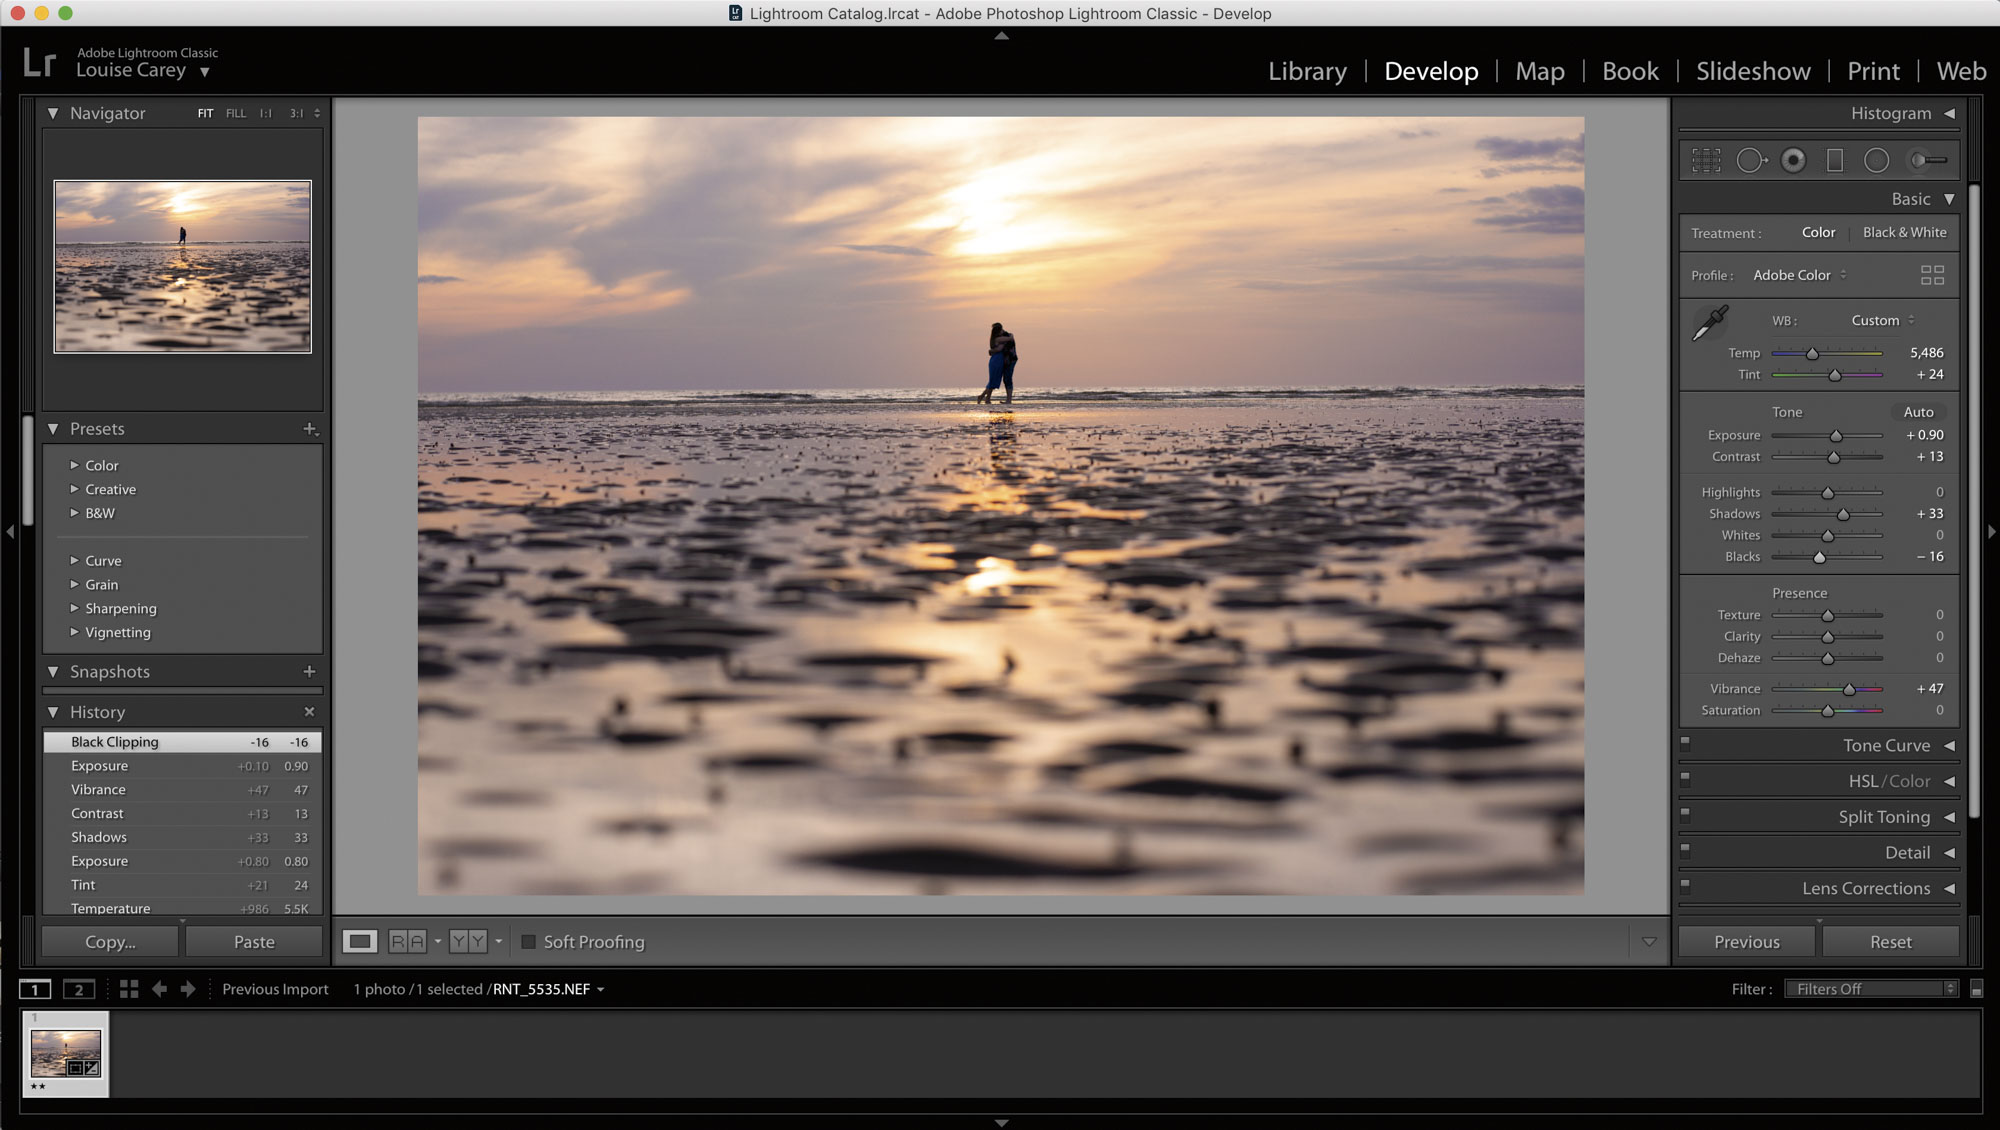
After importing your photo, navigate to the Basic panel in the Develop module. Use the sliders to create the right exposure and white balance for the foreground. Don’t worry if your sky is overexposed, as we will be fixing this with the Adjustment Brush tool later.
02 Choose the adjustment brush tool
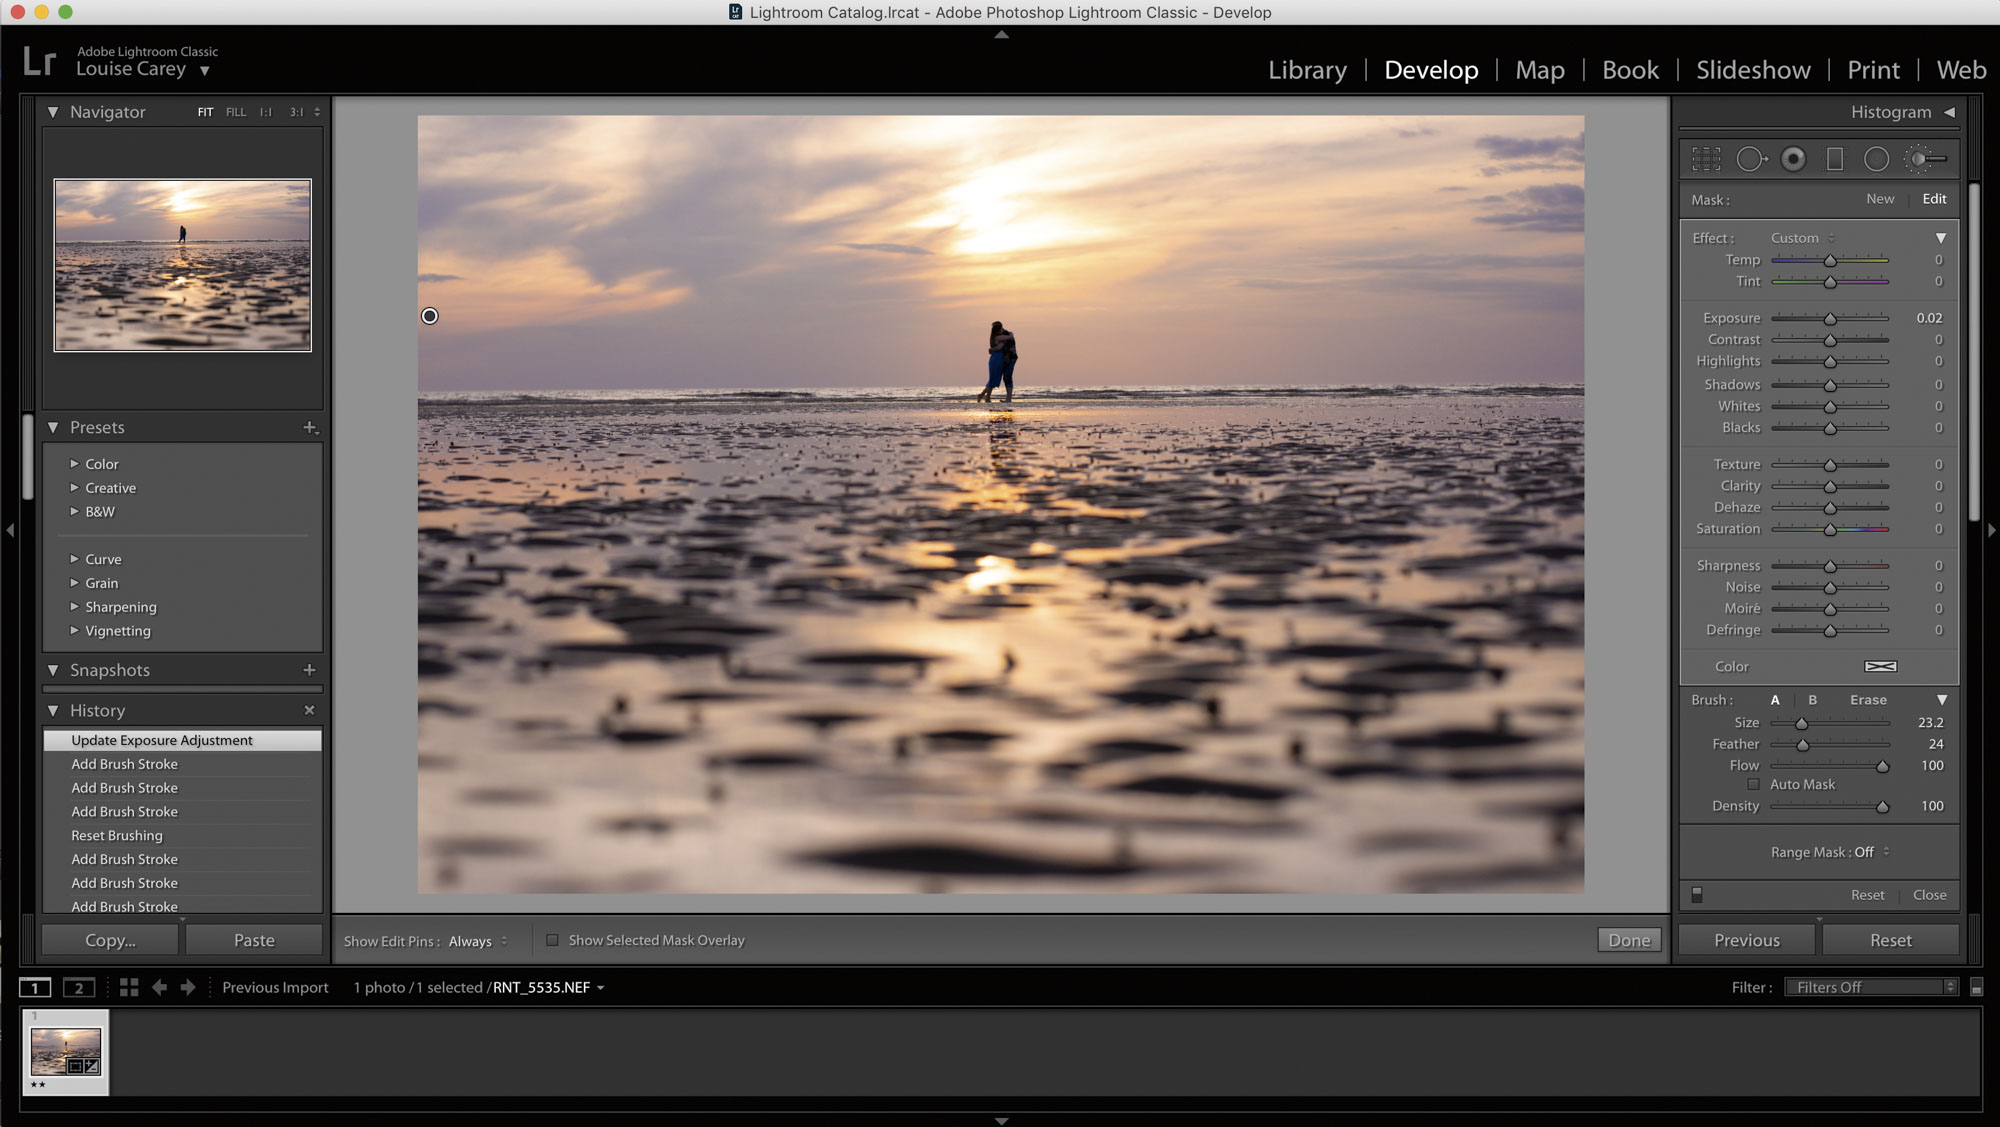
Press ‘K’, or choose the Adjustment Brush tool. Go to the Brush panel and use the sliders to control the tool. The Size and Feather sliders will affect how large the brush is and how soft the edges are. The Flow and Density sliders control the opacity of the brush.
03 Make a rough selection
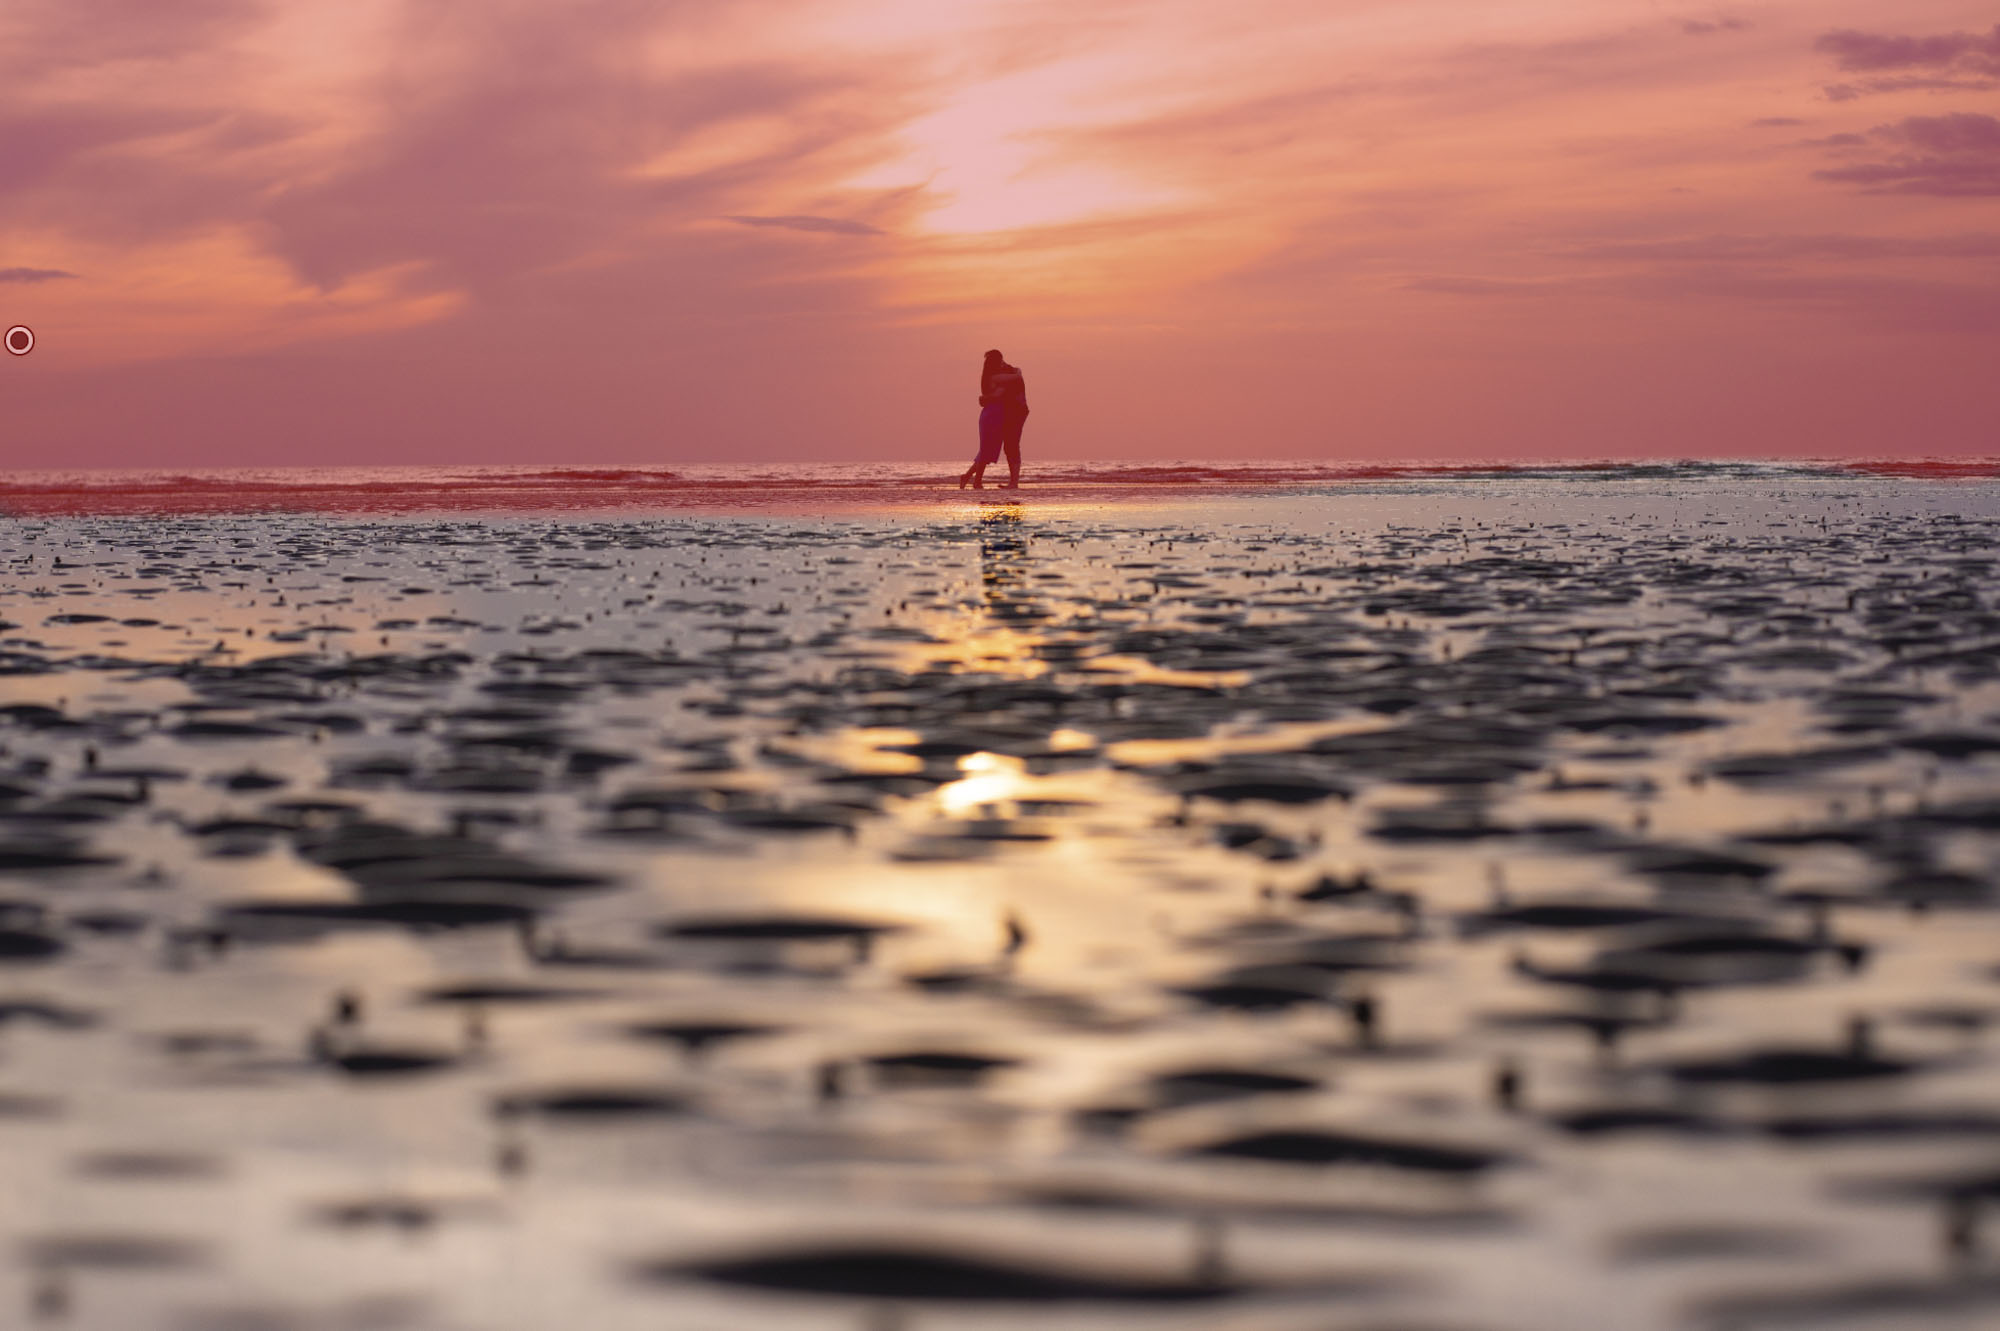
If you have a simple horizon (such as ours), set the Feather slider to around 25% and paint over the sky or any other specific part of the image that you want to adjust separately from your global adjustments and press 'O' to see the area you’ve selected clearly.
04 Bring down the highlights
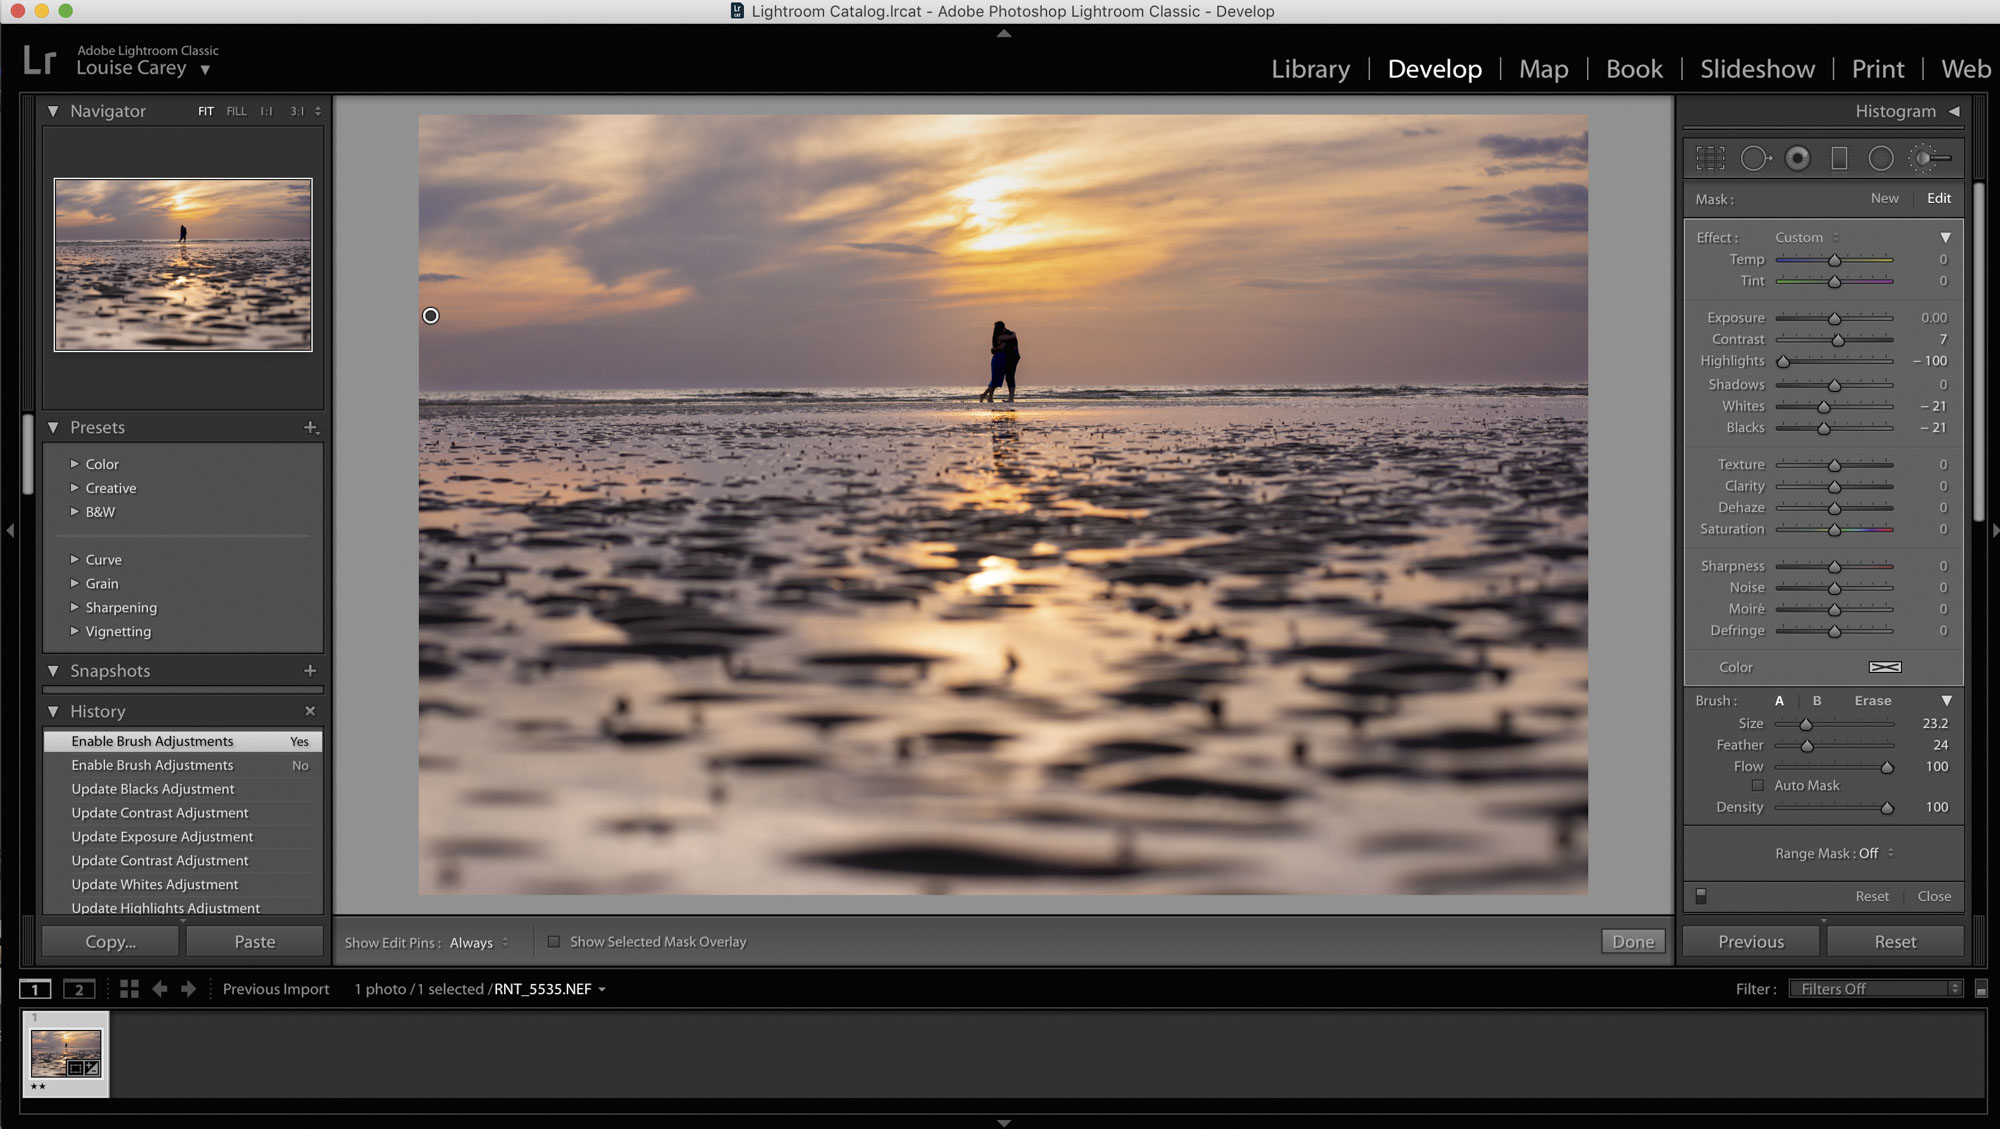
Once you’ve selected the area you want to adjust with the Adjustment Brush tool, move the Highlights slider to the left to darken the brightest areas. For an even more powerful effect, you can also adjust the Whites slider – although a lighter touch works best here.
05 Adjust the tones
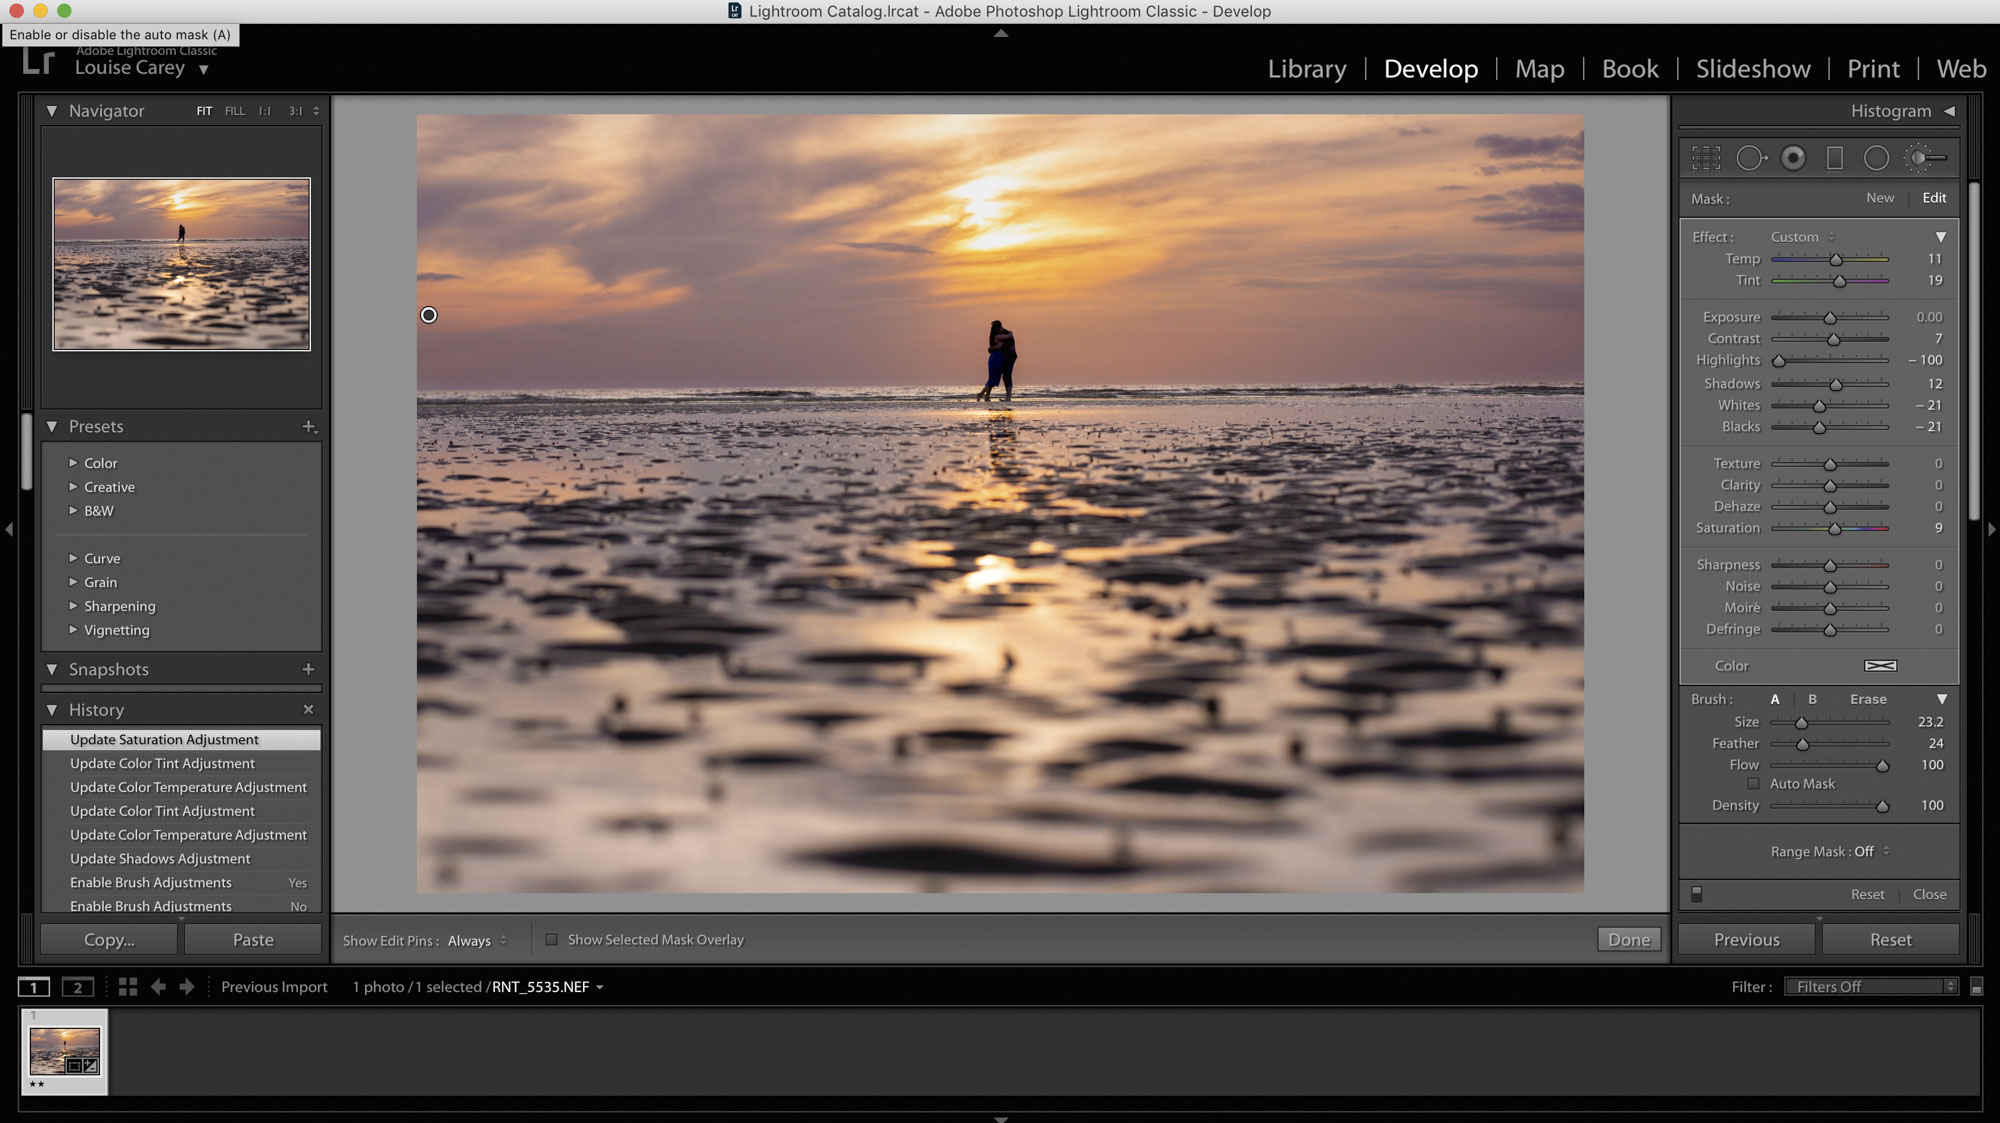
The sky can often be the most exciting aspect of a landscape photo – and the most colorful. Move the Temp and Tint sliders to the right to introduce sunset tones of yellow and purple. Give the colors an extra boost by moving the Saturation slider to the right, too.
06 Tidy up the selection
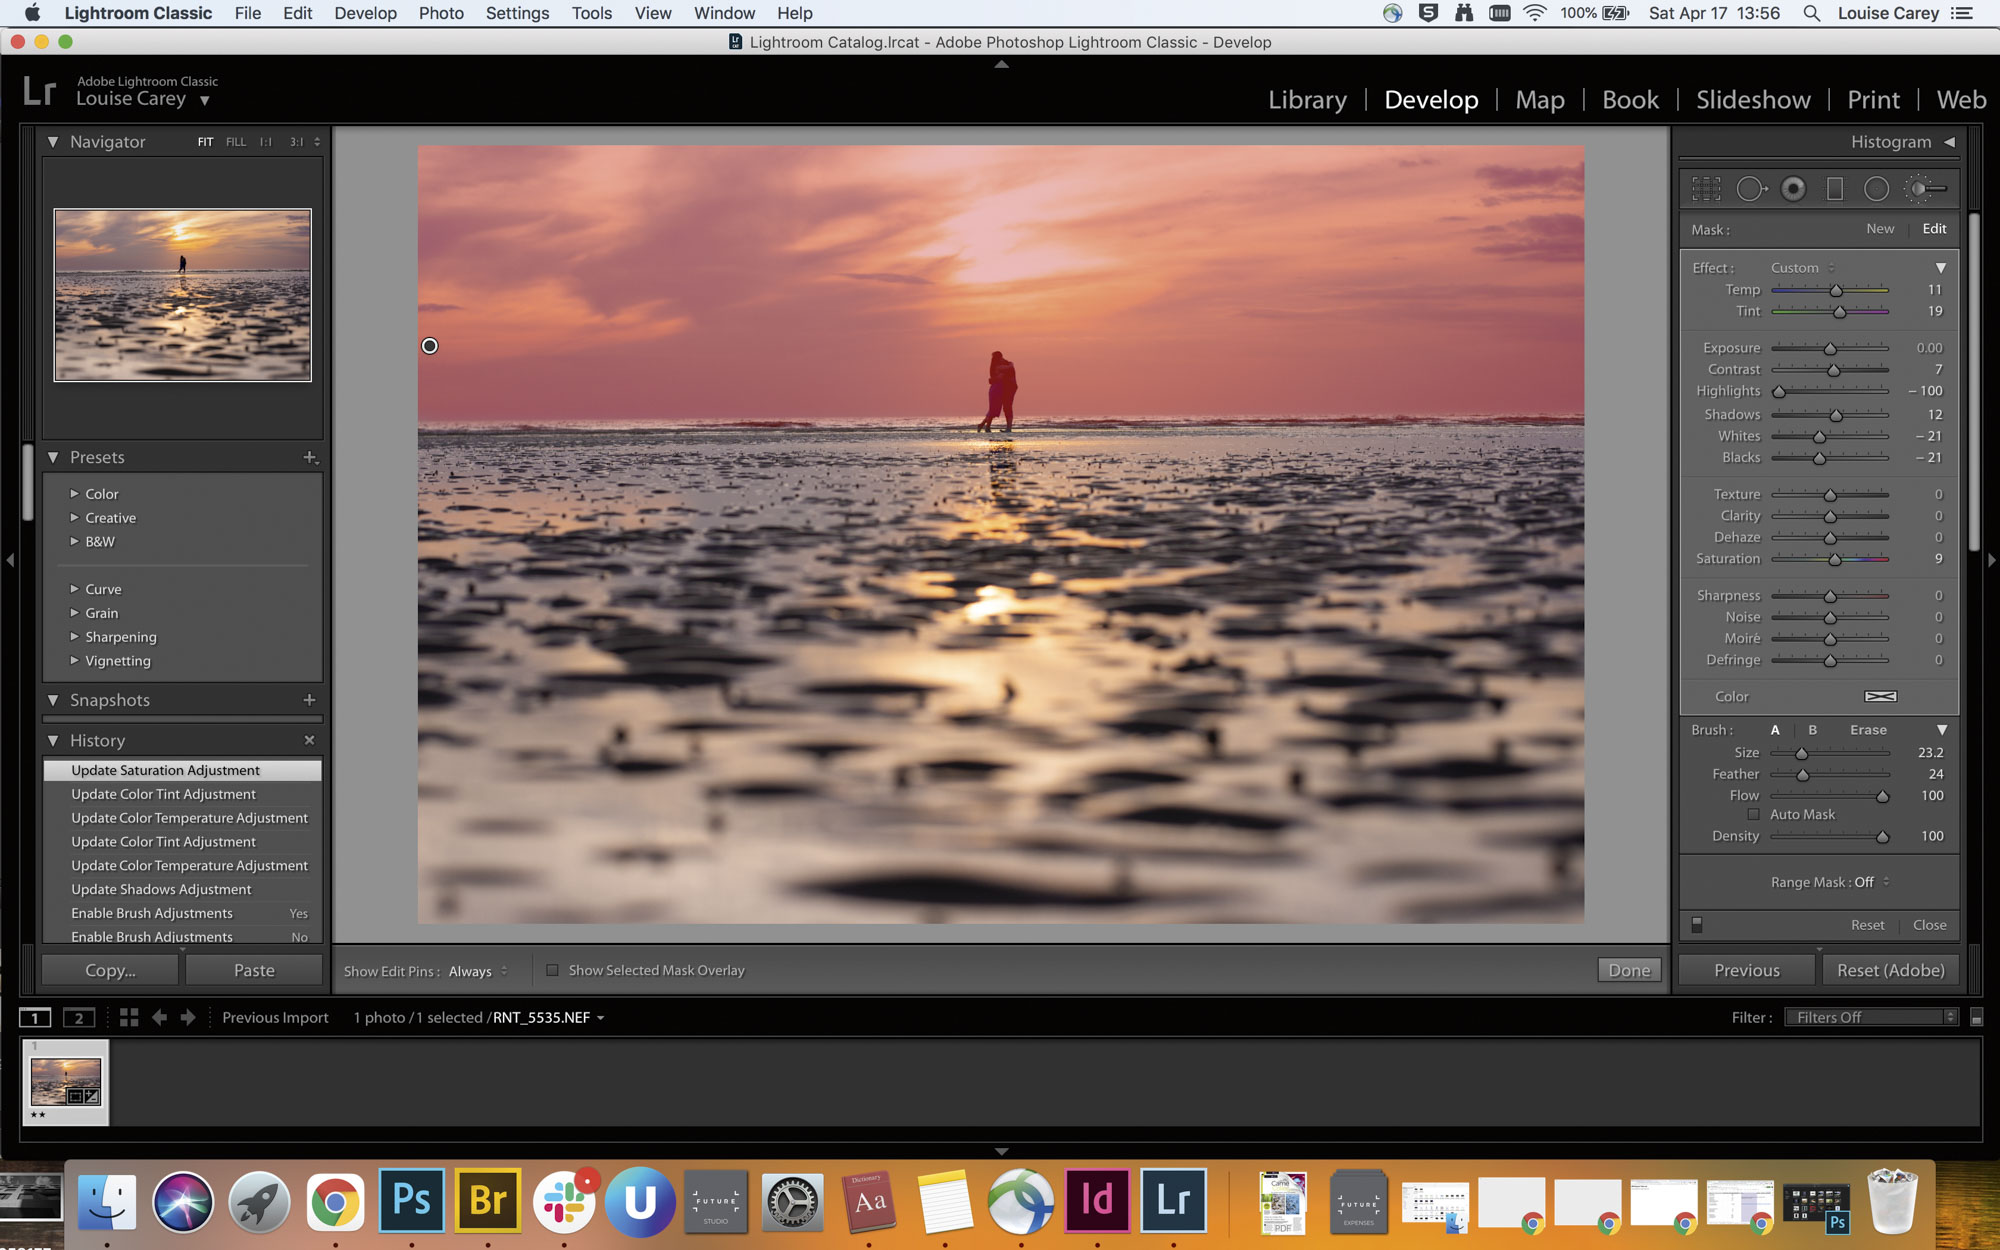
It’s common for Adjustment Brush selections to be a little messy at first. On the Brush panel, navigate to the Erase option and use the Size slider to create a small brush. Then, go along the horizon and tidy up any imperfections to neaten it up.
PhotoPlus: The Canon Magazine is the world's only monthly newsstand title that's 100% devoted to Canon, so you can be sure the magazine is completely relevant to your system.
Read more:
The best photo editing software: image editors for novices through to pros
The best photo-editing laptops: top laptops for photographers
10 best online photography courses – from beginner guides to masterclasses
Get the Digital Camera World Newsletter
The best camera deals, reviews, product advice, and unmissable photography news, direct to your inbox!
With over a decade of photographic experience, Louise arms Digital Camera World with a wealth of knowledge on photographic technique and know-how – something at which she is so adept that she's delivered workshops for the likes of ITV and Sue Ryder. Louise also brings years of experience as both a web and print journalist, having served as features editor for Practical Photography magazine and contributing photography tutorials and camera analysis to titles including Digital Camera Magazine and Digital Photographer. Louise currently shoots with the Fujifilm X-T200 and the Nikon D800, capturing self-portraits and still life images, and is DCW's ecommerce editor, meaning that she knows good camera, lens and laptop deals when she sees them.

