How to use local adjustments in DxO PhotoLab – and get a 15% discount
PhotoLab can transform even the most unpromising raw files – get a 15% discount on any DxO product for a limited time
DxO PhotoLab takes all the raw processing power and lens correction technology we loved in DxO Optics Pro and adds in local adjustments. With PhotoLab, you don’t just get superb image quality, but the ability to enhance your images at the same time using the full raw data in your files.
To celebrate, DxO and Digital Camera World are offering a special 15% discount off any DxO product for one week only, from midnight on May 3rd to 23:59 on May 10. To take advantage of this exclusive offer, follow this link to the DxO website and use the promo code DXO-DCA-15-OFF.
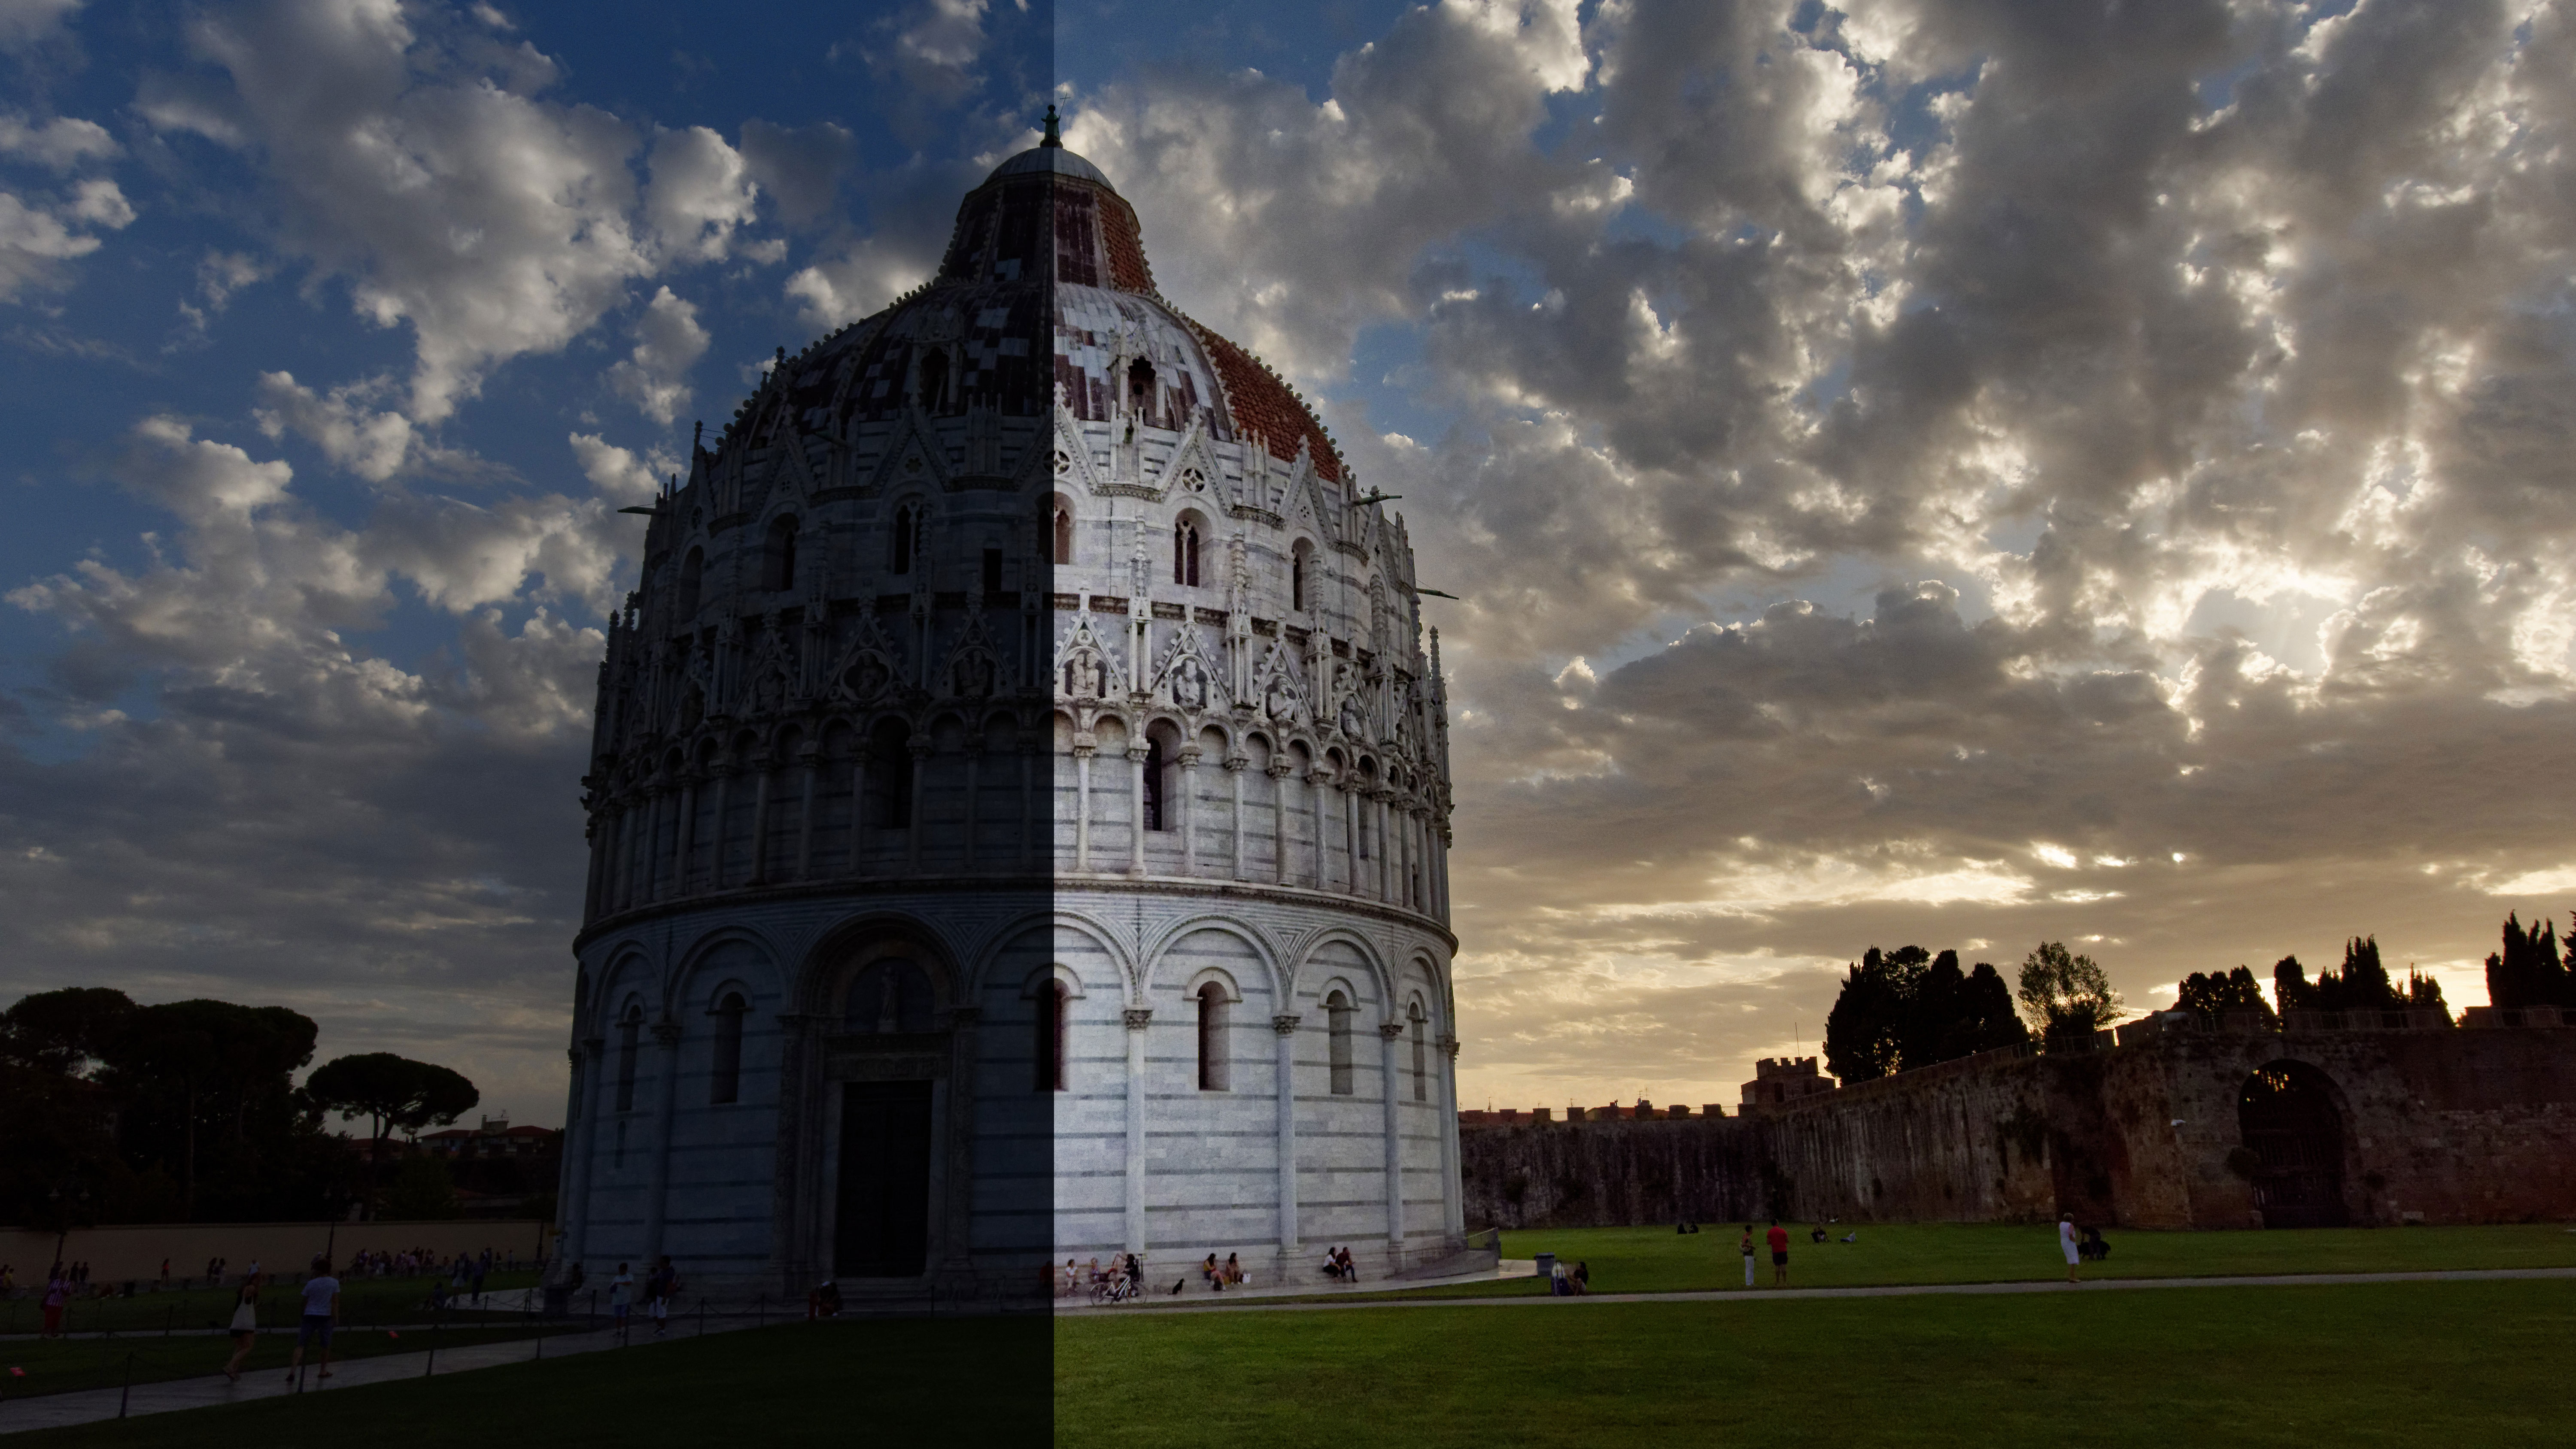
To give you an idea of what PhotoLab can do, we’ve picked this image from the archives to demonstrate how PhotoLab’s local adjustments work and what you can achieve with them.
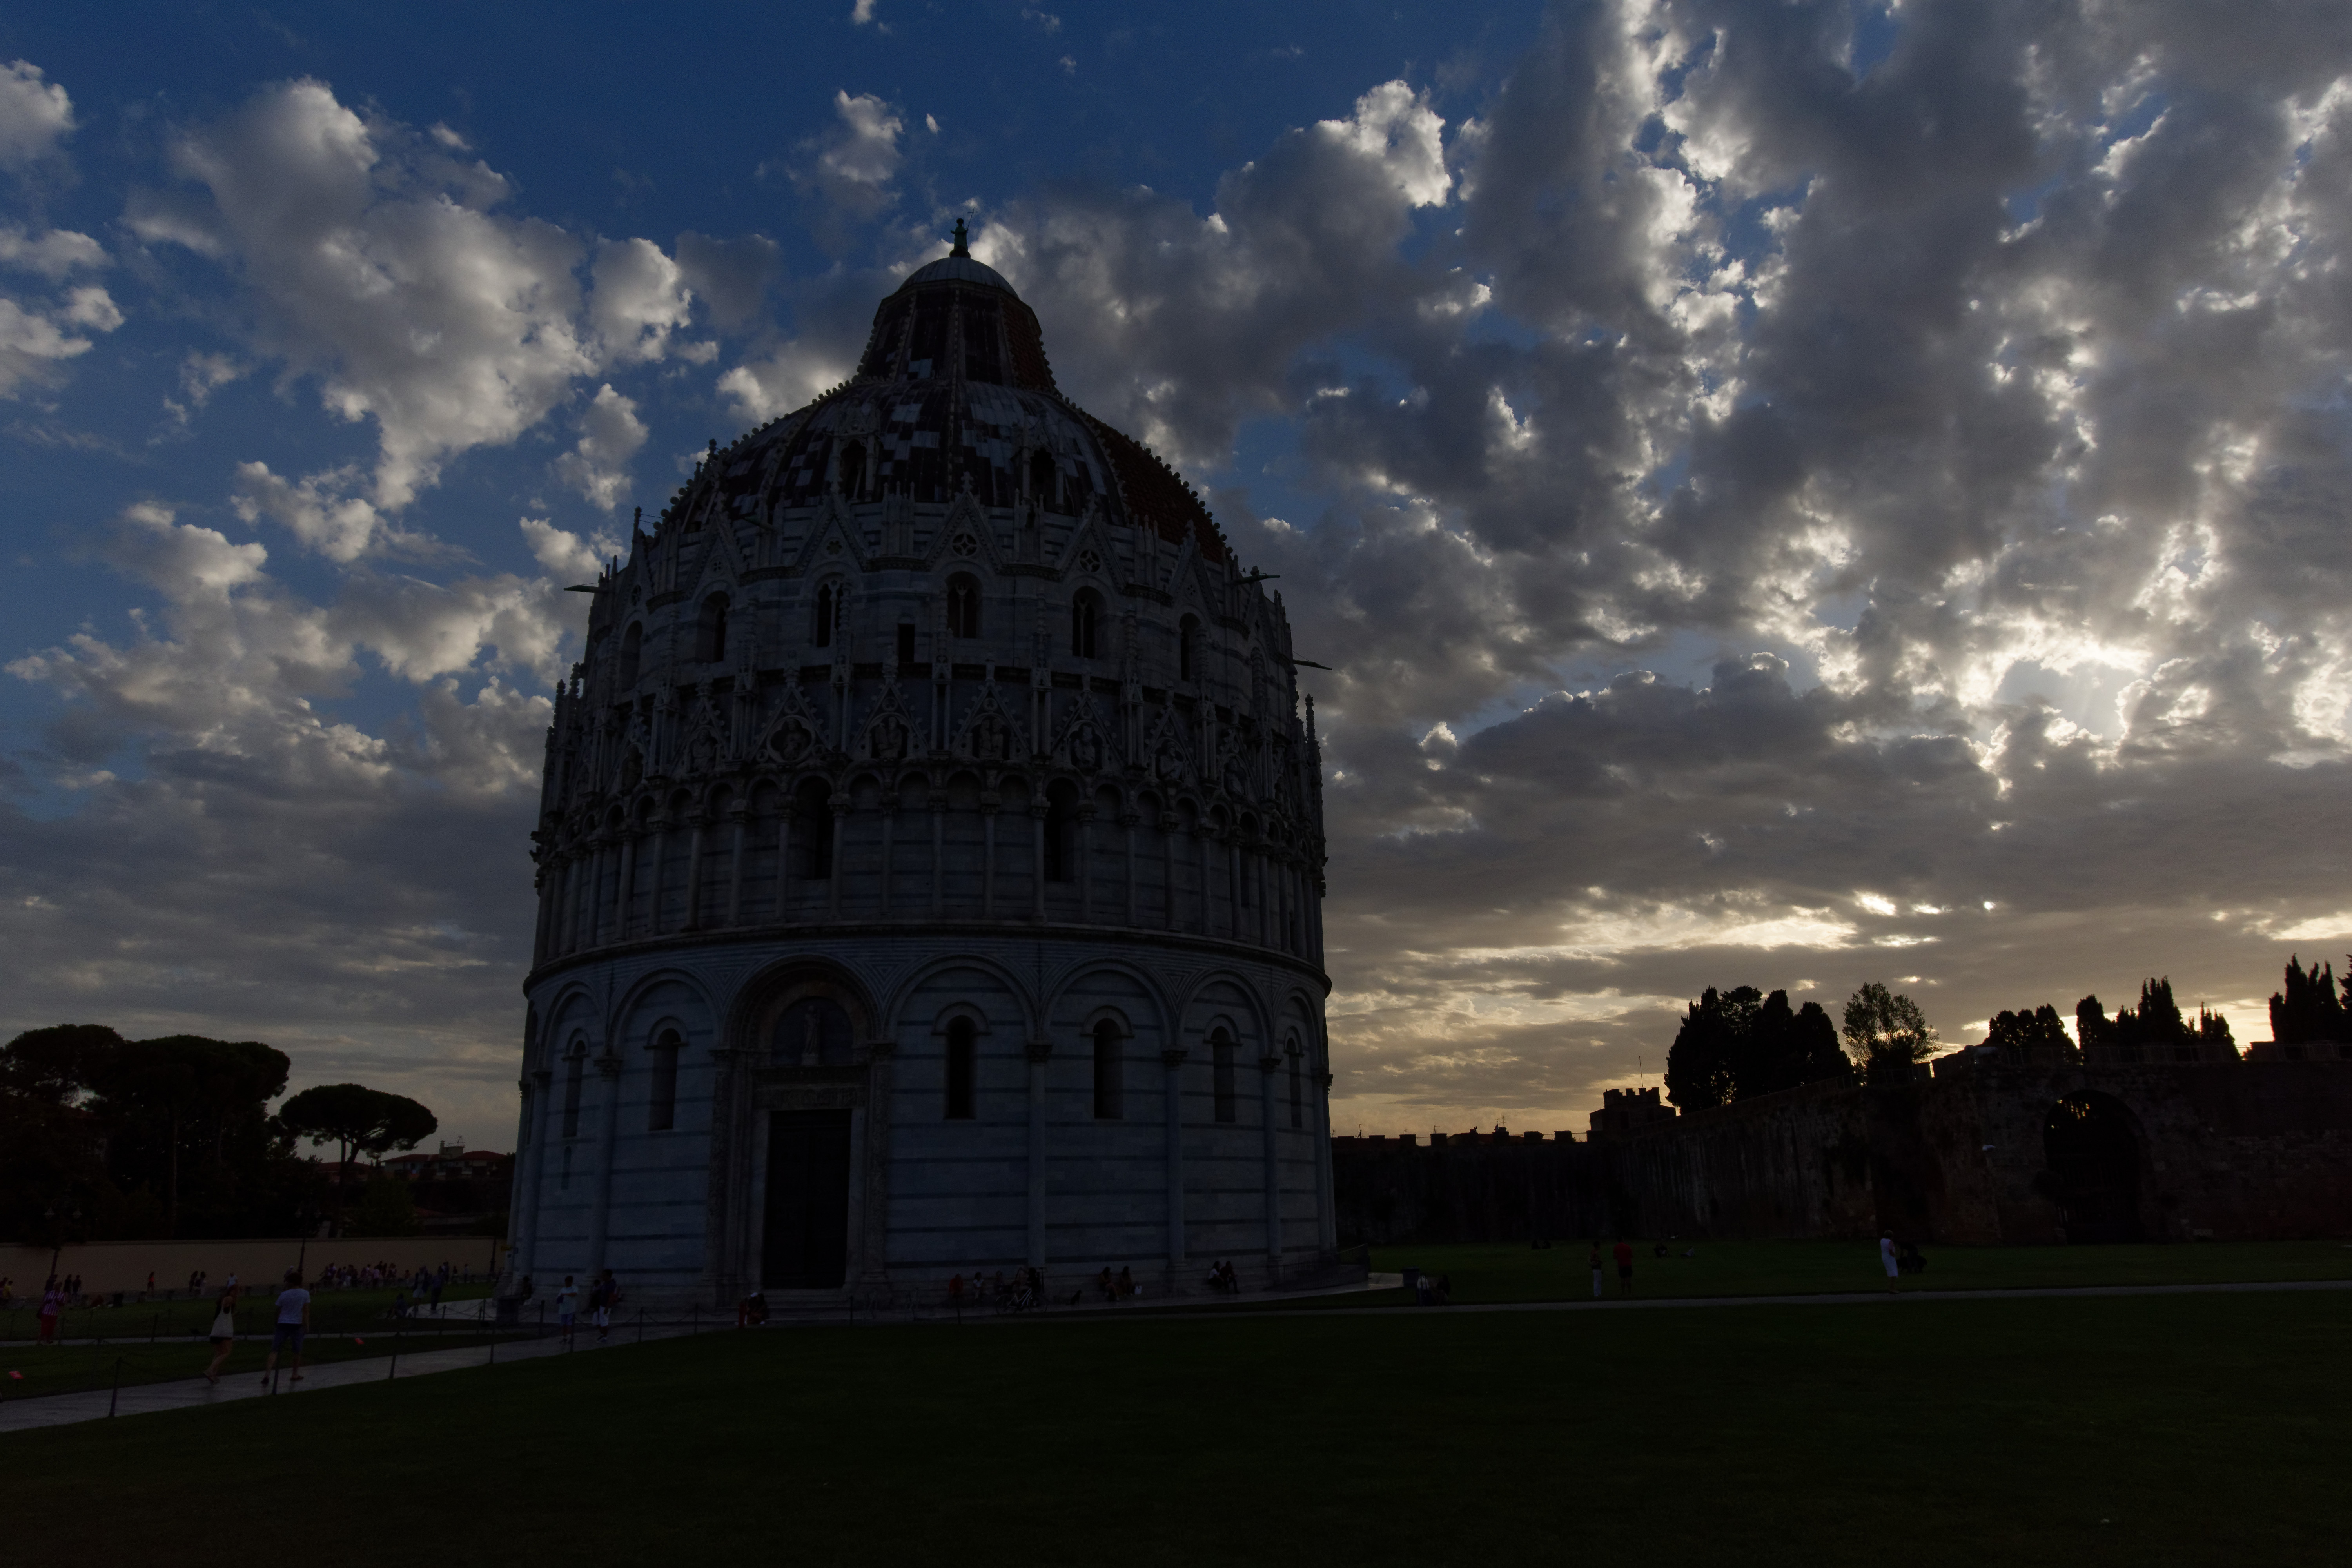
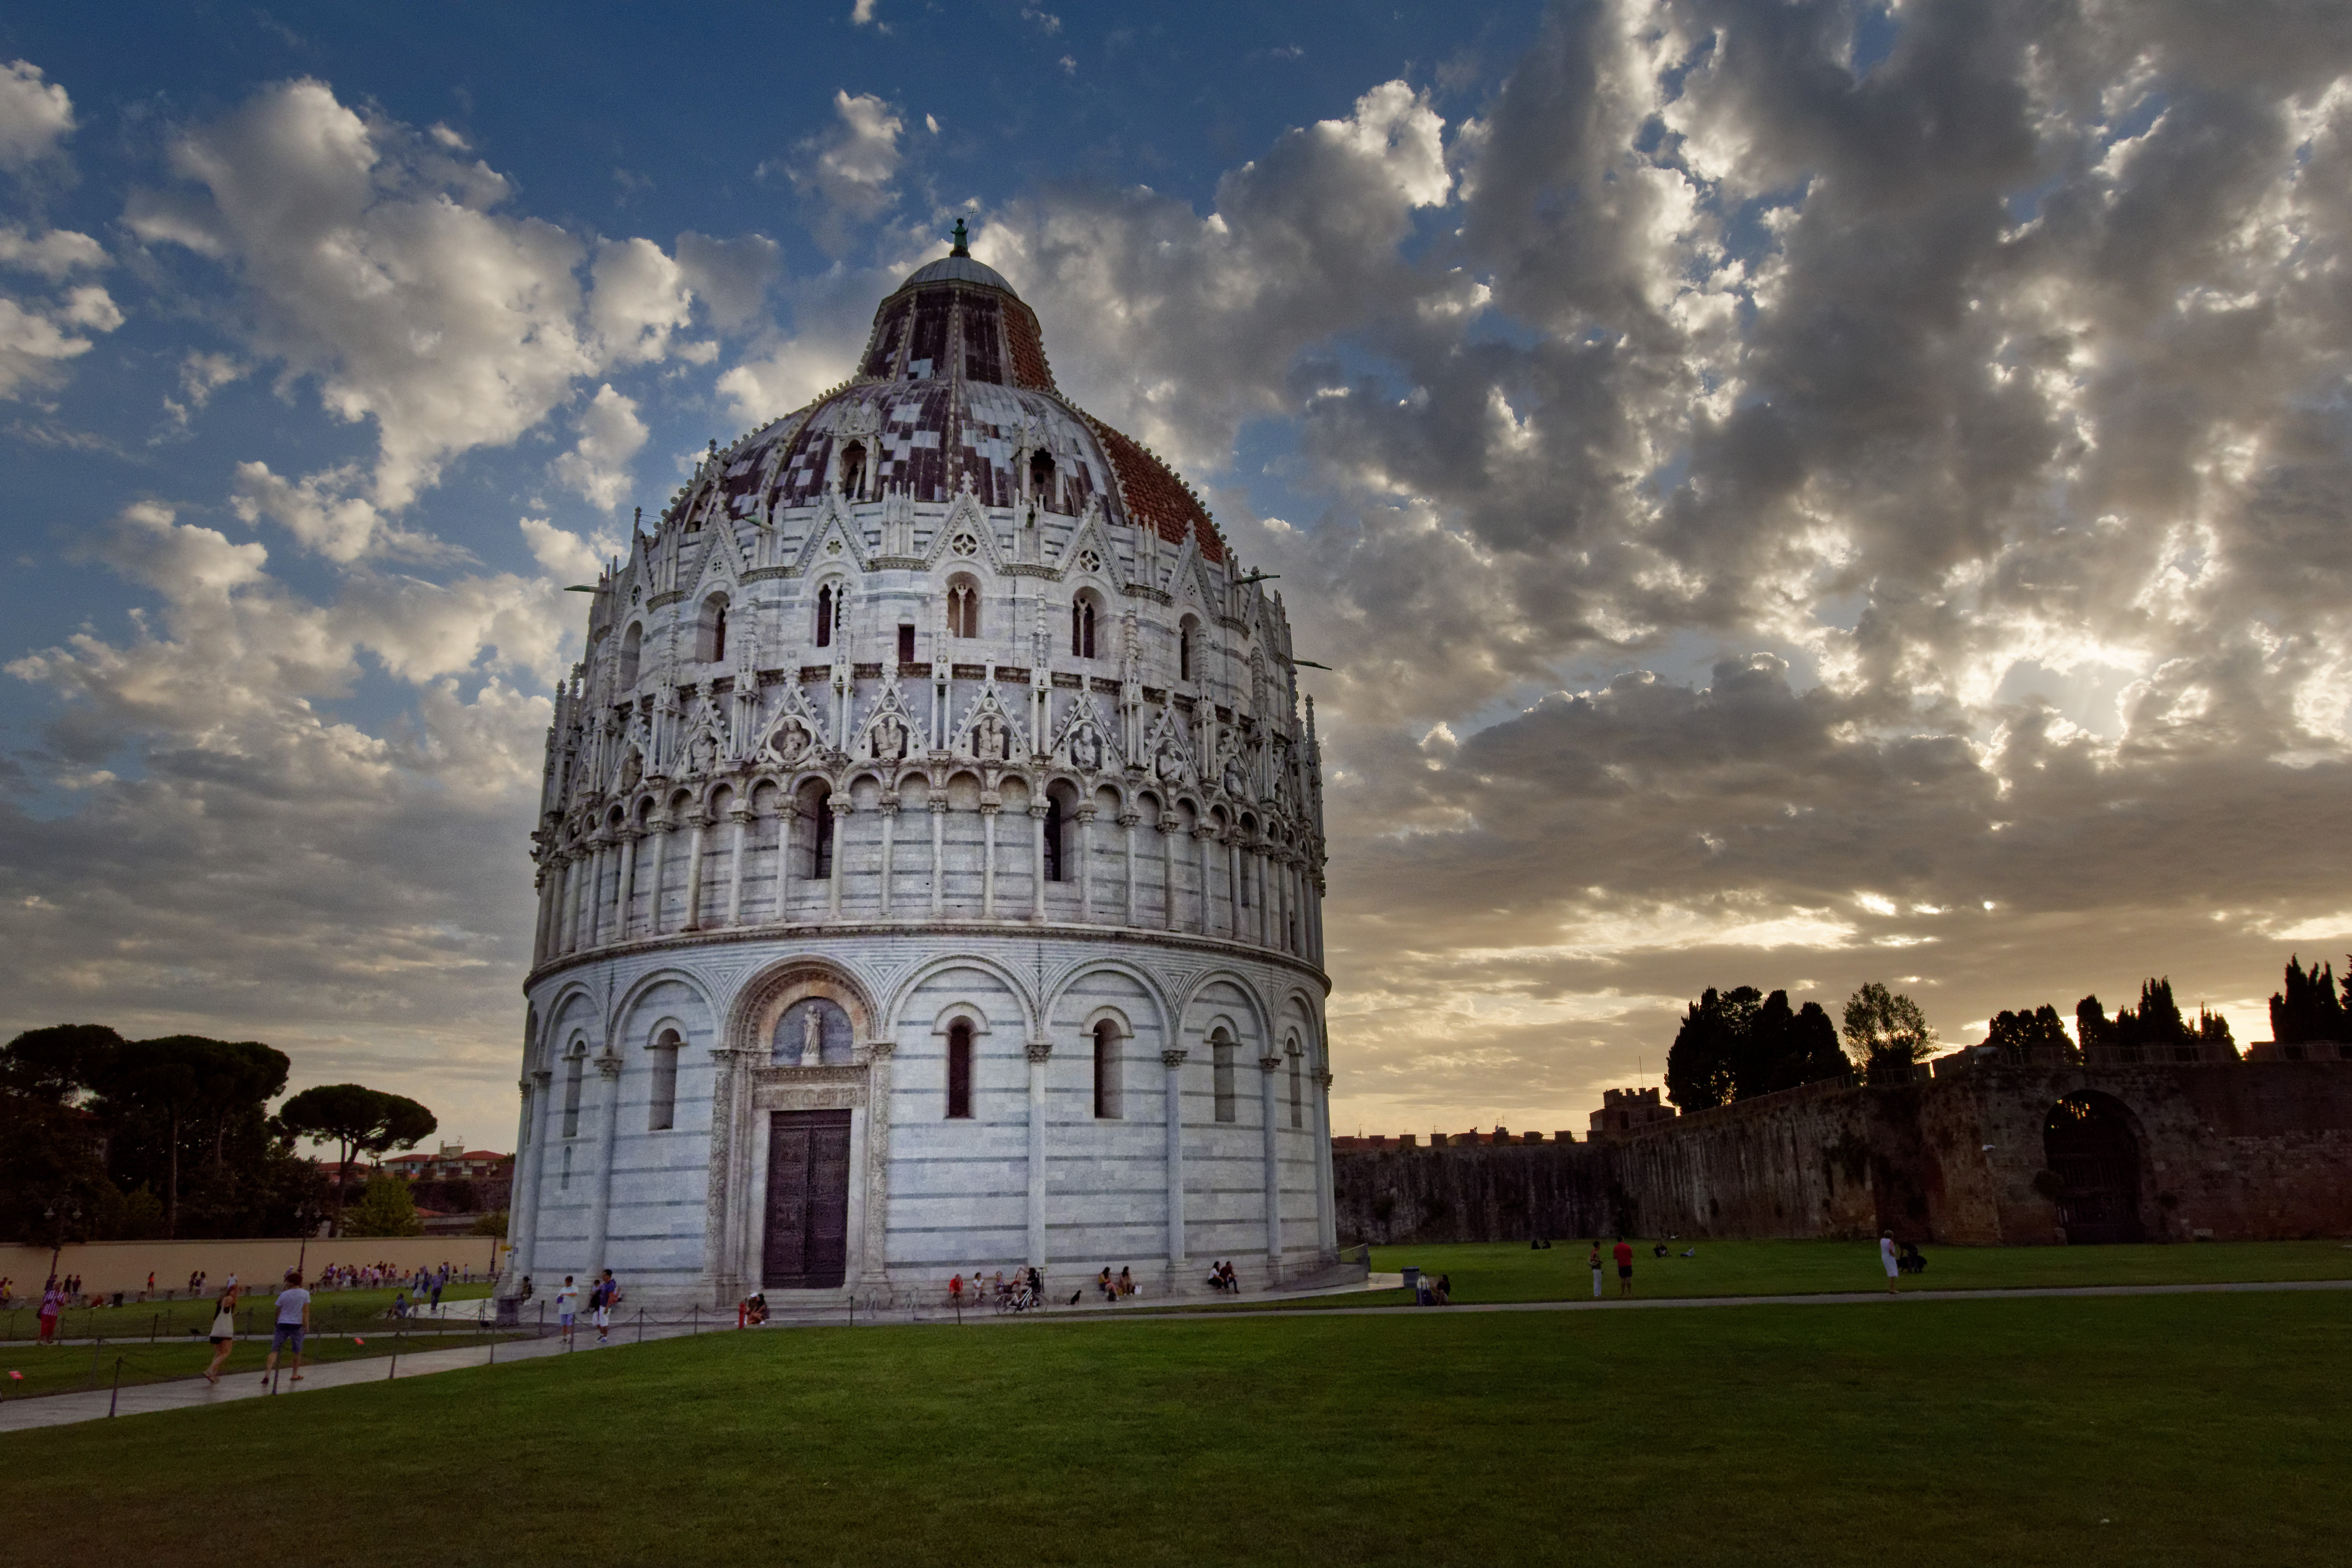
We've used PhotoLab's local adjustments to bring out our subject but still preserve the look and feel of a sunset scene. Here's a step by step walkthrough:
Step 1: Create a graduated filter
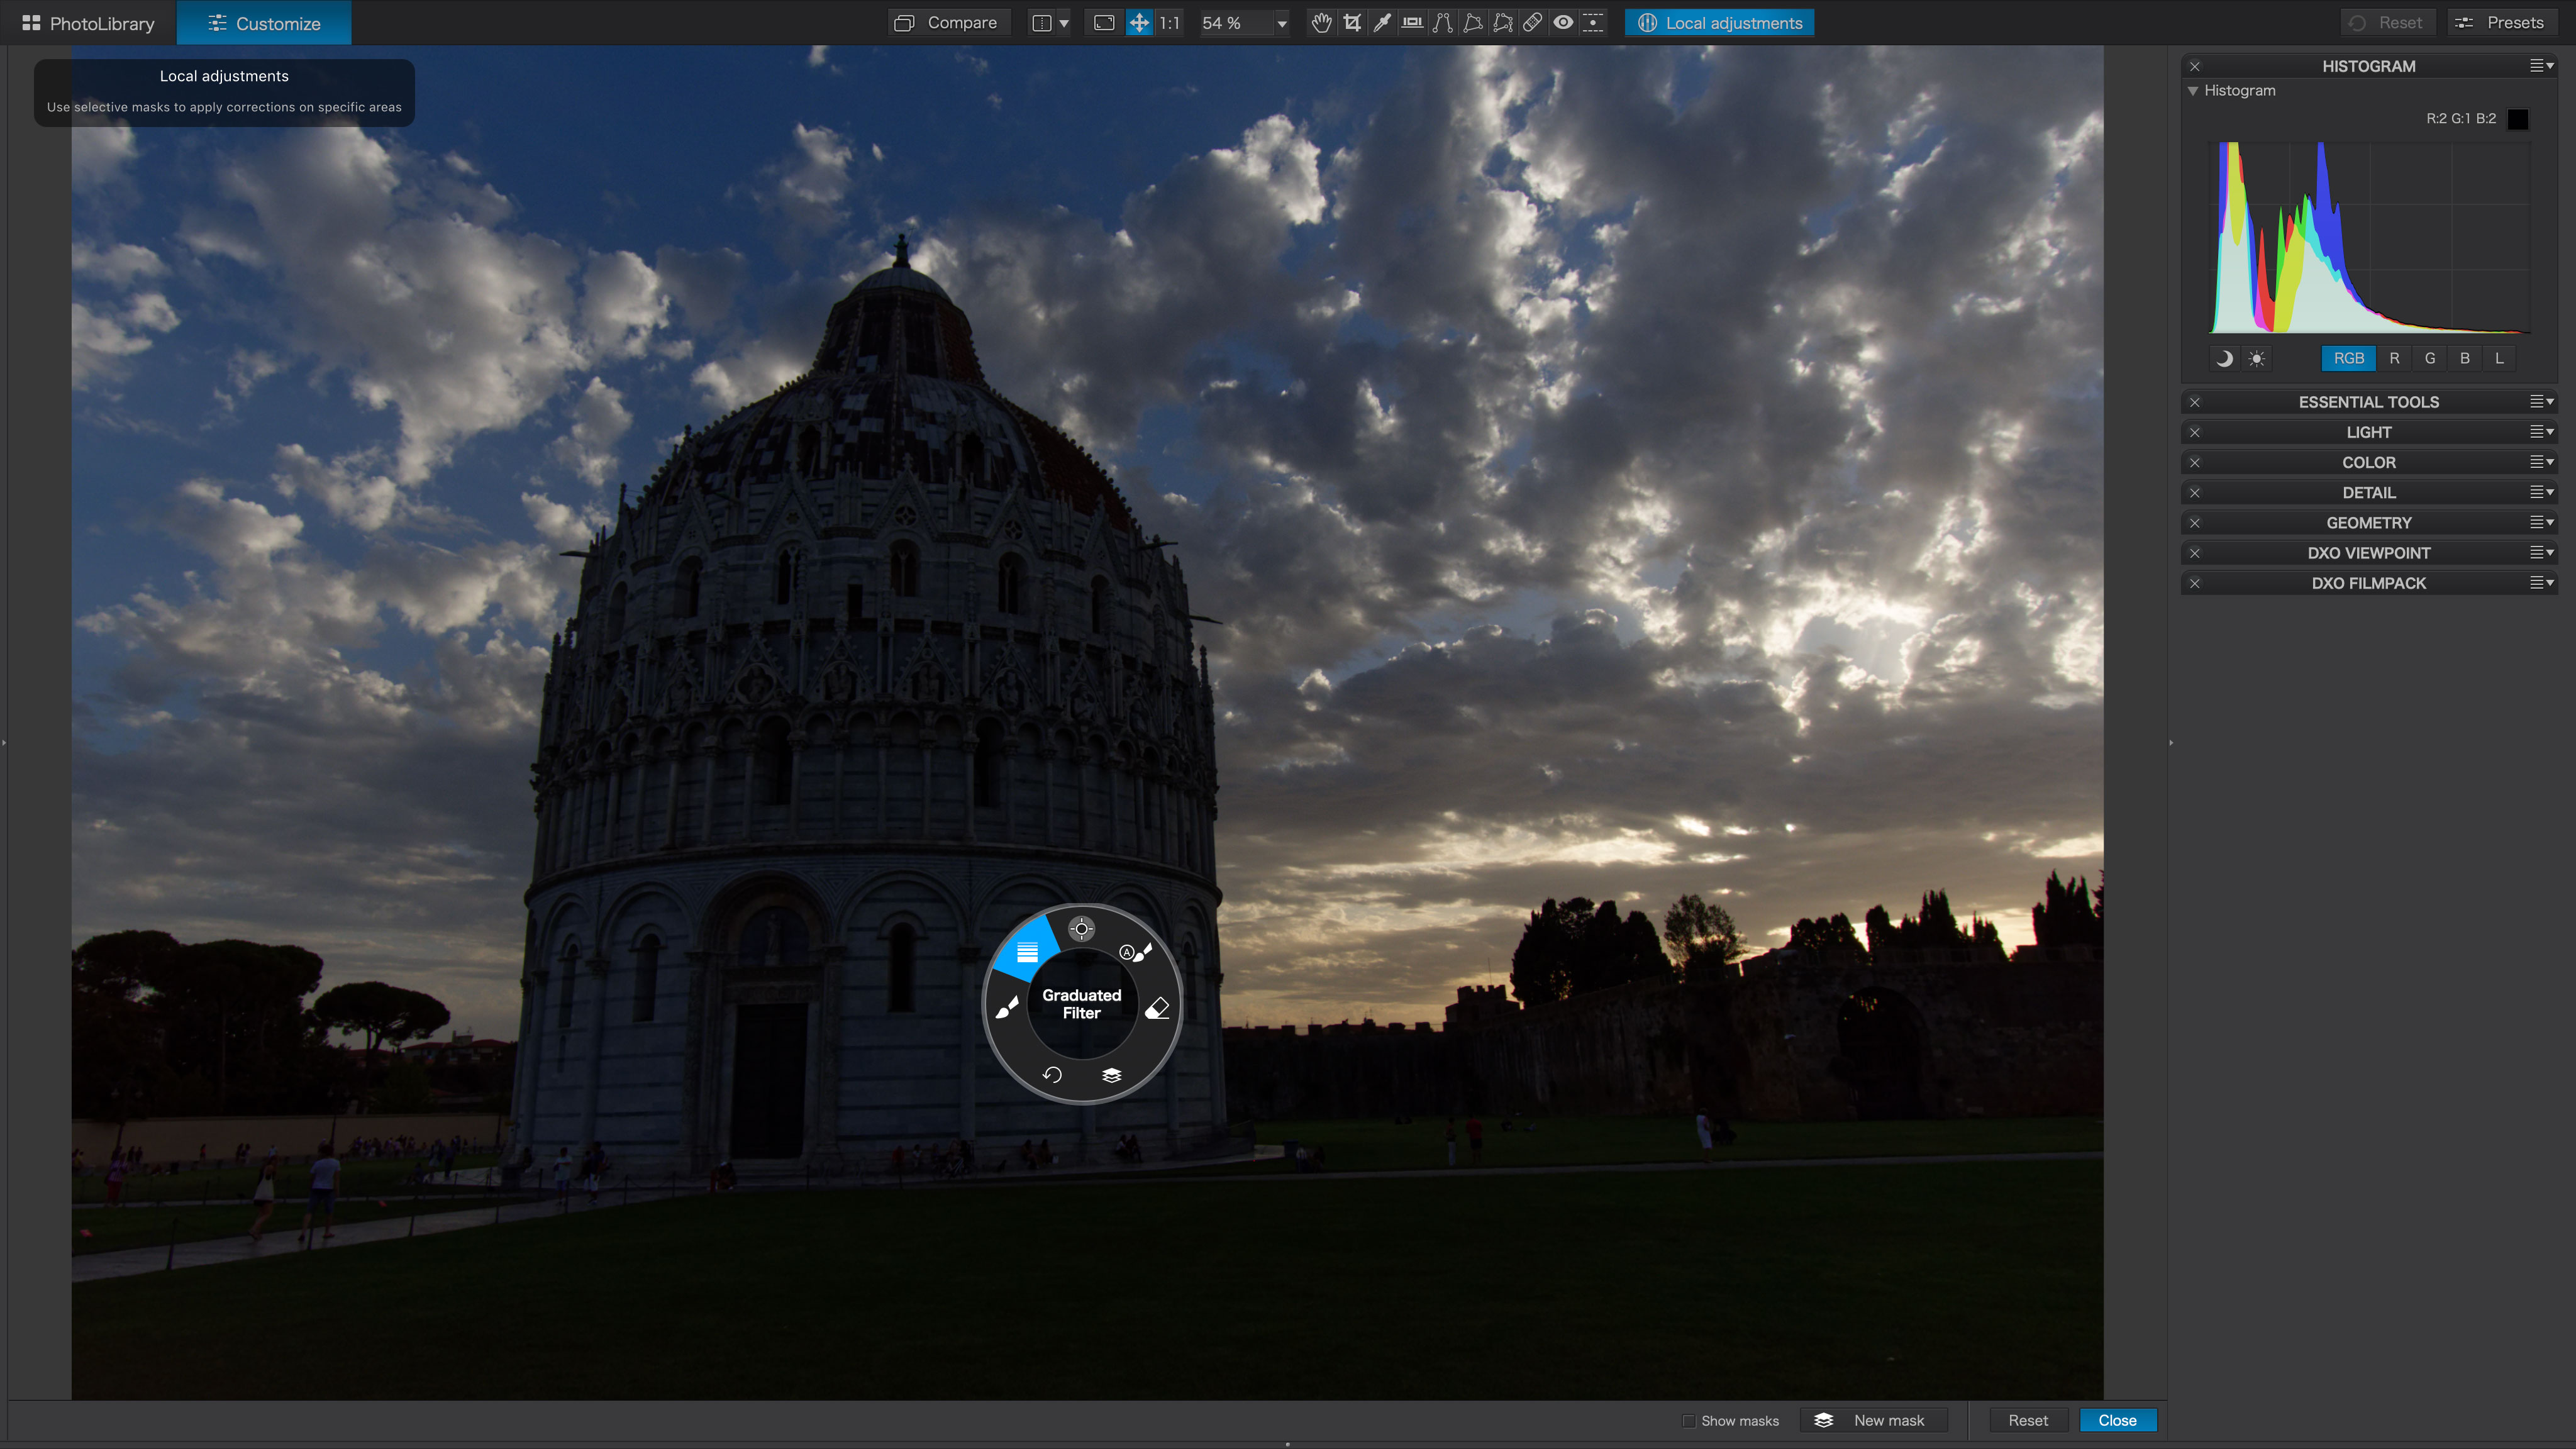
You’ll find the Local adjustments button the top toolbar. You click on this to select it and then right-click on the image. This displays a circular gadget offering all the different local adjustment types you can apply. We want the Graduated Filter option.
Step 2: Position the filter
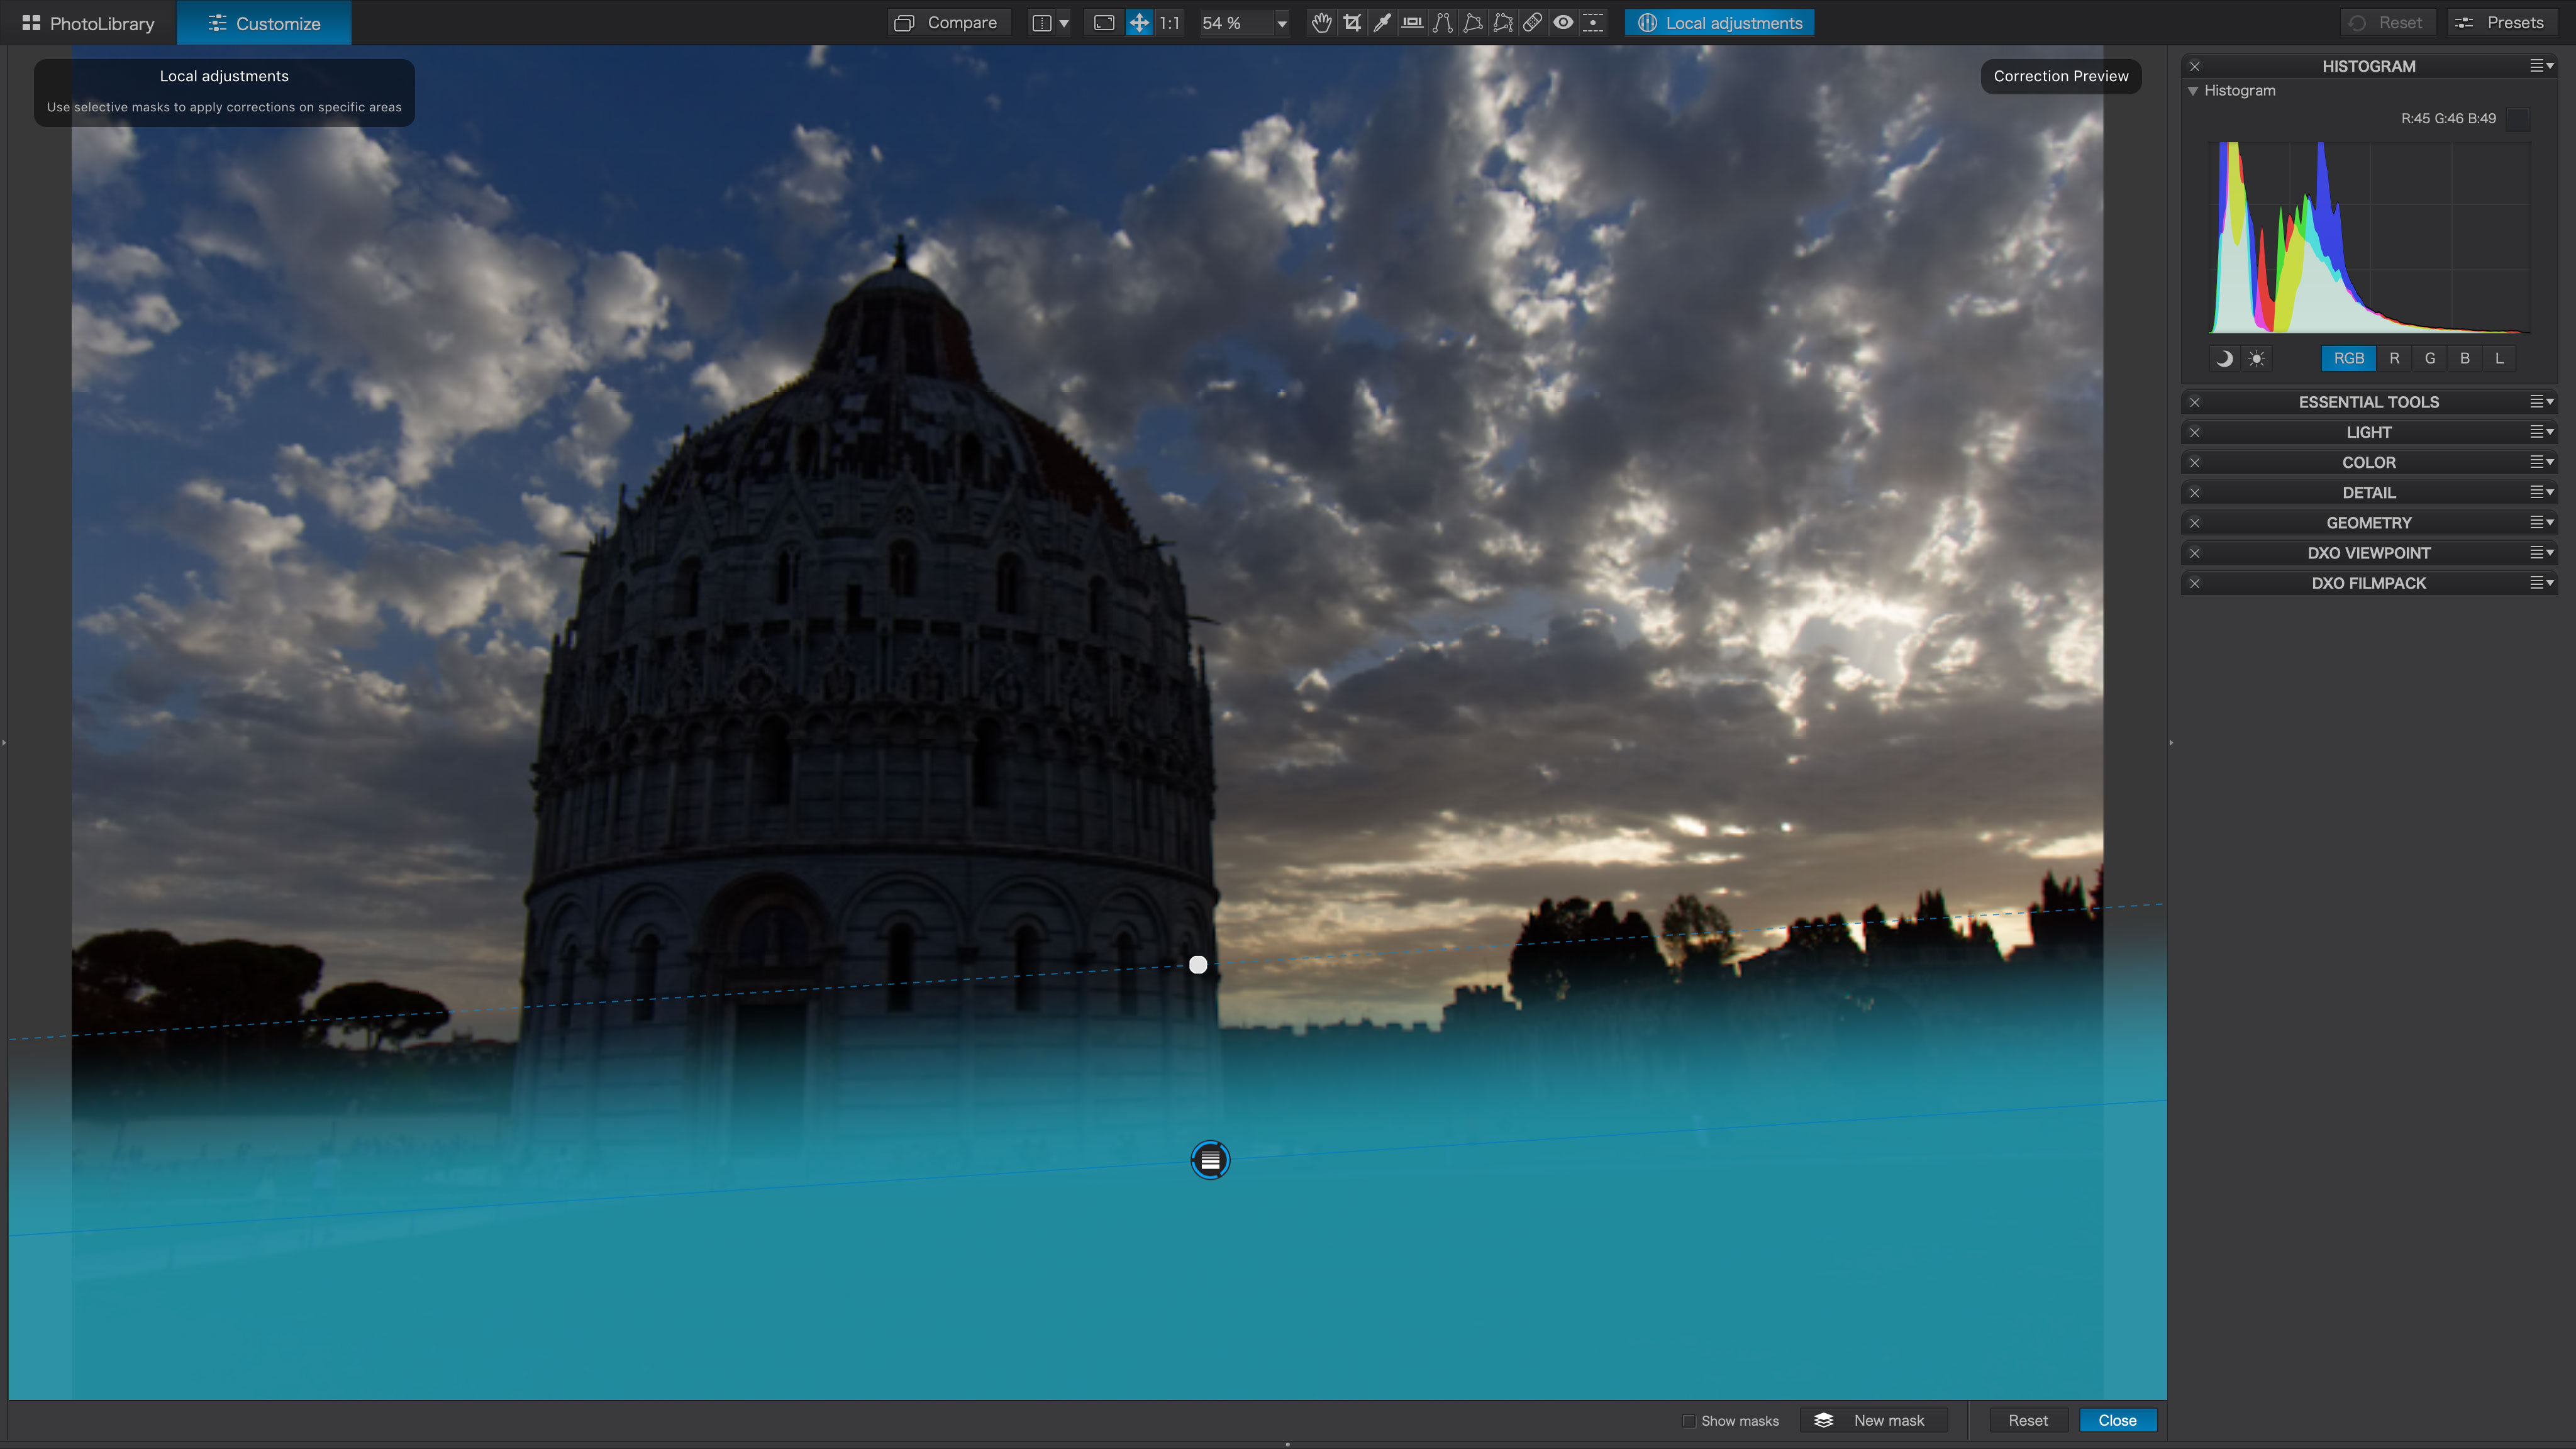
With that selected, you can drag out the filter gradient on the image. Usually, a graduated filter is used to tone down bright skies, but here we’re using it to lighten a dark foreground. We click to add the start point for the filter, then drag upwards to create the ‘graduated’ transition. Initially, PhotoLab shows the filter as a blue mask so that we can see what we’re doing.
Step 3: Make adjustments
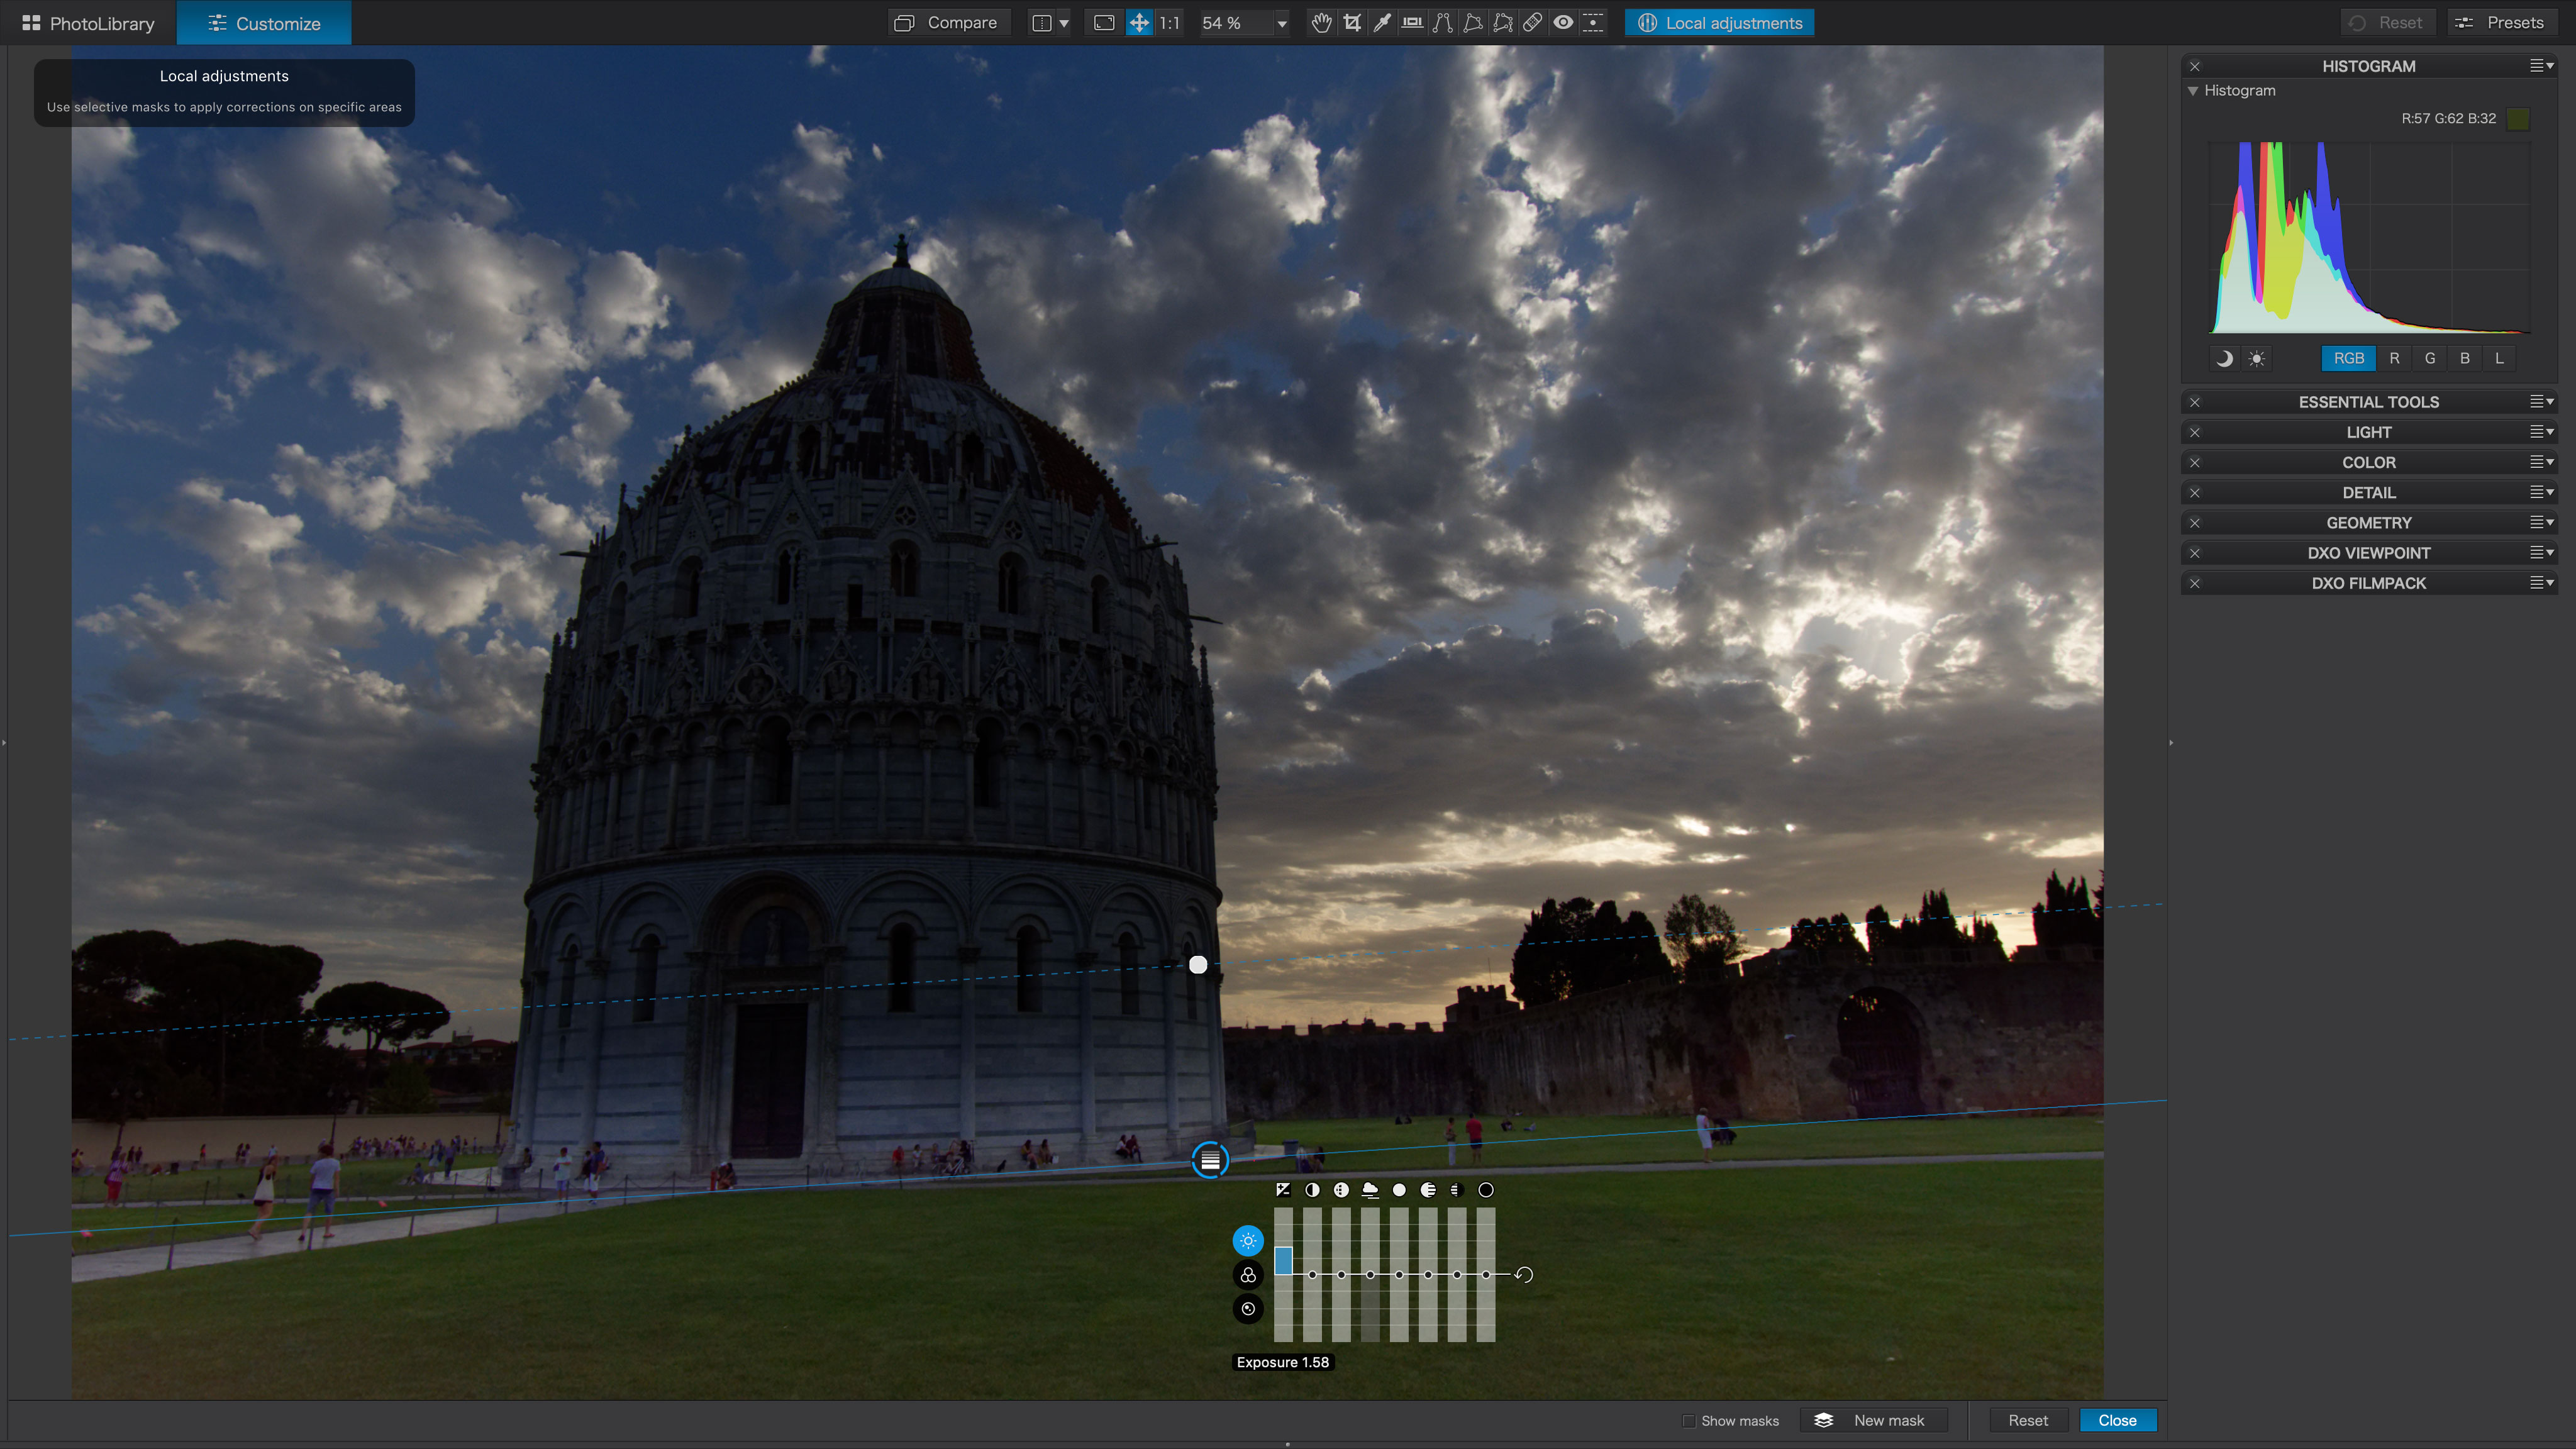
When you click on the gradient filter’s button you see a set of sliders to the side for making adjustments. These are split into three tabs in PhotoLab 2, but we just need the first one, pushing the Exposure slider up to reveal some detail and colour in the foreground. We’re not trying to make it like daylight, just less dark.
Step 4: Create a control point
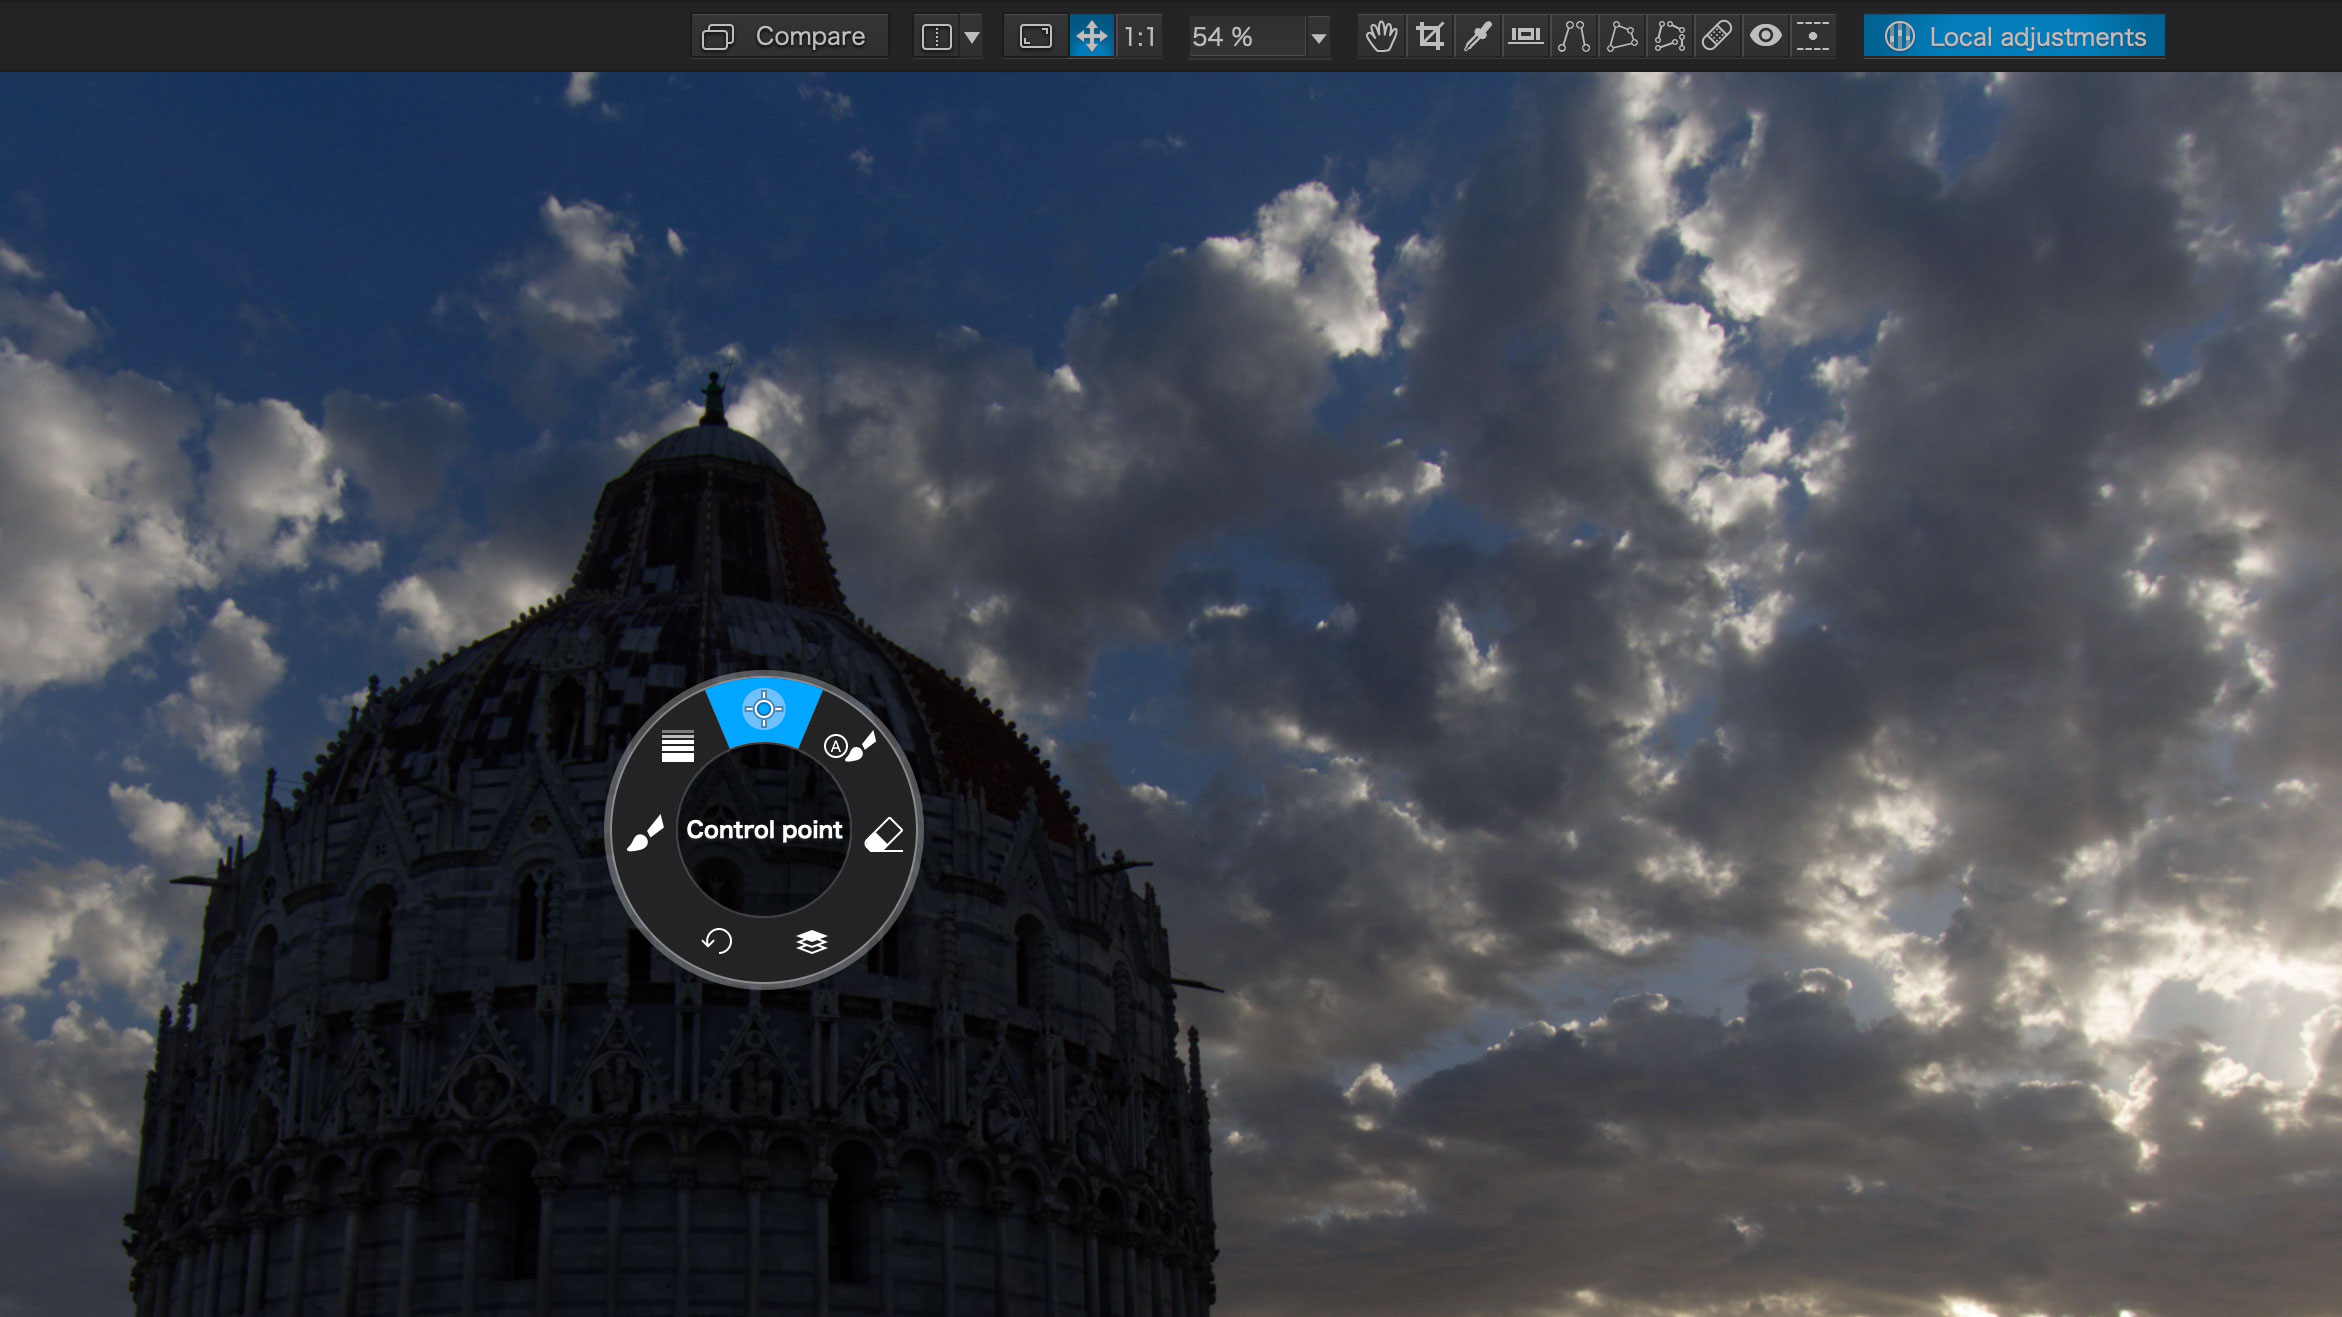
This doesn’t solve our problem with the basilica. For this we need a different sort of local adjustment – a control point. These clever gadgets create their own automatic mask based on the tones and colours of the point where you place them.
Step 5: Make your adjustments
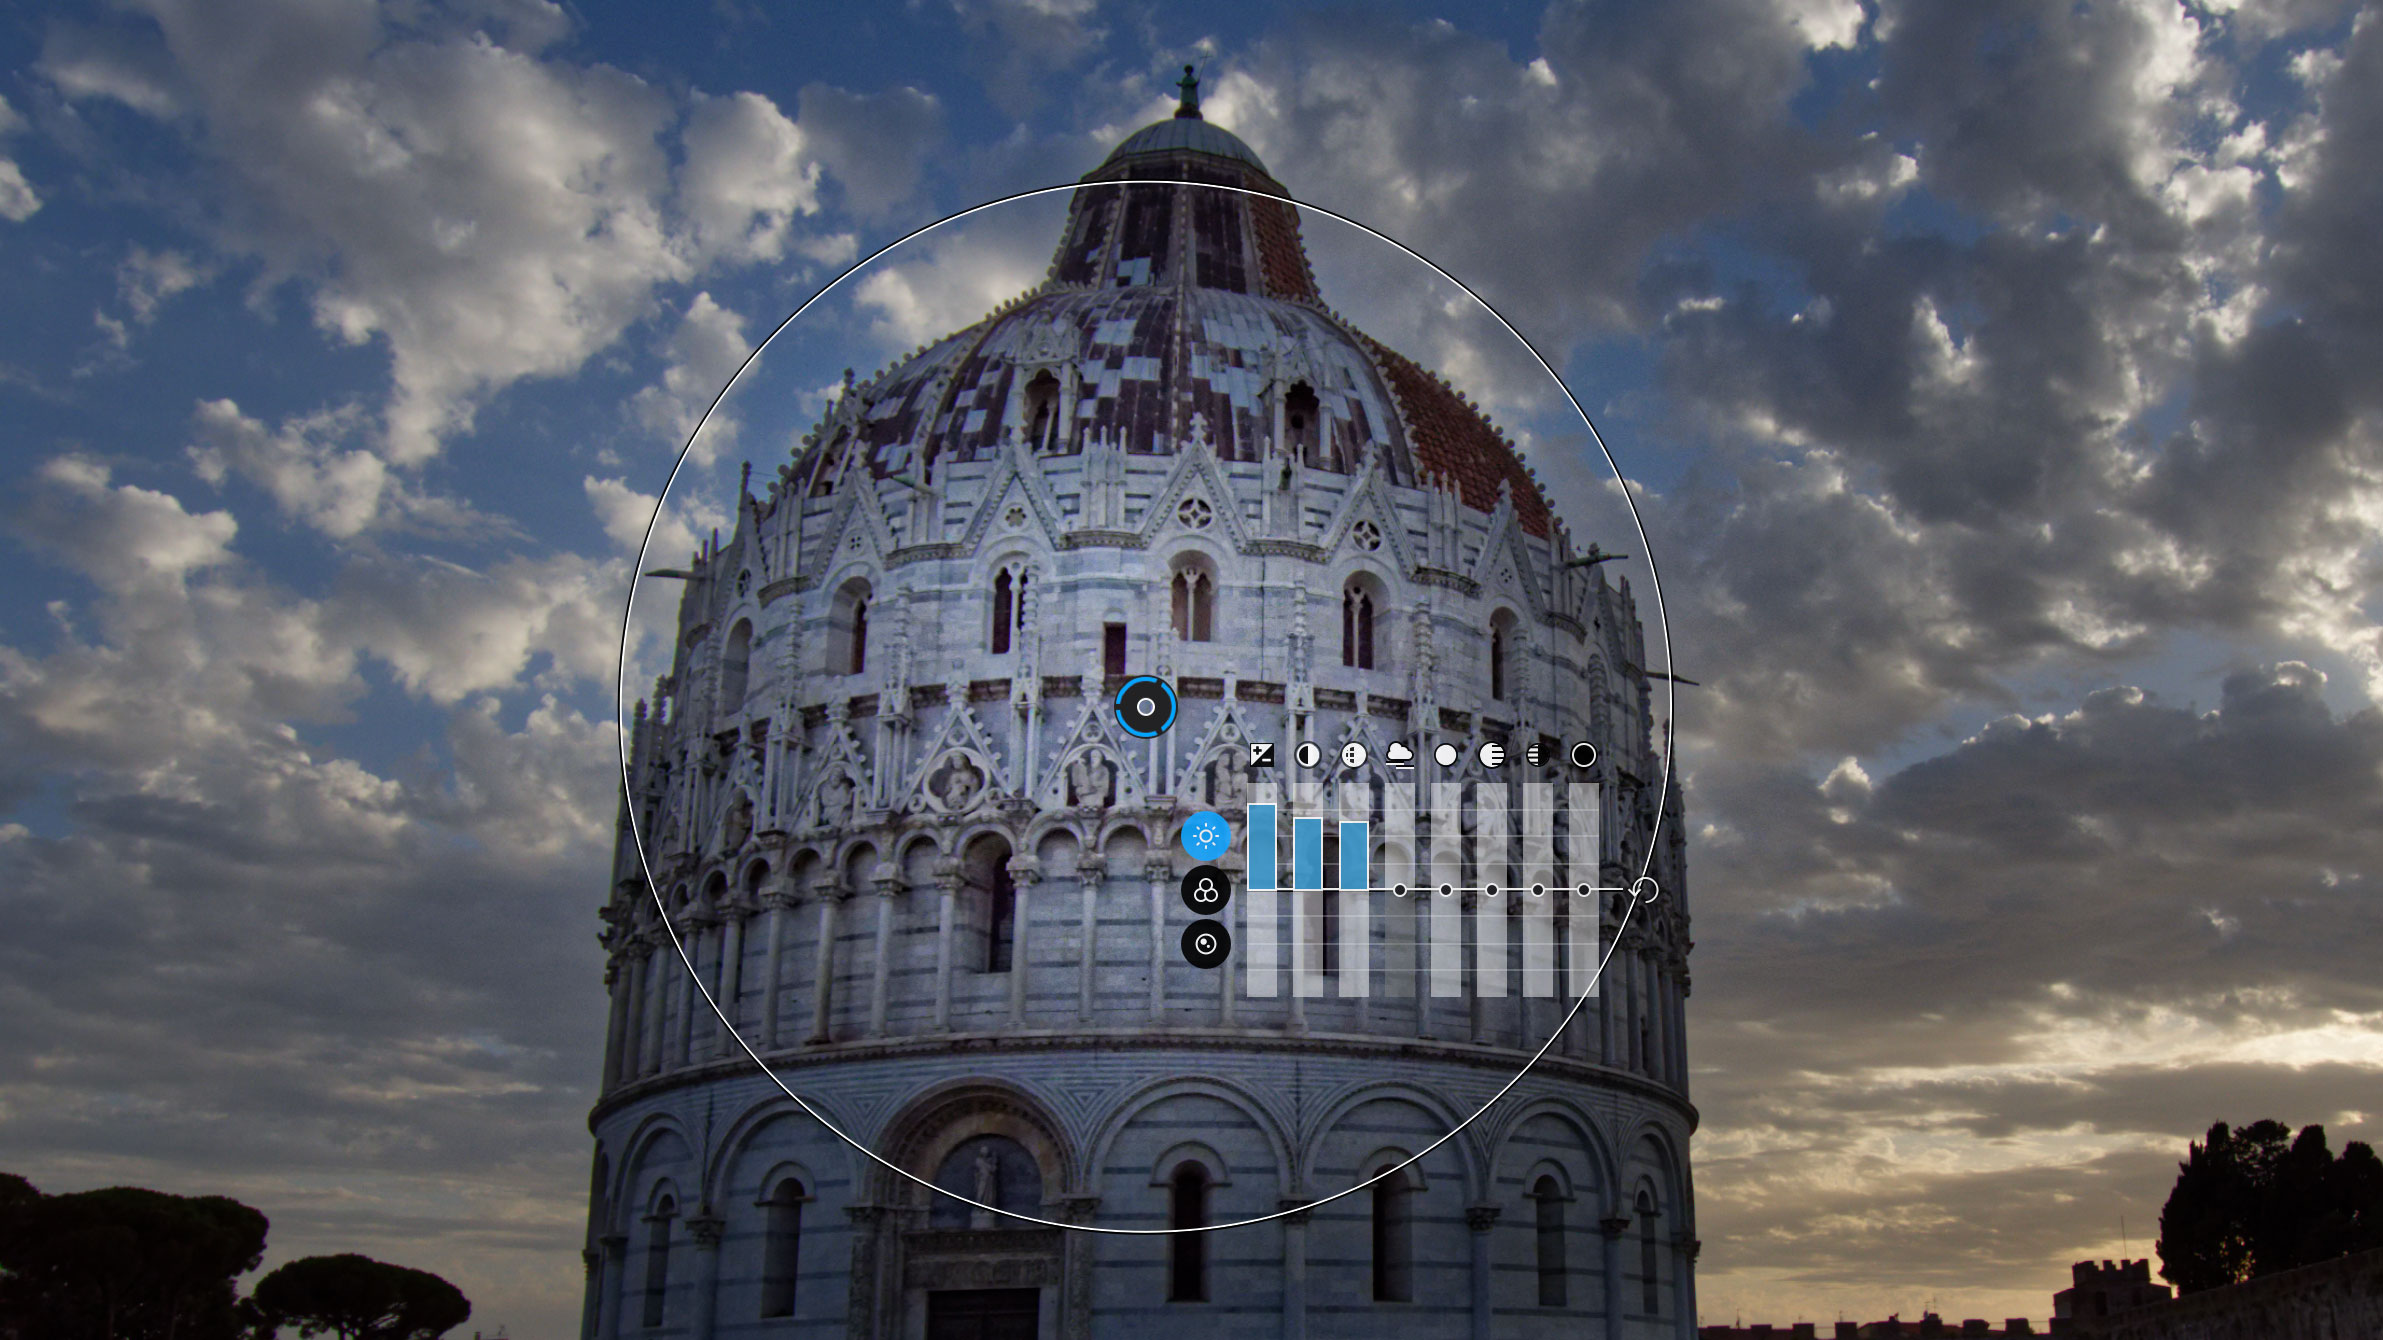
So here we’ve placed a control point in the middle of the building, then increased the Exposure, Contrast and Microcontrast settings to really bring out the detail. You can make the circular mask larger or smaller by dragging on its edge. Making it too large could make the adjustment start to spill out into the sky; too small and it won’t reach the edges of the building.
Step 6: Add more control points if you need to
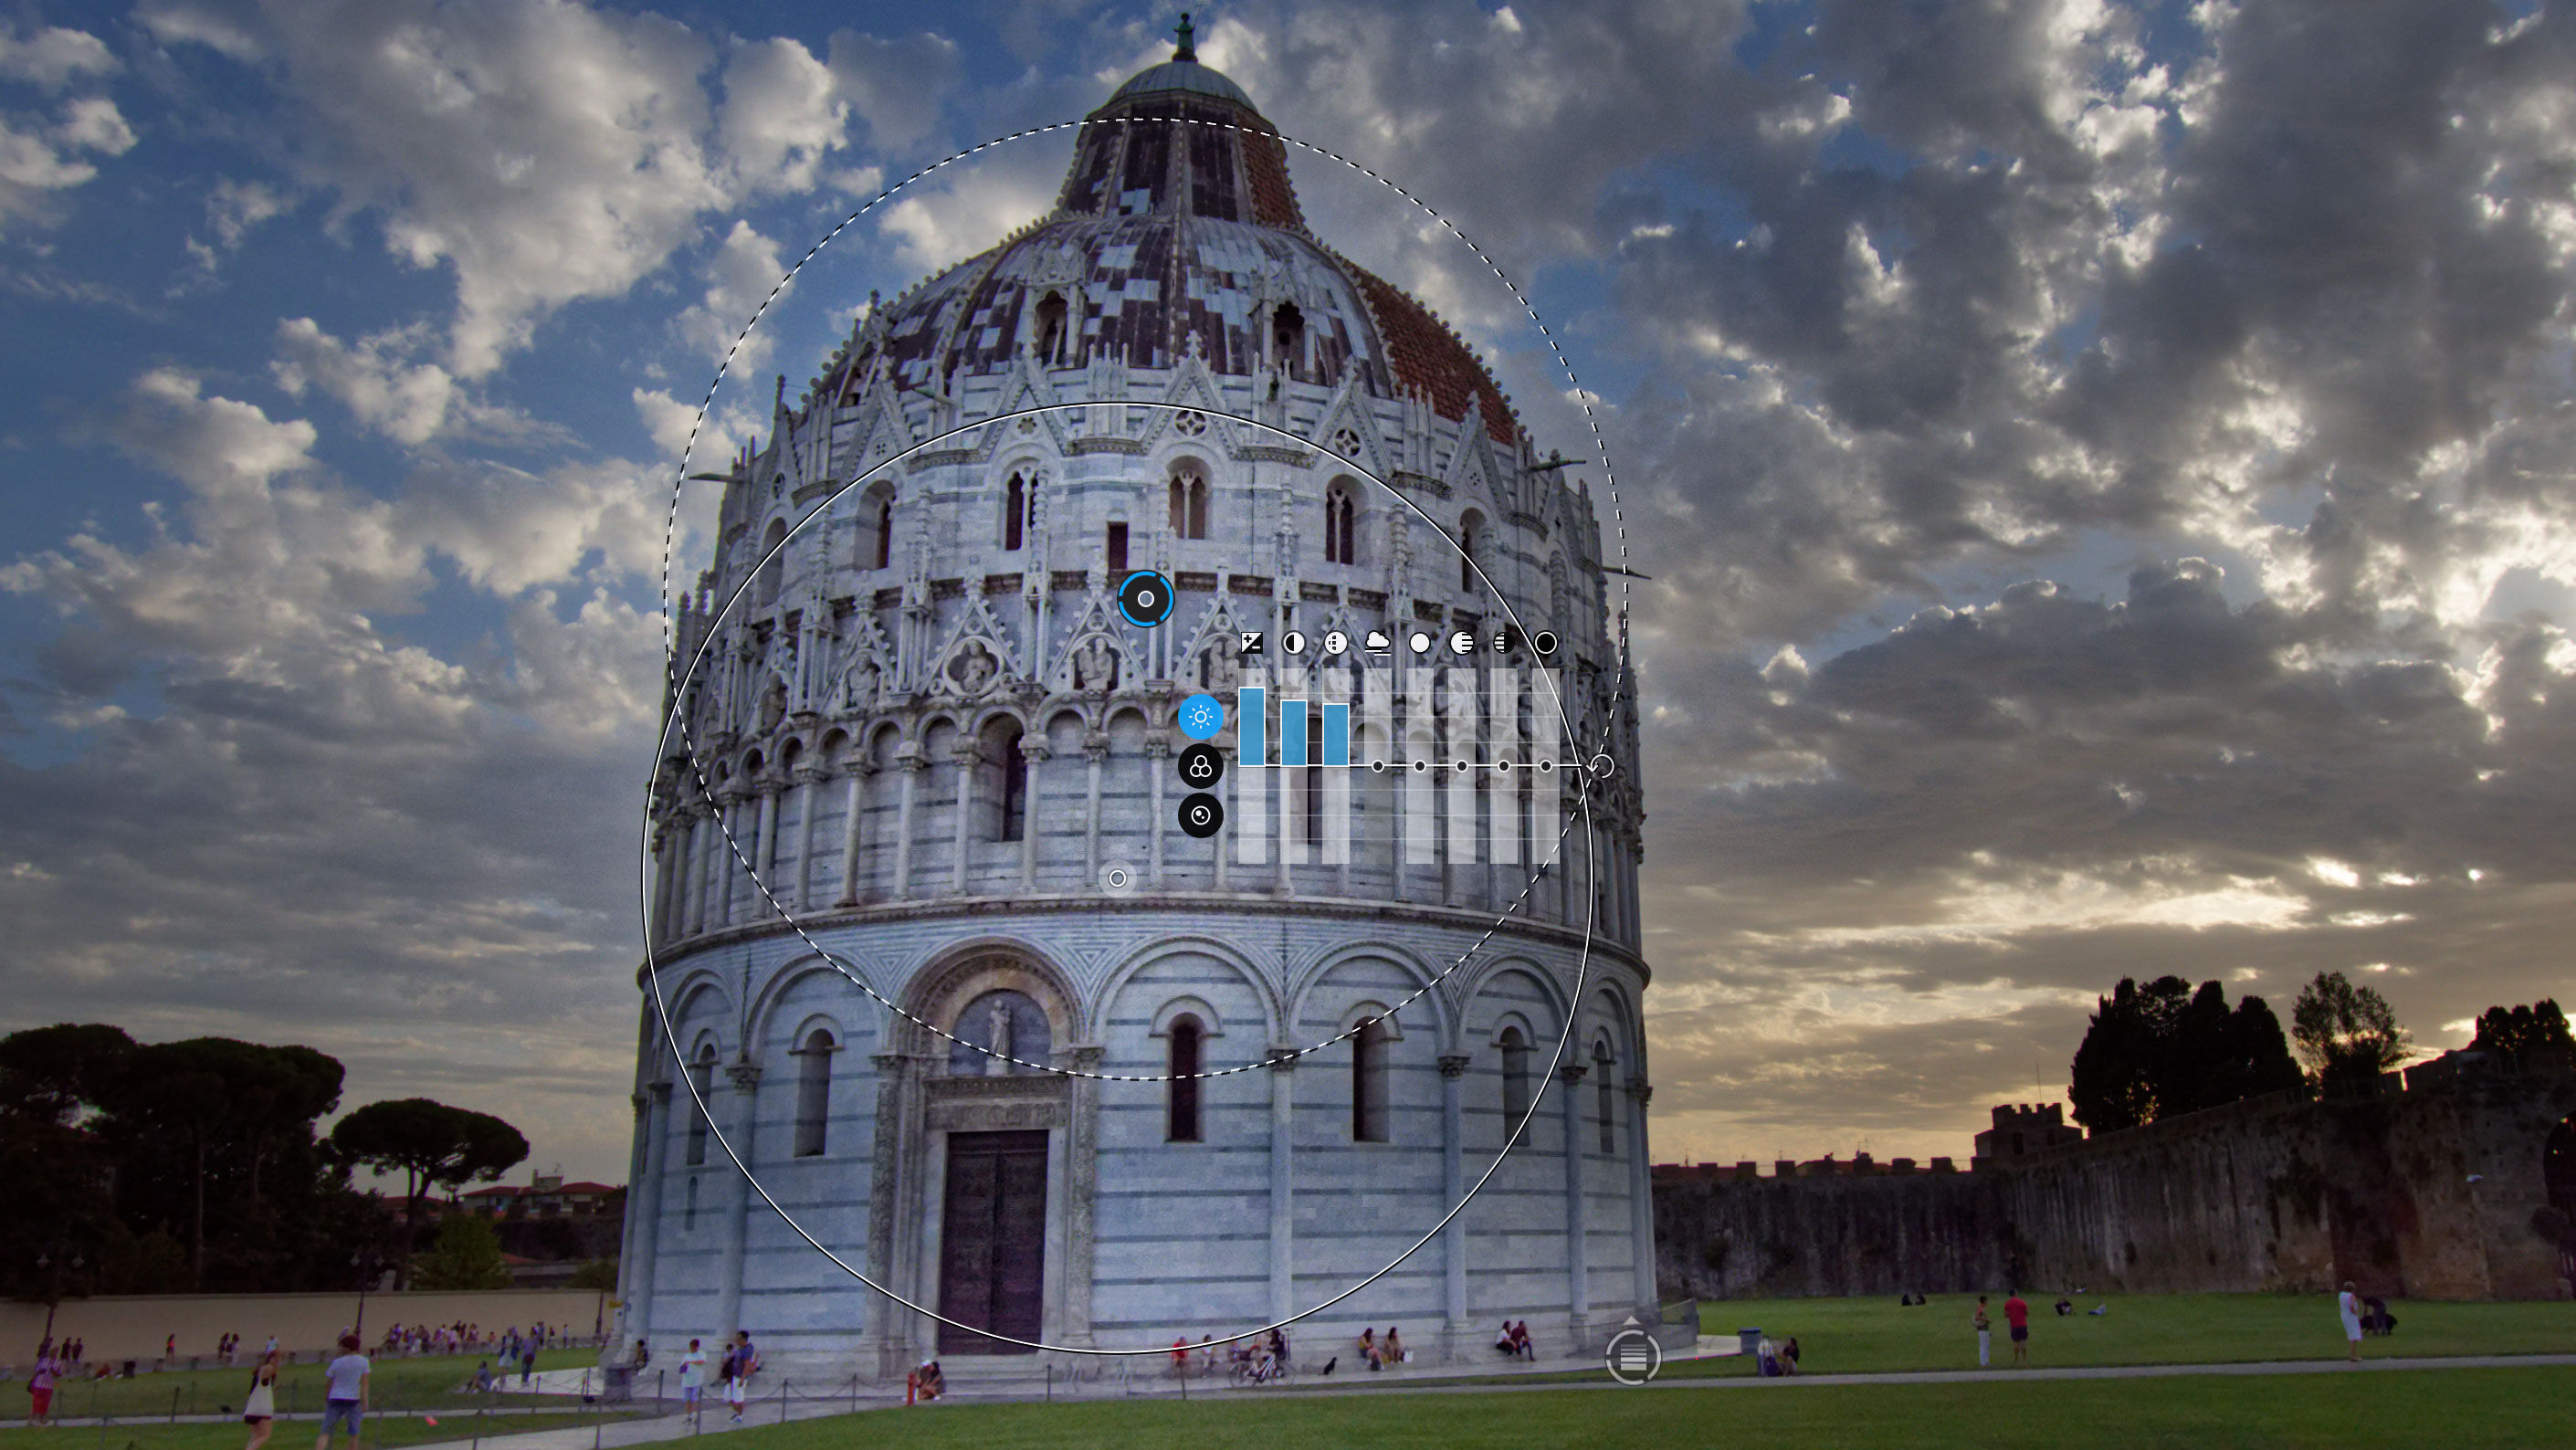
This building is not circular, so we need another control point further down to keep the lighting even. This is the clever part. If you click somewhere else with the first control point still selected, PhotoLab will copy the settings of the first one and keep them linked, so any further adjustments you make will apply to both.
Step 7: Check your lighting
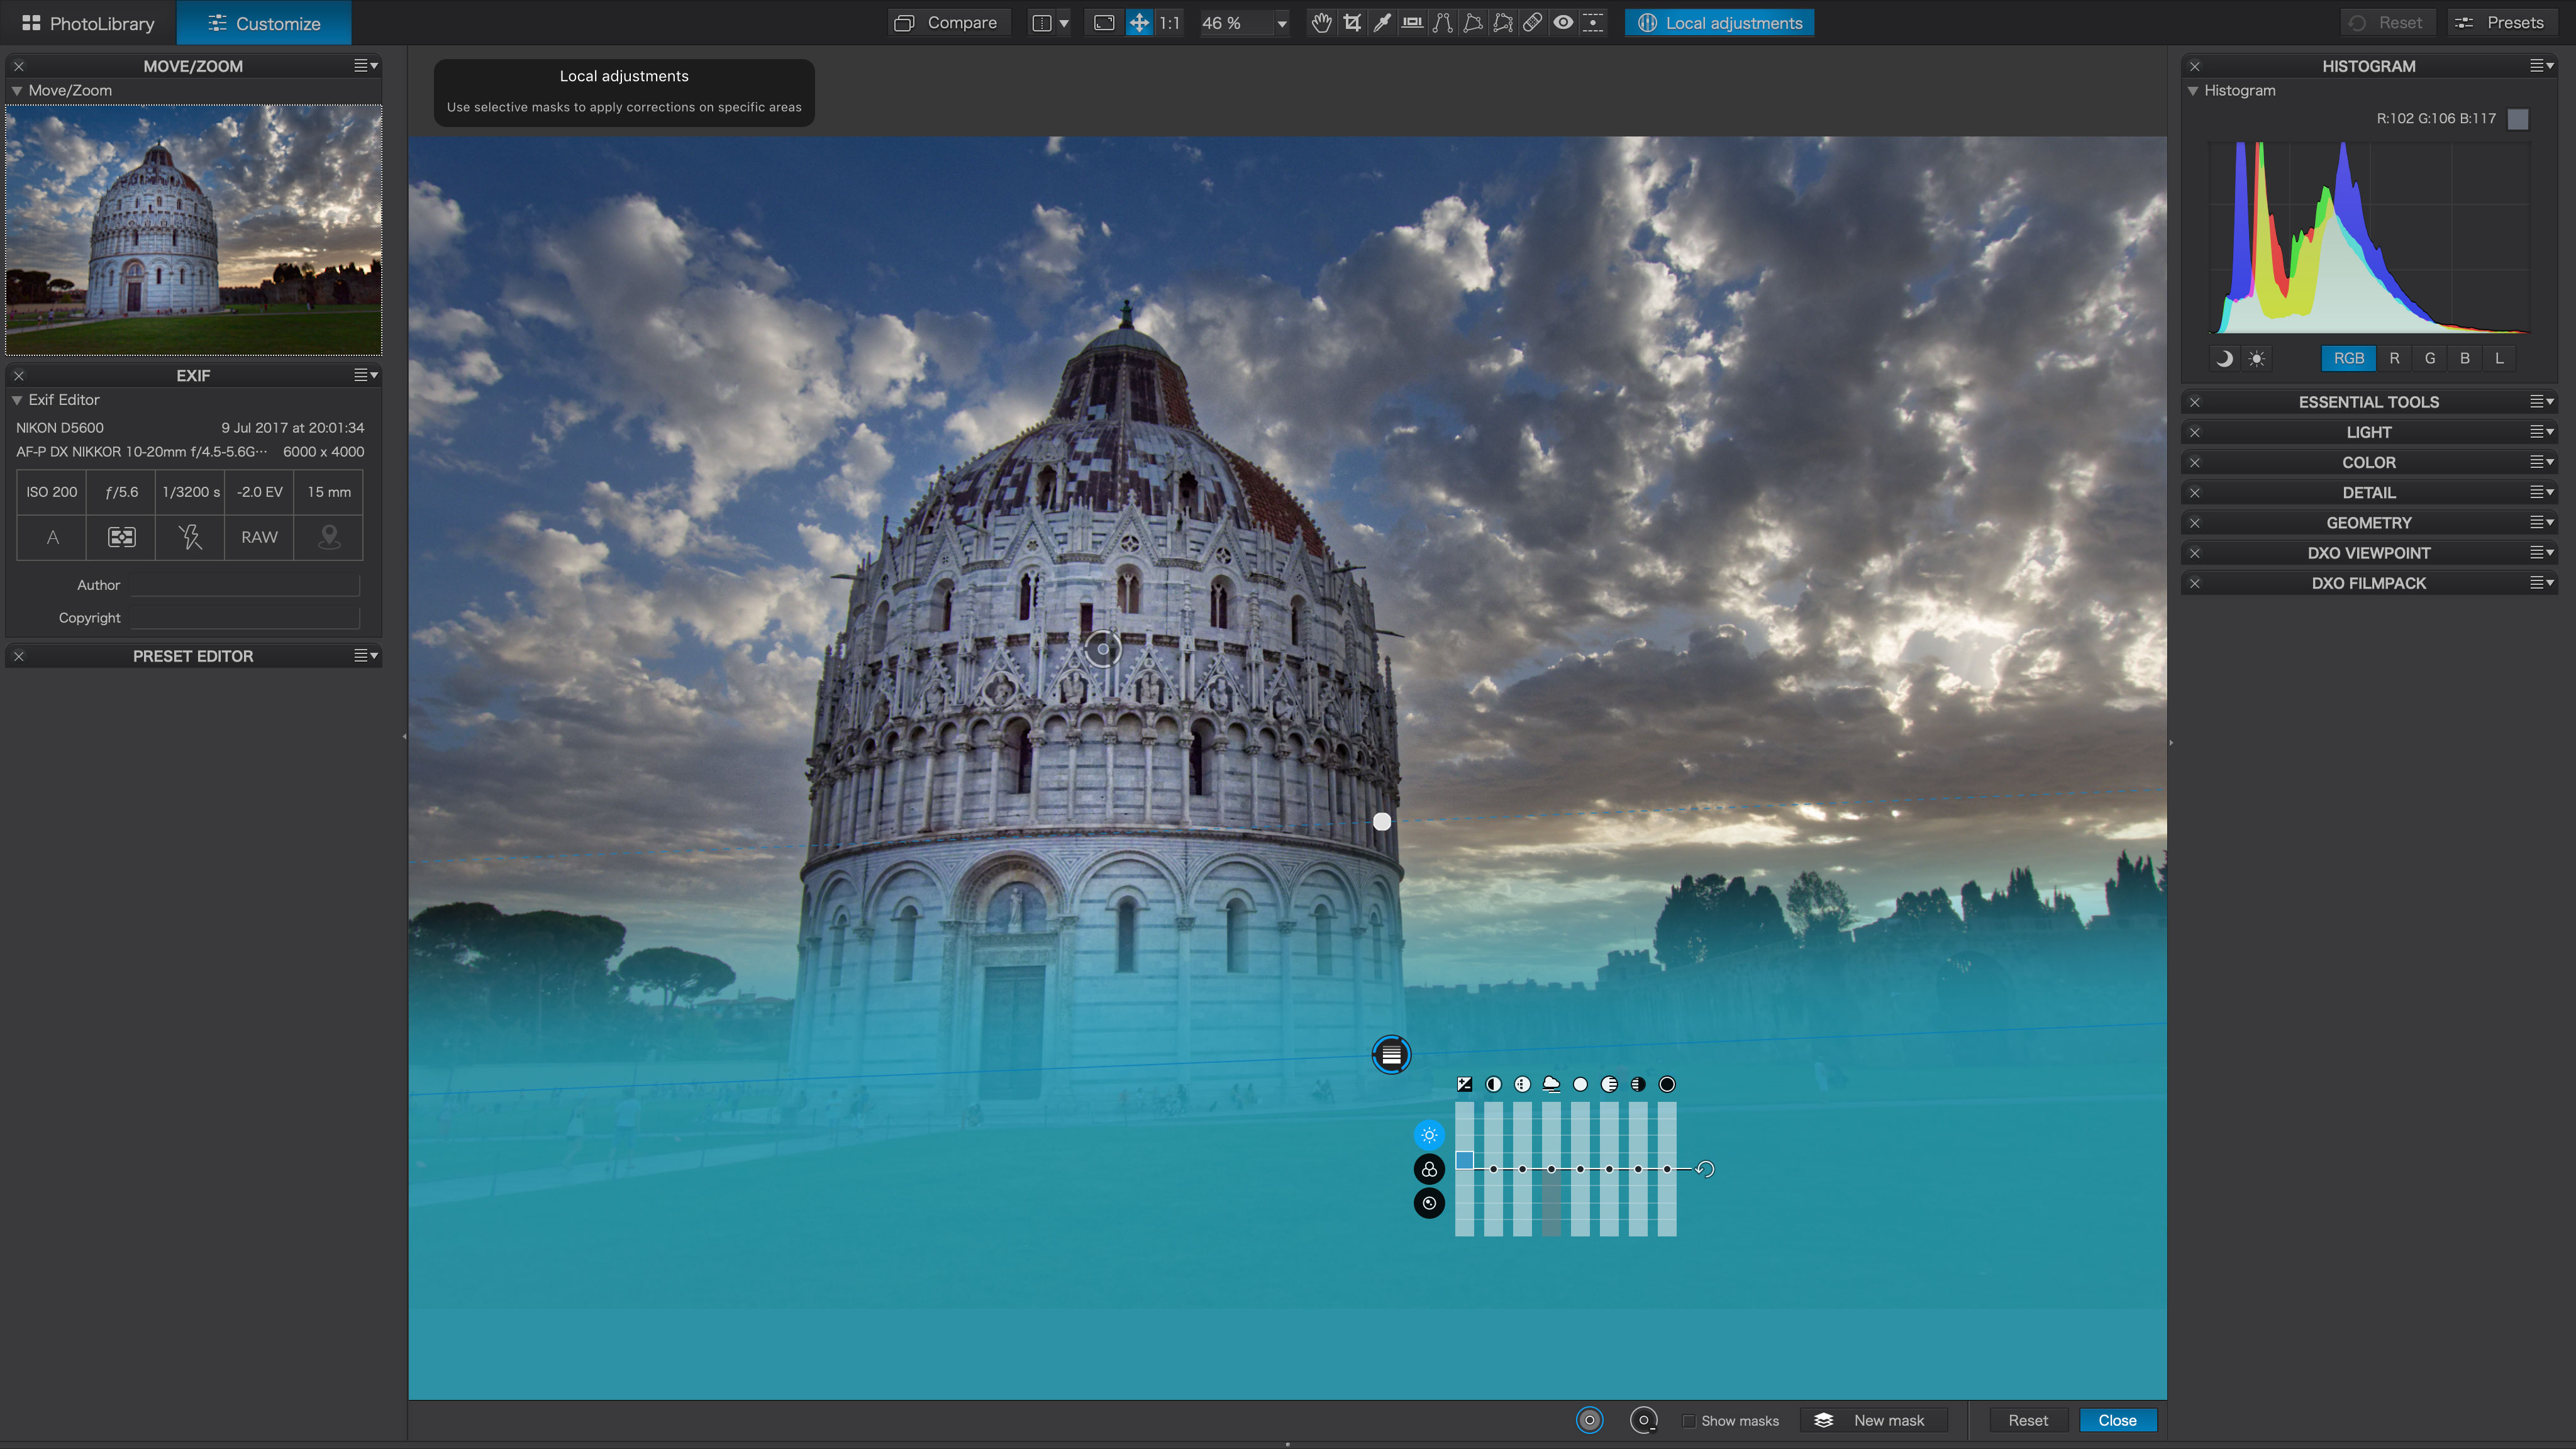
When you add a number of local adjustments you may need to double-check that the overall effect is even and attractive, and for this it’s often helpful to show the left side panel and PhotoLab’s Move/Zoom window, which will give you a small-scale view of the picture. This is often better for judging lighting than the full-size main image.
Step 8: Add any final tweaks
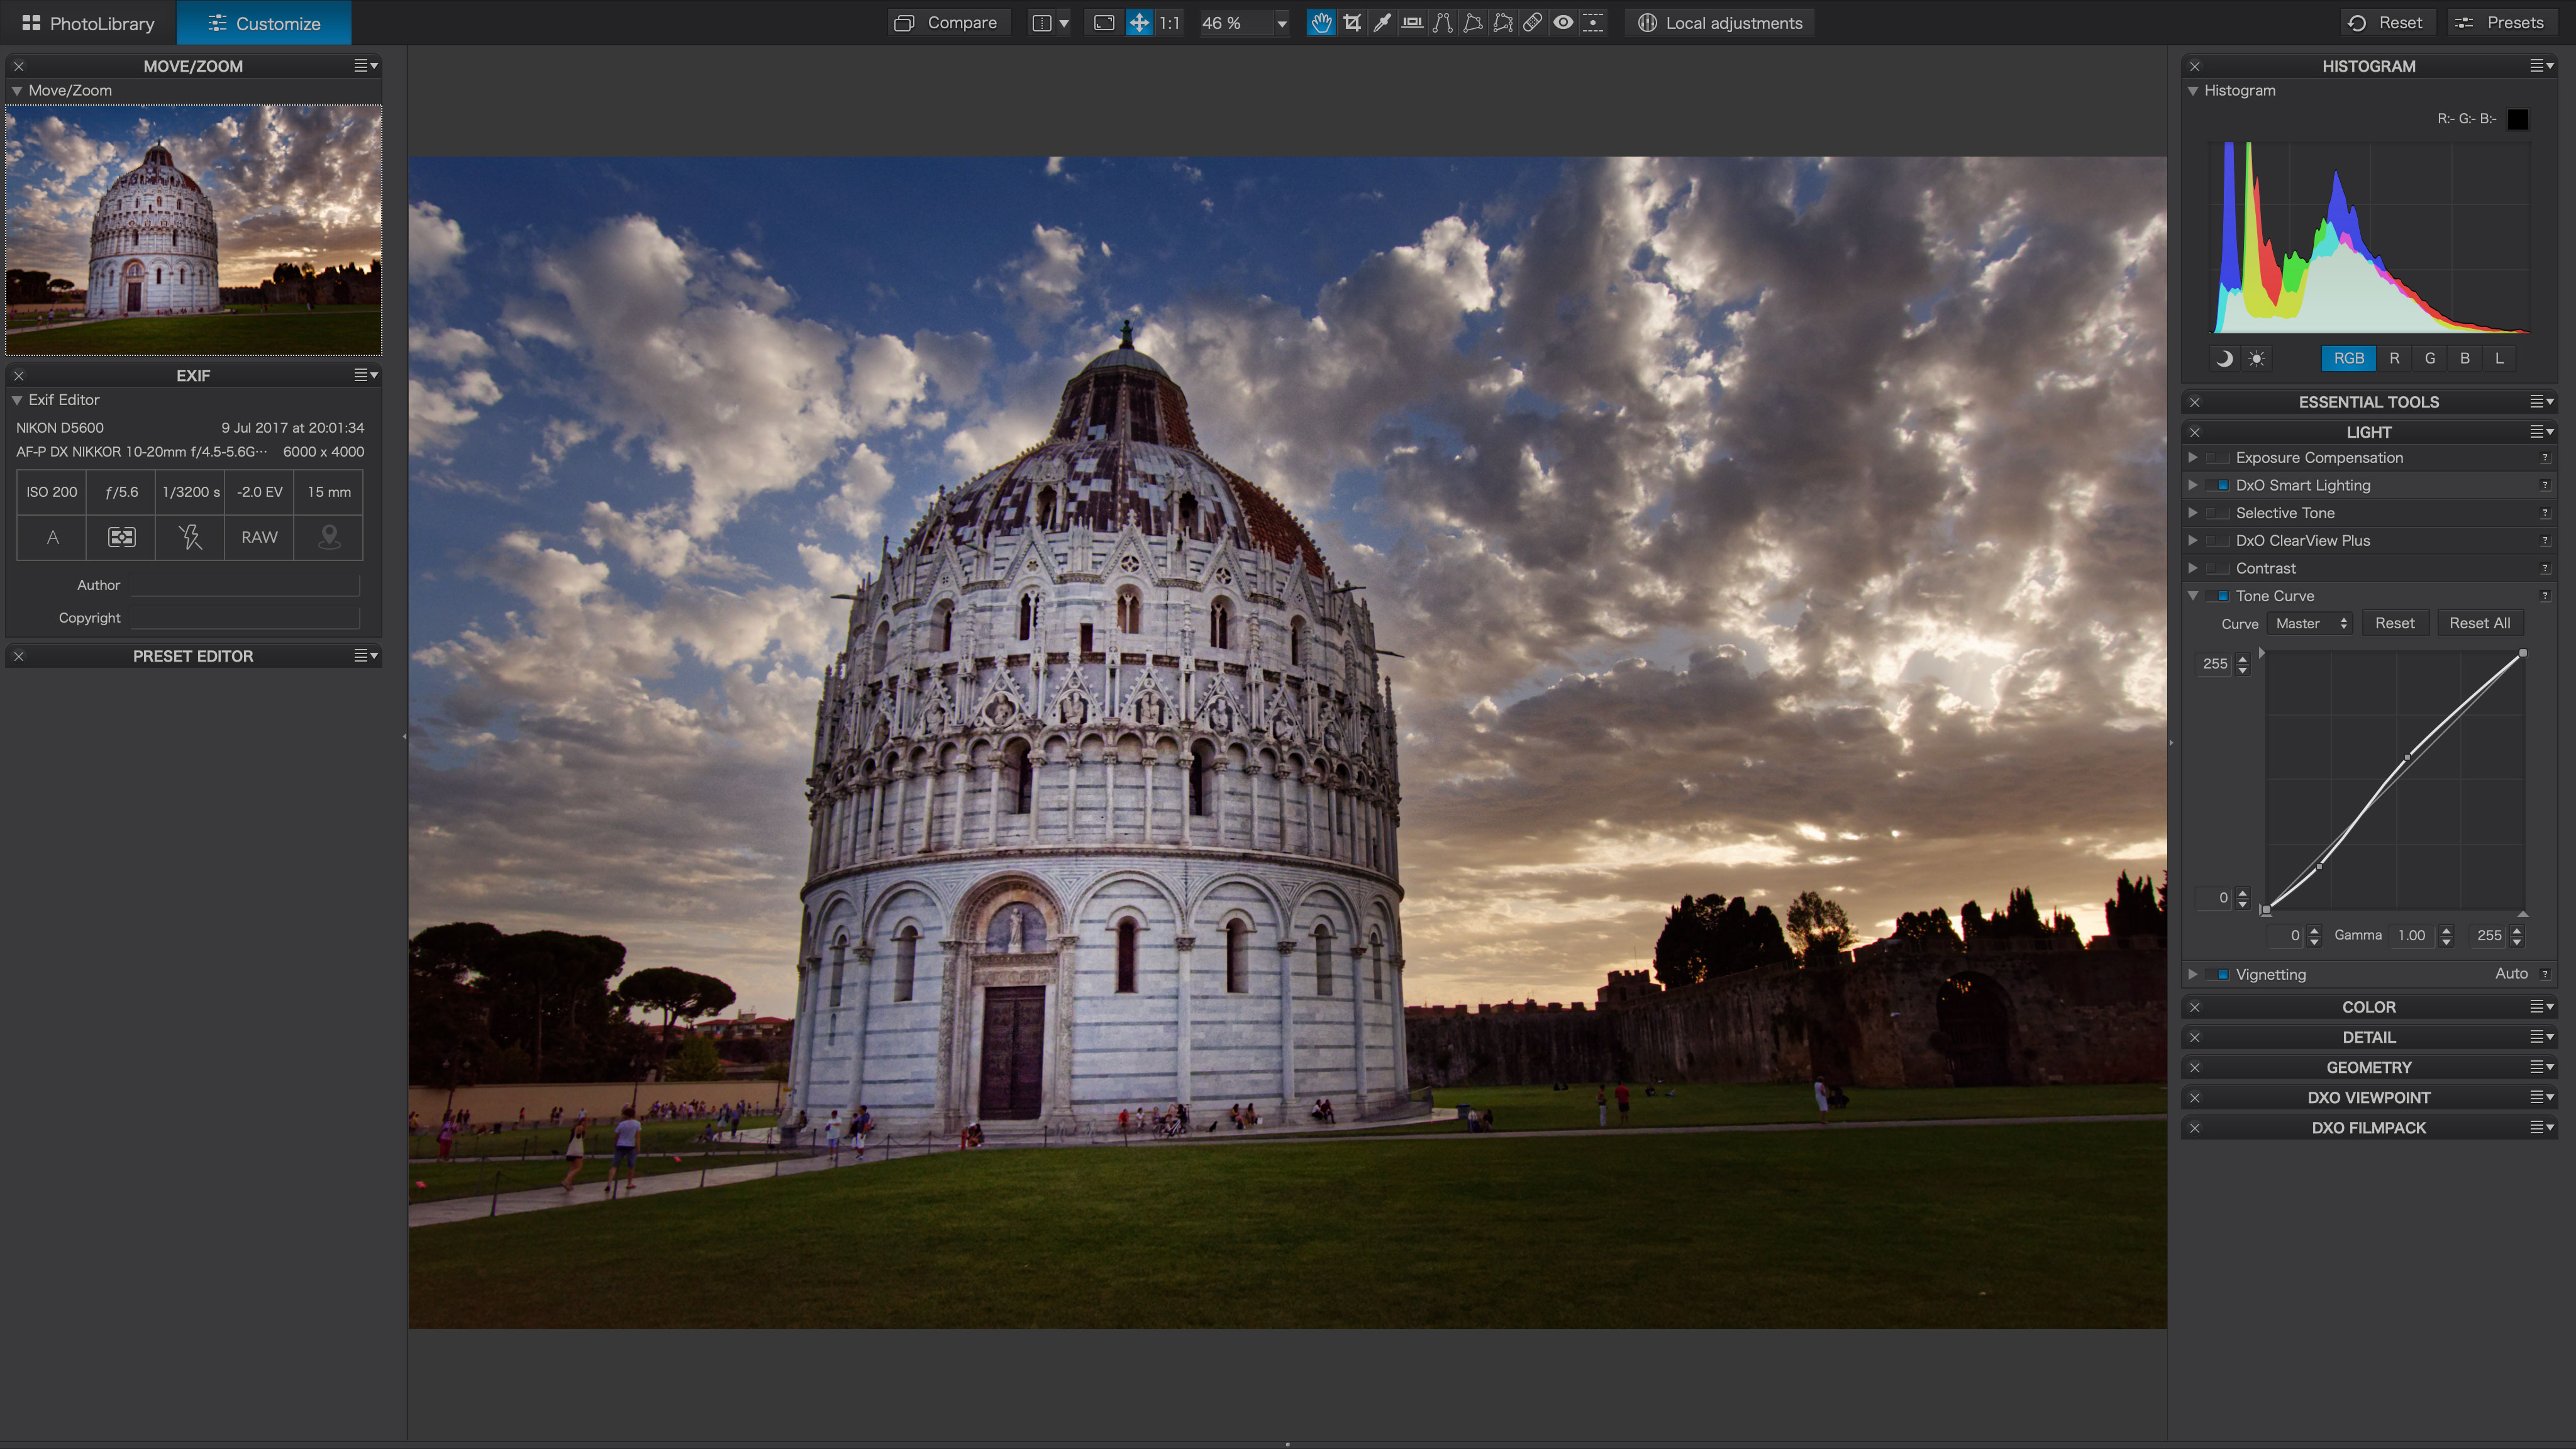
After your adjustments you might want to make a couple of overall adjustments to the picture’s tone and colour. To do this, use PhotoLab’s editing tools on the right side of the screen. We’ve given our picture a slightly warmer white balance and a slight curve adjustment to boost the overall contrast.
Read more:
• The best photo editing software you can get right now
• The best photography tips: 147 techniques, tips and tricks
Get the Digital Camera World Newsletter
The best camera deals, reviews, product advice, and unmissable photography news, direct to your inbox!
Rod is an independent photography journalist and editor, and a long-standing Digital Camera World contributor, having previously worked as DCW's Group Reviews editor. Before that he has been technique editor on N-Photo, Head of Testing for the photography division and Camera Channel editor on TechRadar, as well as contributing to many other publications. He has been writing about photography technique, photo editing and digital cameras since they first appeared, and before that began his career writing about film photography. He has used and reviewed practically every interchangeable lens camera launched in the past 20 years, from entry-level DSLRs to medium format cameras, together with lenses, tripods, gimbals, light meters, camera bags and more. Rod has his own camera gear blog at fotovolo.com but also writes about photo-editing applications and techniques at lifeafterphotoshop.com
