How to use Photoshop Elements Refine Selection Brush tool
Deal with those tricky edges, such as hair and fur
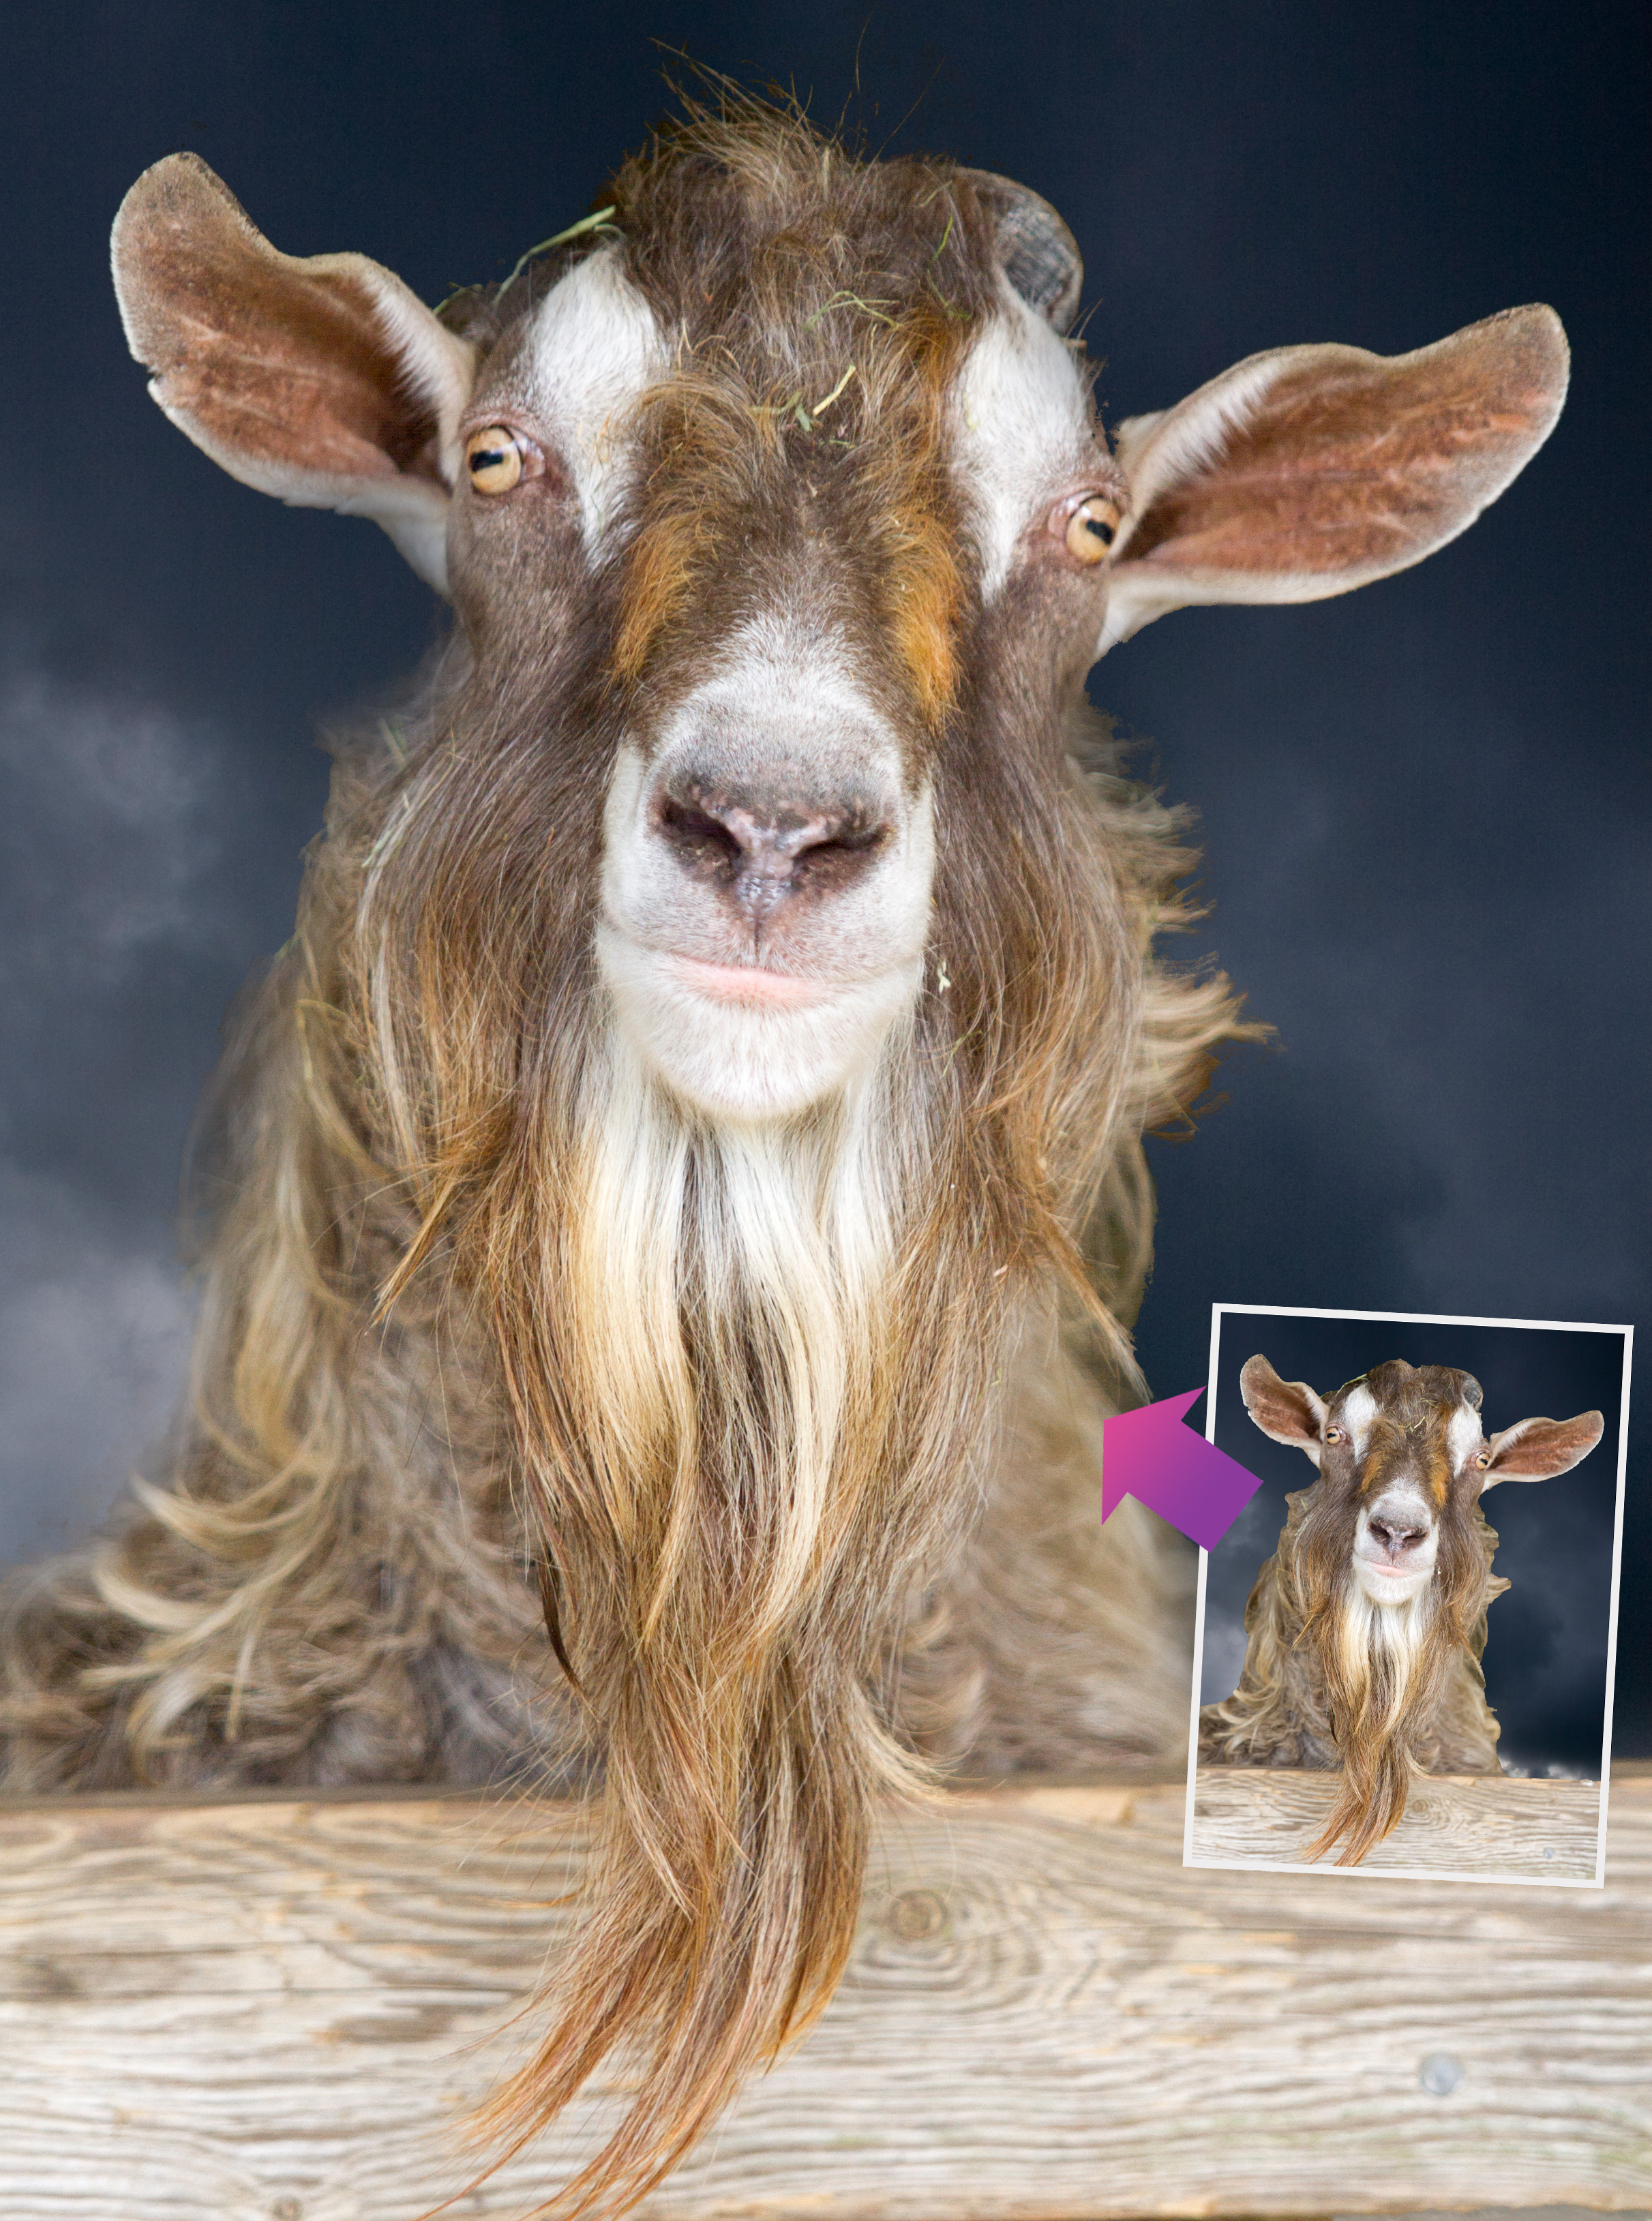
Download project files to your computer from: http://downloads.photoplusmag.com/pp121.zip
Get to grips with the Refine Selection Brush tool to tackle tricky areas
Time needed: 15 minutes
Skill level: Beginner
Kit needed: Photoshop Elements 14
The trouble with regular selection tools is that they act like a switch. Pixels are either selected or not, and this produces unnatural transitions and edge effects.
What you need is a subtler, more intelligent tool that can automatically identify areas you want to keep and separate them from an unwanted background, while creating a smooth and natural-looking boundary around even the most complex and finely divided details.
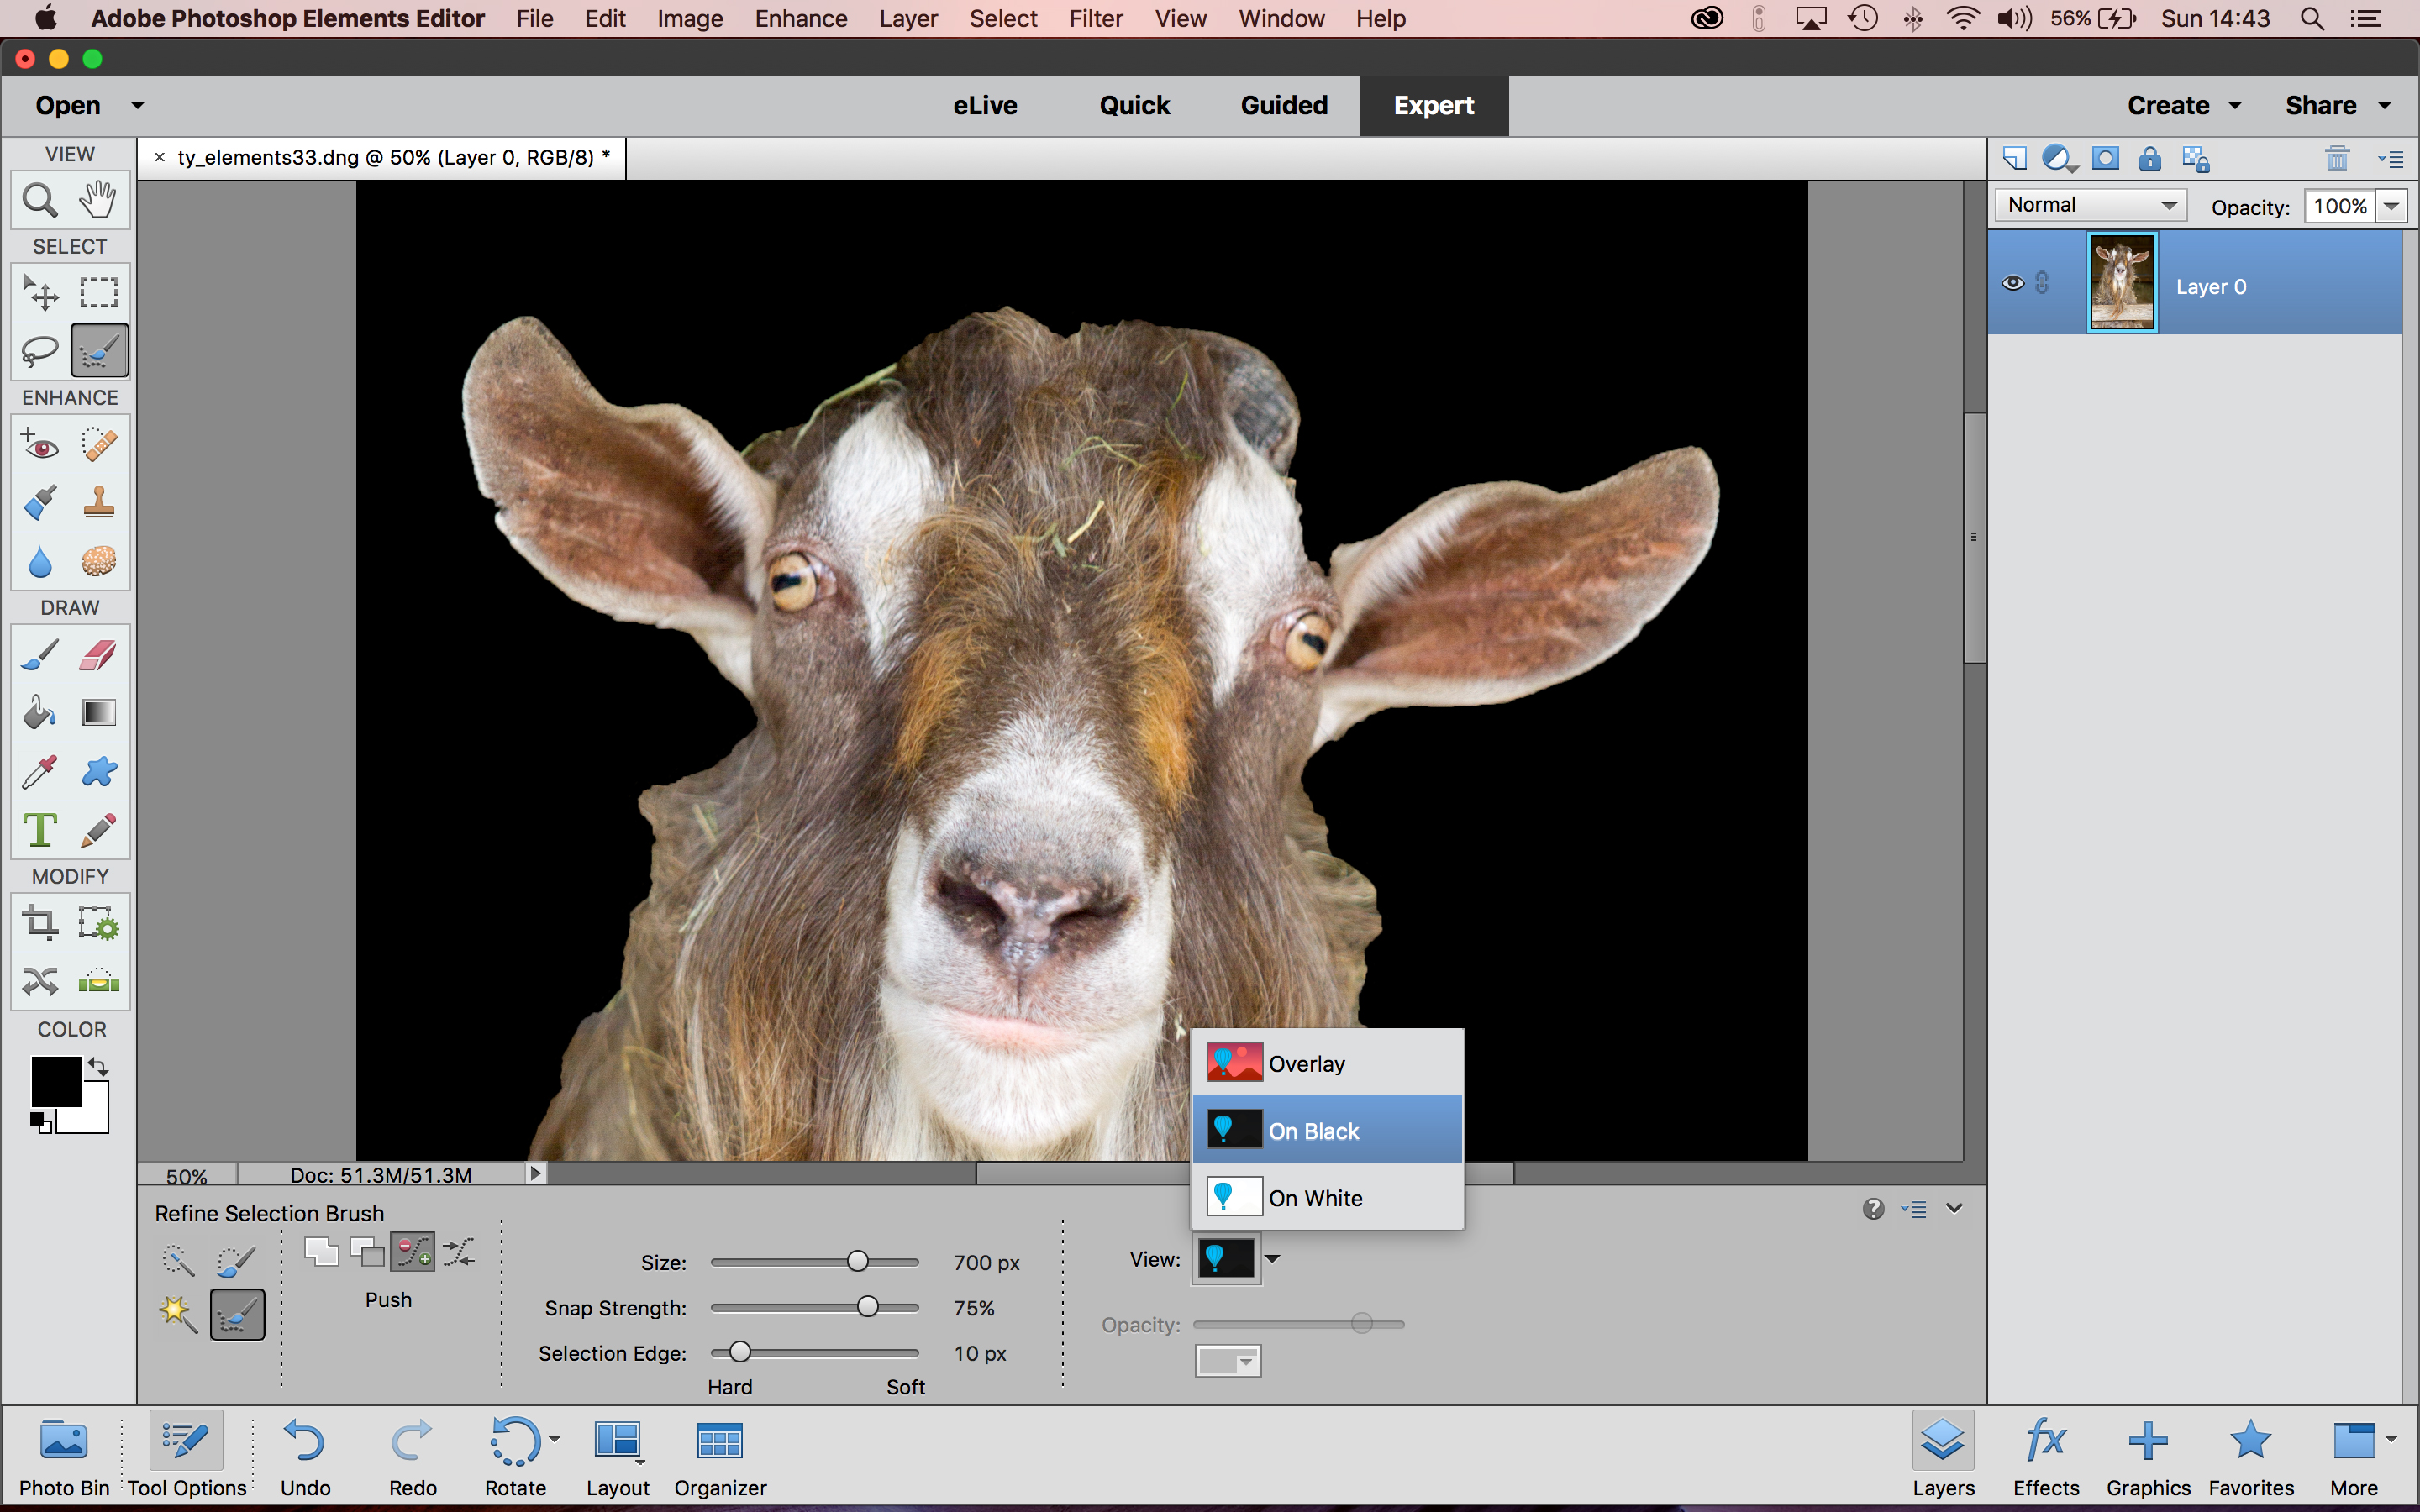
That’s what the Refine Selection Brush is designed to do. It was introduced with Elements 13 but it’s been enhanced in Elements 14 and is a useful alternative to the Refine Edge dialog. The tool is designed to improve a selection you’ve already made – it’s not designed for making selections from scratch. In our example, we’ve started off with the Quick Selection tool and then used the Refine Selection Brush to get a much better result. When you switch to the Refine Selection Brush you’ll notice that the cursor appears as two concentric circles, the outer circle represents the Tolerance setting for detecting edges. The darker centre disc marks the areas you definitely want while the outer grey area automatically selects and blends details.
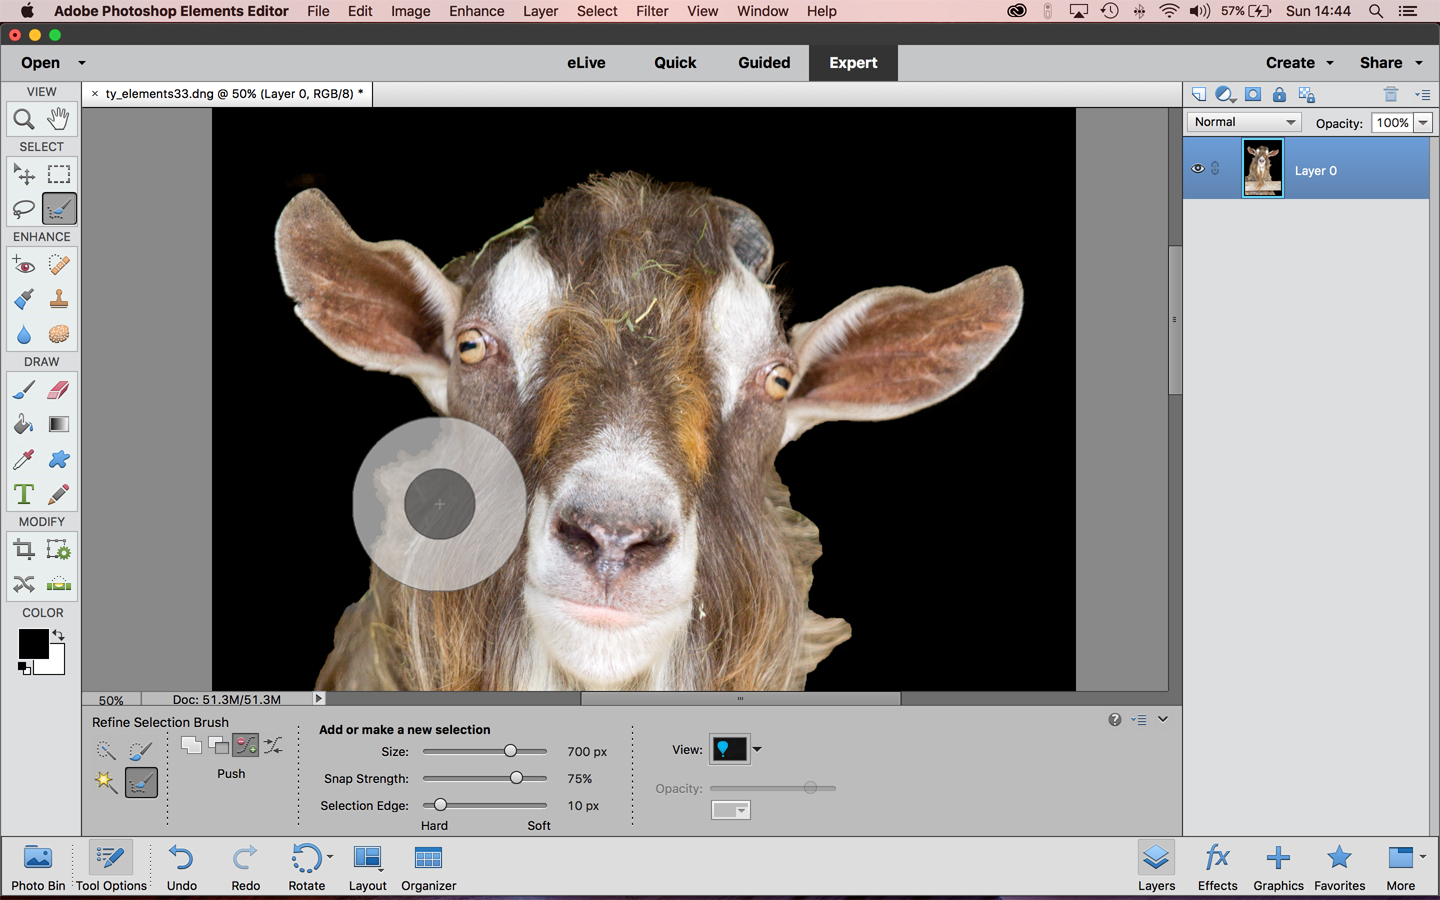
Press and hold the cursor on the area where you want to make a precise adjustment. The selection within your concentric circles grows (the lighter outer area of the circle) as it starts to make a precise selection. Make sure you include the entire edge in this selection. The size of the selection edge is determined by the Selection Edge slider, use this to adjust how hard or soft you want your edges to be. On detailed edges, such as hair or fur, a softer edge will be more effective.
01 QUICK SELECTION TOOL
Grab the Quick Selection tool, click-and-drag to paint over your subject to make a rough selection. Instead of adding to or subtracting from the selection to tidy up the edges, click on the Refine Selection Brush, in the same toolbar fly-out as the Quick Selection Brush.
02 ADD TO YOUR SELECTION
The best camera deals, reviews, product advice, and unmissable photography news, direct to your inbox!
When you refine the selection, the background is red by default; choose black instead as it’s closer to the image we want to use as a background. This tool has different modes – we’ll use the Push mode, as we want to ‘push’ the selection out to select more fur.
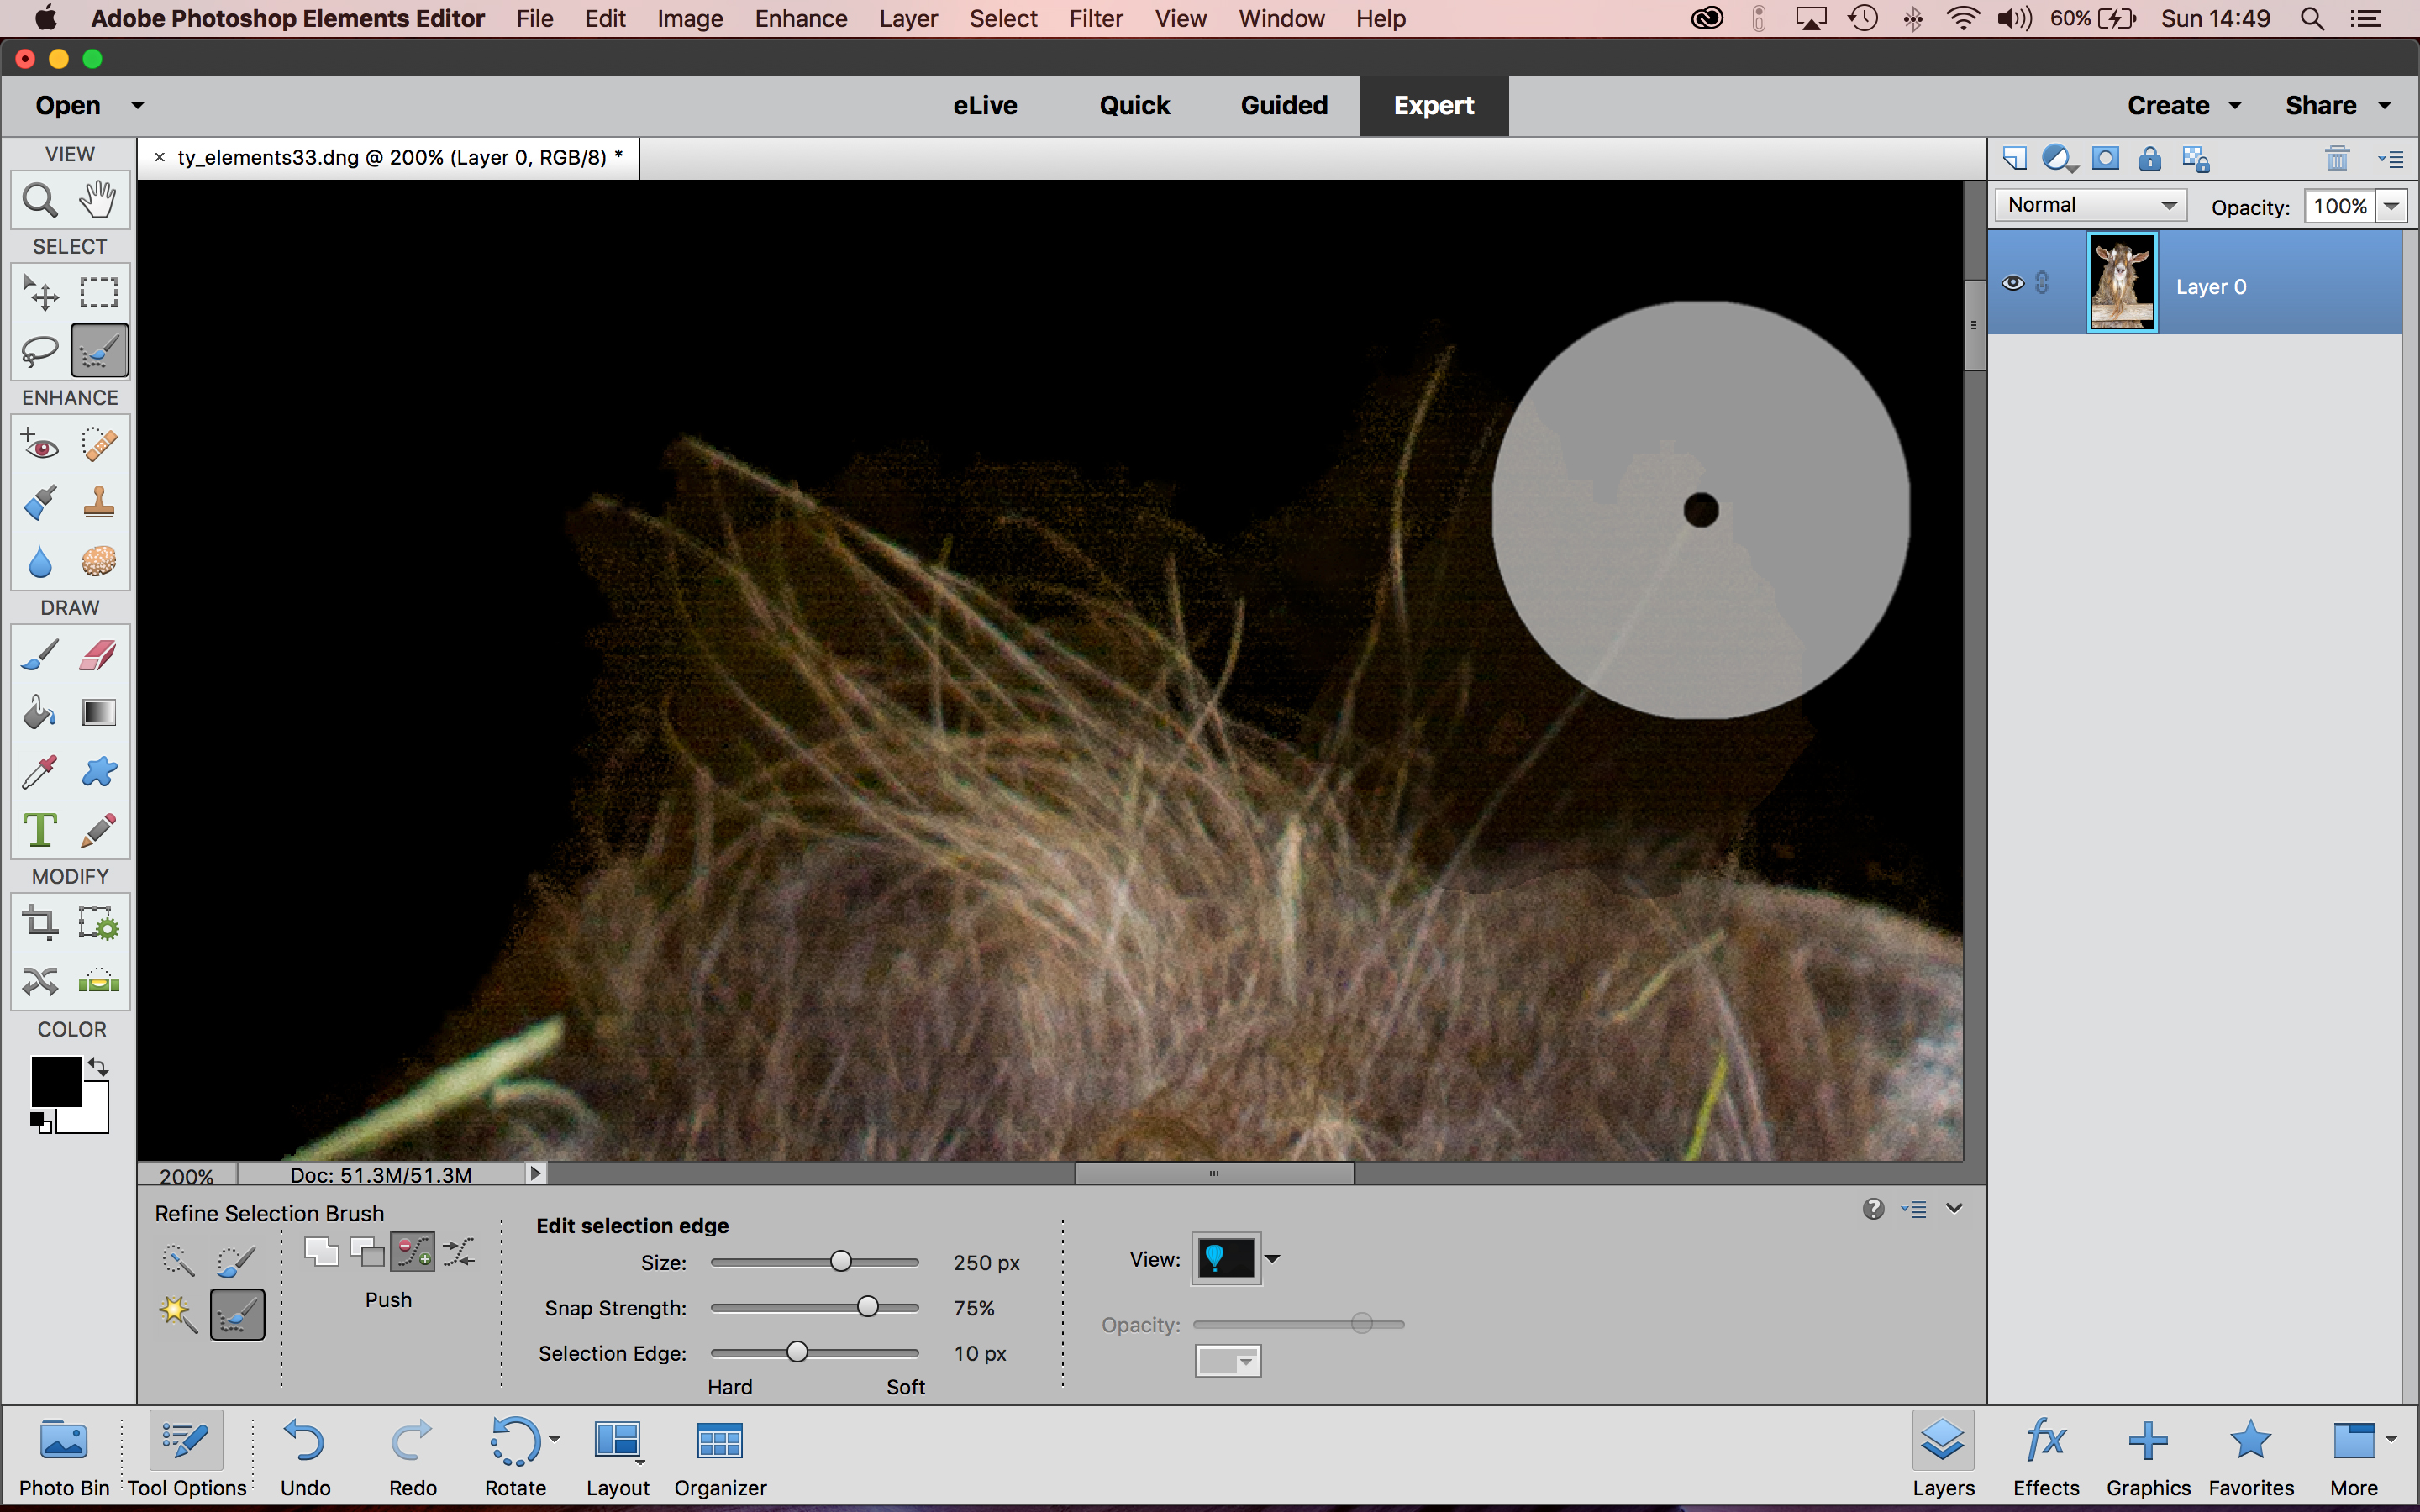
When hovering over the background, hold Shift to toggle between adding and subtracting from your selection
03 REFINE THE EDGES
The dark centre disc marks areas you definitely want while the outer grey area selects and blends details. Move over the background to ‘push’ the selection, or over the boundary to change to ‘edge’ mode, where you can paint along edges to produce a subtler blend.
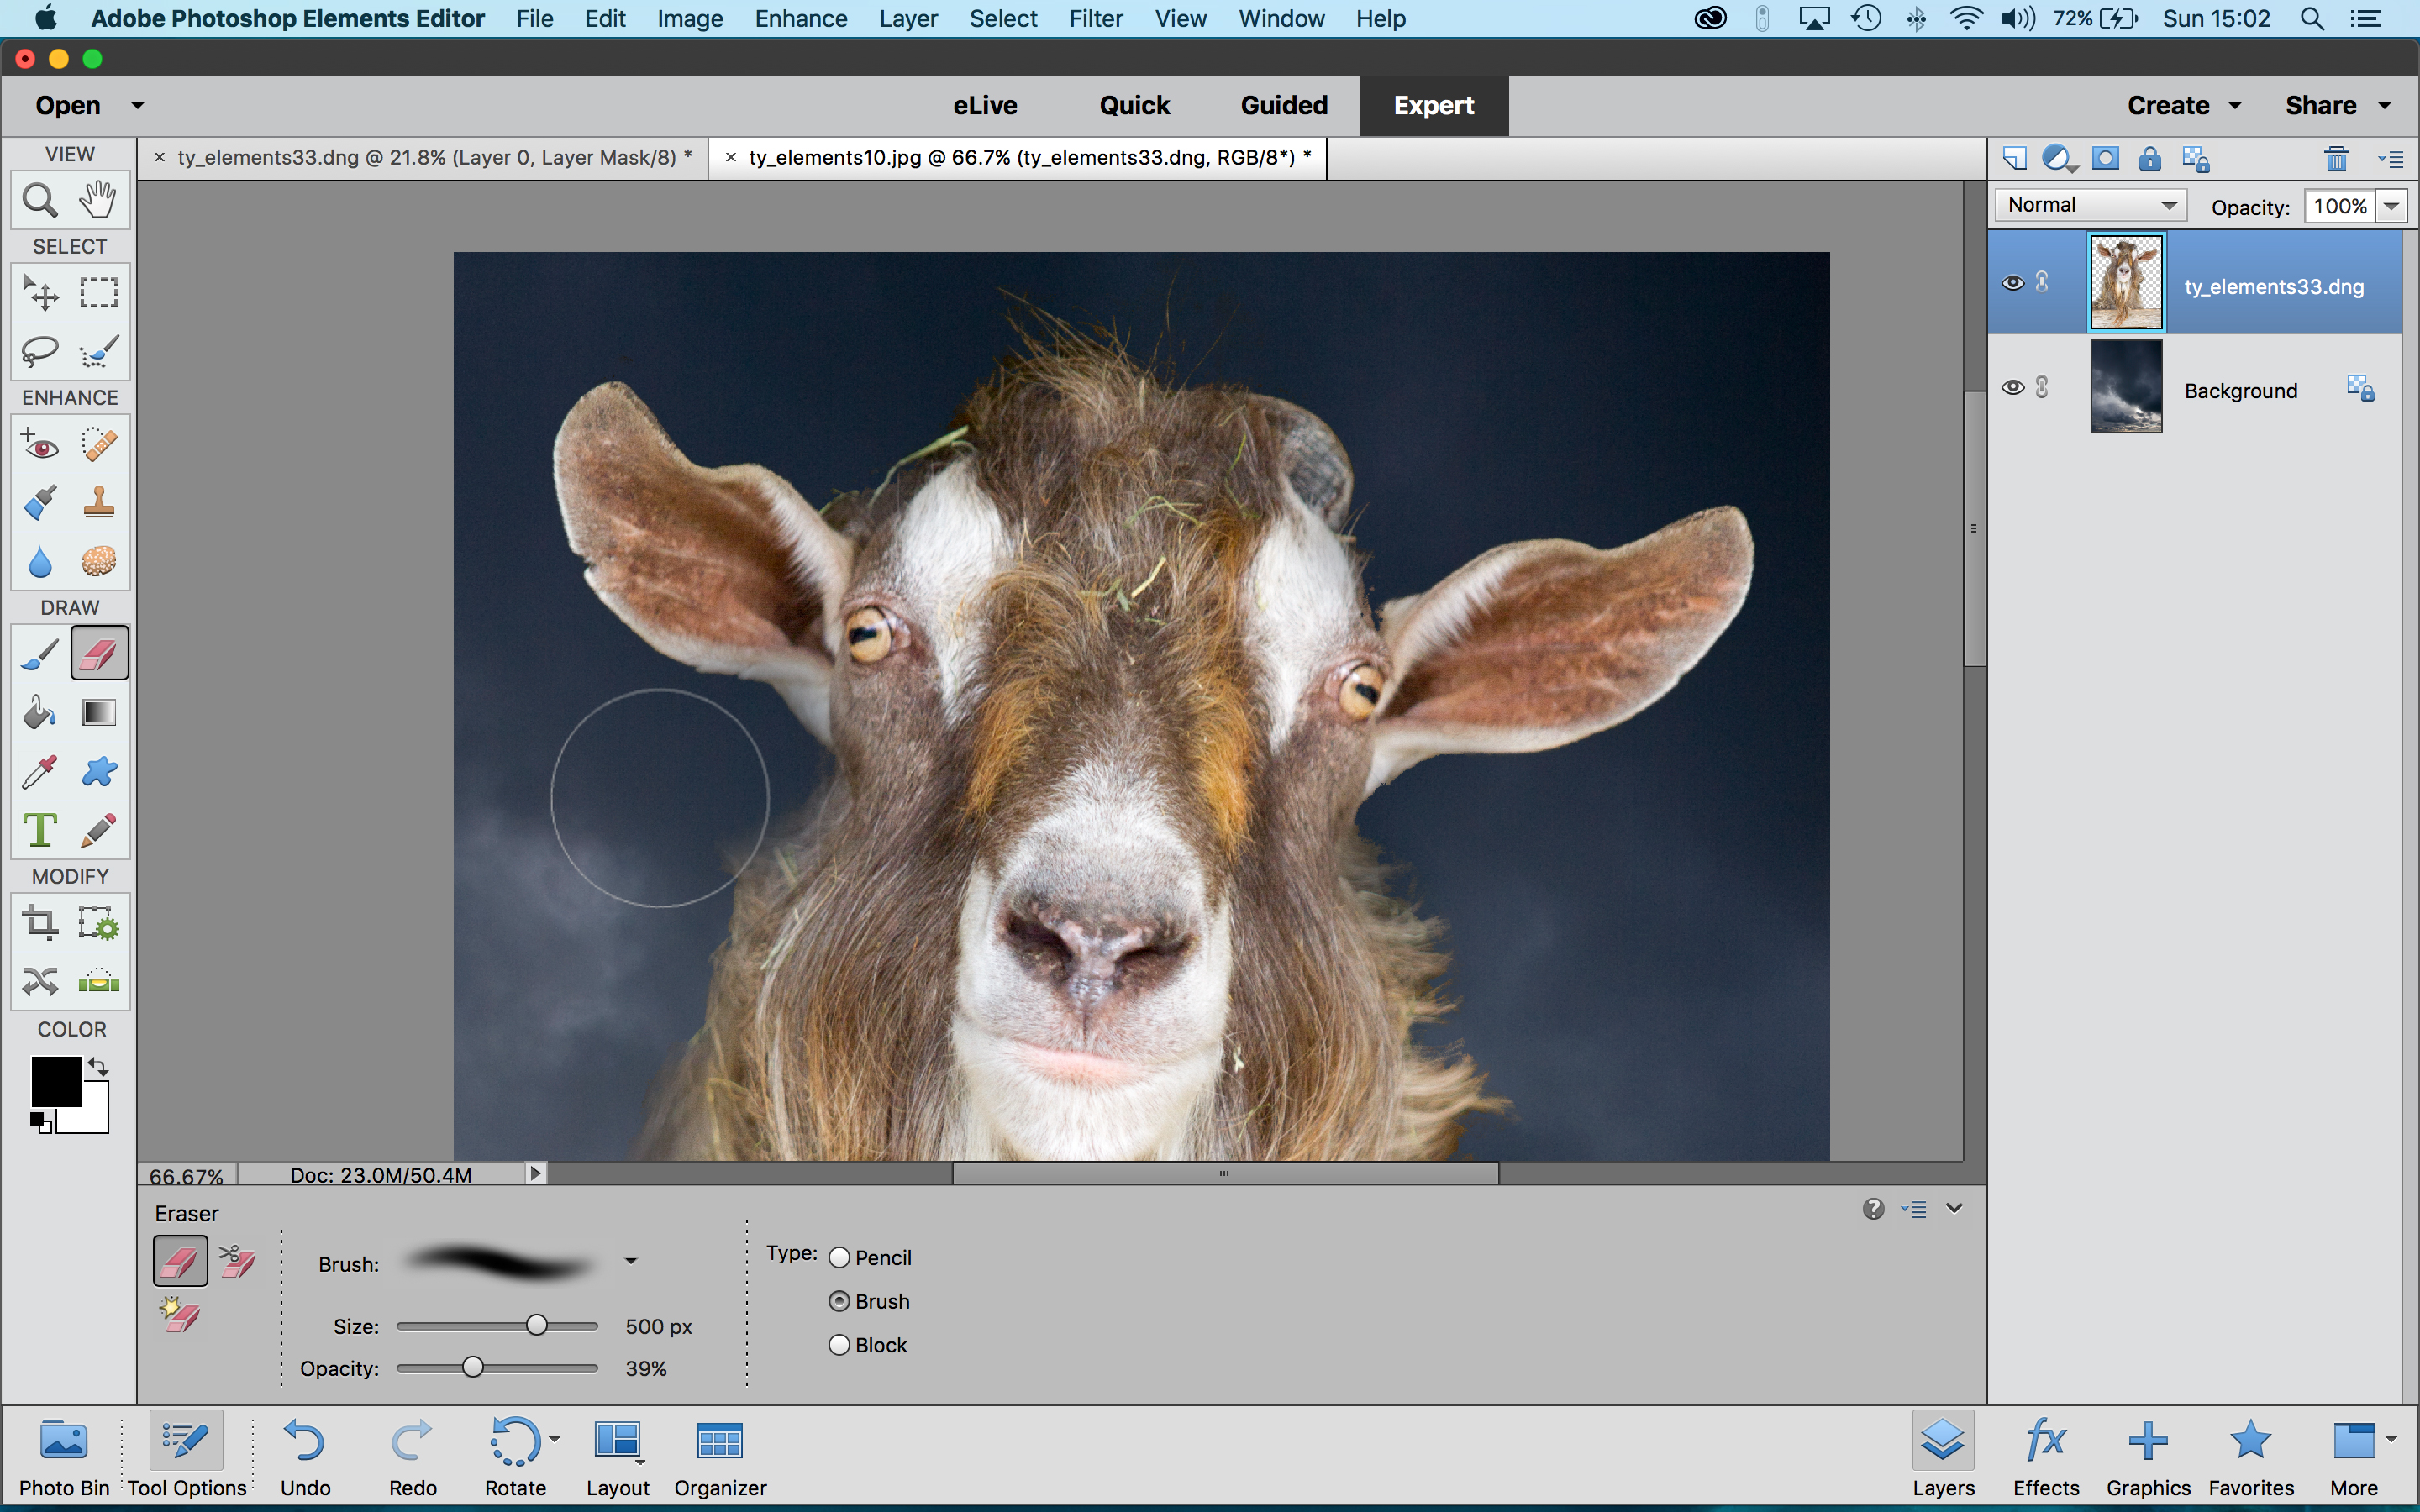
04 FINISHING TOUCHES
When you’re done, switch back to the Quick Selection (or any other) tool to commit to a final selection and drag the cutout image onto the new background. To blend any remaining rough edges, we’ve used the Eraser tool set to a large, soft brush of 35% opacity.

Rod is an independent photography journalist and editor, and a long-standing Digital Camera World contributor, having previously worked as DCW's Group Reviews editor. Before that he has been technique editor on N-Photo, Head of Testing for the photography division and Camera Channel editor on TechRadar, as well as contributing to many other publications. He has been writing about photography technique, photo editing and digital cameras since they first appeared, and before that began his career writing about film photography. He has used and reviewed practically every interchangeable lens camera launched in the past 20 years, from entry-level DSLRs to medium format cameras, together with lenses, tripods, gimbals, light meters, camera bags and more. Rod has his own camera gear blog at fotovolo.com but also writes about photo-editing applications and techniques at lifeafterphotoshop.com
