How to use the ColorWheel in DxO PhotoLab 3 – and win a free copy
Latest version of this popular image editor is the best yet… plus, win a copy worth $199/£169!
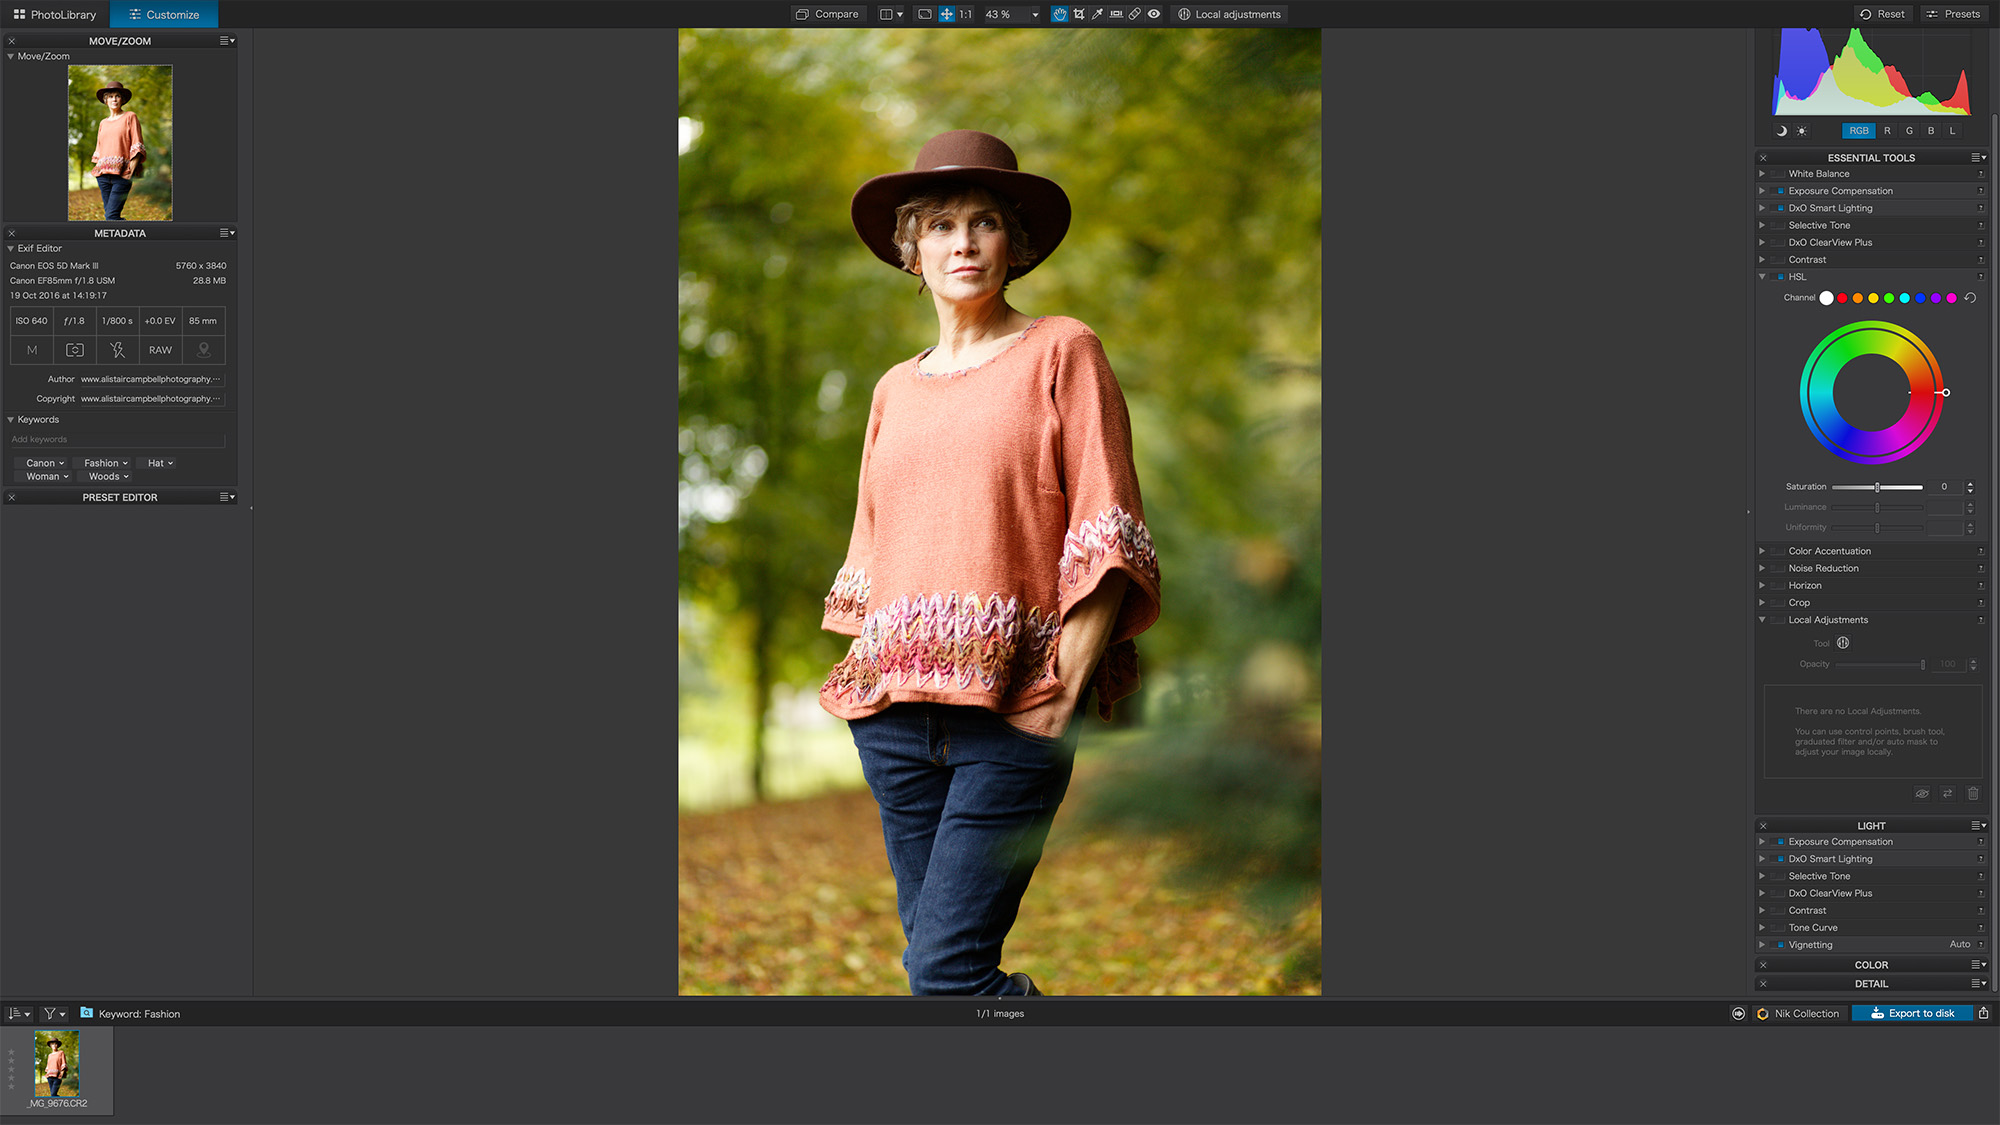
Image correction and enhancement specialist DxO recently released PhotoLab 3, the latest version of its raw processing, lens correction and photo editing software.
Already among the best photo editing programs on the market, DxO PhotoLab offers all the tools of regular photo editors, but takes a different direction from many of its rivals, putting raw processing and lab-derived lens corrections front and centre.
It can extract extraordinary image quality even from the most humble camera equipment, and DxO’s acquisition of the Nik Collection has brought powerful local adjustment tools, too.
(Nik Collection 2.5 by DxO includes both the Nik software suite and PhotoLab Essential, and we understand that there will be upgrade options to incorporate PhotoLab 3.)
What's new in PhotoLab 3?
- ColorWheel, for advanced colour adjustments and replacements
- An optimized Repair tool, where you can now choose the repair ’source’ area
- A Local Adjustments Mask Manager for PhotoLab’s adjustment tools
- Support for keywords in PhotoLab’s PhotoLibrary module
Win a free copy of PhotoLab 3 by DxO with Digital Camera World
We’re giving Digital Camera World users the chance to win a copy of this fantastic software, which normally retails for $199/£169. All you have to do is correctly answer the following question:
Q. Which new feature was introduced in PhotoLab 3?
A. Ferris Wheel
B. Spinning Wheel
C. ColorWheel
Click here to be in with a chance of winning one of the five copies, and to view the competition's T&Cs. Good luck!
Tutorial: how to use PhotoLab 3's ColorWheel
PhotoLab 3's ColorWheel is a brand new way to manipulate hue, saturation and lightness (HSL).
Rather than only using sliders for each of the color channels, as was the case in PhotoLab 2, DxO PhotoLab 3 introduces a much more accurate color wheel.
Normally we’re used to making HSL adjustments on a global scale through linear sliders.
But thanks to the new DxO ColorWheel, we can take a new visual approach – thanks to something that allows us to visually preview and adjust inputs and outputs.
Here's how it works…
Step 1: Import your image
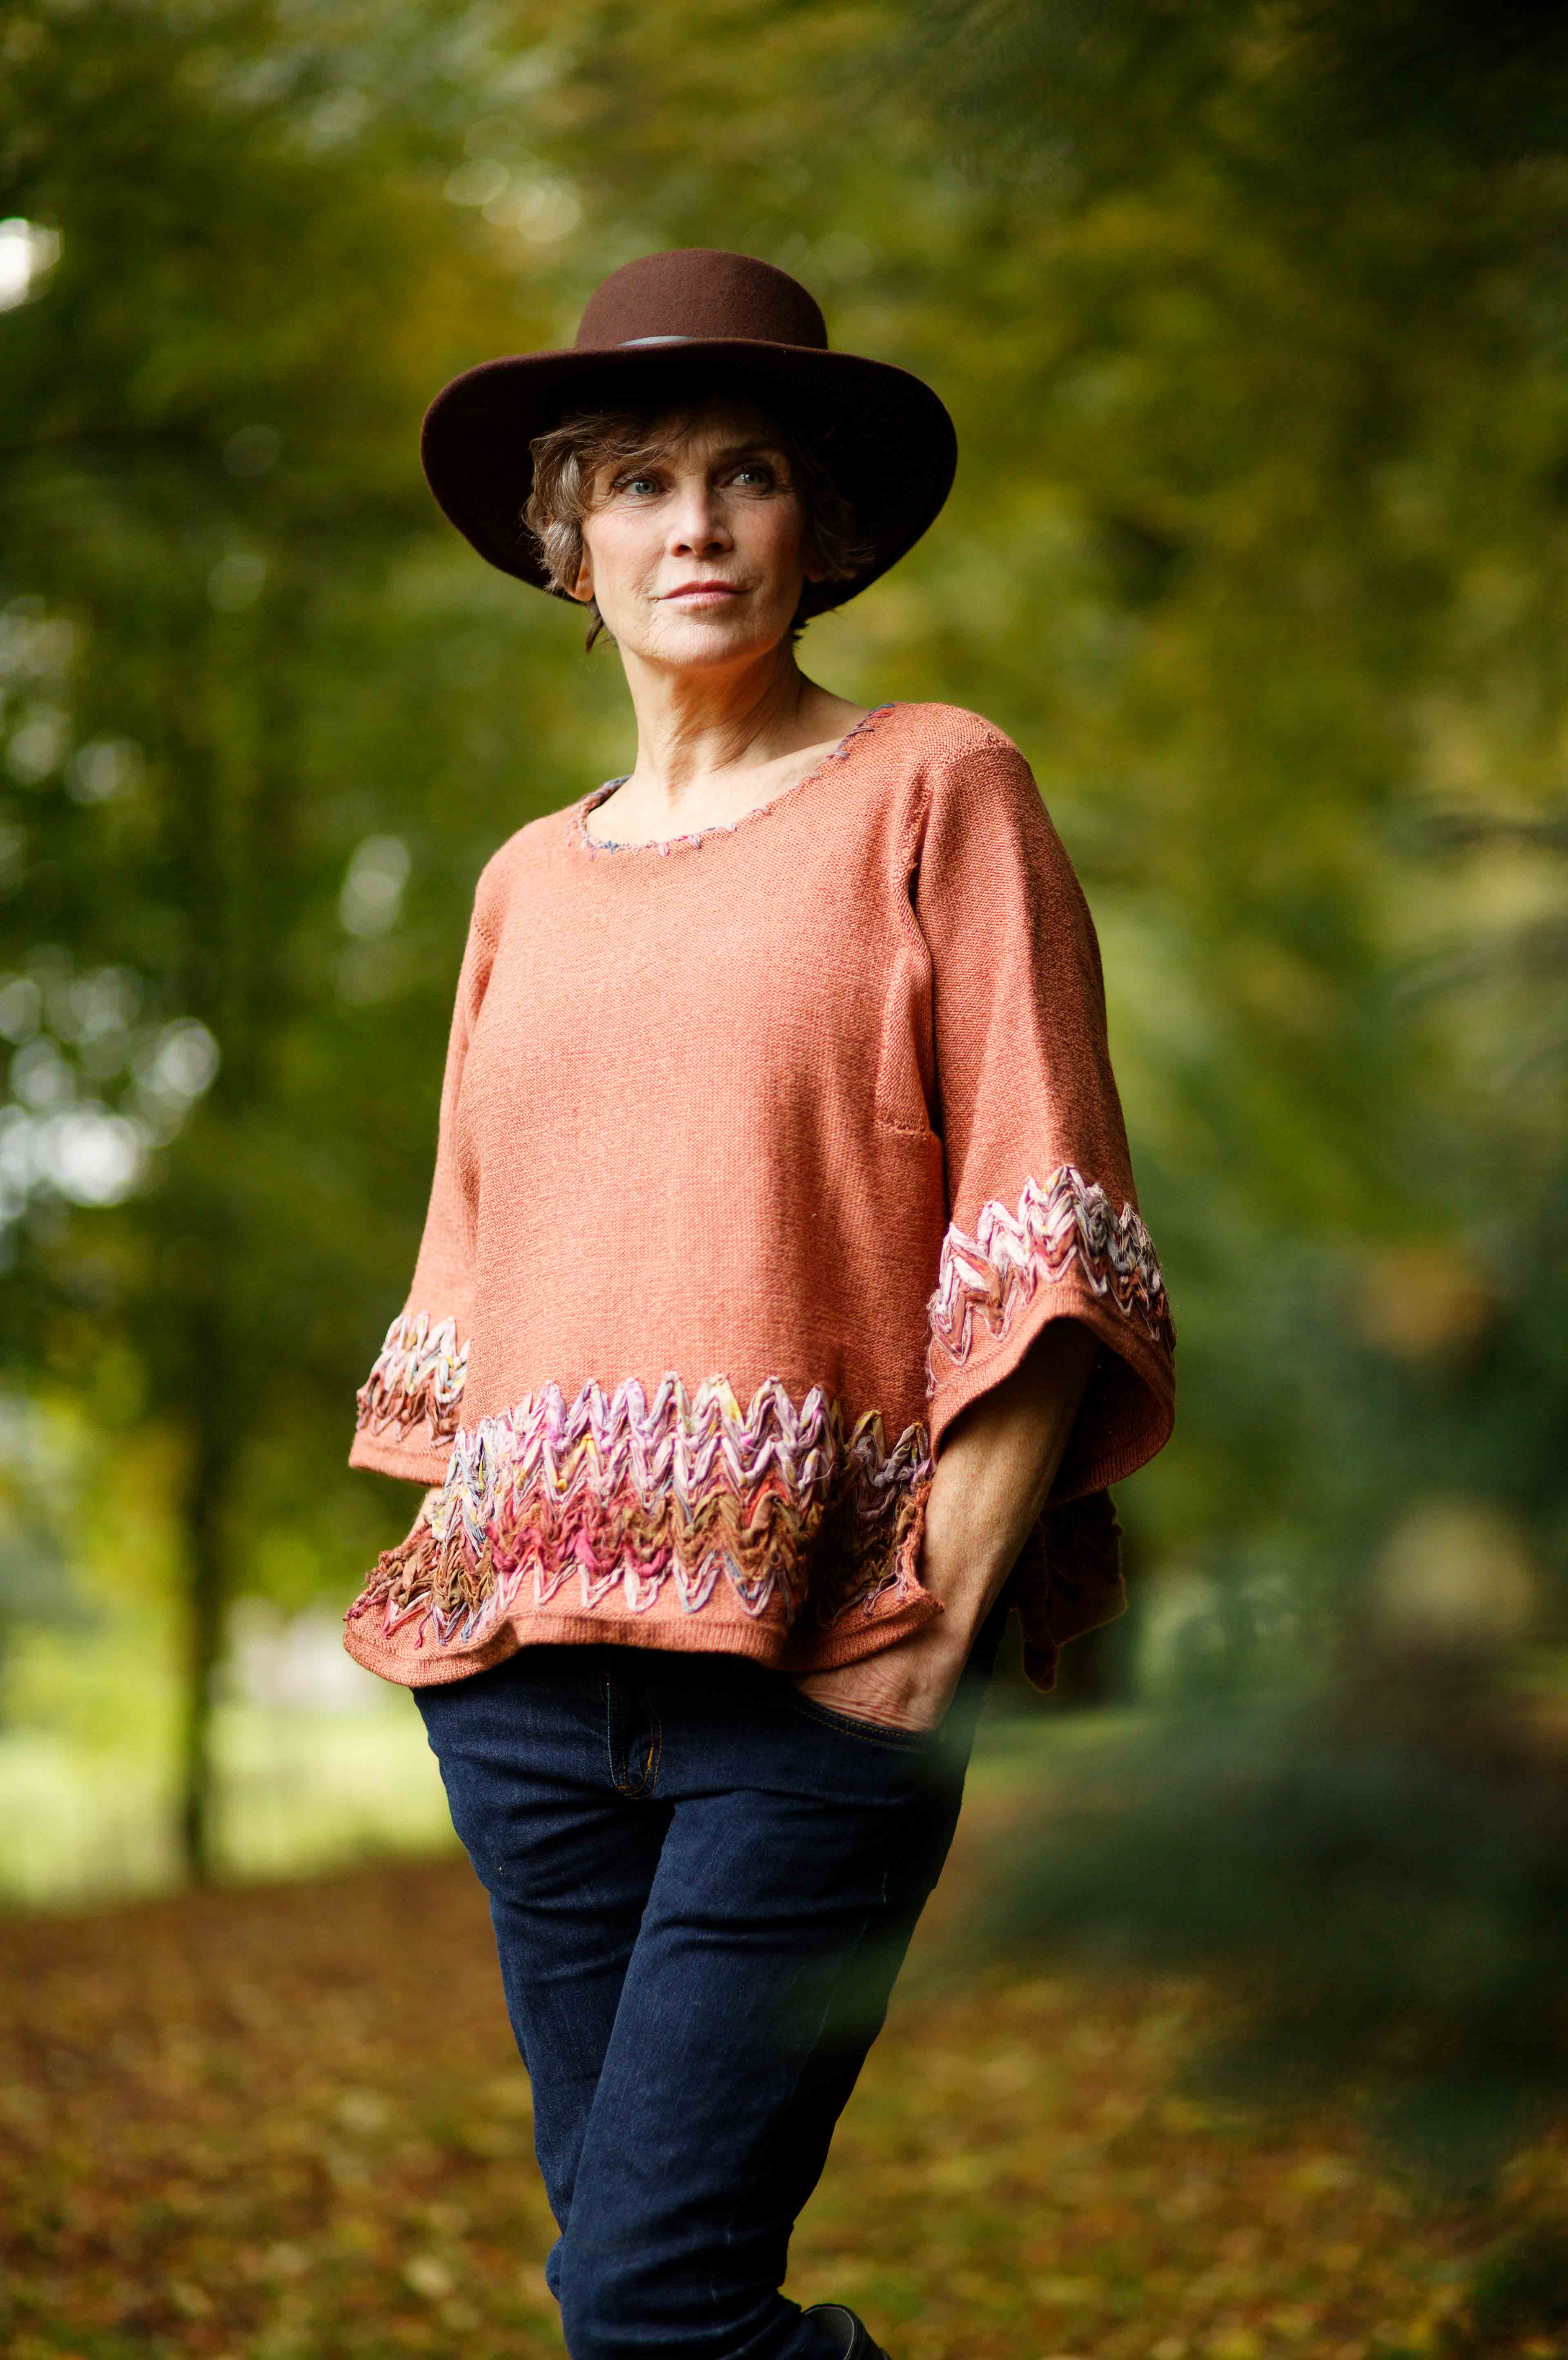
One of the great attributes of PhotoLab is that it gives you a great starting platform to work from by improving your image upon import with various tweaks to your raw or JPEG file.
Taking care of the camera, lens calibration and minor exposure and tonal details means you can quickly get to work on the color to deliver your own personal style and aesthetic.
Step 2: Select a color channel
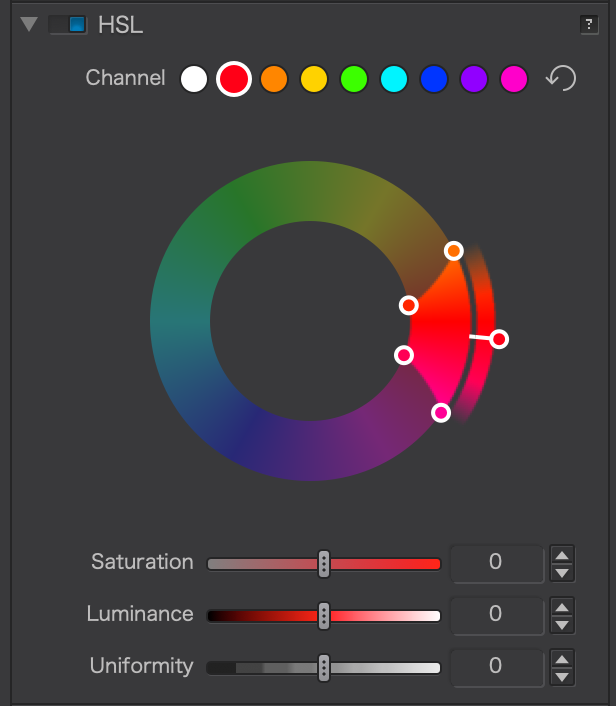
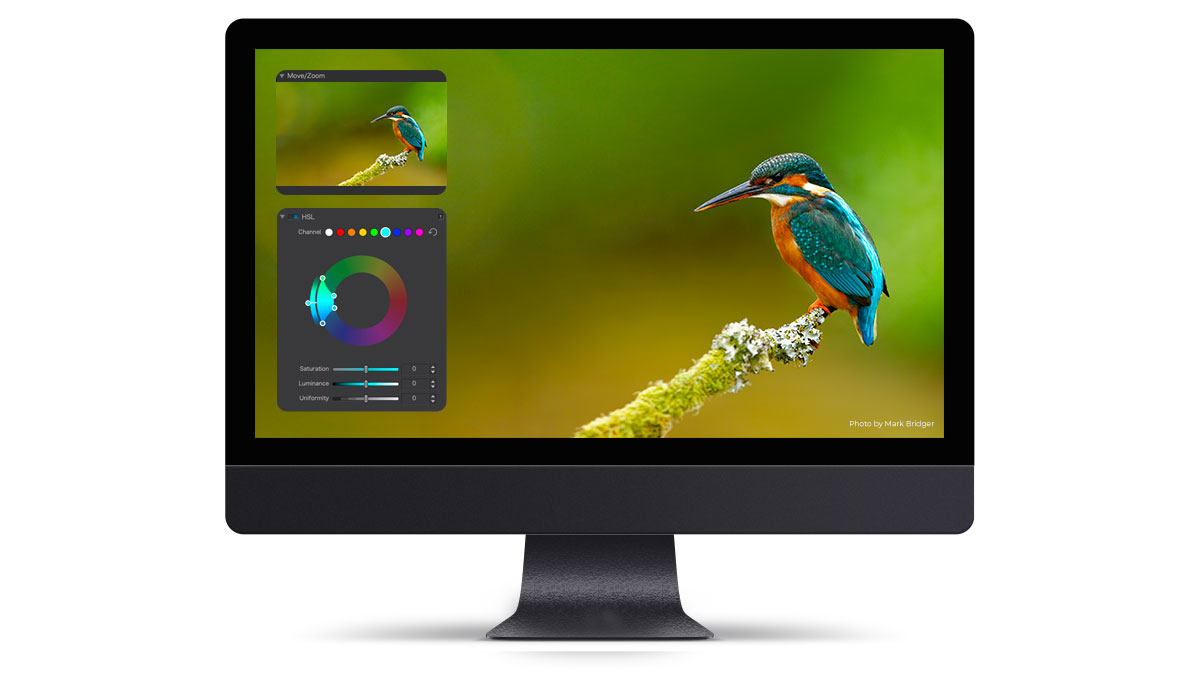
Start with the first colour available – Red. You’ll notice that a small section of the wheel is now highlighted by five small white circles.
If you now continue to click across the rest of the colors available at the top of the panel, you’ll notice that not all of their areas on the wheel are the same size. This is dependent on how much range of that color is in the image.
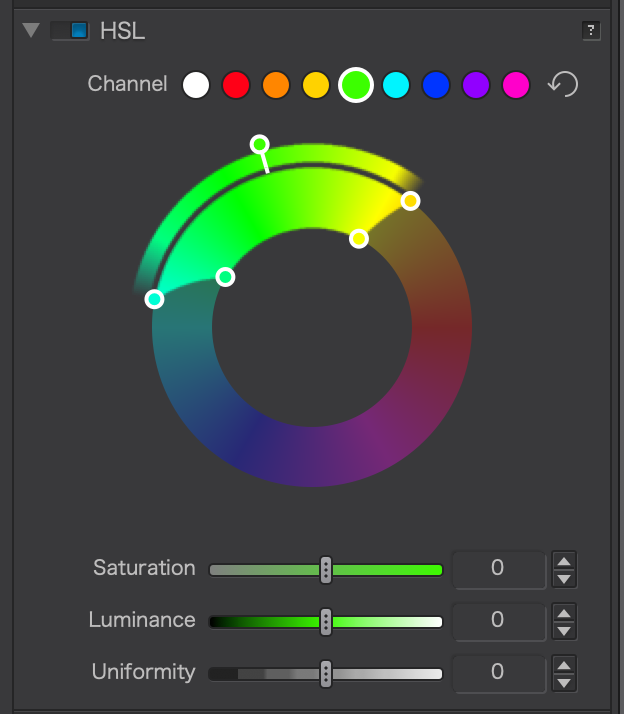
Step 3: Select a wider range of colors
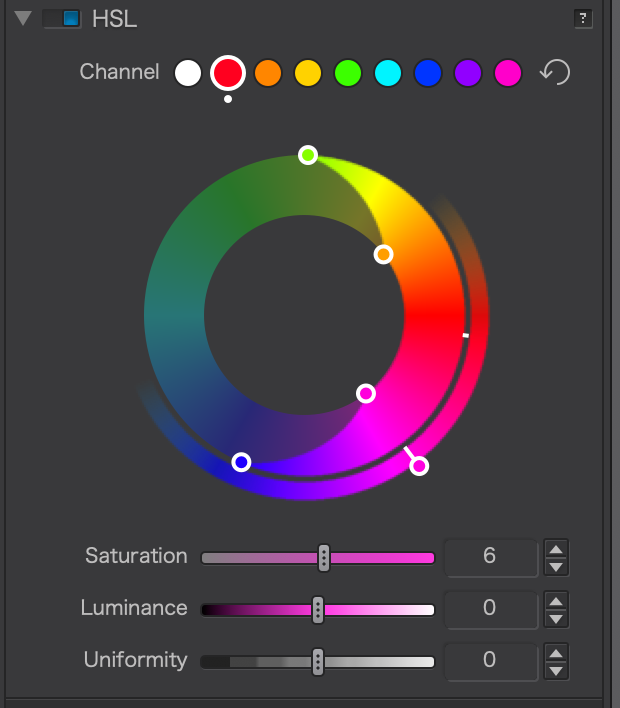
If we go back to the Red color selection you can select a wider range of color by moving the white circles on the inside of the wheel.
We’ve increased it to include some of the Orange tone, plus Yellow and some Red-Violet.
Step 4: Adjust saturation
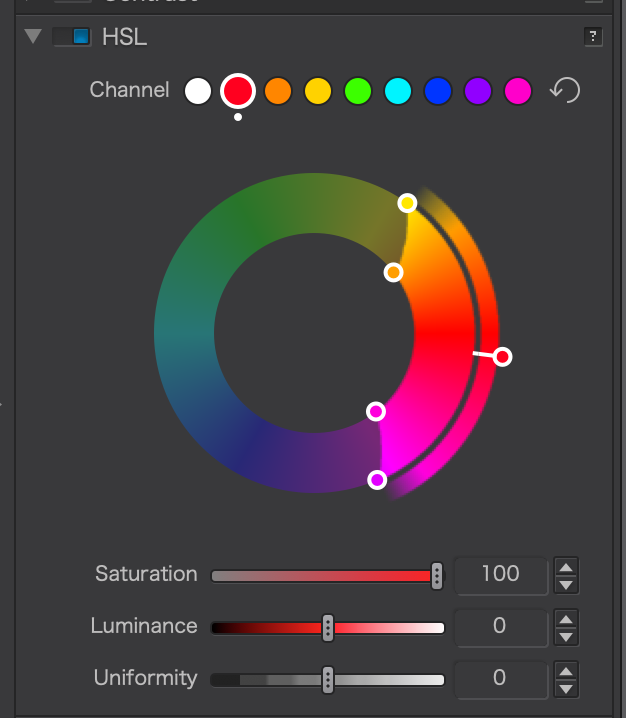
The white circles on the outer area of the colour wheel can also be moved. This is to determine the transition (or blending) of the adjustments.
The wider the range, the more improved blending you will get.
We’ll now turn the saturation back down to a normal level and use the final white circle to change the targeted colour to another.
Step 5: Experiment with color changes

Again, for the purposes of this tutorial, we’ve selected Violet to create an obvious visual difference. Our model and all the other targeted areas have duly become violet.
Notice that if we home in on our model’s jeans, though, they remain blue: there is no bleed into adjacent colors as we begin to change them. This is incredibly precise and very powerful work by DxO.
Making a person purple may not be something you ever need to do, but now we’re going to reset the image back to its starting point so that we can have a look at another way to use the wheel for better overall color management.
Step 6: Make adjustments with the Uniformity slider
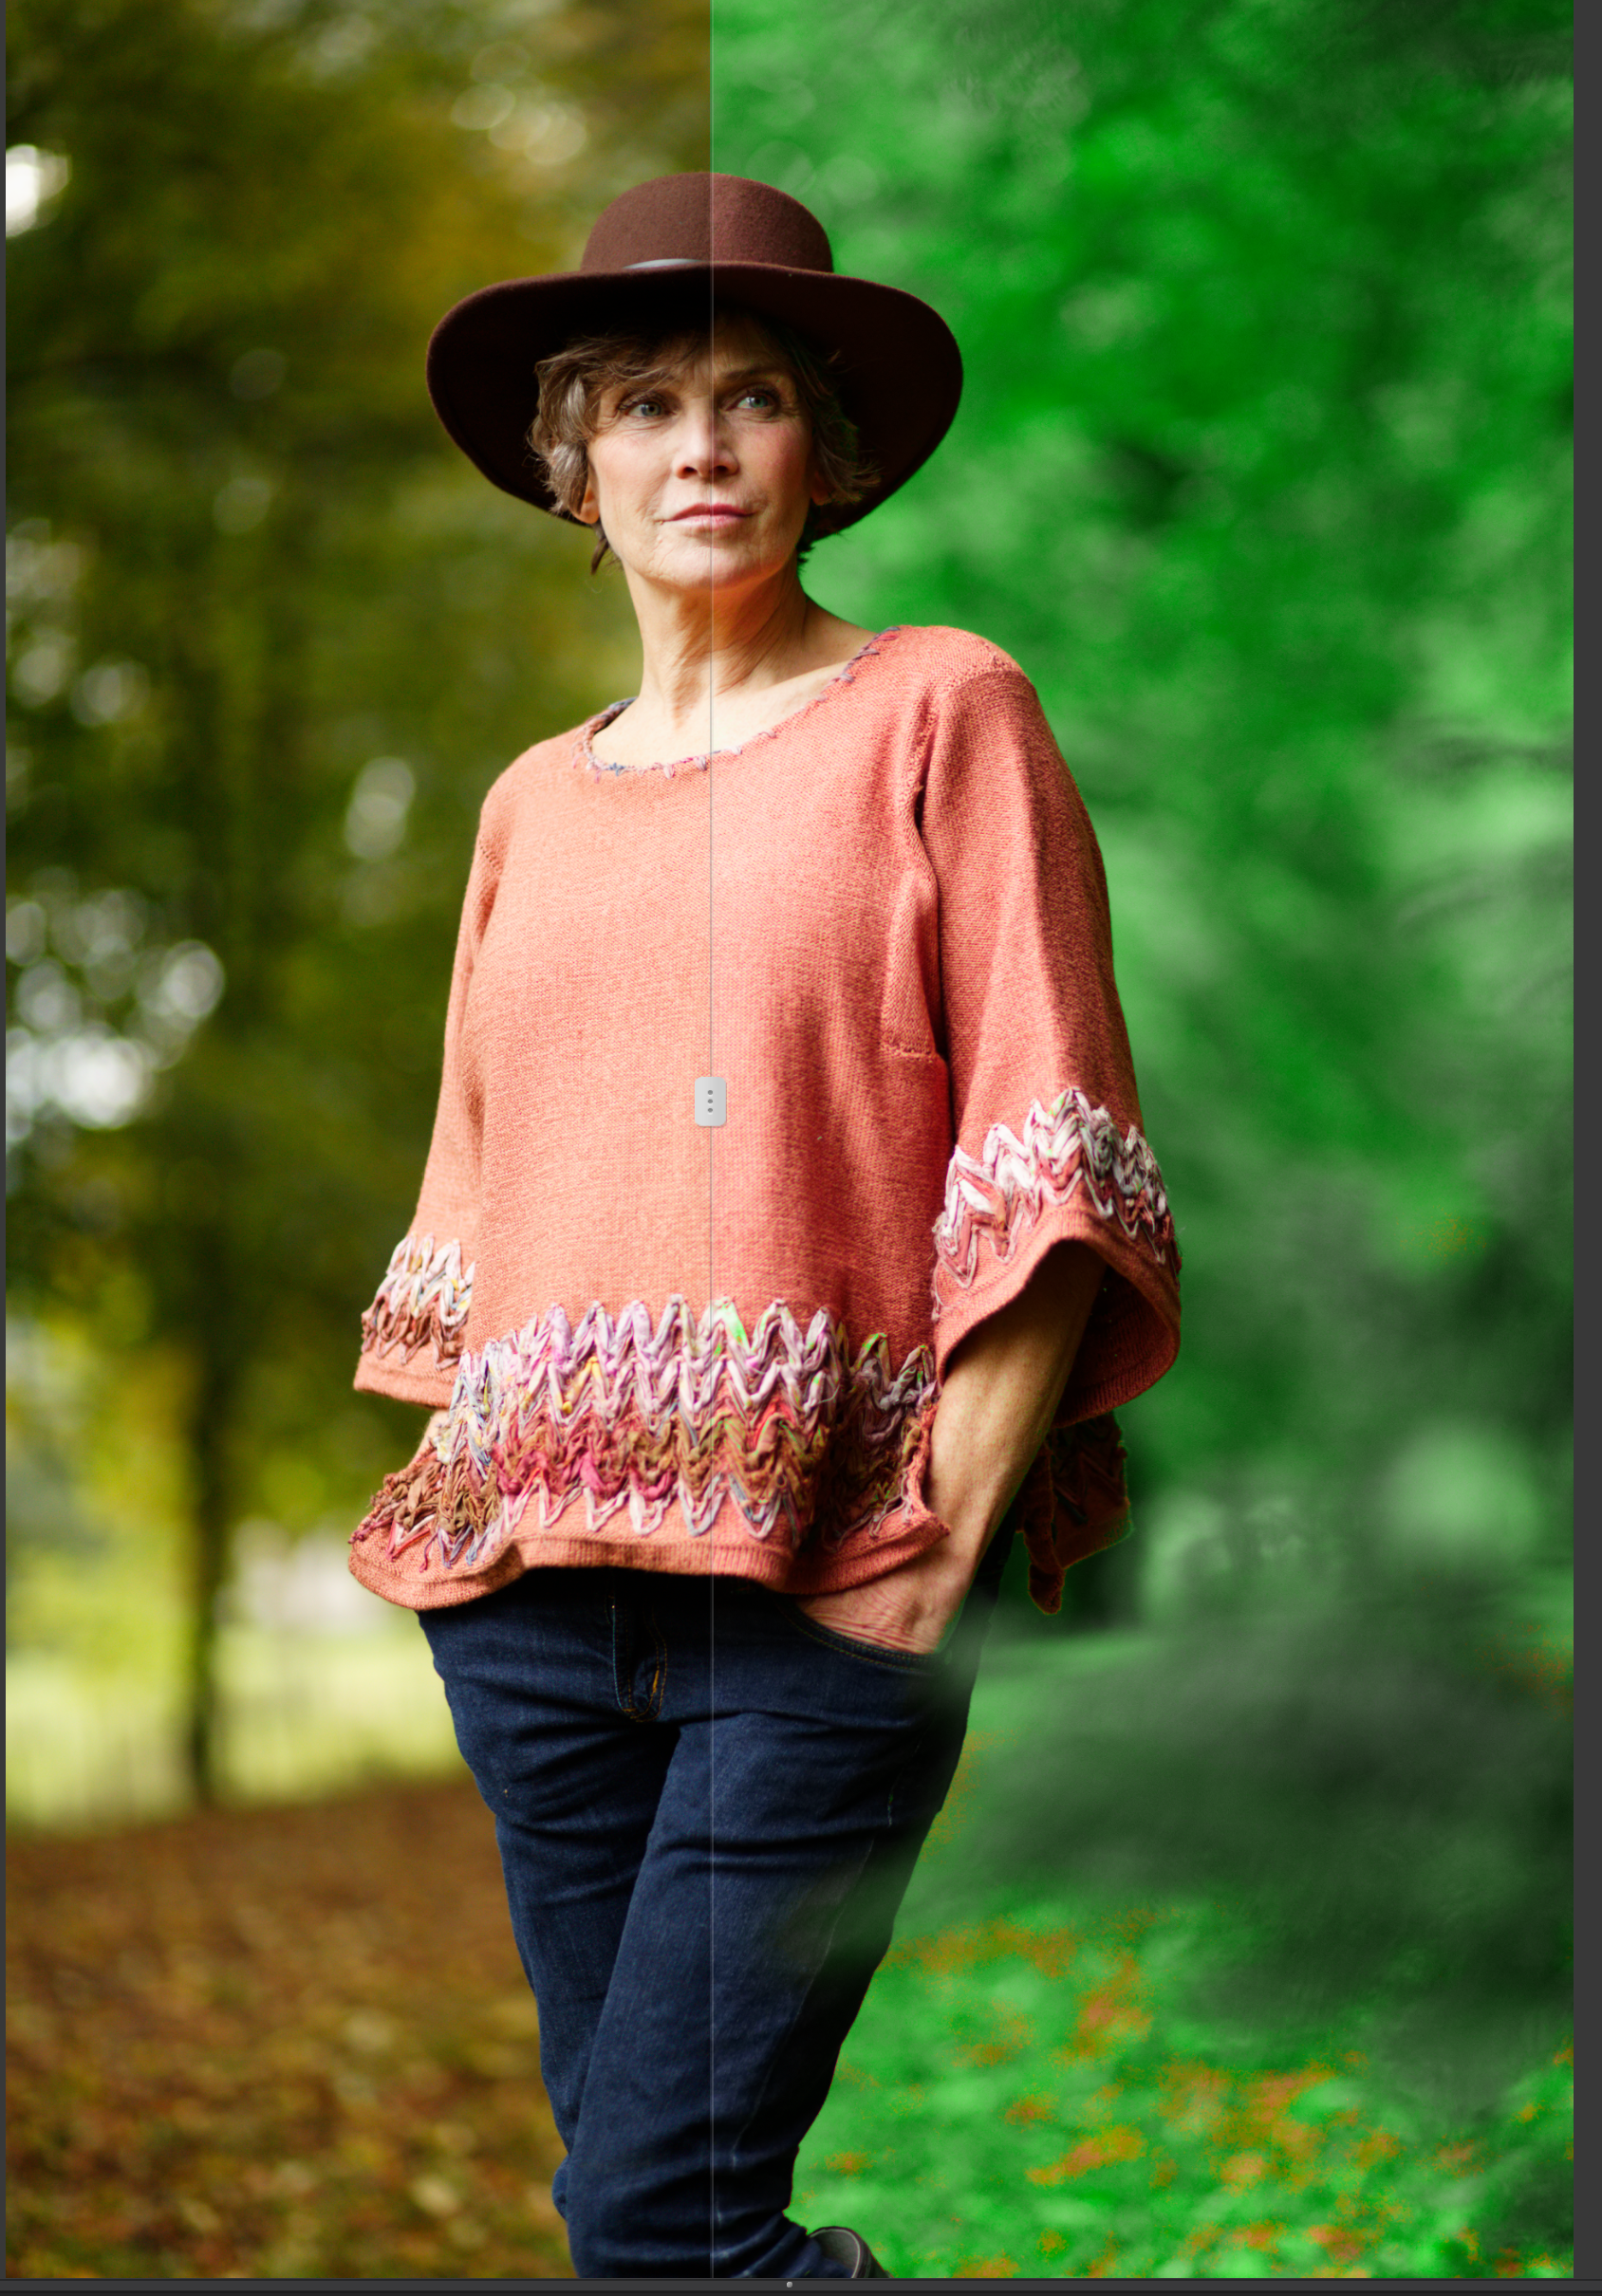
We’ll initially use the slider by increasing it all the way up to surround our subject with an even green color (notice that we’ve also extended the range of the green to incorporate some of the yellow which was also present in the background).
To conclude, we’re going to do the same with the red tones to give a more even look across the clothing and skin.
Step 7: Review the final image
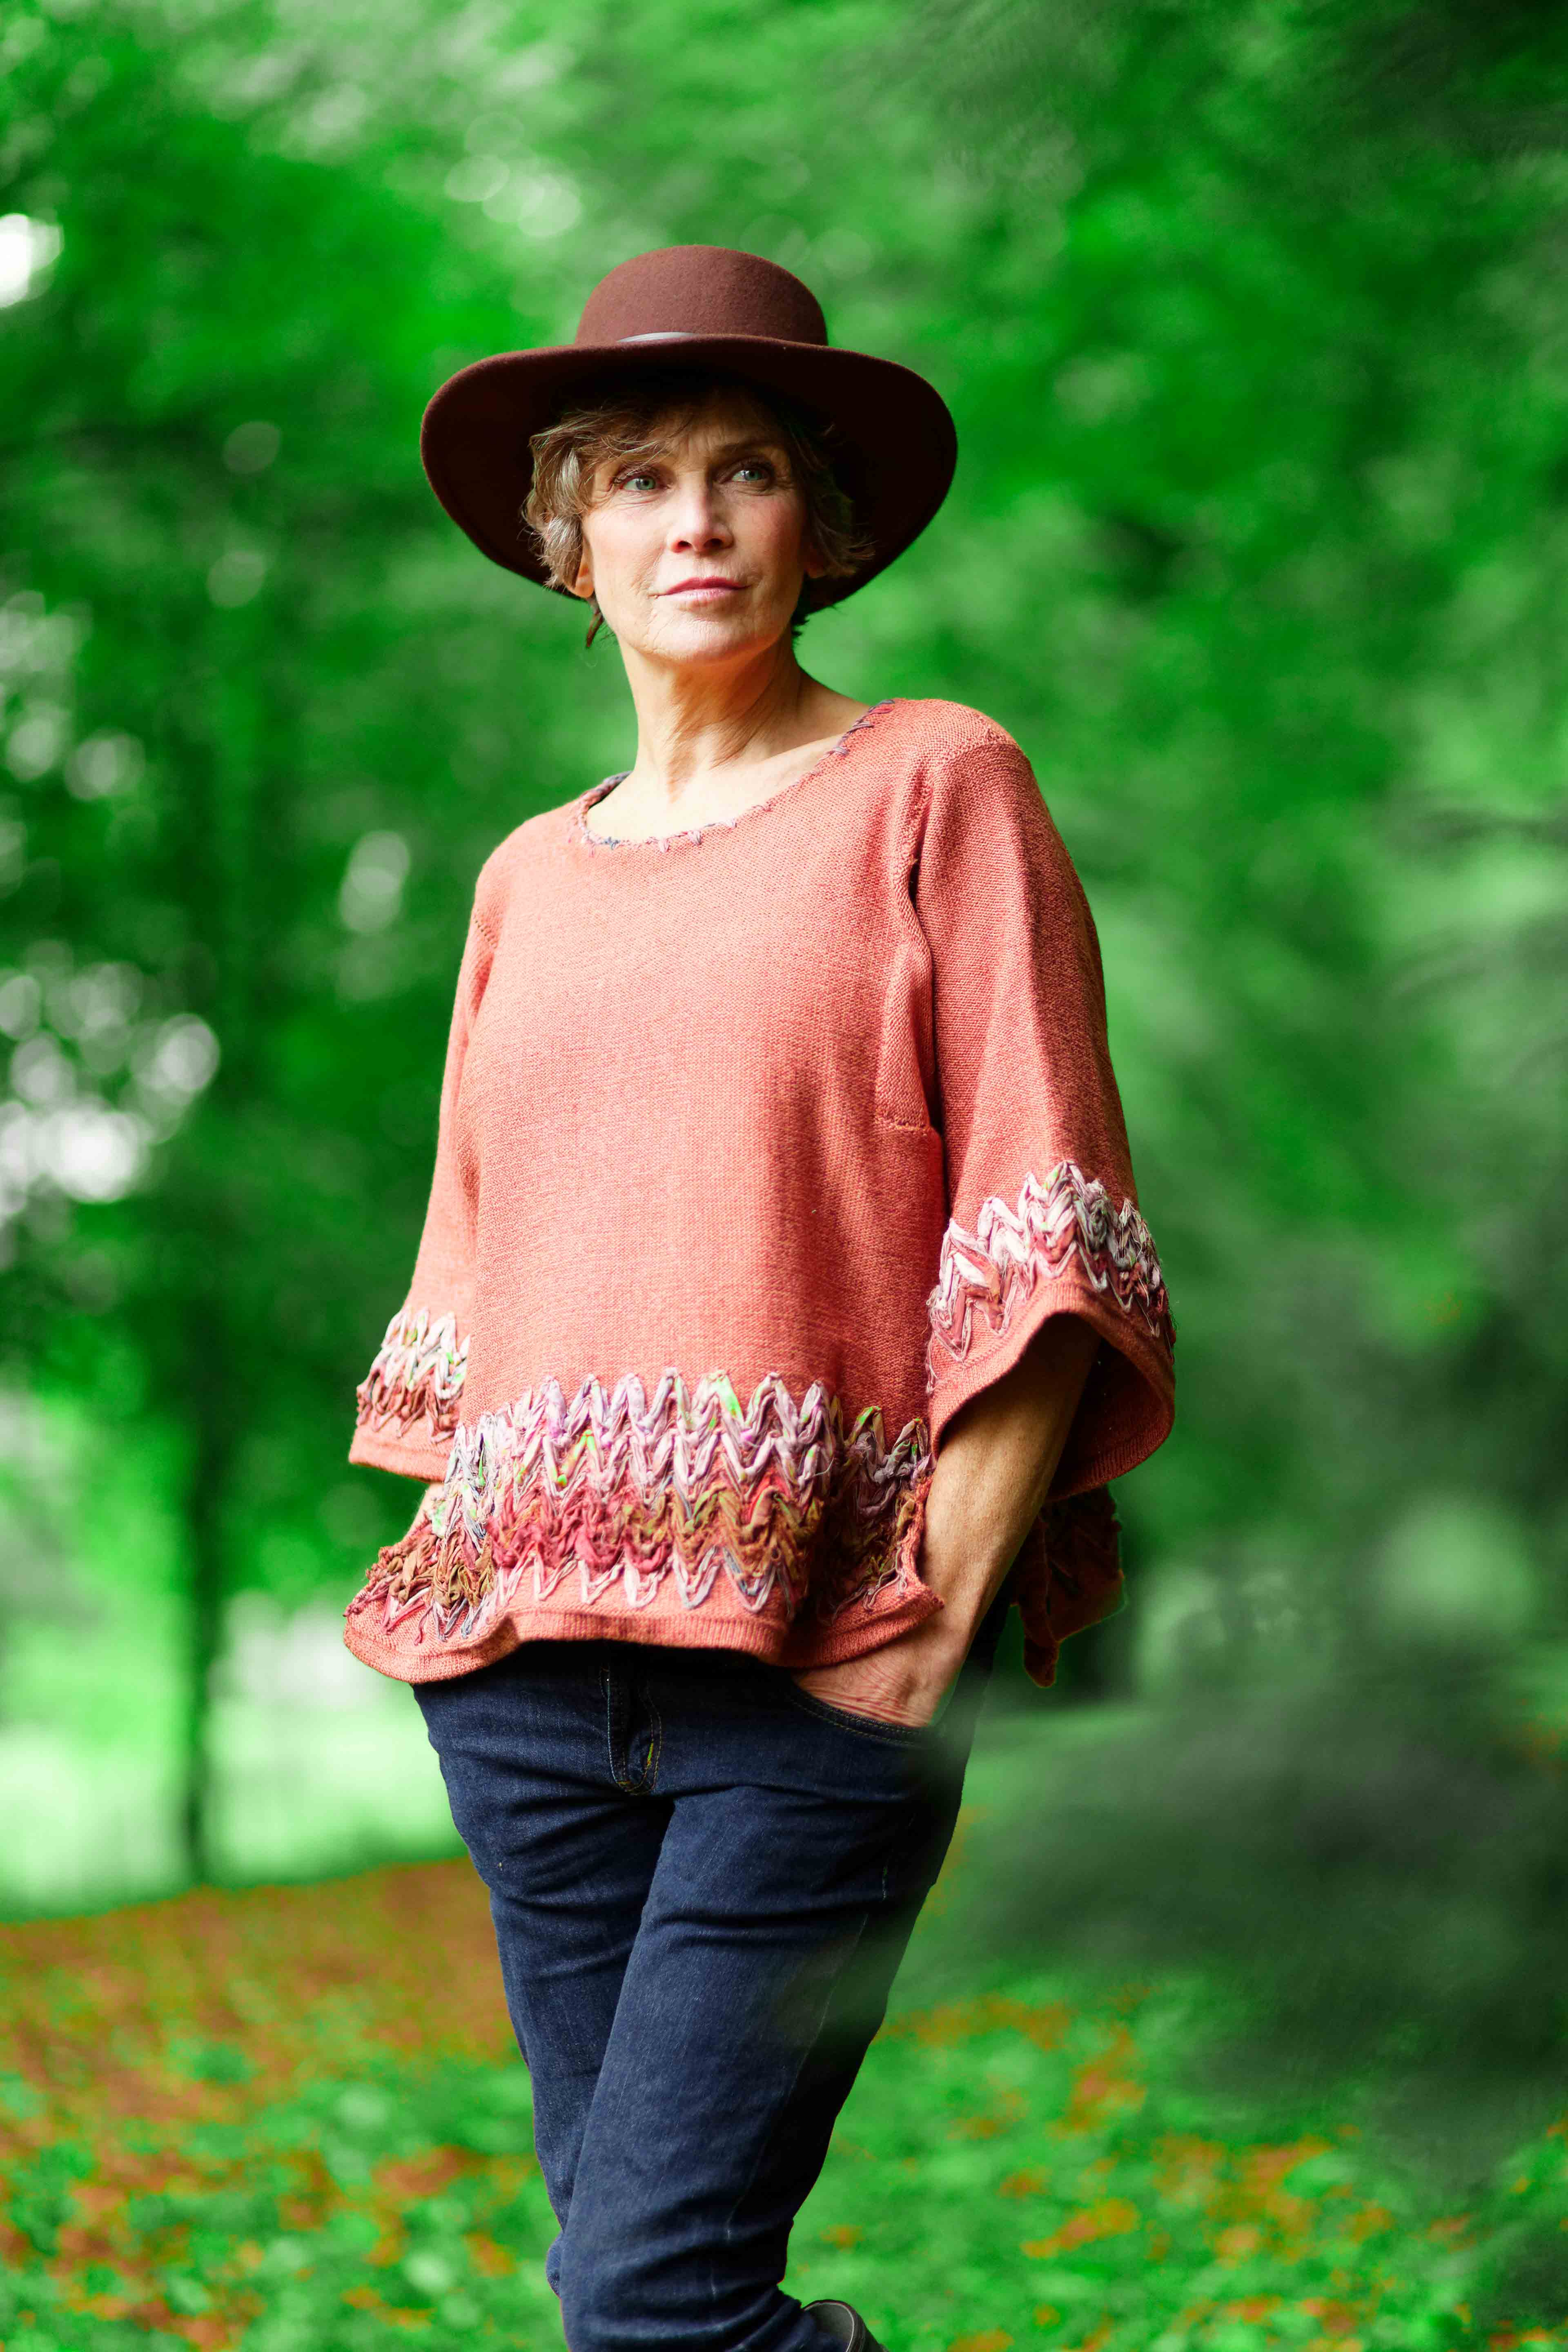
So here's our final image after making just a couple of quick and easy changes within the ColorWheel.
Thanks to PhotoLab’s fully customizable graphical interface, you can also unhook the tool from the column on the right and place it wherever you like on the screen – another handy feature.
Read more:
How to use Nik Collection 2 by DxO
The best photo editing software you can get right now
The best photography tips: 147 techniques, tips and tricks
Get the Digital Camera World Newsletter
The best camera deals, reviews, product advice, and unmissable photography news, direct to your inbox!
Alistair is the Features Editor of Digital Camera magazine, and has worked as a professional photographer and video producer.
