How to use the iPhone Portrait Mode to take stunning people pictures
Adjust the background bokeh blur before (and after) you’ve snapped a portrait and enjoy different lighting effects
▶ Watch the video guide to iPhone's Portrait mode
What is the iPhone Portrait mode?
DSLR or mirrorless camera-owning photographers can capture a more attractive portrait by using a wider aperture setting. The wider the setting (such as f/1.4) the blurrier the background blur (or bokeh) will be. A wide aperture causes distracting background details such as photo-bombing people or graffiti on a wall to turn into abstract shapes and colors, enabling the eye to focus on the foreground subject of the portrait. You can use the Aperture Priority mode to select a wider aperture, safe in the knowledge that the camera will use a faster shutter speed to avoid over-exposing the image.
In the default Photo Mode, the iPhone’s Camera app tends to set the aperture and shutter speed automatically to get the foreground and background looking sharp. If you shoot in low light and with the subject close to the camera you may create a background bokeh naturally, but you have no manual control of the aperture setting when using the iPhone Camera’s default Photo Mode.
However, if you swipe to the Camera app’s Portrait Mode you can add a distinctive DSLR-style background bokeh to your shots for a more professional-looking portrait.
Which iPhones have the Portrait Mode?
The Portrait Mode was first introduced on the iPhone 7 Plus in 2016 (but not available on the basic iPhone 7). Every iPhone generation model since has had the feature.
We used an iPhone 13 Pro Max to capture and edit the images in this tutorial.
How does the iPhone Portrait Mode work?
In Portrait mode the Camera app isolates the foreground subject from the background using a mask. You can then manually drag a Depth slider to choose a wider aperture such as f3.5. The iPhone then uses the mask to blur the background while keeping the foreground subject looking sharp. You can adjust the Depth slider while framing up your subject for a shot safe in the knowledge that you can also adjust the blur amount after you’ve captured the image using the post-production tools in the iOS or macOS Photos app.
iPhone Portrait mode: what are the strengths?
Because Portrait mode uses software to mimic the bokeh produced by a DSLR’s aperture this gives you more creative control over an iPhone portrait’s bokeh than you’d get with the baked-in bokeh produced by a DSLR. You can look at a Portrait mode picture in Apple’s Photos app and use a Depth slider to adjust the amount of blur to suit your creative requirements.
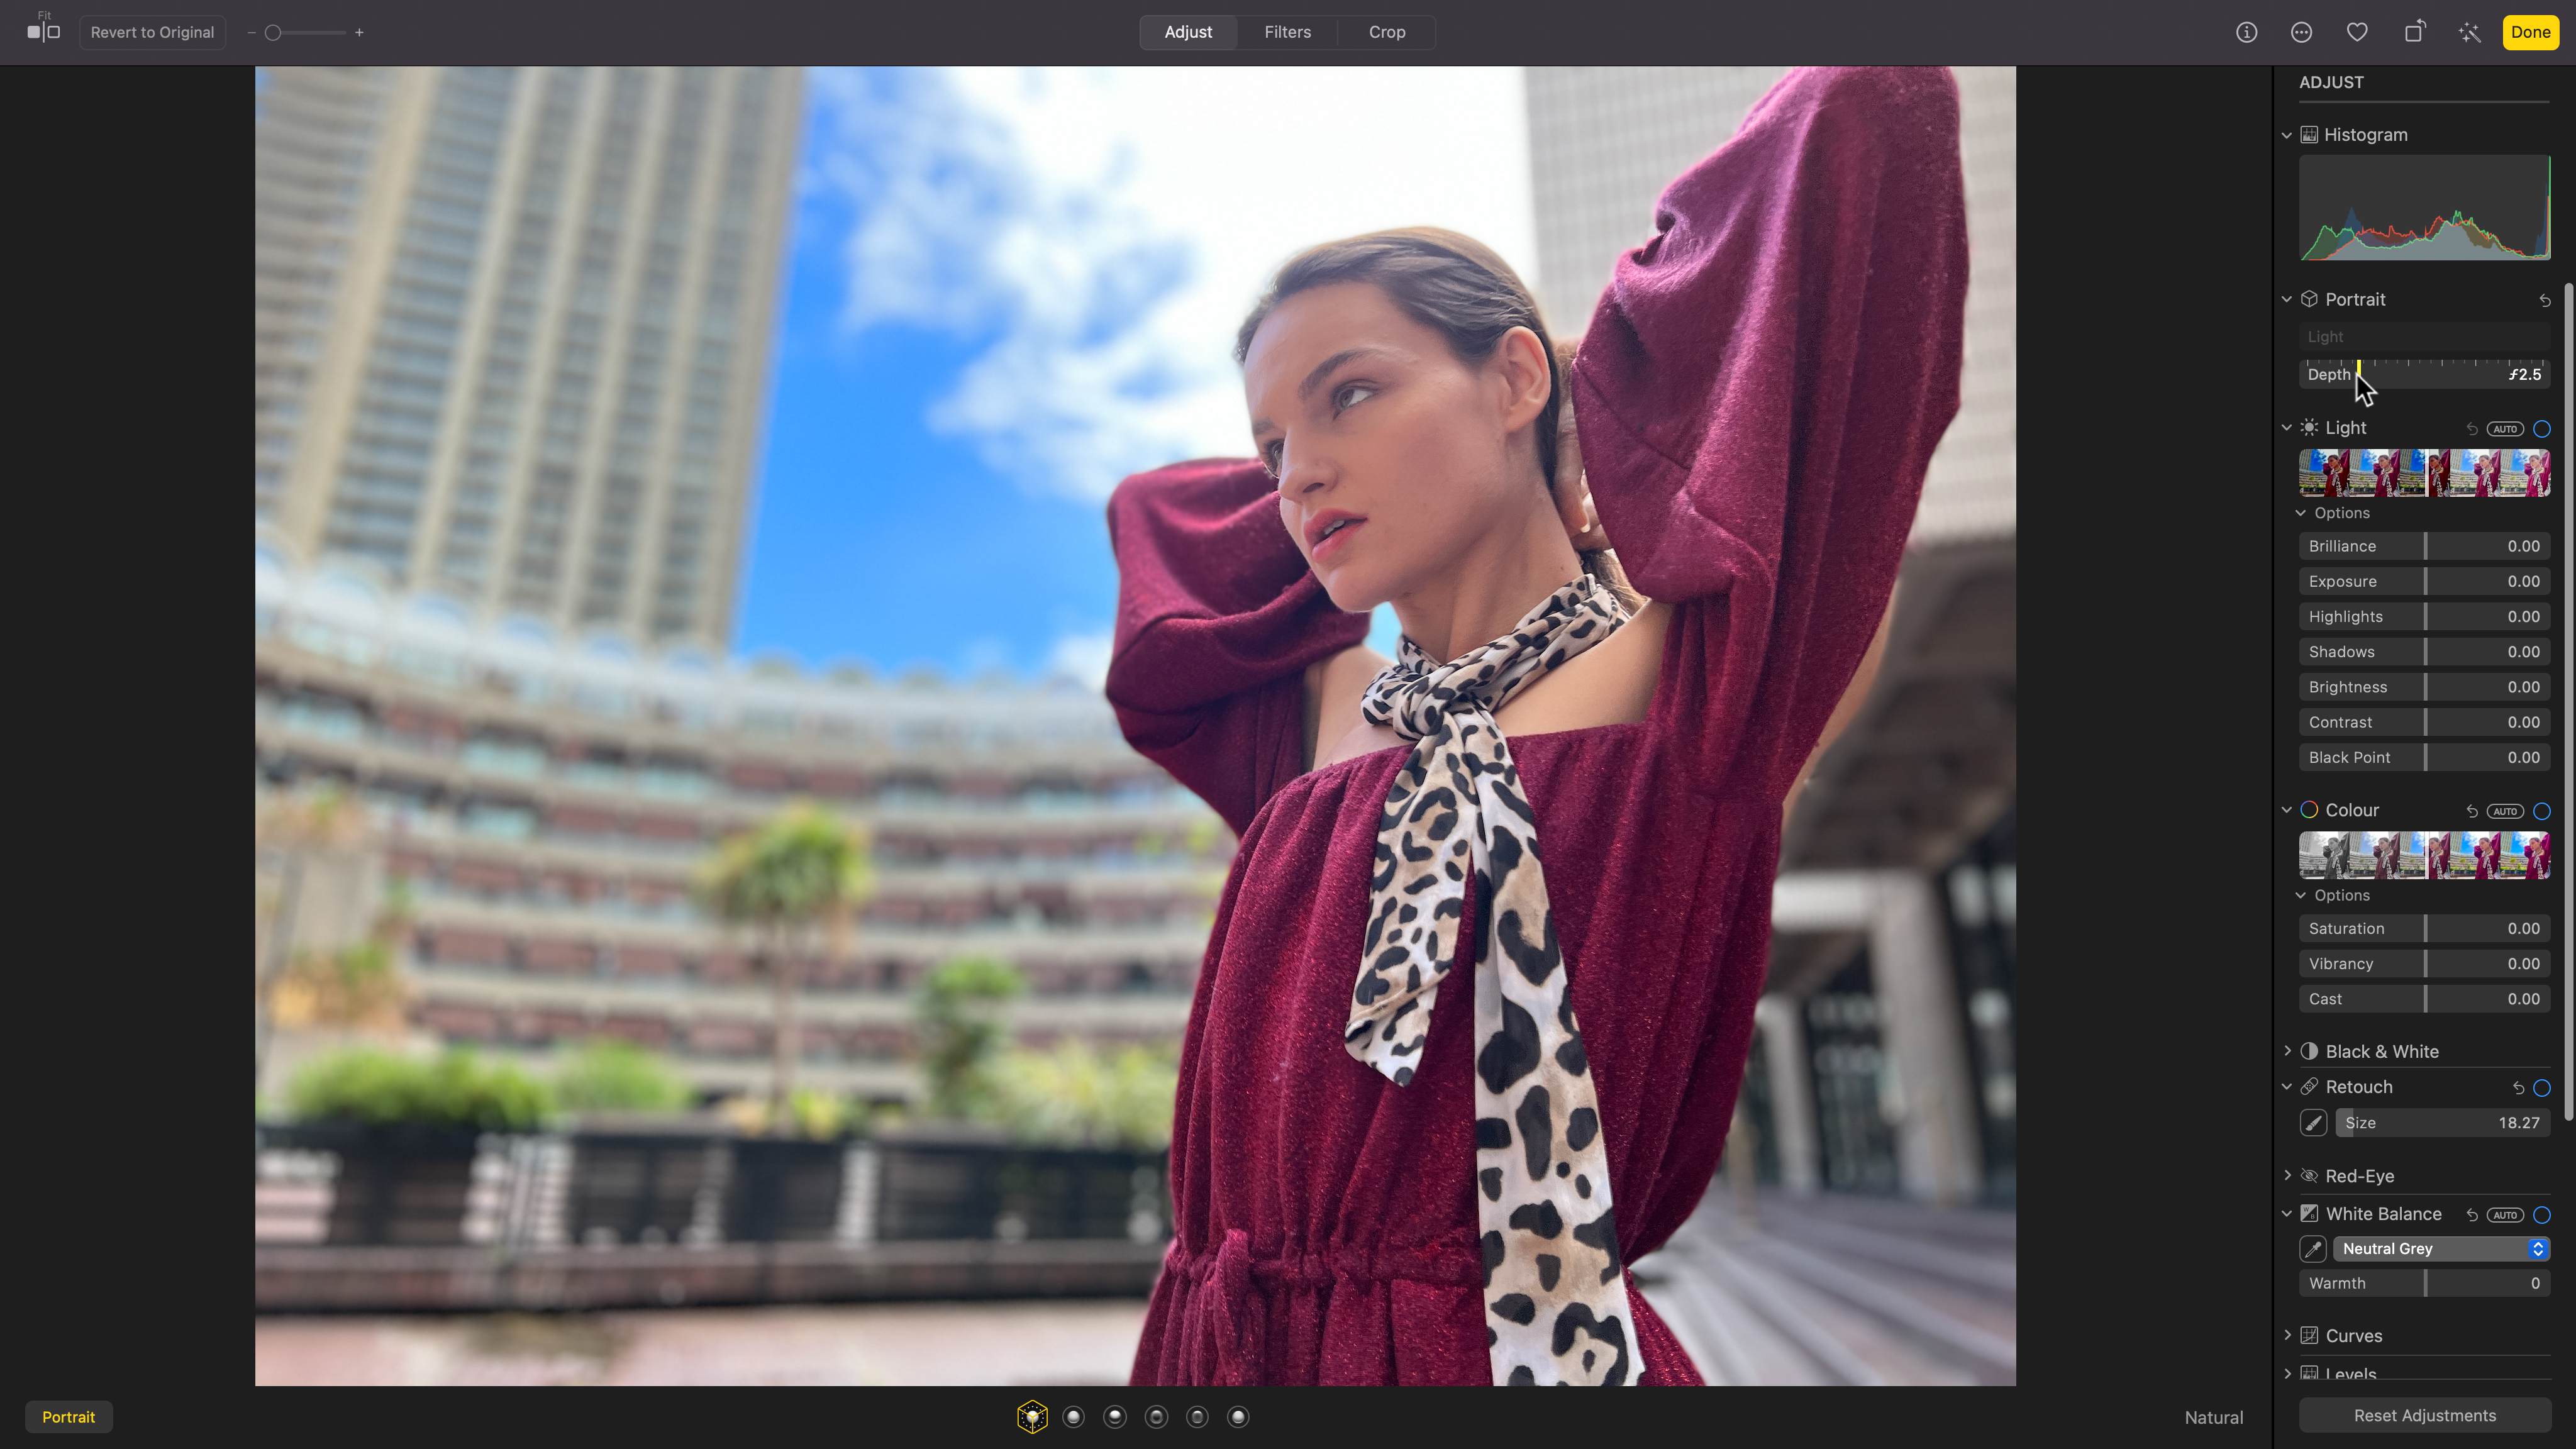
Unlike baked-in DSLR bokeh you can adjust the strength of the Portrait mode’s background blur during the shoot (or afterwards in the Apple Photos app’s Adjust panel as we see here.)
Another of Portrait mode’s strengths is its ability to add lighting effects to your shots. Professional photographers can use an external flash or LED light to add modeling to a subject's face. A light source from a side angle can emphasize the contours of a subject's face. Portrait mode has a series of lighting presets that you can dial in to produce a range of looks. You can even use the mask created by Portrait mode to completely remove the background of the shot, add high-key lighting and mimic a white studio backdrop. Check out our mini walkthrough (and this tutorial’s accompanying video) to see these software lighting effects in action.
iPhone Portrait mode: what are the weaknesses?
Because Portrait mode is faking the bokeh effect it has its limitations. On older iPhone’s (such as the 7 Plus) you can only add background blur to shots featuring human faces. Portrait Mode wouldn’t recognize or add a mask to other subjects. On newer iPhones (from the iPhone 11 onwards) you use Portrait mode to adjust the bokeh behind people or objects. Sometimes Portrait mode fails to recognize every background detail. Complex areas such as gaps in the subject's hair may get missed when the mask is created, causing some background objects to remain sharp while others become blurred. This is less of a problem on newer Lidar-equipped iPhones such as the iPhone 12 Pro and iPhone 12 Pro Max onwards. On a super wide Depth setting (such as f/1.4) the blur can eat into the edges of the foreground subject, so you may need to dial in a slightly narrower aperture value for a more realistic-looking bokeh. Another limitation of Portrait mode is that you can’t capture a RAW (.dng) file when shooting in this mode.
Adjusting bokeh with iPhone Portrait Mode
Step 1: Photo mode
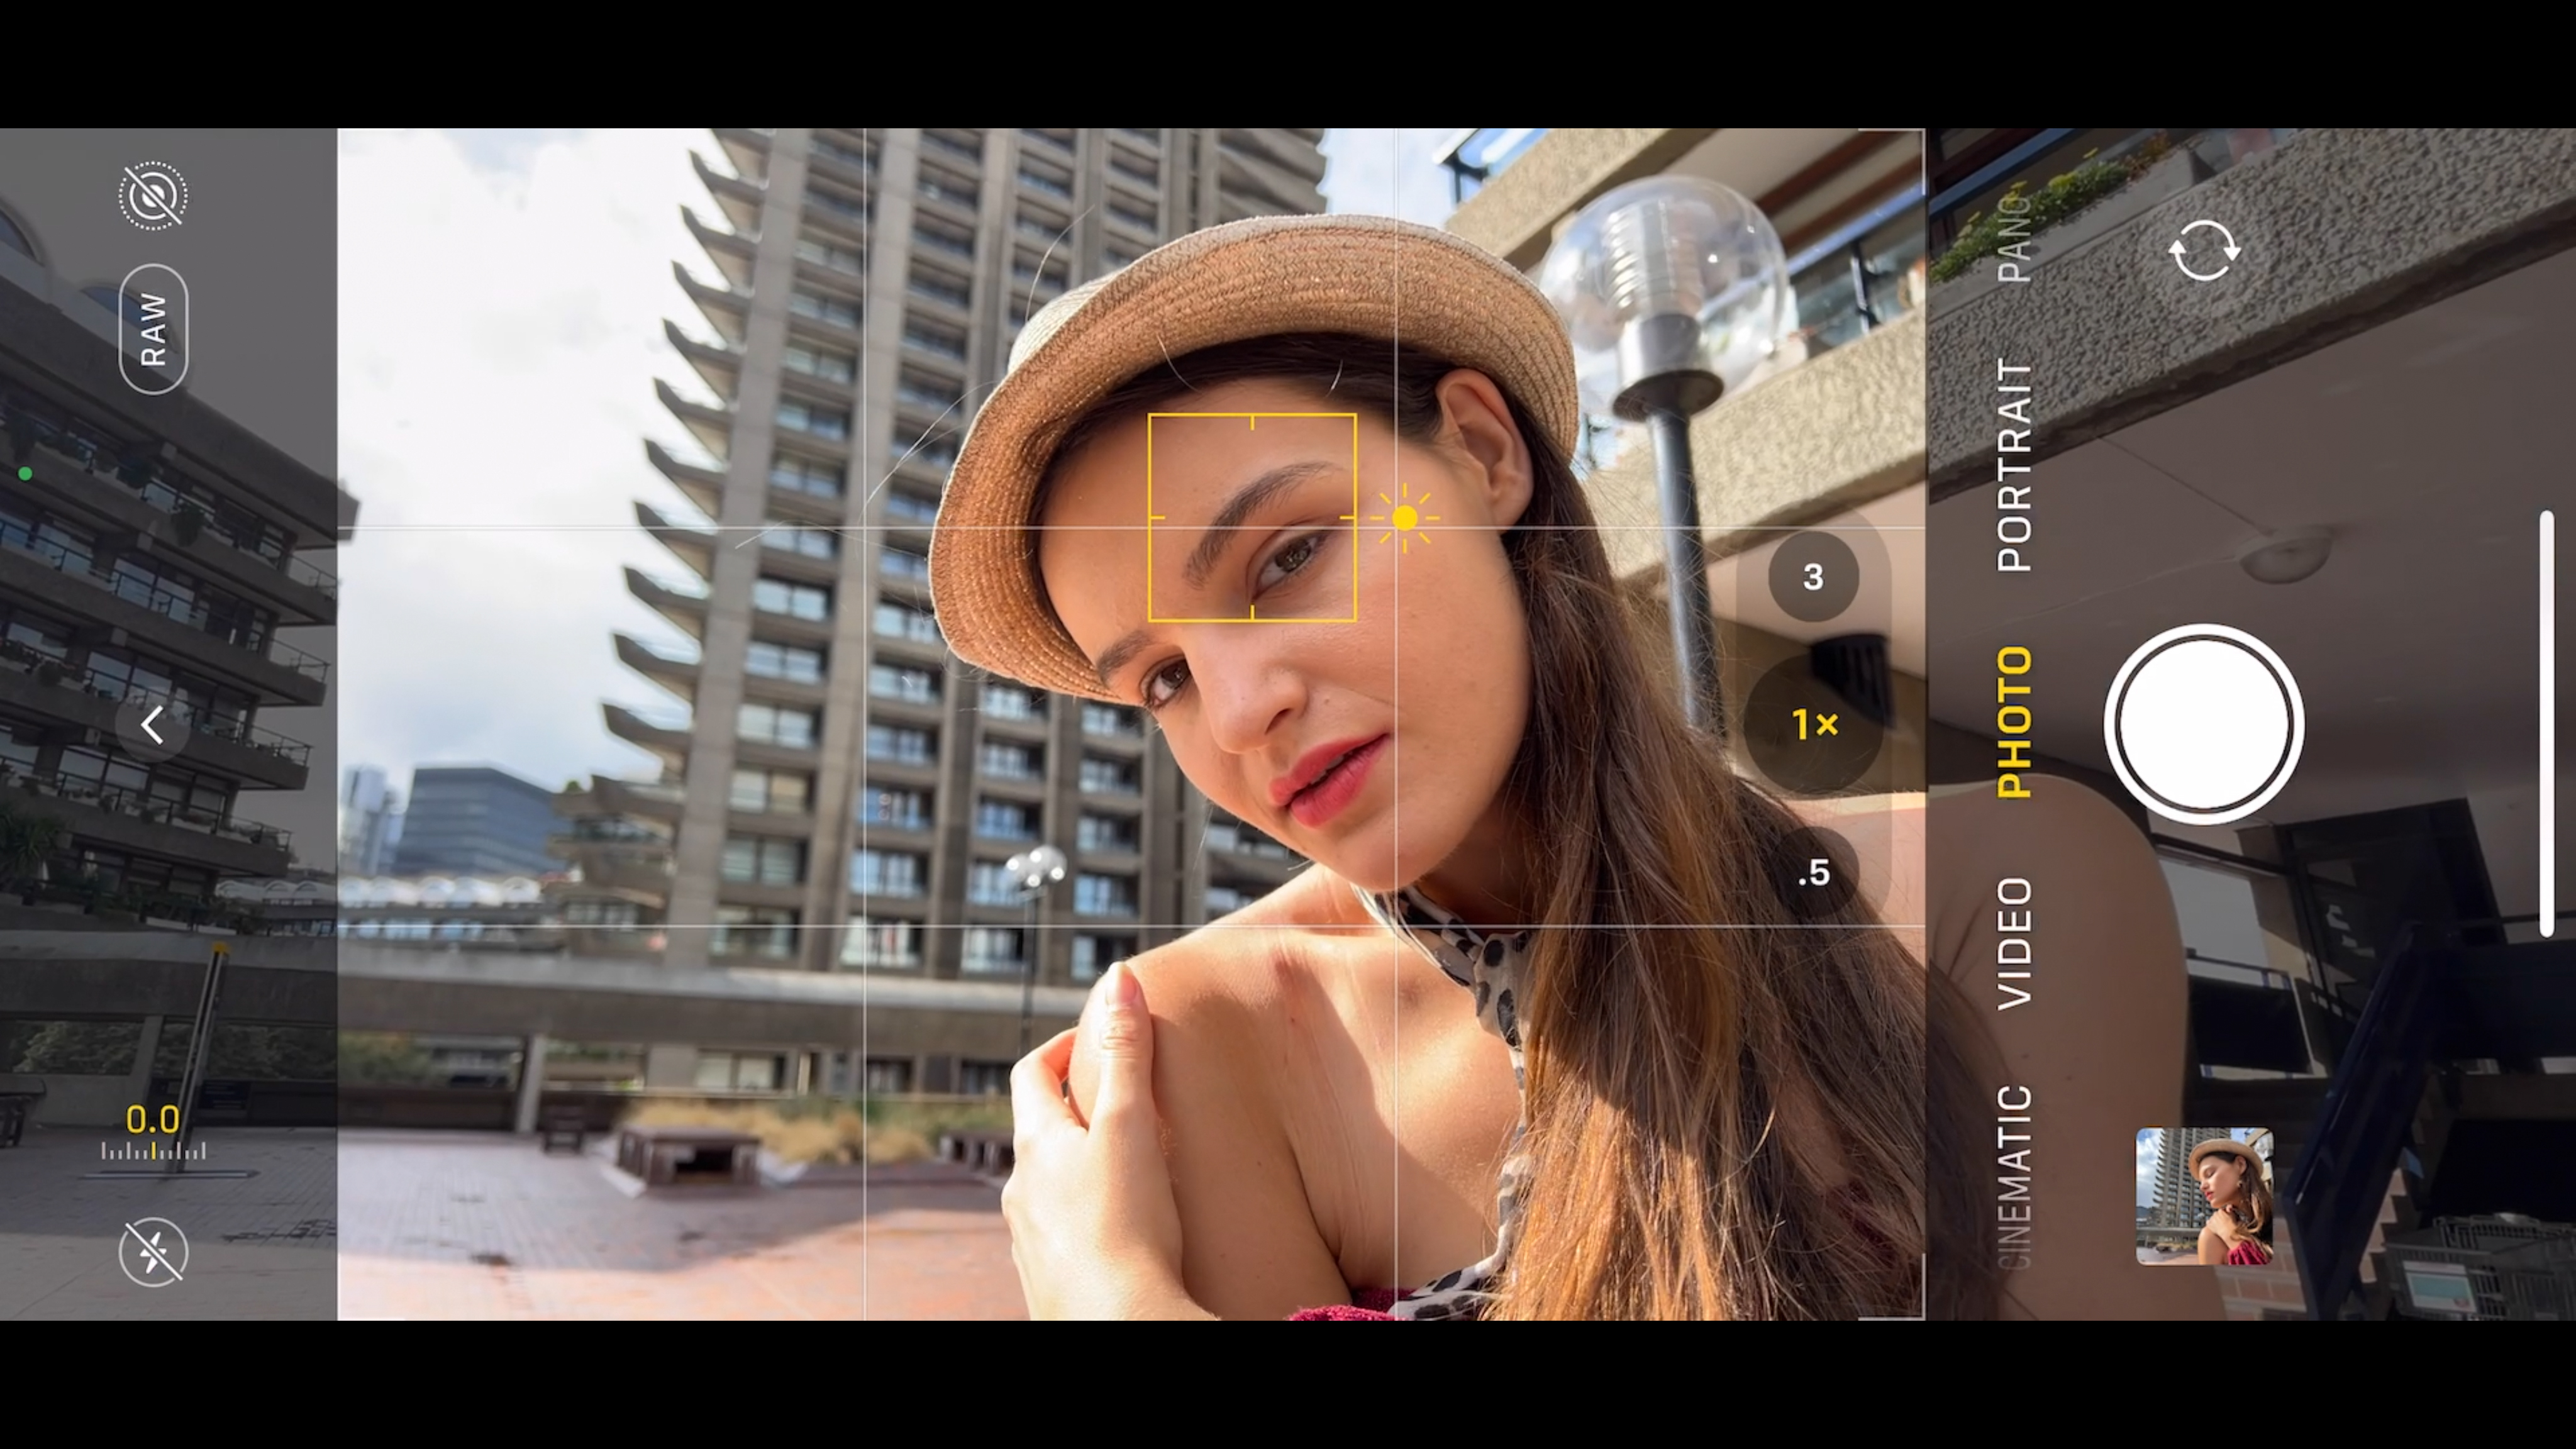
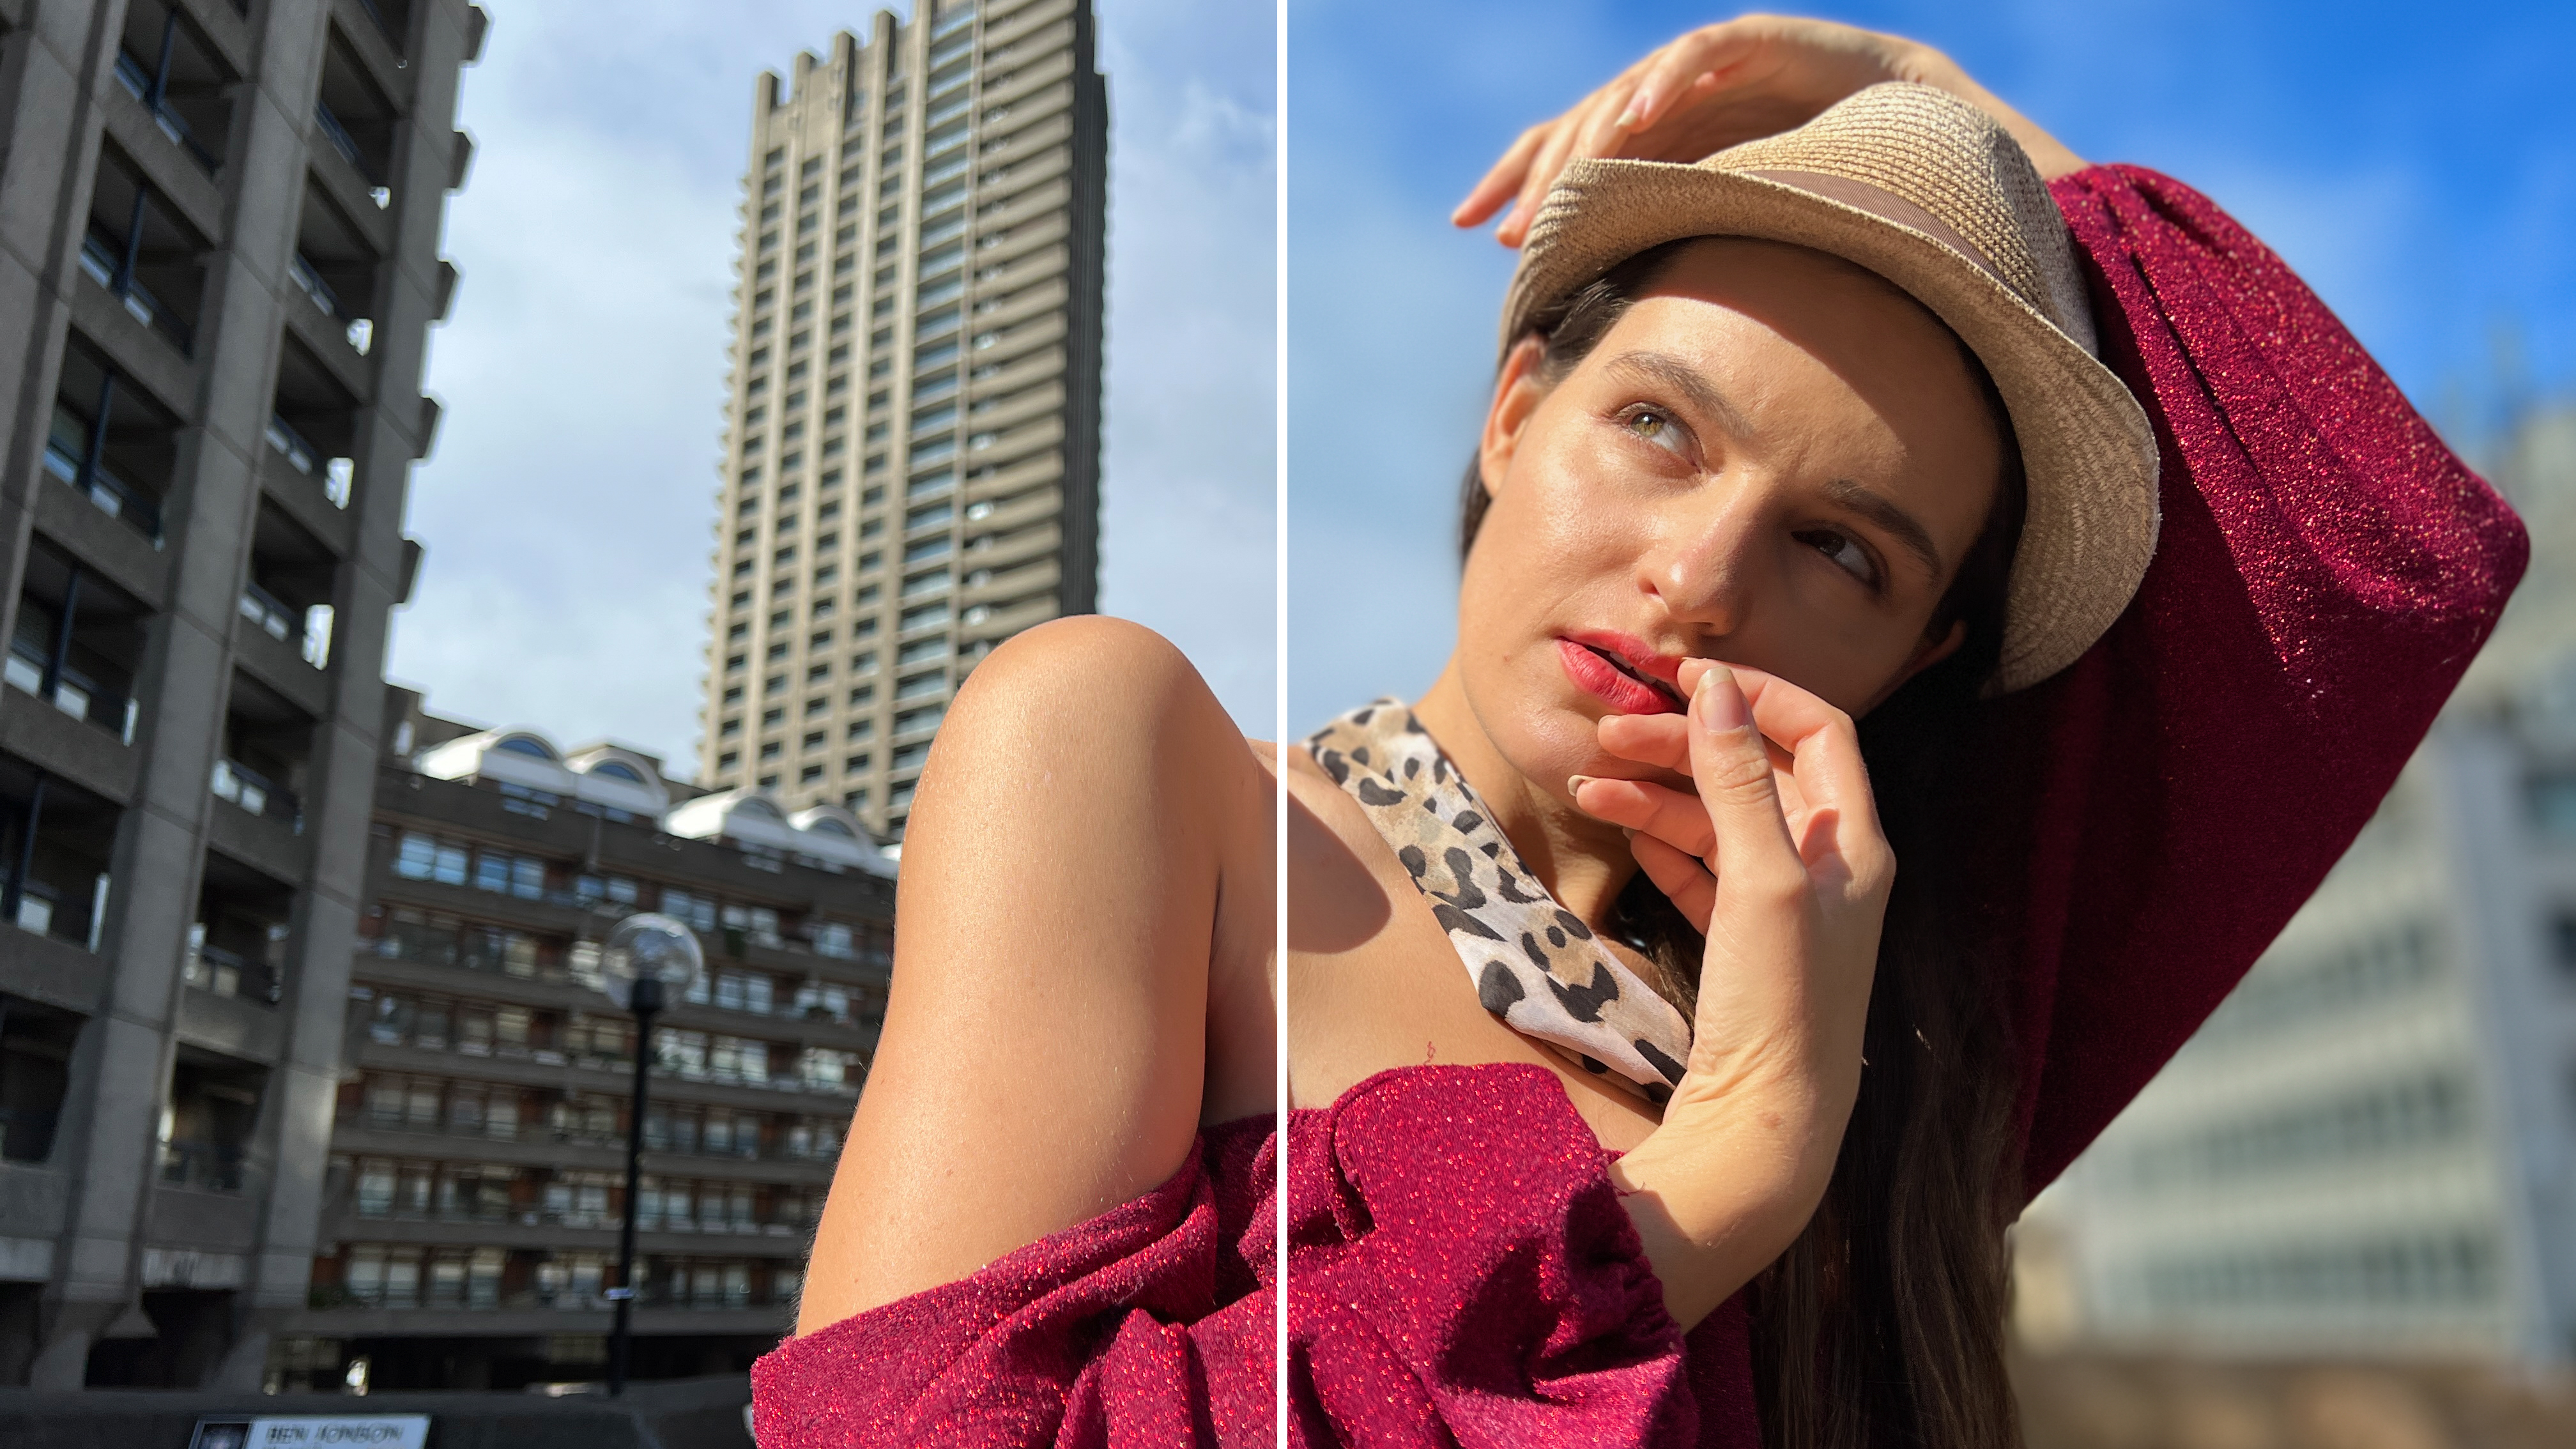
Using the Camera app’s default Photo mode there is a slight background blur due to the close proximity of the iPhone to the girl. However, the background details are is still relatively sharp. With a DSLR we could manually choose a wider aperture to blur the background more. To mimic this effect in the iPhone’s Camera app we need to swipe to Portrait mode.
Step 2: Choose Portrait mode
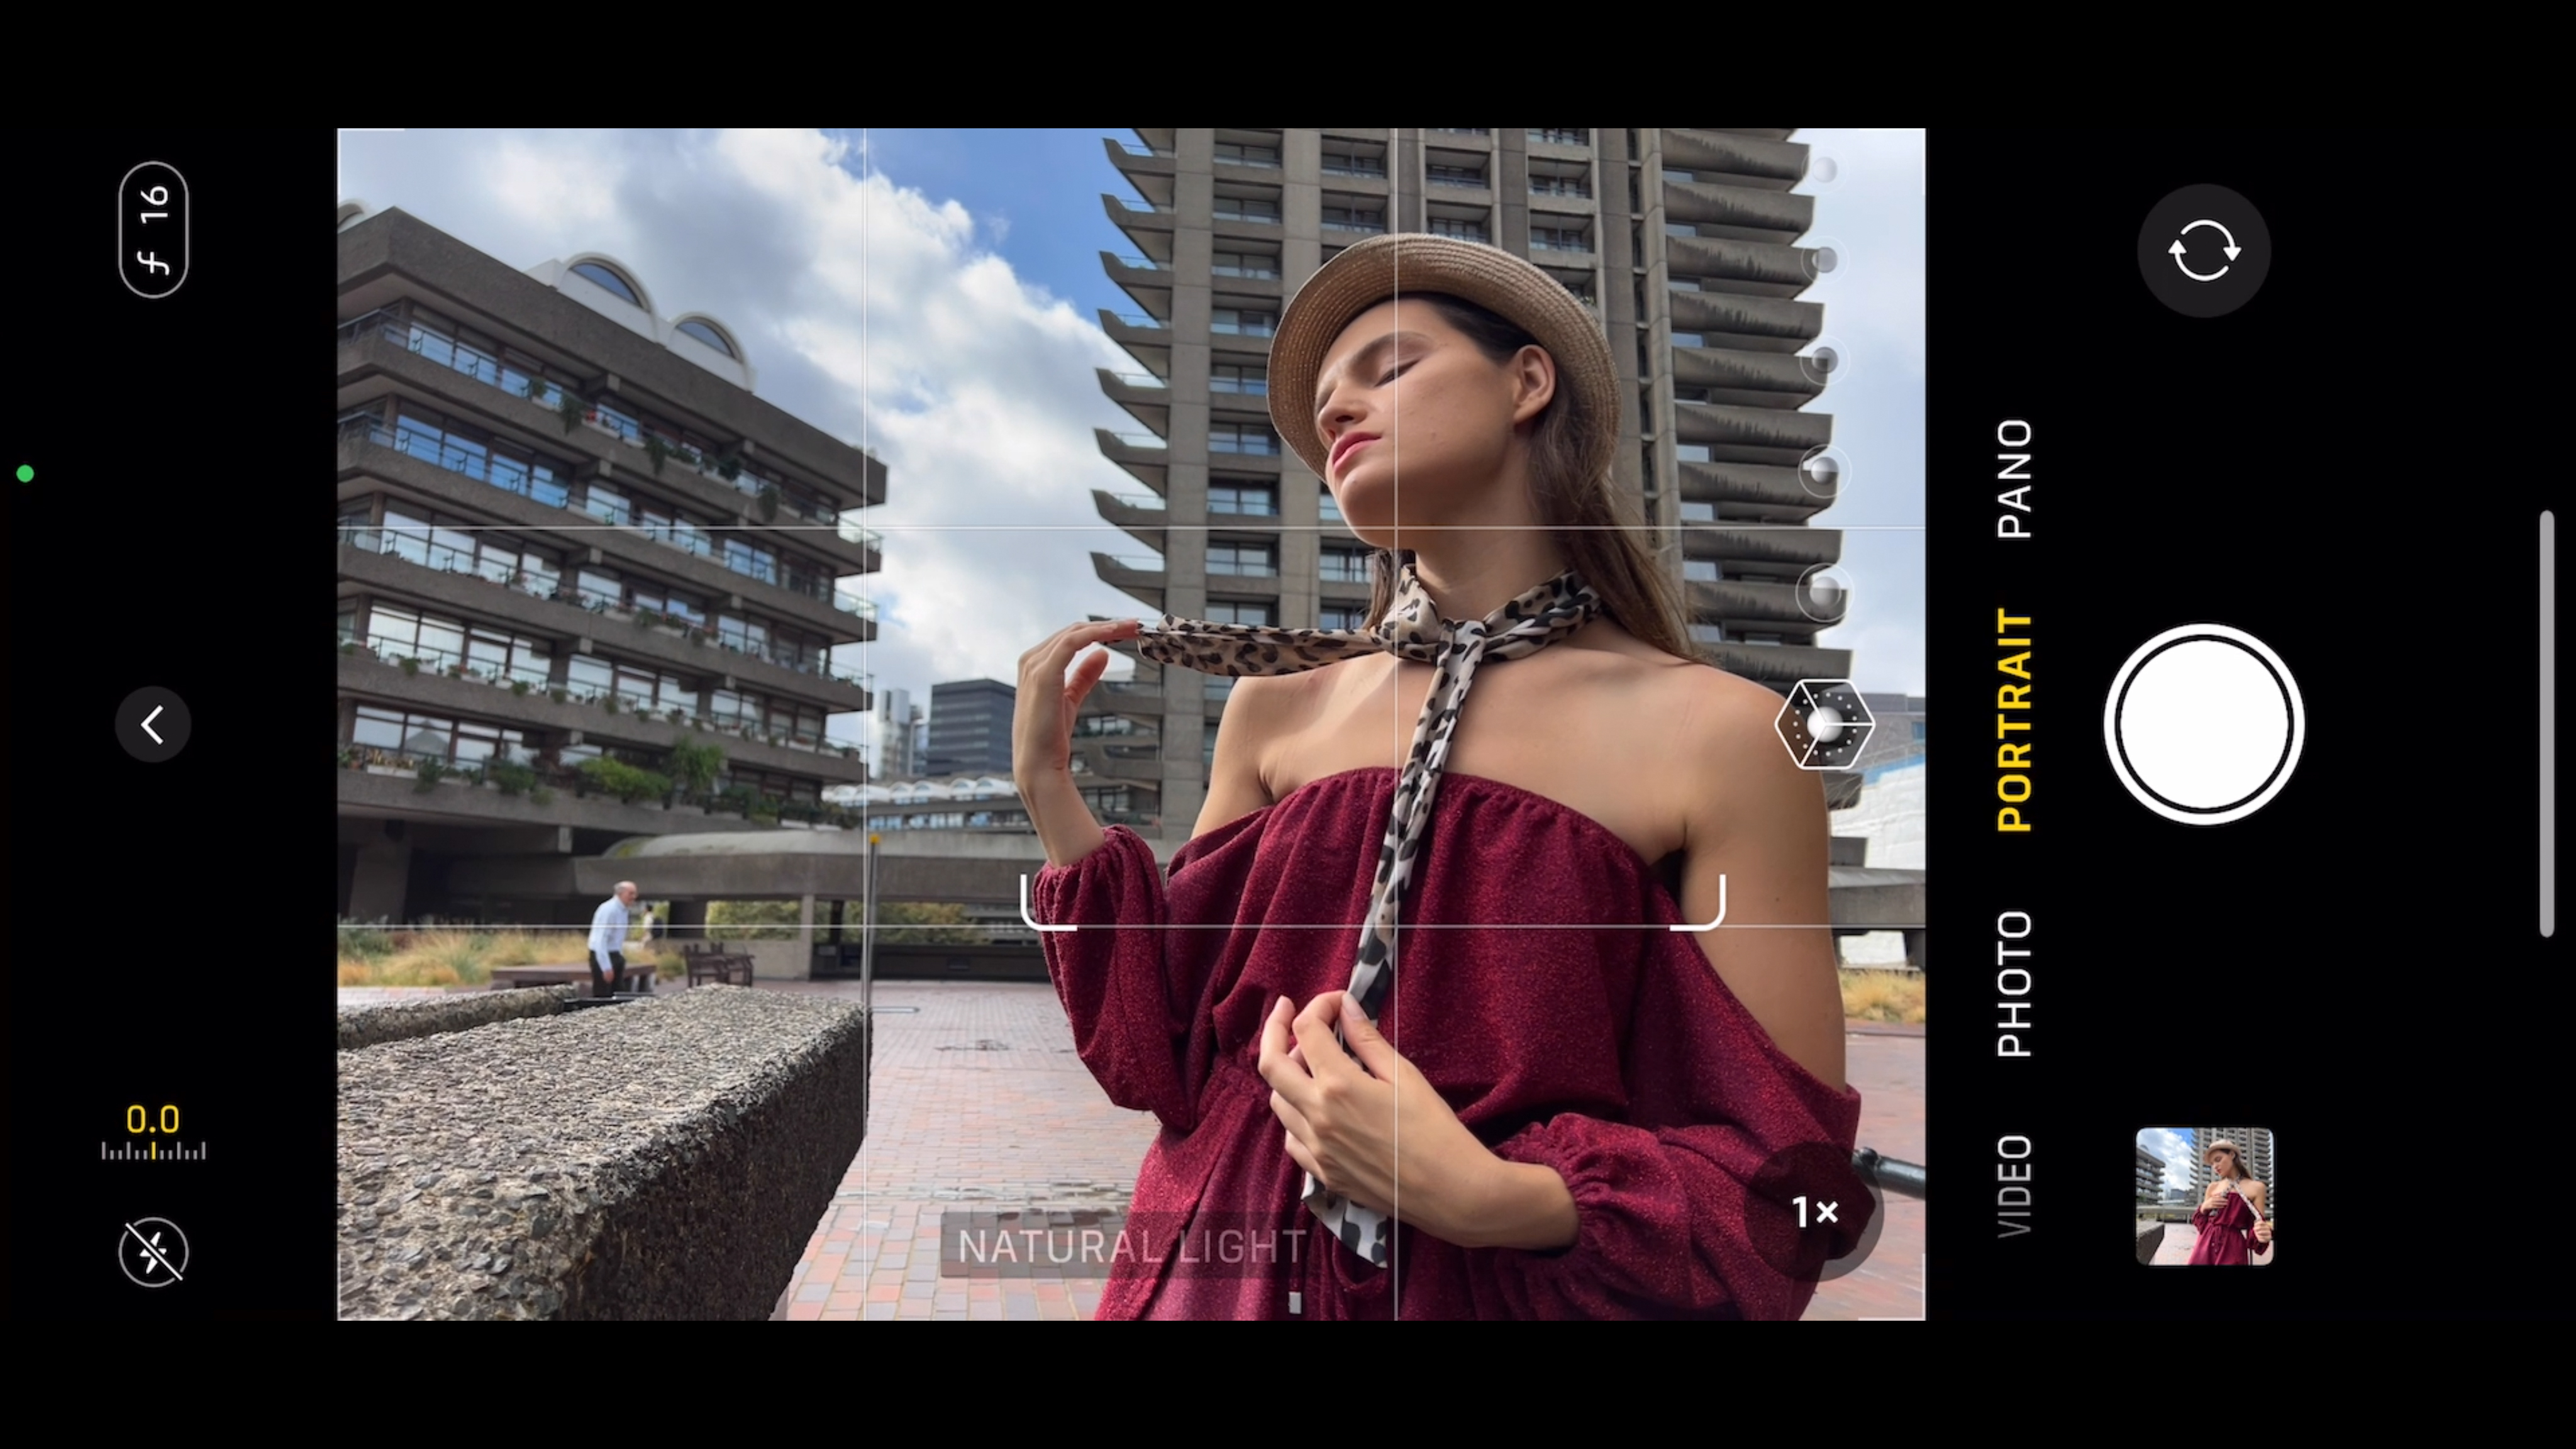
By swiping to Portrait mode you’ll see an aperture value at top left of the iPhone’s display. In this case, it’s a narrow f/16, resulting in a slightly blurred background that features distracting passers-by. By tapping on the aperture value you can access a handy Depth slider that enables you to dial in a different aperture value and add more blur to the background.
Step 3: Adjust aperture value
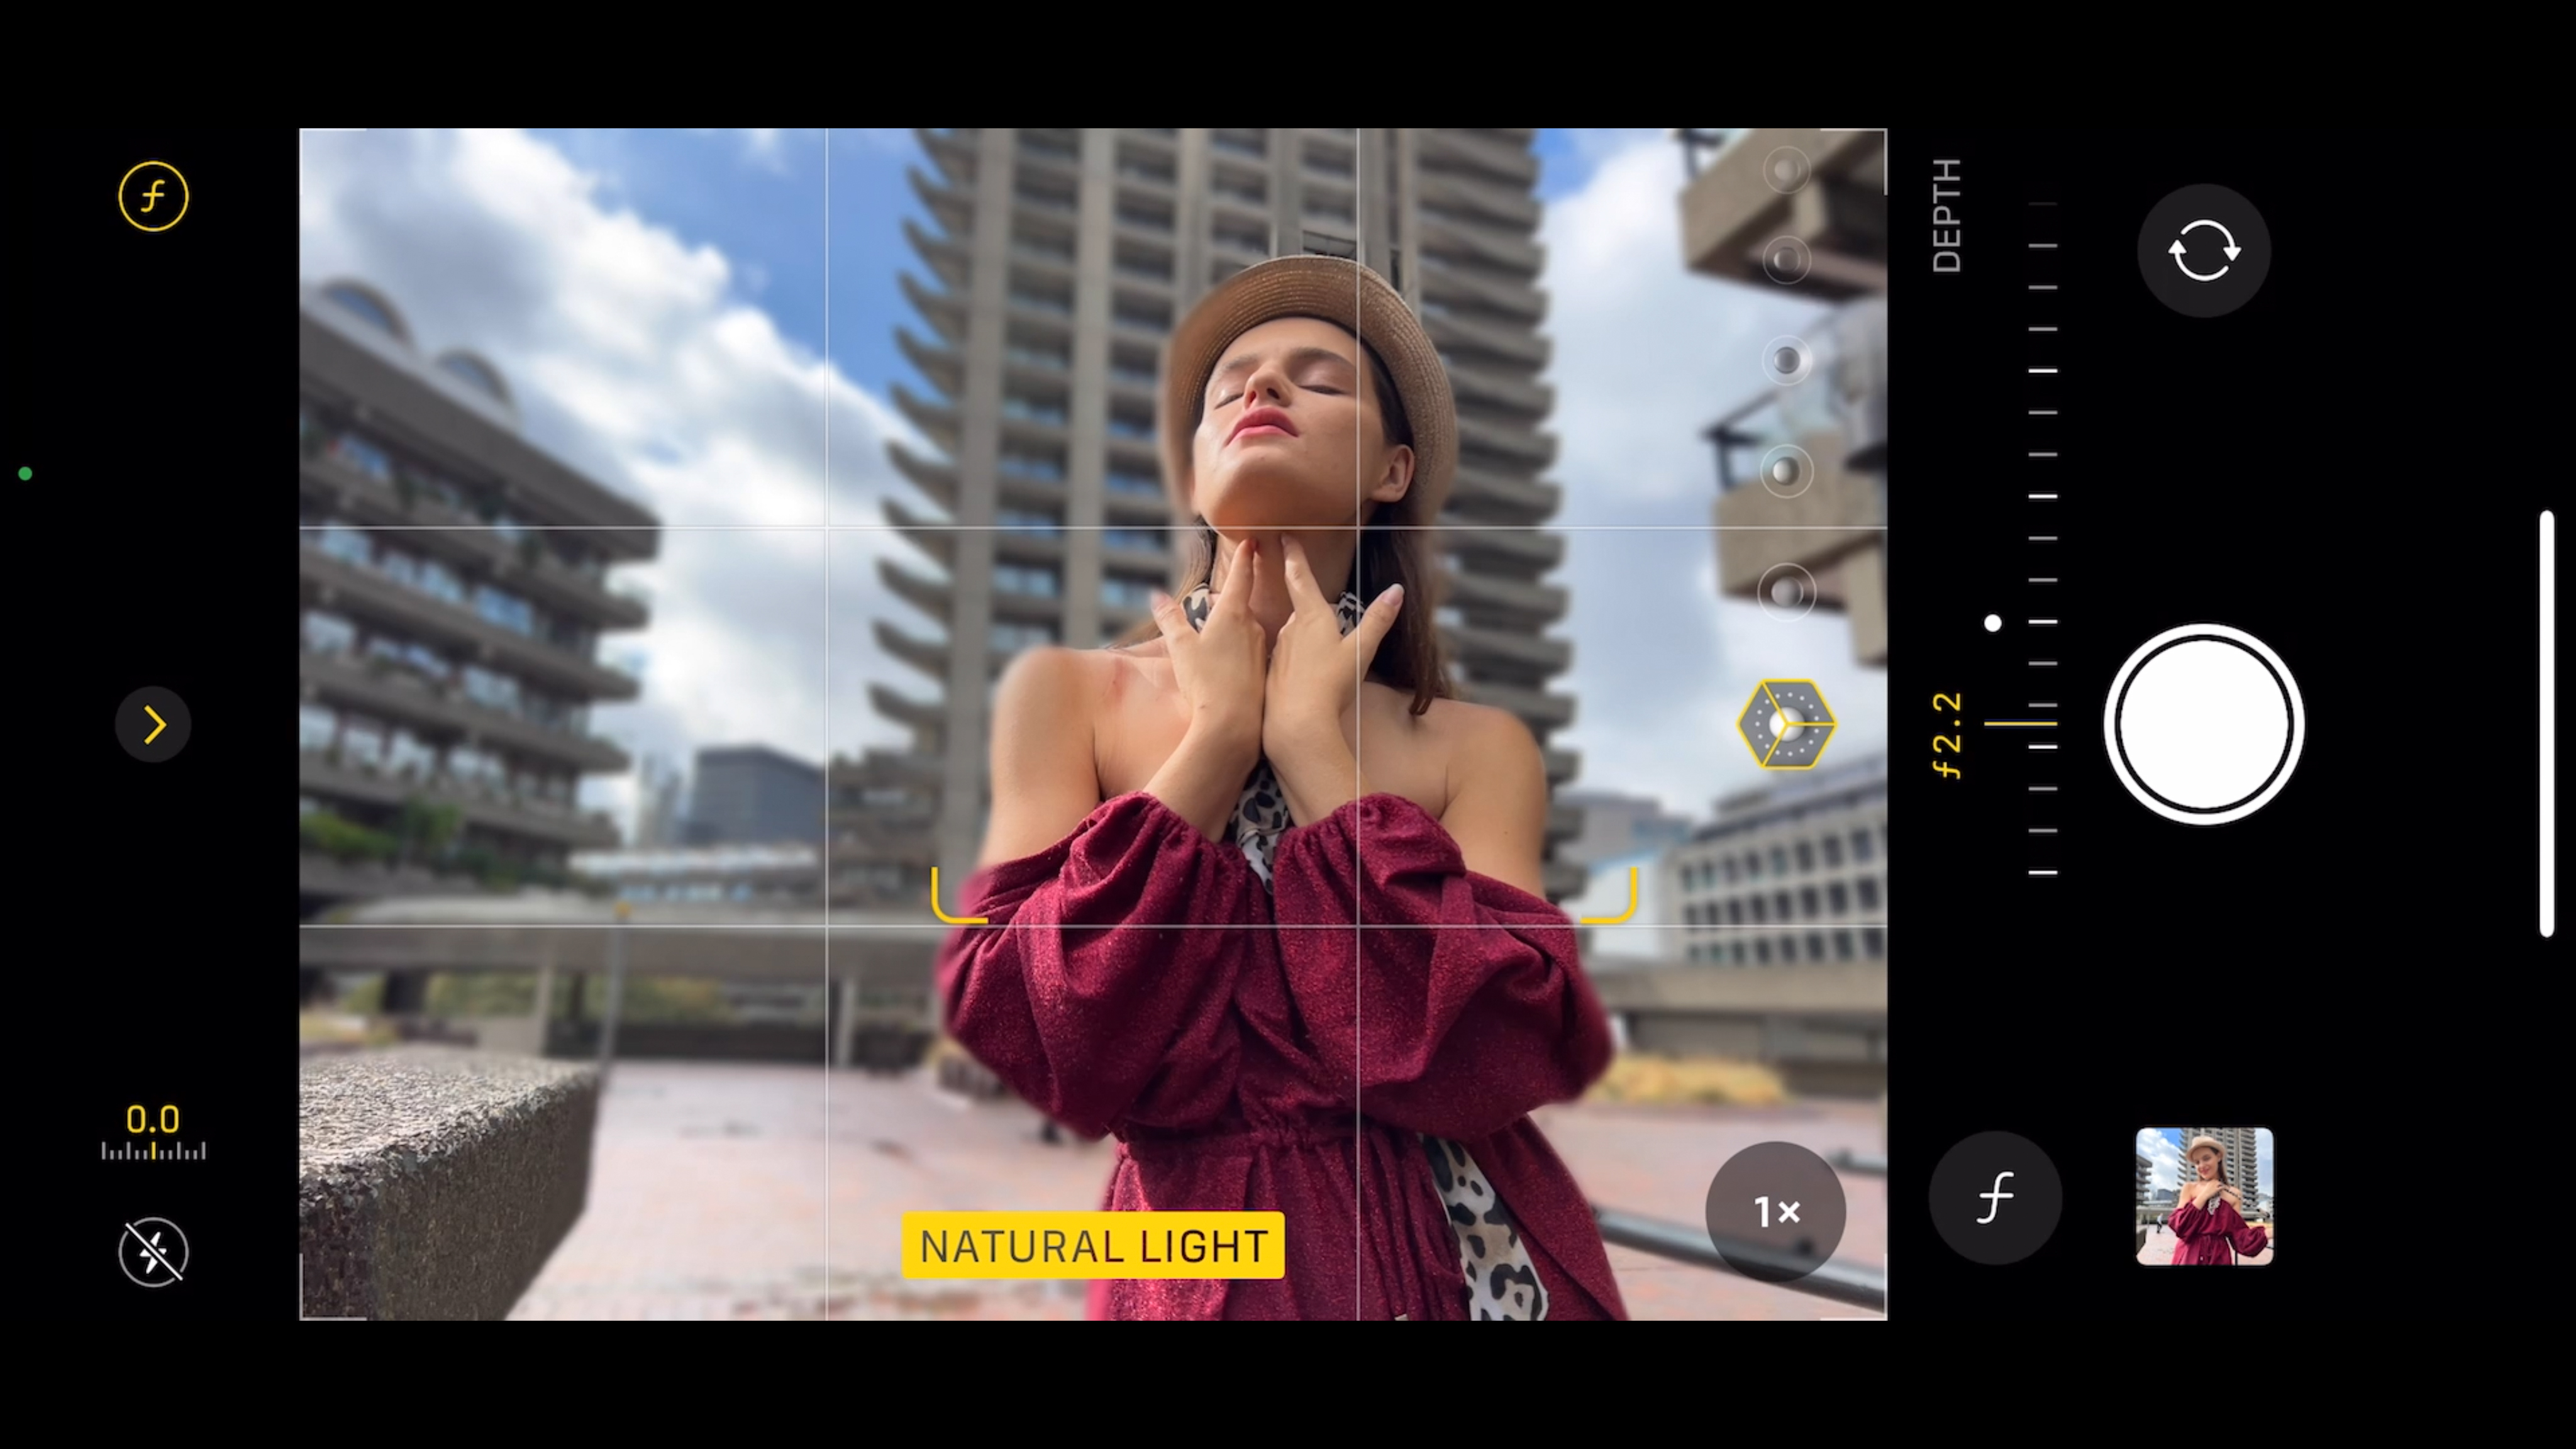
The f/16 aperture value at the top left changes to an f (f-stop) icon and a Depth slider appears. Here you can experiment with different background blur amounts by swiping the slider. You can adjust the aperture value before you take a shot and then tweak it later in the Photos app if it looks too blurry. Here we’ve chosen a wide aperture of f/2.2 for a blurrier bokeh.
iPhone Portrait Mode lighting effects
Step 1: Studio light
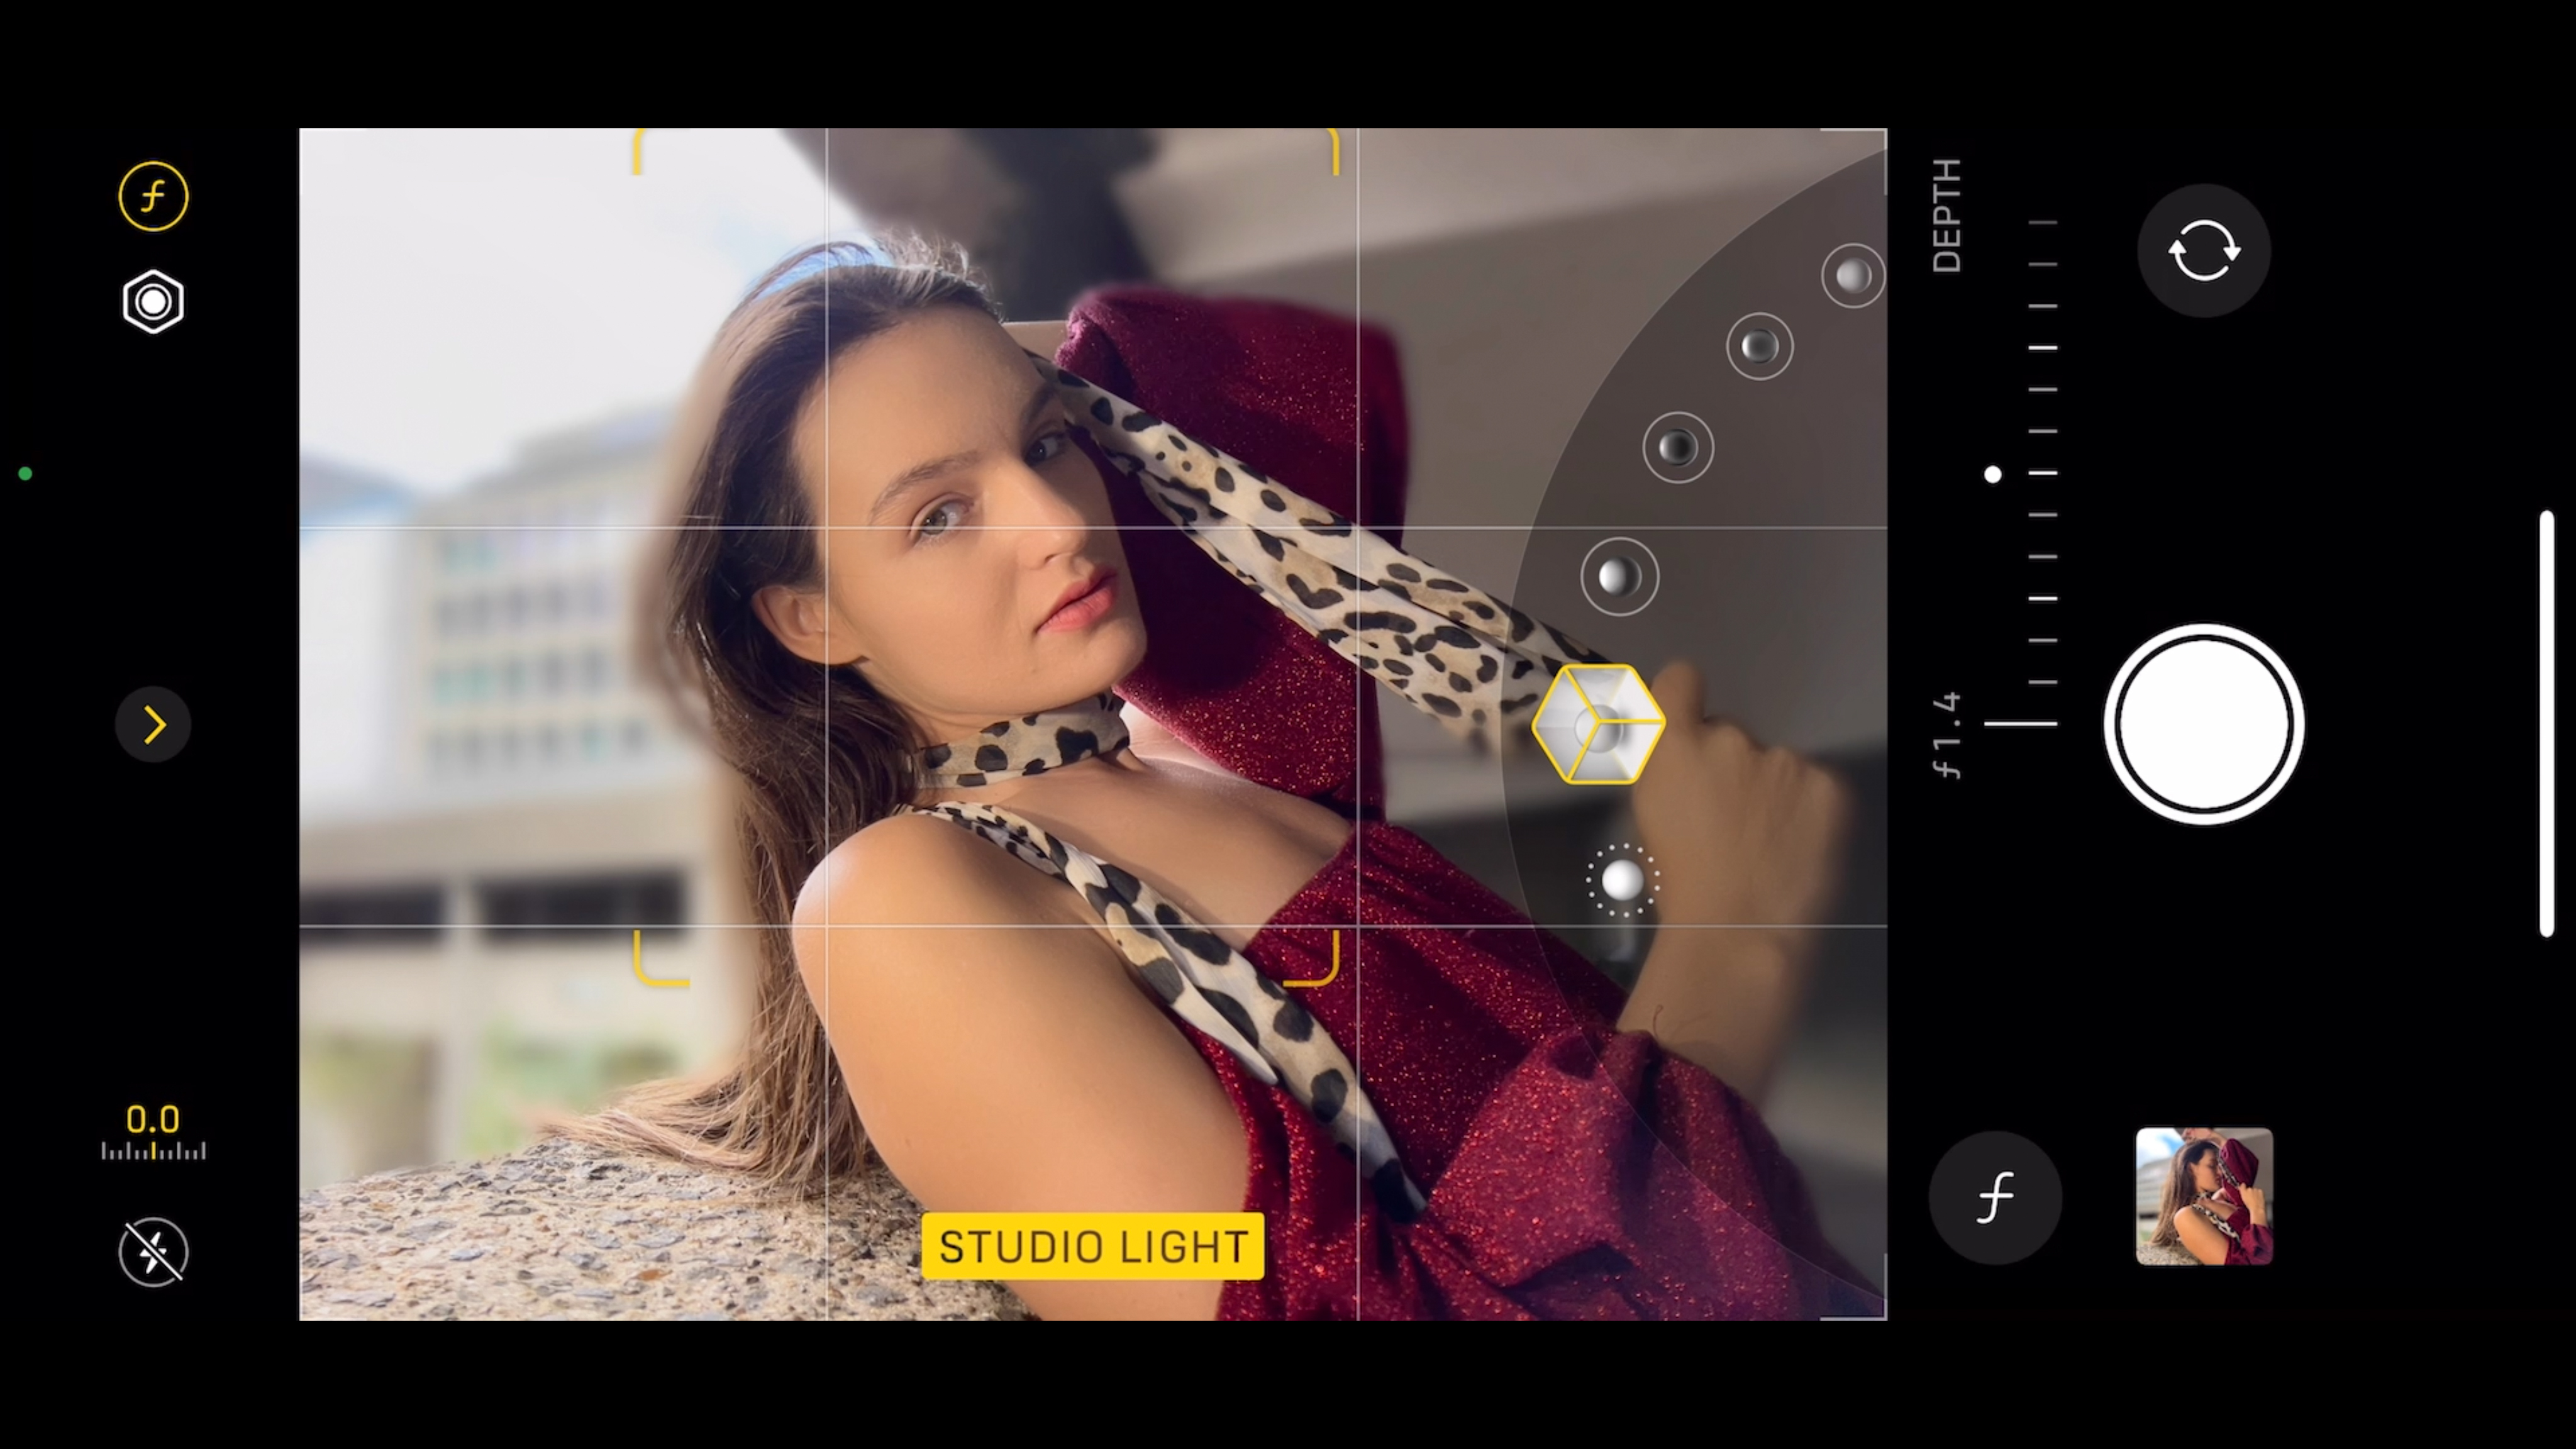
When shooting in Portrait mode you’ll notice box-shaped icons close to the shutter button. By swiping from the default Natural Light icon to other presets you can experiment with different style lighting effects. Here we’ve chosen Studio Light. This gently brightens the highlights on the subject’s face and adds a subtle glow that smoothes the skin tones for a more flattering complexion. In the Photos app you can also adjust the intensity of the chosen light effect.
Step 2: Contour light
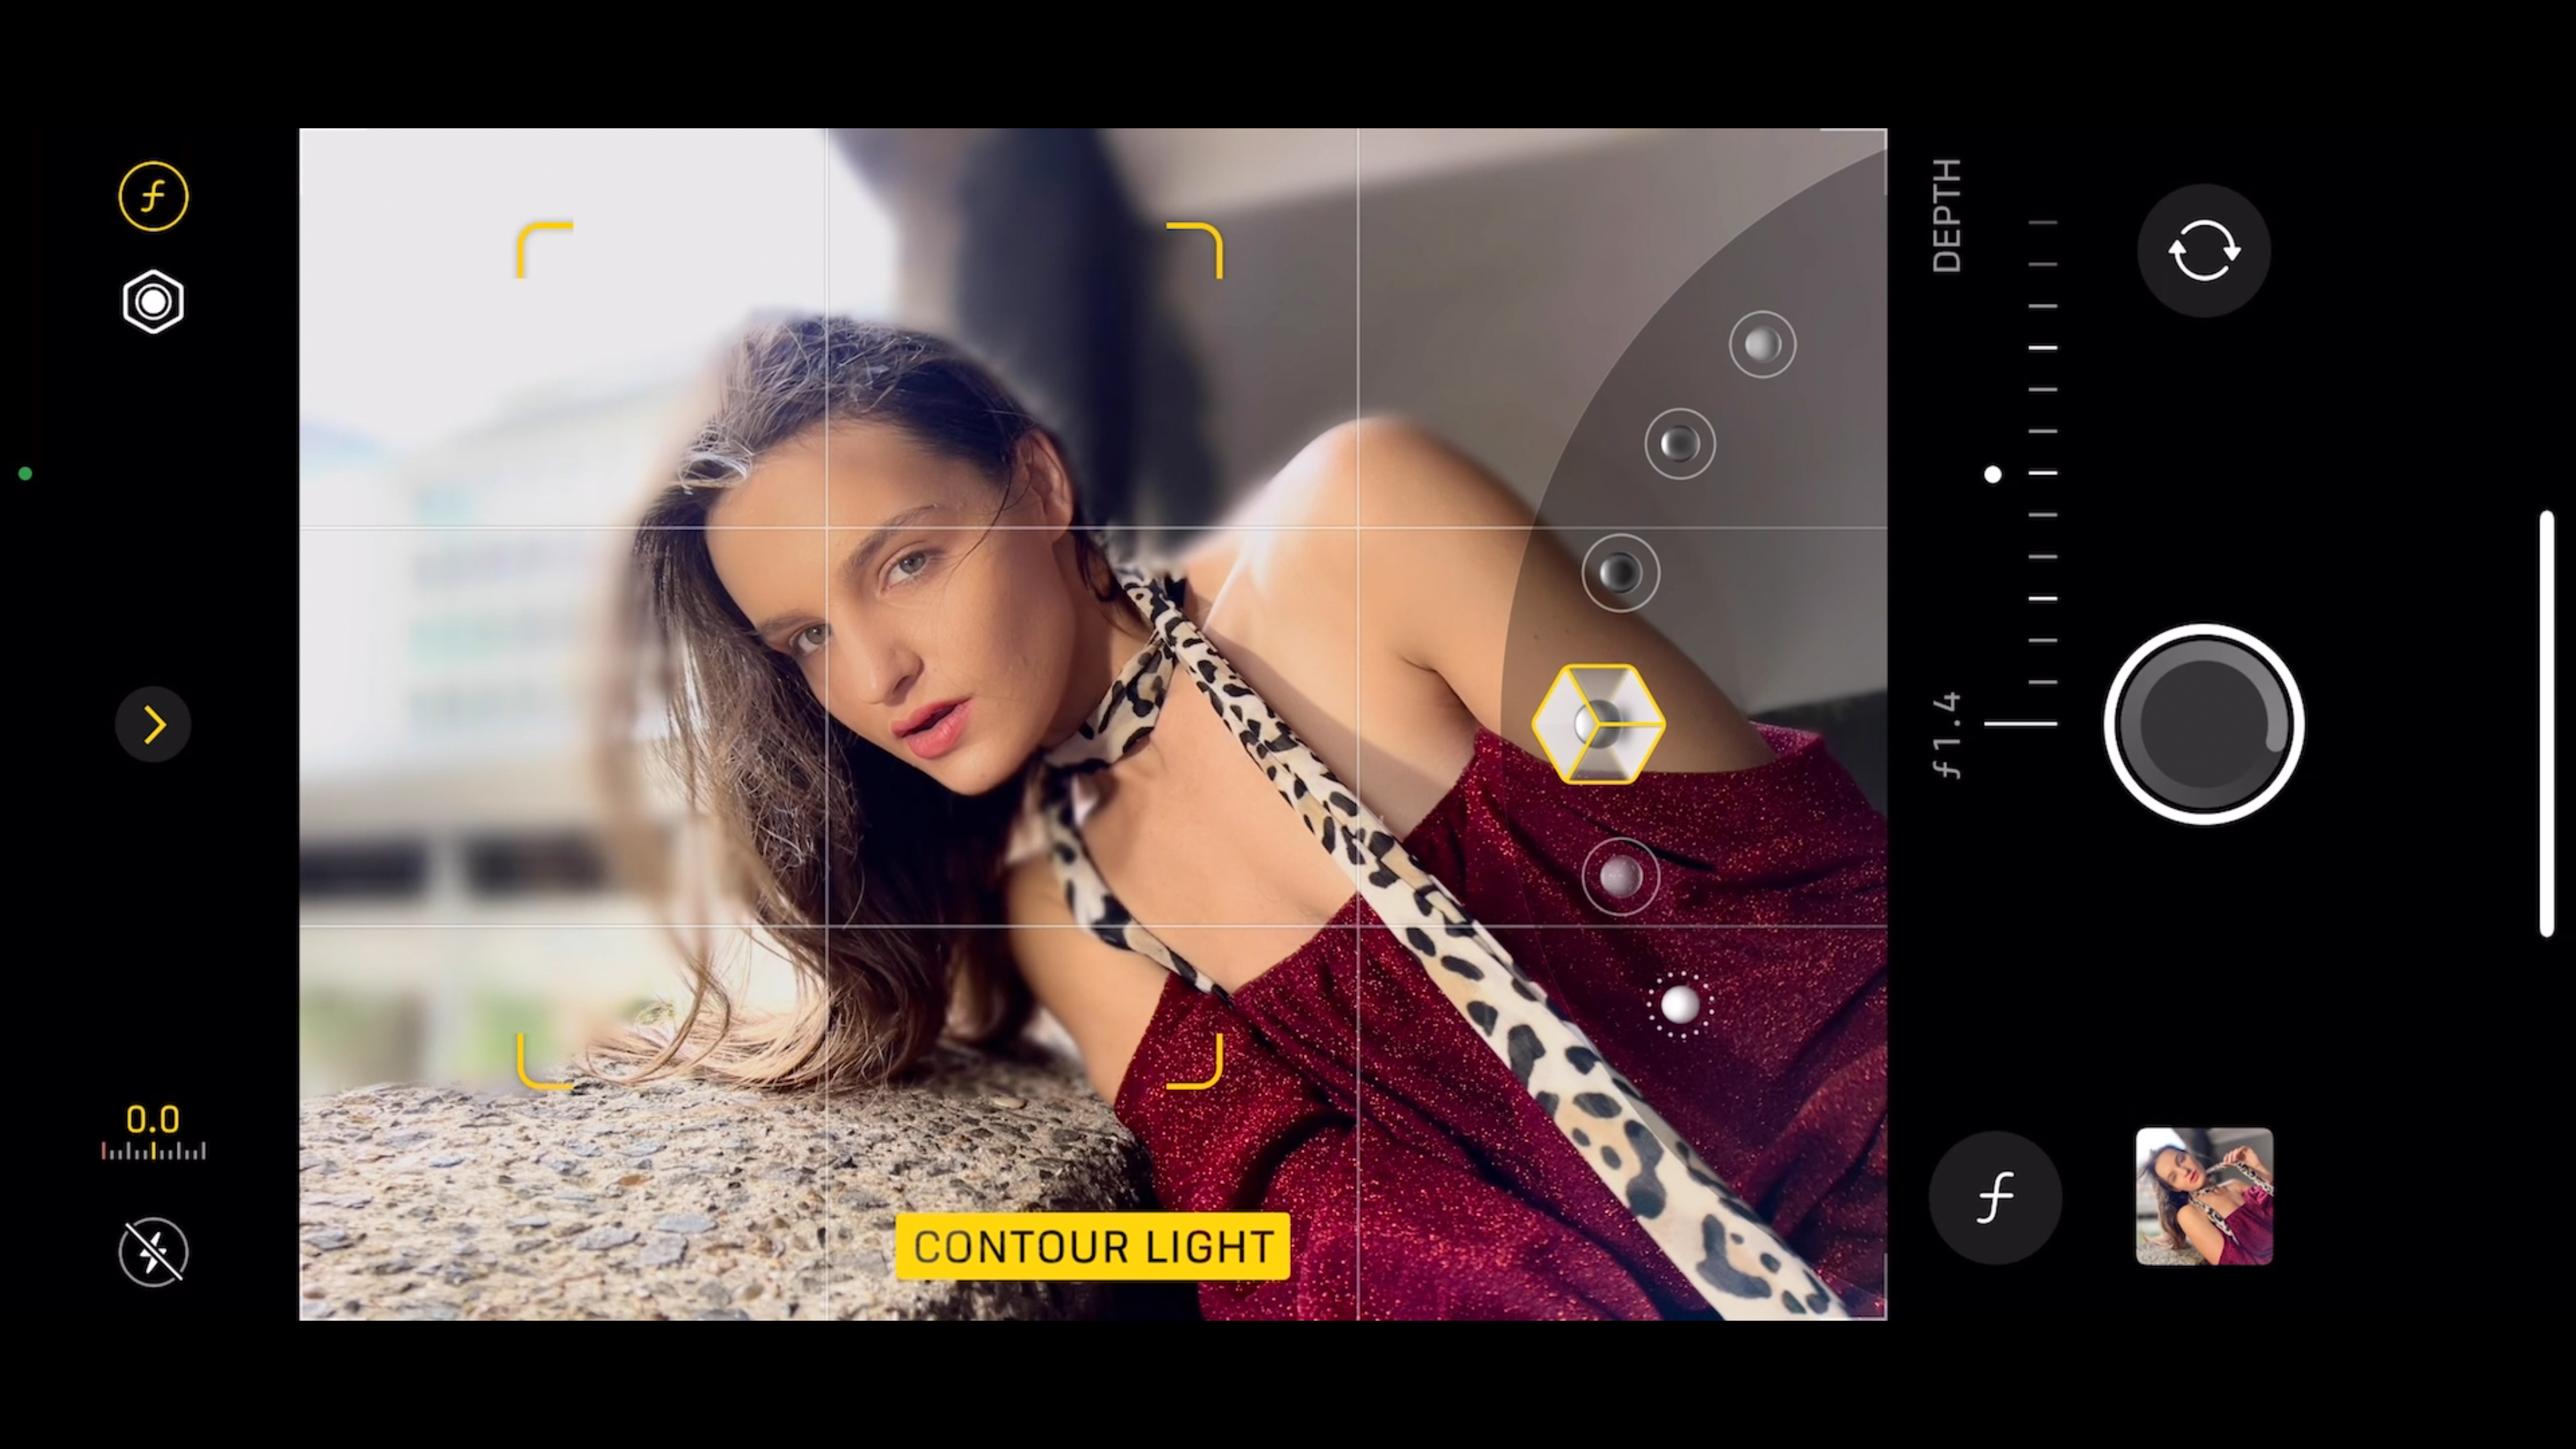
The Contour light adds more contrast to the midtones and highlights of the subject’s face. This ‘modeling’ effect helps emphasize the contours of their face (as we can see in the increased contrast around the highlights, midtones and shadows of our subject’s cheekbones). As with the Portrait mode’s bokeh blur you can change the lighting effects later in the Photos app.
Step 3: High-key Mono
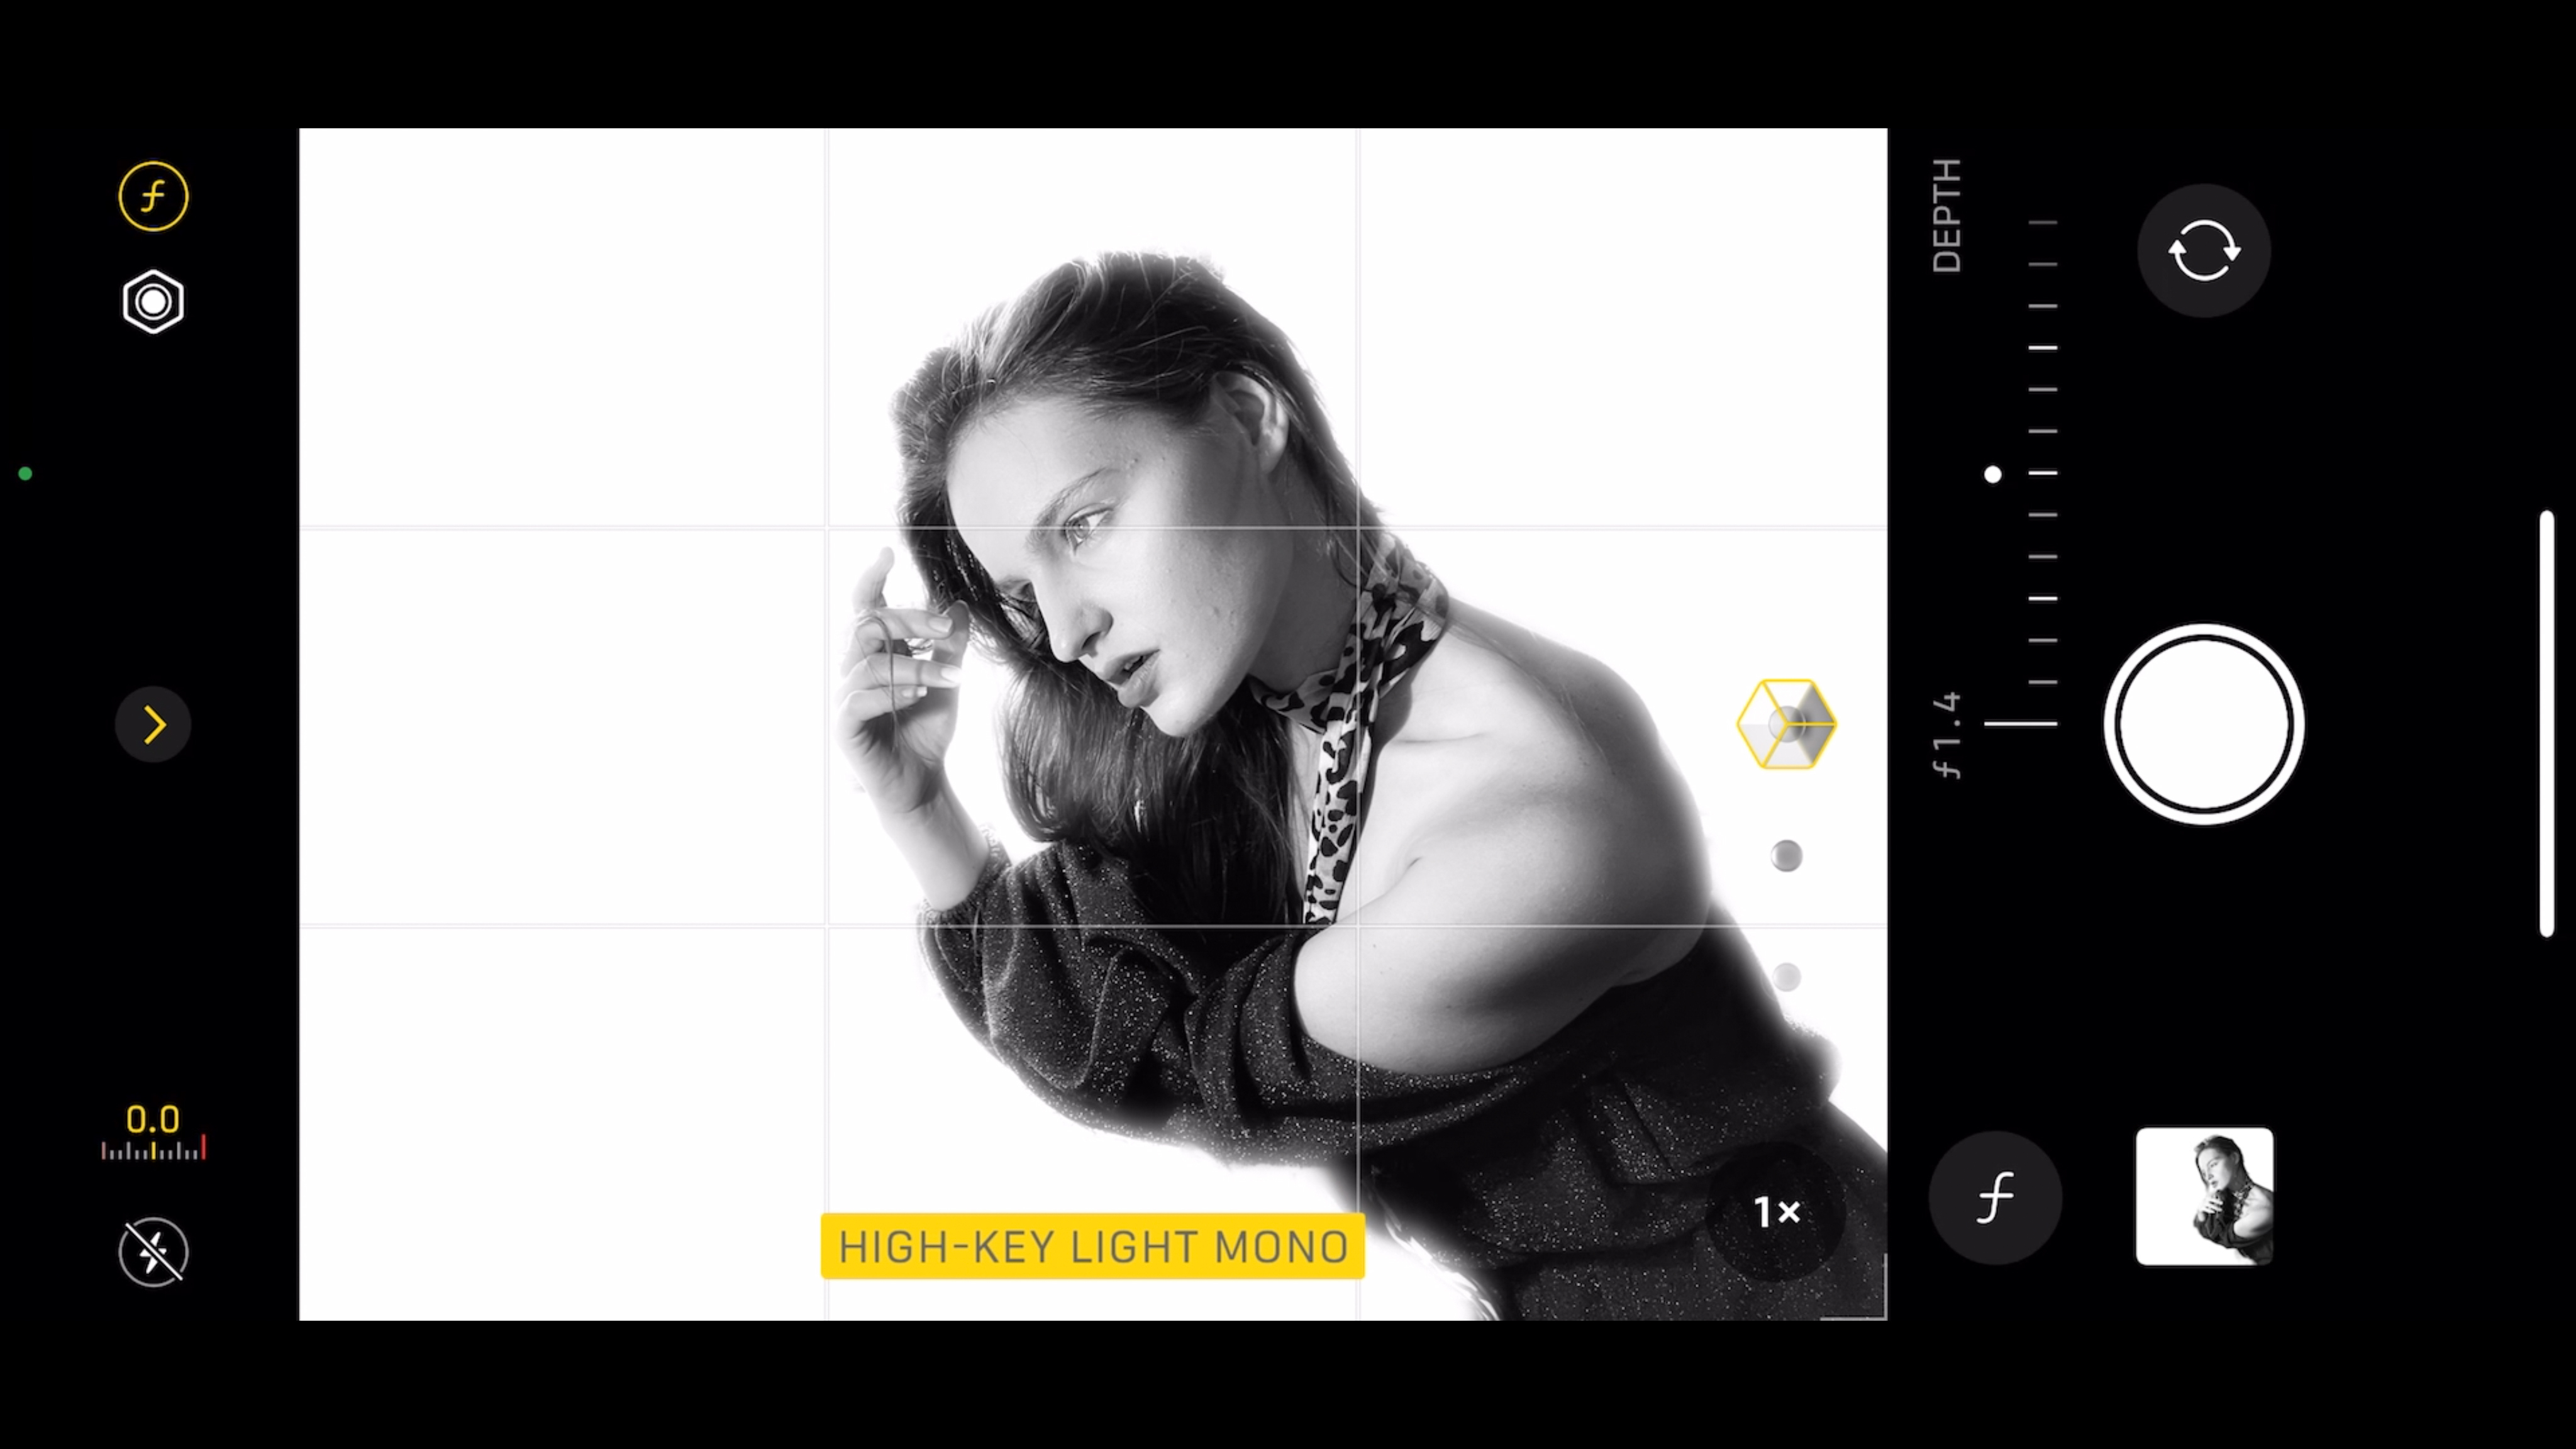
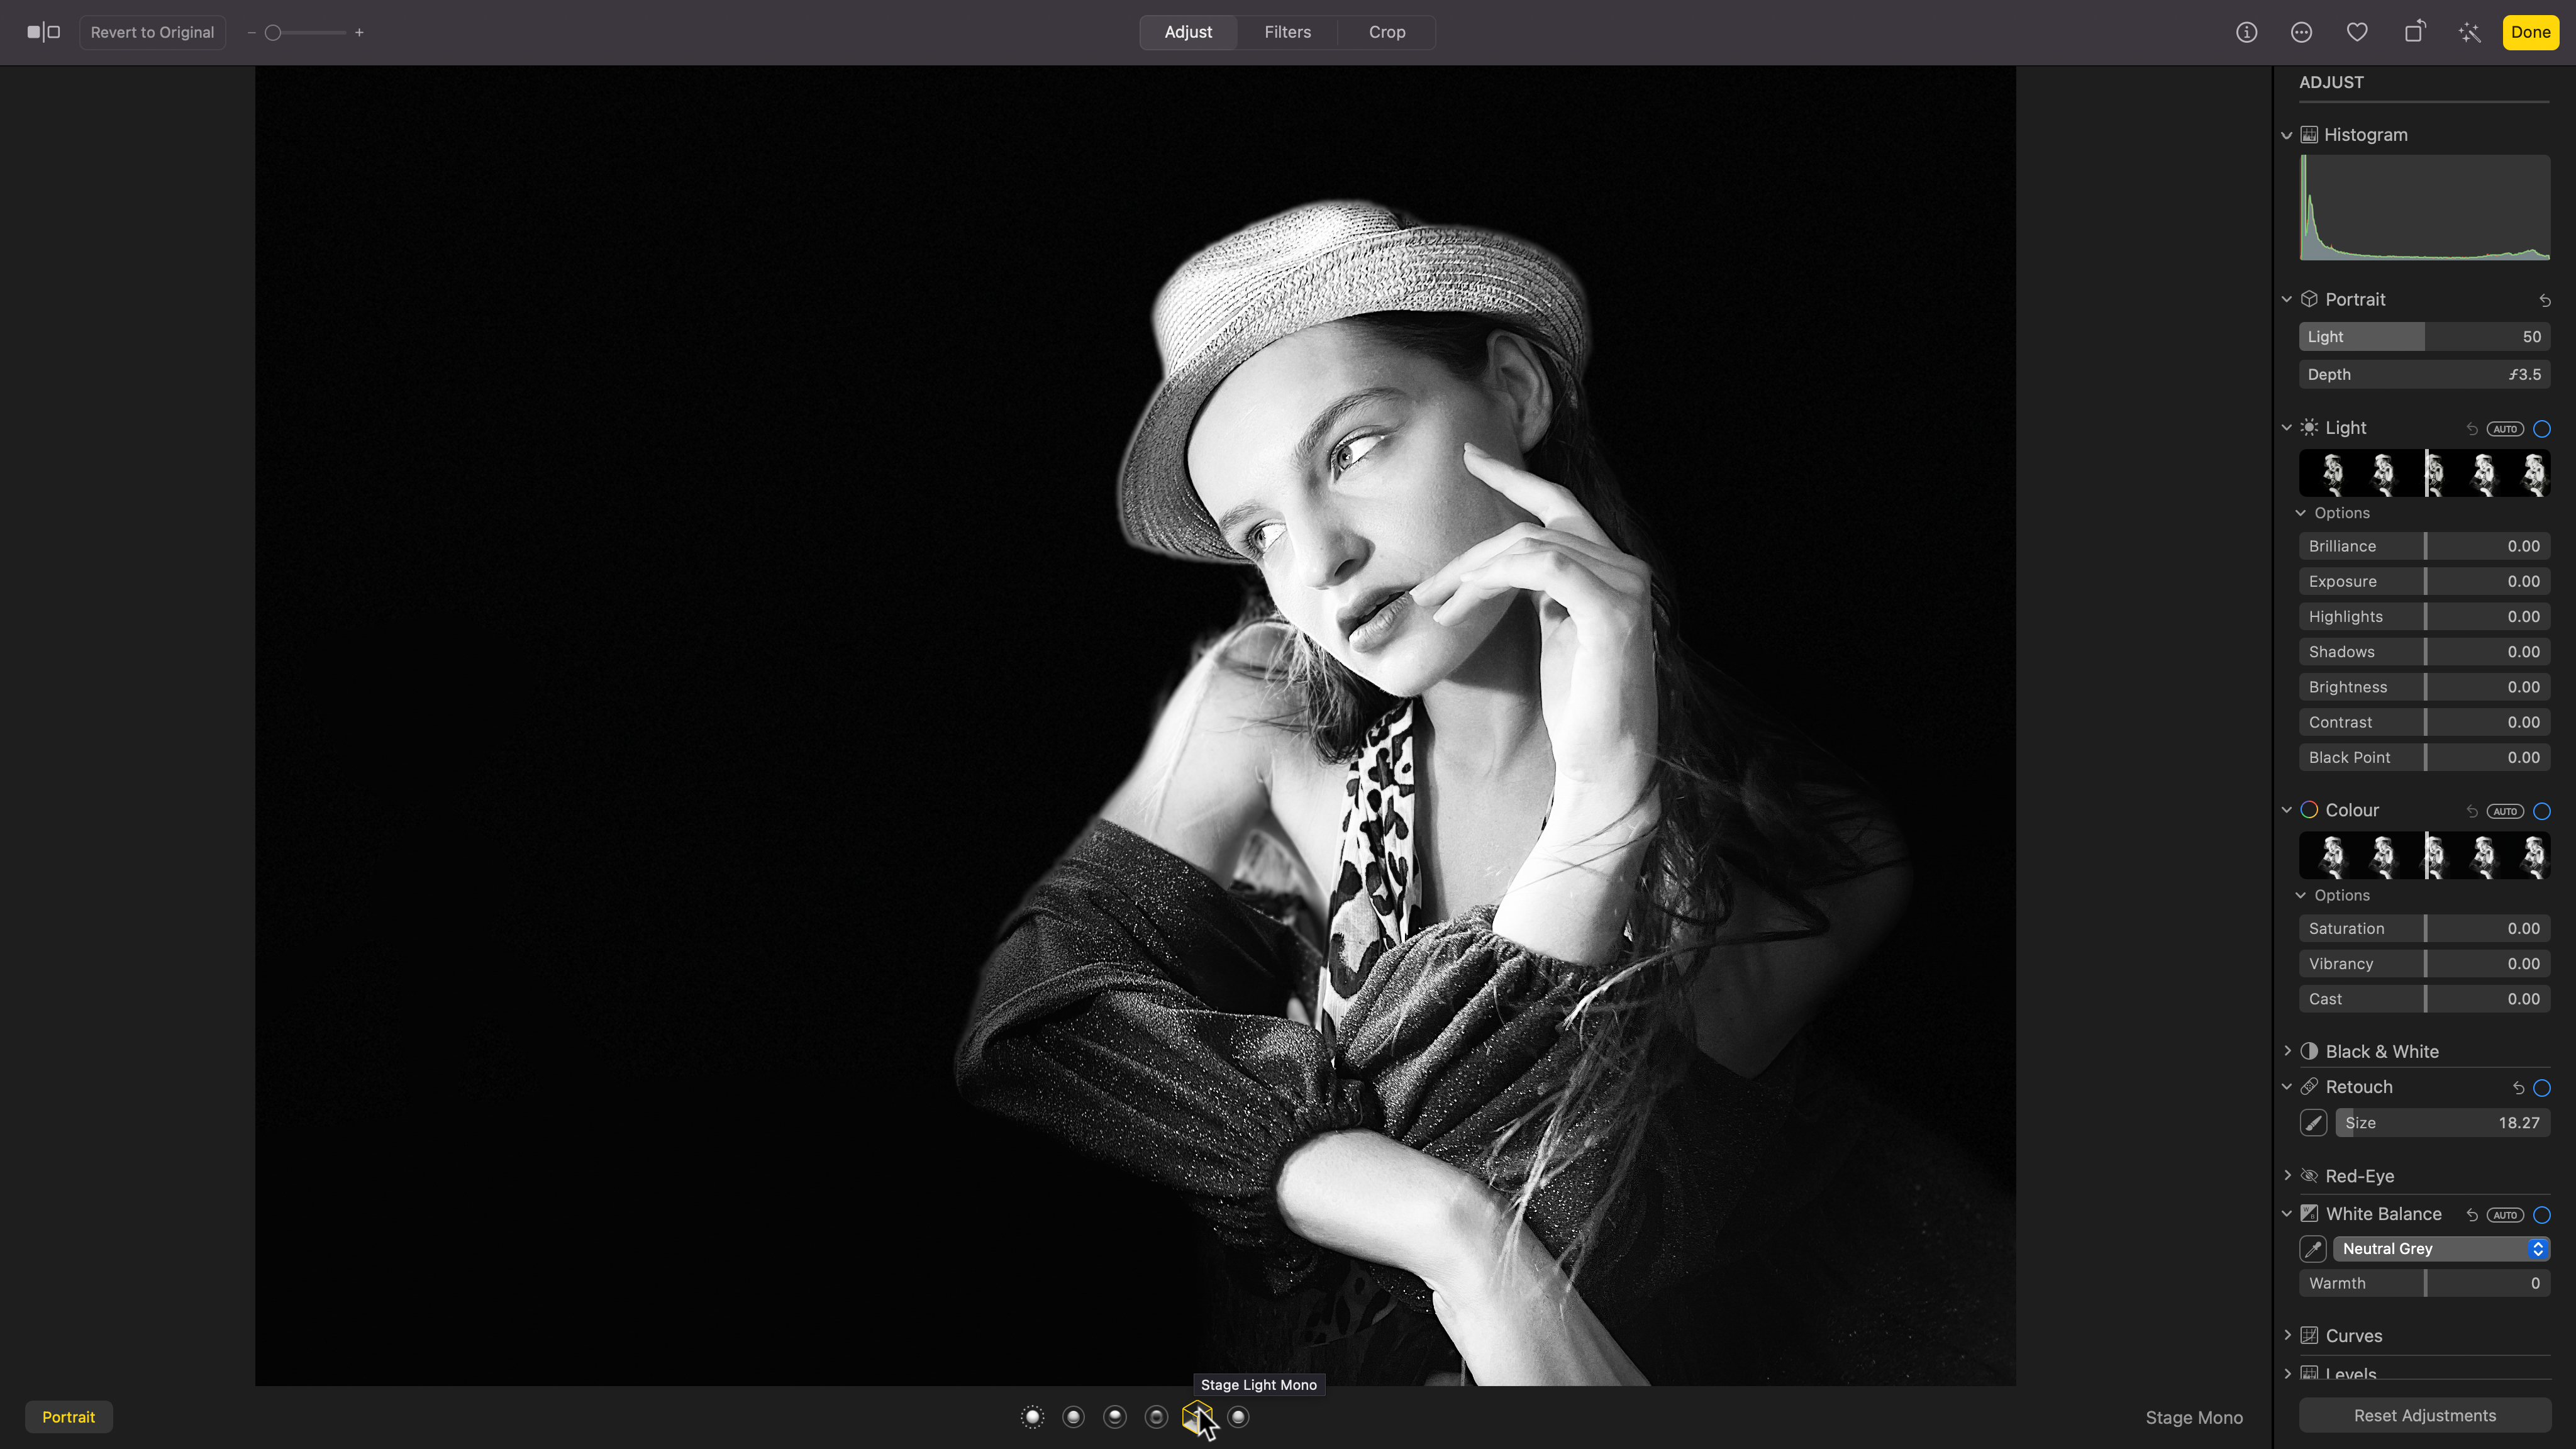
A more striking lighting effect is High-Key Light Mono. This uses the mask created by Portrait mode to isolate the subject completely from the background (as if they’d been shot against a studio backdrop). This results in a striking monochrome portrait. You can create a film-noir-style black background using the Stage Mono lighting preset.
Many thanks to Mia the model @layal.official
Read more:
Best iPhone microphone
Best iPhone charger
The best iPhone keyboard
The best iPhone power bank
Best phone cases
Best iPhone tripods
Best iPhone stand
The best camera deals, reviews, product advice, and unmissable photography news, direct to your inbox!
George has been freelancing as a photo fixing and creative tutorial writer since 2002, working for award winning titles such as Digital Camera, PhotoPlus, N-Photo and Practical Photoshop. He's expert in communicating the ins and outs of Photoshop and Lightroom, as well as producing video production tutorials on Final Cut Pro and iMovie for magazines such as iCreate and Mac Format. He also produces regular and exclusive Photoshop CC tutorials for his YouTube channel.
