Hyperfocal distance and depth of field explained for landscape photography
Get nearby objects and distant horizons sharp at the same time using these depth of field and hyperfocal distance tips
Watch the video: hyperfocal distance and depth of field explained
Most photographers love landscape photography, as it gives you a chance to get out into the countryside with your camera, but it can often be hard to get scenic shots that are as sharp as you want. It is not just a matter of setting a small aperture and using a tripod, you need to take full control of depth of field.
• More photography tips: how to take pictures of anything
• Landscape photography tips and techniques
Depth of field is the range of sharp focus in front of and behind your main subject. With shallow depth of field, the background quickly goes out of focus. This is great for shooting portraits, for example, where you want to concentrate attention on your subject. However, in landscape photography, the whole scene is your subject, and you want as much depth of field as possible, to make everything in the picture sharp, from the flowers and stones at your feet to a distant treeline on the horizon.
A number of factors affect the depth of field. The focal length or zoom setting of your lens is one. A wide-angle setting will give more depth of field, while a telephoto setting will give less. The lens aperture is a factor, too. Wide lens apertures give shallow depth of field, while small apertures give more depth of field.
A lot depends on where you focus. If your subject is right up close to the camera, the depth of field will be quite shallow, but if it’s further away, the depth of field increases. Like a lot of photographic theory, it all starts to make more sense when you actually try it out and you can see the results in your photos.
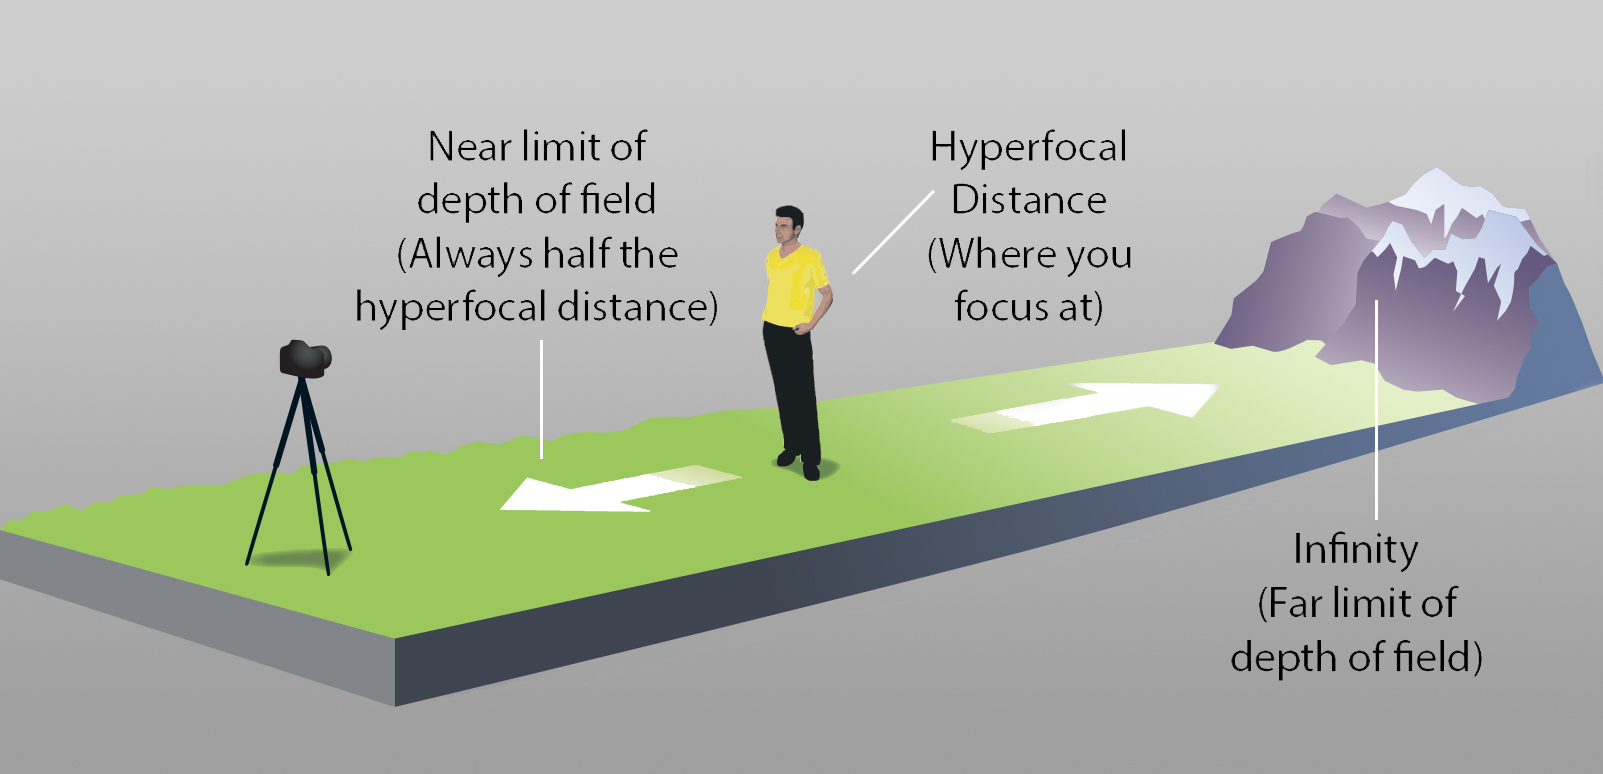
And there is a way to make depth of field much simpler when you’re shooting landscape photographs. It’s called the ‘hyperfocal distance’, and it’s explained in depth at the end of this tutorial.
1. The effects of zooming
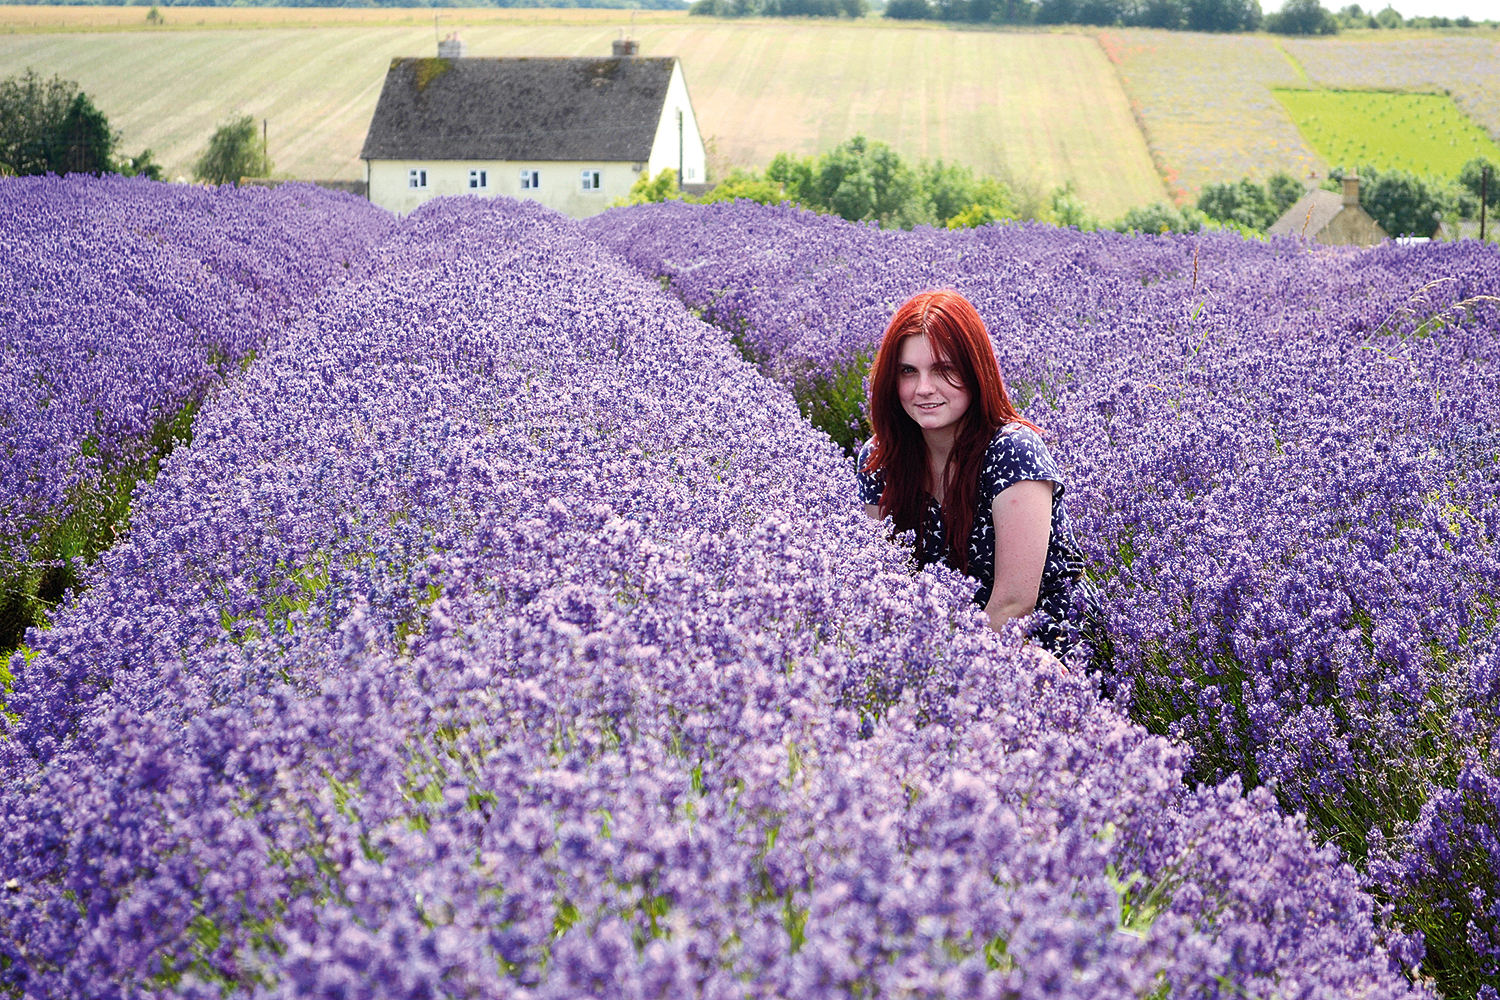
If we shoot this scene with our Nikon D3100’s standard kit lens at its widest focal length, there doesn’t appear to be a depth of field problem at all – everything is sharp. But if we zoom in to the lens’ maximum 55mm focal length, we can now see that only our subject is sharp, and both the background and foreground are blurred.
2. Switch to Aperture Priority
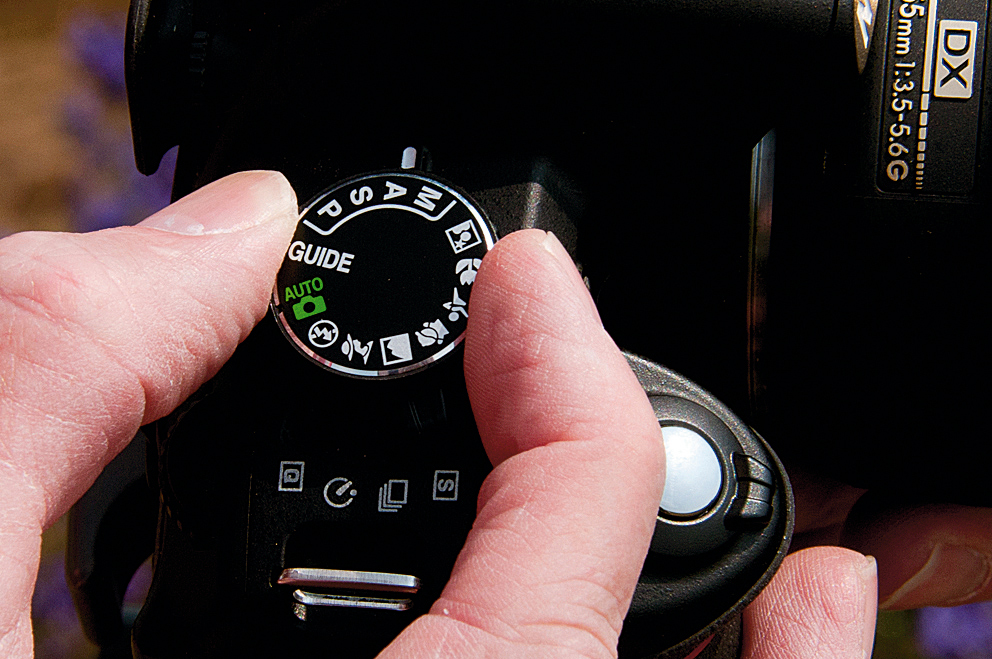
We like this composition, and using this longer focal length is the only way to get it, so if we want more depth of field we’ll need a smaller lens aperture. If you’re shooting in P (Program) mode, the camera chooses the lens aperture and shutter speed automatically, so what you need to do is switch to A (Aperture Priority) mode instead.
3. Change the lens aperture
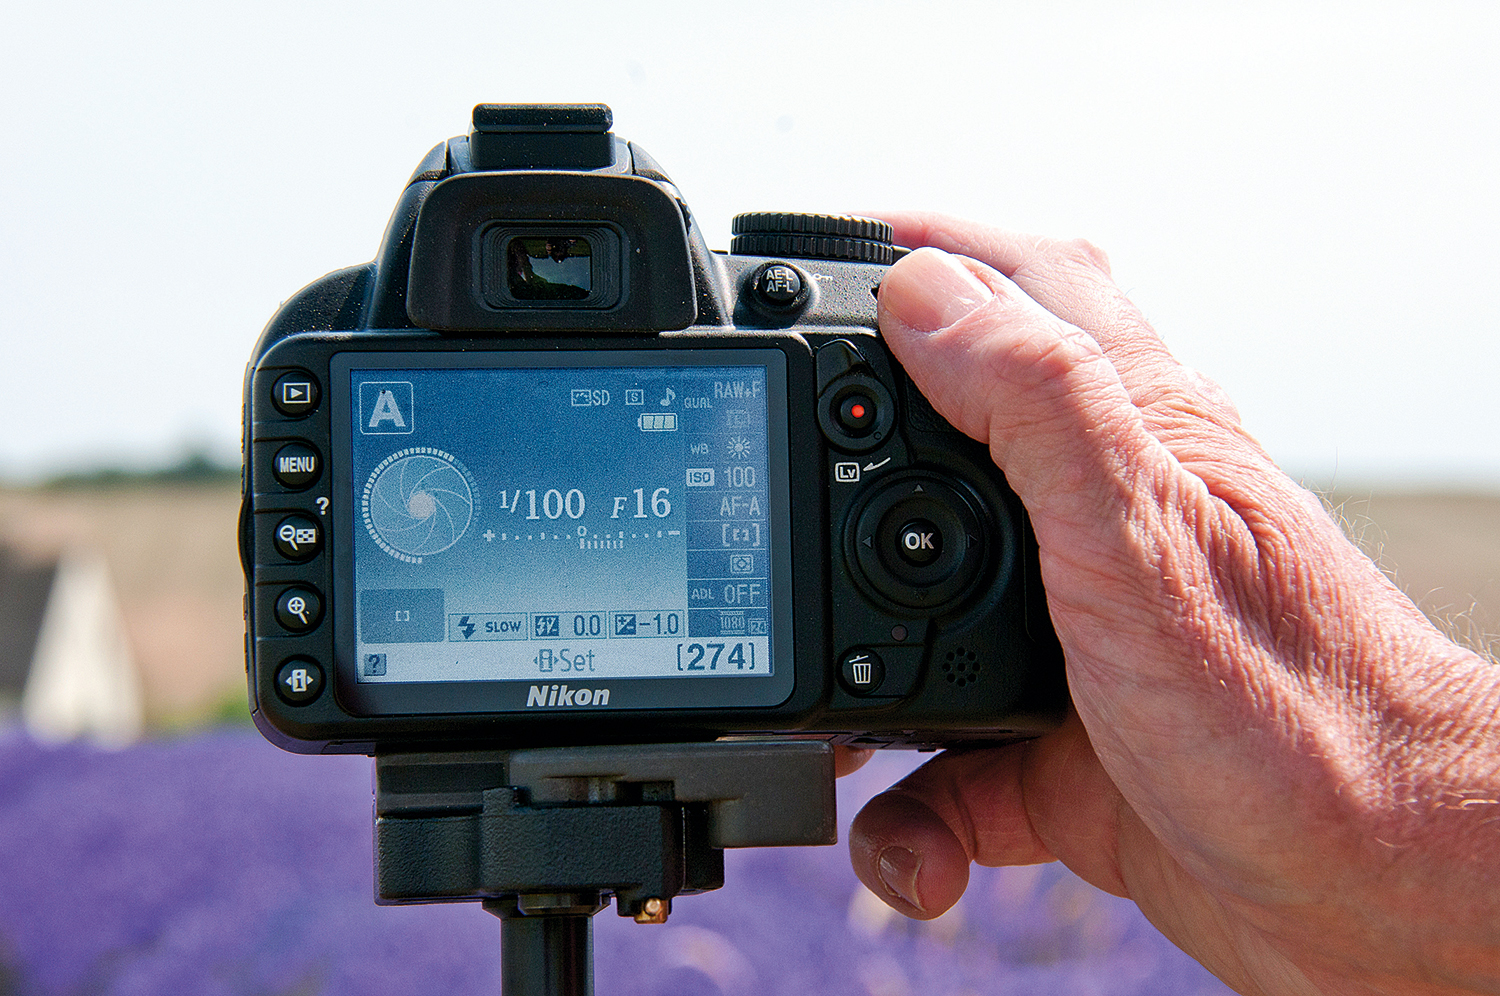
Now turn the main command dial to choose the aperture setting. This is displayed either on the status LCD on the top or the main LCD on the back of the camera. We’ve set the aperture to f/16 here. You could set it smaller, but the picture quality starts to fall off due to ‘diffraction effects’.
4. See the difference
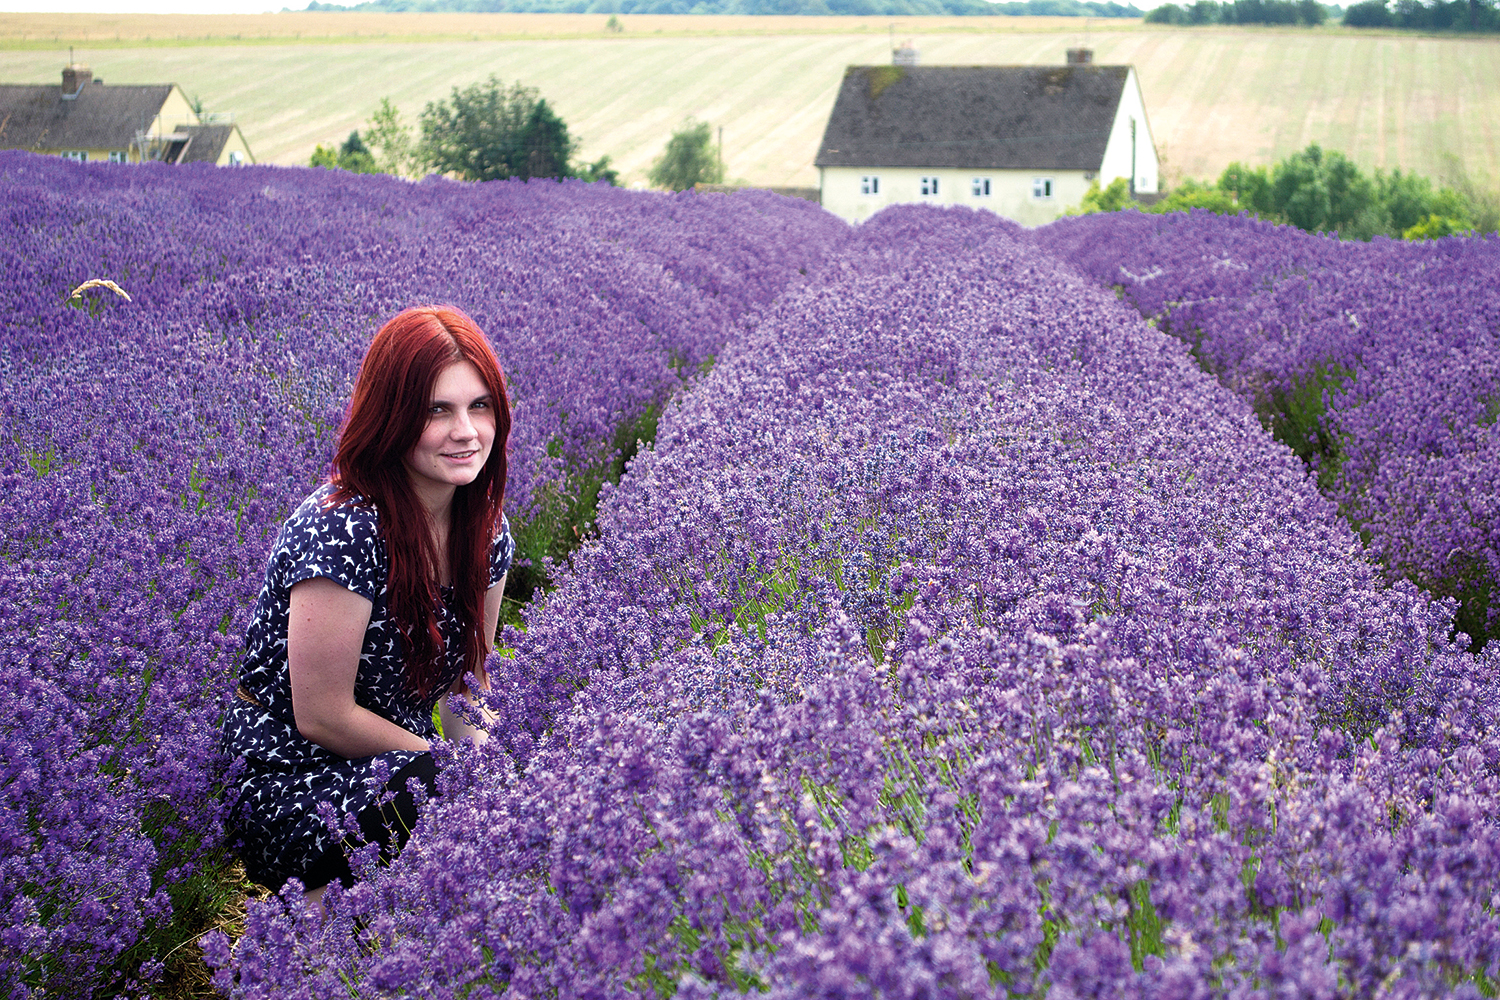
At f/5.6, the widest available at this zoom setting, both the background and the plants in the foreground are out of focus, but at f/16 much more of the scene comes out sharp. However, we can extend depth of field even further by adjusting where we focus…
5. Maximise the depth
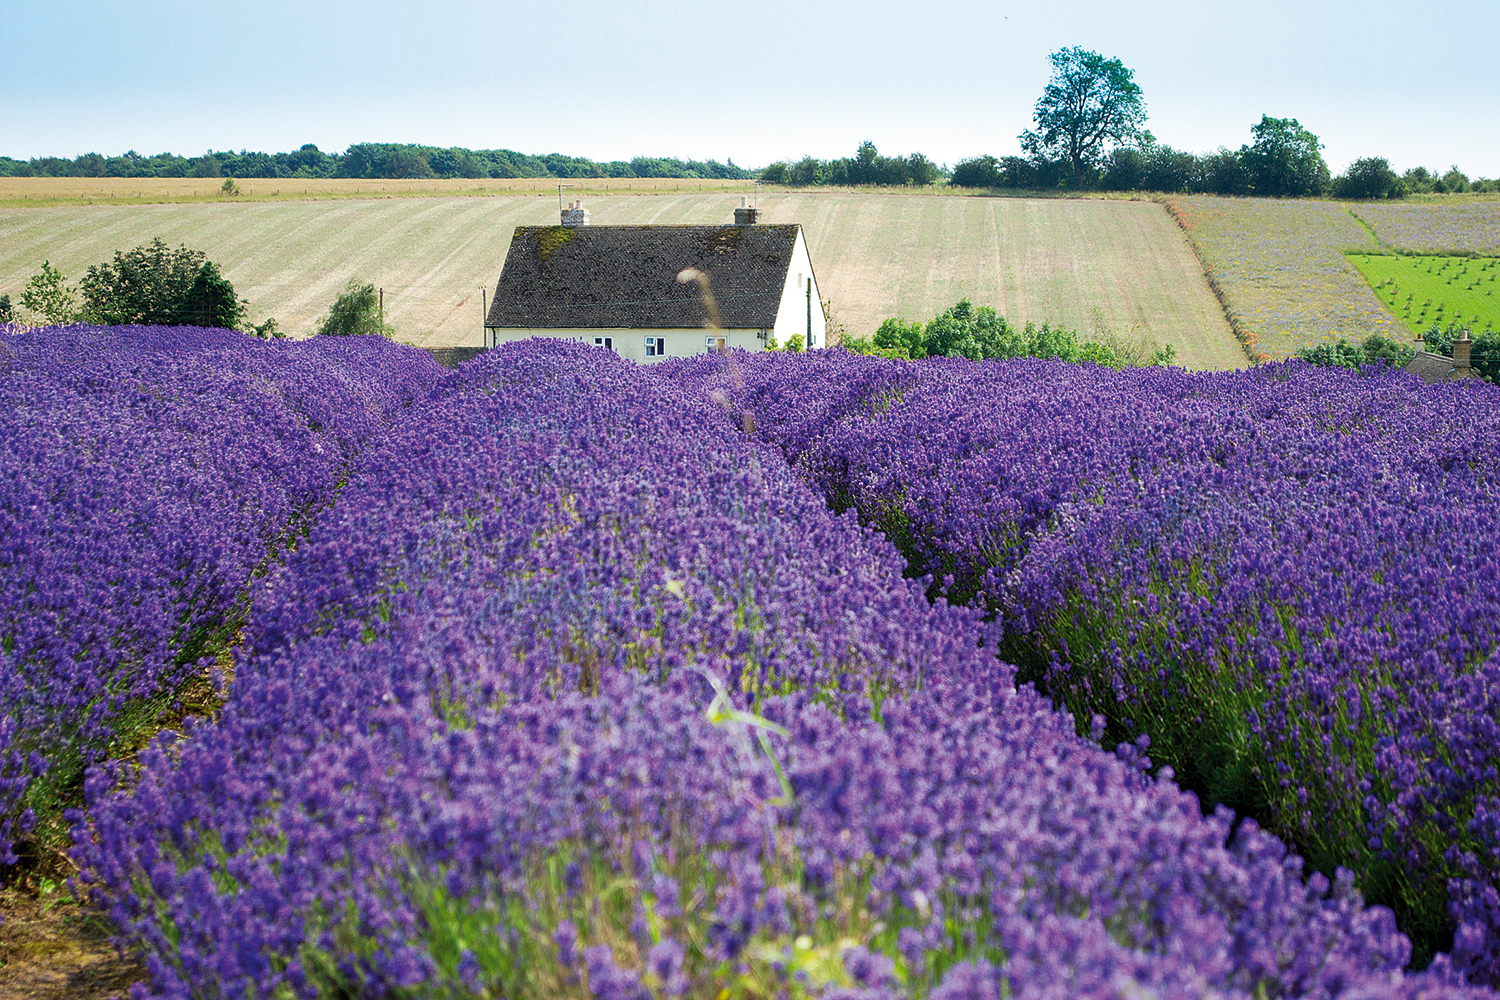
The trick is not to focus on either the foreground or the background. If you focus on the foreground, the background will go out of focus, and if you focus on a detail in the background, the foreground will be blurred. To make both come out sharp, you need to focus between them.
6. Choose your focus point
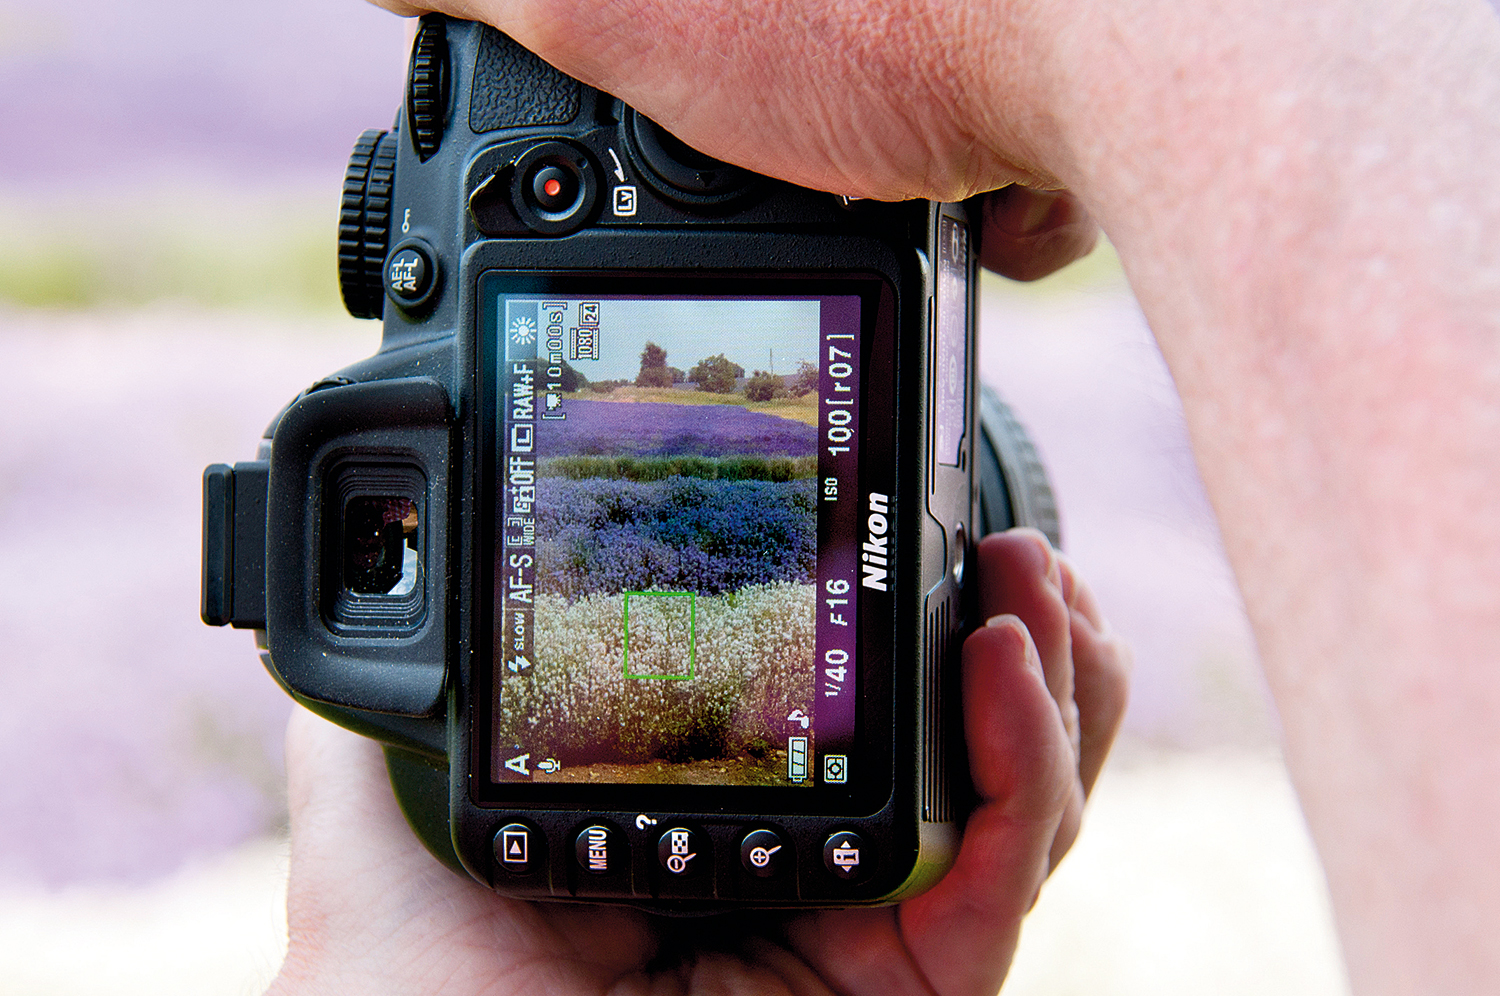
There are two ways to do this. One is to leave the camera set to autofocus, but manually position the focus point. You may find it easier switch to Live View mode and use the multi-selector to place the focus point where you want it – it should be roughly one-third of the way up the frame.
7. Check the figures
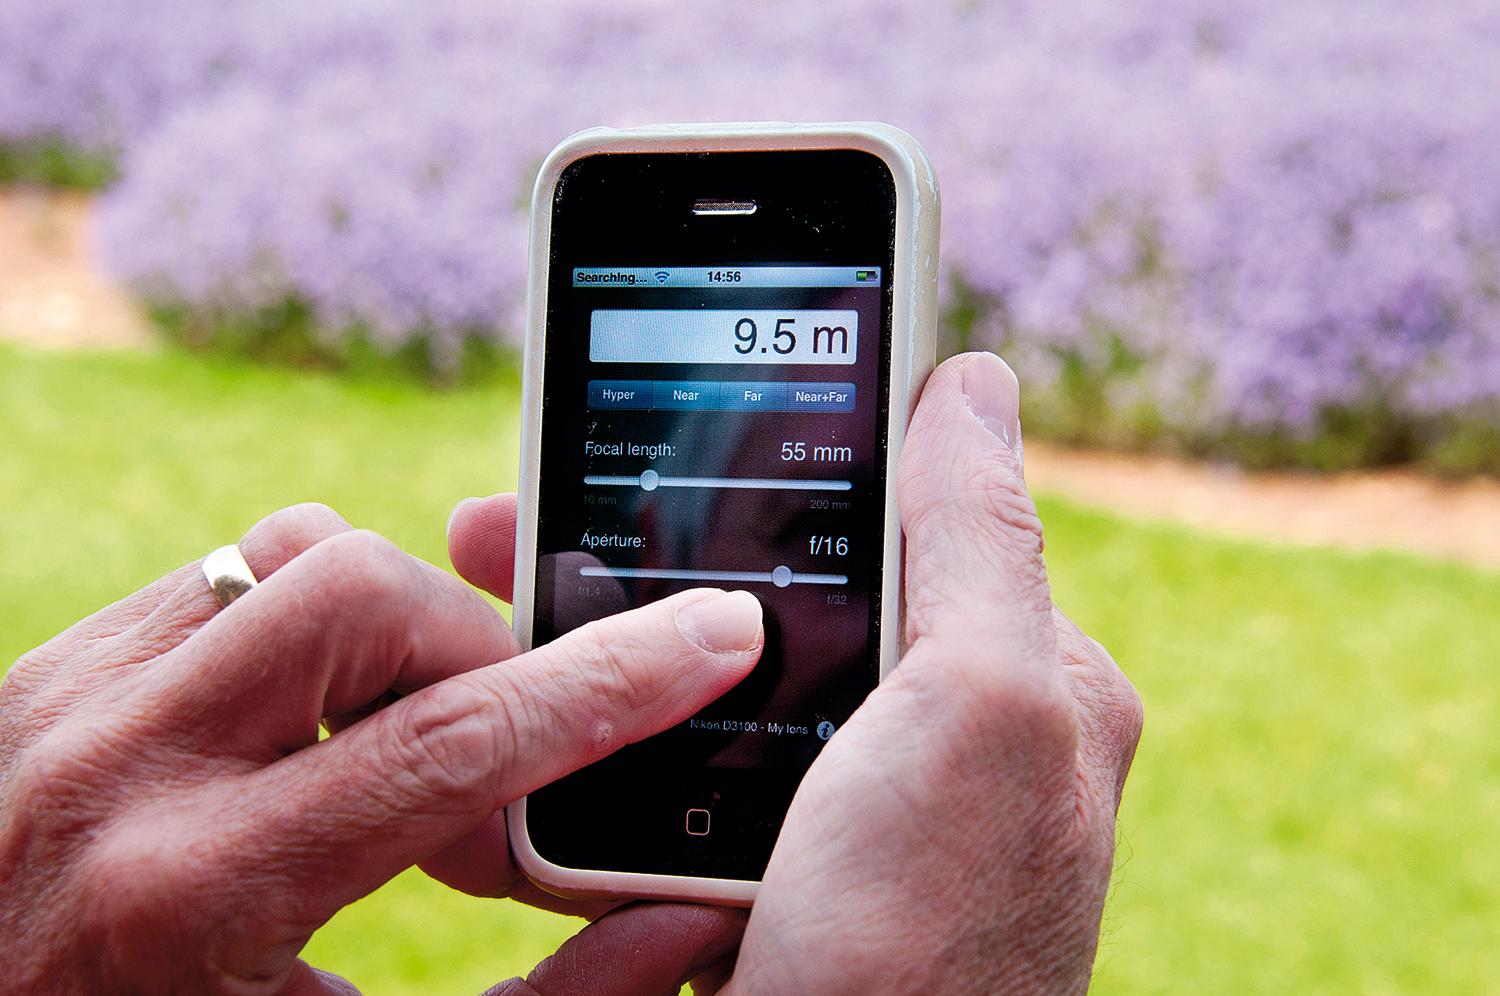
Or you can switch to manual focus and use an app like Field Tools to work out the hyperfocal distance. This places distant objects at the far limit of depth of field, and so maximises the depth of field. At a focal length of 55mm and aperture of f/16, our app says we need to focus at 9.5m…
08 Set your lens
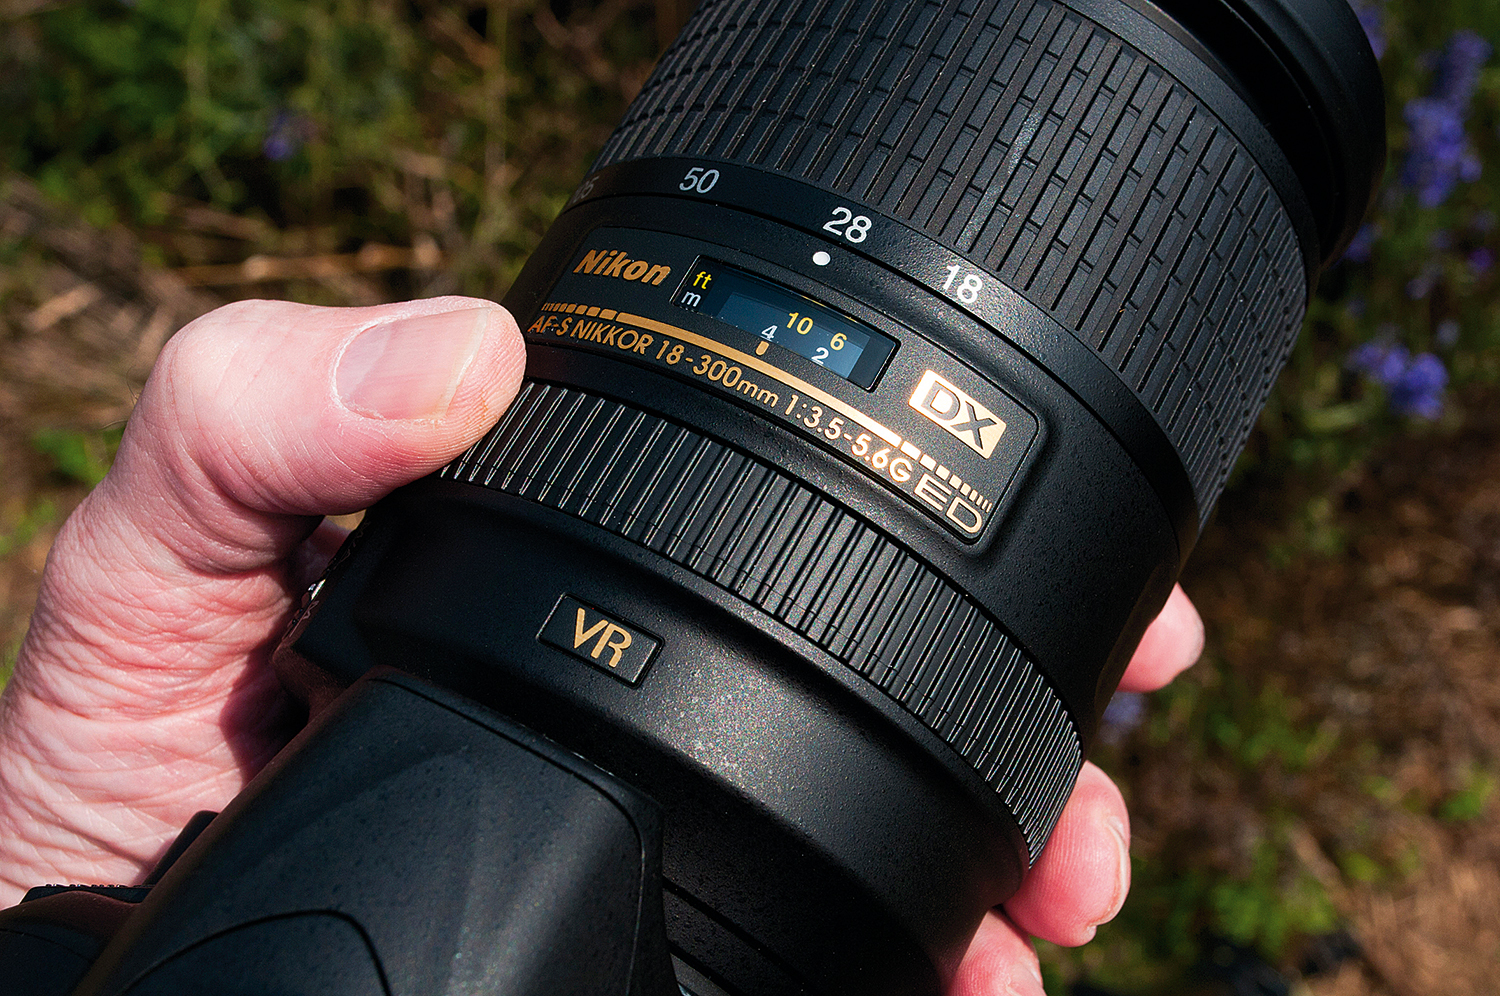
For this you need a lens with a distance scale. Not all lenses have one (the Nikon 18-55mm kit lens doesn’t, for instance), but many others do. Use your judgement if the markings are far apart – depth of field calculations make it sound like a precise science, but the sharpness falls away slowly, so you don’t have to be ultra-precise.
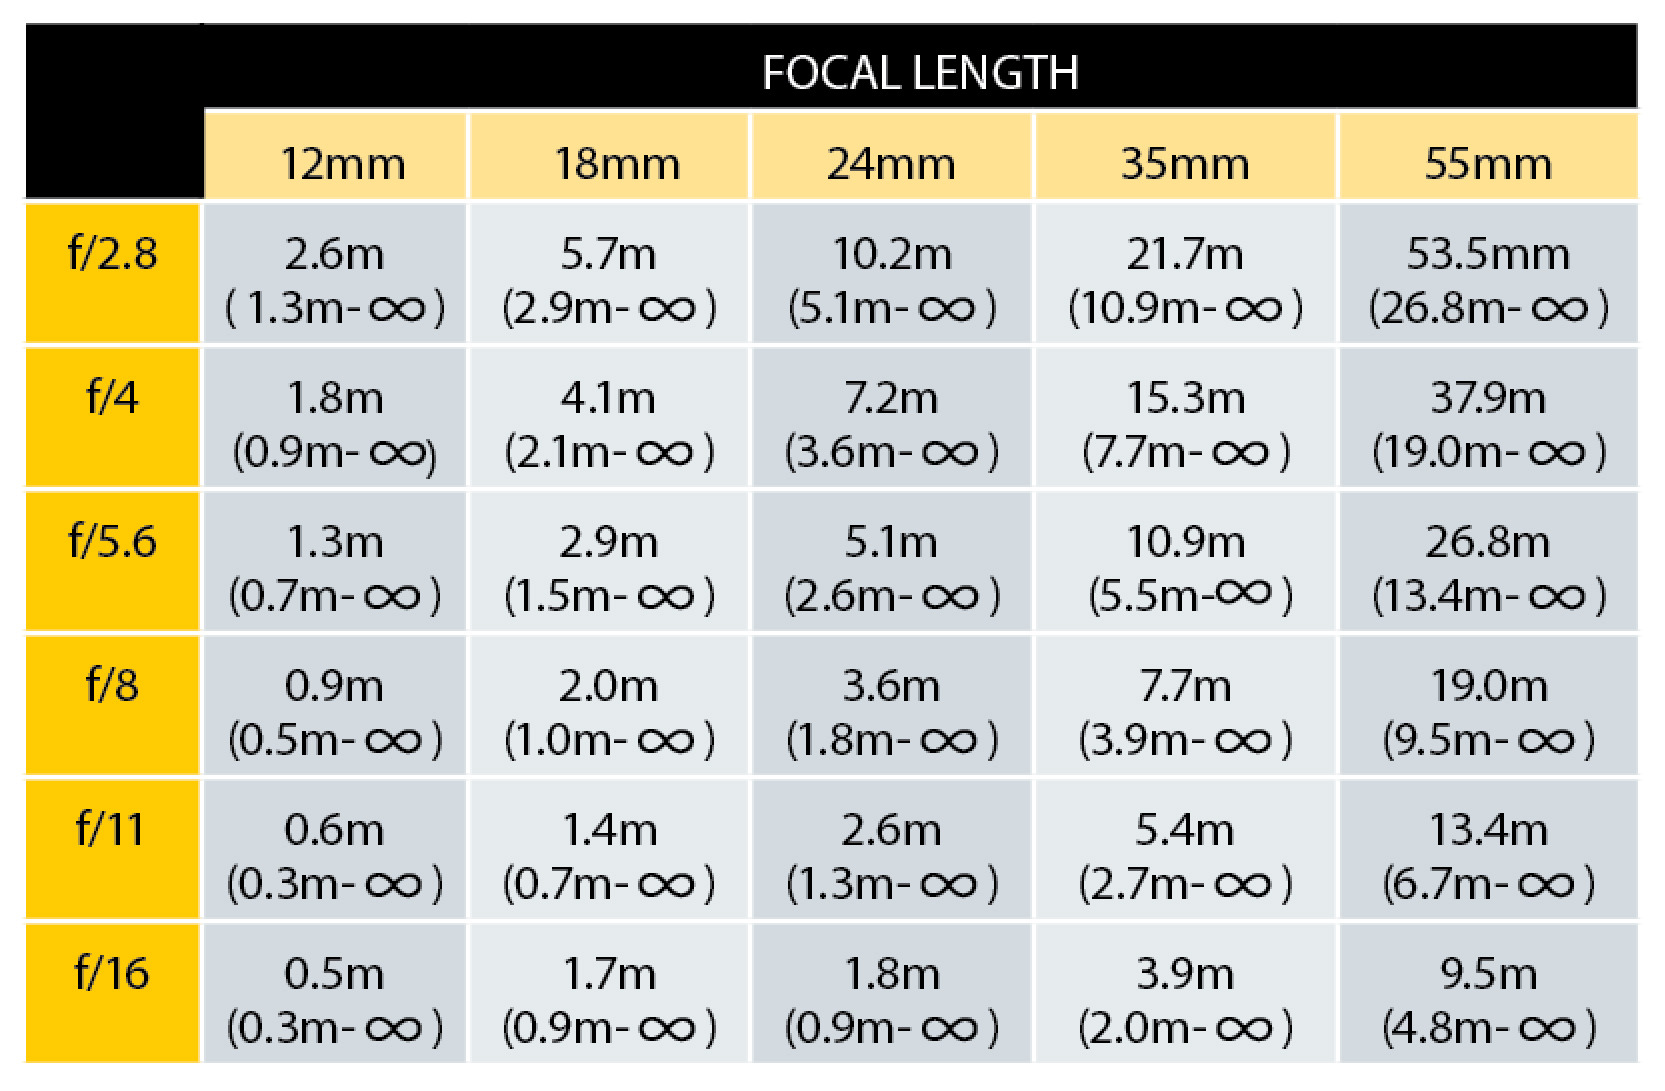
Hyperfocal distance tables
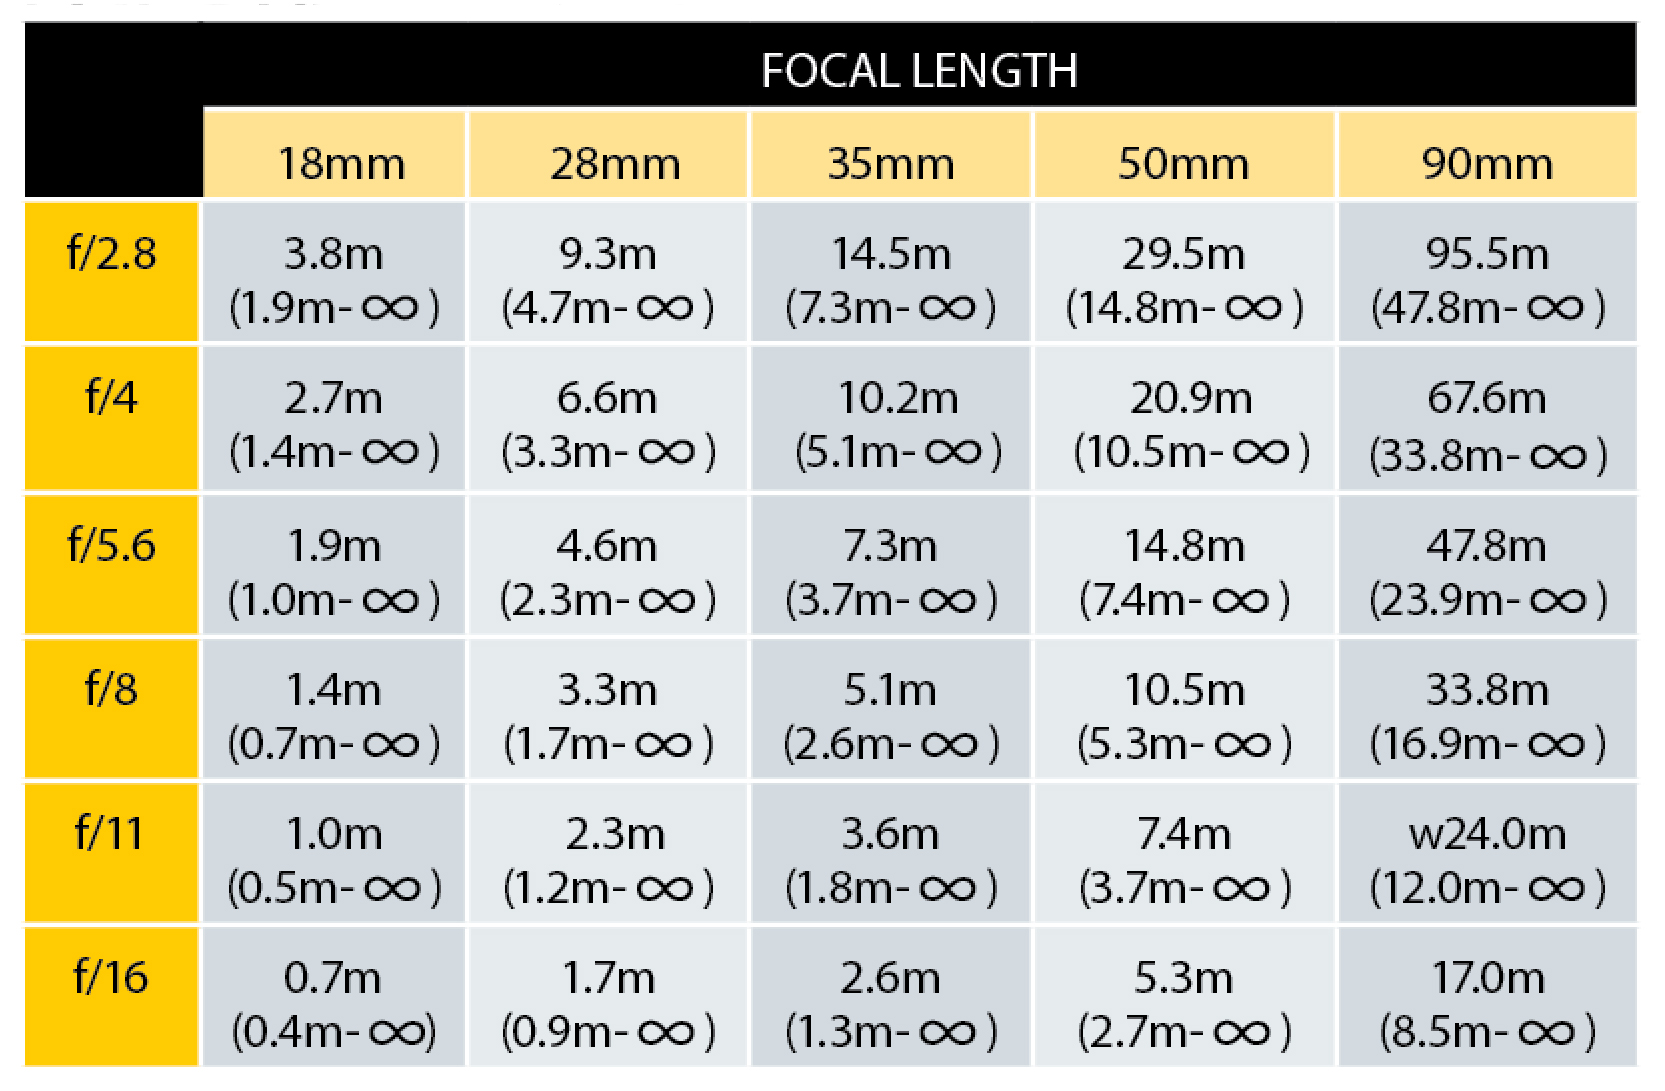
To use these tables look up the aperture and focal length you are using for your type of camera – we have one for 35mm full-frame sensors, and one for APS-C crop sensors. This will tell you the distance at which to focus (the hyperfocal distance) to get as much of the foreground in focus as well as the horizon (infinity). The depth of field range you then get is shown in brackets.
Keep a printout of the tables in your bag – or copy them to your phone.
35mm full-frame cameras
APS-C crop sensor cameras
More videos:
147 photography techniques, tips and tricks for taking pictures of anything
How to use an ND graduated filter for stunning landscape photography
Northern Lights photography: tips and techniques for stunning images
Sunset photography: tips and settings for perfect pictures
Get the Digital Camera World Newsletter
The best camera deals, reviews, product advice, and unmissable photography news, direct to your inbox!
Rod is an independent photography journalist and editor, and a long-standing Digital Camera World contributor, having previously worked as DCW's Group Reviews editor. Before that he has been technique editor on N-Photo, Head of Testing for the photography division and Camera Channel editor on TechRadar, as well as contributing to many other publications. He has been writing about photography technique, photo editing and digital cameras since they first appeared, and before that began his career writing about film photography. He has used and reviewed practically every interchangeable lens camera launched in the past 20 years, from entry-level DSLRs to medium format cameras, together with lenses, tripods, gimbals, light meters, camera bags and more. Rod has his own camera gear blog at fotovolo.com but also writes about photo-editing applications and techniques at lifeafterphotoshop.com
