Landscape photography: shoot stunning panoramics and do justice to a vast scene
Take individual shots and merge them together in software to create an epic scenic vista
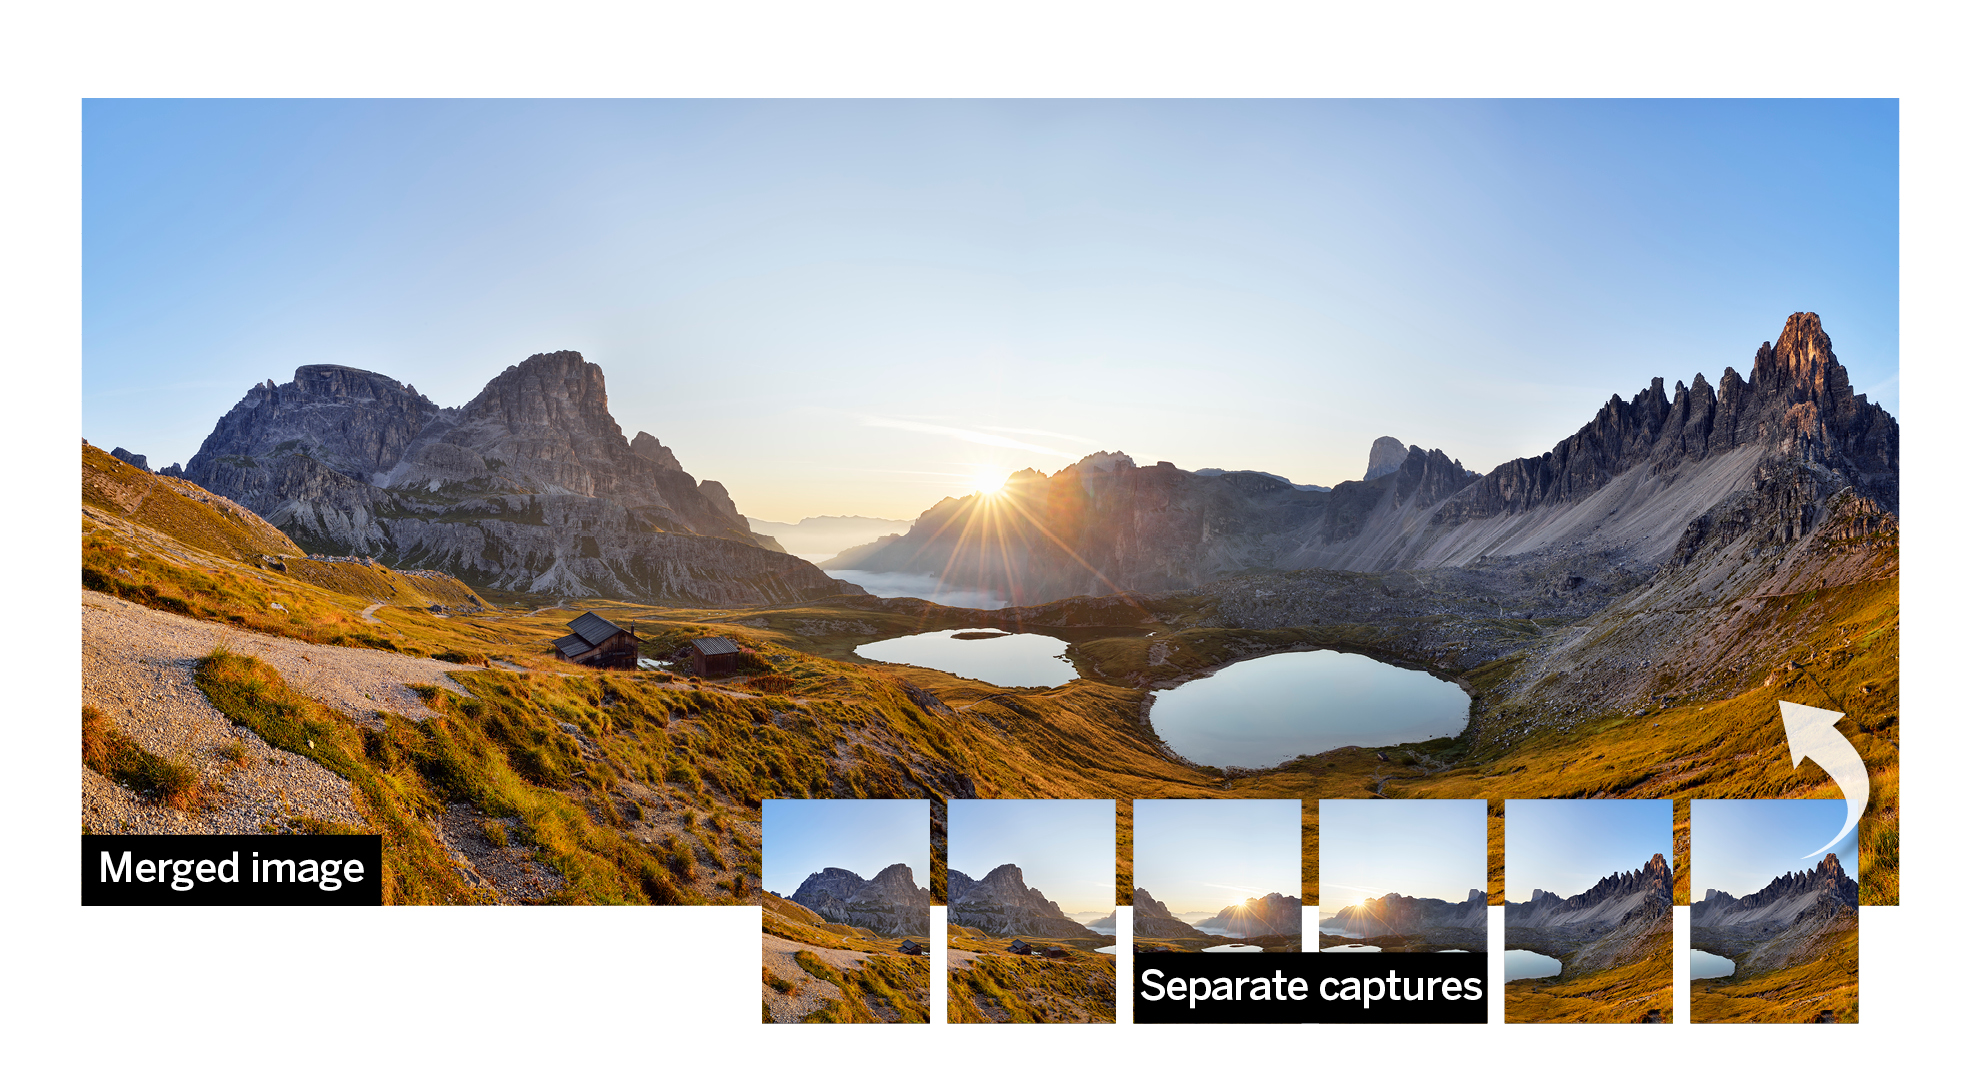
Some vast landscape scenes don’t suit a conventional aspect ratio, so a wider, more cinematic one could work much better. Many camera phone devices have a panoramic photo mode, but the image quality will fall short of a DSLR or mirrorless camera, especially if you want to create professional prints or edit the raw captures.
In this tutorial, I’m going to show you how to do justice to an epic scenic vista by capturing a series of images, then merging them together using Photoshop CC.
You’ll need a DSLR or mirrorless camera and a wide-angle lens, a tripod and ideally one of the best panoramic tripod heads (see below).
So to create a perfect panorama, here's what you need to do…
How to create an epic panorama shot
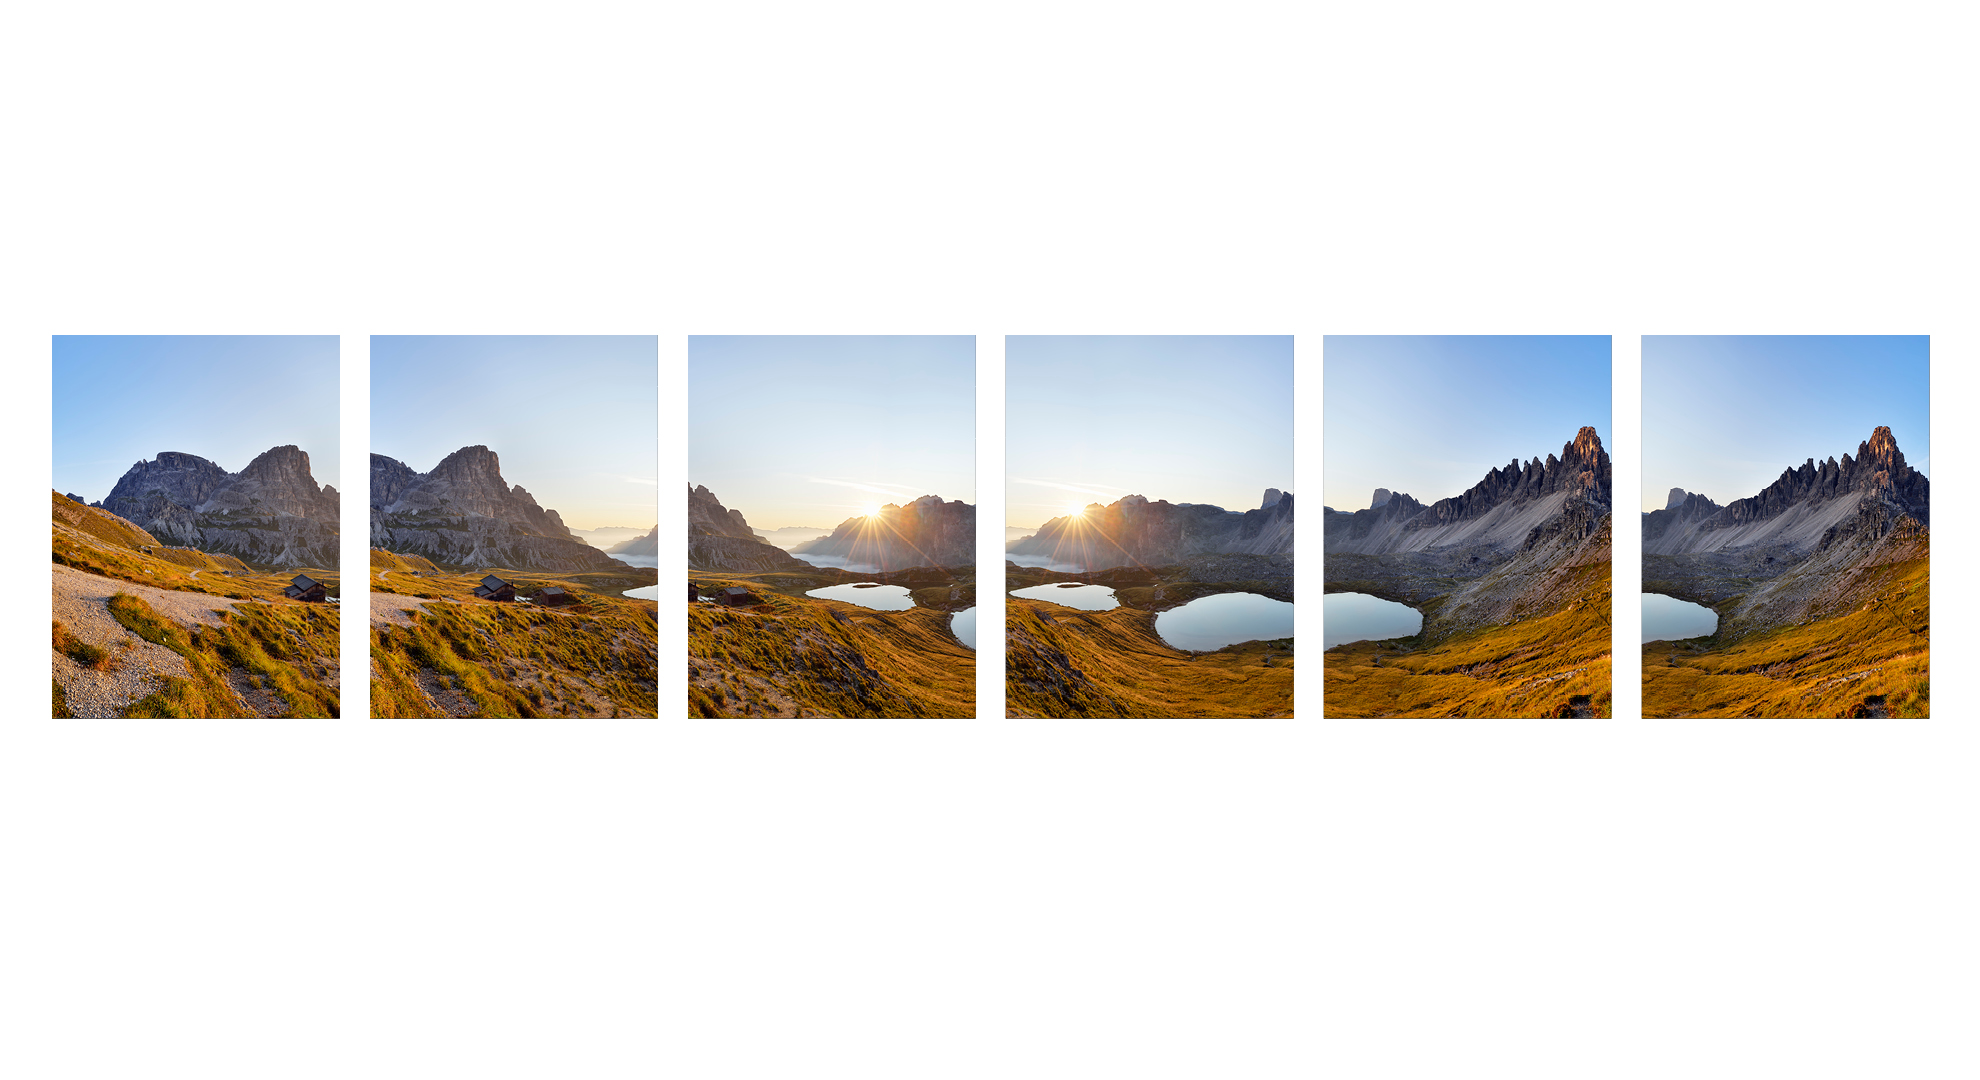
The best way to capture panoramas is with your camera shooting vertically – start at the left-most edge of your scene and work from left to right.
Be sure to capture raw files and use Aperture Priority mode to begin, choosing an aperture of f/16 for good sharpness throughout the scene, then adjust the ISO until you have a shutter speed of 1/200 sec – fast enough for shooting handheld if you don’t have a tripod.
Then go into Manual exposure mode to lock off those settings so that the exposures don’t change between frames, as this will help the tones in each frame stitch together seamlessly.
Now focus a third of the way into the scene and switch to manual focus so the focus is also consistent in each frame; this will also help with the stitching process.
Shoot in the vertical orientation and make sure each shot overlaps by at least 30%. Take note of where the horizon is in each frame and make sure this lines up with the last one so your panorama is straight.
It’s also worth taking a picture of your hand at the start and end of your panorama so it’s easy to find when editing your shots back home.
If you find you enjoy this technique and want to take your panoramic landscapes more seriously, then you could consider using a panoramic tripod head (see below).
Pro tip: Exposure Auto Bracketing
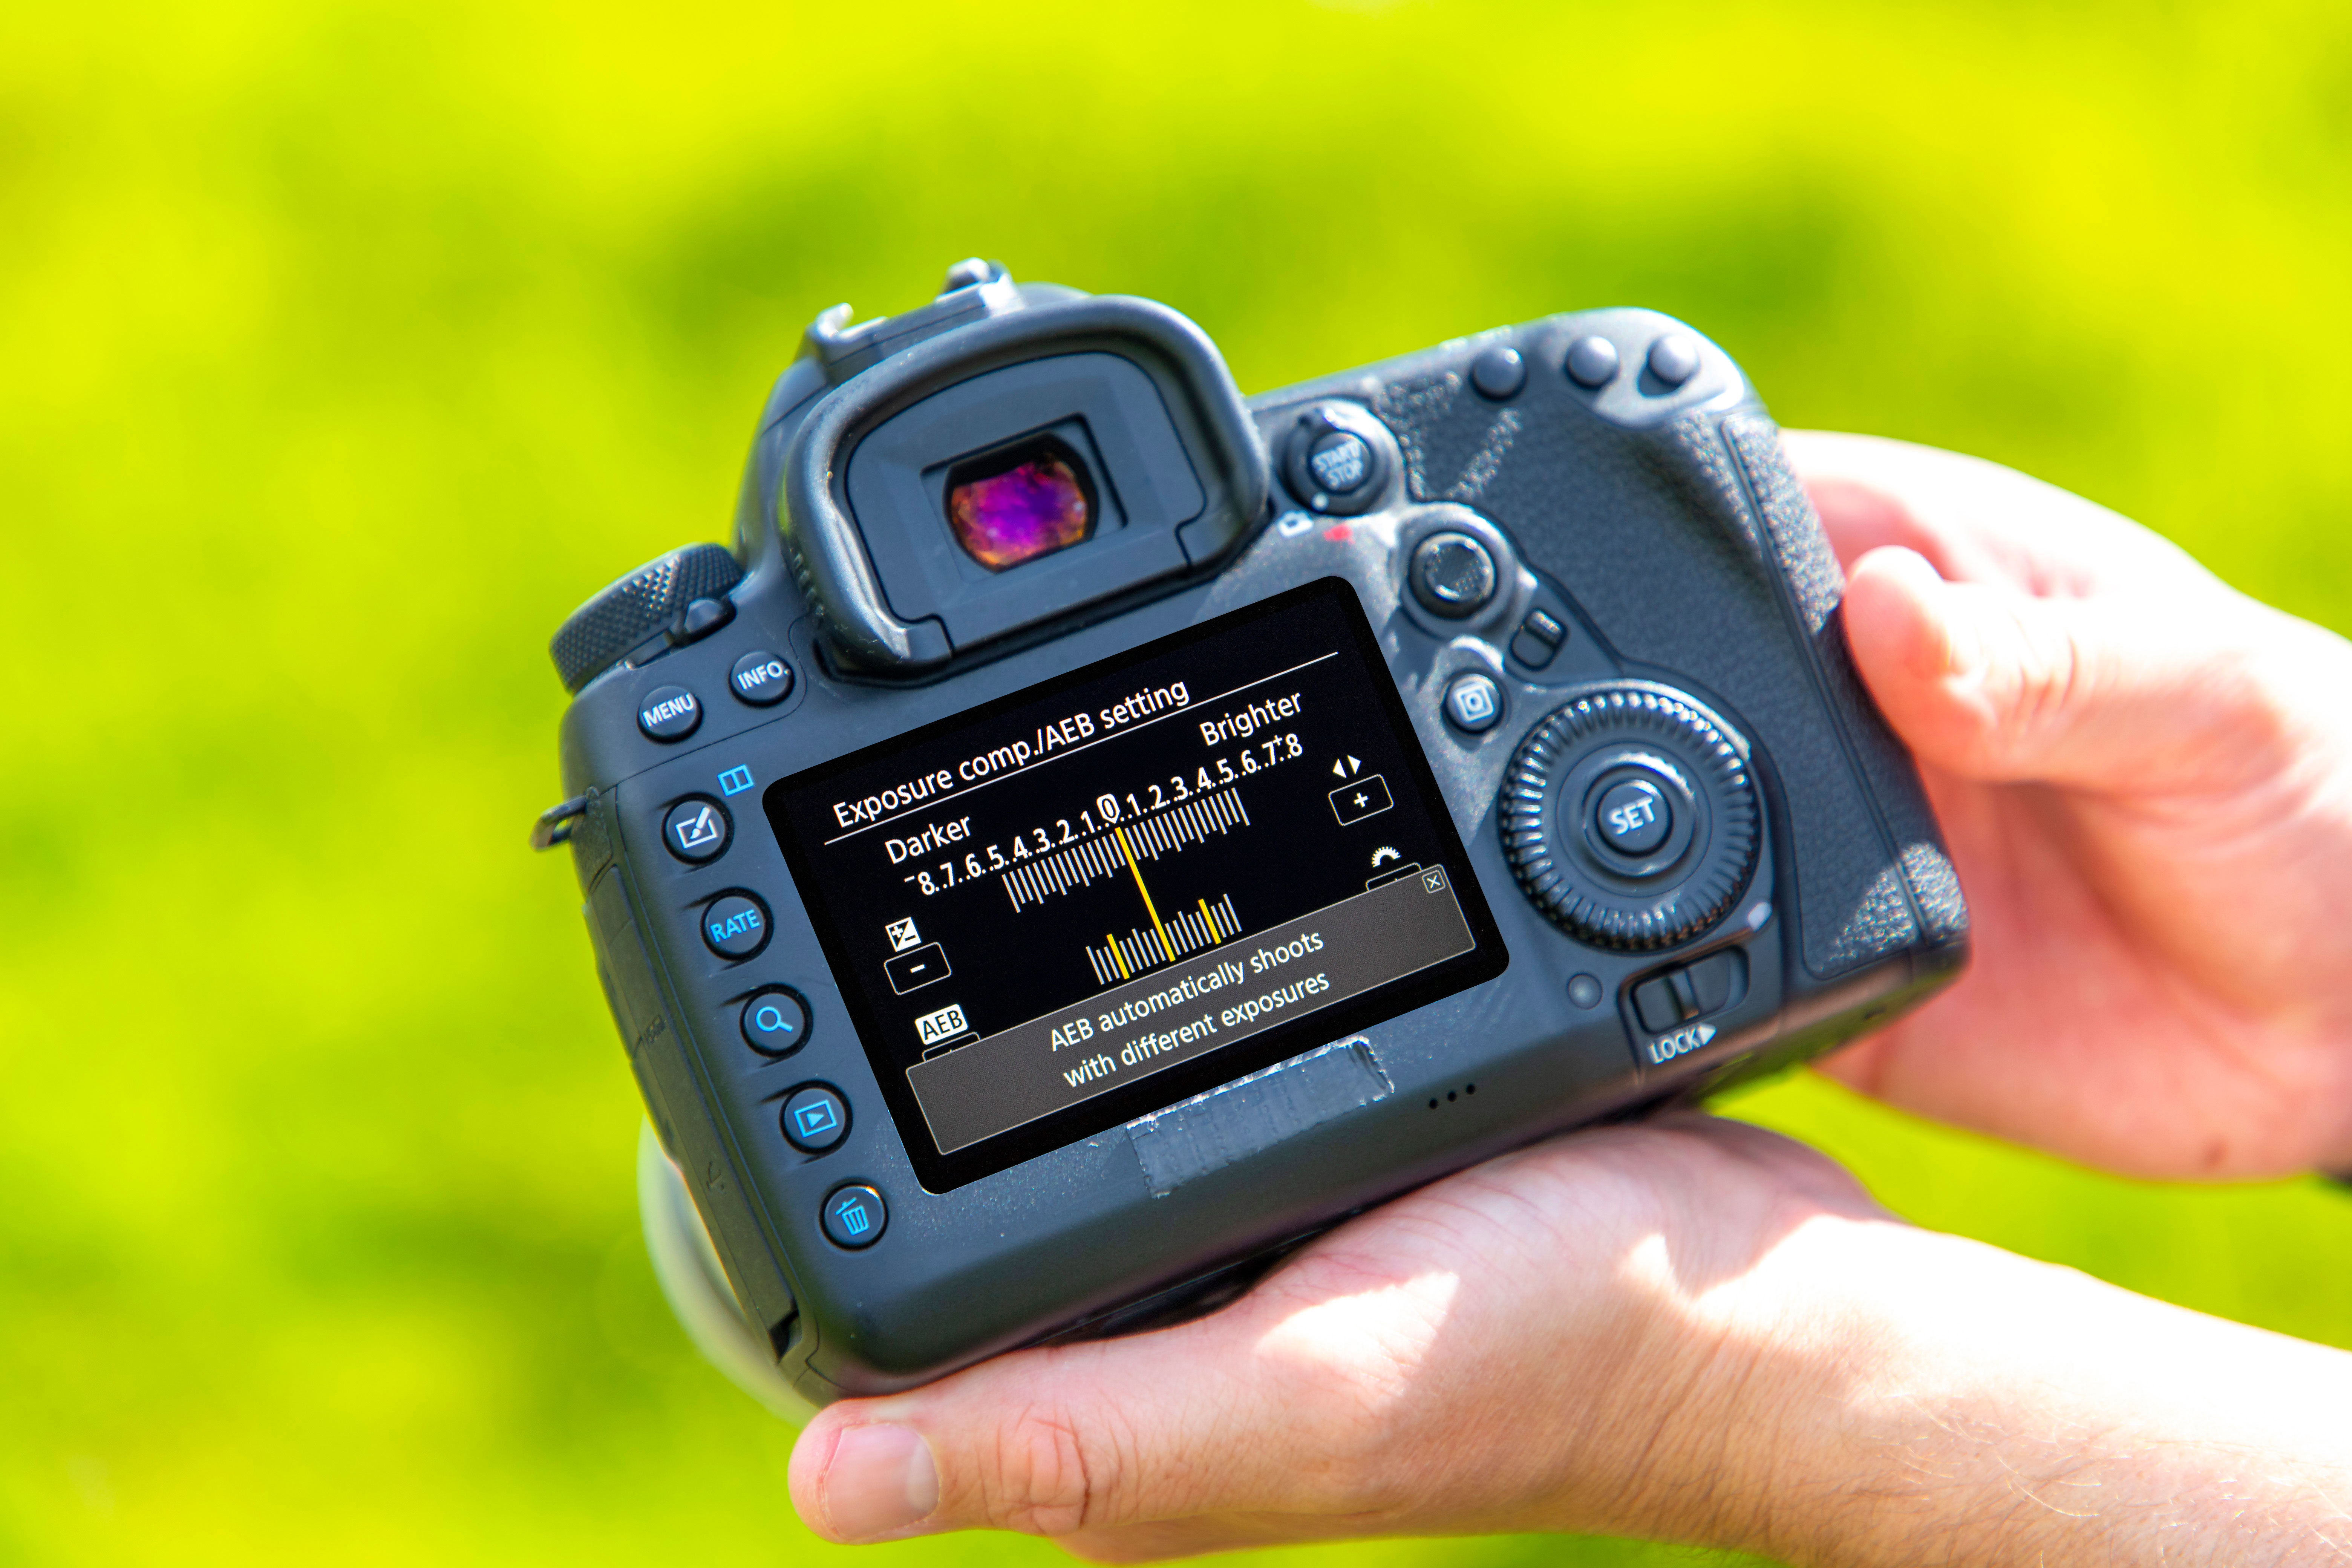
To give your panoramas more detail, shoot a High Dynamic Range (HDR) image by capturing raw files and activating your camera’s Auto Exposure Bracketing mode (AEB).
Set it to take three images (one normal, one underexposed and another overexposed) then merge the best tones.
Kit advice: what is a panoramic tripod head?
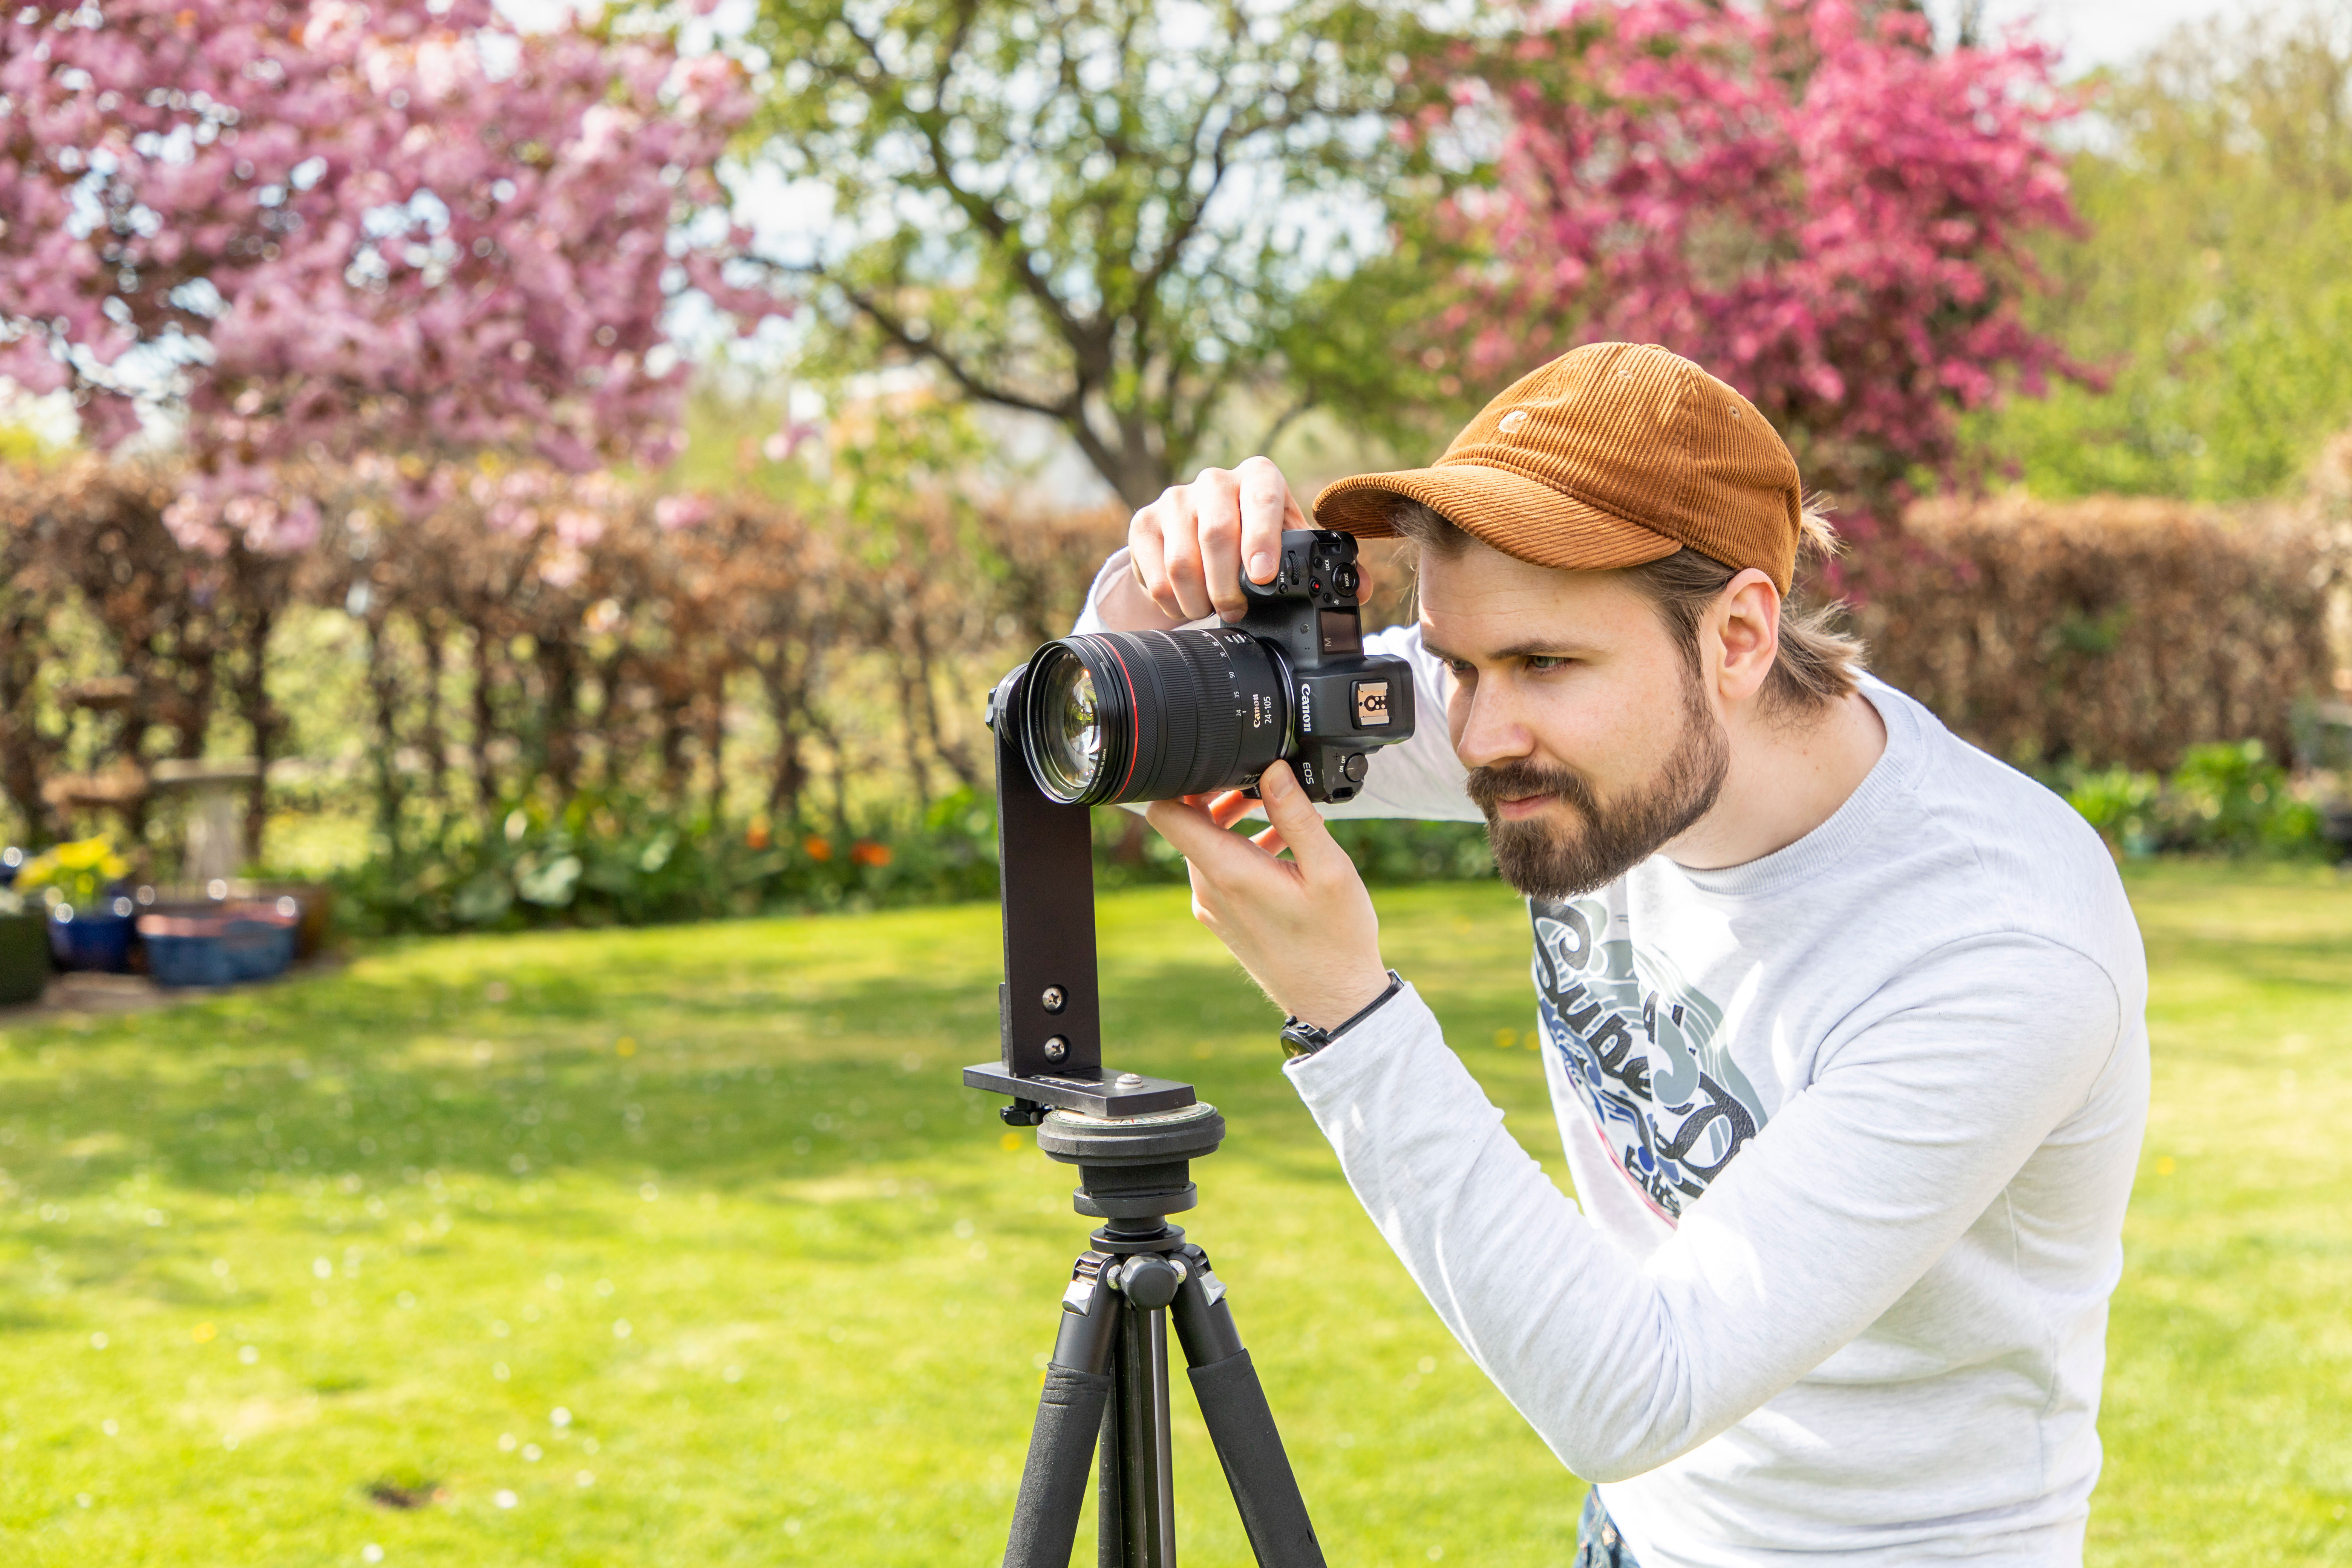
Panoramic heads such as the Nodal Ninja, Manfrotto 057 or Panosaurus are specialist tripod heads for photographing perfect panoramas.
They allow you to mount the lens so that it is over the ‘nodal point’ of the tripod, to minimize an optical distortion called parallax error.
With your images free from this distortion, it’s easier to stitch your pictures together in software like Photoshop CC for a natural aesthetic.
Panoramic tripod heads also make it much easier to shoot a bracket of exposures for each section of your panorama or add additional rows to increase the height of your final panorama.
Read more: The best panoramic tripod heads
Merge your panoramic pictures in Photoshop
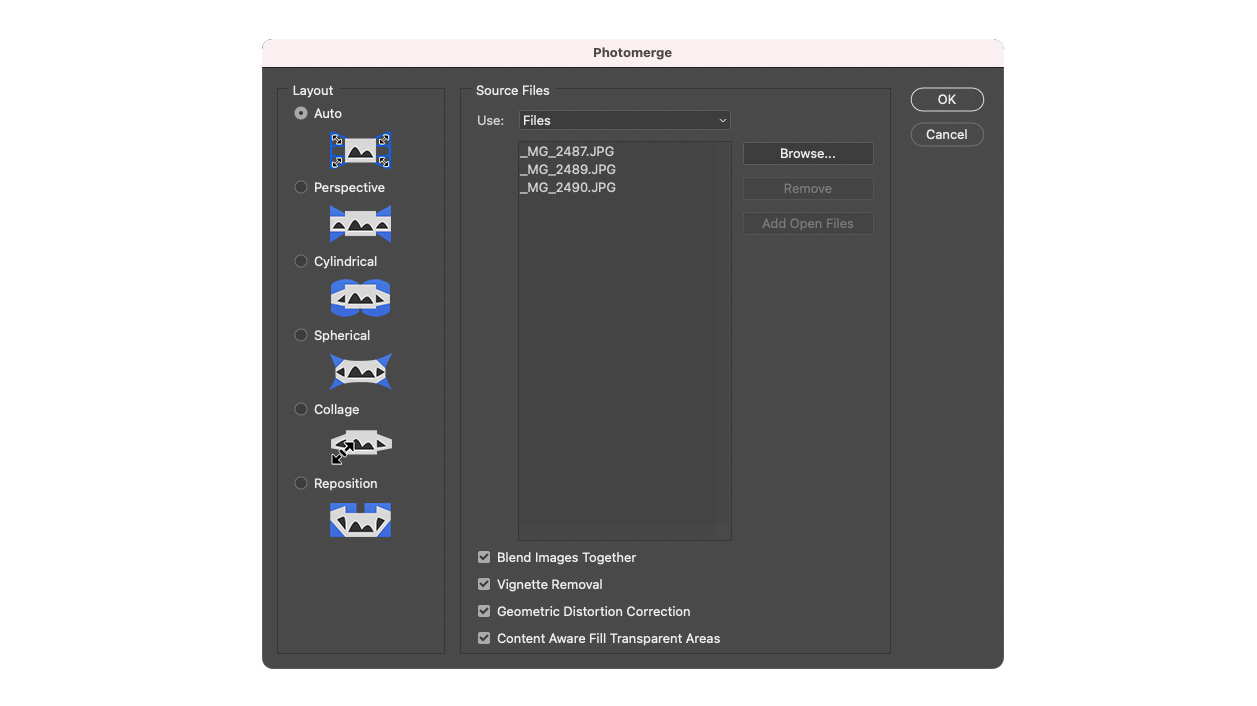
To merge a series of JPEG images into a wide-spanning panoramic photograph, you can open the files in Adobe Bridge and select all your panoramic shots, then go to Tools > Photoshop > Photomerge.
This loads the images into Photoshop CC and presents you with the Photomerge dialogue box (above), where you have control over how your images are stitched together.
Leaving the Layout set to Auto usually does a good job, though you can retry with a different option if the panorama doesn’t stitch together correctly.
We recommend ensuring that the four boxes at the bottom are ticked: ‘Vignette Removal‘ helps remove dark corners and makes the tones in your pano more seamless; ‘Content Aware Fill Transparent Areas‘ helps fill in any blank parts of the canvas from any missing data.
Other photo editing software will allow you to perform this technique, too.
Merge your panoramic pictures in Camera Raw
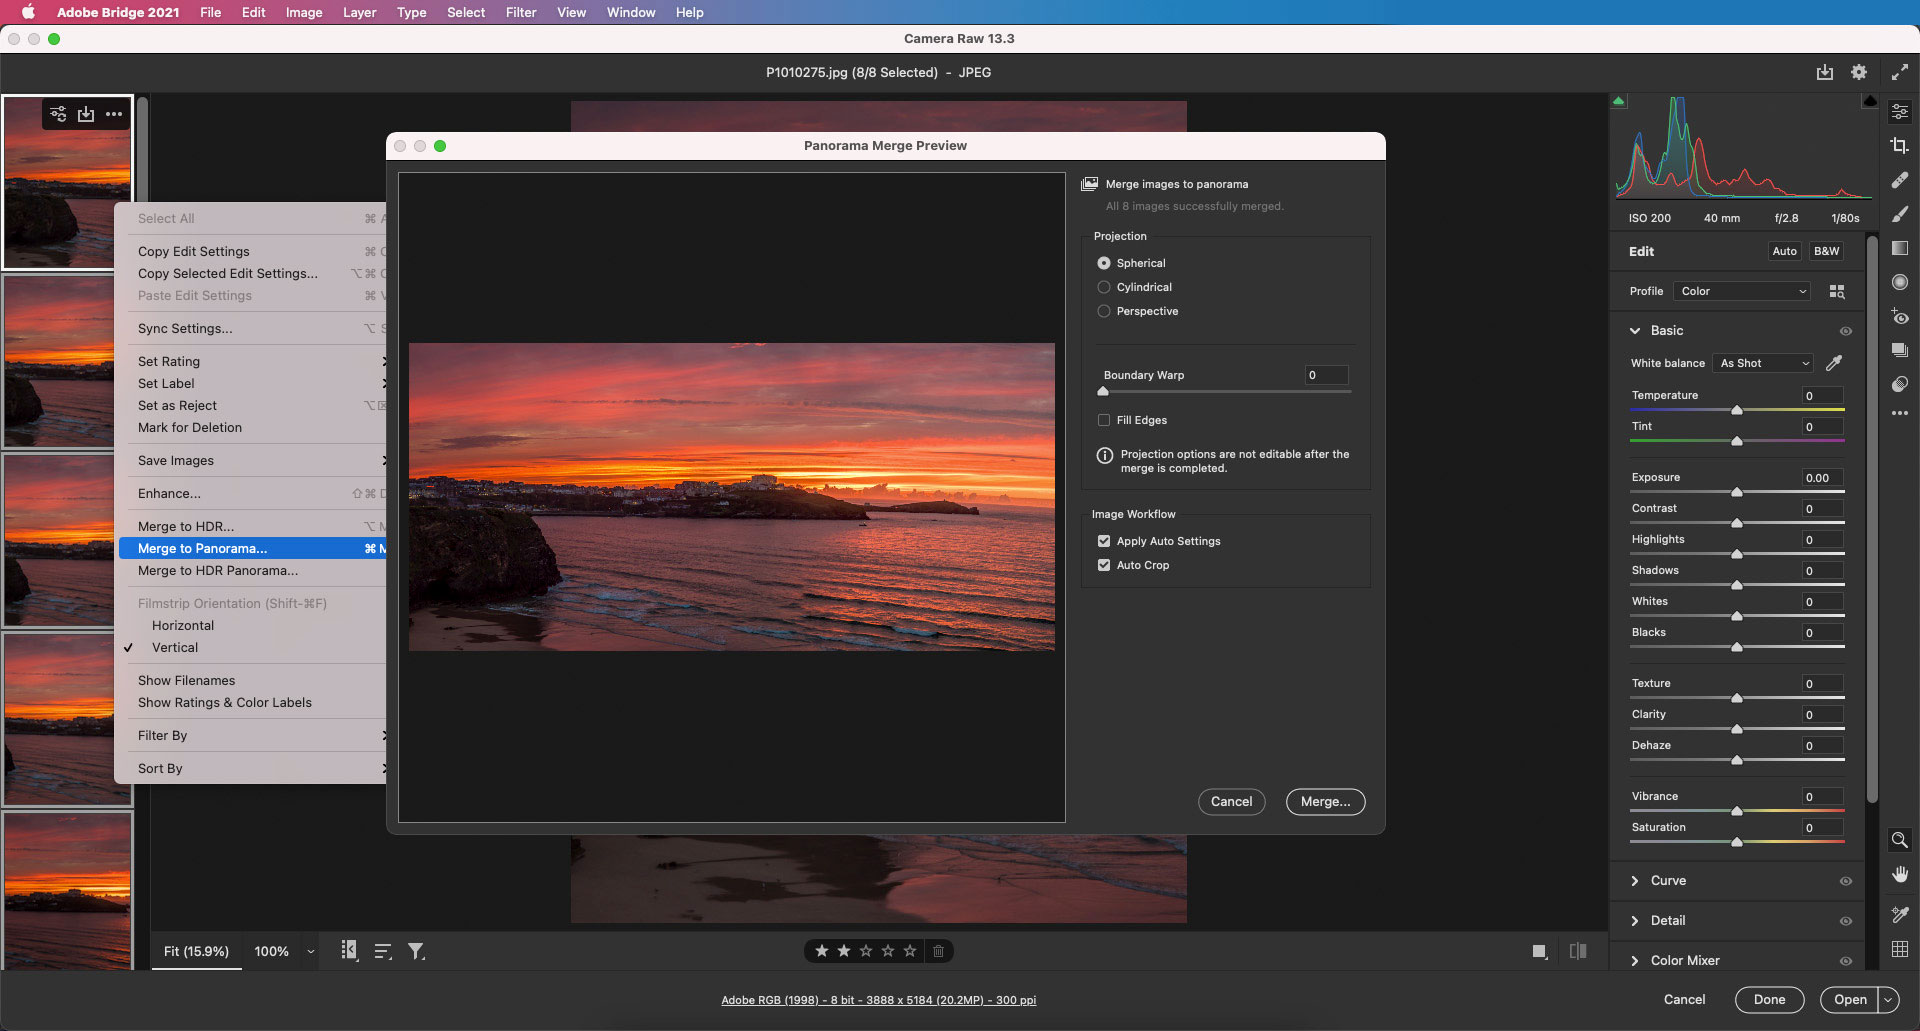
Open the raws of your pano into Adobe Bridge and select them all, then right-click the thumbnails and choose Open in Camera Raw.
In Adobe Camera Raw, select all of the thumbnails again and right-click them, this time choosing Merge to Panorama. This will give you a dialog box with options for how you’d like to stitch the images together.
Read more:
The best lenses for landscapes in 2022
The best cameras for landscape photography
The best alternatives to Photoshop
Get the Digital Camera World Newsletter
The best camera deals, reviews, product advice, and unmissable photography news, direct to your inbox!

Deputy Editor on PhotoPlus: The Canon Magazine, Dan also brings his technical wizardry and editing skills to Digital Camera World. He has been writing about all aspects of photography for over 10 years, having previously served as technical writer and technical editor for Practical Photography magazine, as well as Photoshop editor on Digital Photo.
Dan is an Adobe-certified Photoshop guru, making him officially a beast at post-processing – so he’s the perfect person to share tips and tricks both in-camera and in post. Able to shoot all genres, Dan provides news, techniques and tutorials on everything from portraits and landscapes to macro and wildlife, helping photographers get the most out of their cameras, lenses, filters, lighting, tripods, and, of course, editing software.
- Lauren ScottFreelance contributor/former Managing Editor
