Learn to work with Adobe Camera Raw
A simple workflow for editing Raw files
Download project files to your computer from: http://downloads.photoplusmag.com/pp122.zip
Develop an effective ACR workflow
Time needed: 15 minutes
Skill level: Beginner
Kit needed: Adobe Camera Raw (found in Photoshop Elements and CC)
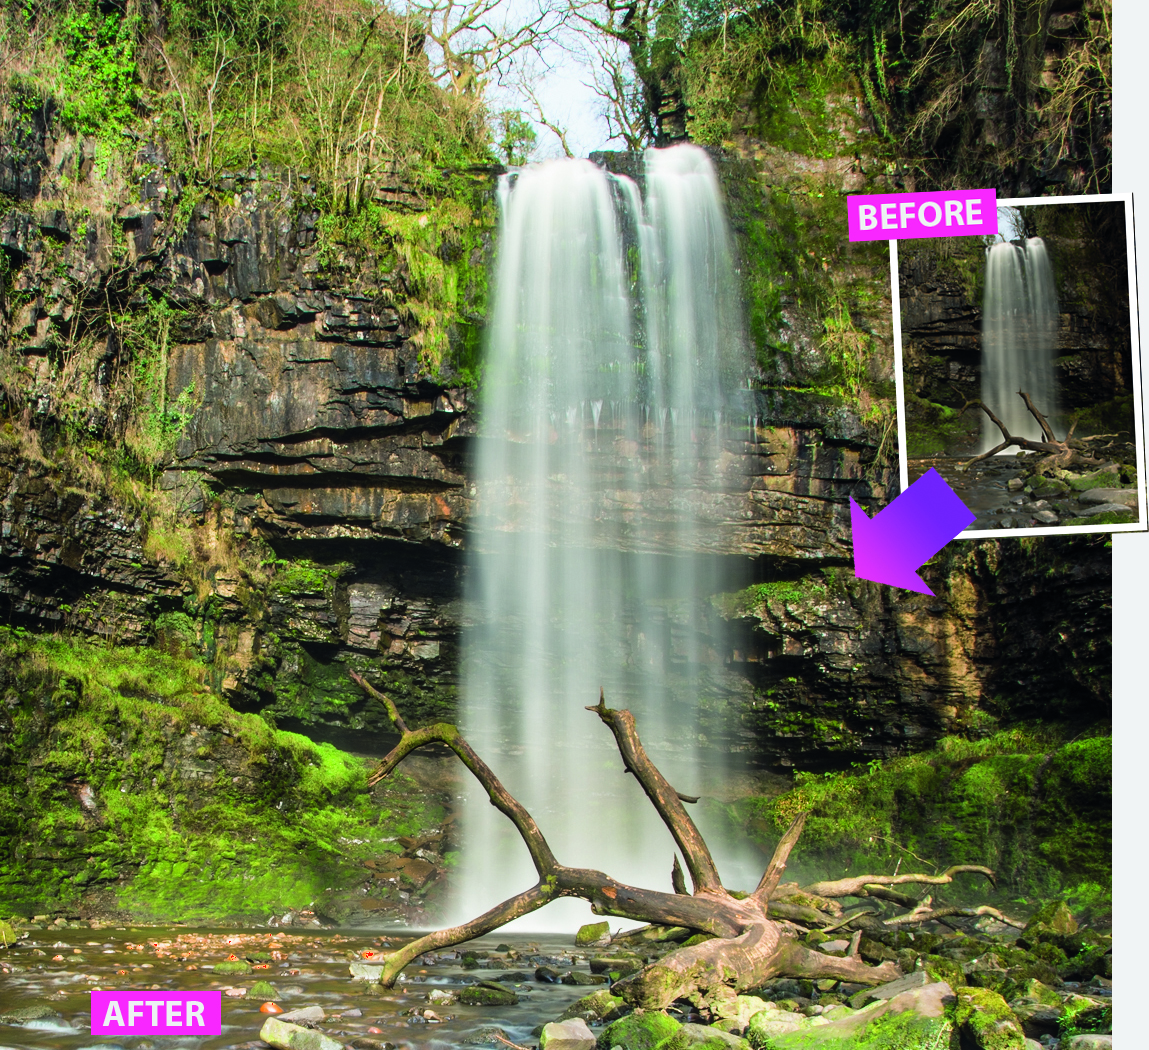
Raw files have so much more information about the colours and tones in a scene, compared to a JPEG. But what you gain in quality you lose in convenience, and you’ll need to do some work to display these tones that appear to be missing in darker or brighter areas. You may also find that colours occasionally suffer from a warm or cool tint due to incorrect white balance settings used by the camera at the time of capture.
In this tutorial we’ll show you a typical photo-fixing workflow that will demonstrate the ways you can analyse a Raw file for typical exposure and colour problems, then correct them using the sliders in Adobe Camera Raw’s so-called Basic panel, which is available in both Photoshop Elements and CC versions.
Once your photo looks more like the scene did on location, you can build on this basic workflow by applying more complex tools and effects to the image.
STEP BY STEP: Go with the flow
Follow our simple workflow to tease maximum detail from your Raw files
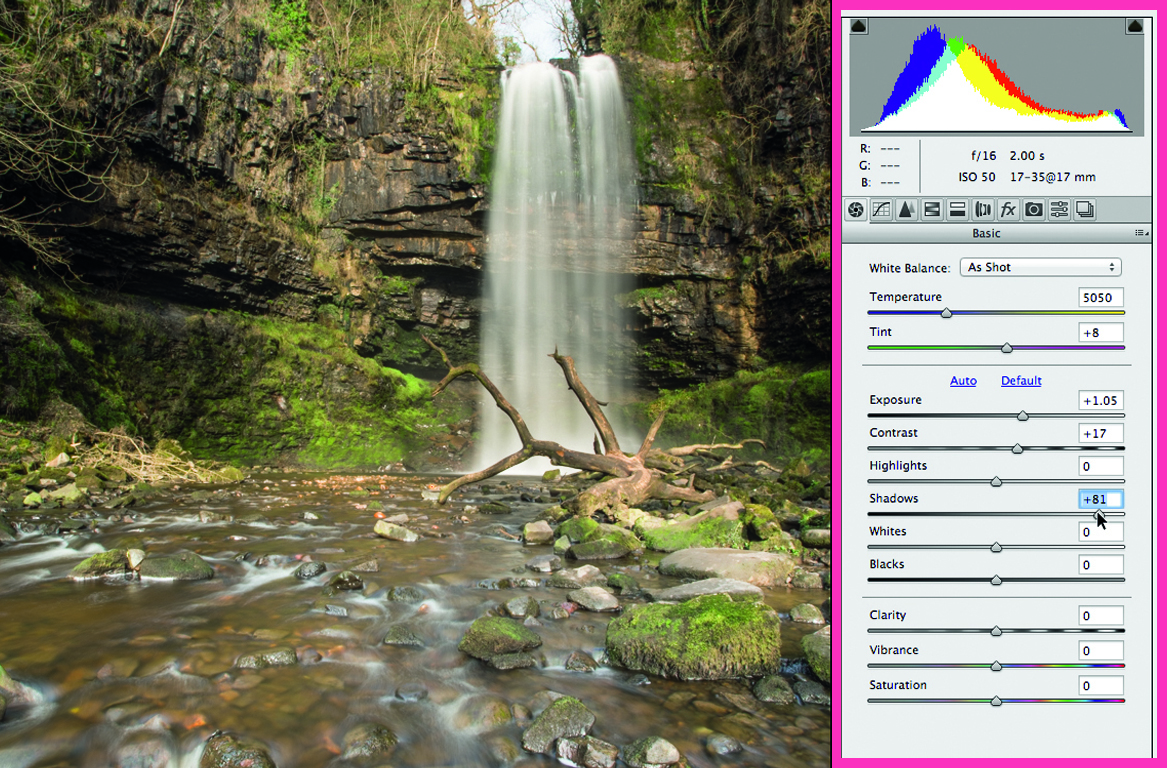
Once you’ve improved your photo, you have a variety of choices. Click on Done to record the slider changes and store them with the Raw file, so you can fine-tune them at a later date. To continue editing the image in Photoshop, choose Open Image. To save a JPEG version to share online, click on Save Image, then set the Format drop-down menu to JPEG and click on Save.
01 OPEN THE IMAGE
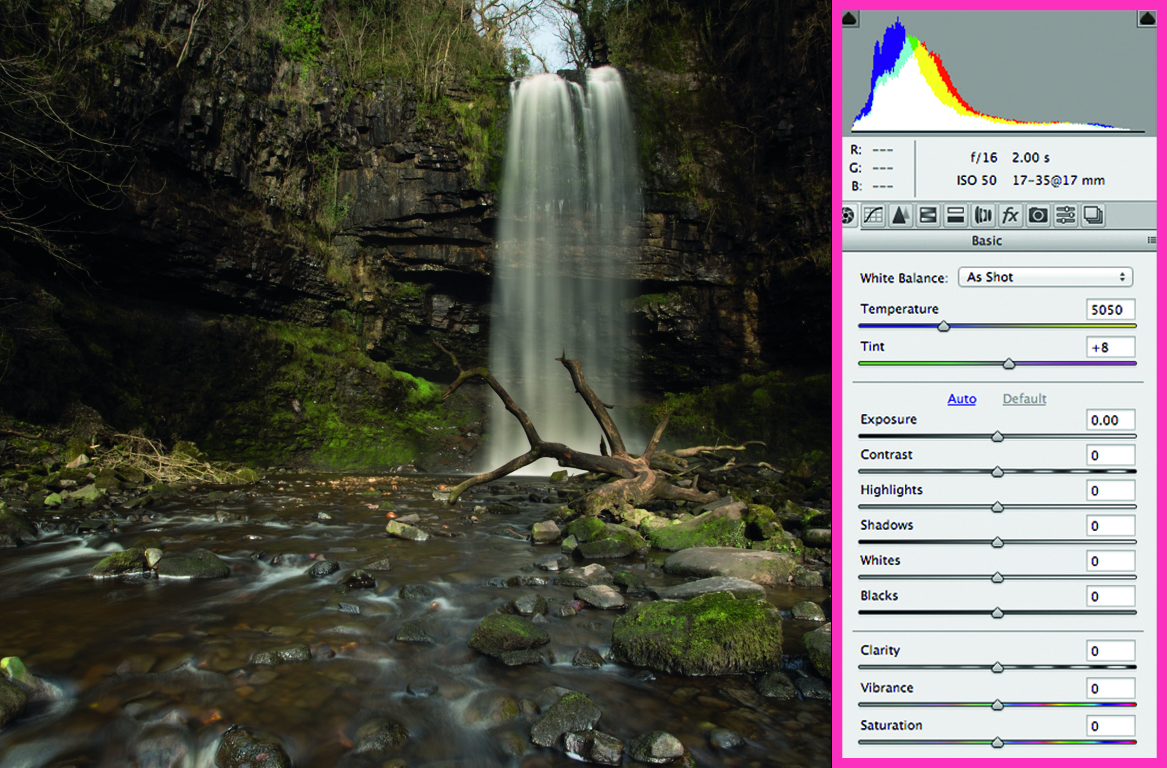
If you’re using CC’s Bridge or Elements’ Organizer, right-click on raw_workflow.dng and pick Open in Camera Raw from the pop-up menu. If you’re in Photoshop, pick File>Open. The file is a DNG (digital negative), so it will automatically open in Camera Raw.
ACR in Elements is cut down compared to the Photoshop CC version we used, but our workflow is applicable to both
02 BOOST THE EXPOSURE
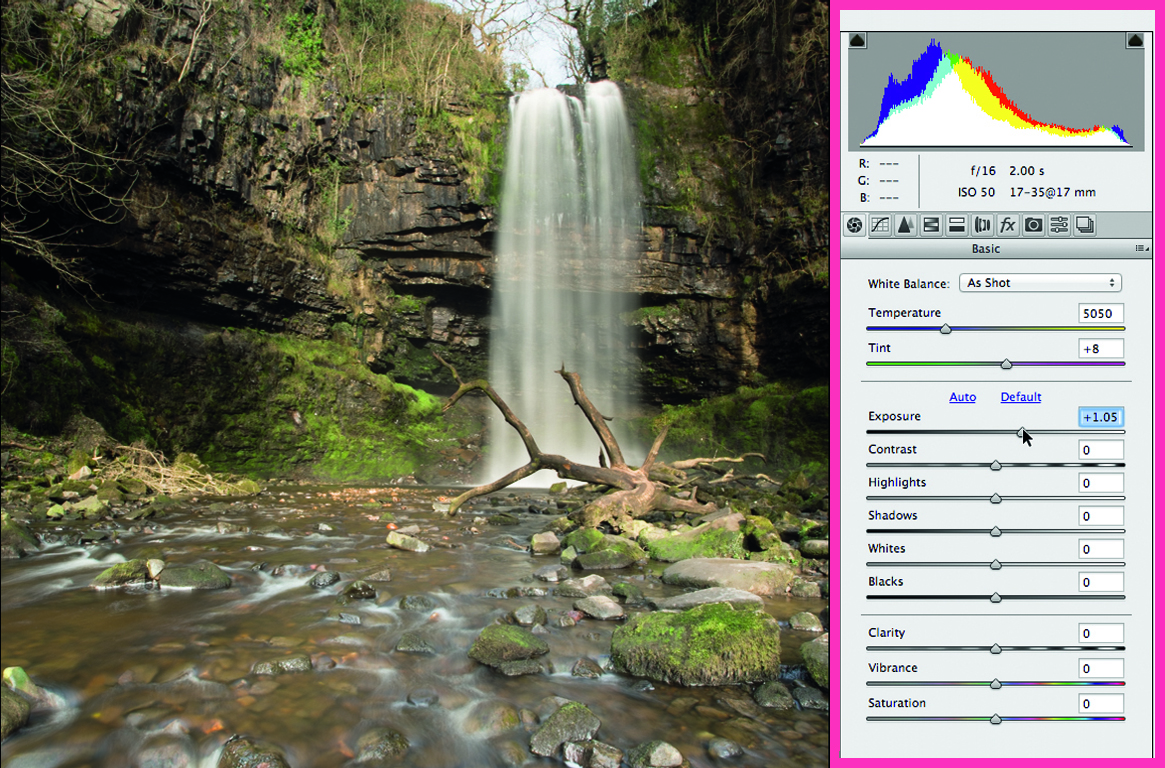
Look at the Histogram panel. The graph is clumped towards the left, showing the photo is underexposed. By dragging the Exposure slider right, the graph’s underexposed tones slide right, creating brighter highlights. A value of +1.5 does the trick here.
03 LIGHTEN THE SHADOWS
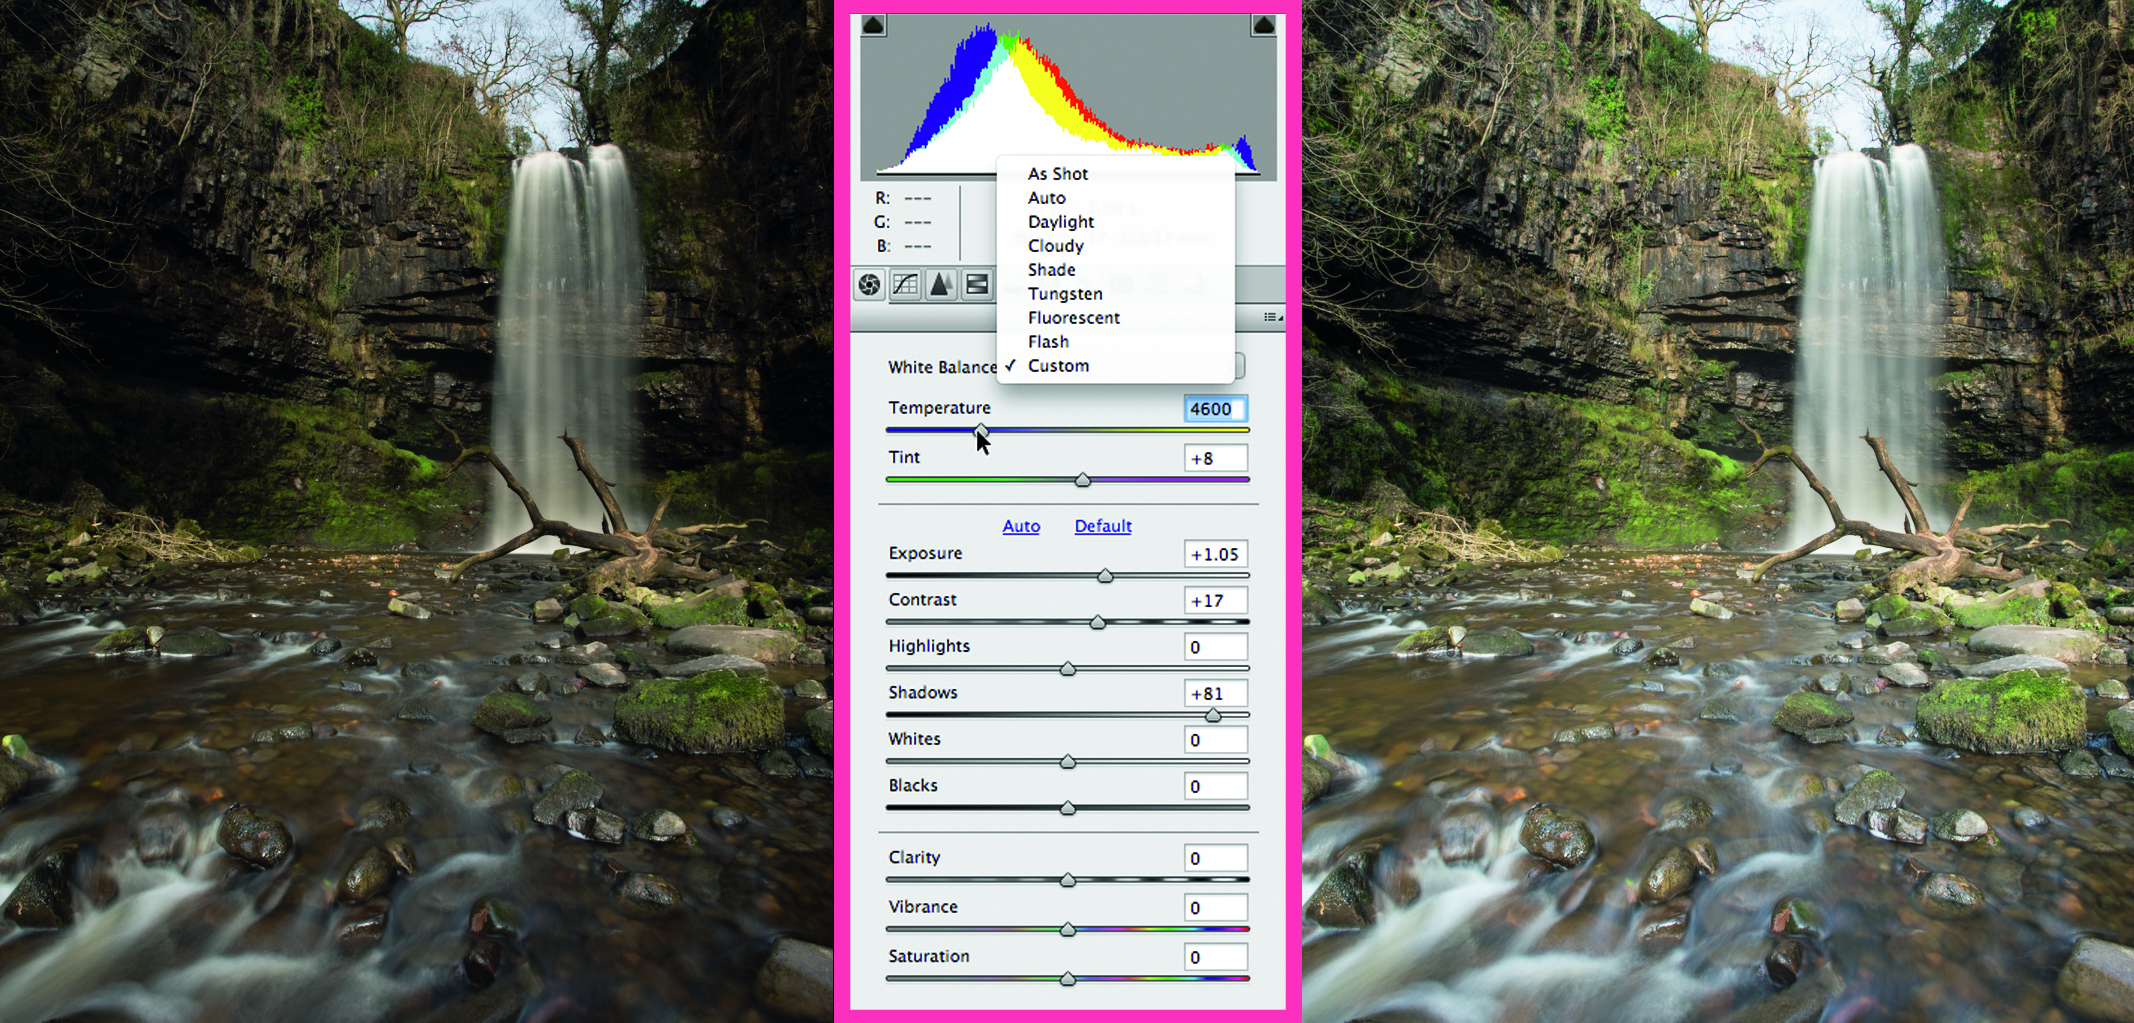
The shadows still lack detail. You can target them by dragging the Shadows slider right to +81. If a photo’s highlights were too bright, you’d drag the Highlights slider left to claw back detail. Drag Contrast to +17, for slightly blacker shadows and whiter highlights.
04 IMPROVE THE COLOUR
If the colours look too warm or cold, experiment with different white balance presets. For this image, drag Temperature left to 4600K to cool down the warm colour and create neutral, less muddy-looking whites. Press Q to cycle the Before and After views.
05 INCREASE CLARITY
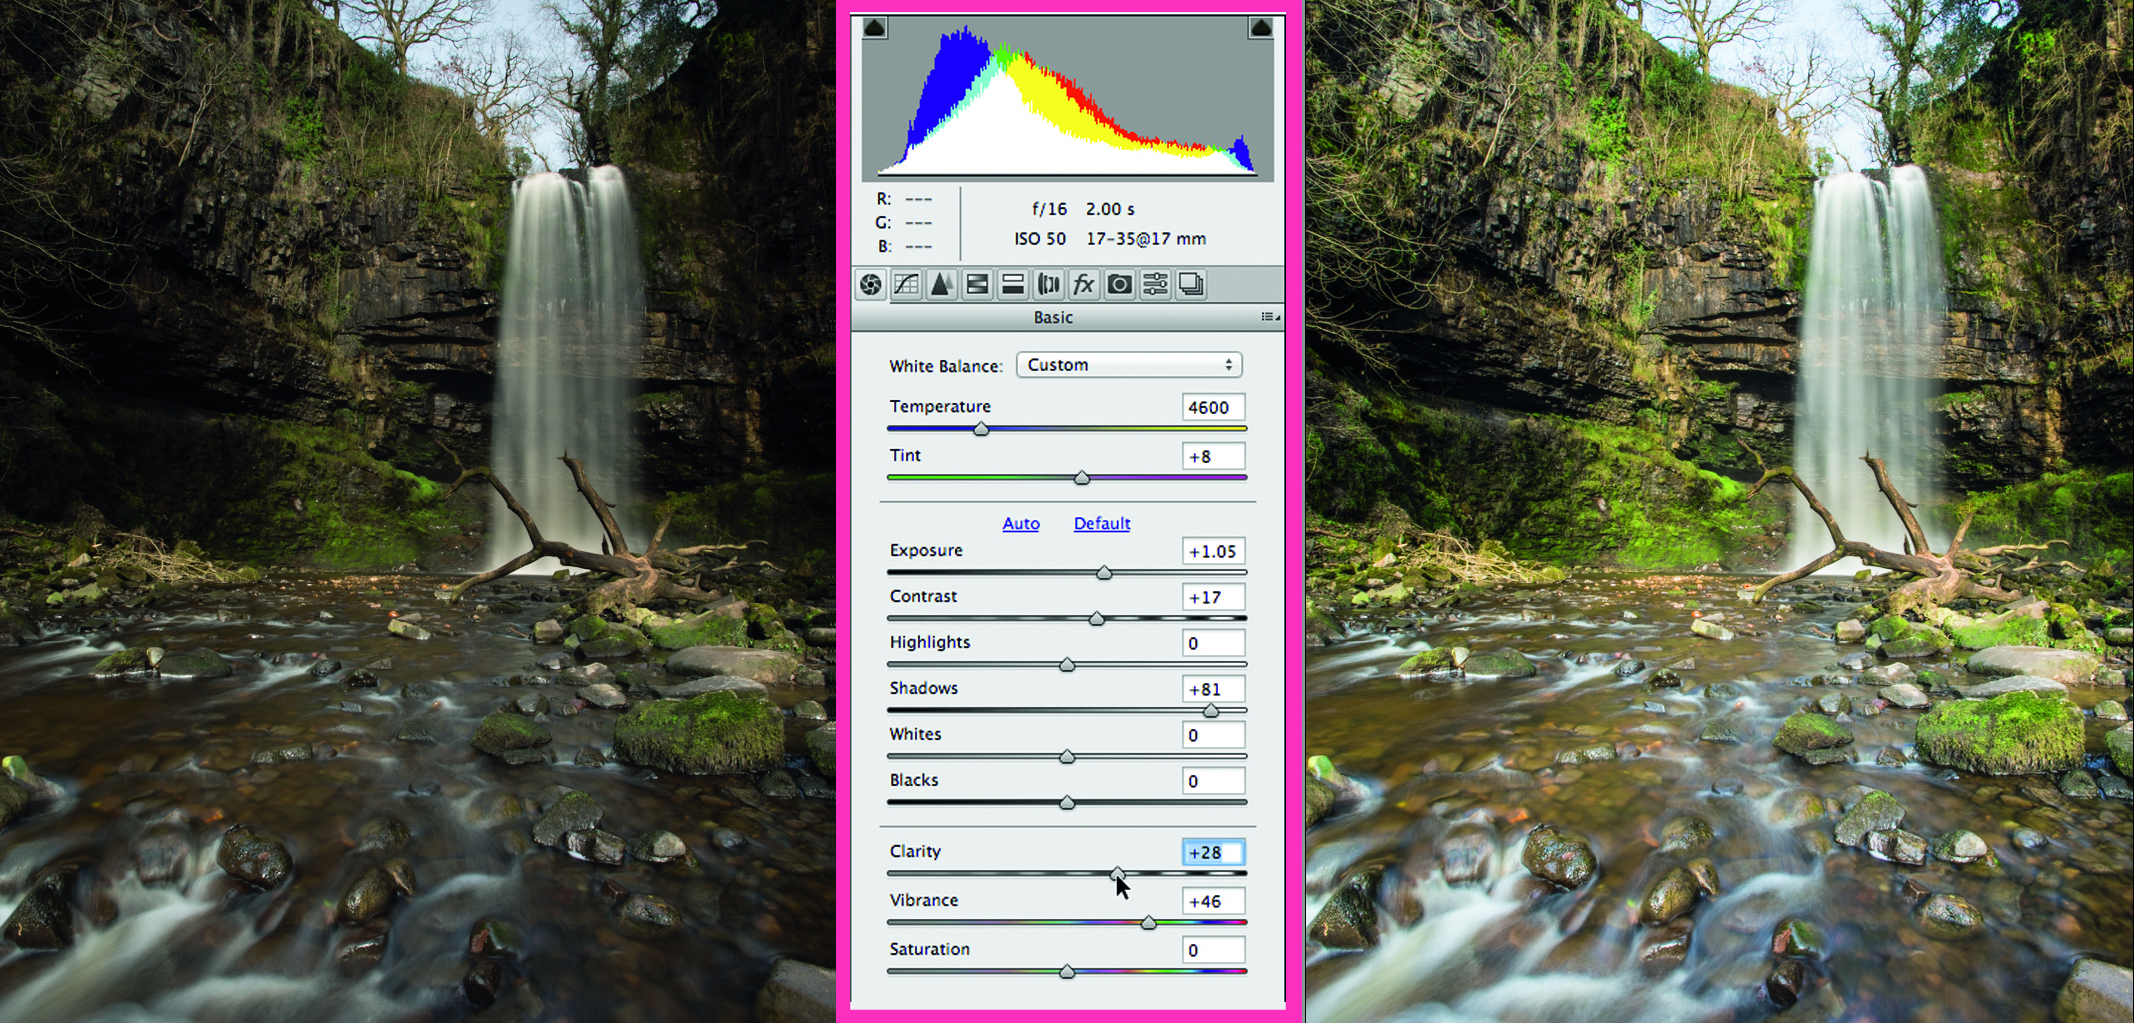
When you reveal tones in underexposed scenes, the colours can look drab. Drag Vibrance to +46. This boosts blues and greens, but won’t over-saturate warmer colours. Use the Clarity slider to boost mid-tone contrast and tease out textures; +28 is ideal.
06 SHARPEN IT UP
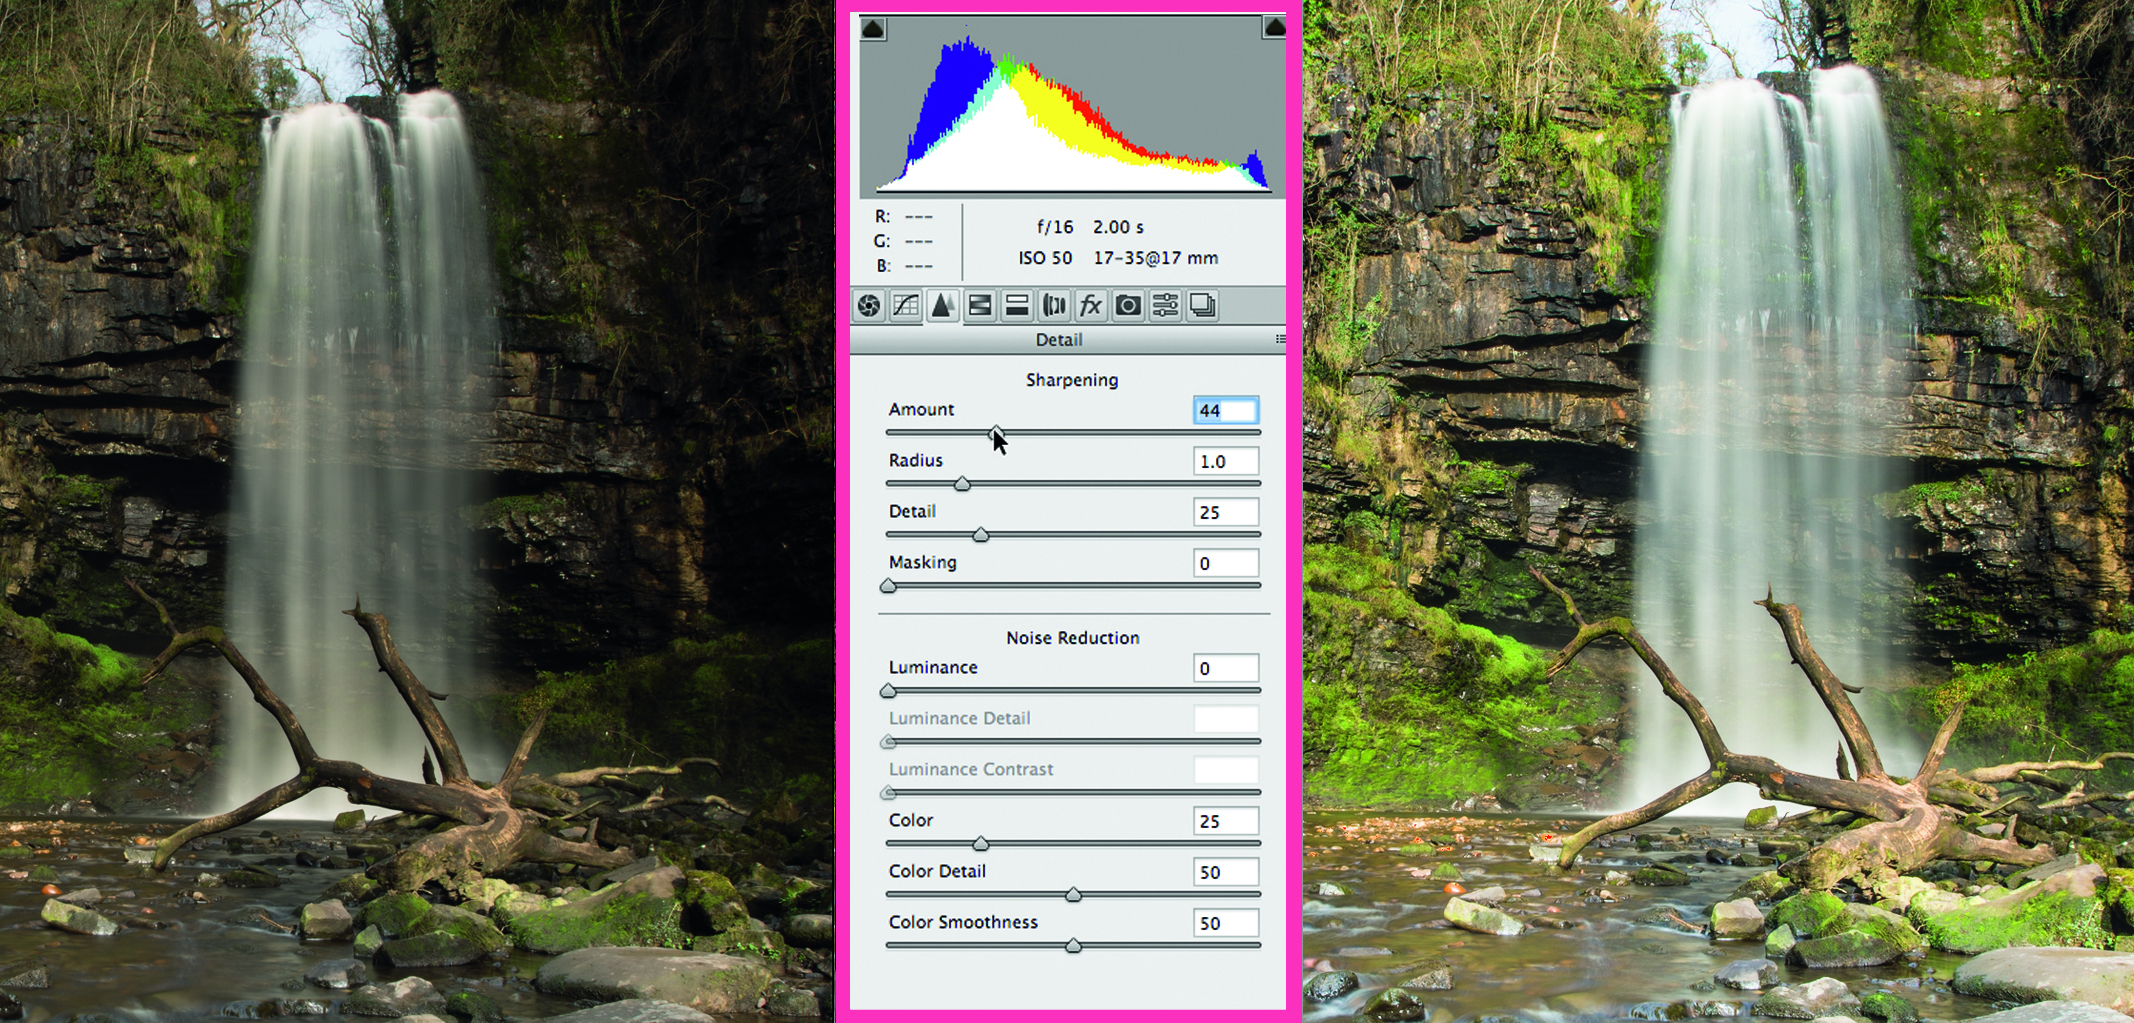
Camera Raw applies a little post-production sharpening. If you plan to print your photo, sharpen it a bit more. Select the Zoom tool and right-click to see the image at 100%. Go to the Detail tab and set the Amount slider in the Sharpening section to 44.
Get the Digital Camera World Newsletter
The best camera deals, reviews, product advice, and unmissable photography news, direct to your inbox!
George has been freelancing as a photo fixing and creative tutorial writer since 2002, working for award winning titles such as Digital Camera, PhotoPlus, N-Photo and Practical Photoshop. He's expert in communicating the ins and outs of Photoshop and Lightroom, as well as producing video production tutorials on Final Cut Pro and iMovie for magazines such as iCreate and Mac Format. He also produces regular and exclusive Photoshop CC tutorials for his YouTube channel.

