Organizing a styled shoot can be a little daunting, especially for Halloween, but careful preparation will give you the best chance of getting everything you want out of the shoot.
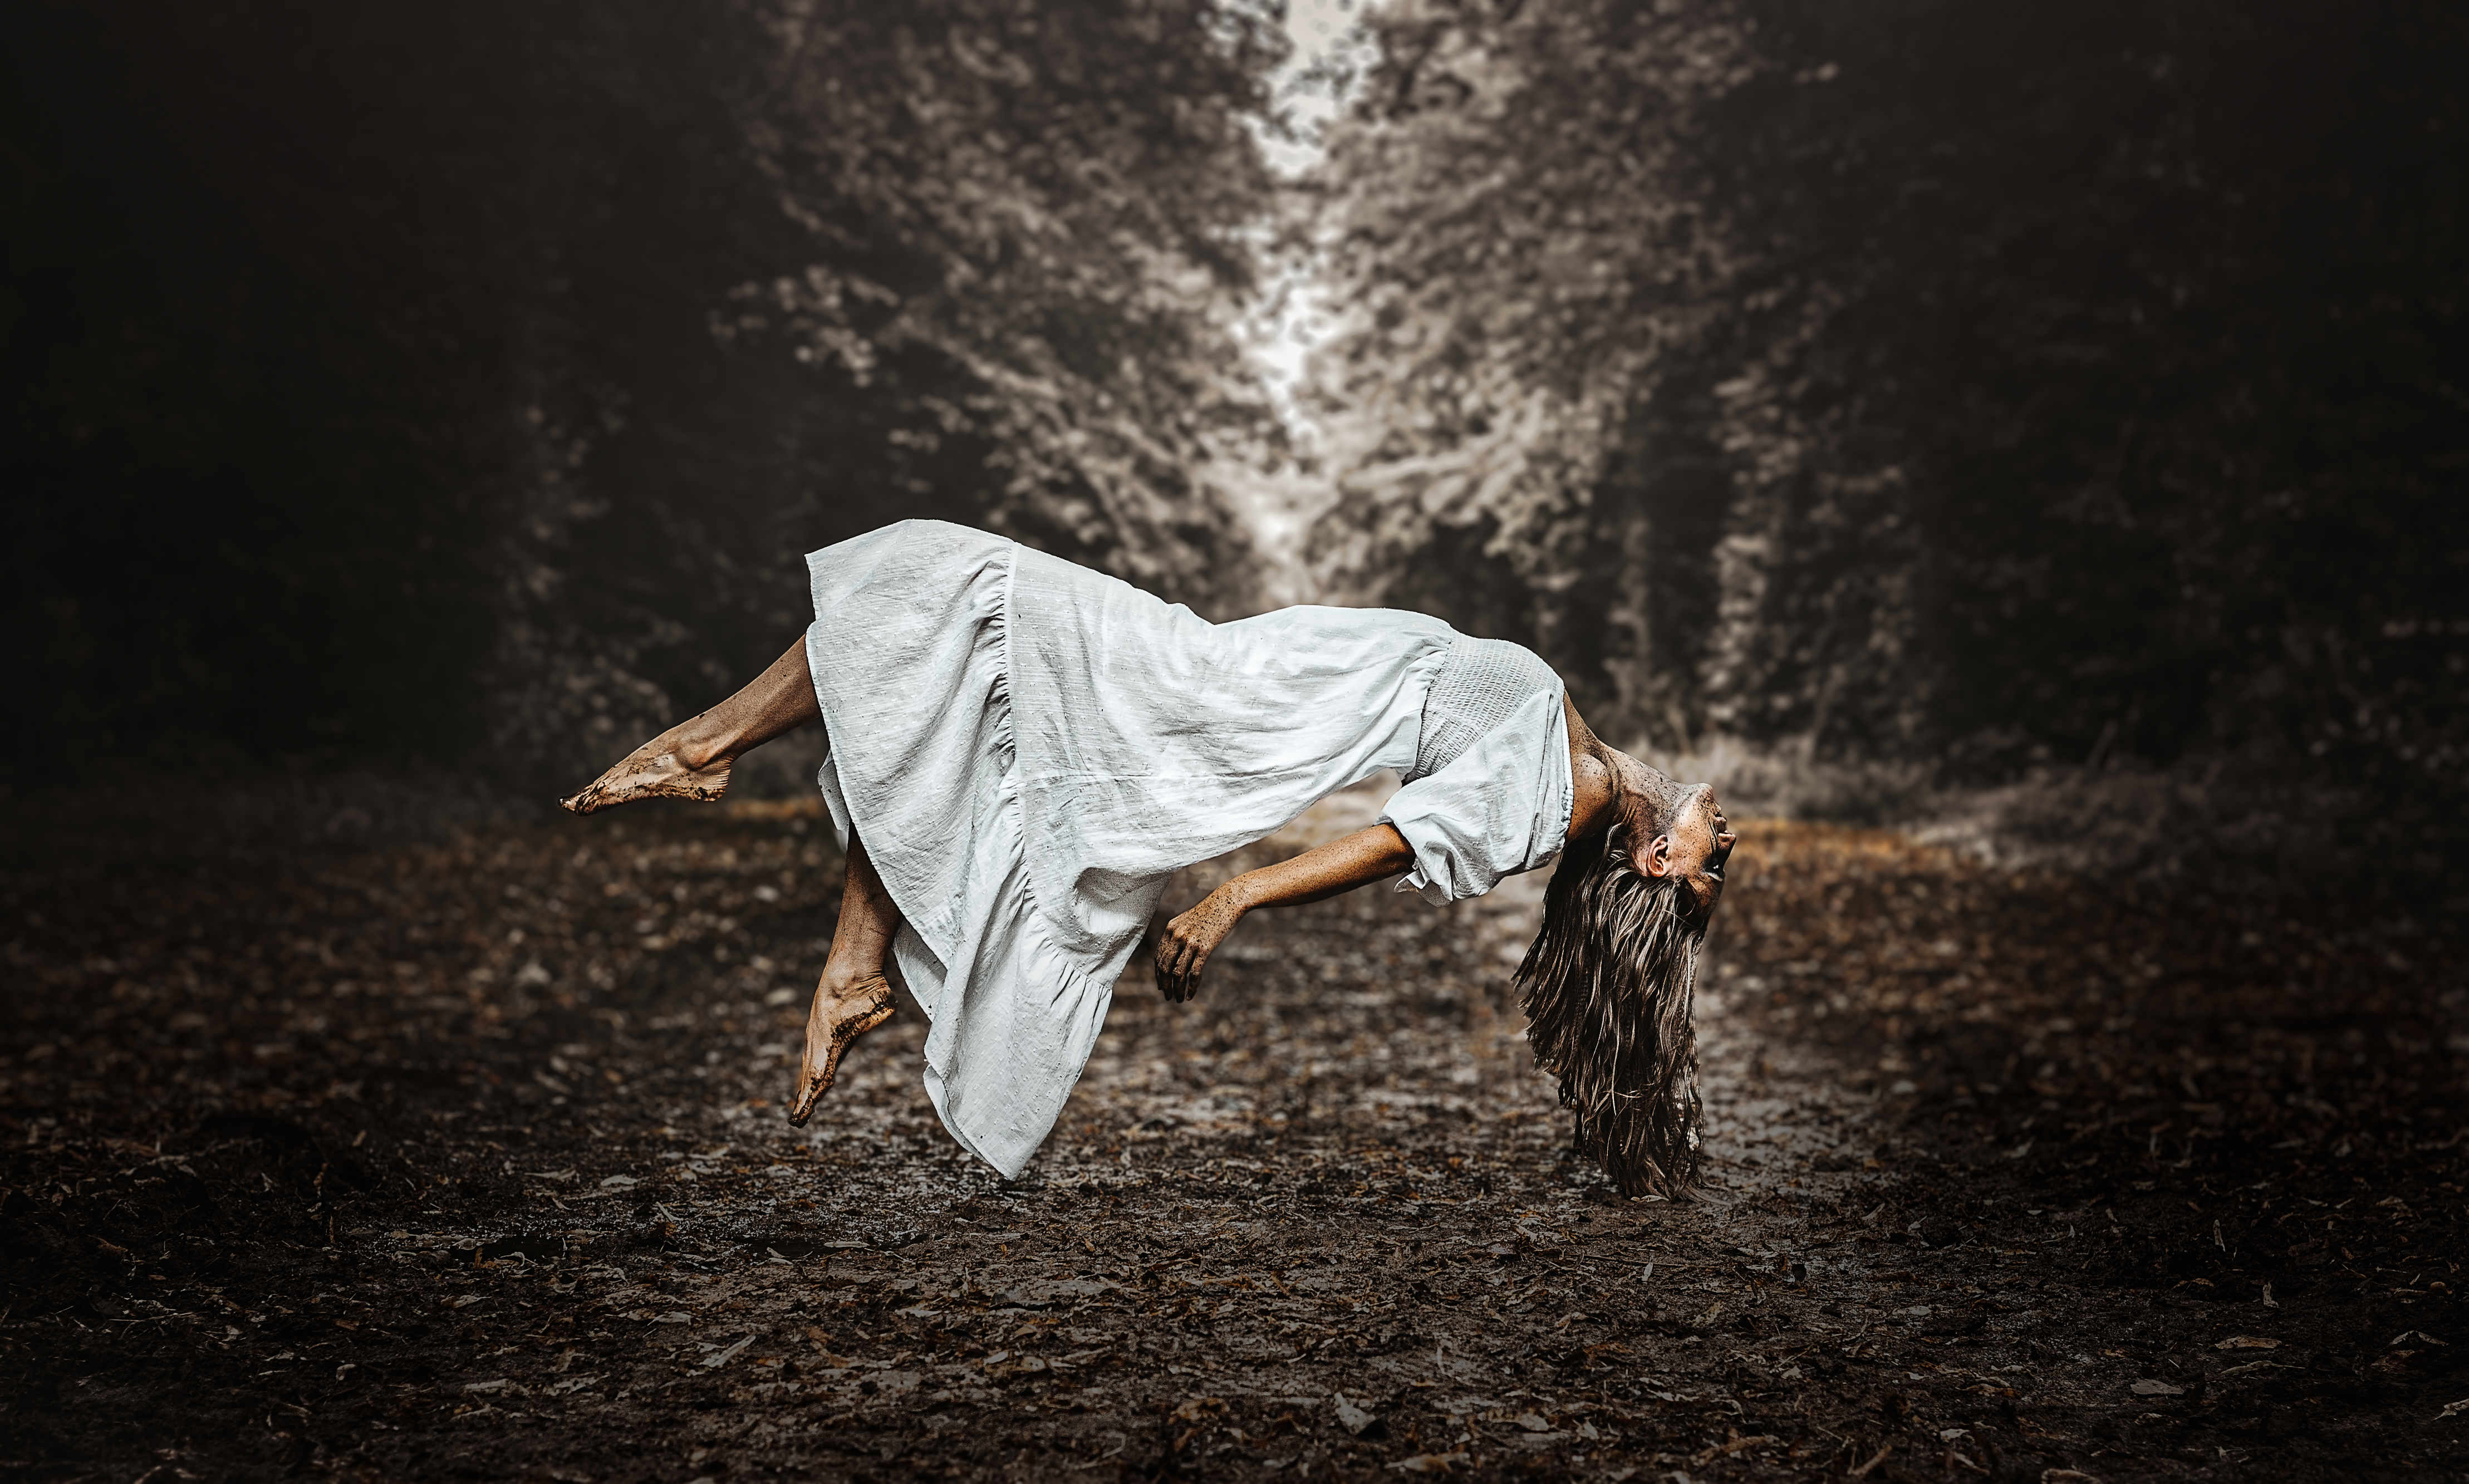
With a levitation-styled shoot being especially technical, planning was an absolute must. To start with create a mood board of make up, hair and clothing ideas, and send them to your team of creatives. Create a list of timings so that the shoot runs smoothly and you're shooting the right thing at the right time.
Write down a shot list for yourself, too; it's crucial that you don't miss any element for the final edit. You might even want to go one step further and do a scout of the location (or even a small test shoot) and make sure there are no access issues.
Once you've done all these things, you can then start to gather your props, costumes and various items for your model to stand or lay on. Below I'll go into some detail of how you can attempt this yourself with a few simple tips and tricks (or treats!).
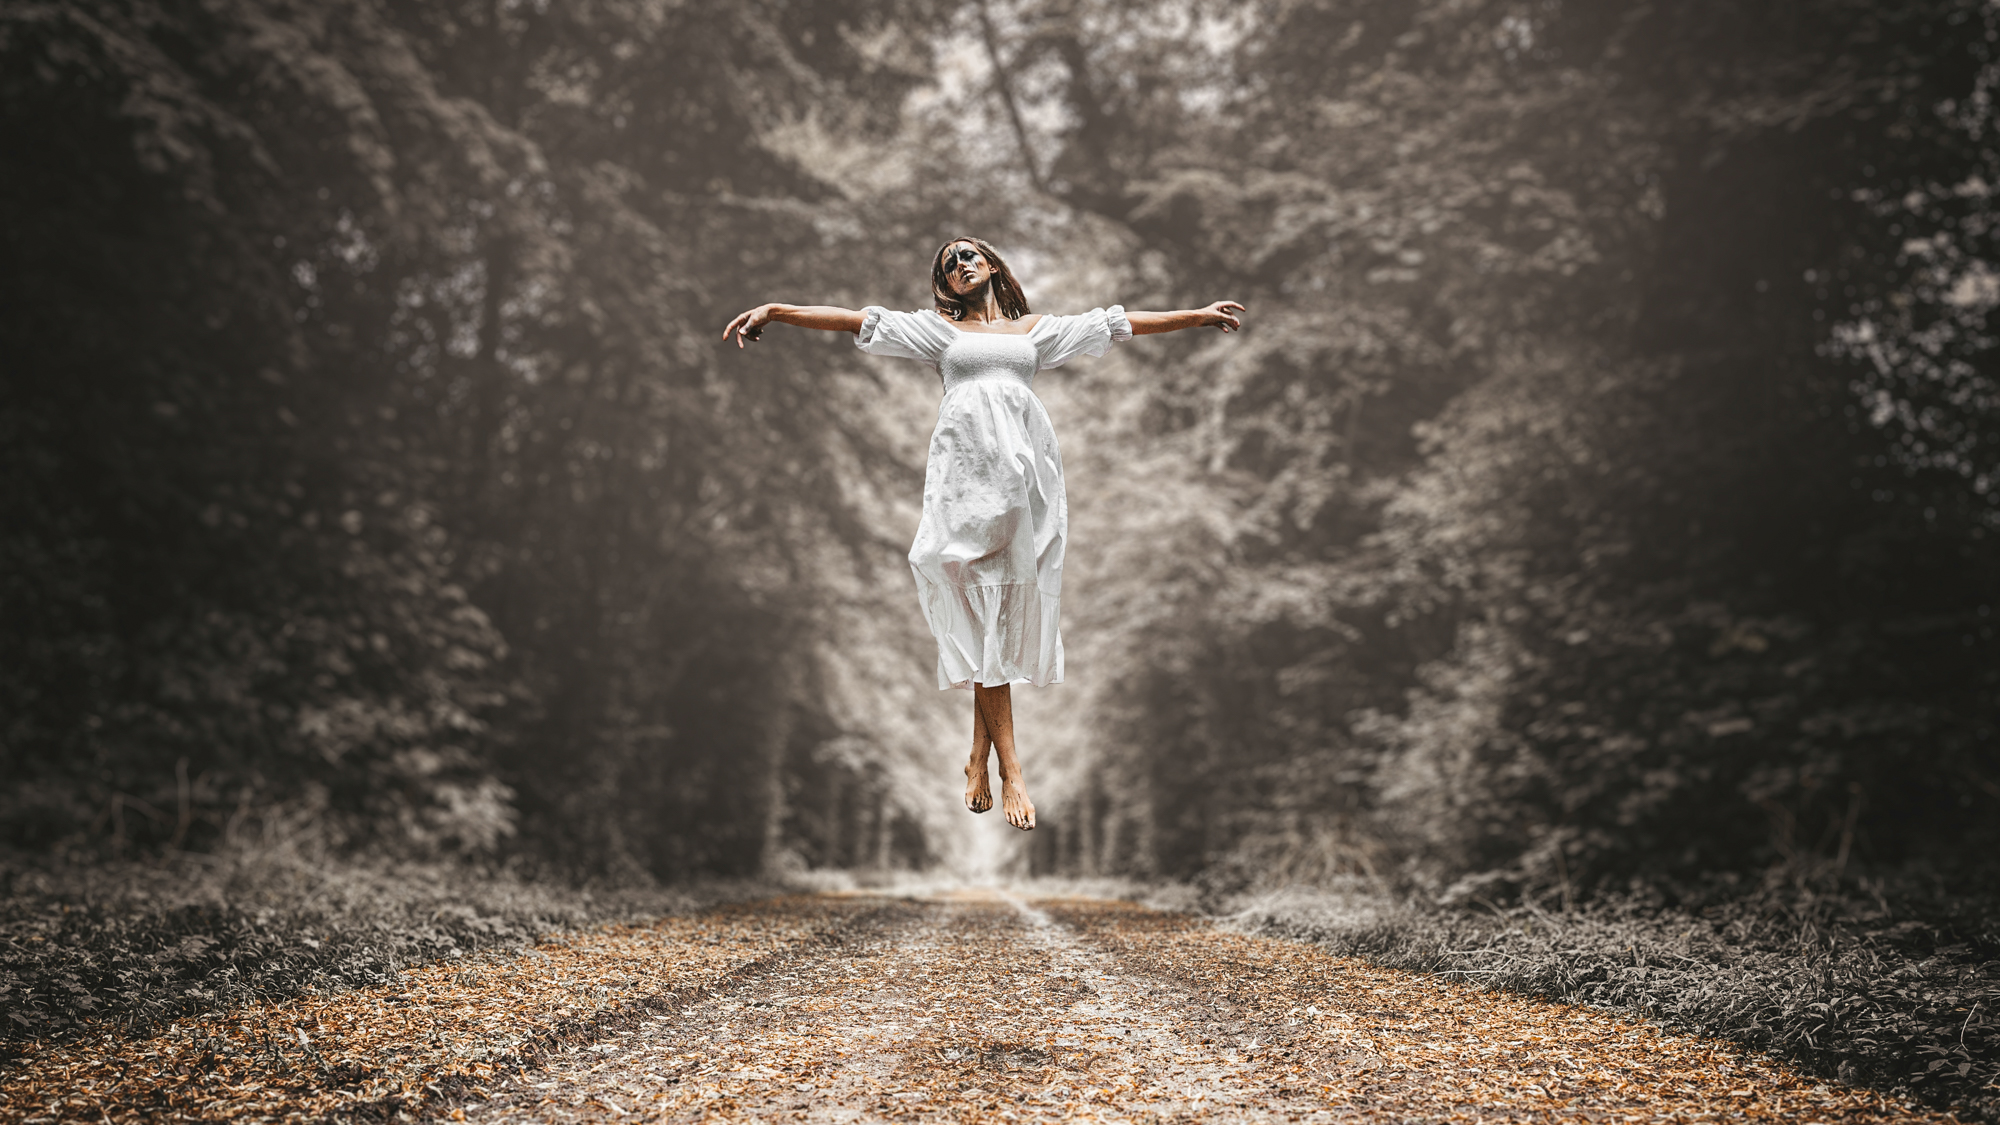
Shooting a spooky levitation image
Perhaps this is obvious, but it is the essential factor of your overall image and entire shoot going well: set your camera up on a sturdy tripod, and do whatever you can to avoid moving it from this point onwards.
It's even a good idea that other people in your team don't come too close to see the images and reduce the risk of knocking it from where you began. Make sure you have a fully charged battery, too, because you don't want to be removing the camera from the tripod head at any point.
The best camera deals, reviews, product advice, and unmissable photography news, direct to your inbox!
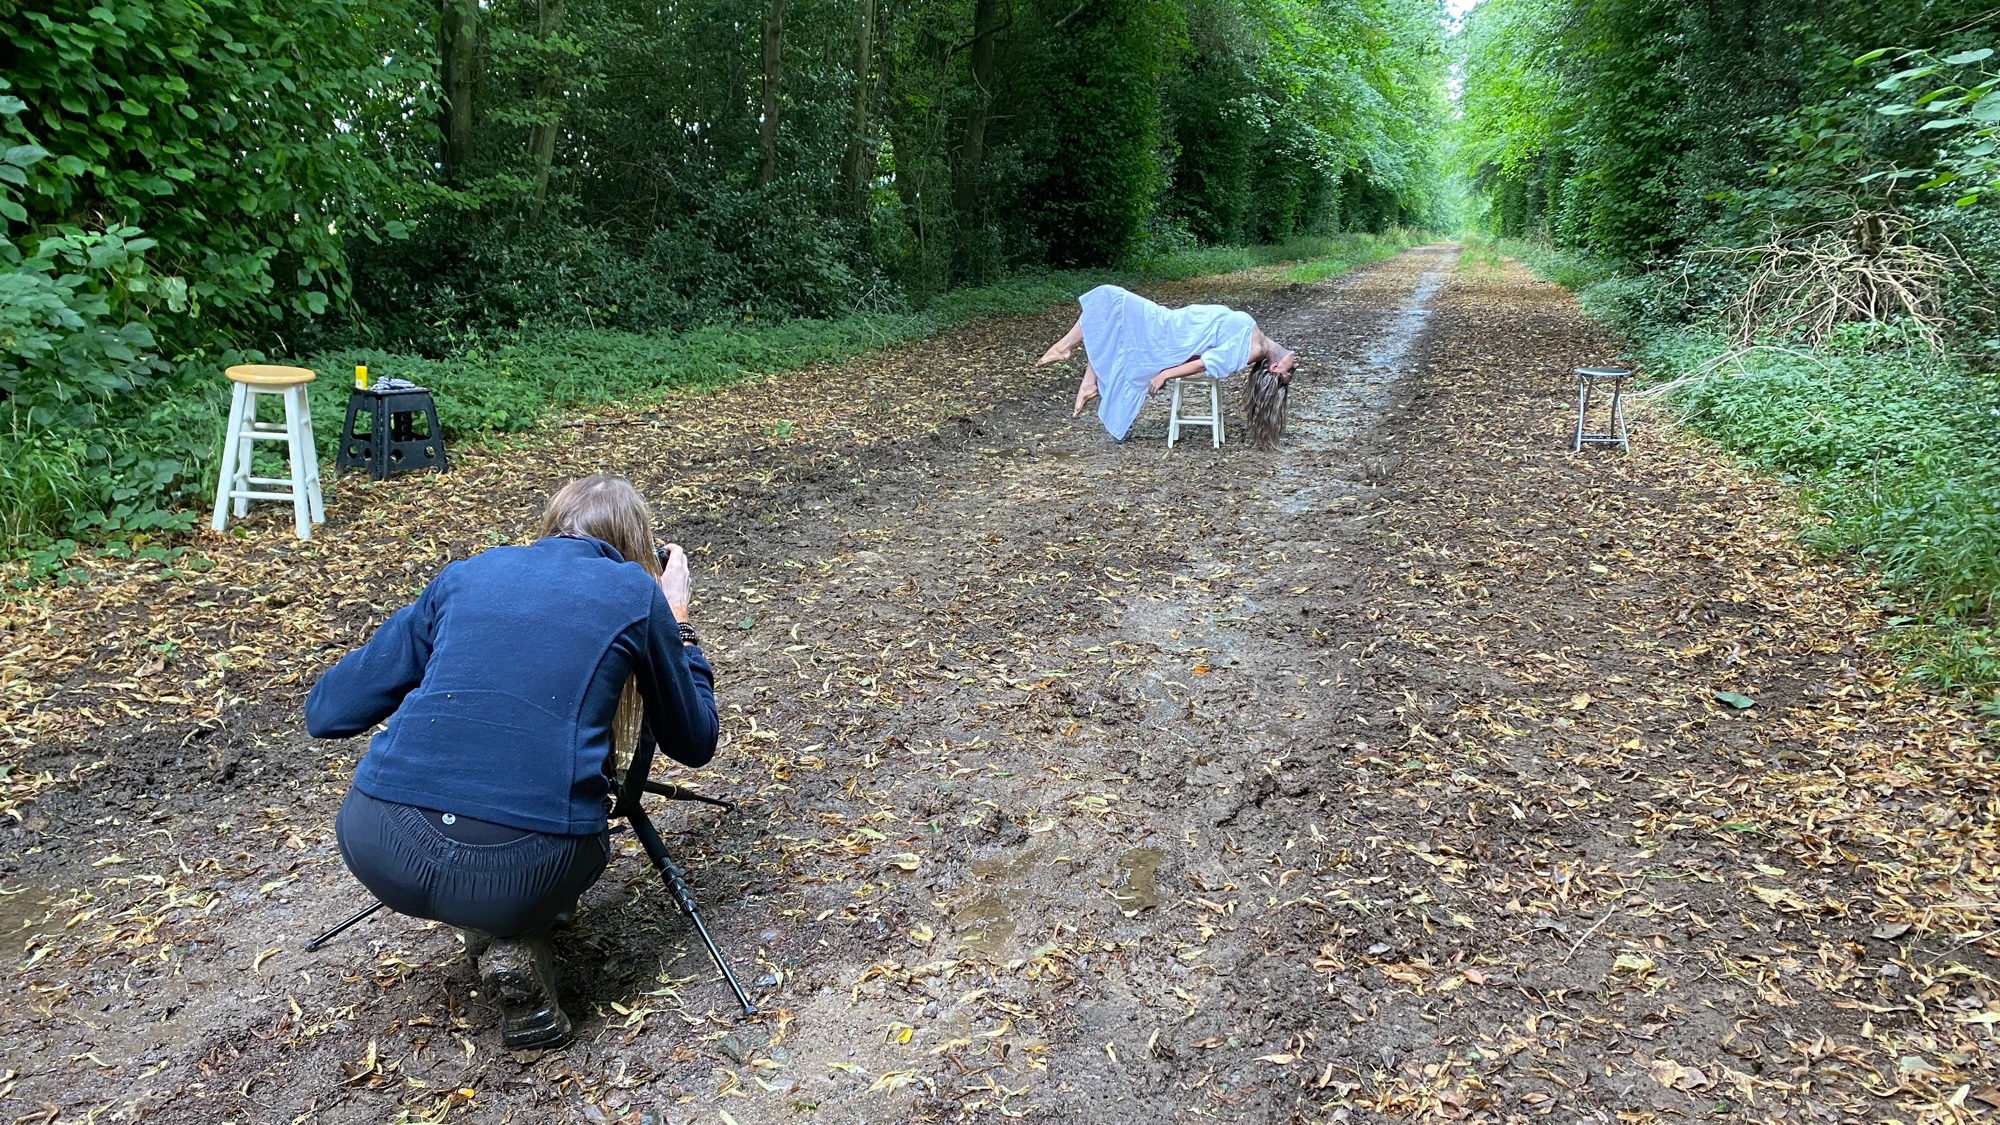
Change your camera settings to make sure that your shutter speed is fast enough to capture any movement and that is exceeds your focal length. Here I was shooting at around 24mm, and shot at f/4, ISO500 and a shutter speed of 1/250. You can now position your model in the middle of the frame and set your focus point on them. Then switch your lens focus to manual focus. Make a floor marker where your model is stood, so that they know where to stand in the frame. We made a line in the mud so it was easy for the model to see where she had to stand.
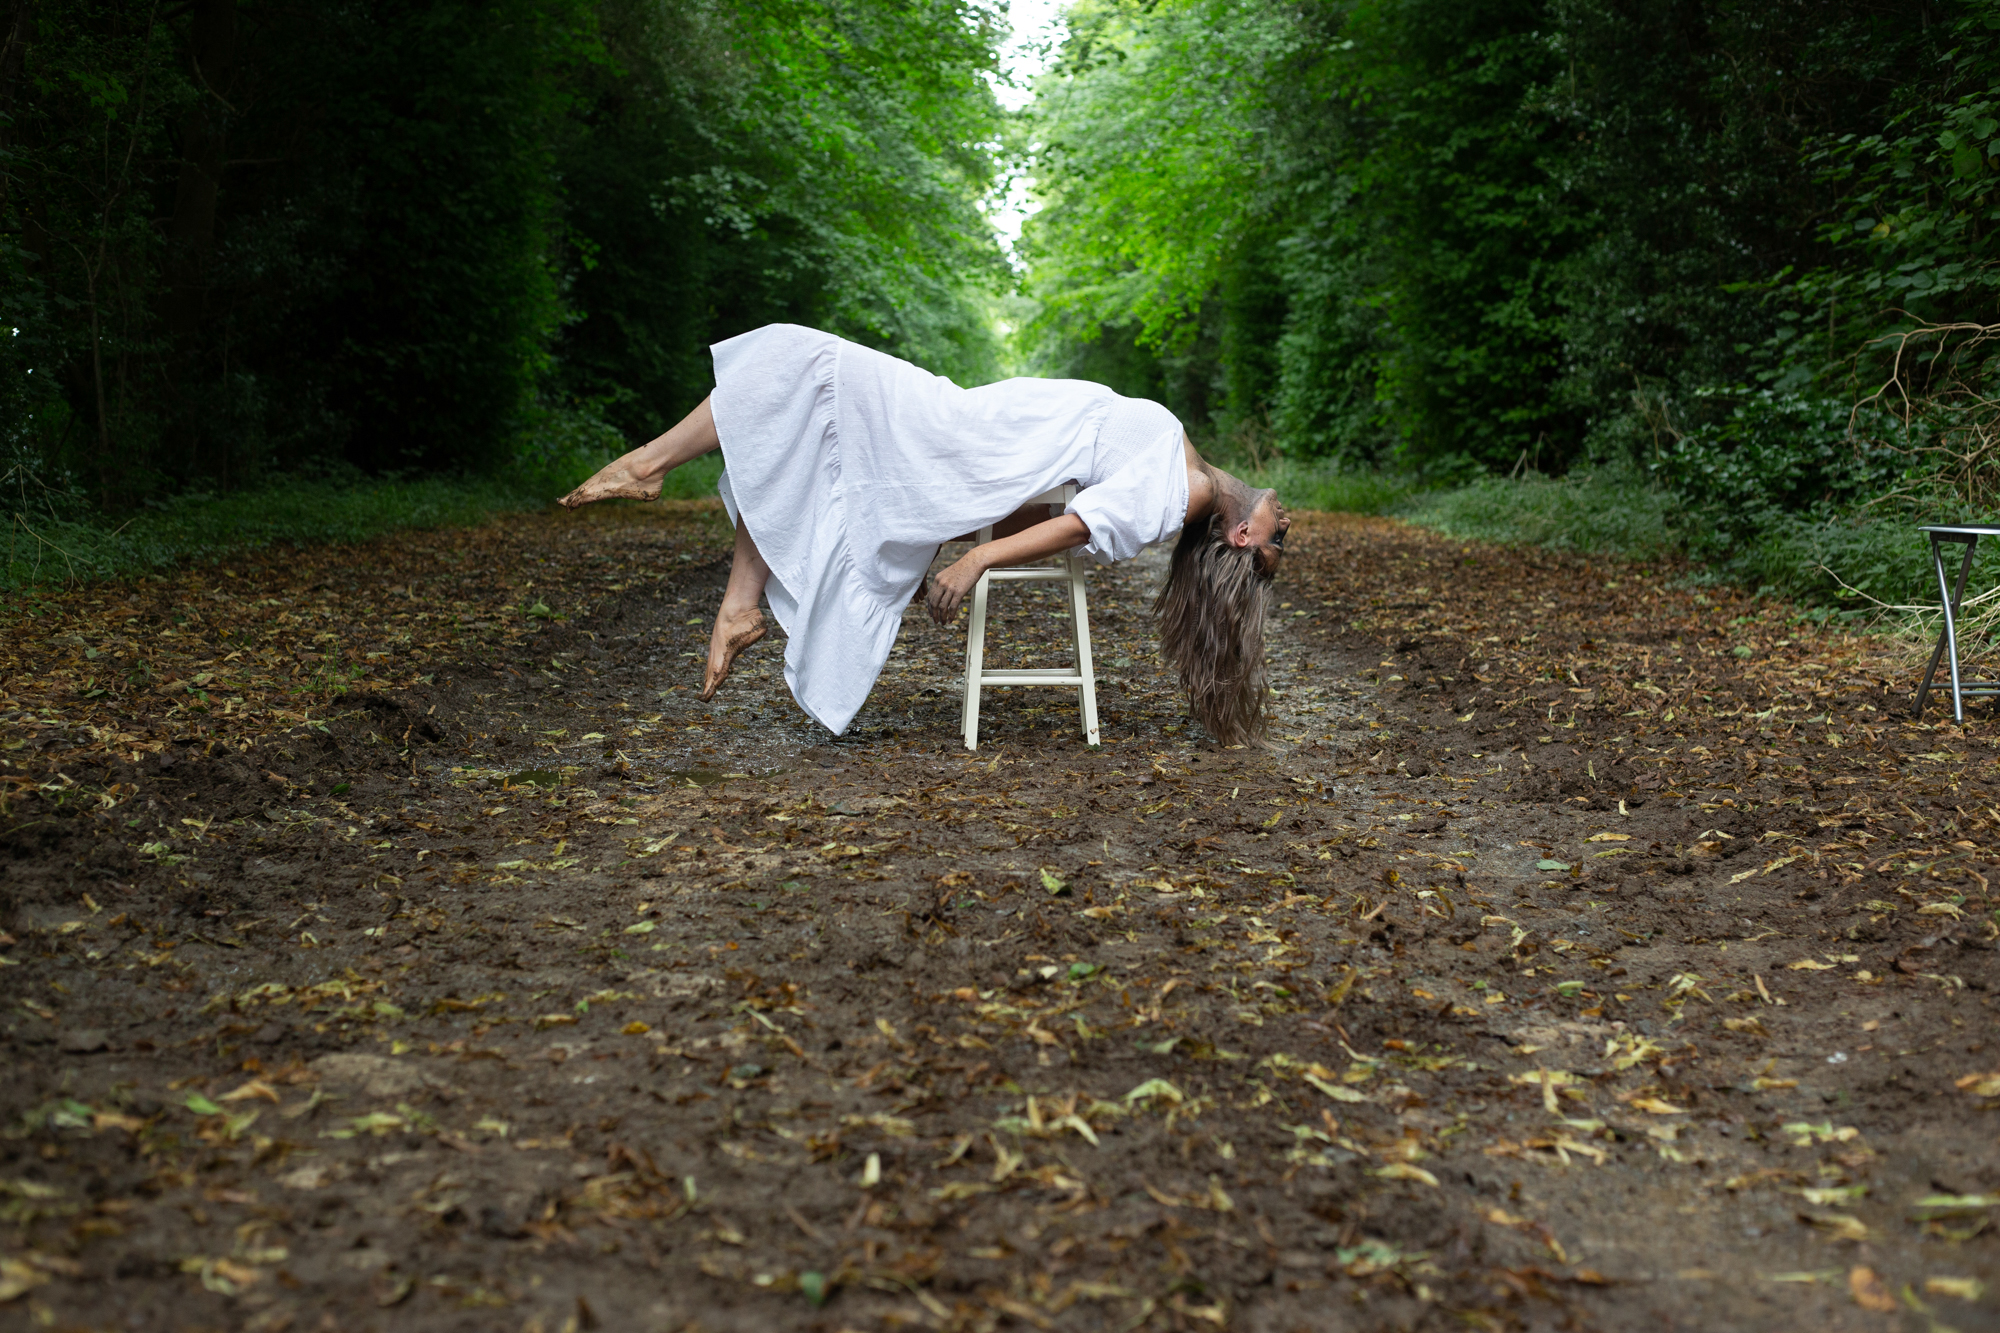
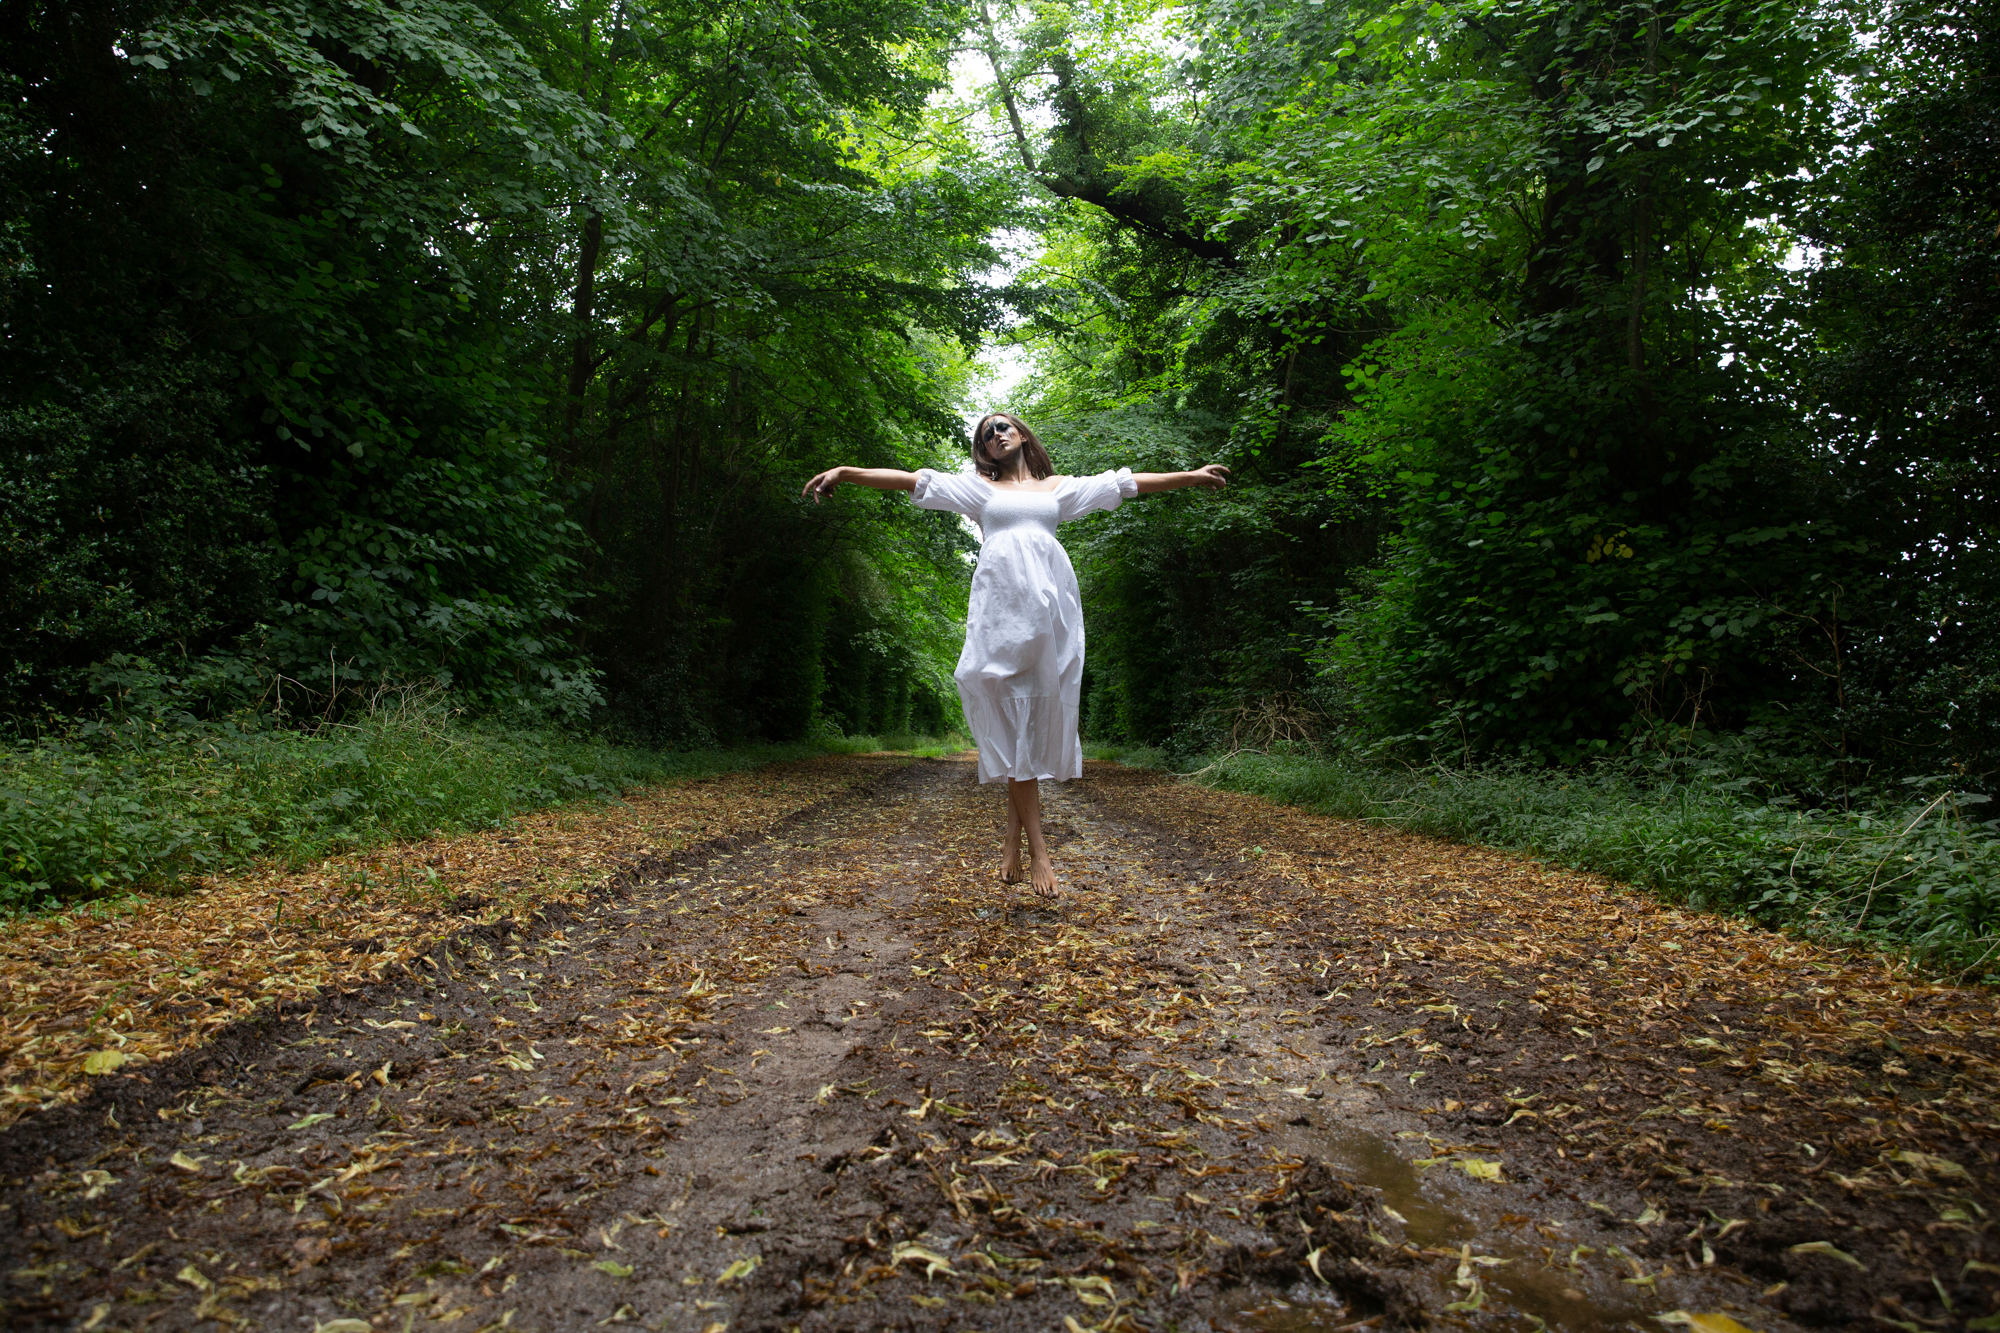
Ask your model to leave the frame so that you can take an 'empty' shot (making sure your lens is still on manual focus). Ask your model to come back into the frame and stand on the marker. Now you can set up and start going through your poses on your shot list. Make sure your model is wearing loose-fitting clothing and be sure to drape it over the edges of the props that they are sat or stood on. This is going to help make the shot look more believable and minimizes any sharp or flat edges.
When your model is posing, try to encourage them to have soft, "floaty" movements. If they are jumping up or jumping into the air, try to make it look like they are floating. Try to avoid doing the shoot in bright sunshine, as this will cause shadows on the ground that are harder to edit out afterwards. Take an extra 'empty shot' at the end of the shoot just to make sure you’re covered.
Photoshop post processing in 5 simple steps:
1. Open up your first posed image along with the empty shot image
2. Copy and paste the posed image onto the empty shot image
3. Add a layer mask to the posed image layer
4. Select the brush tool, set your foreground color to black, and make sure that your opacity is at 100%
5. Now brush over the areas of the props on which your model is stood or sat, which will reveal the empty image underneath – et voila!
Read more:
Photography tips and techniques
Best cameras for portraits
Best lenses for portraits
Digital Camera World is one of the leading authorities on camera and photography news, reviews, techniques, tutorials, comparisons, deals and industry analysis. The site doesn't just specialize in cameras, but all aspects of photography, videography and imaging – including camera phones, gimbals, lenses, lighting, editing software, filters, tripods, laptops, printers, photo books, desks, binoculars and more.
Whether you're using, looking to buy or trying to get the most out of a compact camera, action camera, camera drone, cinema camera, beginner camera or professional camera, Digital Camera World has a roster of experts with combined experience of over 100 years when it comes to cameras, photography and imaging.

