Lightroom hack #12: Black and white conversions
Thanks to digital imaging we can easily recreate the effect of black and white filters… up to a point
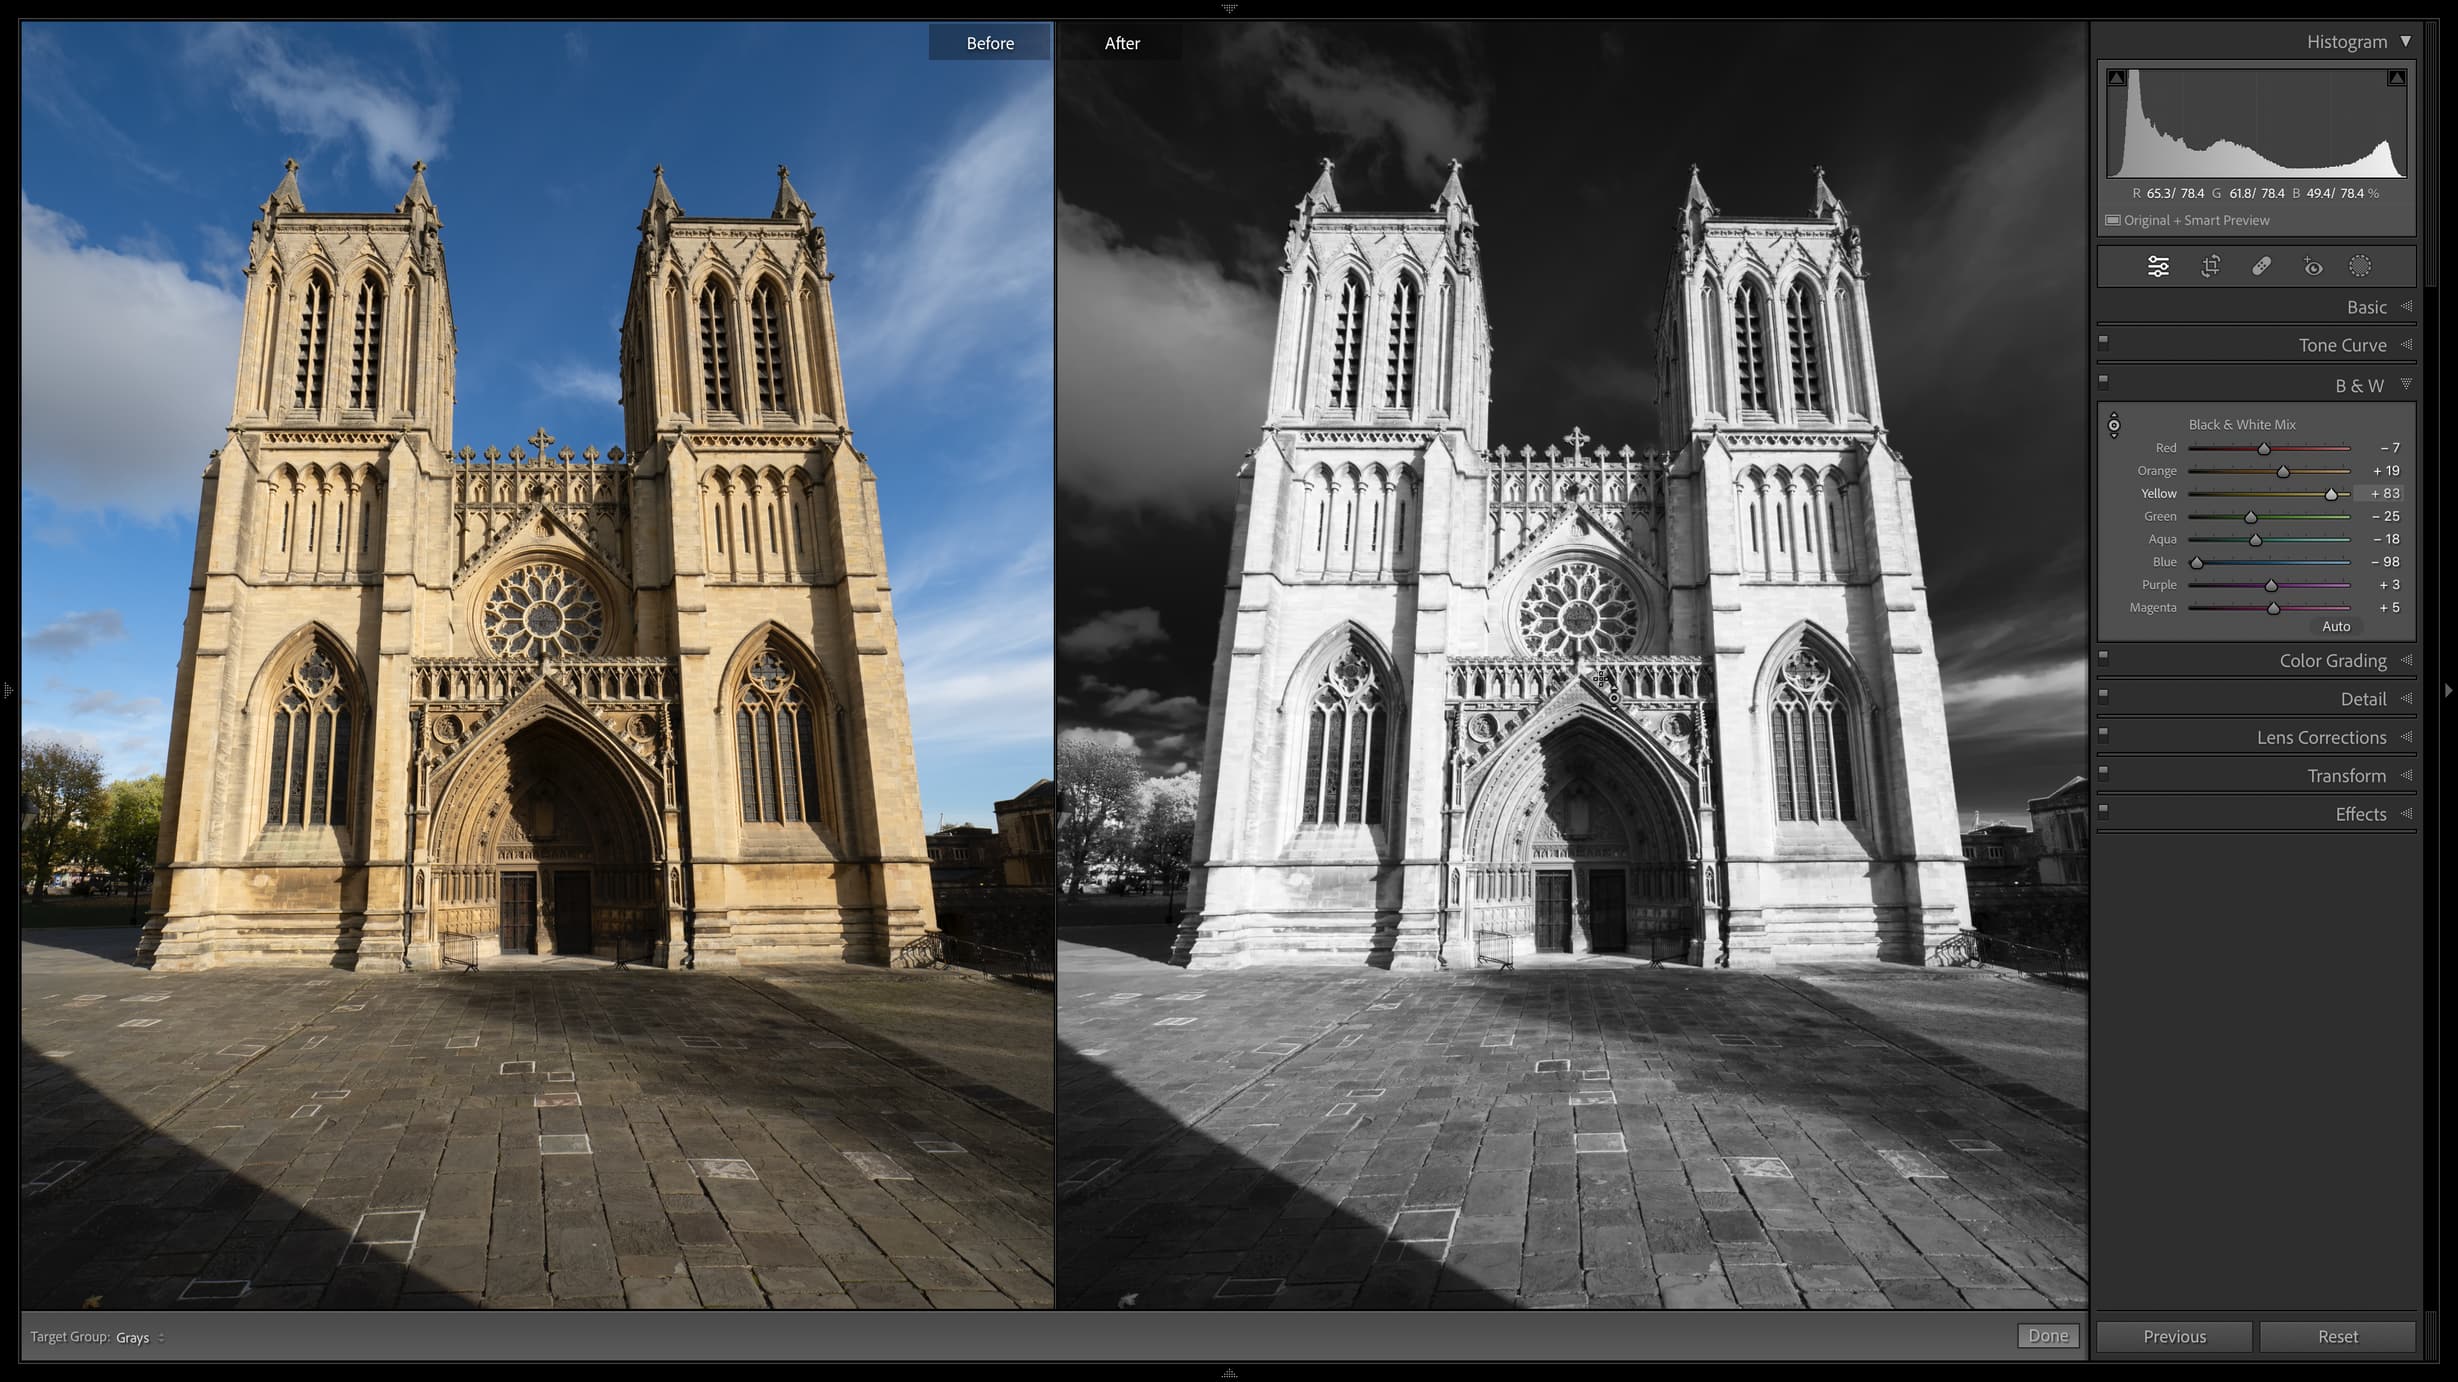
In black and white photography you use filters to change the way different colors translate into a black and white. Landscape photographers might use a yellow filter, for example, to block the light from blue skies to make them deeper and to allow through the color of vegetation and grass to make it appear lighter.
We are publishing one hack a day this Christmas holiday period, see our other Lightroom Hacks
You don’t need these filters with digital cameras because you can control the black and white conversion later in software. You COULD shoot in mono mode and use traditional black and white filters, but you don’t really achieve anything technically.
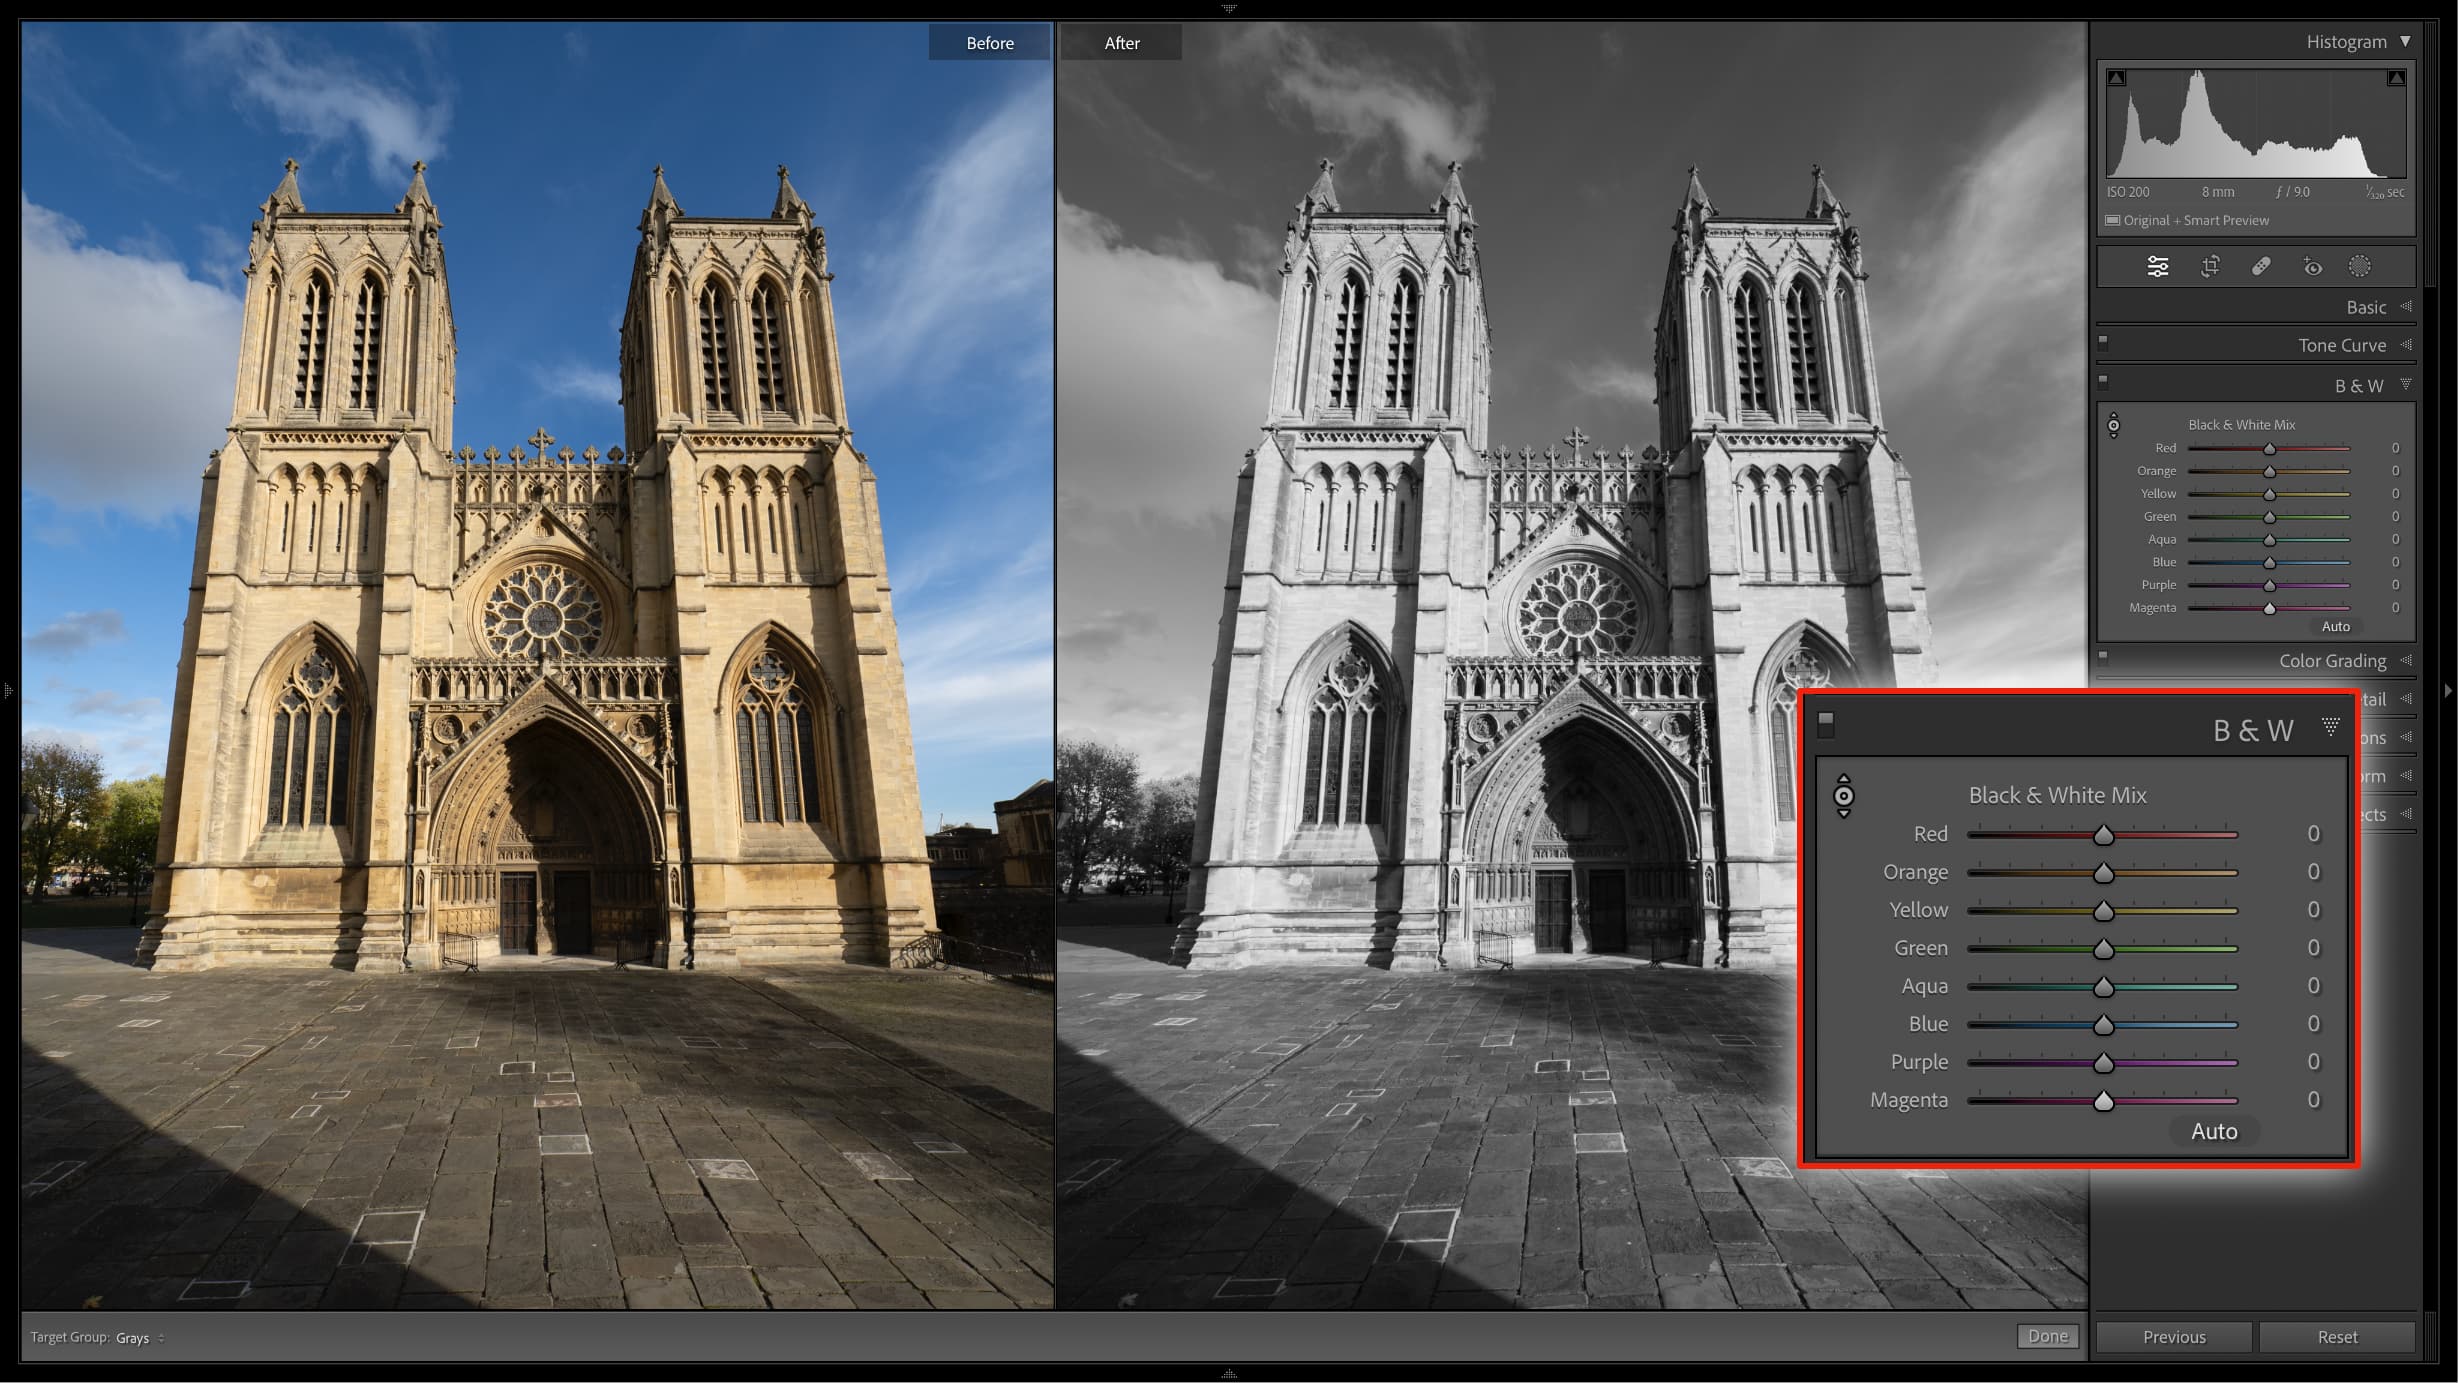
In Lightroom, the first step is to switch to Black and White mode at the top of the Basic panel, and this activates the B & W panel used for the tonal conversion.
I’ve kept the before and after comparison window open for these screenshots as a visual reference to the original colors versus the conversion.
The B & W panel contains eight sliders covering the full range of colors, and you adjust these to manage the Black & White ‘mix’. This would be a pretty long drawn out process done manually, but there are quicker ways.
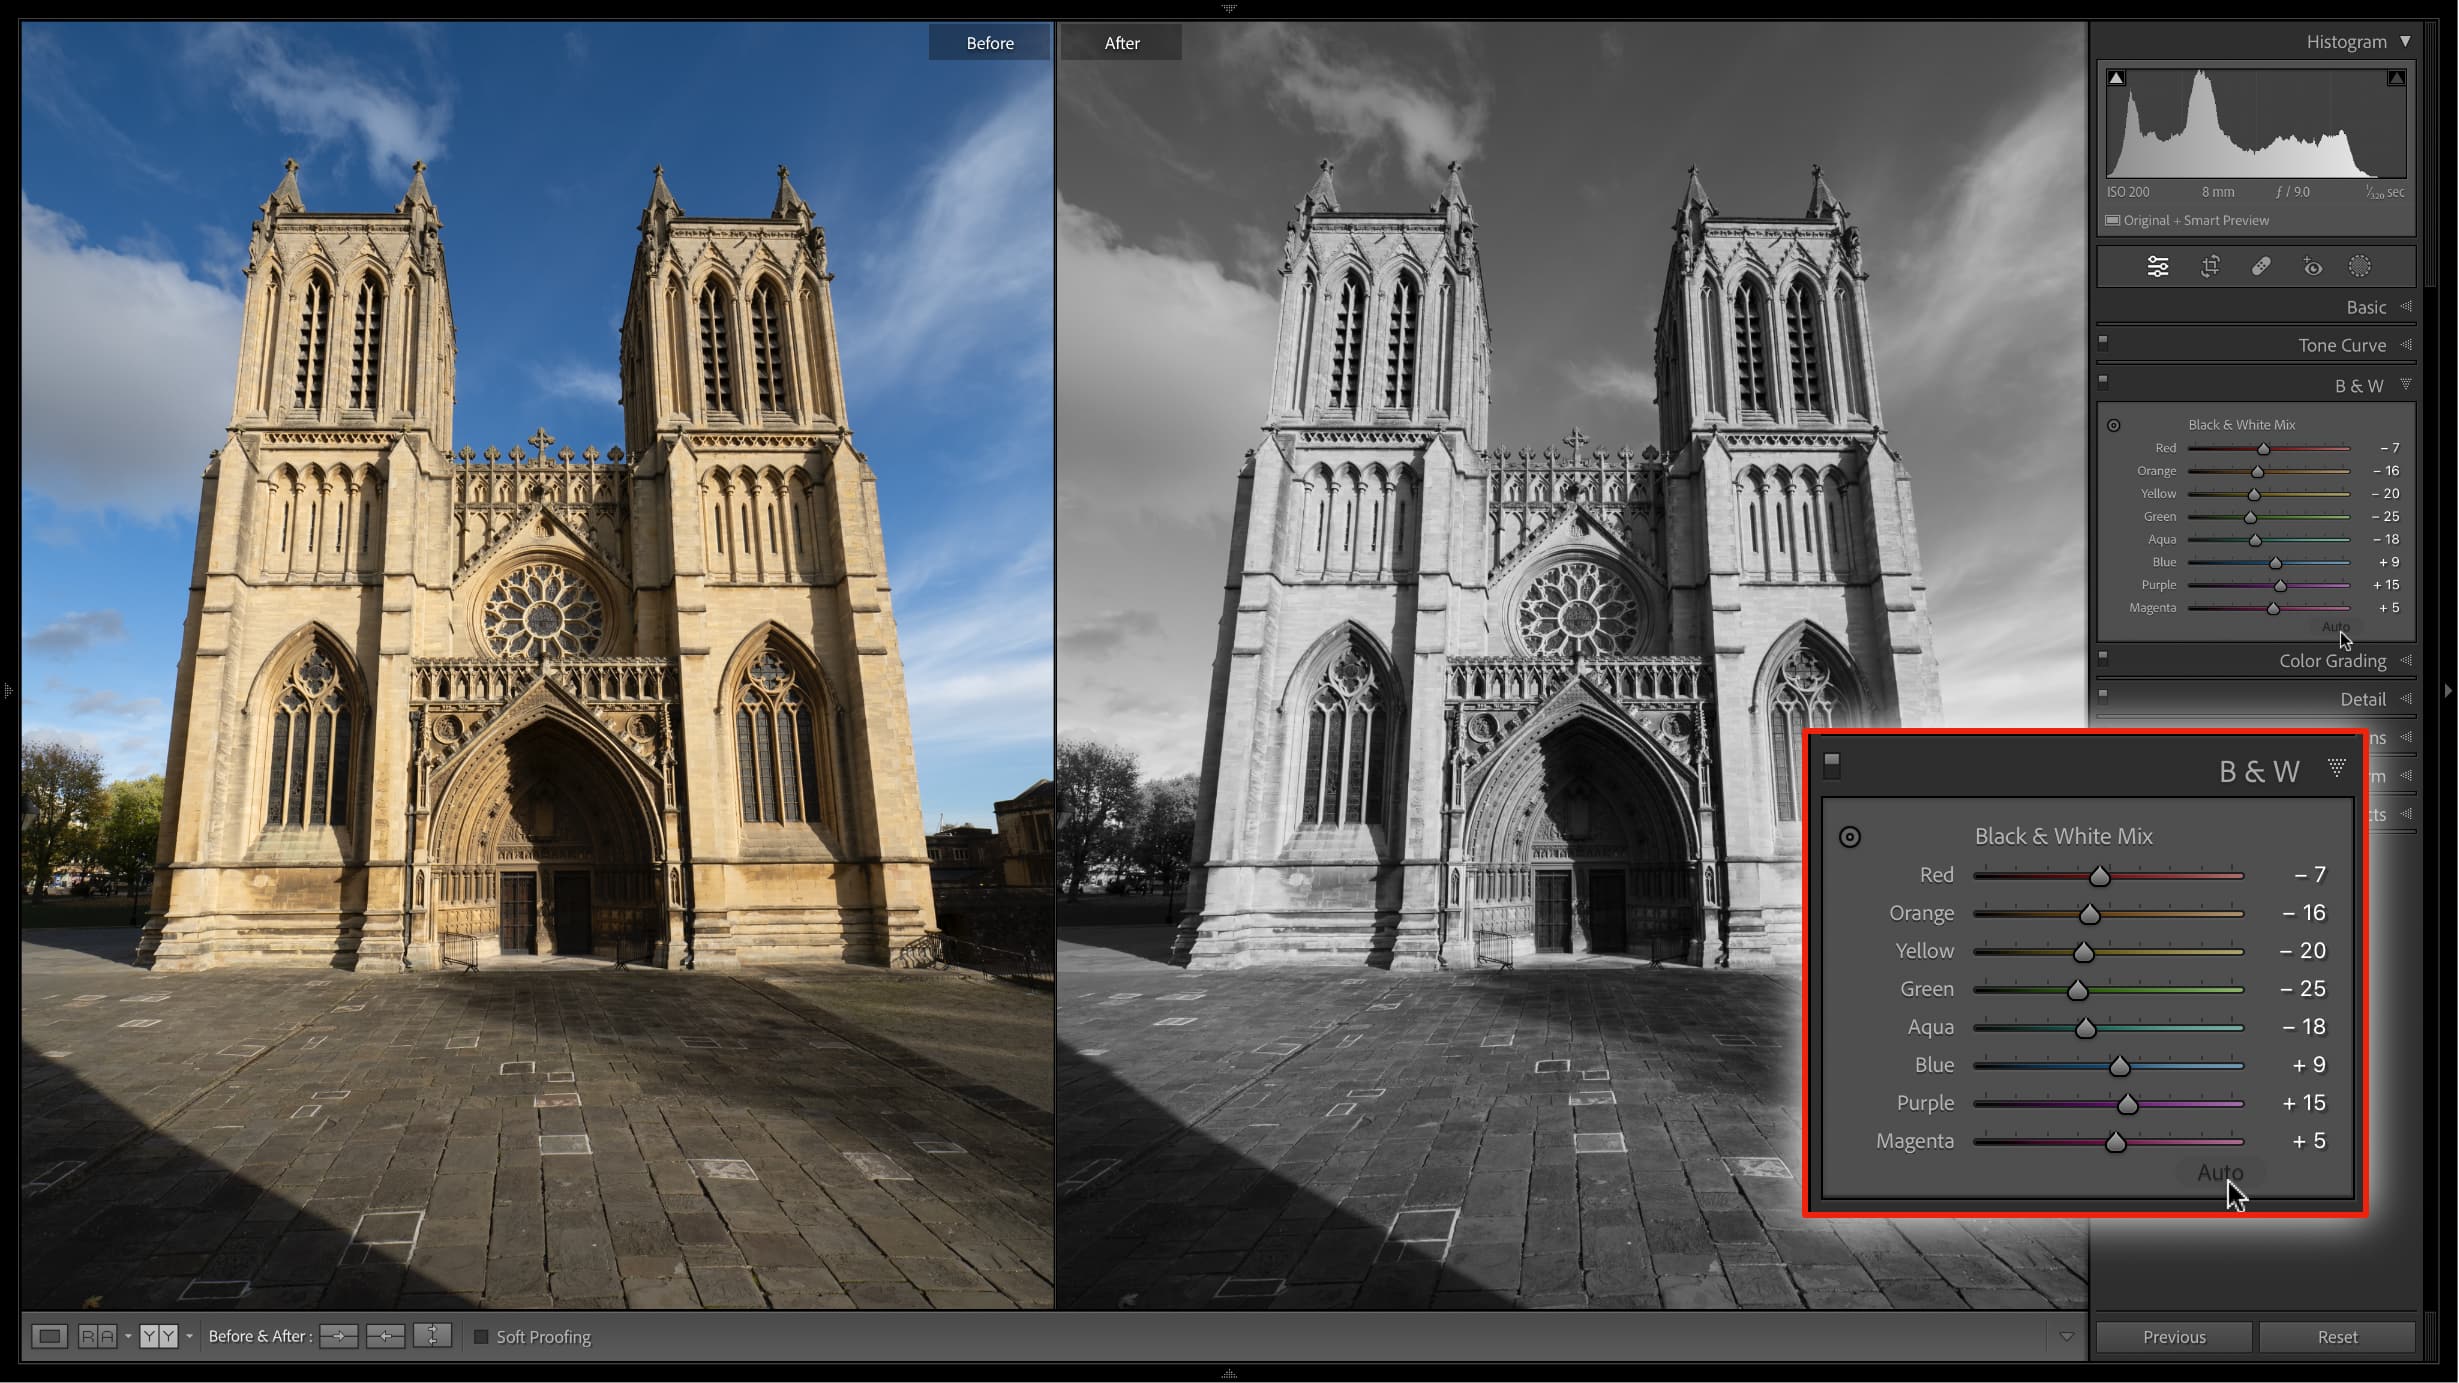
One is to use the Auto button at the bottom, which darkens the cooler tones and lightens the warmer ones, so the sky in our picture gets deeper while the cathedral is lightened.
But this may not go far enough, so for a more dramatic effect I can switch to the targeted adjustment tool in the top left corner of the panel and drag up and down in those areas of the image I want to make lighter or darker respectively.
The result is much more dramatic and probably what you might hope for using a traditional red filter.
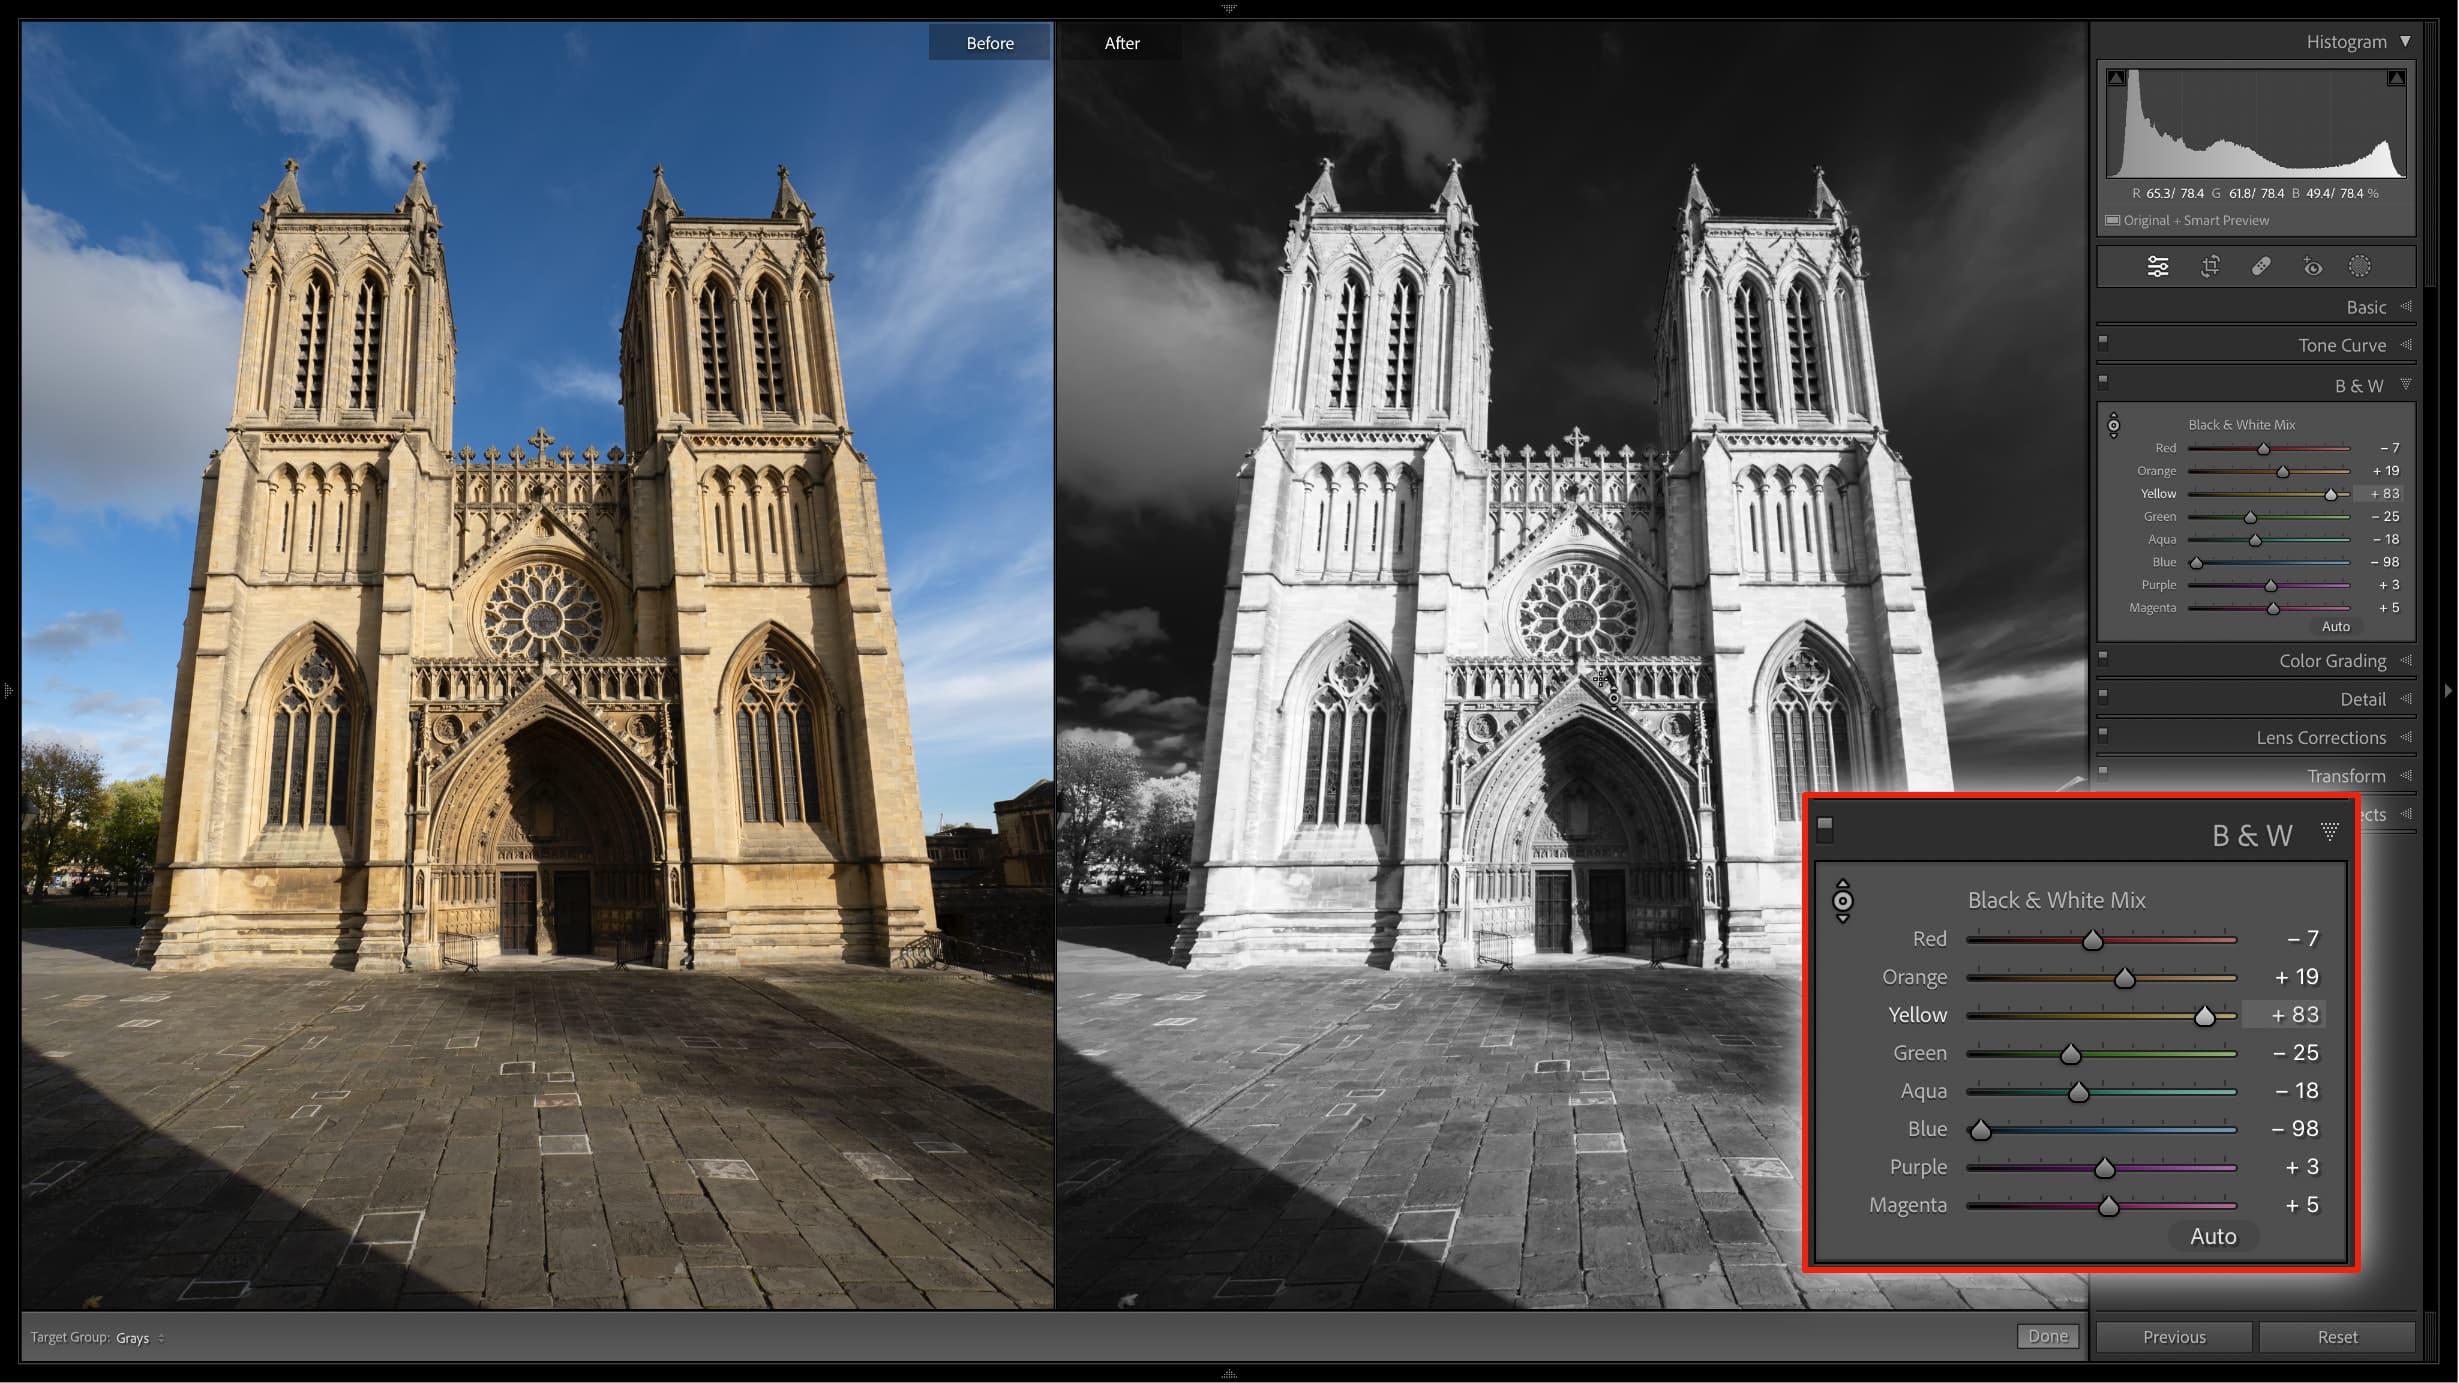
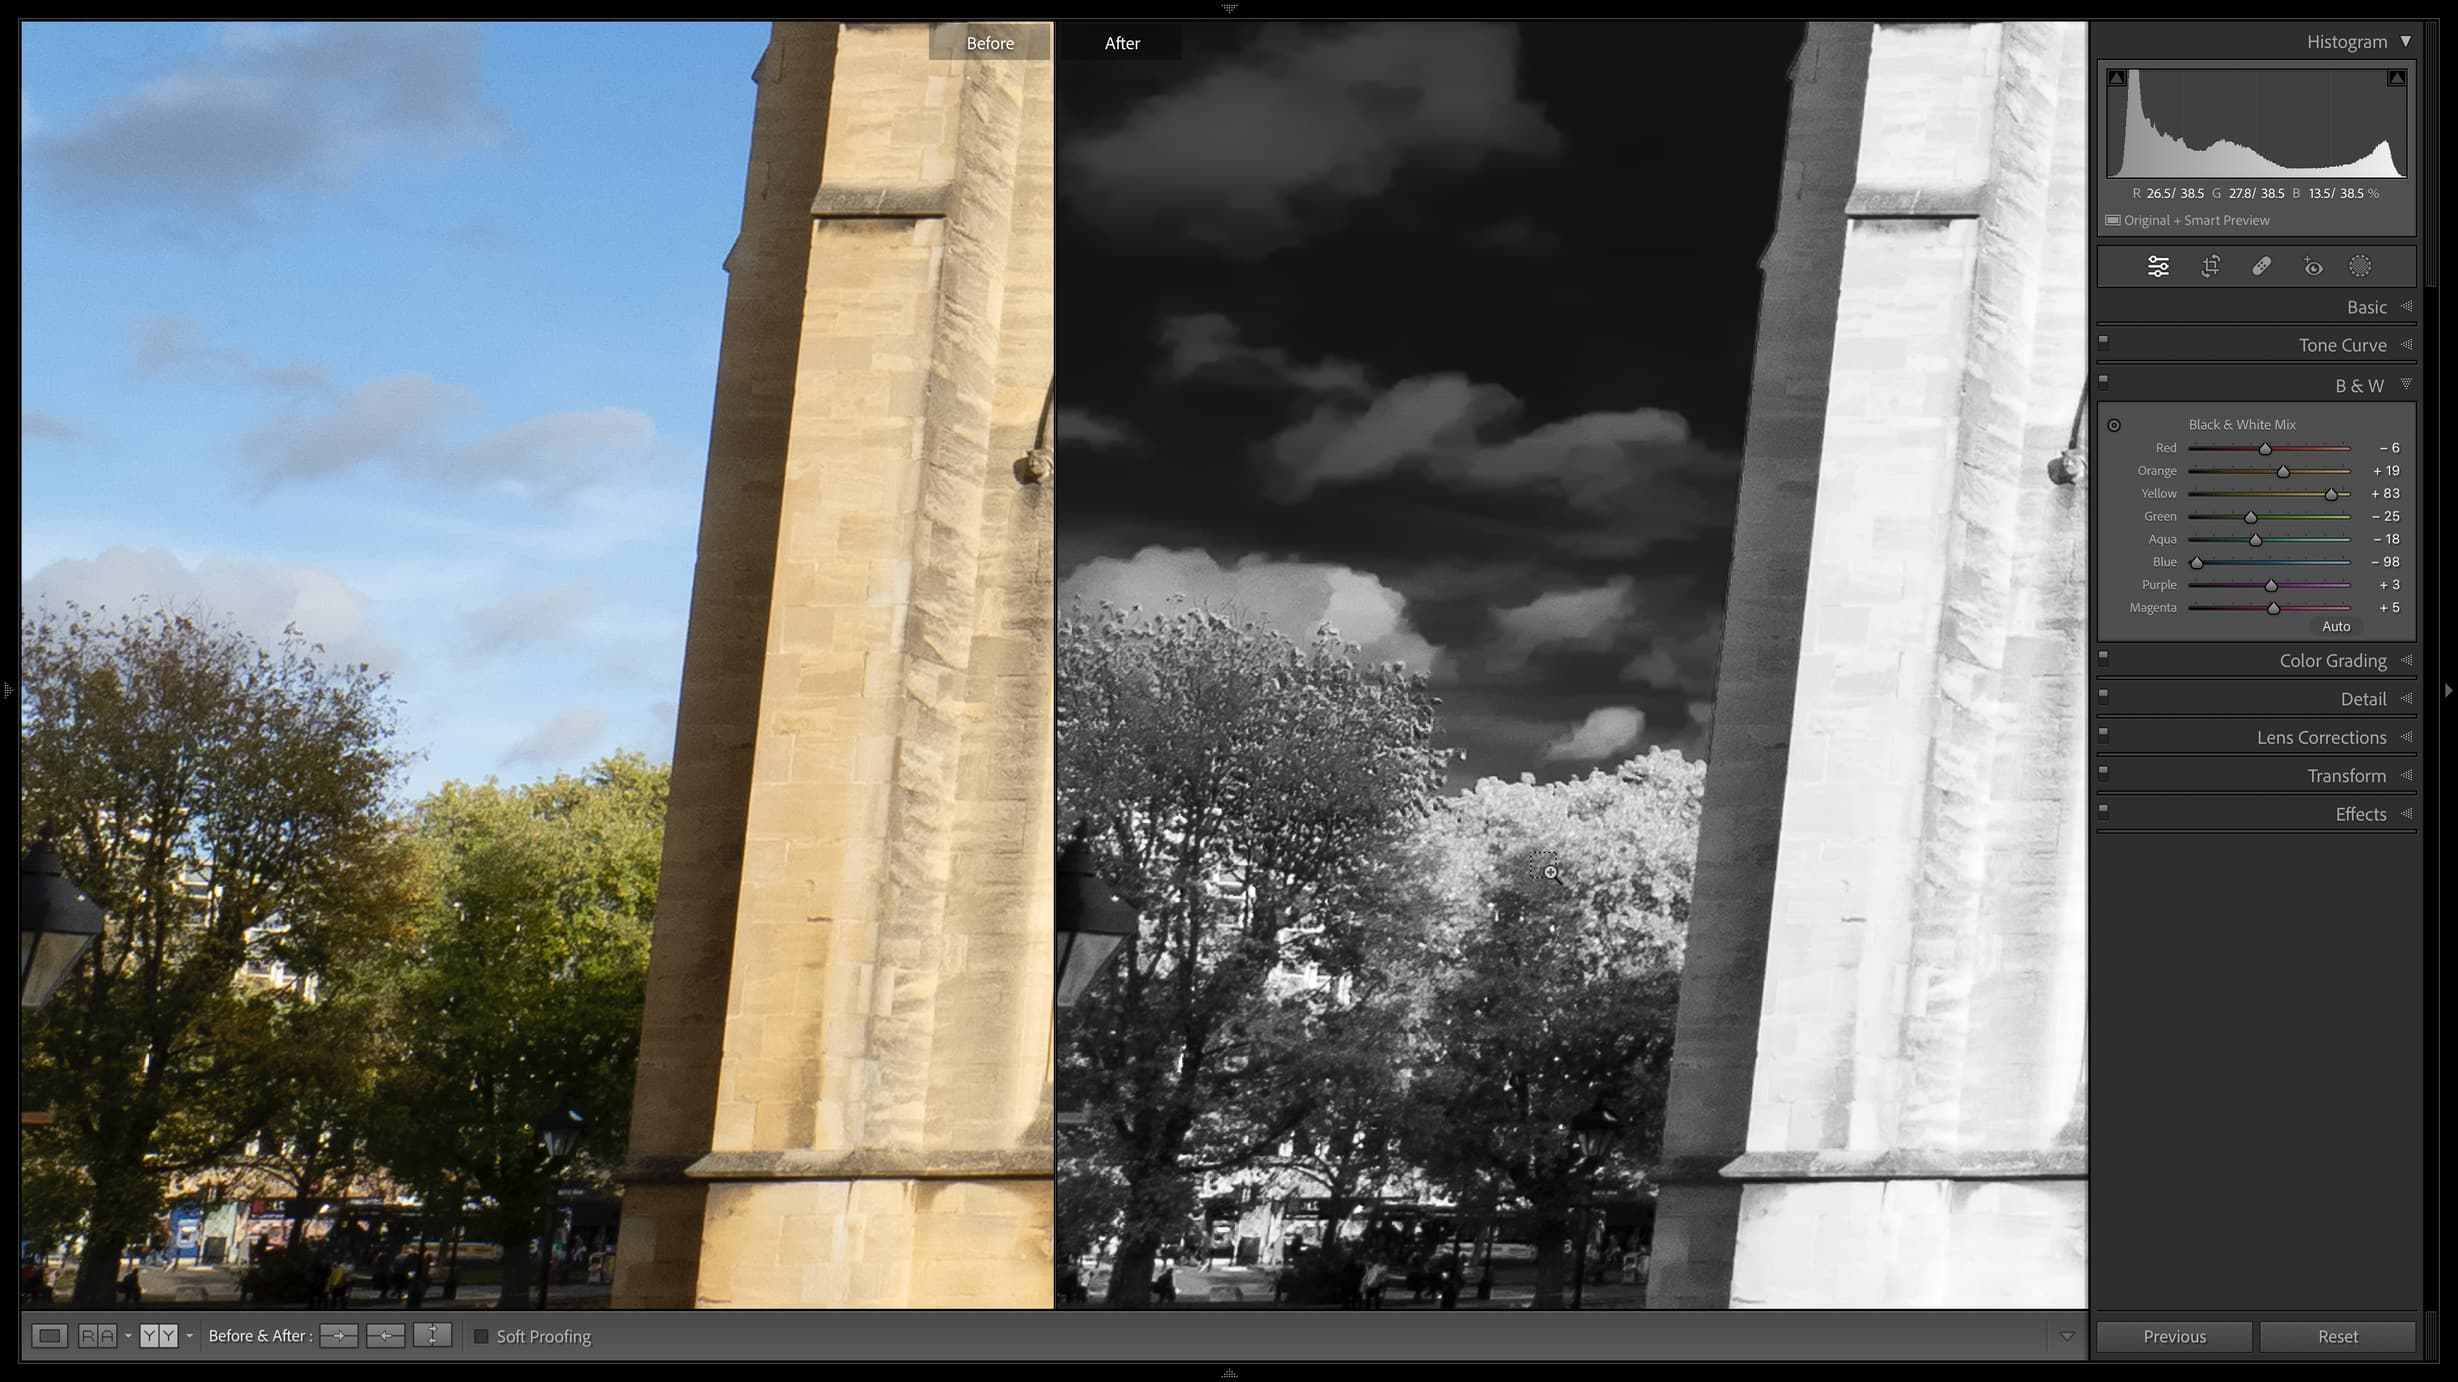
But while this looks good from a distance, there are some problems which become apparent up close, and these are mostly because of the way sensors work. Specifically, only one pixel in four on a camera sensor records red, so if you lean too heavily on the red channel in your conversions, as I have in this example, you can start to see some pretty nasty artefacts. These can show up as increased noise in skies and bright white outlines around objects. In this example, there is a nasty effect around the finely detailed trees against the sky, and the clouds have started to take on a posterised effect.
This is not Lightroom’s fault, or the cameras. It’s just the way digital sensors record color. You have the editing potential for all kinds of black and white tonal conversions, but there is a limit to how far you can push them.
Read more:
• Best photo editing software
• Lightroom review
• Lightroom Classic review
Get the Digital Camera World Newsletter
The best camera deals, reviews, product advice, and unmissable photography news, direct to your inbox!

Rod is an independent photography journalist and editor, and a long-standing Digital Camera World contributor, having previously worked as DCW's Group Reviews editor. Before that he has been technique editor on N-Photo, Head of Testing for the photography division and Camera Channel editor on TechRadar, as well as contributing to many other publications. He has been writing about photography technique, photo editing and digital cameras since they first appeared, and before that began his career writing about film photography. He has used and reviewed practically every interchangeable lens camera launched in the past 20 years, from entry-level DSLRs to medium format cameras, together with lenses, tripods, gimbals, light meters, camera bags and more. Rod has his own camera gear blog at fotovolo.com but also writes about photo-editing applications and techniques at lifeafterphotoshop.com
