Lightroom series part 10: The smart way to retouch a portrait shot
You can enhance portraits to perfection with these straightforward Lightroom techniques
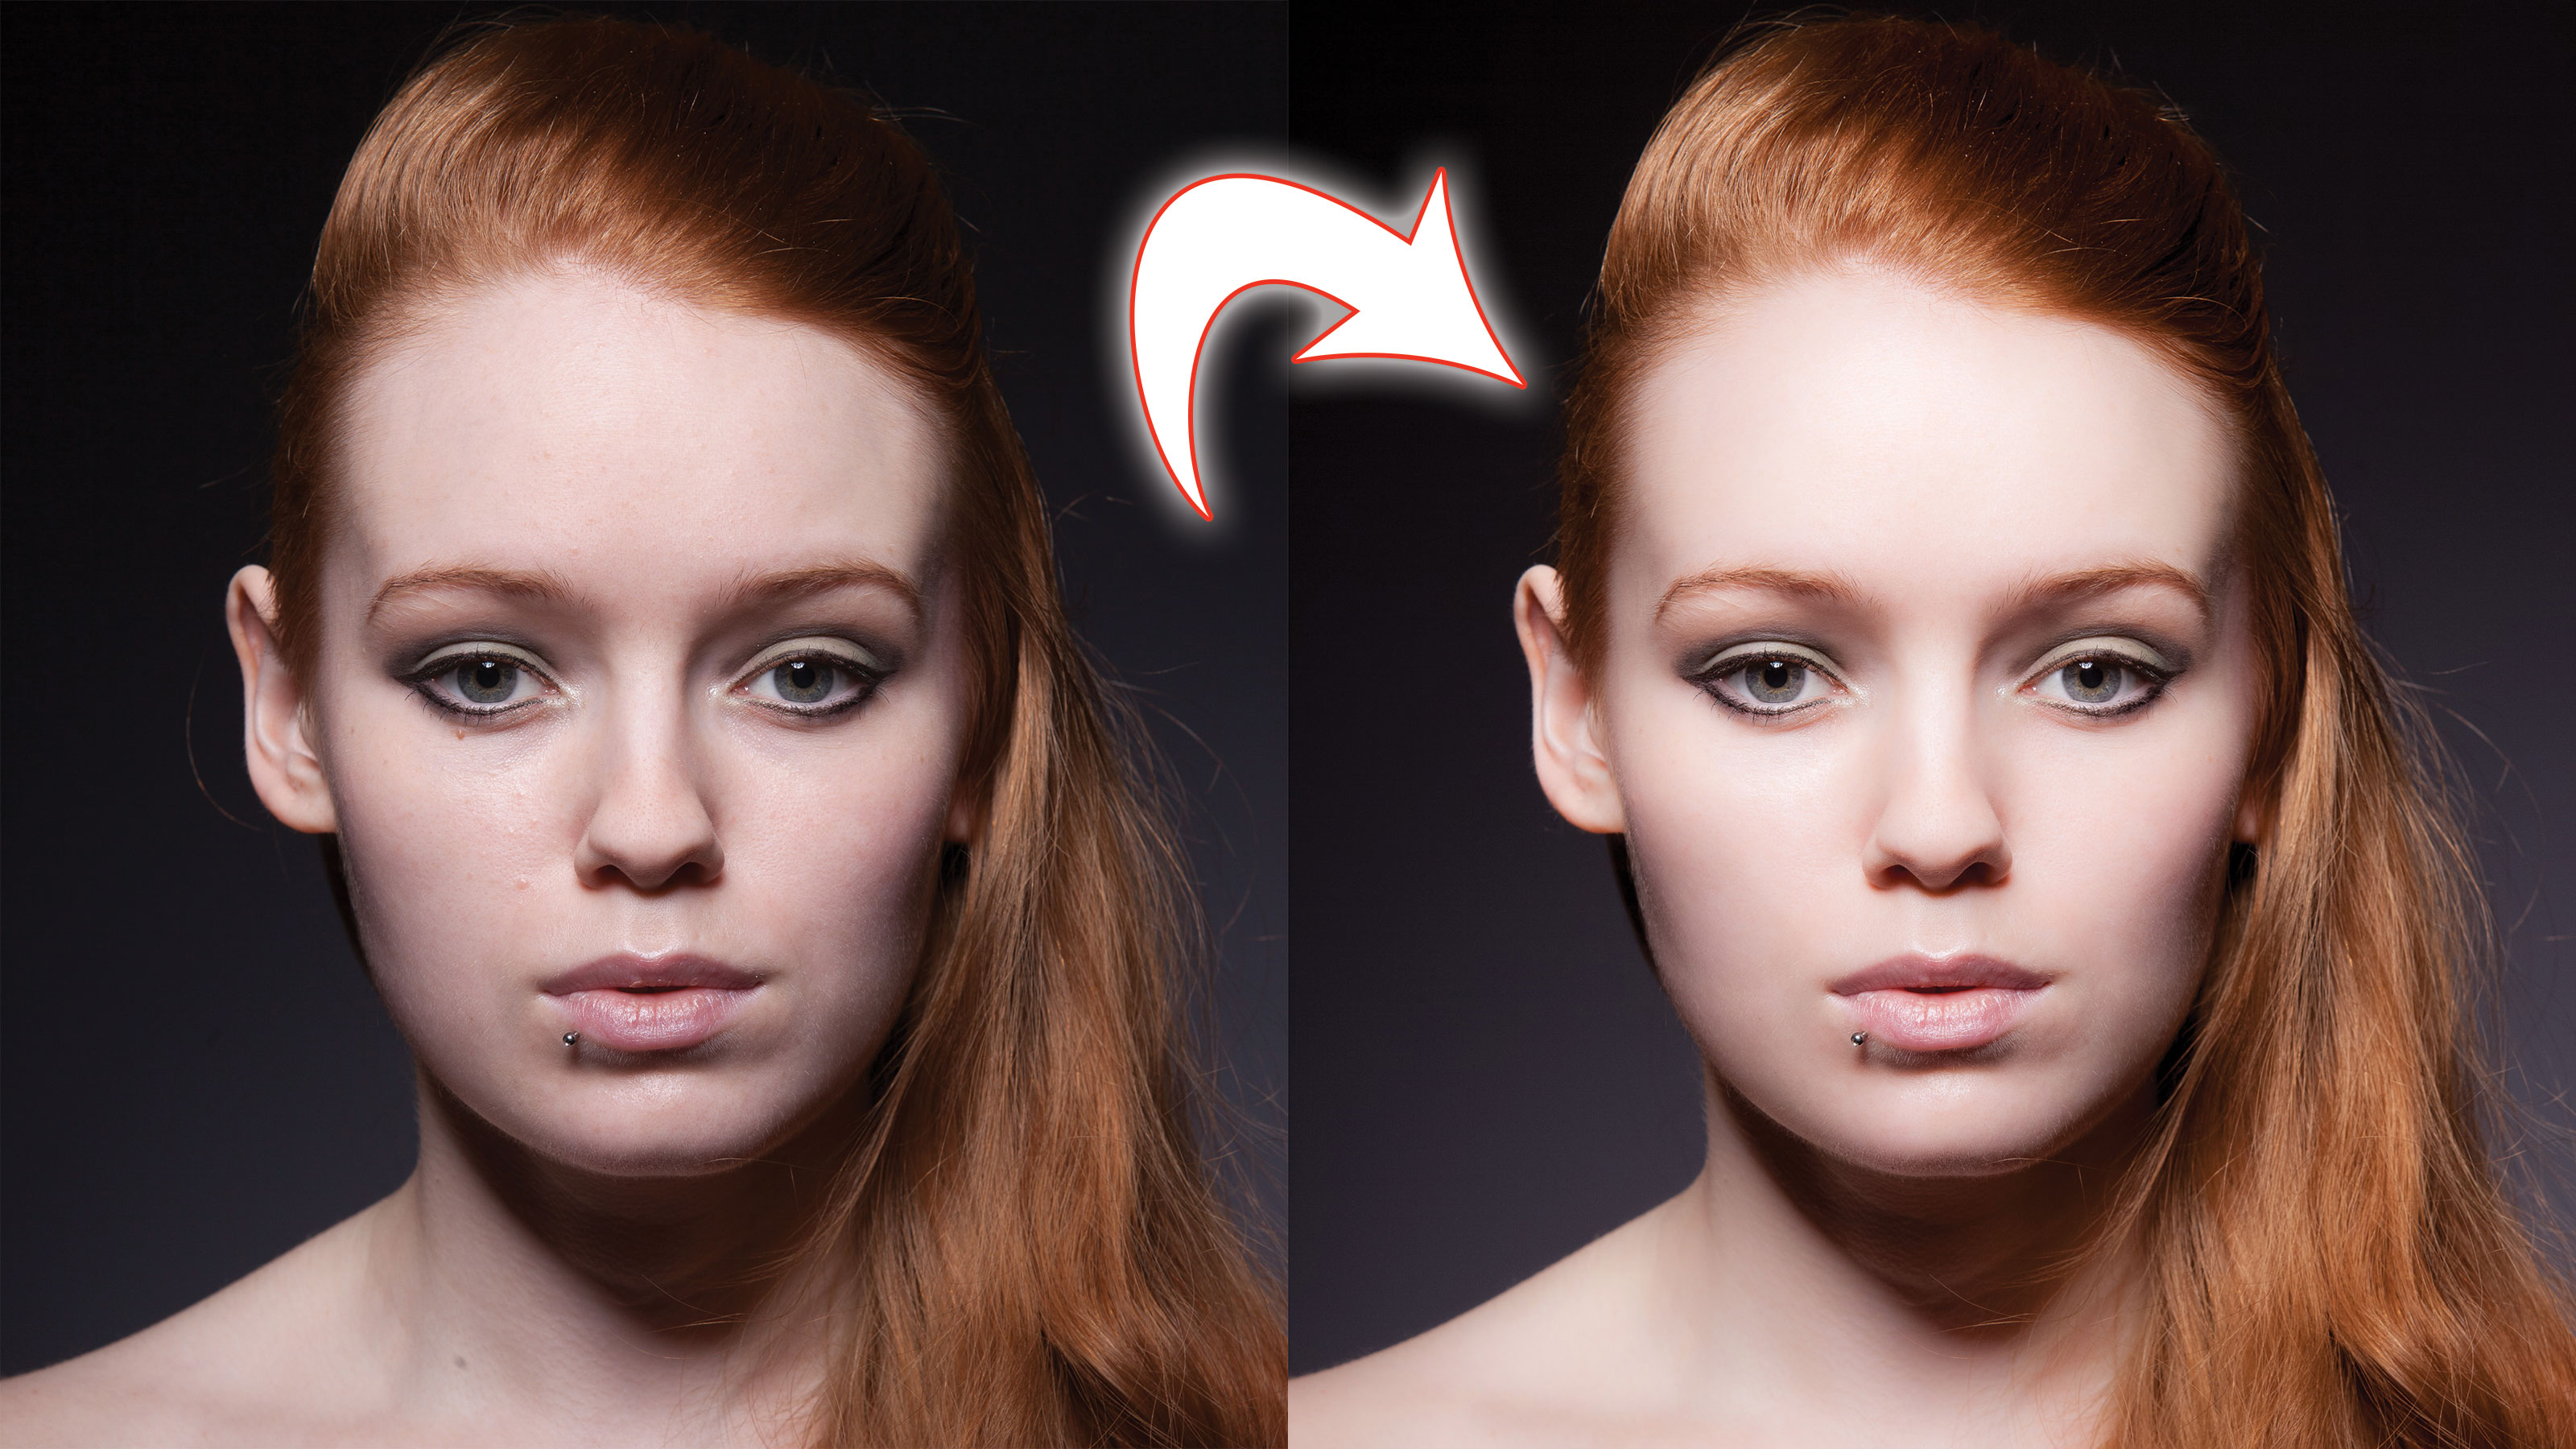
We're bombarded with images on a constant basis, from TV ads to magazines and billboard advertising. Even in public bathrooms, you have posters looking down at you. These images are feeding us with the visions of a perfect world, marketed to us by companies that are hoping we’ll buy into their message.
Advertising has raised the expectation of how our photos should look, especially when it comes to portraits.
Welcome to the tenth instalment of our Lightroom series, first published in Digital Camera magazine (see below for subscription offers).
If you are already a Lightroom user, you could discover some new tricks and processes you haven't tried yet. If you don't use Lightroom, then scroll down to the bottom where you'll discover how to get it and which Adobe Photography Plan is best.
We all know commercial portrait images are retouched, so it’s no surprise your subjects would ask for a little of this magic too. You don’t need Photoshop, though: Lightroom has the tools to give a nice finish to your portraits.
• See more Lightroom tutorials
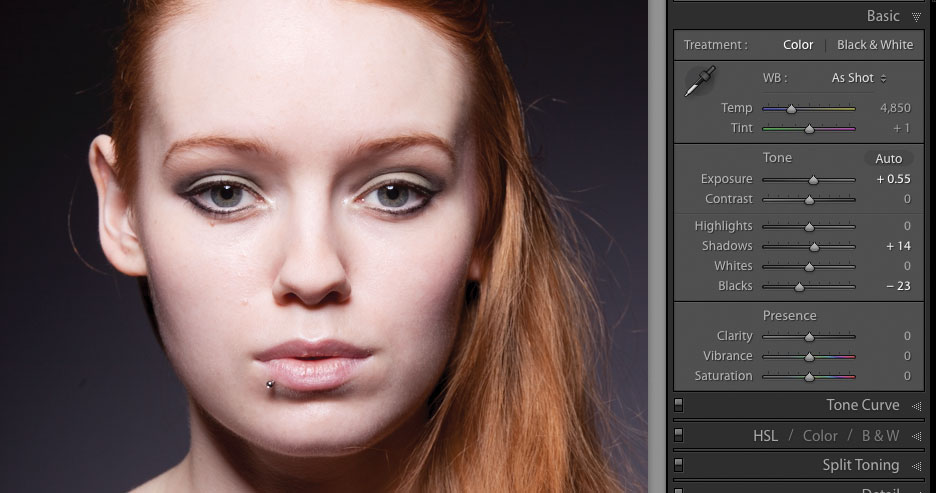
1. Get a good exposure
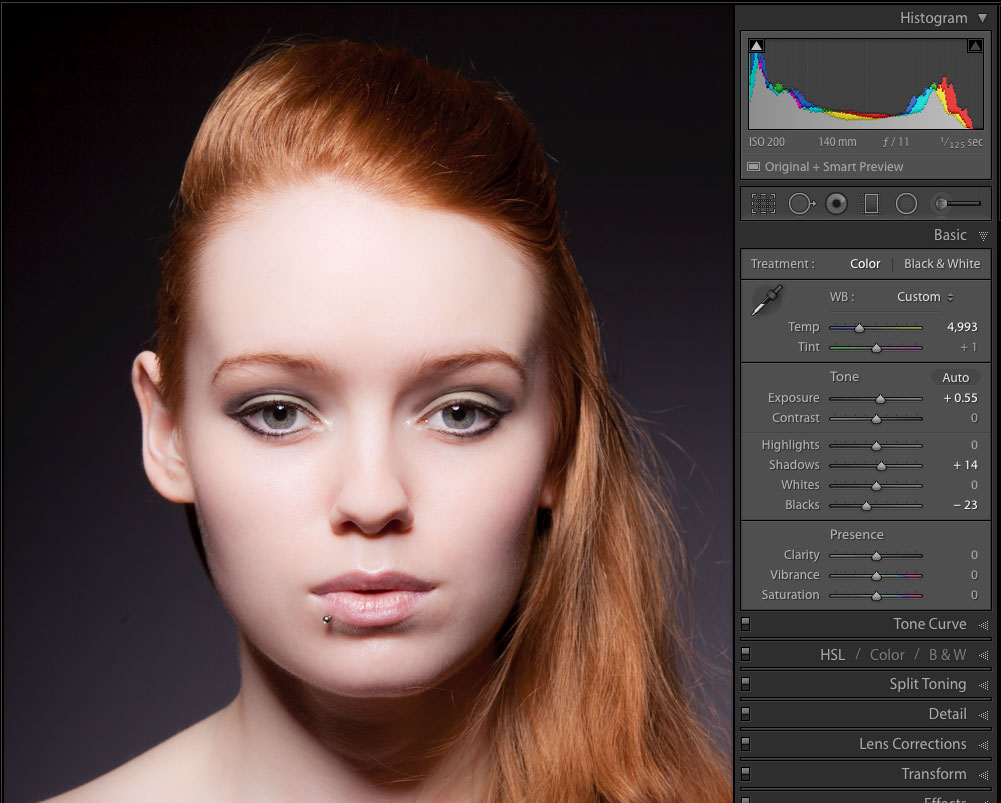
The first step is always to get the best of the exposure from the raw file. You want a good balance of tones, without blowing out the skin. For this photo, I’ve increased the Exposure, opened the Shadows and reduced the Blacks.
The best camera deals, reviews, product advice, and unmissable photography news, direct to your inbox!
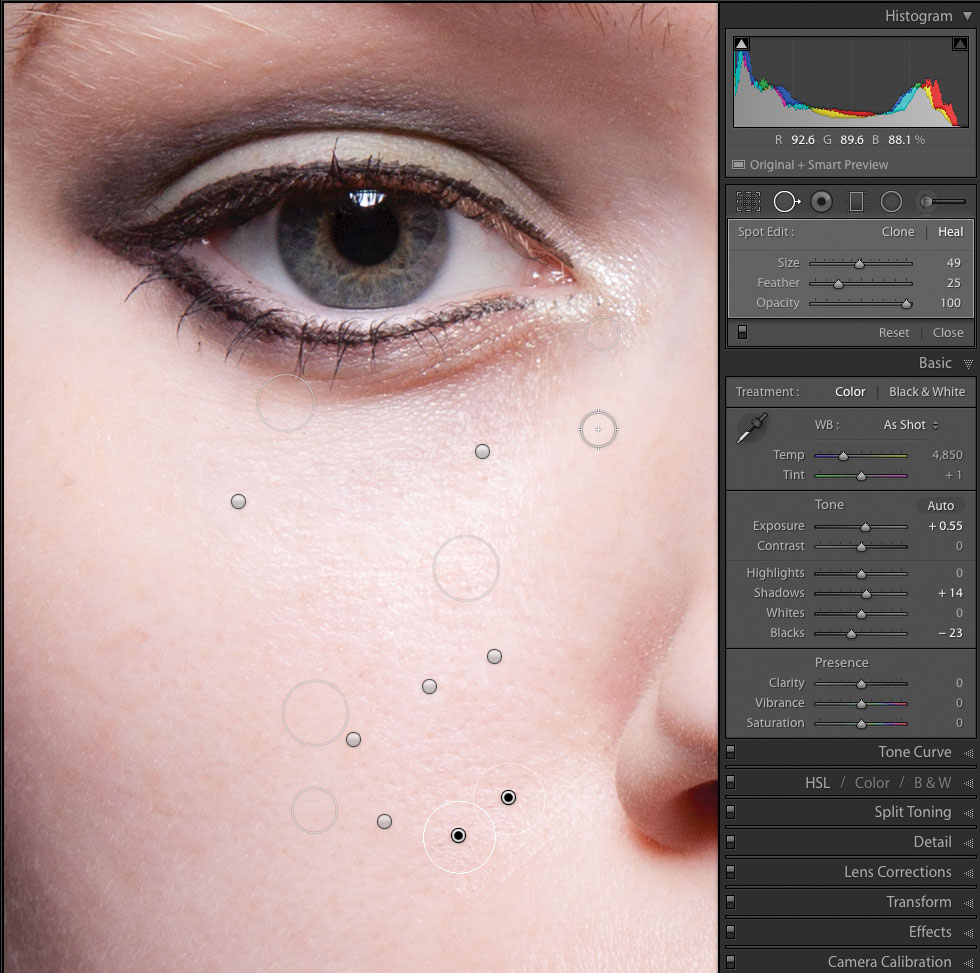
2. Remove blemishes
Using the Spot Removal Tool, click on skin blemishes to remove them. Set a medium Feather, then paint the Spot Removal brush under the eyes. Drag the source until under the eyes looks best. To select a source, hold the Ctrl (Cmd in Mac OS X) key when you click. Keep holding and drag to select your source point.
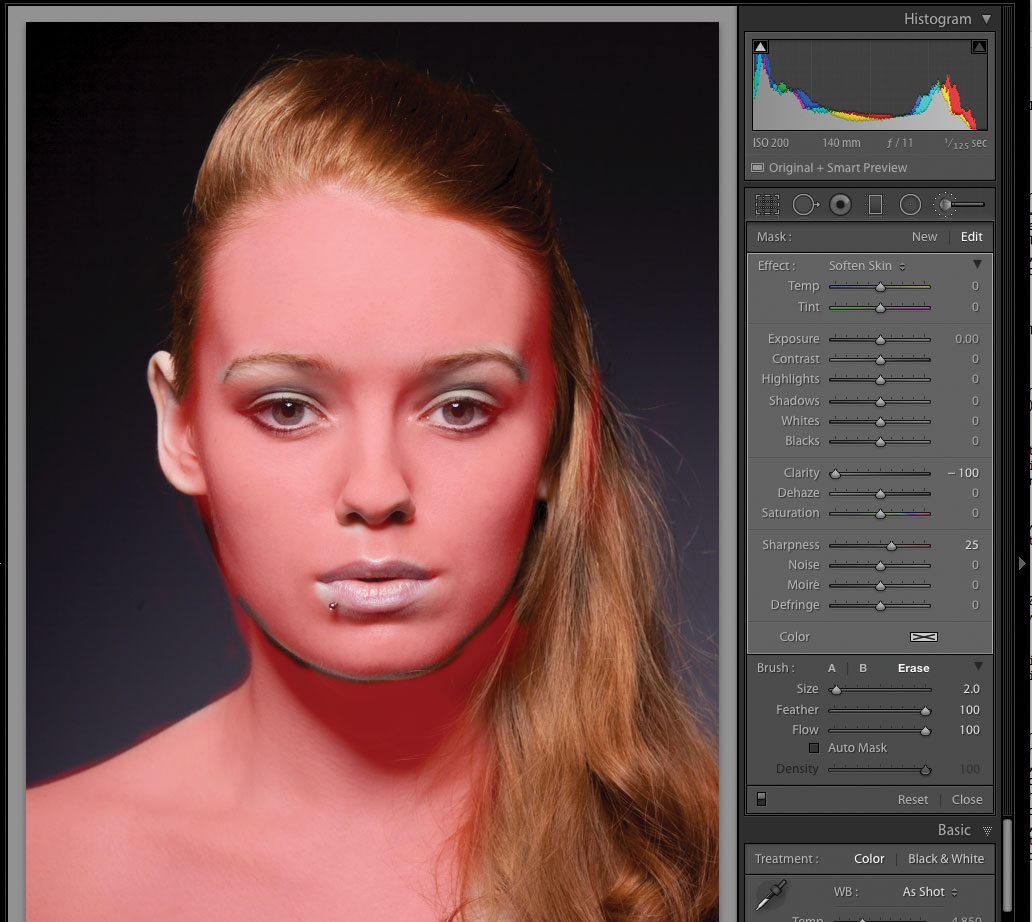
3. Soften the skin
From the Effects menu in the Adjustment Brush (K), select the Soften Skin preset. Paint over the skin only, avoiding the eyes, nostrils and mouth. Also avoid the lines of the face. Press O to see the mask, so you know exactly where you’re painting. Press O again when you’re done.
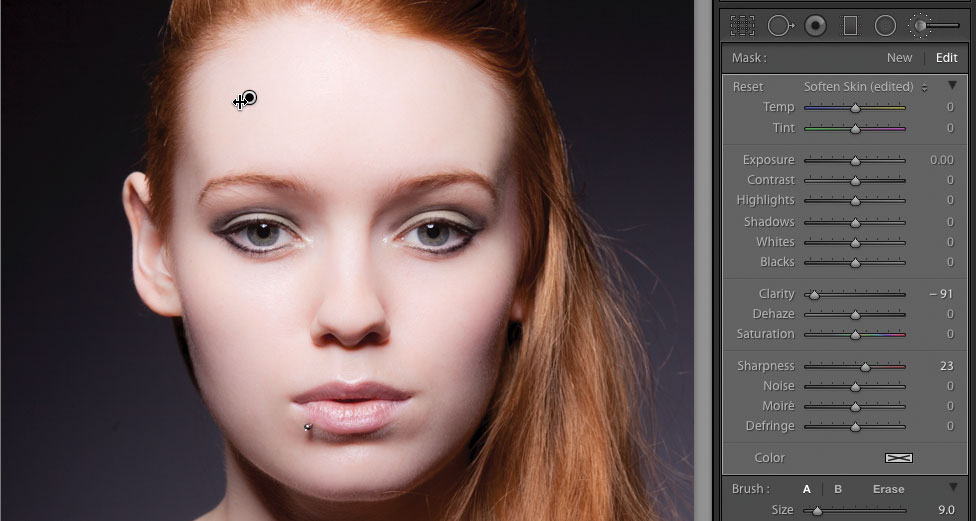
4. Tone things down
You can immediately see that the effect is a little strong here, so we need to hold down the Alt key while hovering over the brush pin. This will tone down the effect a little, making it look better. Next, you can click on the pin and drag to the left in order to reduce all of the sliders in the Brush Effects setting evenly.
5. Paint each iris
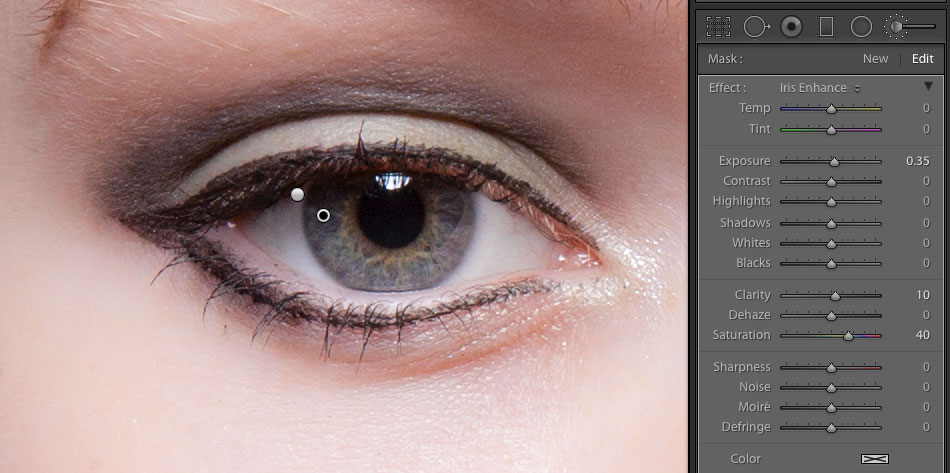
To do this, click New then, from the Effects menu, choose Iris Enhance. With a small soft brush, carefully paint over each iris. Click New again, and this time choose Dodge from the menu. We reduce Exposure to 0.25, then paint the whites of the eyes close to the iris. Don’t do the whole white, as it will look fake and unrealistic.
6. Increase the temperature
You should always correct the white balance on the image, however for portraits, the skin can benefit from adding a little warmth. To achieve this, just move the Temperature slider to the right slightly.
Expert tip: contour the skin
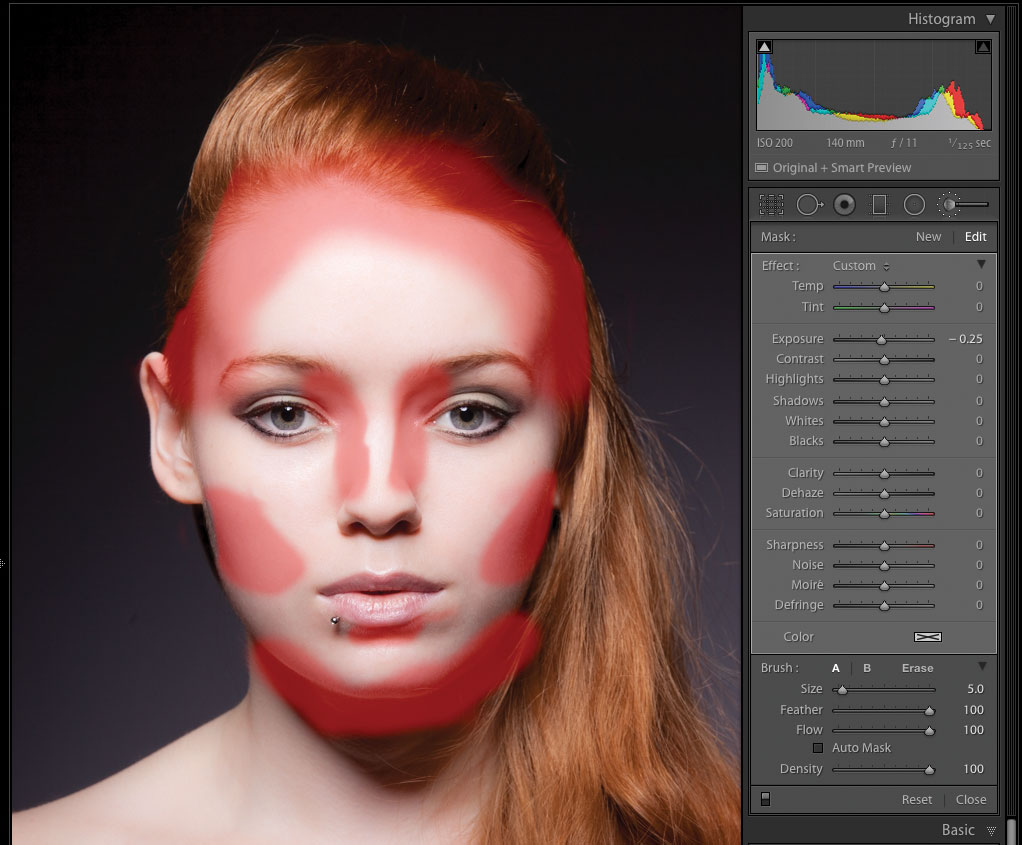
One technique used by professional retouchers is dodge and burn. Lightroom doesn’t have the same amount of finesse, but you can still contour the face. Dodge means lightening areas, while Burn means darkening. Dodging first: with Exposure set at 0.2-0.3, paint in highlights (with a soft brush) on places that stick out – the centre of the forehead, the bridge of the nose, the top of the cheeks, the ridges between the nose and lips and the chin. To burn, set Exposure to -0.2 or lower and paint in the outer part of the forehead, the sides of the nose, under the lips, and the mid-section of the cheeks (from below the ear to the lip), tapered towards the lips.
About Digital Camera magazine
This tutorial originally appeared in Digital Camera Magazine, the monthly newsstand magazine for all photographers. Why not subscribe to a print edition, and have the magazine delivered direct to your door every month?
Alternatively, we have a number of different digital options available, including:
• Apple app (for iPad or iPhone)
• Zinio app (multi-platform app for desktop or smartphone)
• PocketMags (multi-platform app ideal for Android devices)
• Readly (all-you-can-eat digital magazine subscription service)
If you wanted a printed version of any of our most recent issues we have a selection of back issues to choose from in our online store.
How to get Adobe Lightroom
Adobe Lightroom is available in two versions: the regular Adobe Lightroom Classic CC designed for desktop users, which is what we cover in this series, and a new cloud-based Adobe Lightroom CC, which stores your files online and offers a similar but reduced set of features. For regular desktop users we recommend Adobe Lightroom Classic CC.
Adobe offers three subscription based Photography Plans which you can click on below. We recommend either the regular Photography Plan, or the Photography Plan (1TB) which costs more but comes with 1TB online storage in case you decide to go with Lightroom CC.
For this set of tutorials and for anyone who likes to work on a single main computer, we recommend the regular Creative Cloud Photography Plan. This is the cheapest way to get started AND it comes with Photoshop CC too.
Read more:
• This is the best photo-editing software today
• These are the best laptops for photographers right now
• We help you choose the best desktop computers for photo editing
• The best portrait photography tips
Sean McCormack is a commercial, and editorial photographer, book author, and regular contributor to Digital Camera magazine based in Galway, Ireland. He has extensive experience with Lightroom, dating back to its original beta version, and has tried out just about every plugin and preset available. His latest book is Essential Development 3: 25 Tips for Lightroom Classic’s Develop Module.
