Lightroom series part 11: Enhance your Milky Way photos the easy way
Combine a few simple techniques in Lightroom and you’ll soon bring out the stellar detail in your Milky Way photos
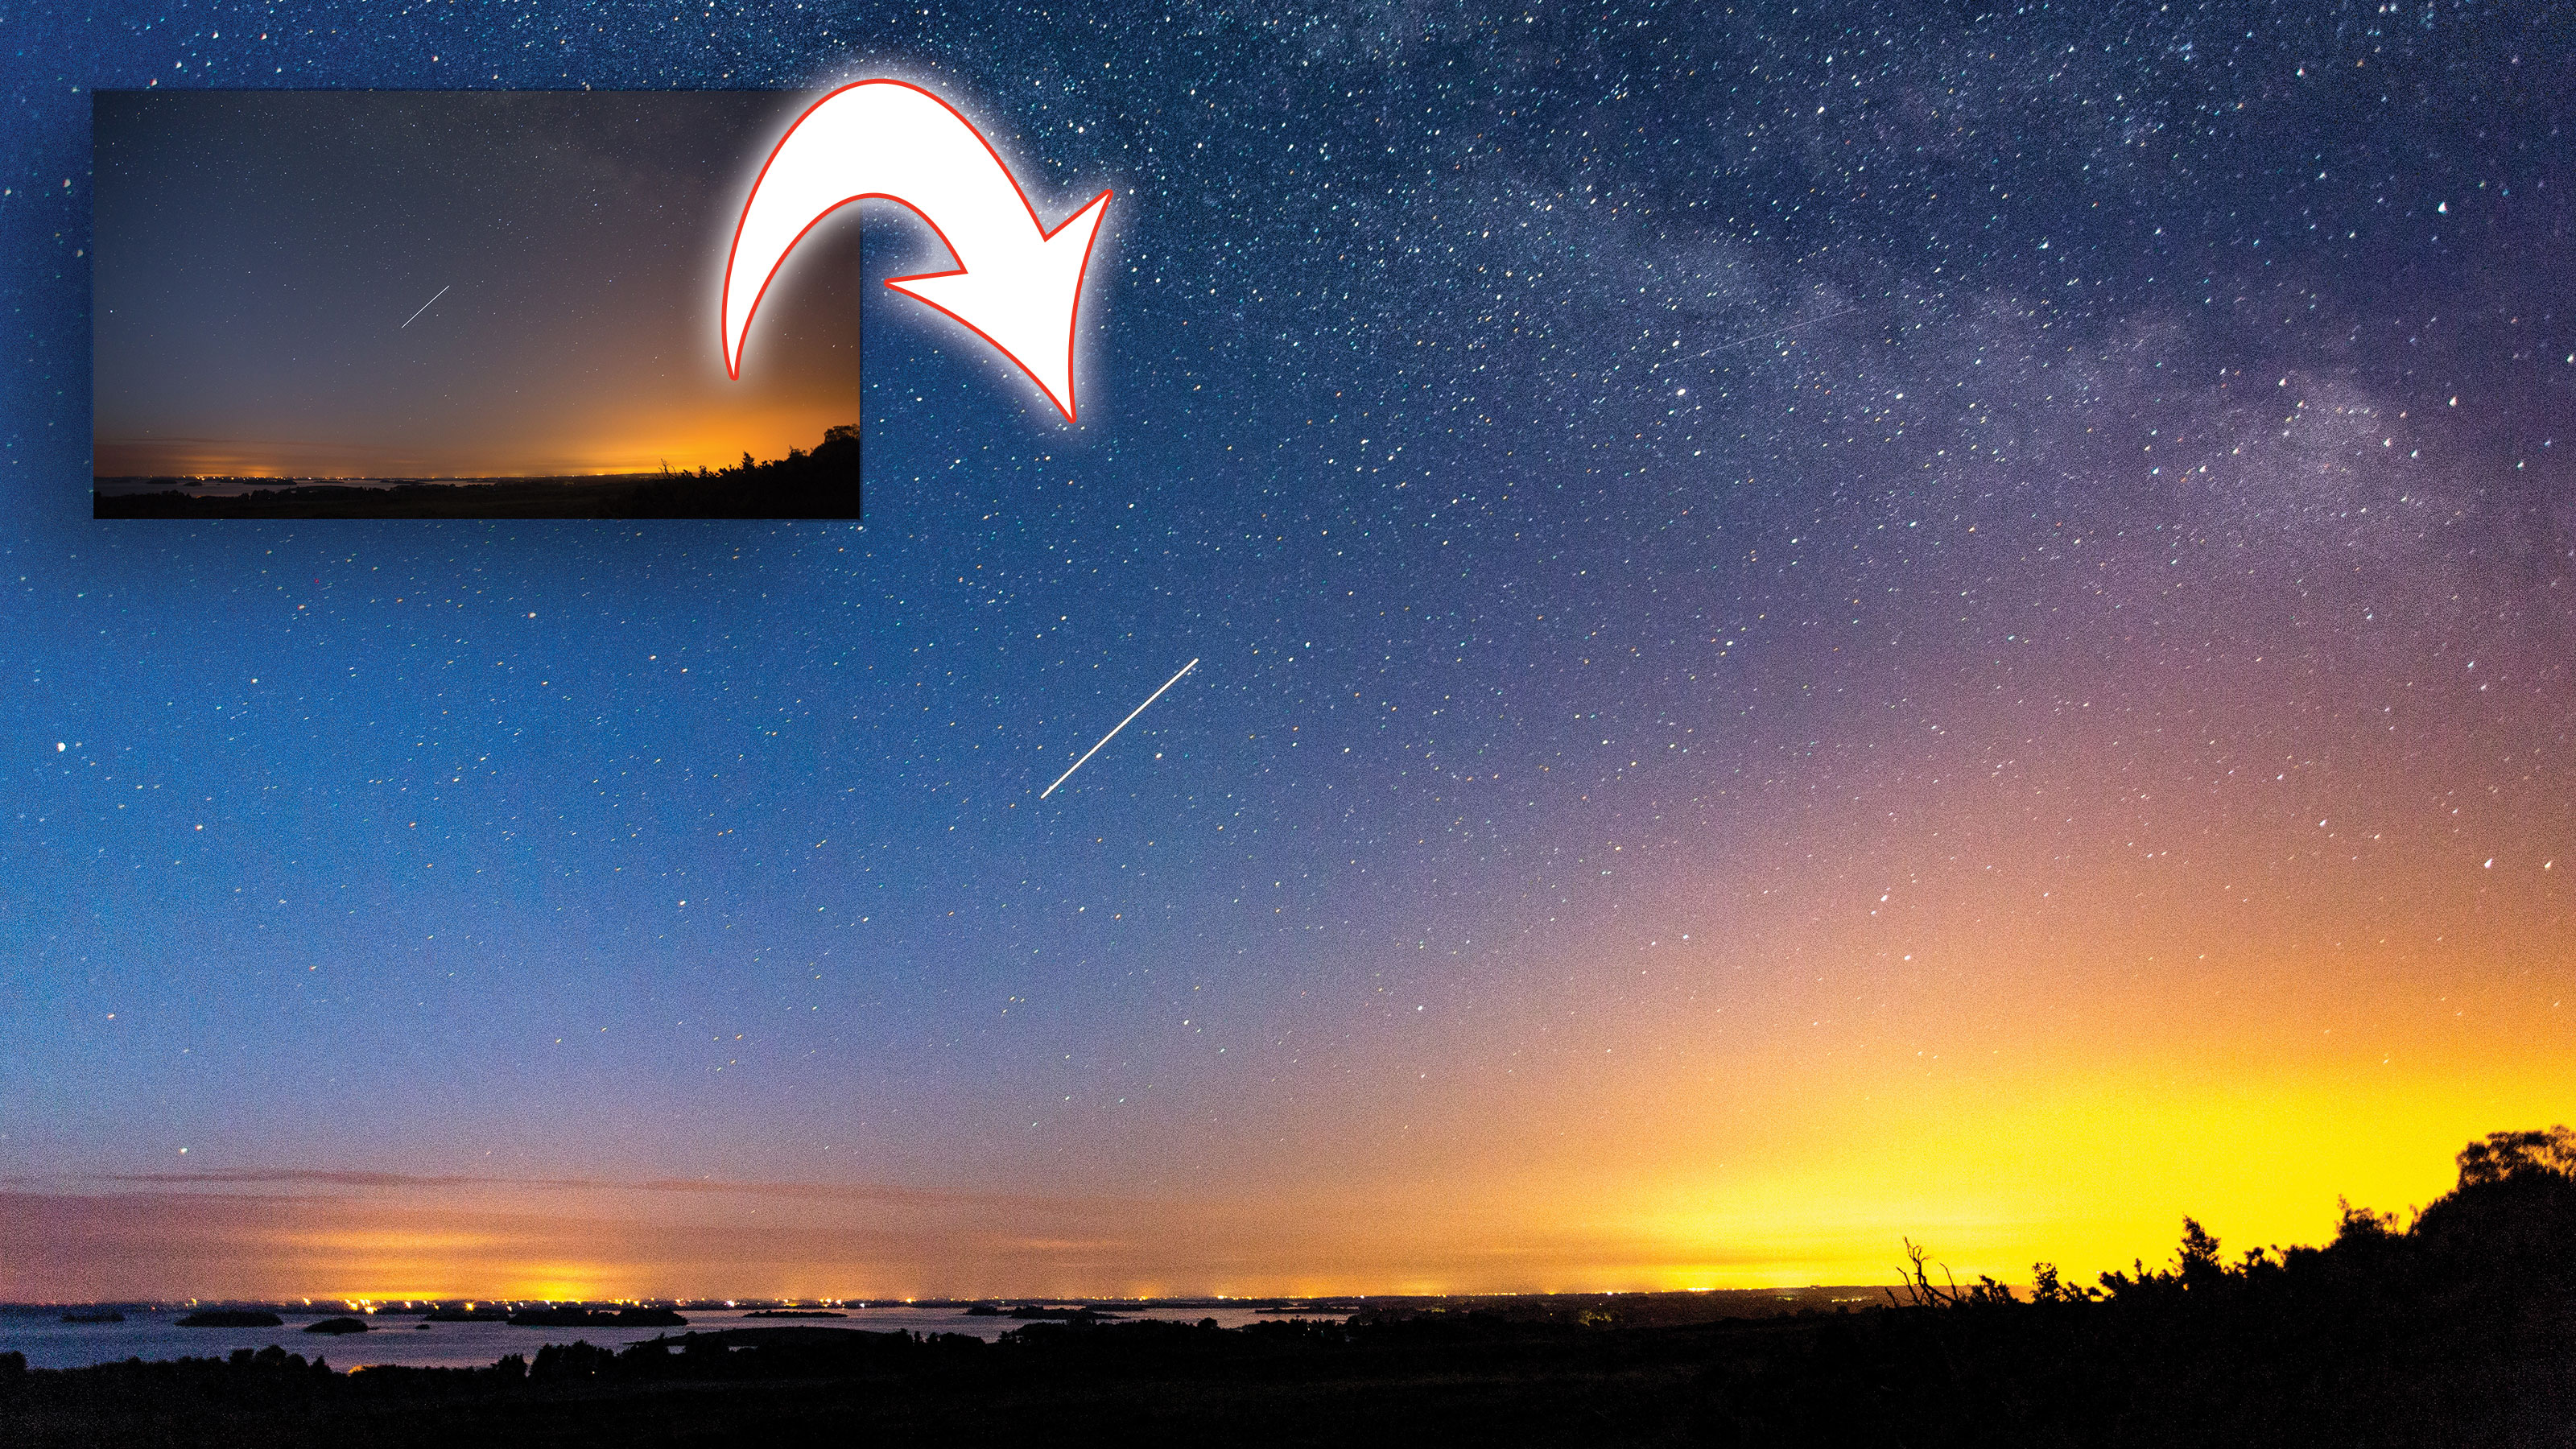
Shooting the Milky Way needs a lot of luck with cloudless skies. Even then, what shows up on-screen can be a sad reflection on what we actually saw with our eyes!
Welcome to the 11th instalment of our Lightroom series, first published in Digital Camera magazine (see below for subscription offers).
If you are already a Lightroom user, you could discover some new tricks and processes you haven't tried yet. If you don't use Lightroom, then scroll down to the bottom where you'll discover how to get it and which Adobe Photography Plan is best.
Note: This was written for Lightroom 6. Some of the tools and panels have changed in later versions, notably the Chromatic Aberration Removal option (now a simple checkbox) and the Dehaze slider (now in the Basic panel).
It’s good to know that you can rely on Lightroom to help bring impact to the faint glow of our galaxy’s core. For this we’ll use a mix of tools: the Basic panel, the Lens Corrections panel and the Adjustment Brush. The base image is of the Milky Way with the International Space Station passing by.
• See more Lightroom tutorials
1. Adjust the color
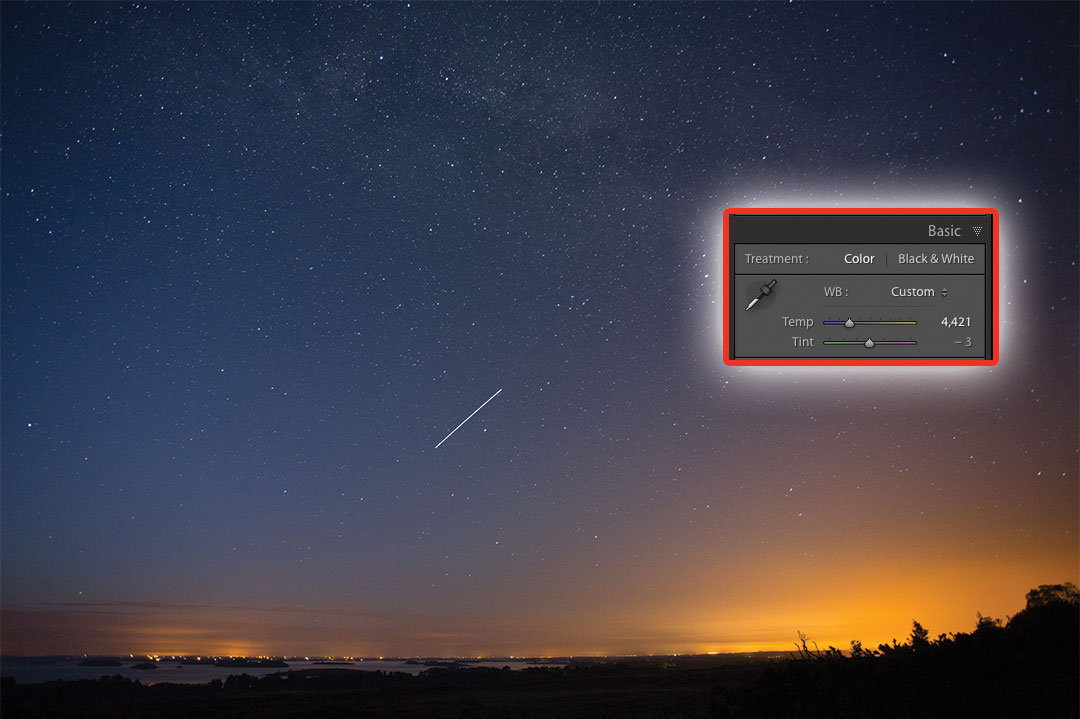
We’ll begin in the Basic panel, and start with the color. As there’s yellow light pollution in this shot, moving the Temperature slider makes the sky more blue, while reducing the impact of the sodium lighting. This also brings more balance to the complementary colours here.
2. Highlights and Exposure
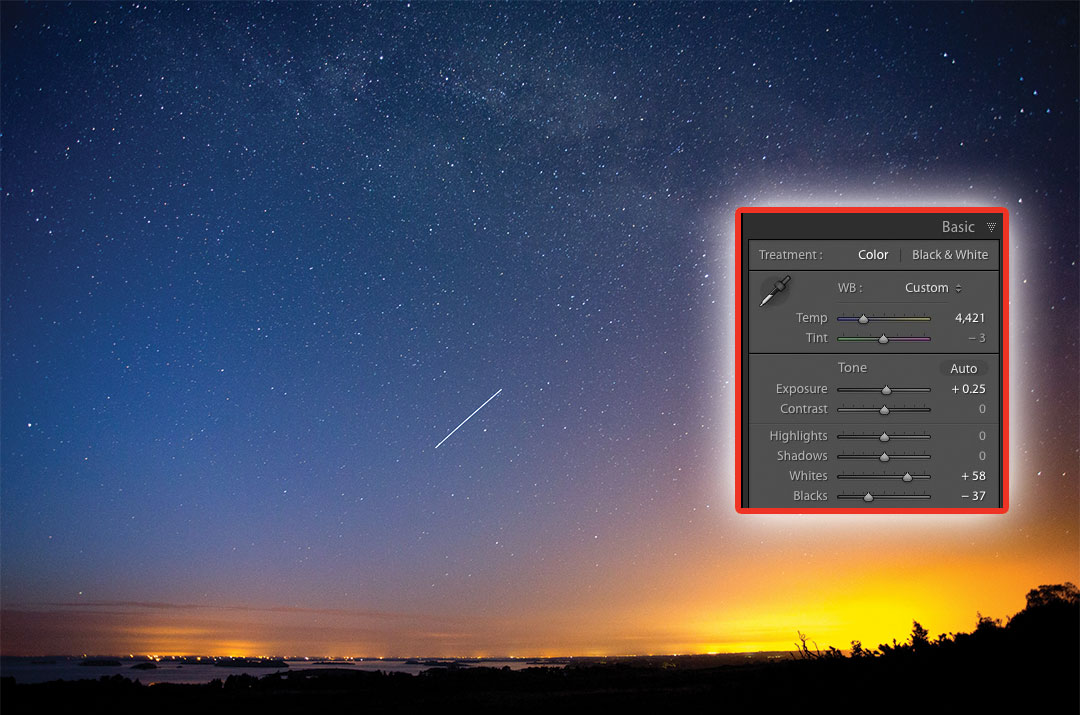
Push the Whites slider to ensure that the stars are fully white. For a stronger silhouette on the ground, reduce the Blacks. Finally, use Exposure to set the overall brightness.
3. Remove the color fringing
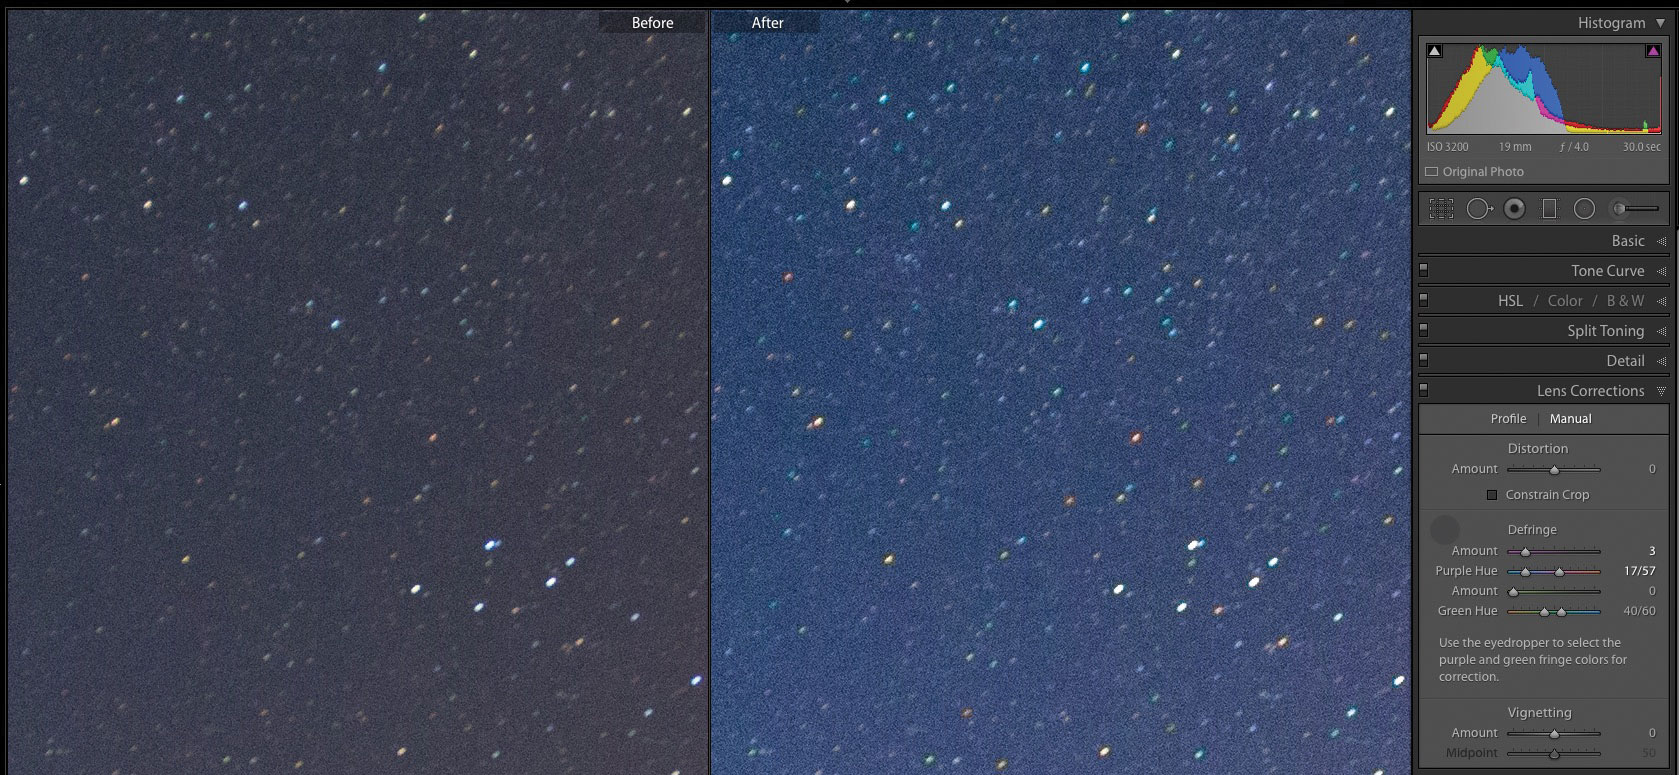
As astrophotography is generally shot at wider apertures, you see more of the lens's vignetting effects and chromatic aberration. Go to Lens Corrections and turn on Remove Chromatic Aberration. Next, go to Manual, grab the eyedropper and click on the edge of a star with obvious edges. This removes the colour on the edges of the stars.
4. Correct distortion
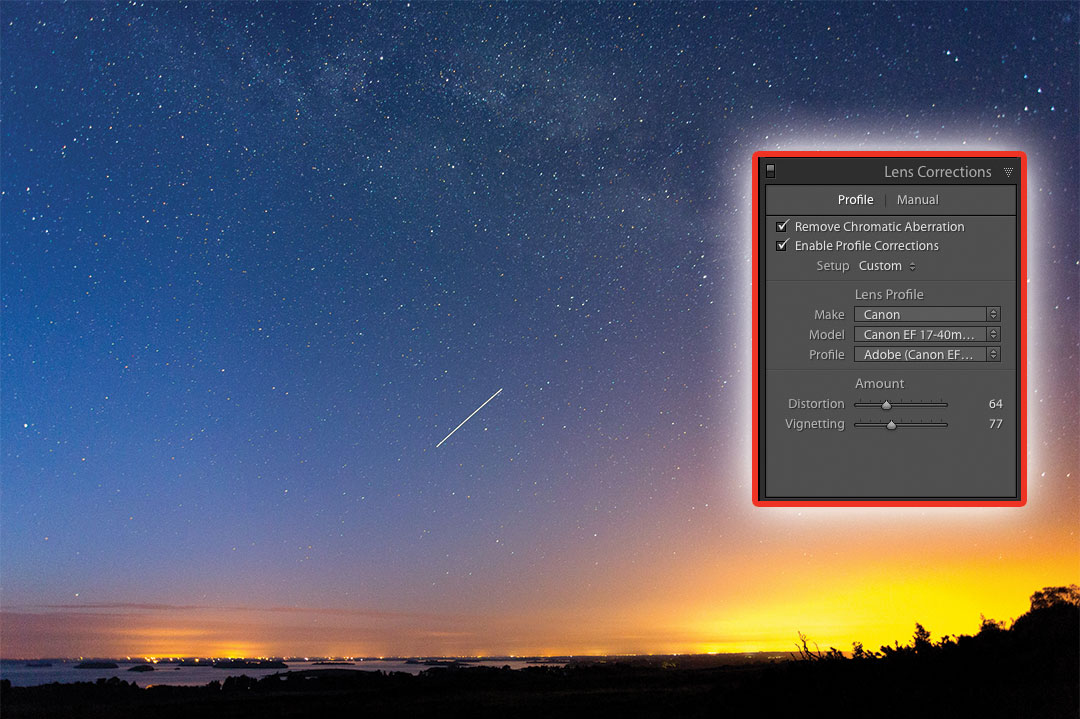
Next, click Enable Profile Corrections. This will correct lens distortion and fix the darkening of the corners in the photo, using a profile dedicated to the lens used. For astro-photography, I find it overdoes this fix, so you may need to reduce the effect by moving the Vignetting and Distortion sliders down to taste. This balances out the color and stops the stretching of stars at the corners a little.
5. Add some punch
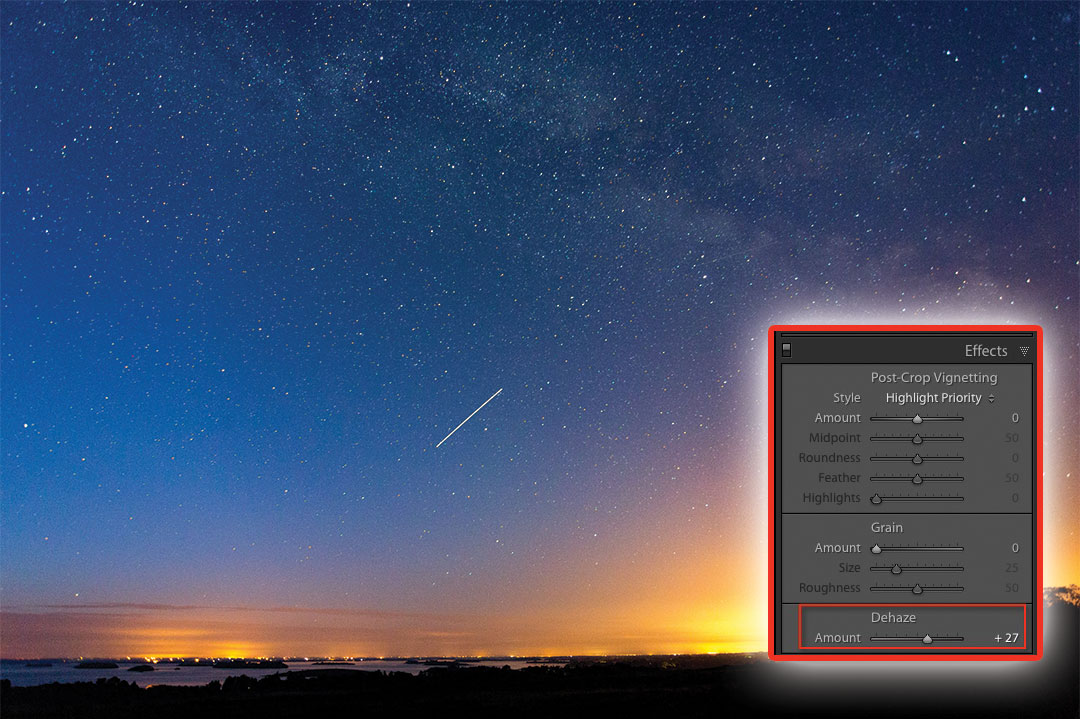
A great way to increase punch in an astro-photo is to increase the Dehaze slider, which is located in the Effects panel. A small amount does wonders to add contrast and saturation in the image.
6. Add depth
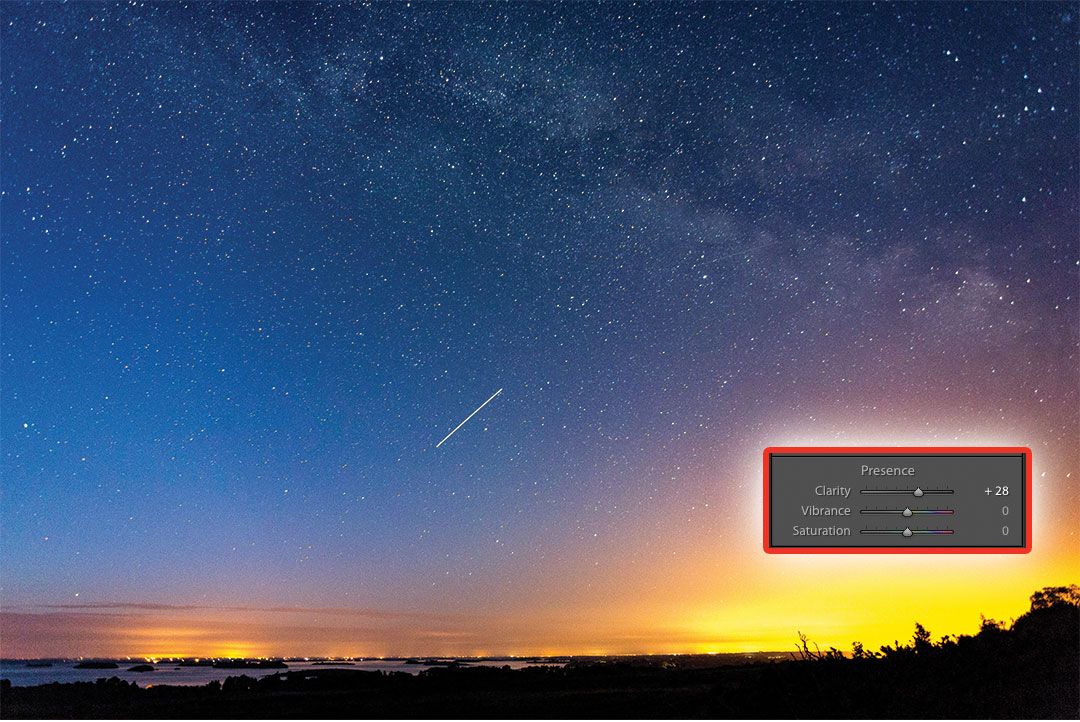
The final global tool we’ll use is the Clarity slider, which you can find in the Basic panel. Increasing this really helps to bring out depth in the Milky Way. Too much of it can mush up the rest of the image, though, so be careful not to overdo it.
Expert tip: Paint in more depth
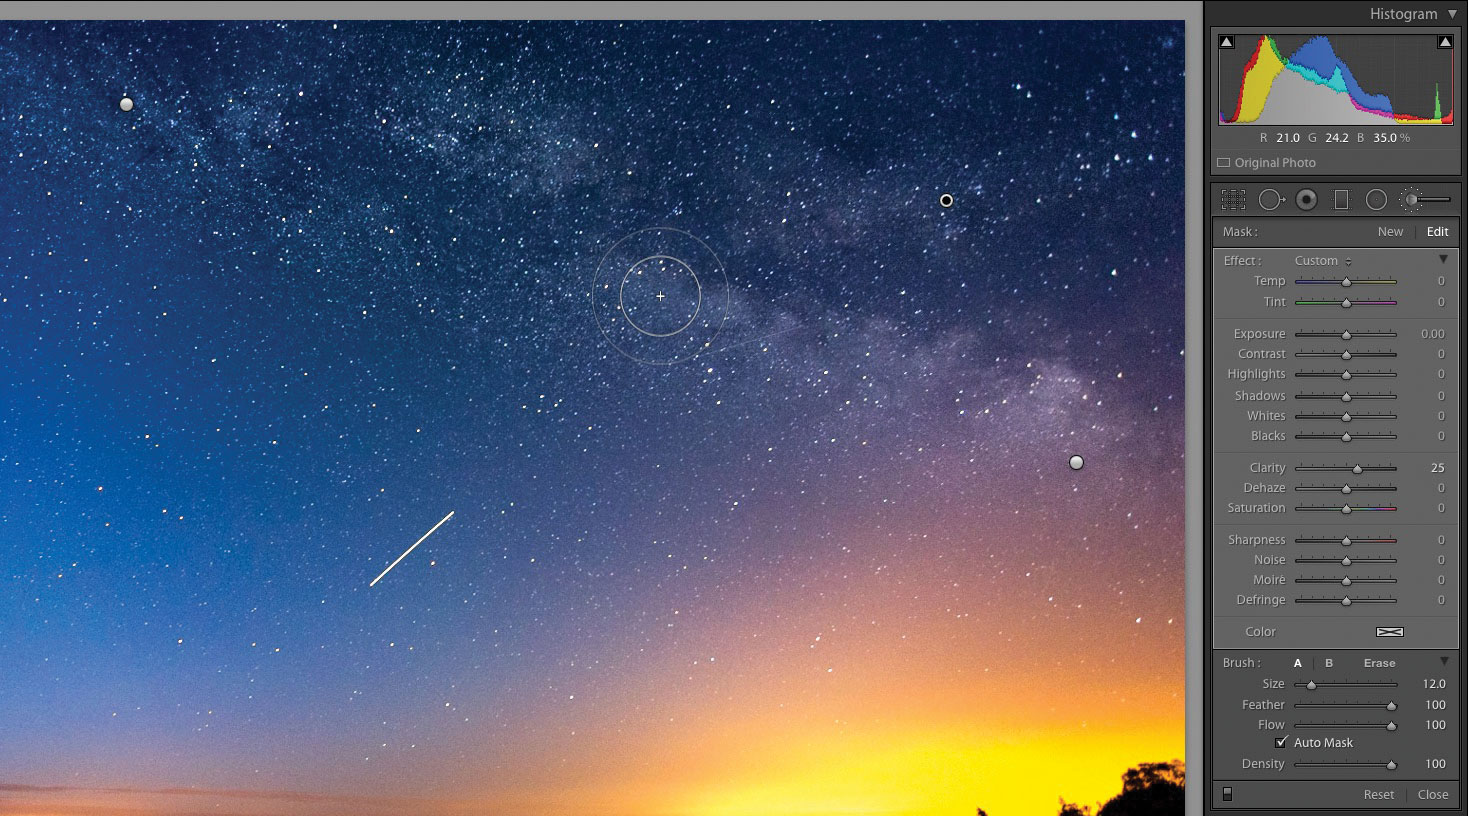
Clarity looks good on the sky, but it’s too much for most of the image. Instead, click the Adjustment Brush under the Histogram (or press K). Double-click the word Effect to reset all the sliders and the swatch. Now set Clarity to 25 – that’s low, but it’s better to build the effect up. Set Feather to 100 for a soft edge. Set Flow and Density to 100 to get the full effect. Set the size to cover one half of the Milky Way. Brush along each half. Press New and repeat. Repeat again. Alternatively, right-click the active pin after the first round of brushing and choose Duplicate to double the effect. Hold down the Alt key to erase areas where you don’t want the effect after you’ve painted.
About Digital Camera magazine
This tutorial originally appeared in Digital Camera Magazine, the monthly newsstand magazine for all photographers. Why not subscribe to a print edition, and have the magazine delivered direct to your door every month?
Alternatively, we have a number of different digital options available, including:
• Apple app (for iPad or iPhone)
• Zinio app (multi-platform app for desktop or smartphone)
• PocketMags (multi-platform app ideal for Android devices)
• Readly (all-you-can-eat digital magazine subscription service)
If you wanted a printed version of any of our most recent issues we have a selection of back issues to choose from in our online store.
How to get Adobe Lightroom
Adobe Lightroom is available in two versions: the regular Adobe Lightroom Classic CC designed for desktop users, which is what we cover in this series, and a new cloud-based Adobe Lightroom CC, which stores your files online and offers a similar but reduced set of features. For regular desktop users we recommend Adobe Lightroom Classic CC.
Adobe offers three subscription based Photography Plans which you can click on below. We recommend either the regular Photography Plan, or the Photography Plan (1TB) which costs more but comes with 1TB online storage in case you decide to go with Lightroom CC.
For this set of tutorials and for anyone who likes to work on a single main computer, we recommend the regular Creative Cloud Photography Plan. This is the cheapest way to get started AND it comes with Photoshop CC too.
Read more:
• This is the best photo-editing software today
• These are the best laptops for photographers right now
• We help you choose the best desktop computers for photo editing
• Best head torch
Get the Digital Camera World Newsletter
The best camera deals, reviews, product advice, and unmissable photography news, direct to your inbox!
Sean McCormack is a commercial, and editorial photographer, book author, and regular contributor to Digital Camera magazine based in Galway, Ireland. He has extensive experience with Lightroom, dating back to its original beta version, and has tried out just about every plugin and preset available. His latest book is Essential Development 3: 25 Tips for Lightroom Classic’s Develop Module.

