Lightroom series part 14: How to simulate a tilt-shift lens effect in Lightroom
Simulating tilt-shift effects for toy town landscapes is all the rage – but did you know you can use the effect in portraits too?
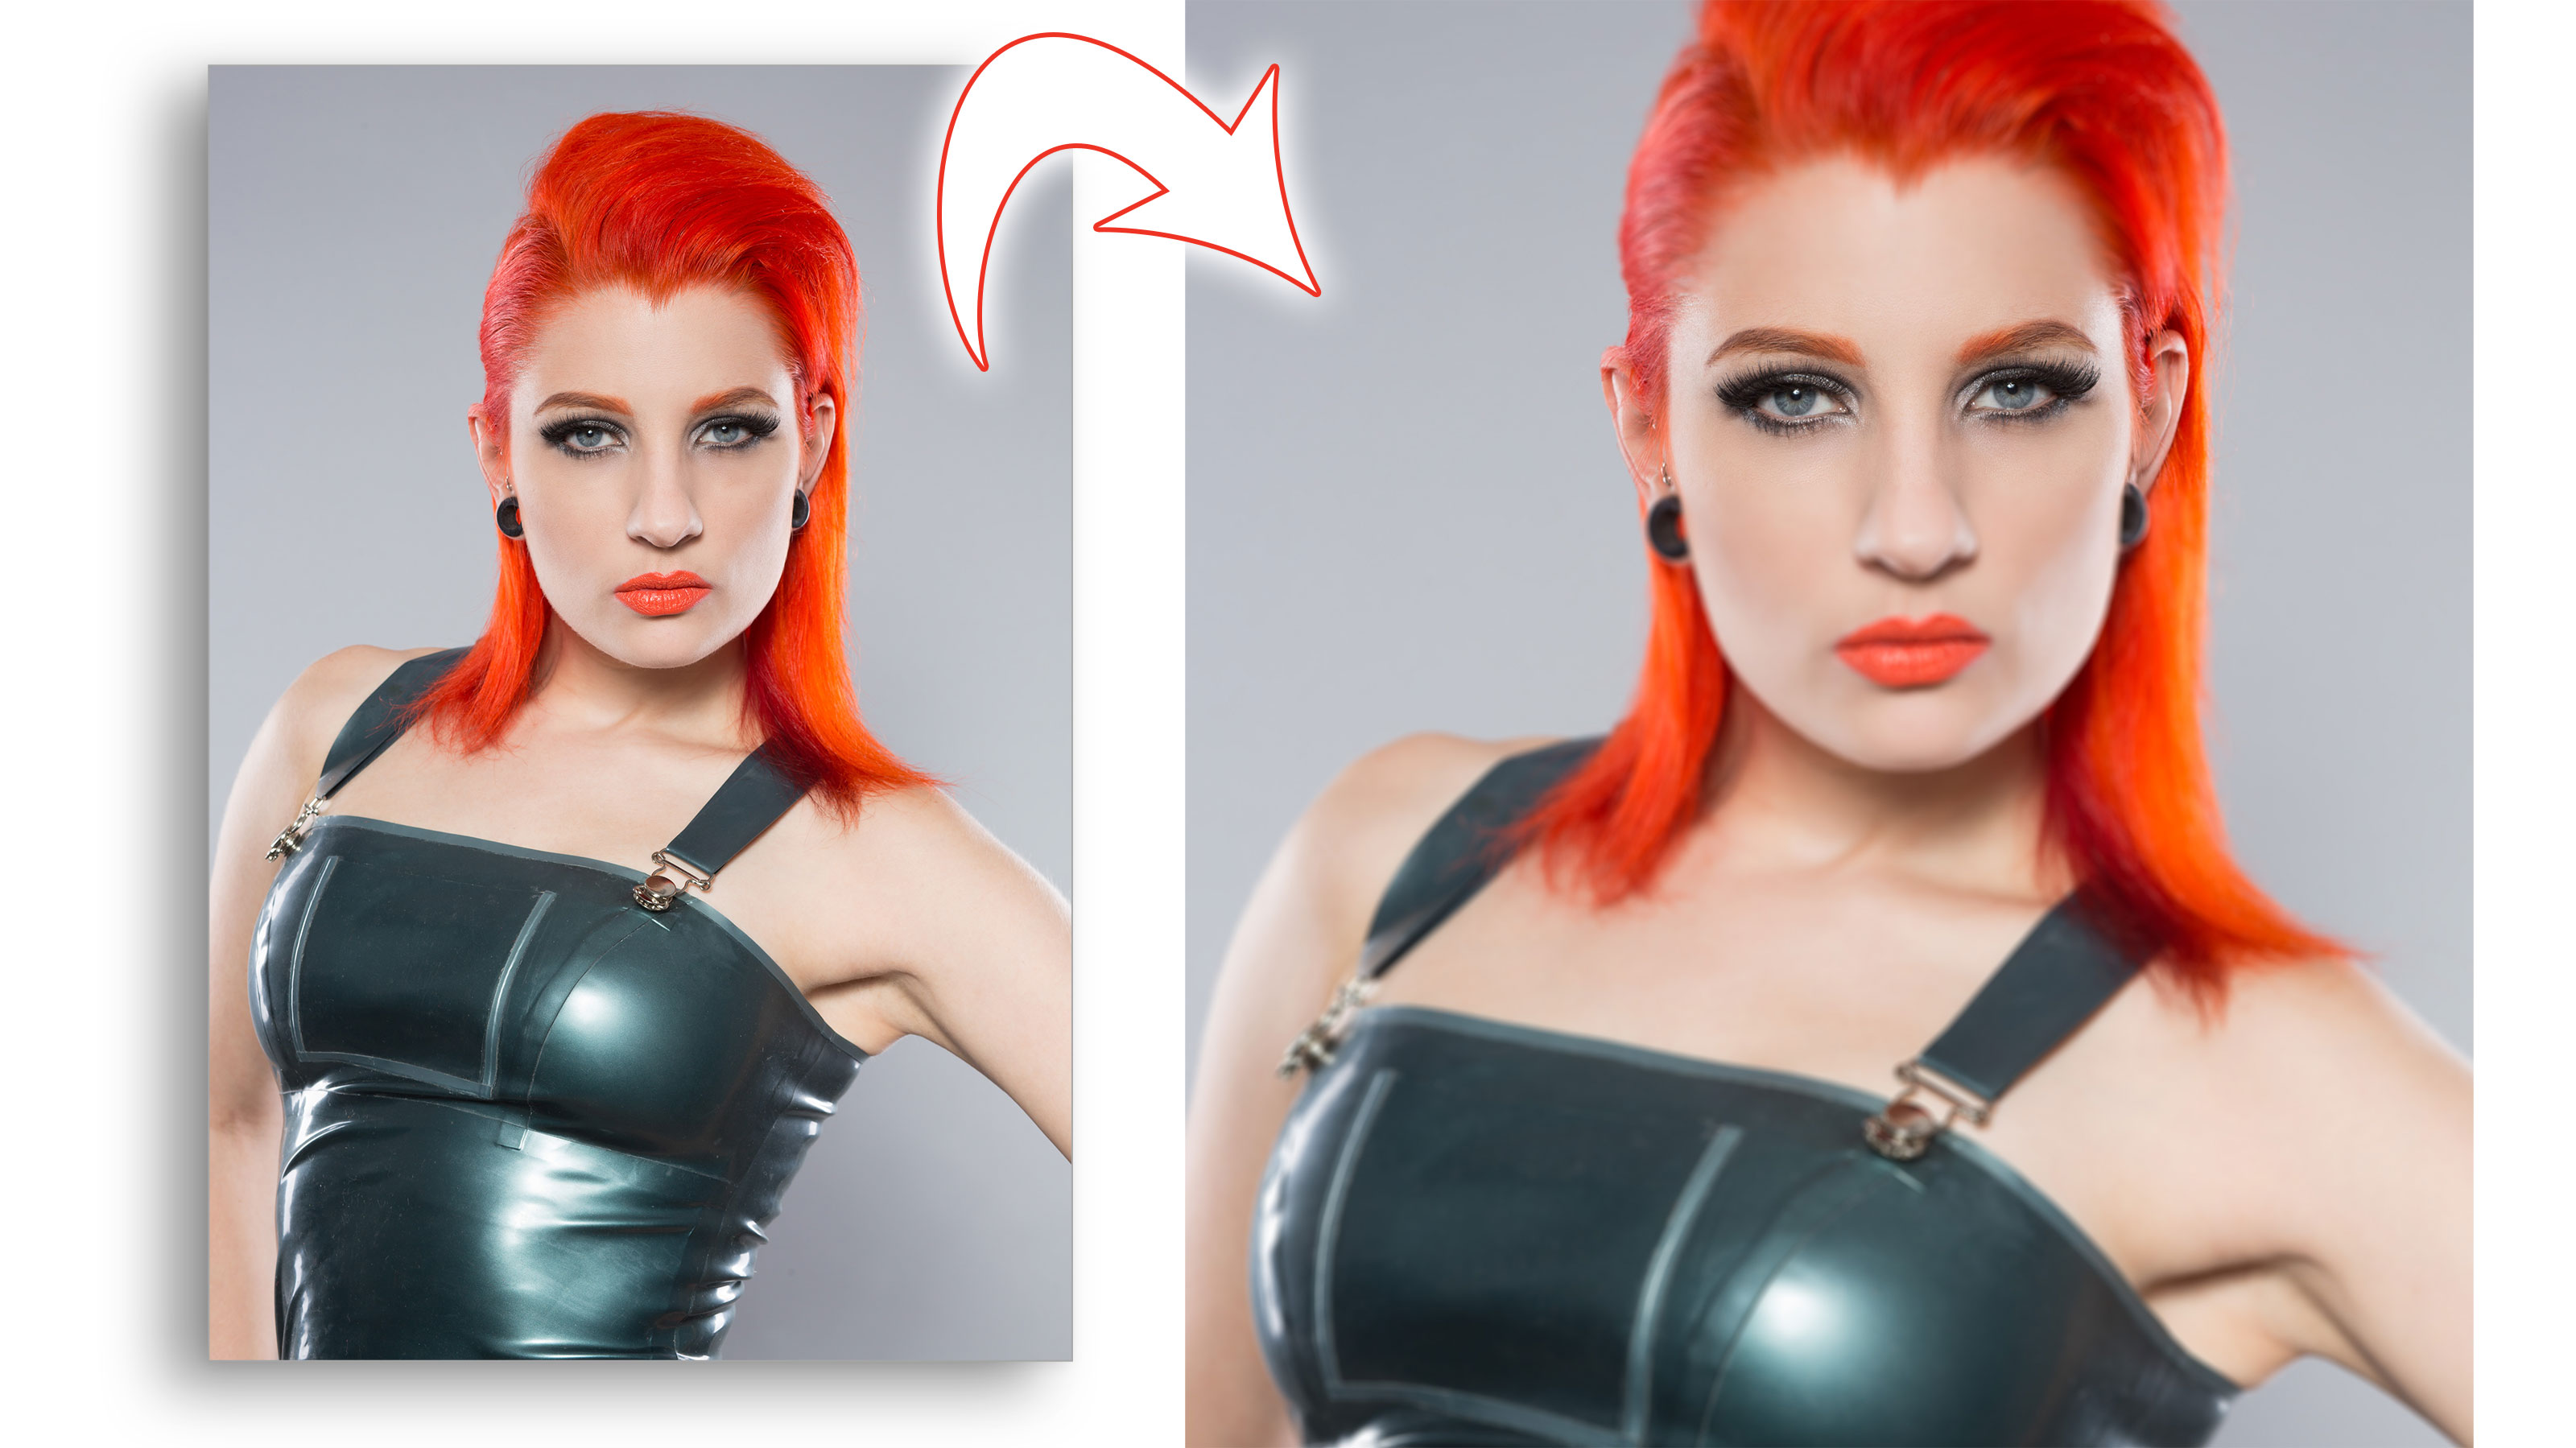
Tilt-shift lenses are designed to change the angle of the focal plane, as well as allow perspective corrected photos of buildings. Generally the tilt property is used to increase the depth of field at wider apertures, allowing you to get landscapes in focus at f/8 rather than f/22. With the potential for diffraction at f/22, getting the same results at f/8 is fantastic.
Welcome to the 14th instalment of our Lightroom series, first published in Digital Camera magazine (see below for subscription offers).
If you are already a Lightroom user, you could discover some new tricks and processes you haven't tried yet. If you don't use Lightroom, then scroll down to the bottom where you'll discover how to get it and which Adobe Photography Plan is best.
Recently, though, a lot of people have been using tilt-shift lenses to decrease the depth of field. In landscapes, especially those from a height, the scene takes on a miniaturised look. Valleys look like railway models, while urban areas look like toy towns. For portraits, this allows you to have only the eyes in focus. Photographers like Mark Tucker pioneered this look. Let’s use Lightroom to create this effect without the expense of a tilt-shift lens.
• See more Lightroom tutorials
1. The Graduated Filter tool
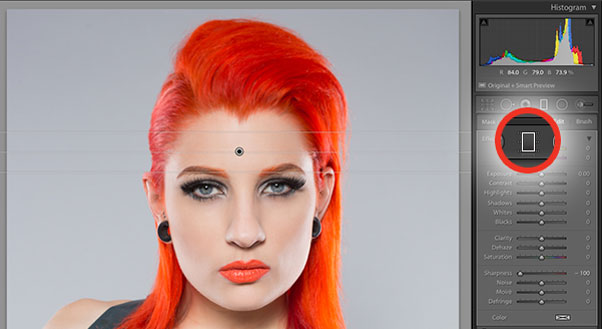
We’re going to use the Graduated Filter for this. It’s located under the Histogram in the Tool Strip. You can use the keyboard shortcut M to get it.
2. Reset the panel
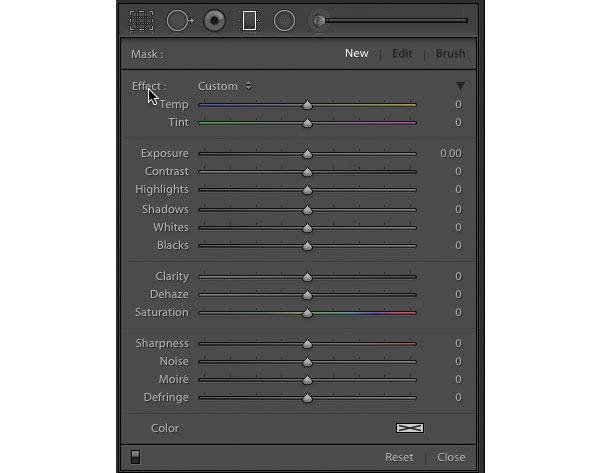
Double click the title Effect. This resets everything in the panel to zero. We only need one tool here: Sharpness.
3. How Sharpness works
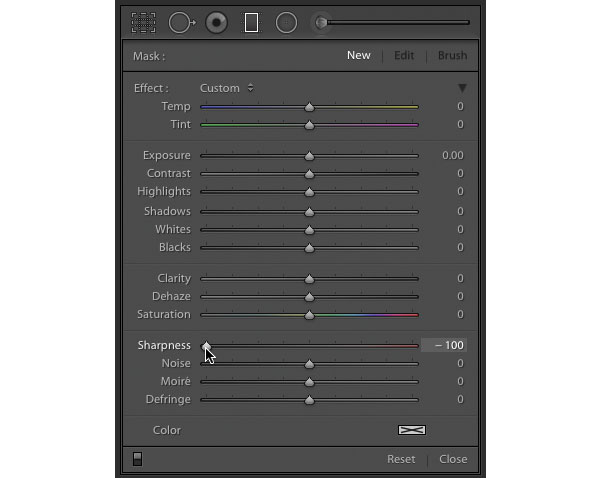
The Sharpness slider has a negative set as well as a positive set. From 0 to -50, it works to remove sharpness from the areas where the local adjustment is applied. From -51 to -100, it acts as a lens blur.
4. Add a filter
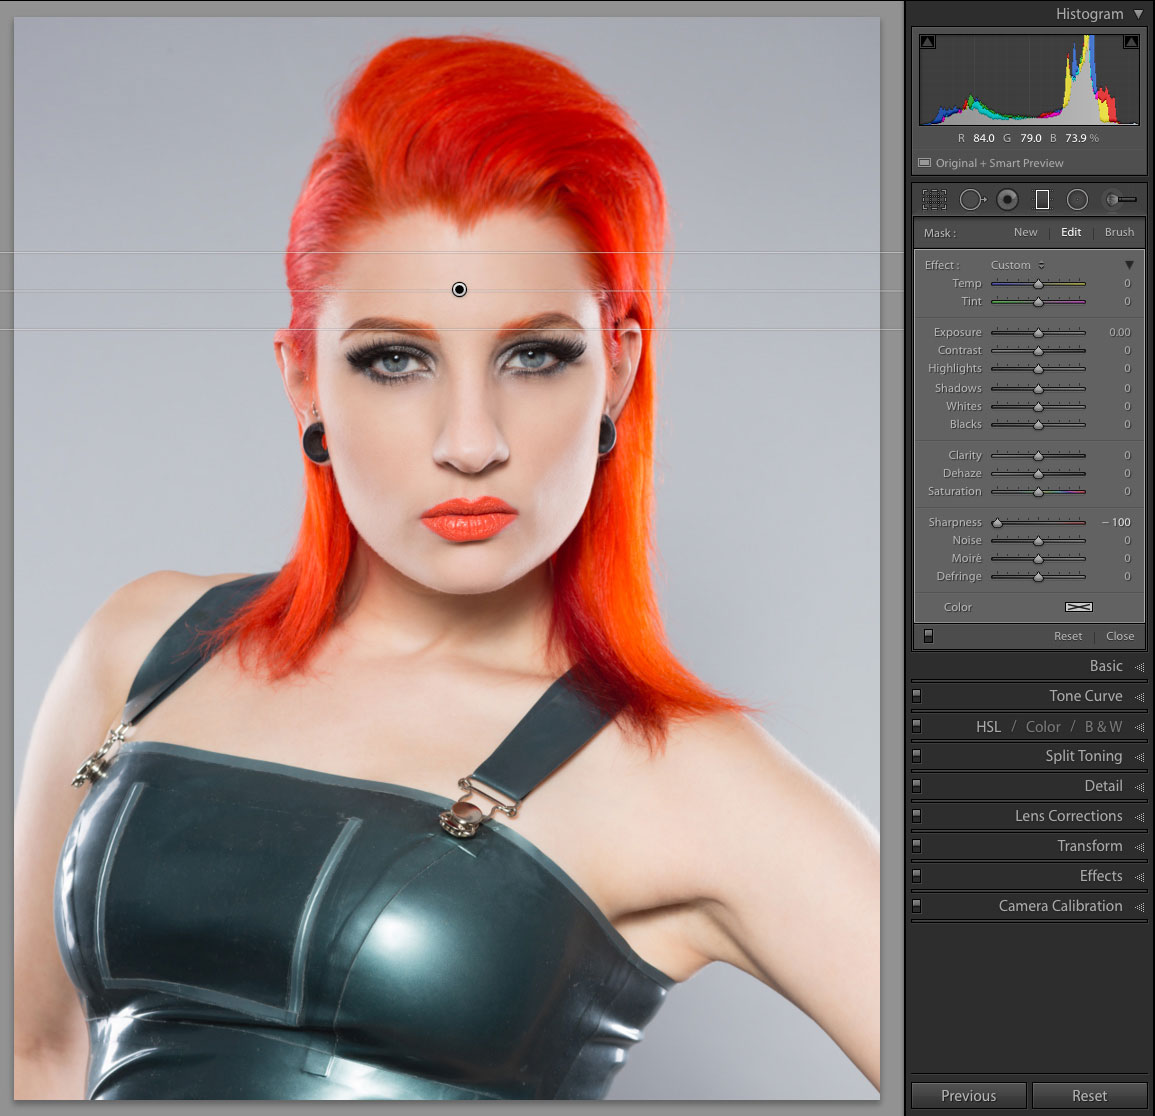
We set the Sharpness slider to -100, then click and drag from the top down just above the eyes. The longer the gap between the edges of the filter, the softer the transition is. I usually do a soft set and a hard set.
5. Add a second filter

Now we drag up from the bottom to just below the eyes for a second filter. You don’t want the top and bottom filters to overlap, or you won’t get a sharp area in-between. Because we changed the settings before dragging the first filter, they also apply to this filter.
6. Complete the effect
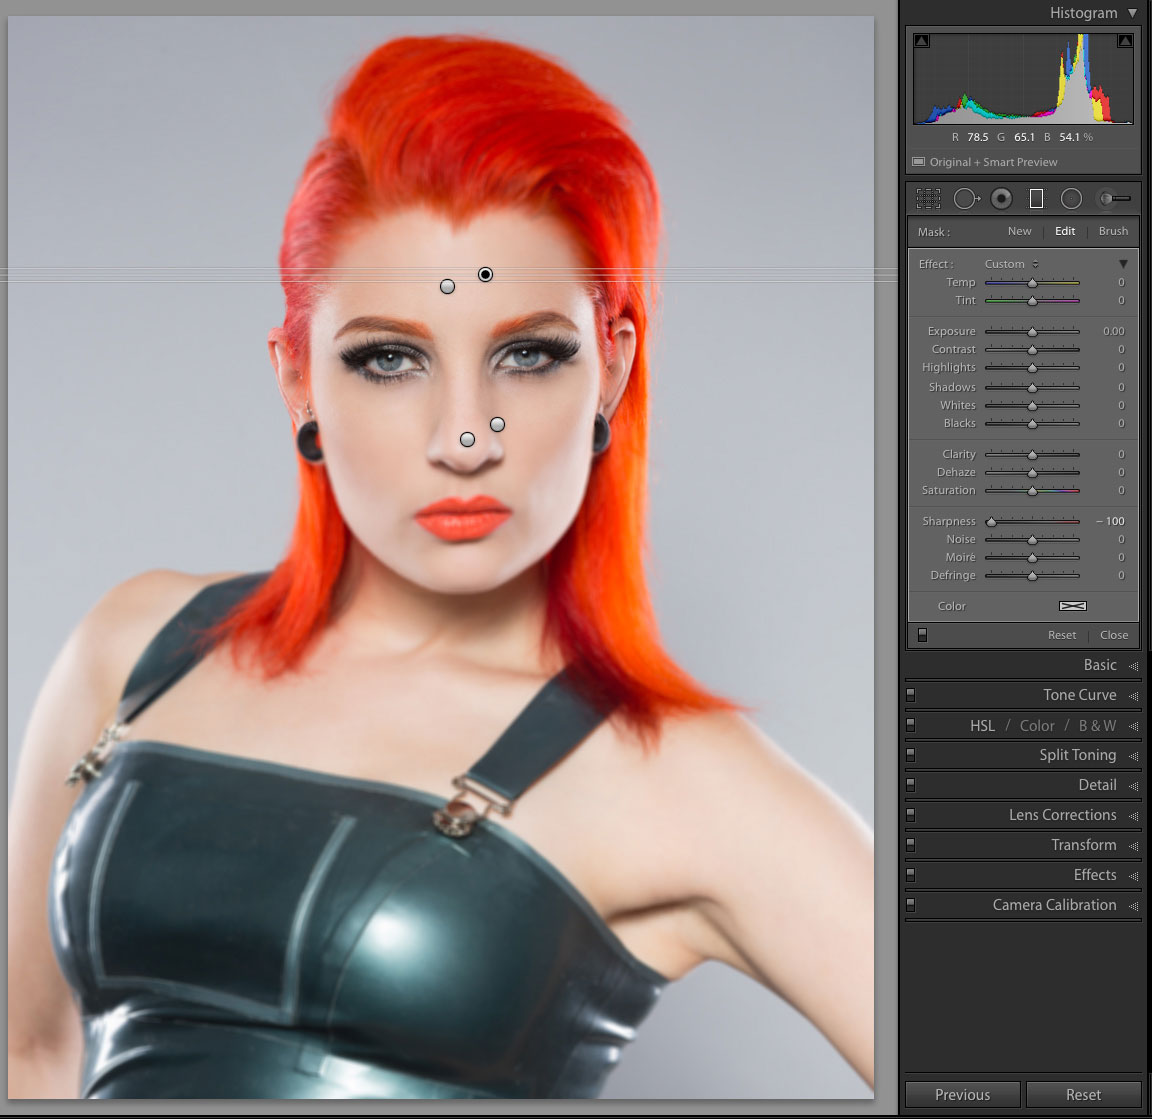
Because a tilted lens is less focused than a normal lens at the edge, we can create a second set of filters, this time with a harder edge to emphasis the effect. For even more effect, apply a third set.
Expert tip: Radial tilt-shift effects
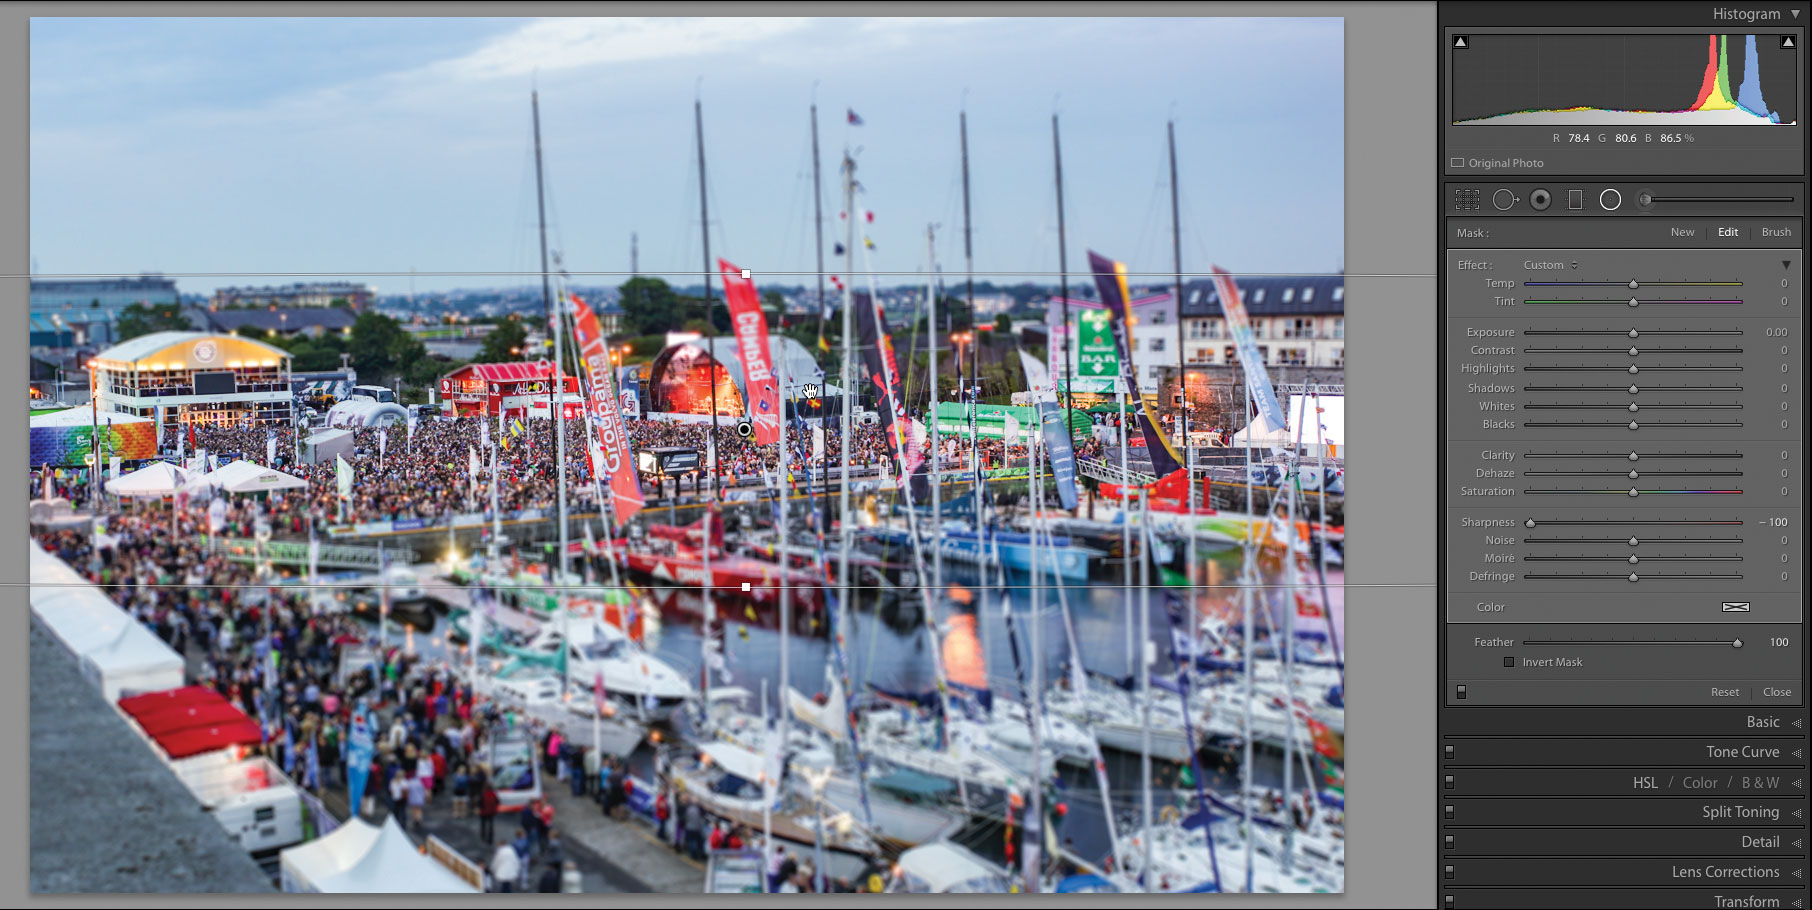
The Graduated Filter isn’t the only way to simulate a tilt-shift effect in Lightroom: you can also use the Radial Filter, although there’s a little trick in getting the Radial filter to emulate this look. As with the Graduated Filter, set Sharpness to -100. Using the Navigator zoom drop-down, select 16:1 zoom. Close the side tabs and drag a really long, narrow ellipse out. Tick the Invert Mask button. Set Feather to 100 for a long transition; use a lower Feather for a harder transition. Right-click on the filter pin and choose Duplicate to increase the filter strength. To set the position of the filters, zoom back in and move the pin or the Radial Filters’ handles.
About Digital Camera magazine
This tutorial originally appeared in Digital Camera Magazine, the monthly newsstand magazine for all photographers. Why not subscribe to a print edition, and have the magazine delivered direct to your door every month?
Alternatively, we have a number of different digital options available, including:
• Apple app (for iPad or iPhone)
• Zinio app (multi-platform app for desktop or smartphone)
• PocketMags (multi-platform app ideal for Android devices)
• Readly (all-you-can-eat digital magazine subscription service)
If you wanted a printed version of any of our most recent issues we have a selection of back issues to choose from in our online store.
How to get Adobe Lightroom
Adobe Lightroom is available in two versions: the regular Adobe Lightroom Classic CC designed for desktop users, which is what we cover in this series, and a new cloud-based Adobe Lightroom CC, which stores your files online and offers a similar but reduced set of features. For regular desktop users we recommend Adobe Lightroom Classic CC.
Adobe offers three subscription based Photography Plans which you can click on below. We recommend either the regular Photography Plan, or the Photography Plan (1TB) which costs more but comes with 1TB online storage in case you decide to go with Lightroom CC.
For this set of tutorials and for anyone who likes to work on a single main computer, we recommend the regular Creative Cloud Photography Plan. This is the cheapest way to get started AND it comes with Photoshop CC too.
Read more:
• This is the best photo-editing software today
• These are the best laptops for photographers right now
• We help you choose the best desktop computers for photo editing
Get the Digital Camera World Newsletter
The best camera deals, reviews, product advice, and unmissable photography news, direct to your inbox!
Sean McCormack is a commercial, and editorial photographer, book author, and regular contributor to Digital Camera magazine based in Galway, Ireland. He has extensive experience with Lightroom, dating back to its original beta version, and has tried out just about every plugin and preset available. His latest book is Essential Development 3: 25 Tips for Lightroom Classic’s Develop Module.

