Lightroom series part 16: Enhance a night-time photograph with Lightroom
These handy Lightroom tips and tricks will really make your night-time landscape shots pop
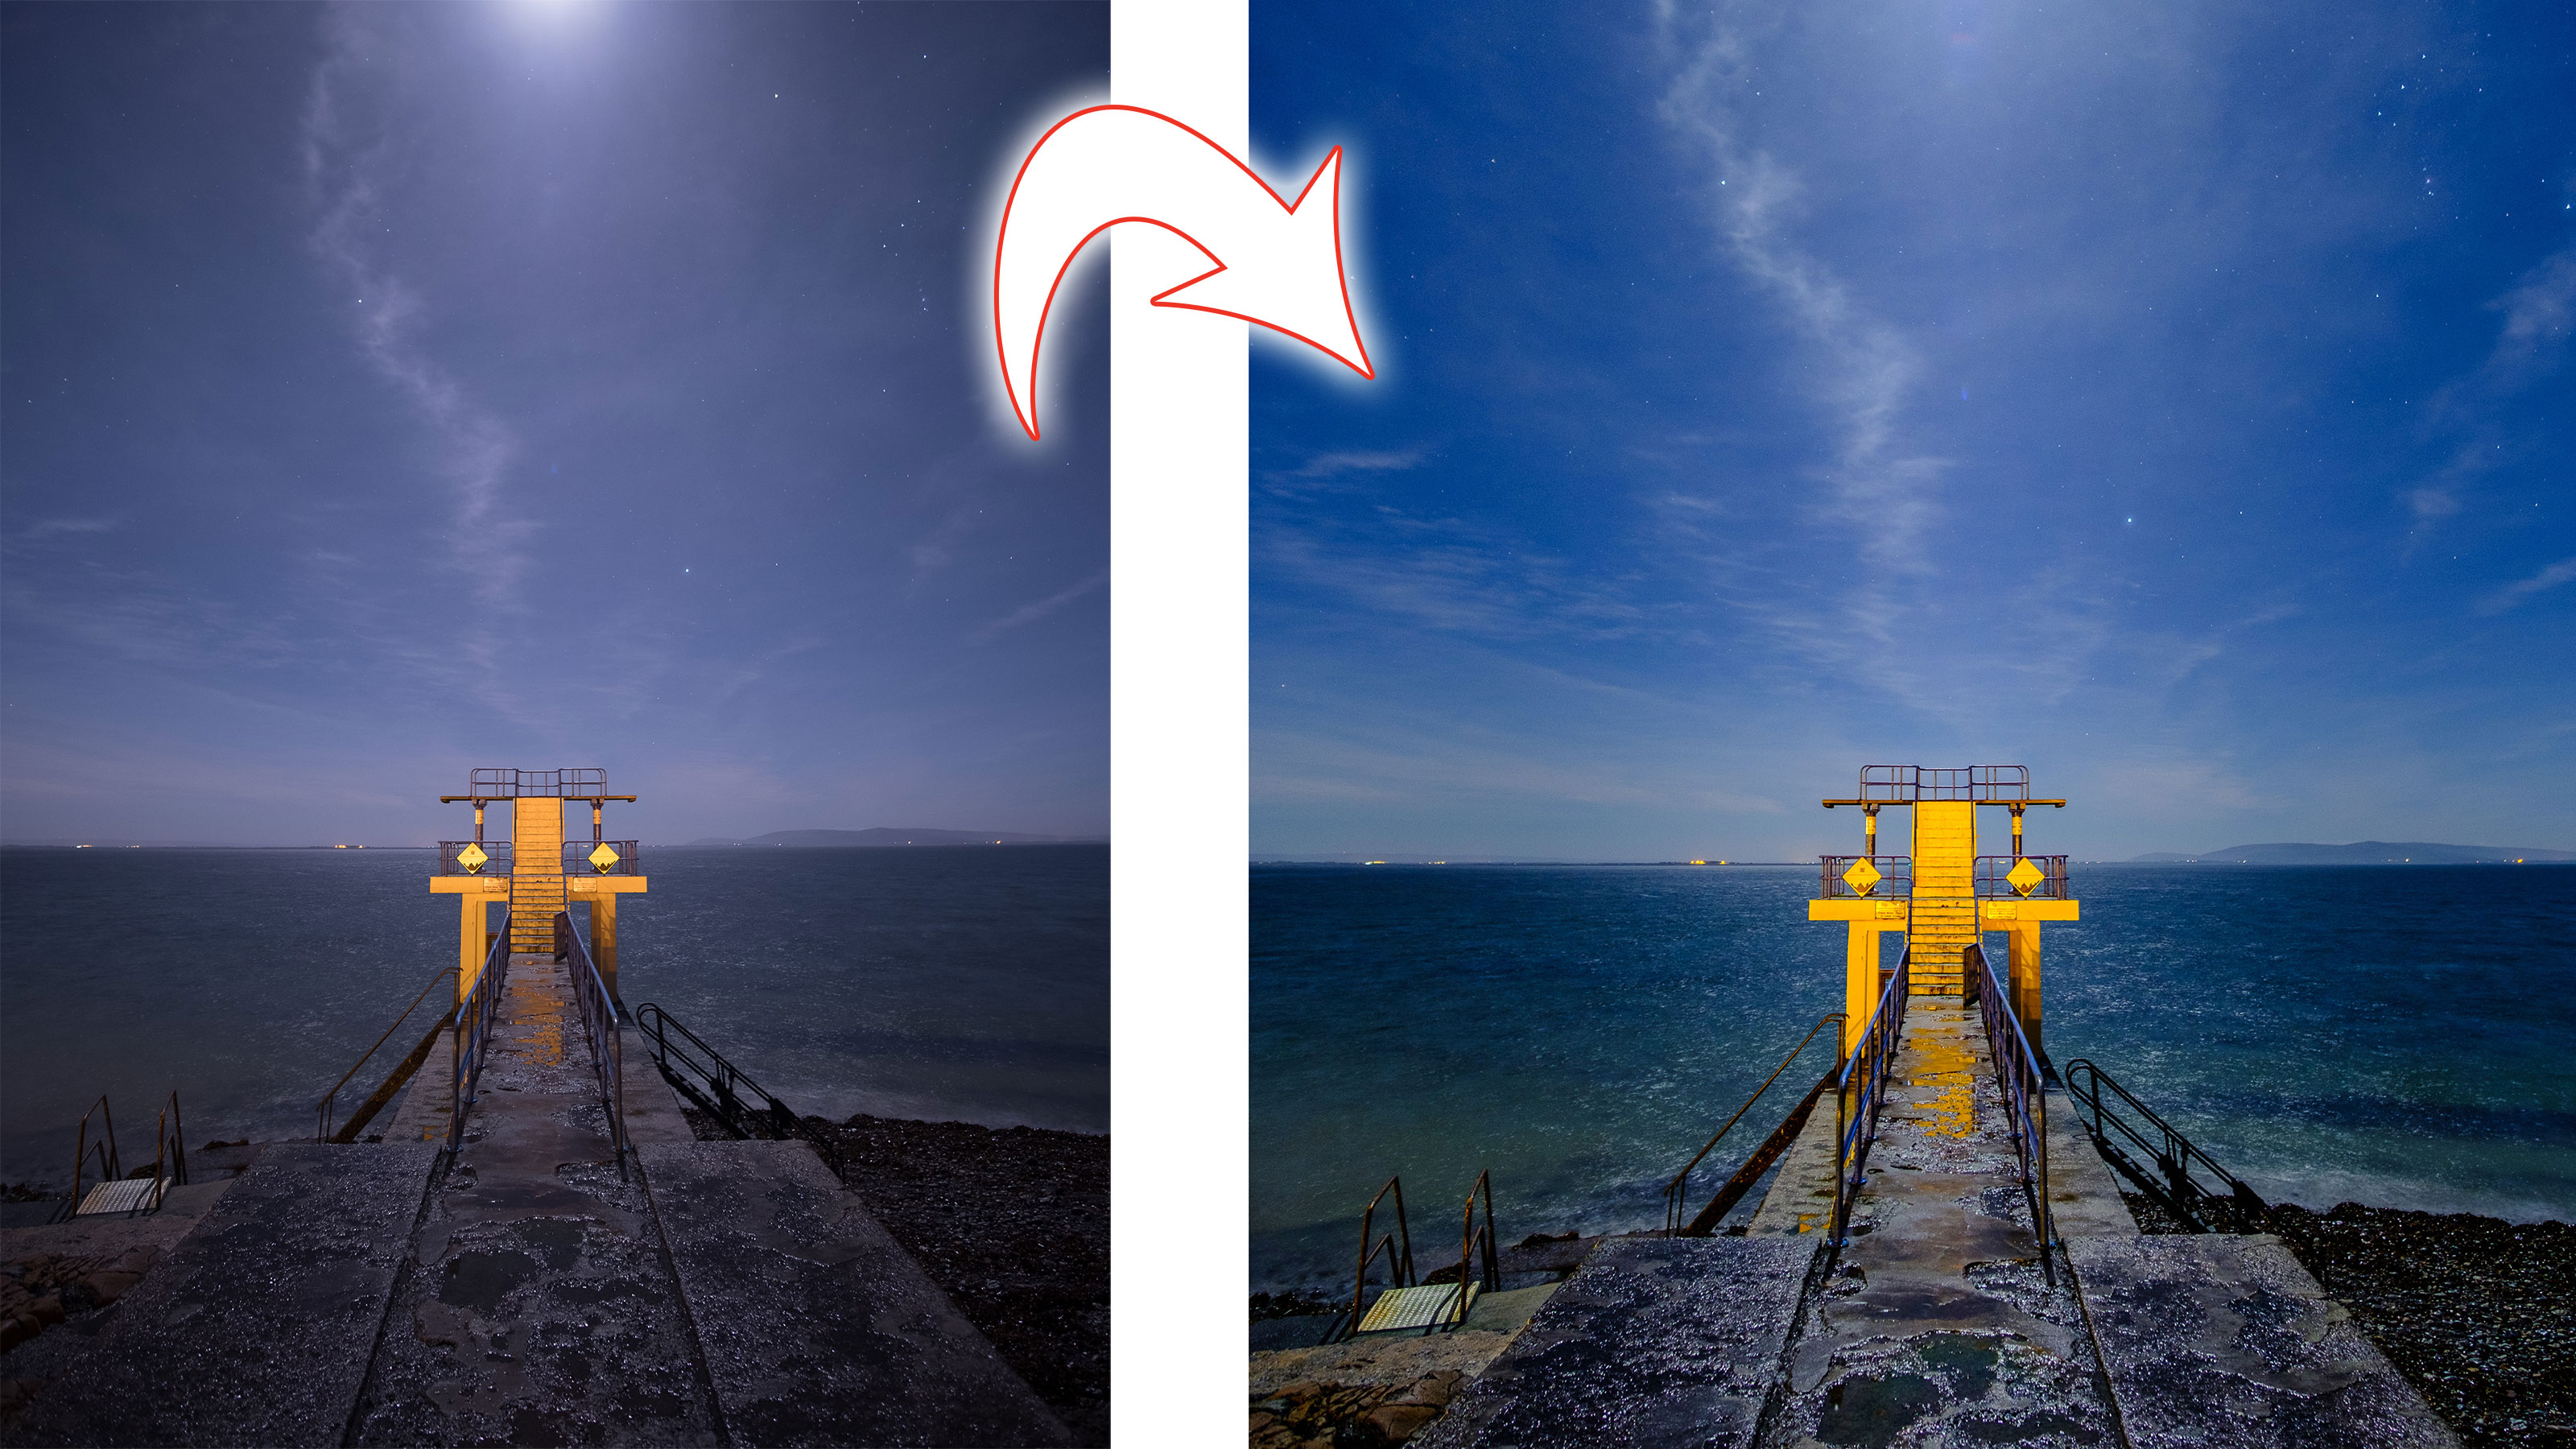
Night shots have a special magic all their own, but they don't always live up to their promise straight from the camera. Here are some Lightroom tools and processes that will help bring them to life.
Welcome to the 16th instalment of our Lightroom series, first published in Digital Camera magazine (see below for subscription offers).
If you are already a Lightroom user, you could discover some new tricks and processes you haven't tried yet. If you don't use Lightroom, then scroll down to the bottom where you'll discover how to get it and which Adobe Photography Plan is best.
There are a few things that are different about night shots to daytime landscapes, but you still need to emphasise the good and hide the bad! This night scene was taken with the winter moon over a local diving tower. In post-production, I wanted to highlight the yellow tower against the dark blue sky.
• See more Lightroom tutorials
1. Set the camera profile
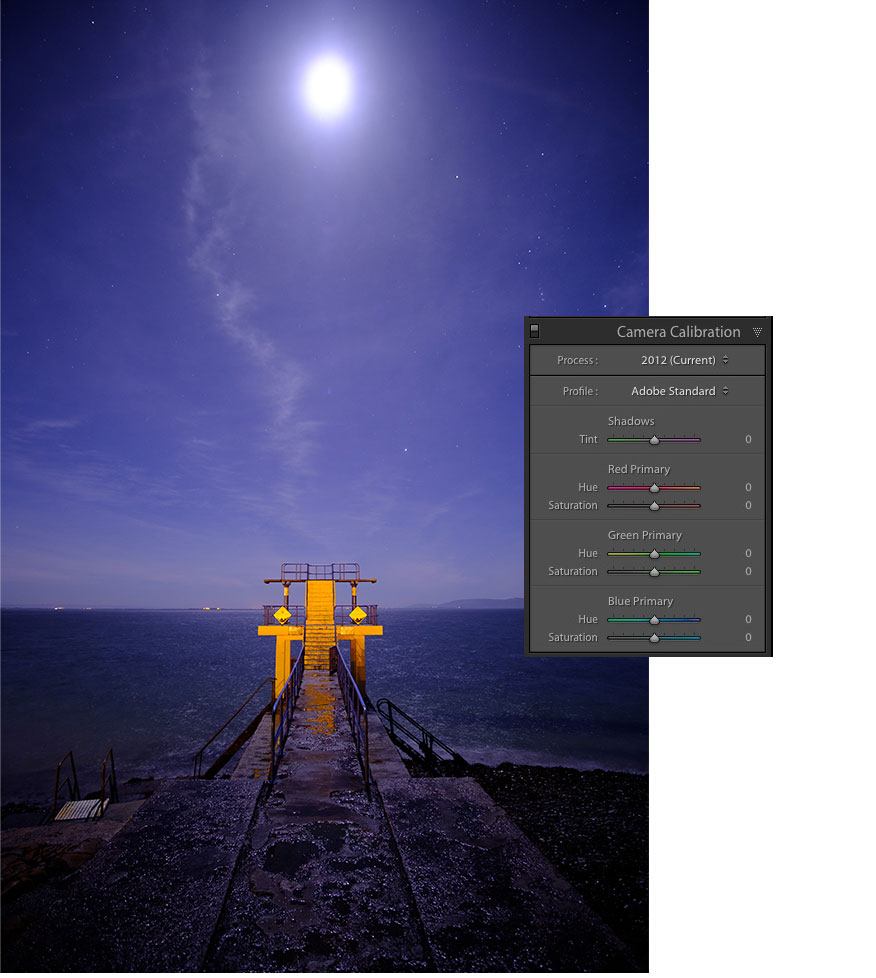
One of the most impactful changes you can make to any photo in Lightroom is changing the Camera Profile. Tucked away in the Camera Calibration panel in Lightroom 6, it's been moved to a more prominent position at the top of the tools panel in later versions. This tool changes the way Lightroom renders your raw file even before you make any editing adjustments. Here, I chose the Velvia/Vivid profile. You should have a Vivid or Landscape option available which is similar (the profiles vary according to the camera).
2. Fix the color cast
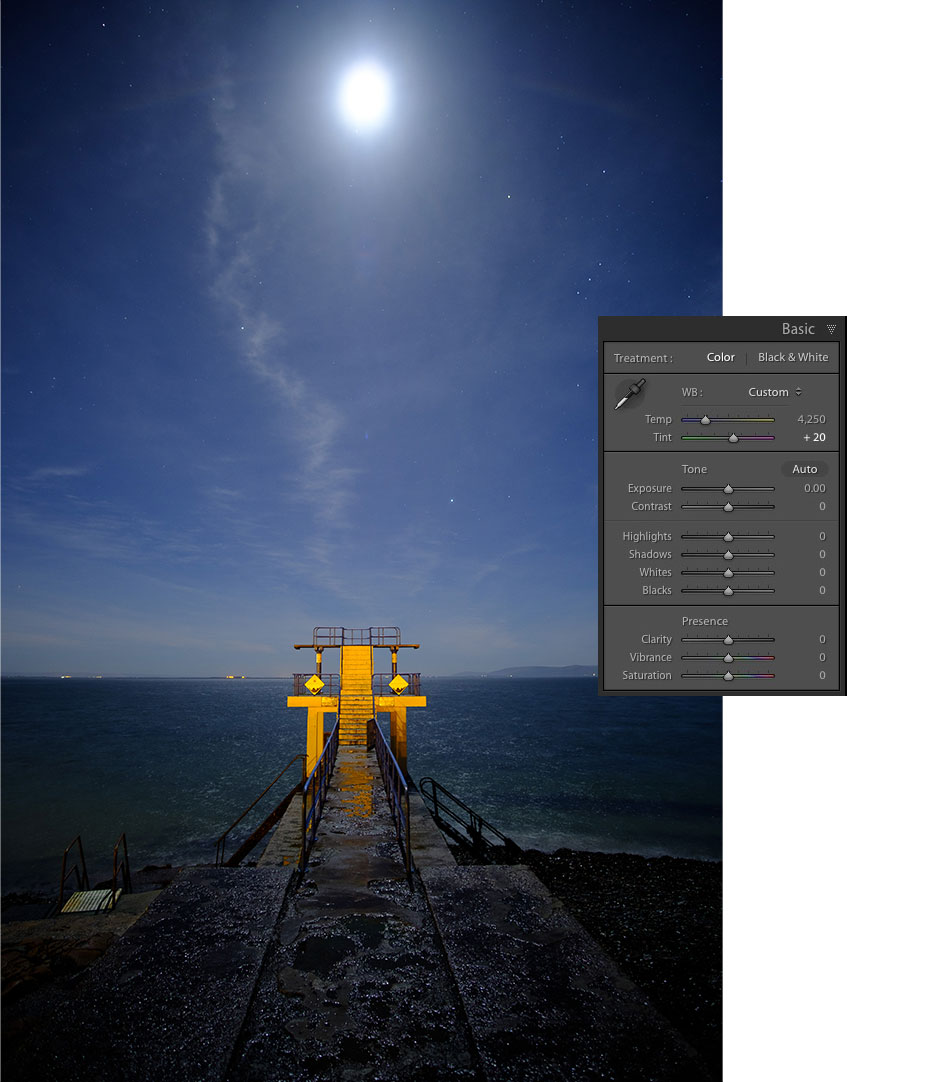
The change of profile looks great, but it shows up some of the issues in the photo. The first is the magenta cast. This can be fixed by reducing the Tint slider in the WB section in the Basic panel. I’ve dropped it from 51 to 20.
3. Adjust the tones
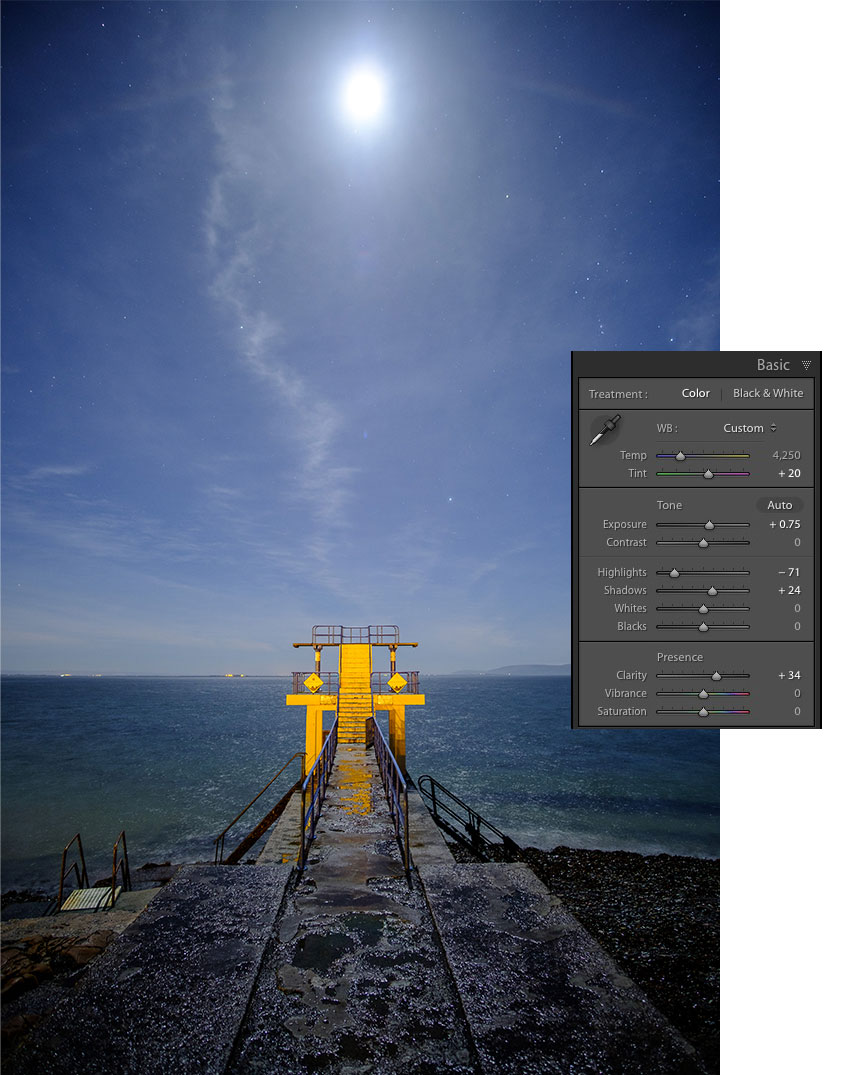
The image is a little dark, so an increase of Exposure to 0.75 helps. To pull back the moon a little, I set Highlights down to -71. To aid the foreground, I’ve opened up Shadows to 24. The final step in the Basic panel for now is to set Clarity to 34, which renders the sky better.
4. Dehaze
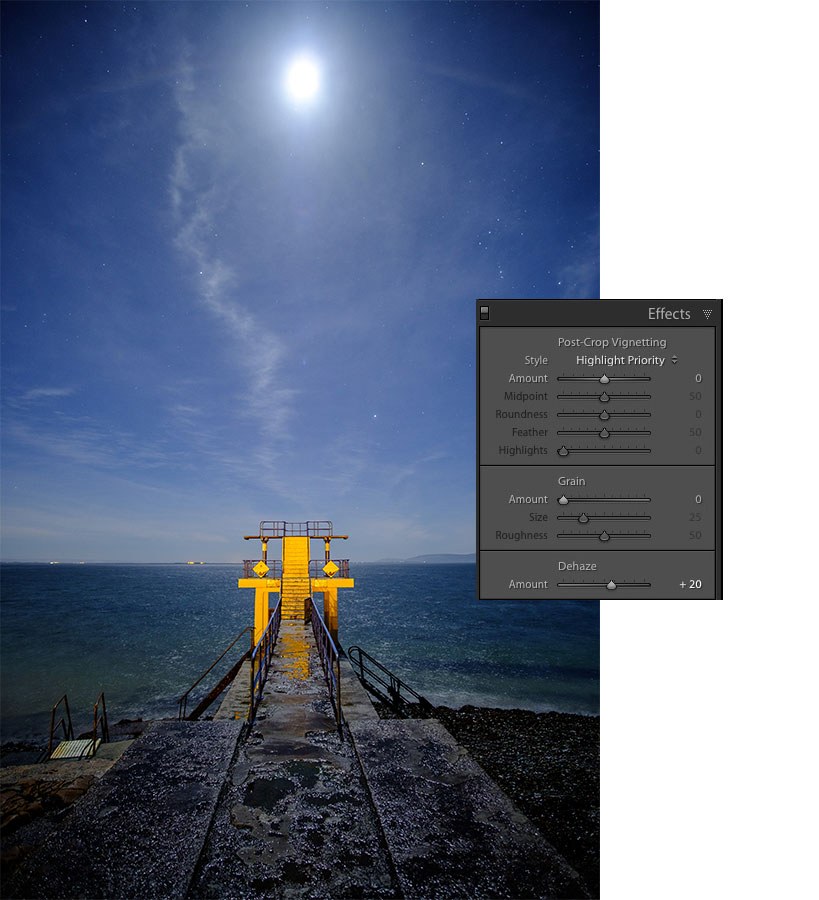
One of the coolest features for Lightroom users is the Dehaze slider in the Effects panel. Normally used for images with poor atmospheric conditions, it’s also a miracle provider for general landscapes. Setting it to 20 increases apparent contrast and saturation.
5. Fix the lens profile
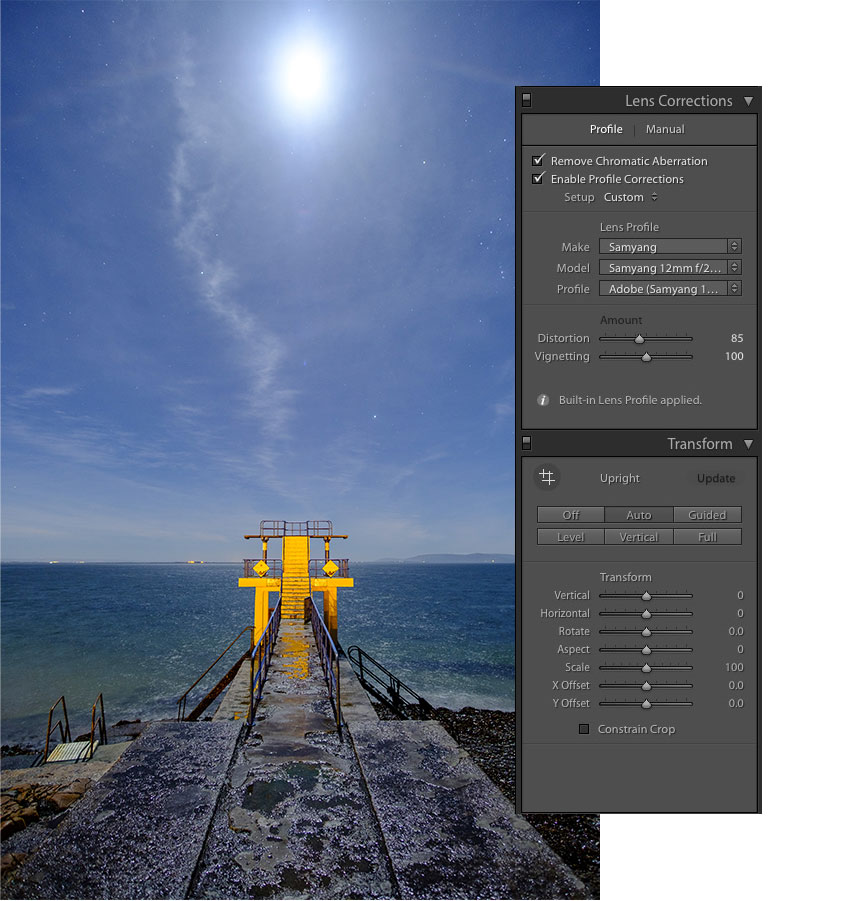
The edges of the image are quite dark, due to vignetting caused by lens fall-off. To fix this, turn on Profile Corrections in the Lens Correction panel. Even though Lightroom thinks it has a profile, it’s not the correct one, so I have to manually select it. I also brought the distortion correction back slightly and applied Auto in the Transform panel.
6. Finishing touches
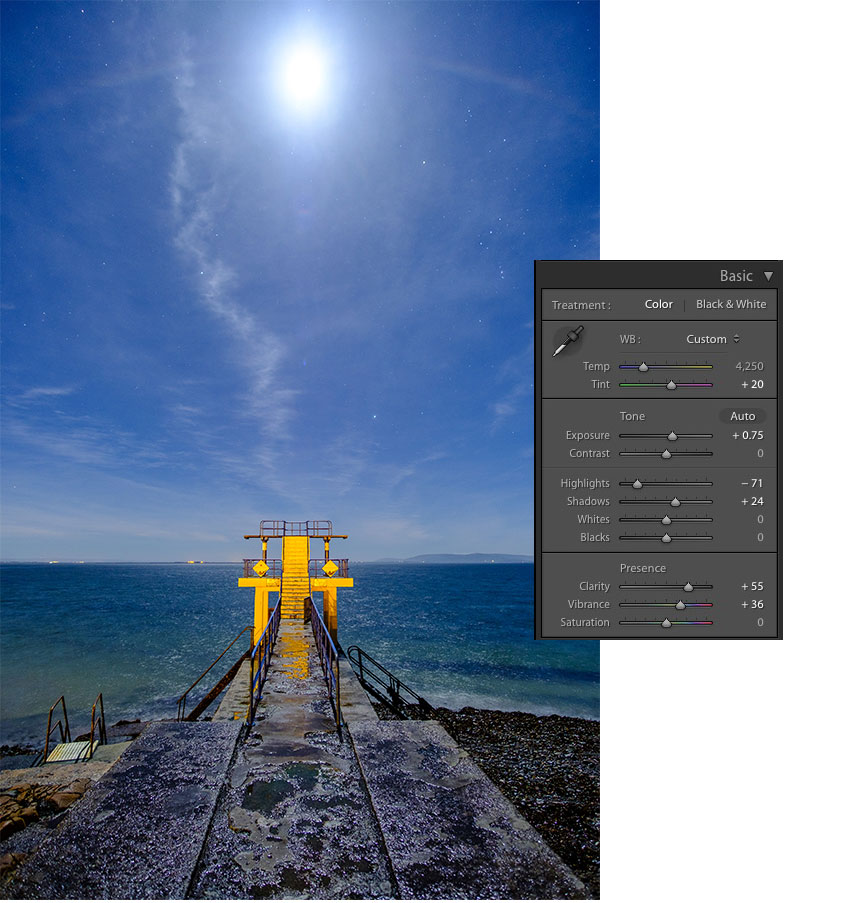
With all the changes made, it’s time to go back to Basic and do some tweaks. Setting Vibrance to +36 boosts the colour in the photo, while increasing Clarity to +55 adds more punch to the sky and emphasises the stars more.
Expert tip: Radial vignette
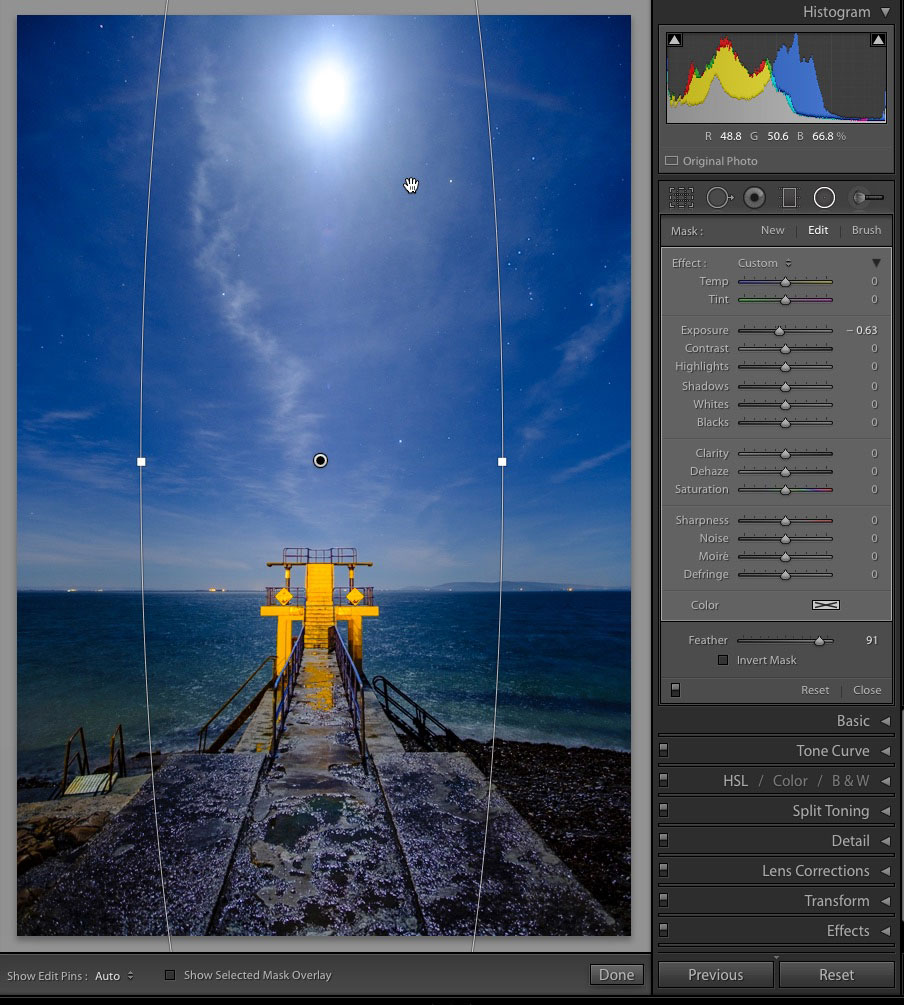
The key part of this image is the diving board, as an ‘arrow’ pointing to the moon. A good way to highlight this feature is to make it brighter than the surrounding area. In this case the feature is bright already, so you I to darken the surrounding area instead. I set the zoom level to 1:16 in the Navigator panel, from the Toolstrip, select Radial Filter and drag a long ellipse out from the centre of the image up. Double-clicking the Effect label will reset any settings. I check that Invert Mask is off, so the effect happens outside the filter, then bring the Exposure down to darken the edges. For this image, about 1/3 of a stop is enough. Finally, I adjust the Feather to make a smooth transition.
About Digital Camera magazine
This tutorial originally appeared in Digital Camera Magazine, the monthly newsstand magazine for all photographers. Why not subscribe to a print edition, and have the magazine delivered direct to your door every month?
Alternatively, we have a number of different digital options available, including:
• Apple app (for iPad or iPhone)
• Zinio app (multi-platform app for desktop or smartphone)
• PocketMags (multi-platform app ideal for Android devices)
• Readly (all-you-can-eat digital magazine subscription service)
If you wanted a printed version of any of our most recent issues we have a selection of back issues to choose from in our online store.
How to get Adobe Lightroom
Adobe Lightroom is available in two versions: the regular Adobe Lightroom Classic CC designed for desktop users, which is what we cover in this series, and a new cloud-based Adobe Lightroom CC, which stores your files online and offers a similar but reduced set of features. For regular desktop users we recommend Adobe Lightroom Classic CC.
Adobe offers three subscription based Photography Plans which you can click on below. We recommend either the regular Photography Plan, or the Photography Plan (1TB) which costs more but comes with 1TB online storage in case you decide to go with Lightroom CC.
For this set of tutorials and for anyone who likes to work on a single main computer, we recommend the regular Creative Cloud Photography Plan. This is the cheapest way to get started AND it comes with Photoshop CC too.
Read more:
• This is the best photo-editing software today
• These are the best laptops for photographers right now
• We help you choose the best desktop computers for photo editing
Get the Digital Camera World Newsletter
The best camera deals, reviews, product advice, and unmissable photography news, direct to your inbox!
Sean McCormack is a commercial, and editorial photographer, book author, and regular contributor to Digital Camera magazine based in Galway, Ireland. He has extensive experience with Lightroom, dating back to its original beta version, and has tried out just about every plugin and preset available. His latest book is Essential Development 3: 25 Tips for Lightroom Classic’s Develop Module.

