Lightroom series part 2: How to make shots look sharper with Lightroom
Use Lightroom to discover three straightforward ways to make your favourite photos look sharper and much more detailed...
If the coronavirus crisis has left you confined to your house, you'll want new ways to feed your photography hobby. This enforced isolation does have an upside – it's a chance to learn new software and new photo-editing techniques. So we're running our full 32-part series on Adobe Lightroom Classic with a fresh article every day.
If you are already a Lightroom user, you could discover some new tricks and processes you haven't tried yet. If you don't use Lightroom, then scroll down to the bottom where you'll discover how to get it and which Adobe Photography Plan is best.
This series first appeared in Digital Camera magazine, which is currently running a 5 issues for $5/£5 special subscription offer – scroll down to the bottom of this article for more.
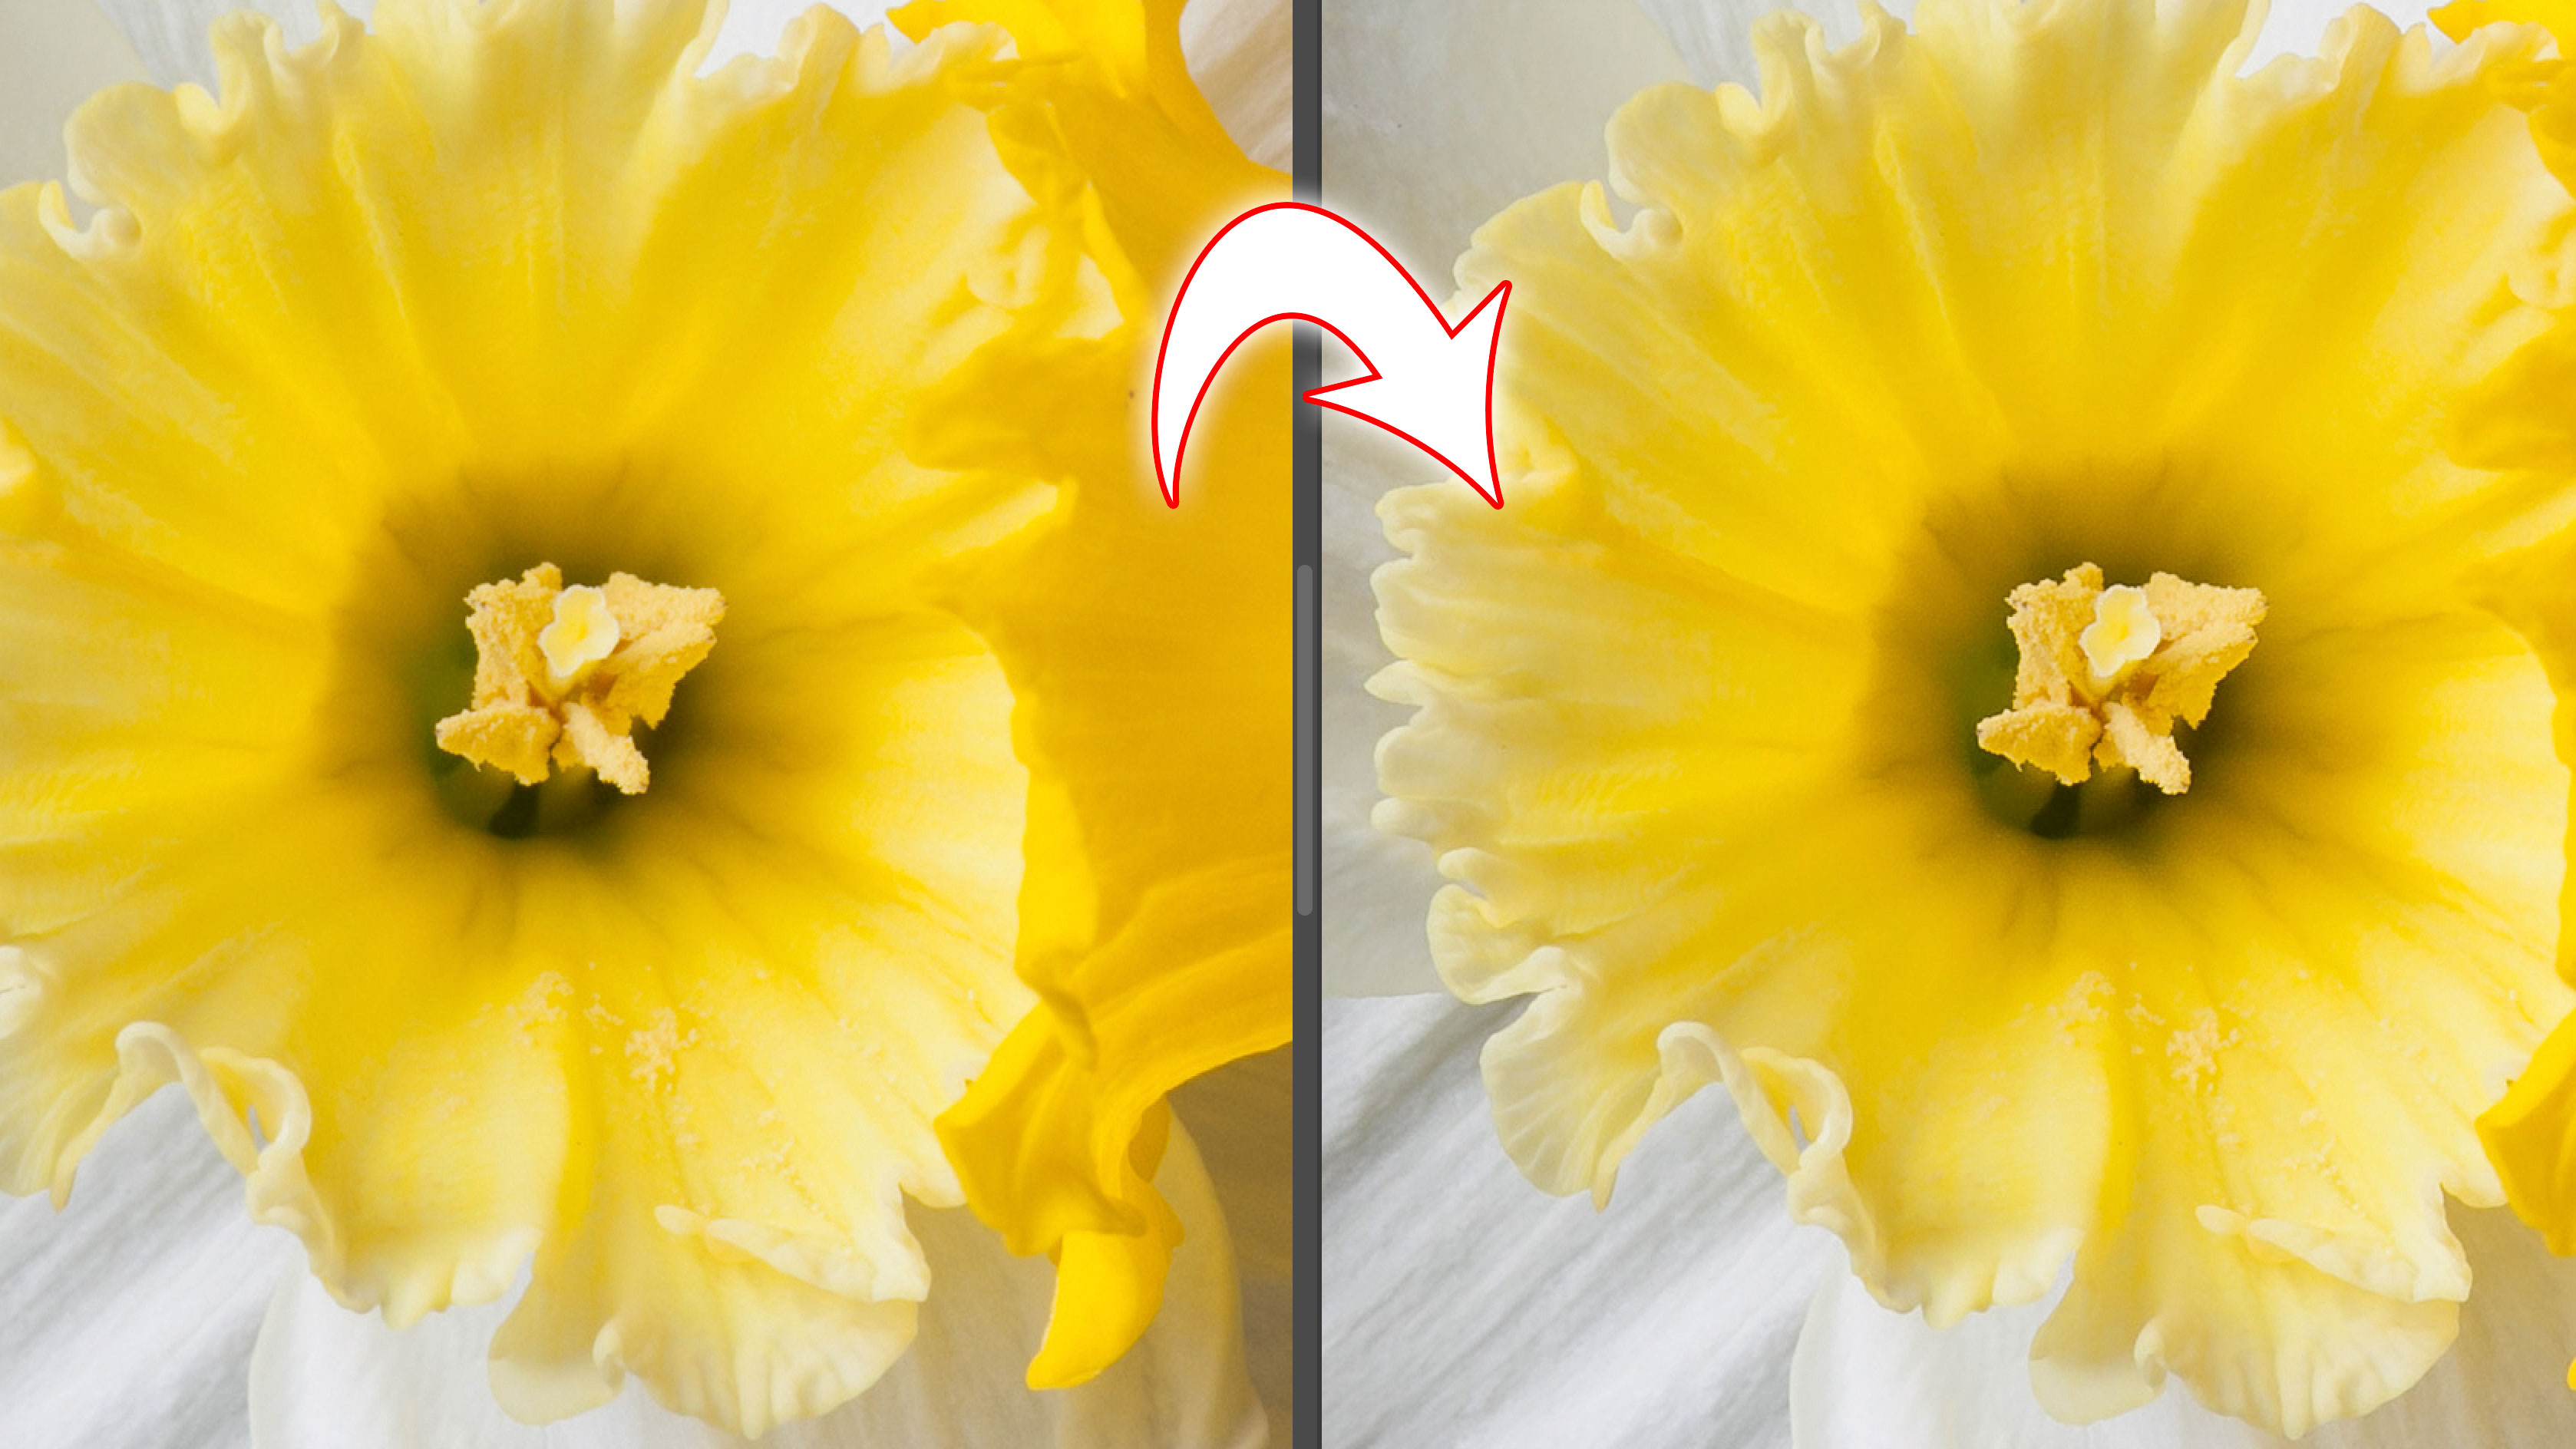
In this instalment, we tackle one of the key image enhancement steps – sharpening. The legendary American landscape photographer Ansel Adams may have said “There’s nothing worse than a sharp image of a fuzzy concept”, but sharpening can still make or break a photo.
In fact, Lightroom has three forms of sharpening not one: global sharpening, via the Detail panel; local sharpening, via the Brush/ Grad Filter or the Radial Filter; and output sharpening in Export, Print and Web.
Most modern cameras have an anti-aliasing filter that works to remove the stair- stepping effect in photos. This actually blurs the photo, so some sharpening is needed to restore visual sharpness.
Lightroom automatically applies a Sharpening amount of 25 to every raw file for this reason. Processed file formats like JPEG and TIFF are assumed to be sharpened already, and have no sharpening applied.
• See more Lightroom tutorials
Local sharpening
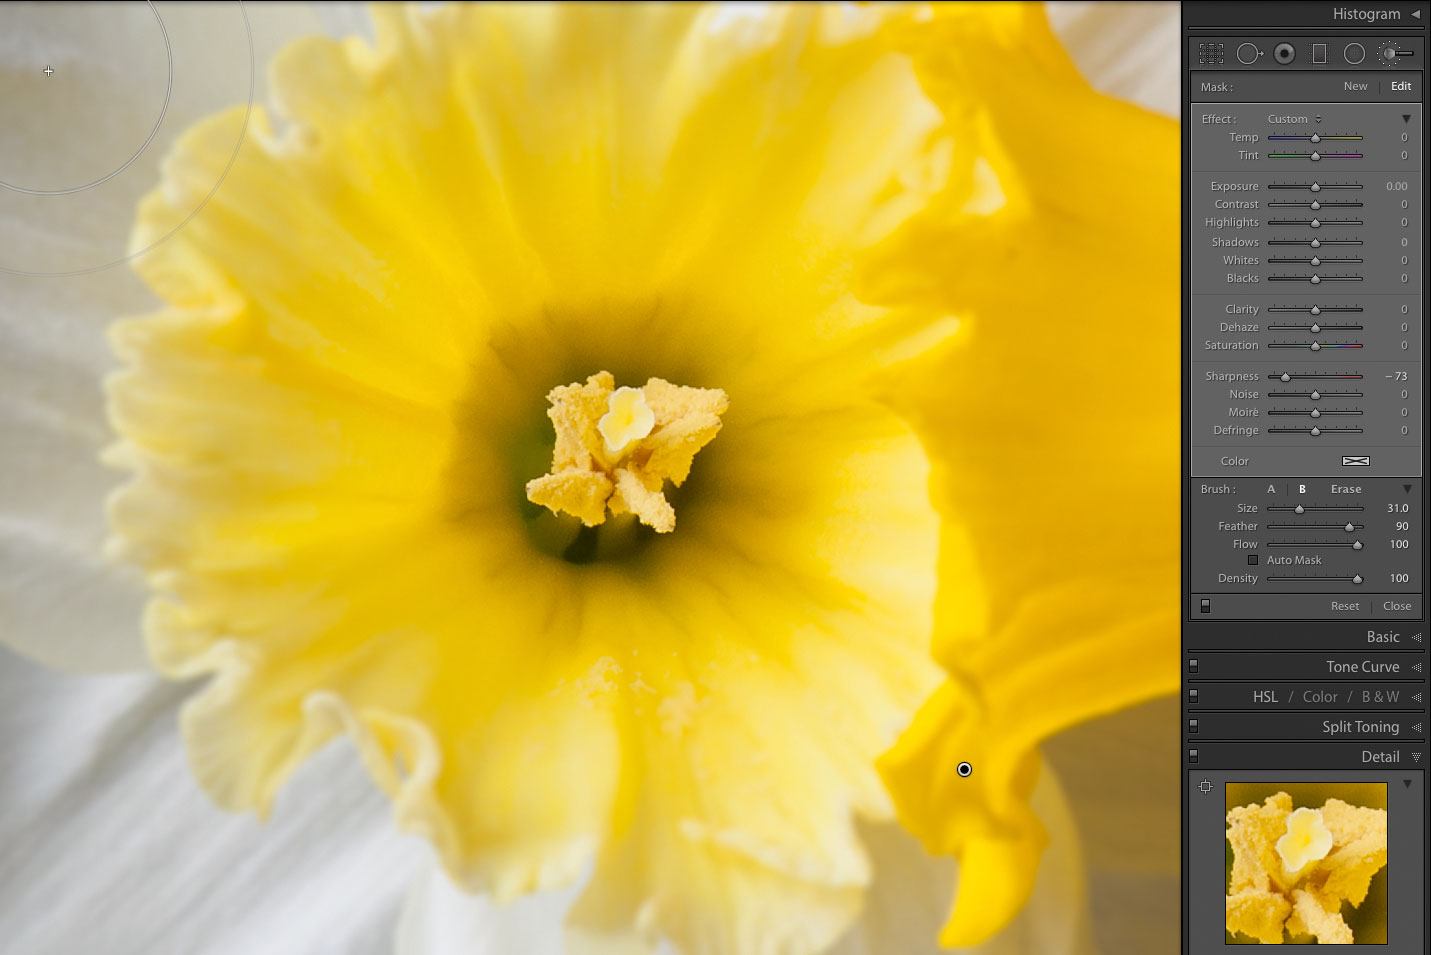
To apply sharpening only to areas of the image you select, you need to use one of the local tools: the Adjustment Brush, the Grad Filter or the Radial Filter. For accuracy, I recommend the Adjustment Brush.
Choose from the A or B brush and set Size and Feather to suit your task; Feather controls the softness of the edge of the brush. Reset the brush by double-clicking the Effect label, then use the Sharpness slider to set the level of Sharpening.
You’ll notice that you can have negative Sharpness as well as positive. Between 0 and -50, this removes sharpening from the areas you brush. Below -50, it acts as a lens blur, so you can create tilt-shift or other lens blur effects.
The Amount slider
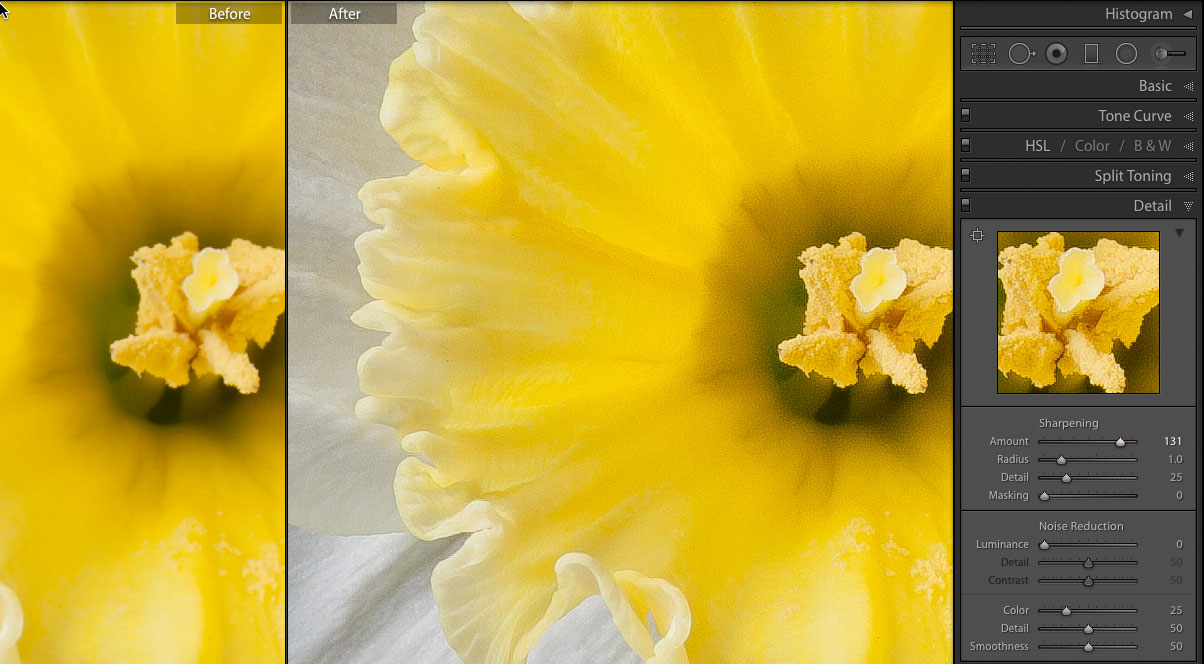
This sets the strength of the sharpening. Originally this went from 0-100, but at the request of users it was changed to 150. Anything above 100, safeguards are off, so the image can become really crunchy.
The Radius slider
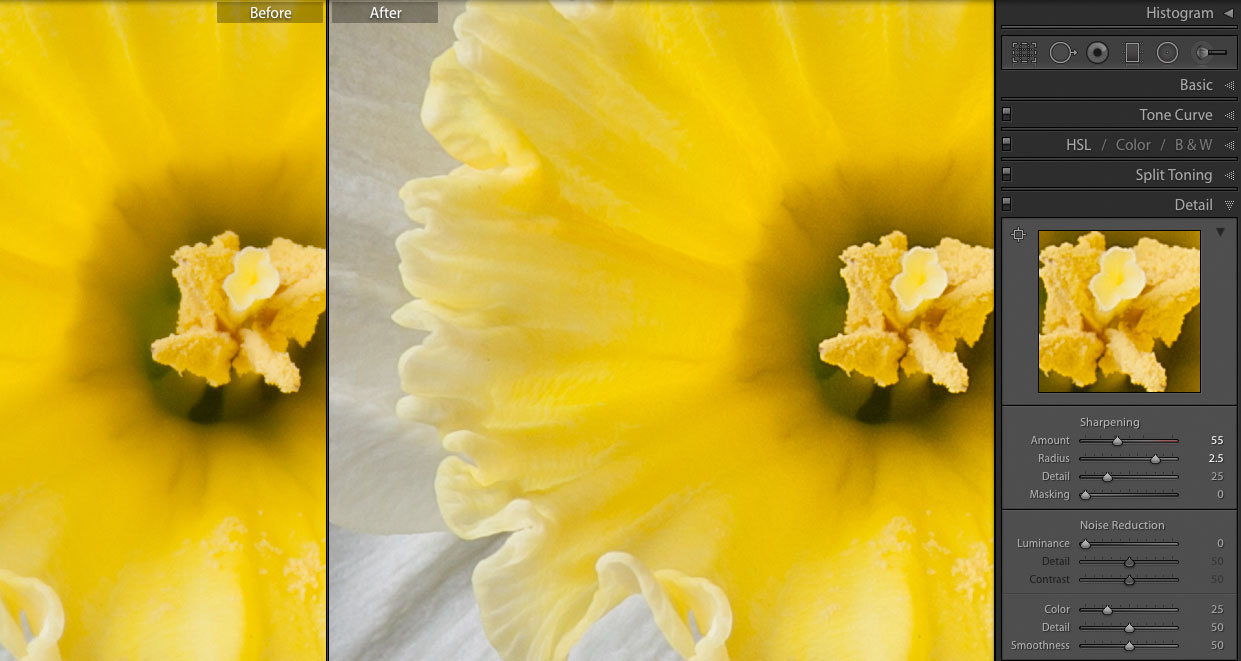
Sharpening works by creating contrast around the edges of objects. The Radius slider controls how far from the edge the sharpening effect is applied.
Detail

This slider has two opposing effects. Increasing it accentuates high-frequency detail like textures or leaves in shots of trees, but also increases edge haloes. Decreasing Detail will remove haloes on edges, but reduce the level of detail.
Masking
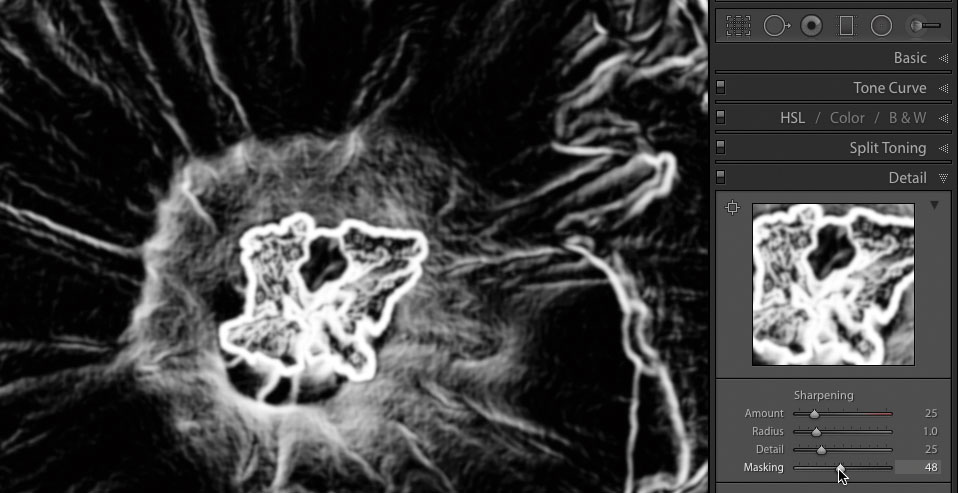
You don’t need to sharpen everything in a photo, for example skin or sky in a shot. The Masking slider detects edges, and uses these to reduce the areas being sharpened. Hold down the Alt key to see the affected areas change as you slide.
Alt key magic!
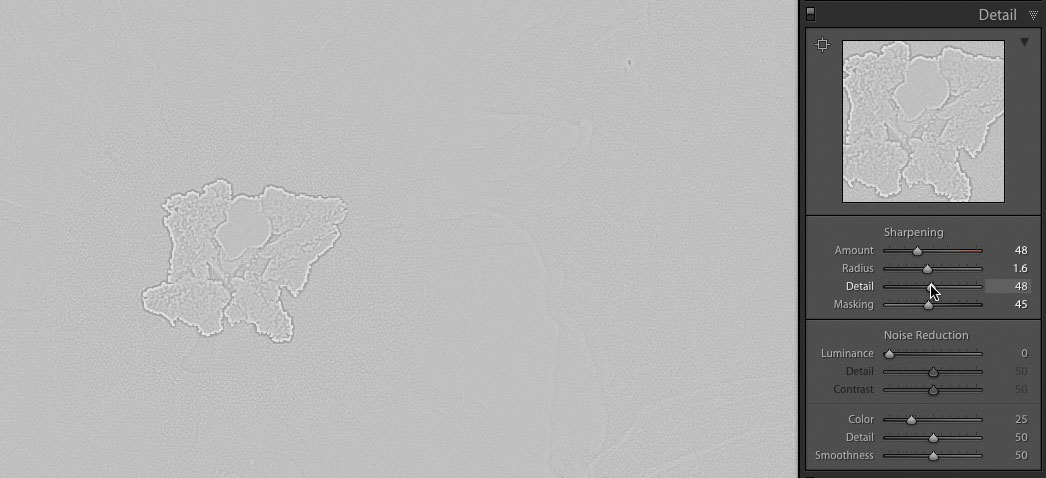
The Alt key trick for Masking actually works on all four Sharpening sliders. On Amount you see a luminosity version of the image. Used with Radius, Alt shows the pixels being affected; and on Detail you see the haloes and detail sharpening.
View at 100%
Any preview of sharpening you see in Lightroom is only an approximation unless you’ve zoomed into 1:1. The window in the Detail panel offers a correct view if you’re at another zoom level. This is because of the processing required for an accurate preview, so Lightroom errs on the side of speed.
Output sharpening
This guide explains 'creative sharpening', or using sharpening to make images look crisper and better. Output sharpening is different. This adds a further sharpening effect that's optimised for the paper or screen size being used for the output image. The best sharpening settings will vary according to how the image will be displayed, so that's why these are built into Lightroom's Export presets.
About Digital Camera magazine
This tutorial originally appeared in Digital Camera Magazine, the monthly newsstand magazine for all photographers. Why not subscribe to a print edition, and have the magazine delivered direct to your door every month?
Alternatively, we have a number of different digital options available, including:
• Apple app (for iPad or iPhone)
• Zinio app (multi-platform app for desktop or smartphone)
• PocketMags (multi-platform app ideal for Android devices)
• Readly (all-you-can-eat digital magazine subscription service)
If you wanted a printed version of any of our most recent issues we have a selection of back issues to choose from in our online store.
How to get Adobe Lightroom
Adobe Lightroom is available in two versions: the regular Adobe Lightroom Classic CC designed for desktop users, which is what we cover in this series, and a new cloud-based Adobe Lightroom CC, which stores your files online and offers a similar but reduced set of features. For regular desktop users we recommend Adobe Lightroom Classic CC.
Adobe offers three subscription based Photography Plans which you can click on below. We recommend either the regular Photography Plan, or the Photography Plan (1TB) which costs more but comes with 1TB online storage in case you decide to go with Lightroom CC.
For this set of tutorials and for anyone who likes to work on a single main computer, we recommend the regular Creative Cloud Photography Plan. This is the cheapest way to get started AND it comes with Photoshop CC too.
Read more:
• This is the best photo-editing software today
• These are the best laptops for photographers right now
• We help you choose the best desktop computers for photo editing
Get the Digital Camera World Newsletter
The best camera deals, reviews, product advice, and unmissable photography news, direct to your inbox!
Sean McCormack is a commercial, and editorial photographer, book author, and regular contributor to Digital Camera magazine based in Galway, Ireland. He has extensive experience with Lightroom, dating back to its original beta version, and has tried out just about every plugin and preset available. His latest book is Essential Development 3: 25 Tips for Lightroom Classic’s Develop Module.

