Lightroom series part 20: Create your own light leaks in Lightroom!
Add old-school imperfections to your pristine photos with the help of the Graduated and Radial Filters in Lightroom
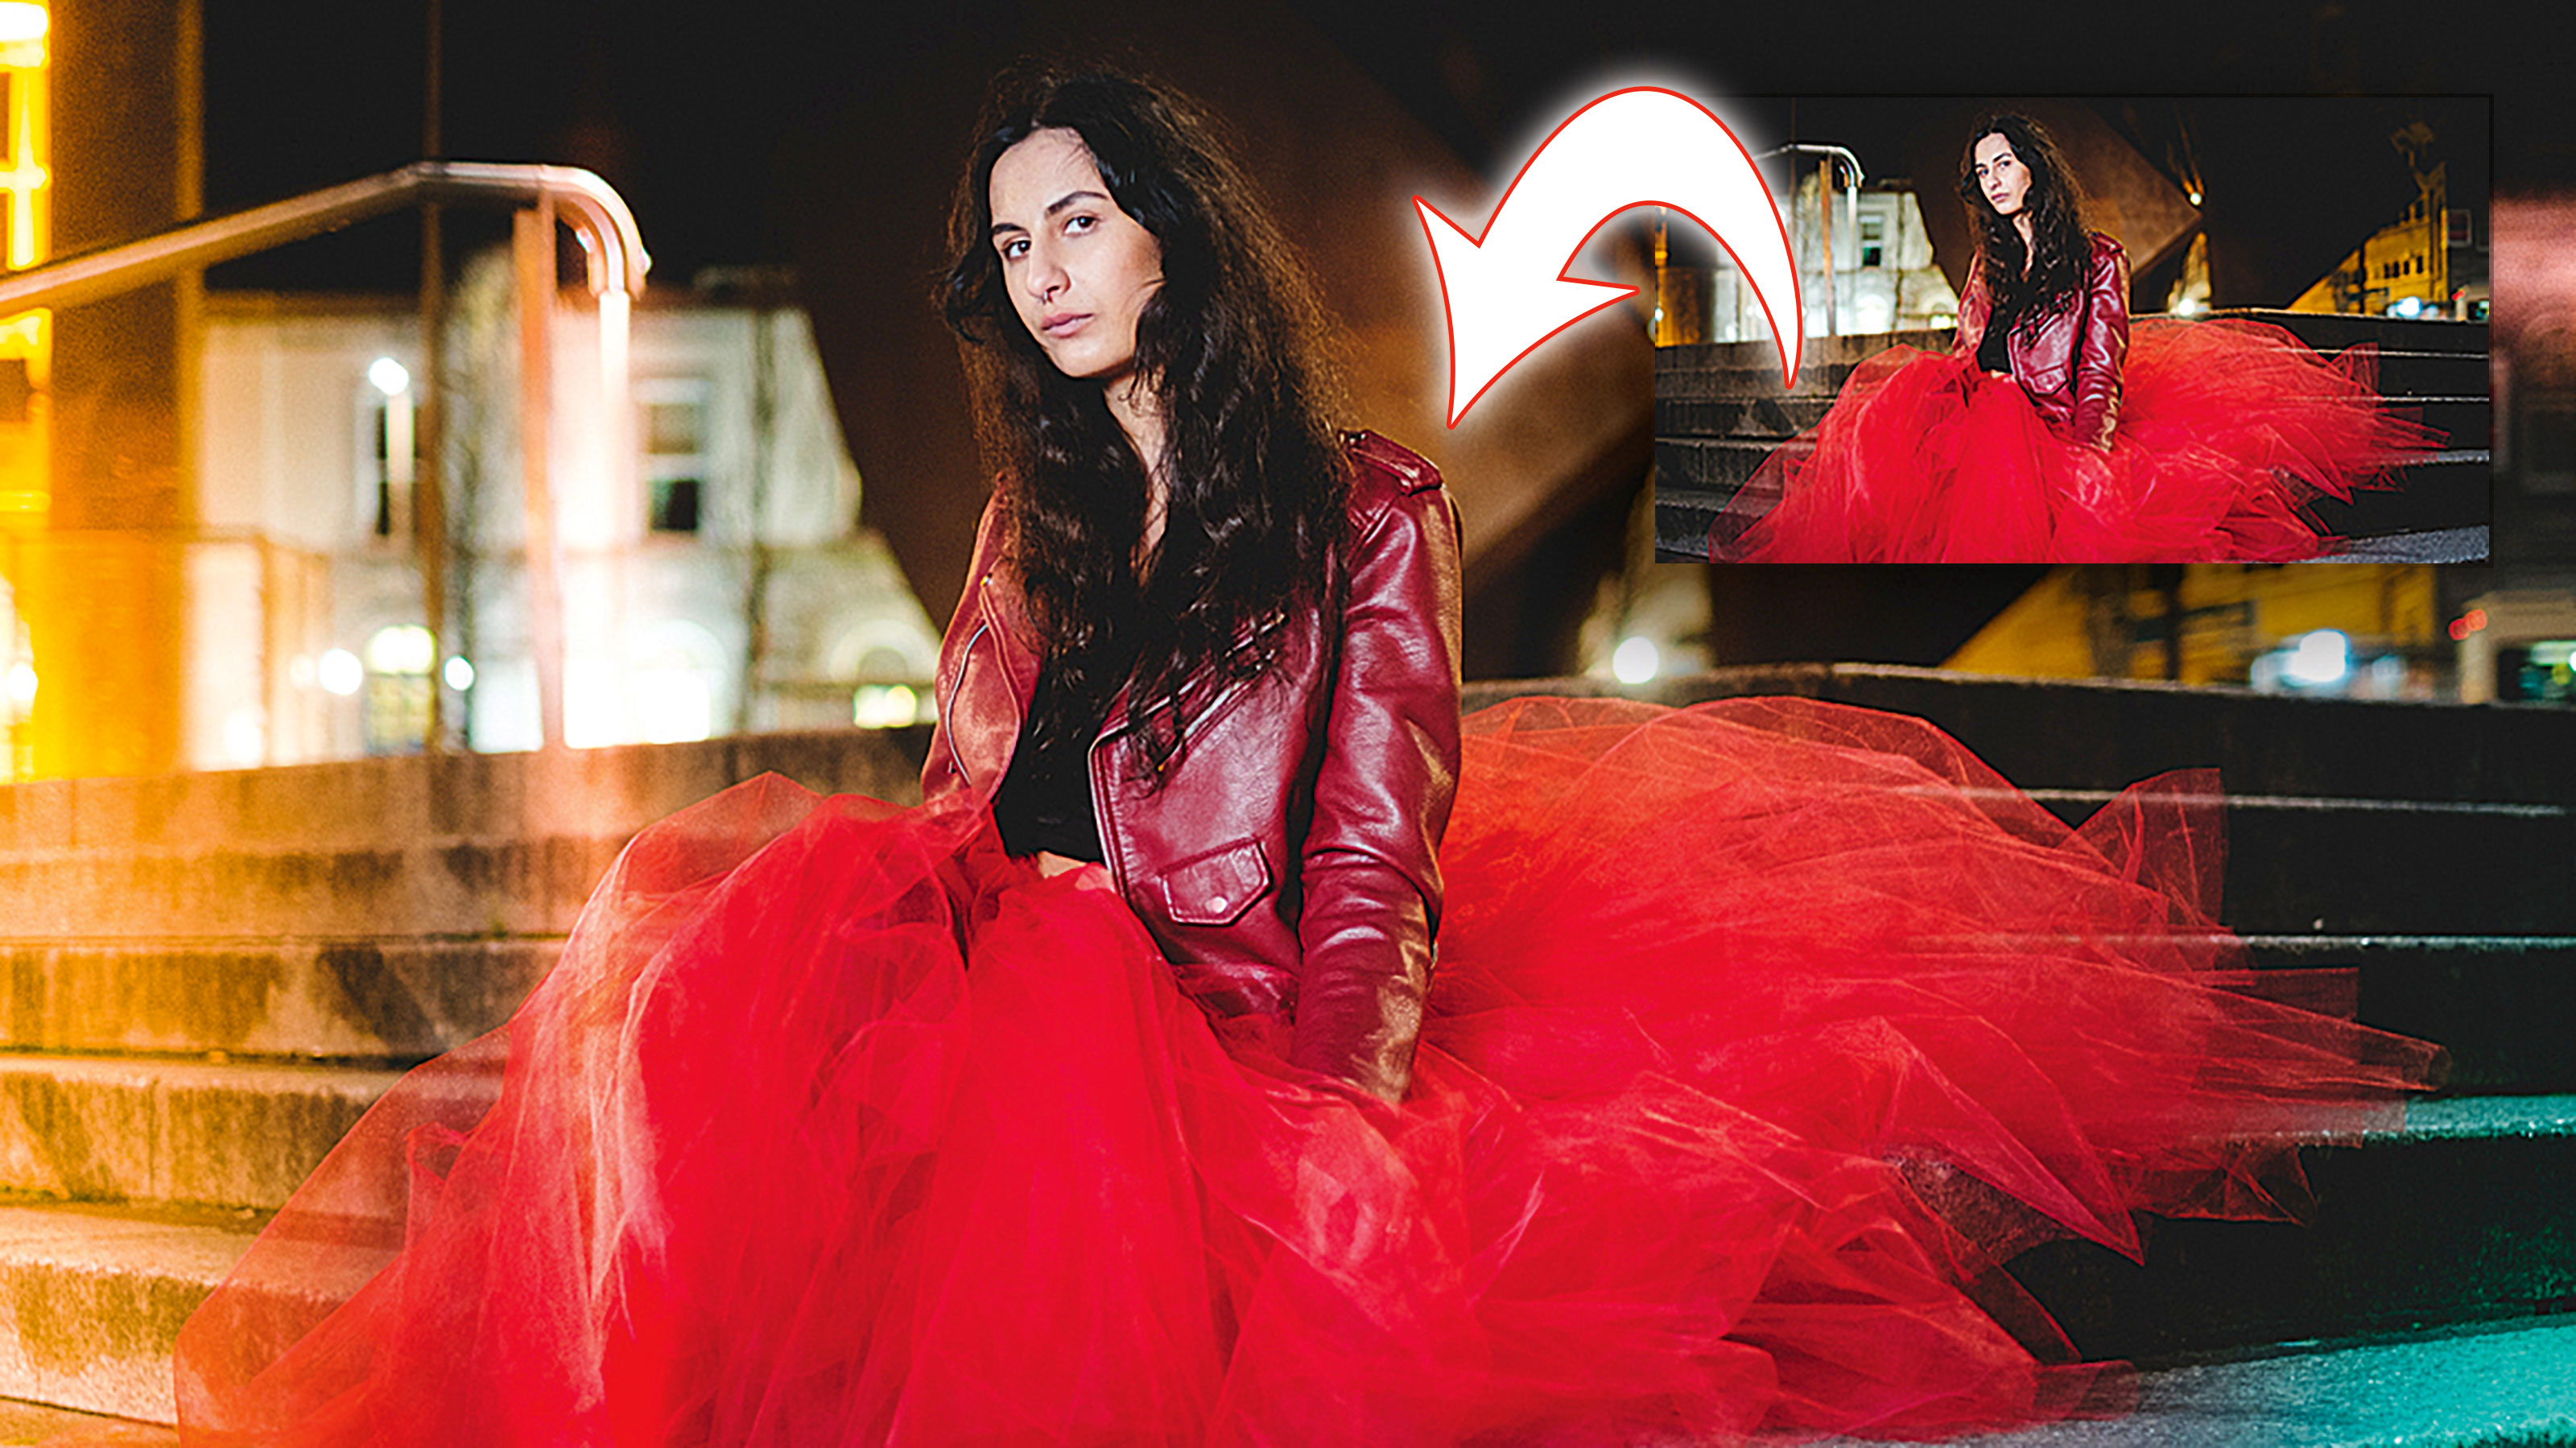
Digital technology has been fantastic for photography. The instant feedback from digital devices has shifted the learning curve back so much that anyone can become a photographer.
Still, the perfection of digital hasn’t removed the urge to produce photos in a more organic way, using traditional film or even toy cameras. The visual aesthetic from non-digital devices has even made its way back into digital processing, where everything old is new again.
Welcome to the 20th instalment of our Lightroom series, first published in Digital Camera magazine (see below for subscription offers).
If you are already a Lightroom user, you could discover some new tricks and processes you haven't tried yet. If you don't use Lightroom, then scroll down to the bottom where you'll discover how to get it and which Adobe Photography Plan is best.
The whole retro feel from Instagram and even Snapchat has made its way back to the point where people process to make the shots less perfect. One way of doing this is to emulate the look of film, where imperfections in the camera (the Holga for example) have let light in. Technically the film is ruined in the process, but there’s just something visually appealing about it!
• See more Lightroom tutorials
1. Graduated Filter
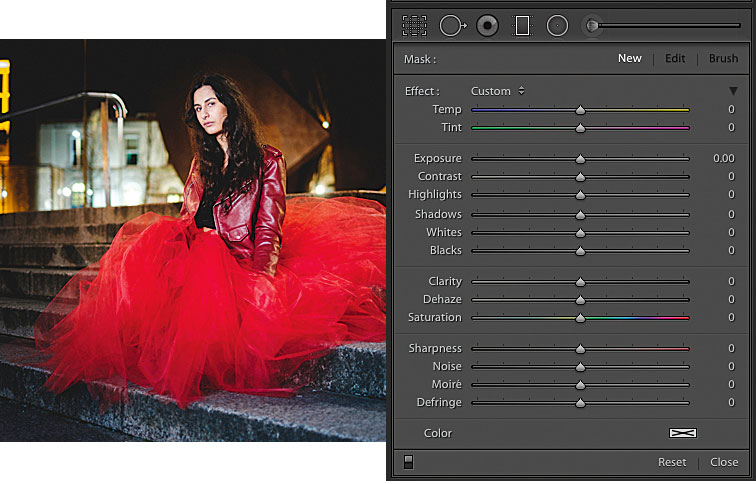
Once you’ve done your main edit, select the Graduated Filter in the Toolstrip under the Histogram. Reset all settings by double-clicking on the Effect label.
2. Soft edged filters
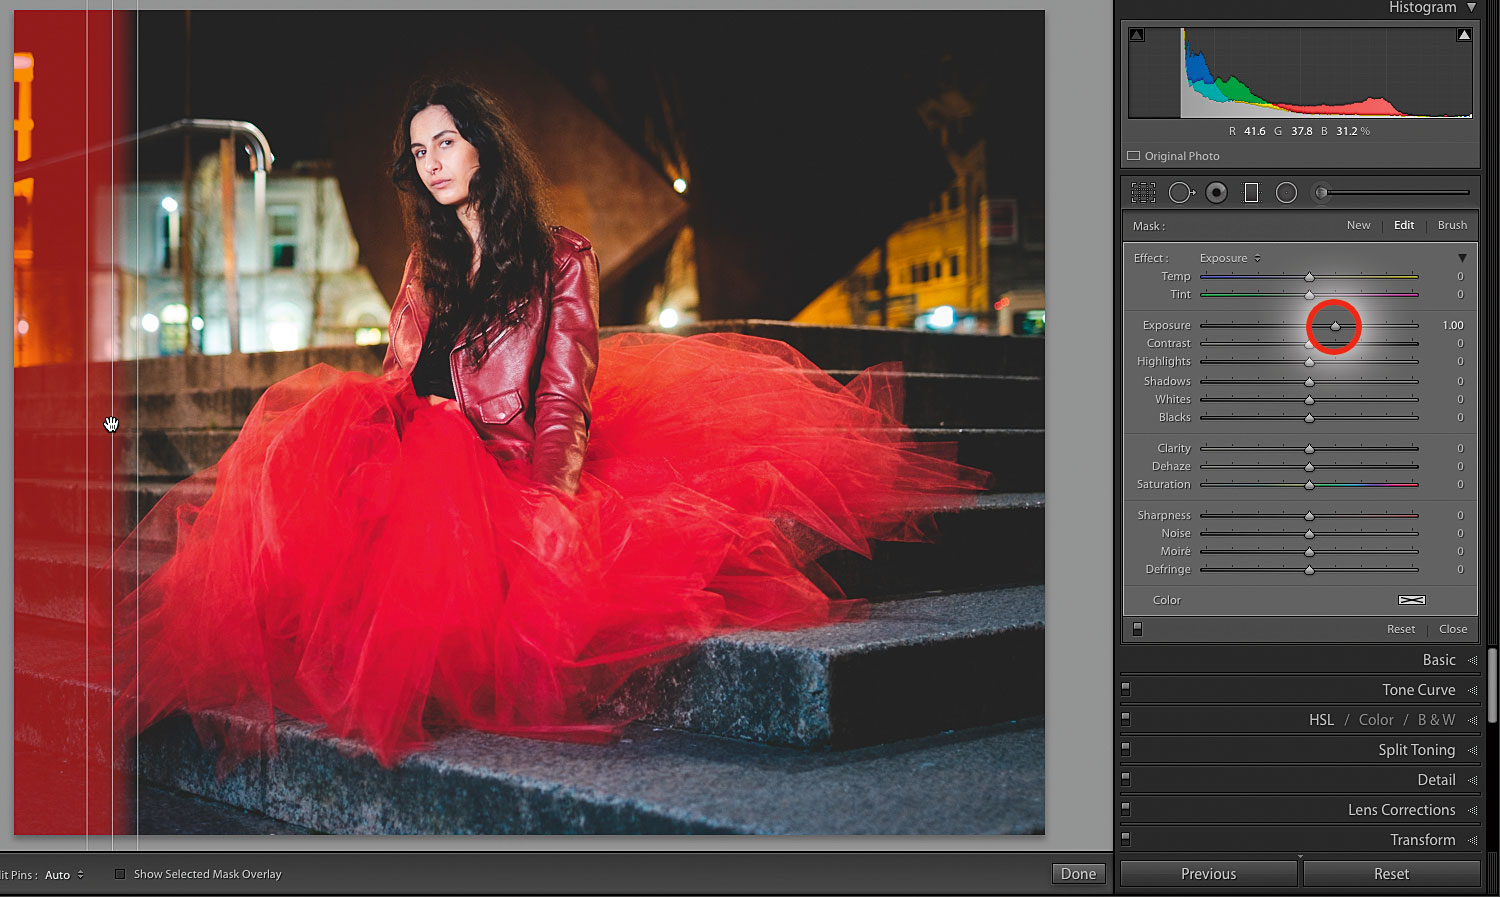
To have any changes in settings remembered, change the settings before applying the filter. Here, I set Exposure to +1 and dragged from the edge of the photo in, far enough to create a soft-edged filter.
3. Work with color
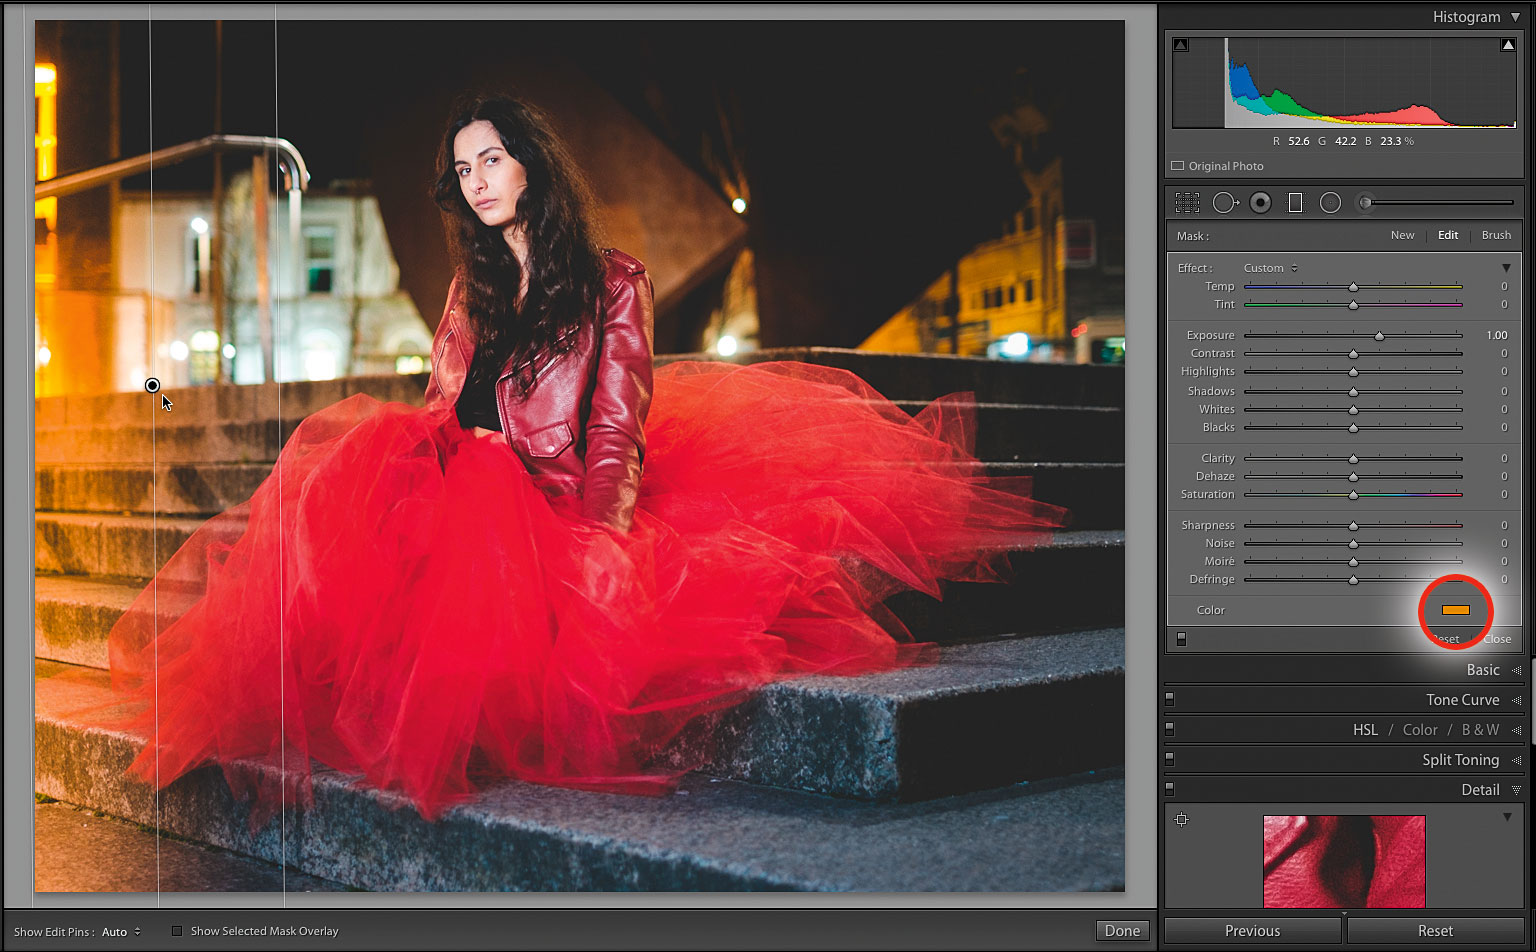
Light leaks often occur in the yellow/orange/red band, so click on the swatch tile at the end and select a hue you like in that range. If you’re not seeing the colour, turn down the Saturation slider to remove the underlying colour. Right-click the pin and click Duplicate to increase the intensity. Repeat to taste.
4. Radial filter
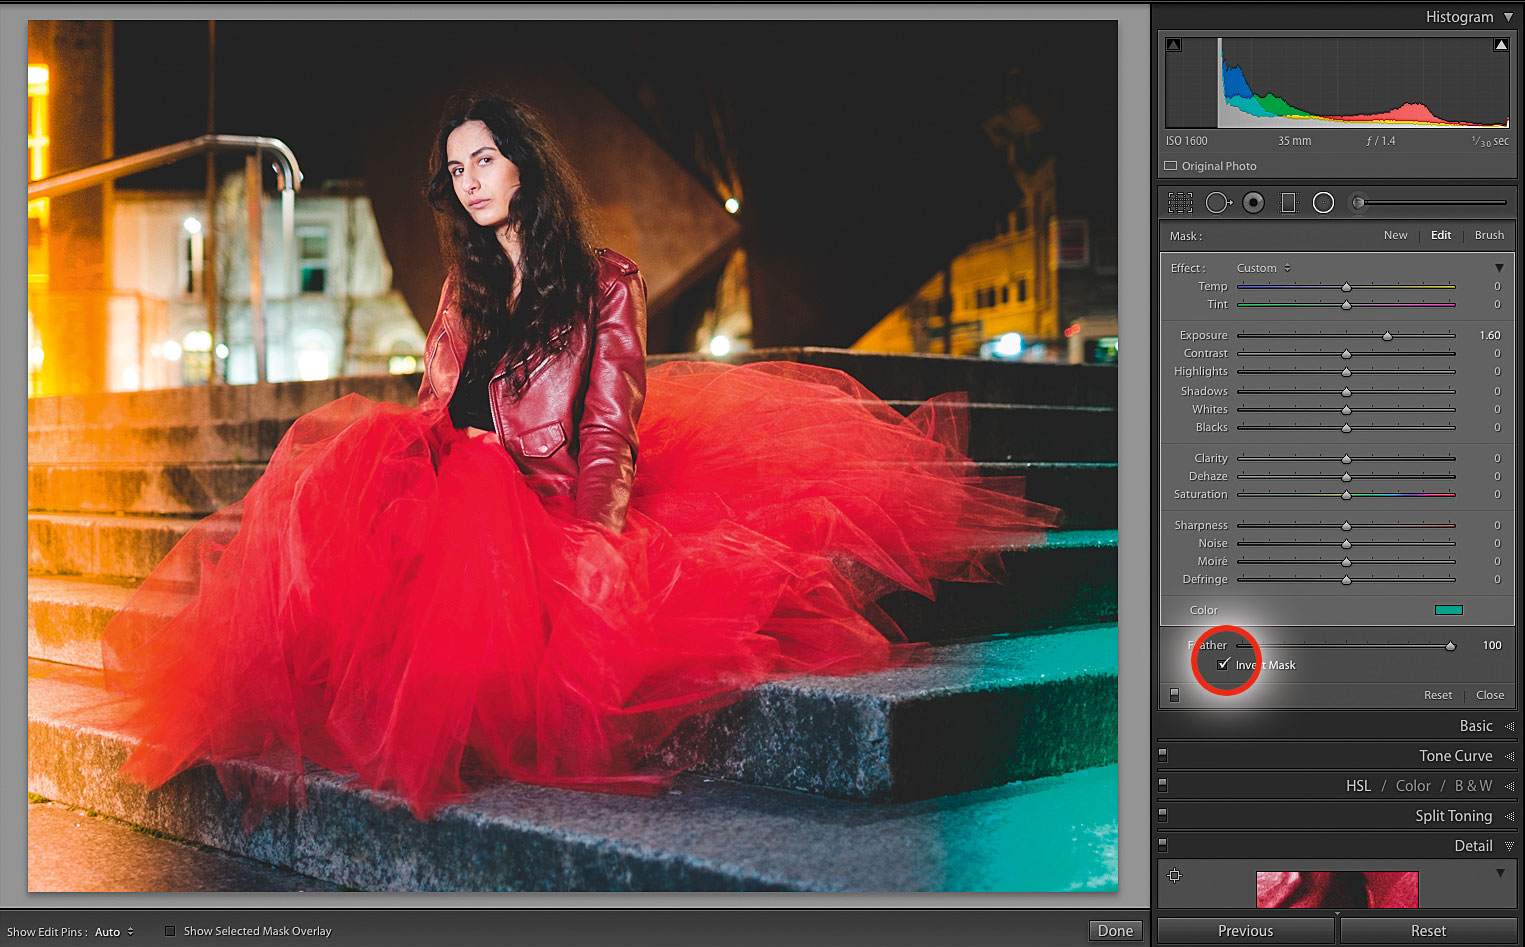
Repeat the process with a Radial Filter. This time, drag from an opposite corner. Increase the exposure and change the colour to make it different. Make sure you tick Invert Mask active for this. Use Feather to control the edge of the leak’s transition. Right-click and use Duplicate to increase the effect.
5. Radial variation
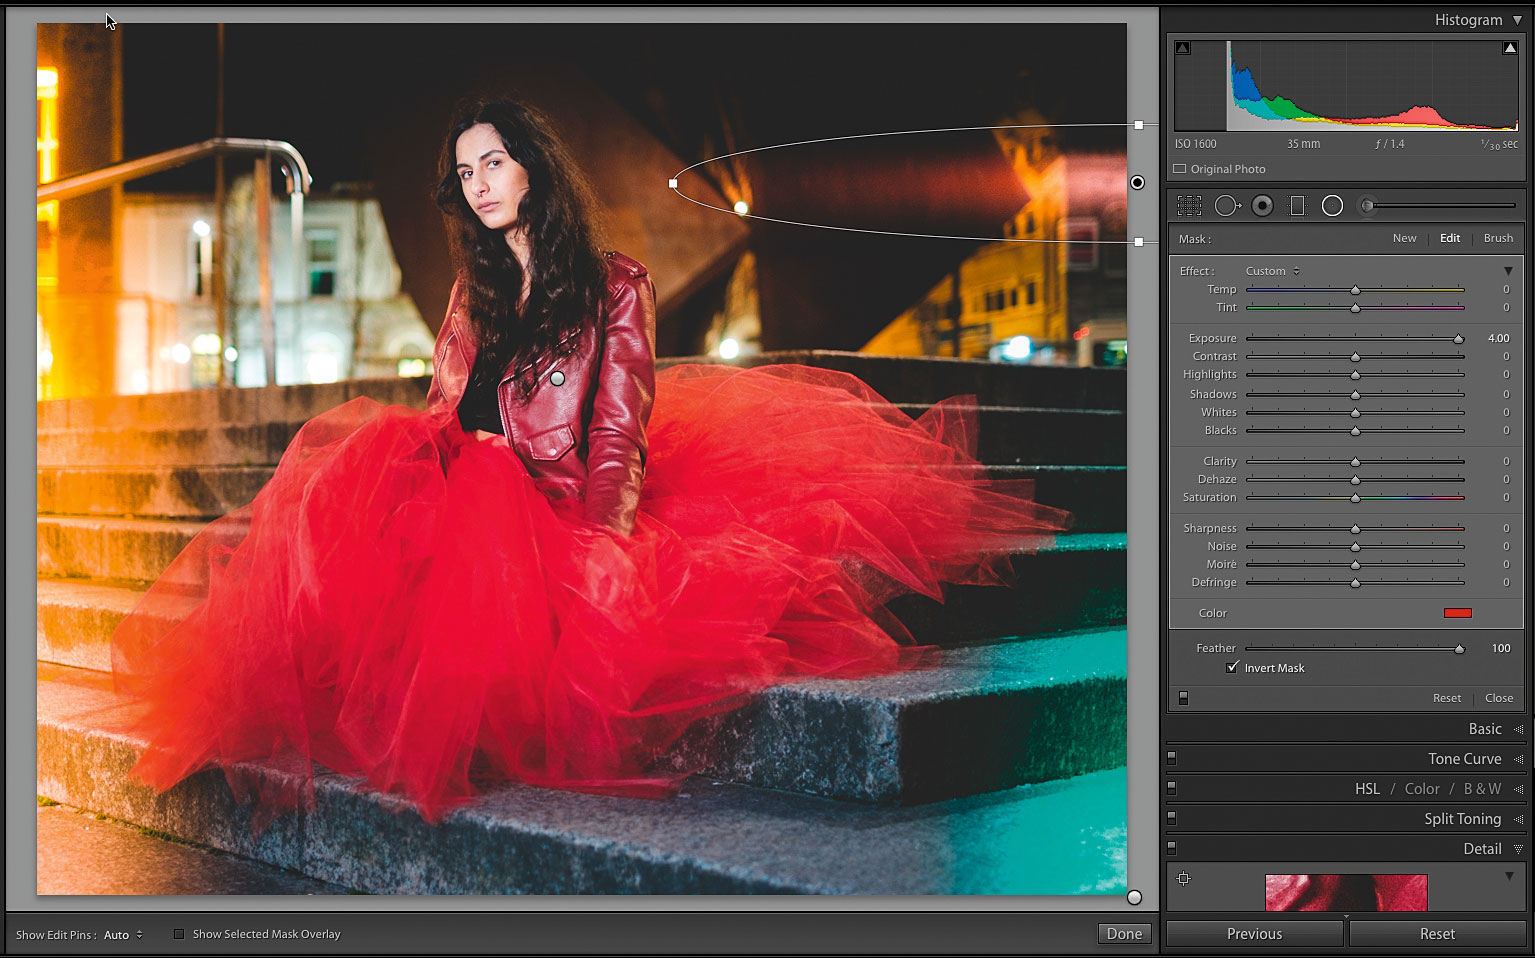
For the next leak, I use the Radial Filter again – but this time, I make an elongated spike in from the edge. While light leaks are often at the edge of the photograph, they don’t have to be there exclusively, so you can create light leaks in areas that support the composition.
6. Combine looks
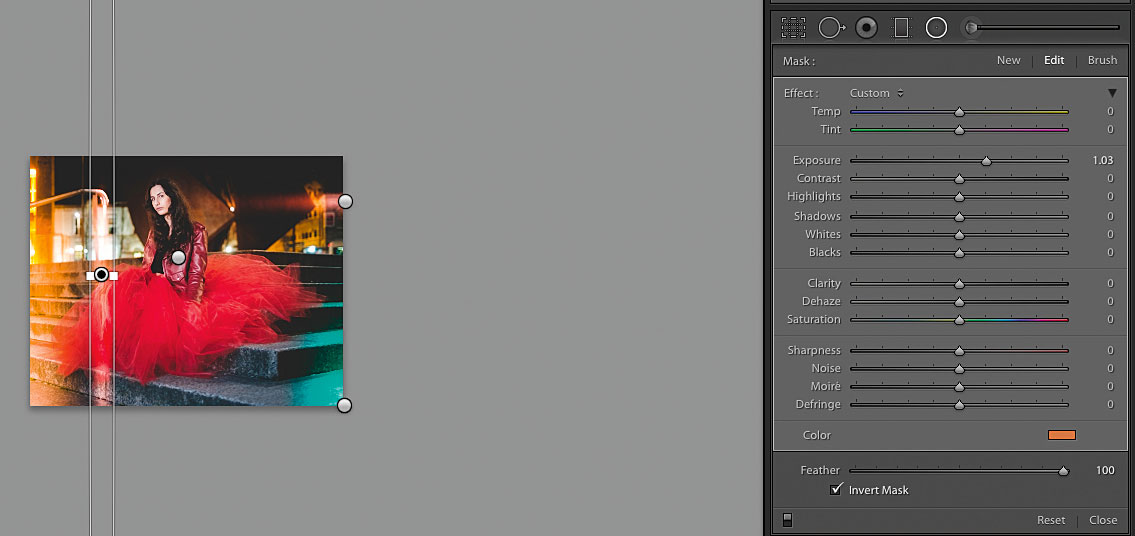
To have a light leak within the main part of the frame, Zoom out to 16:1 and drag a really long Radial Filter so the sides of the filter are almost parallel. Set the Exposure and color to taste. You can use any combination of these looks to build up a library of light leaks.
Expert tip: Imperfect presets
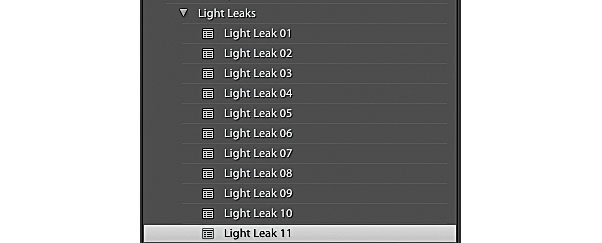
Both the Radial and Graduated Filters will wipe out any existing Radial or Grad filters you may have previously applied when used in a preset. While it would be great for these to be cumulative, they’re not. The only way to work around this is to save each step you make as a new preset. So add a basic light leak, then save a preset. Add more, then save another new preset. To get variety, once you hit the 4 or 5 leaks stage, remove an earlier leak from the set and save that as a new Preset. Yes, you’ll build up a lot of presets, but the joy is that when you run over the presets in the panel, you get a preview of what’s happening in the Navigator panel.
About Digital Camera magazine
This tutorial originally appeared in Digital Camera Magazine, the monthly newsstand magazine for all photographers. Why not subscribe to a print edition, and have the magazine delivered direct to your door every month?
Alternatively, we have a number of different digital options available, including:
• Apple app (for iPad or iPhone)
• Zinio app (multi-platform app for desktop or smartphone)
• PocketMags (multi-platform app ideal for Android devices)
• Readly (all-you-can-eat digital magazine subscription service)
If you wanted a printed version of any of our most recent issues we have a selection of back issues to choose from in our online store.
How to get Adobe Lightroom
Adobe Lightroom is available in two versions: the regular Adobe Lightroom Classic CC designed for desktop users, which is what we cover in this series, and a new cloud-based Adobe Lightroom CC, which stores your files online and offers a similar but reduced set of features. For regular desktop users we recommend Adobe Lightroom Classic CC.
Adobe offers three subscription based Photography Plans which you can click on below. We recommend either the regular Photography Plan, or the Photography Plan (1TB) which costs more but comes with 1TB online storage in case you decide to go with Lightroom CC.
For this set of tutorials and for anyone who likes to work on a single main computer, we recommend the regular Creative Cloud Photography Plan. This is the cheapest way to get started AND it comes with Photoshop CC too.
Read more:
• This is the best photo-editing software today
• These are the best laptops for photographers right now
• We help you choose the best desktop computers for photo editing
Get the Digital Camera World Newsletter
The best camera deals, reviews, product advice, and unmissable photography news, direct to your inbox!
Sean McCormack is a commercial, and editorial photographer, book author, and regular contributor to Digital Camera magazine based in Galway, Ireland. He has extensive experience with Lightroom, dating back to its original beta version, and has tried out just about every plugin and preset available. His latest book is Essential Development 3: 25 Tips for Lightroom Classic’s Develop Module.

