Lightroom series part 25: How to merge a raw panorama in Lightroom
Bring your separate panoramic photos into Lightroom and merge them into a raw file you can edit any way you like
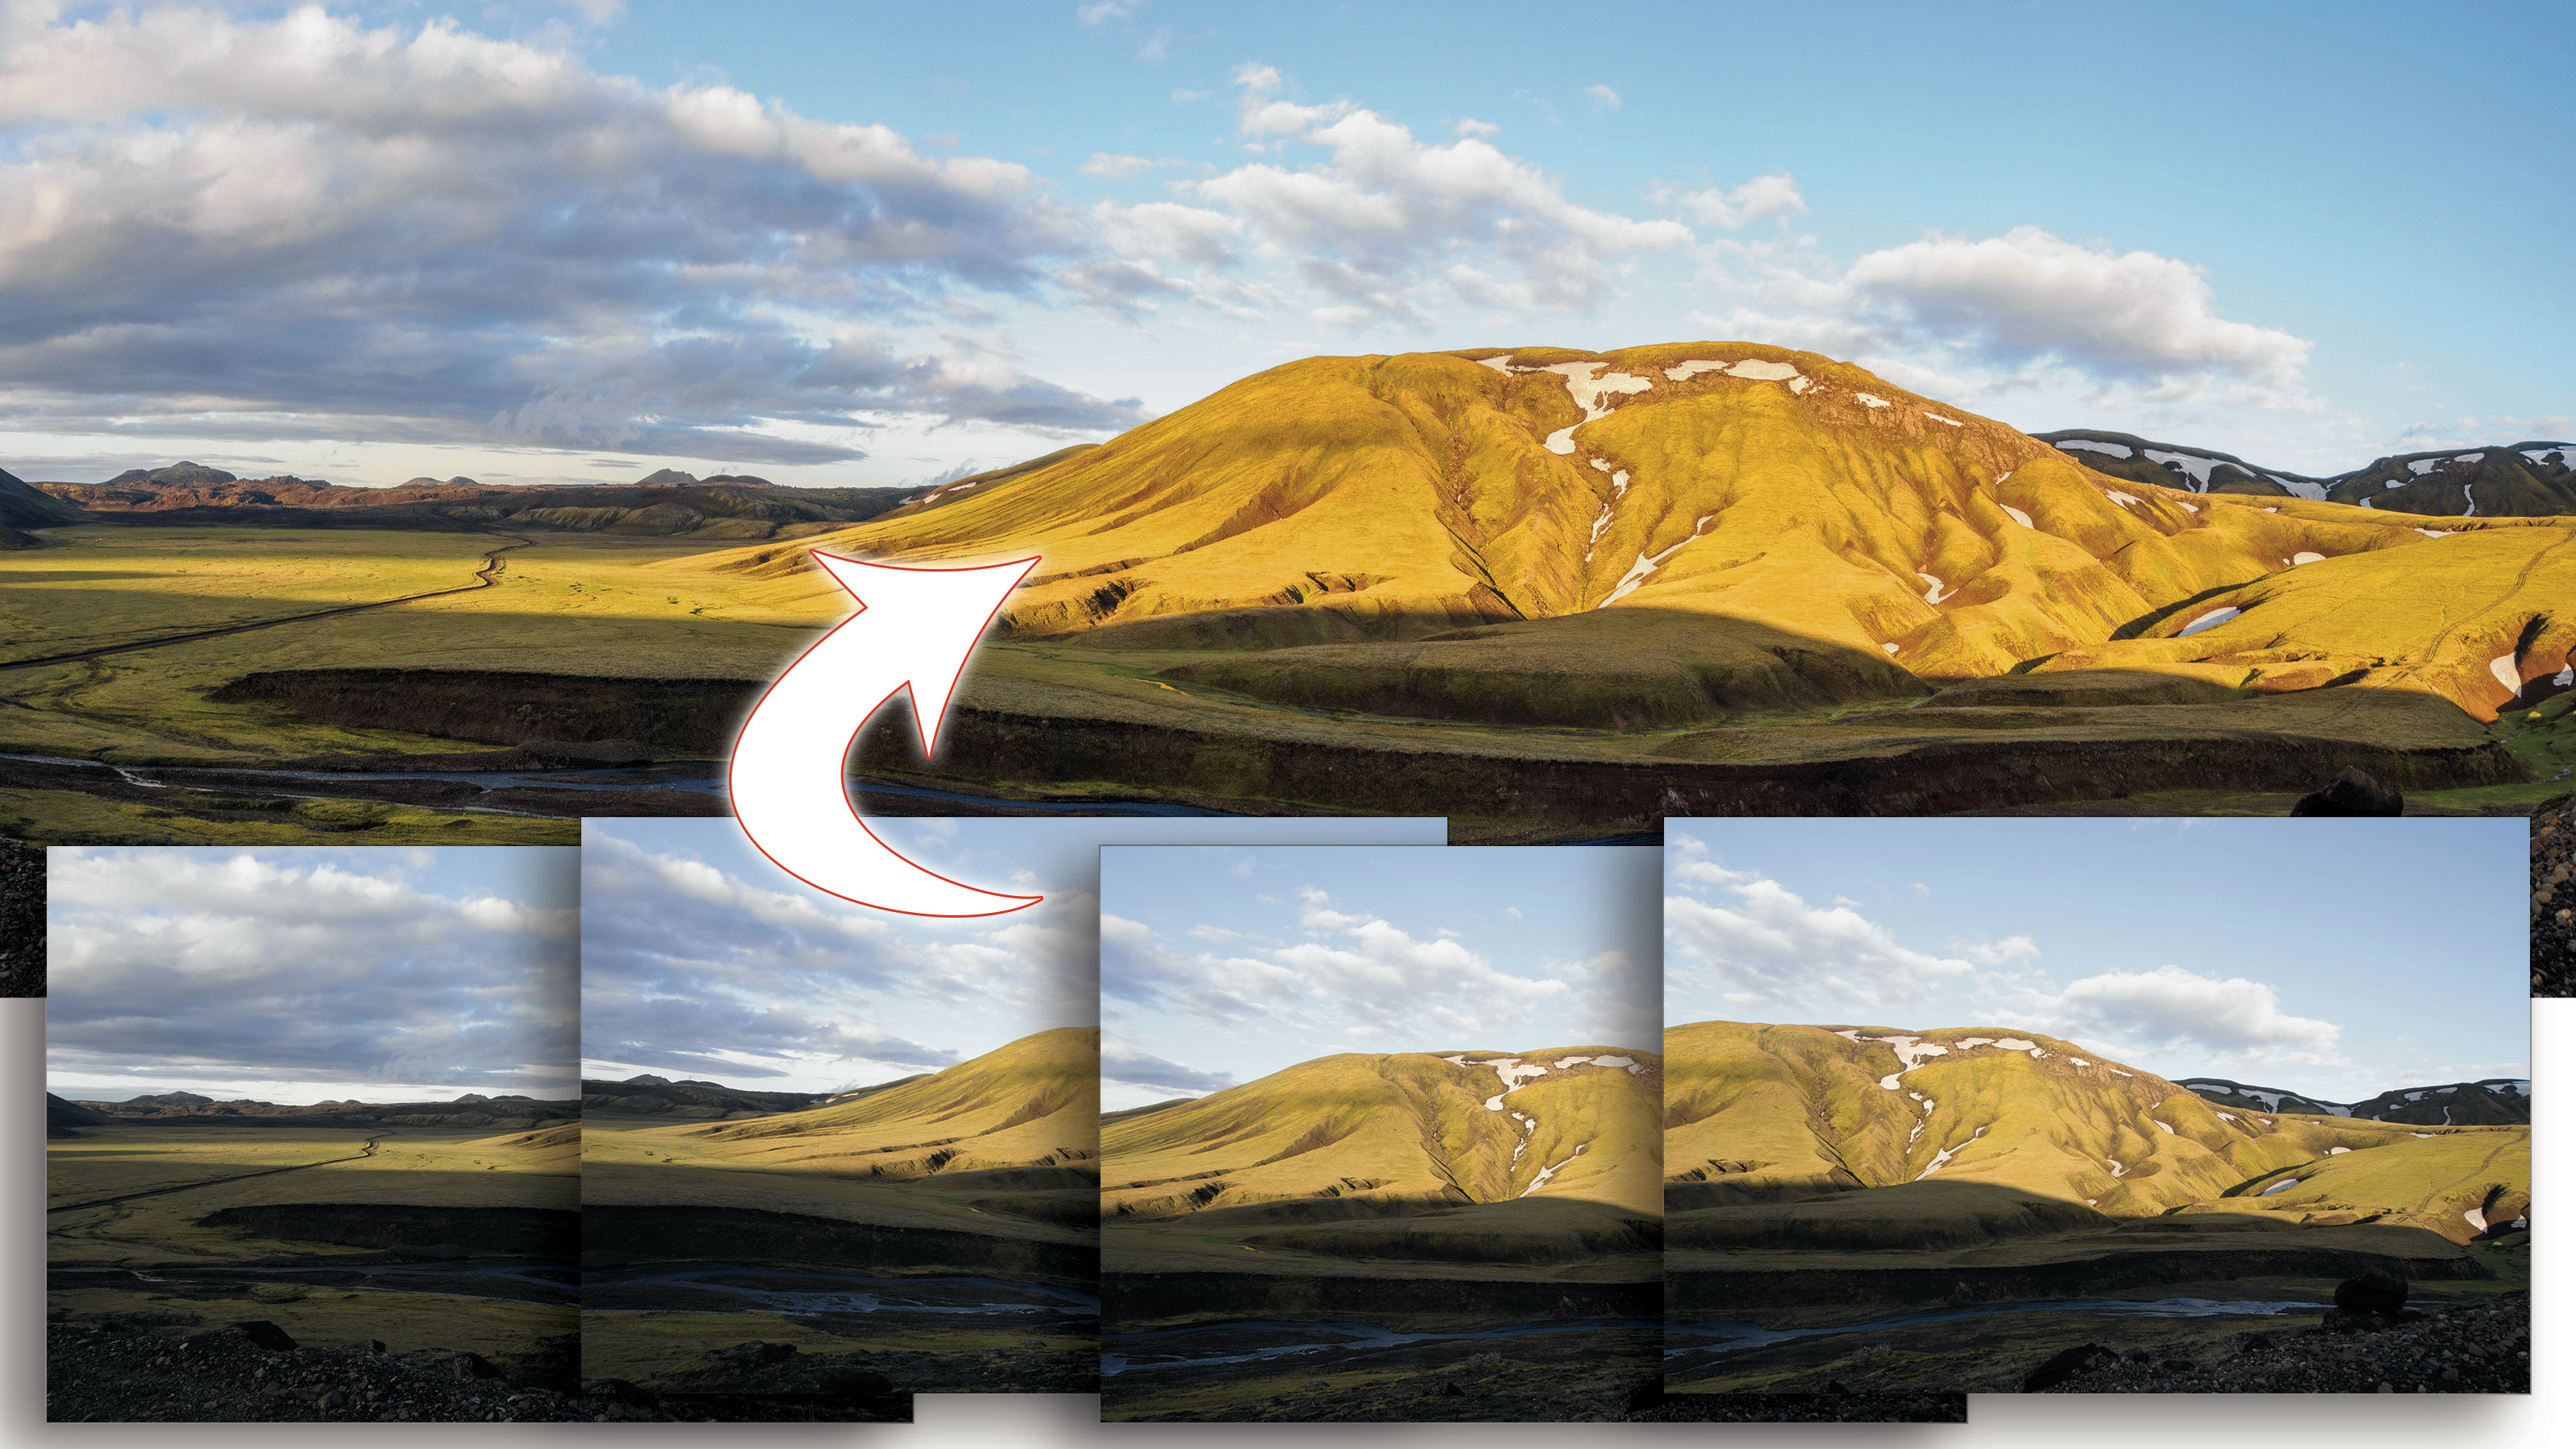
The vista is laid out before you. Your initial photos show that either you can’t capture the scene in one photo – or if you can, it’s kinda small, and there’s a lot of that boring sky. You could crop the sky out after, but then you’ll lose the quality you need for a decent print. You know it’s time for a panorama – so you shoot a sequence of overlapping shots to edit later.
Welcome to the 25th instalment of our Lightroom series, first published in Digital Camera magazine (see below for subscription offers).
If you are already a Lightroom user, you could discover some new tricks and processes you haven't tried yet. If you don't use Lightroom, then scroll down to the bottom where you'll discover how to get it and which Adobe Photography Plan is best.
Traditionally with panoramas, or 'stitchers', you’d now be at the point where you have to edit each file, then render the raw to bring into Photoshop, or another app to merge the files together. Because the file is rendered, you’d have less leeway in editing after, which isn’t optimal.
Fortunately Lightroom can come to the rescue here with its Merge To Pano tool. It creates a stitched file that retains all the editablity of a raw file, because it IS actually a rawfile – a DNG file, to be precise, Adobe’s Digital Negative format.
• See more Lightroom tutorials
1. Start the process
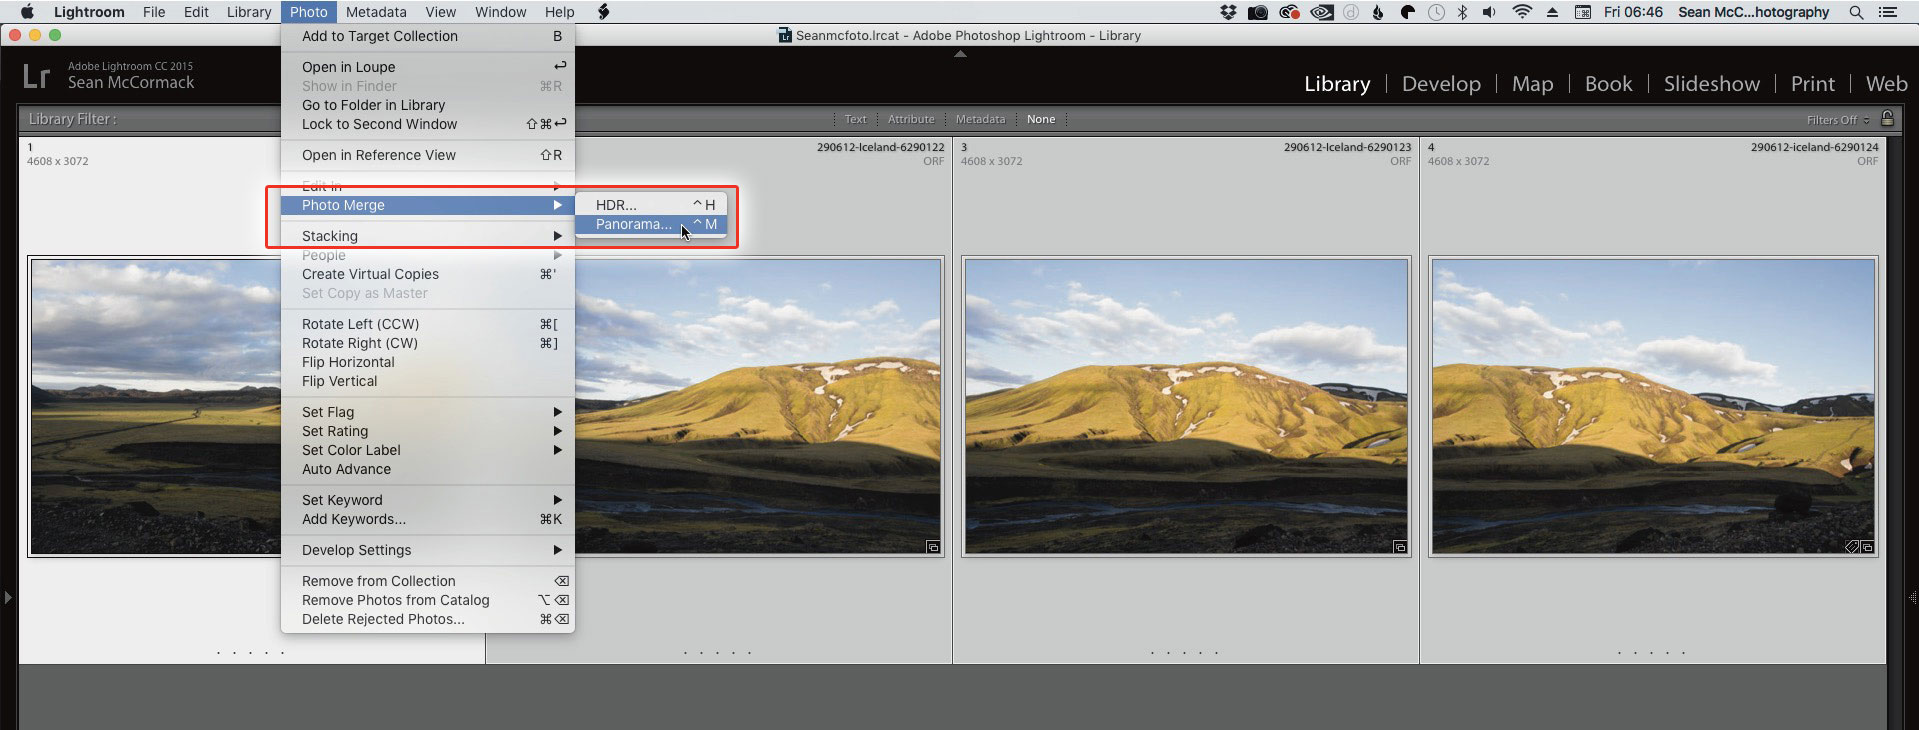
Collect the images you want in the panorama together and select them in the Grid. Select the menu command Photo > Photo Merge > Panorama. This has the shortcut Ctrl+M – unusually, it’s the same shortcut in both macOS and Windows.
2. Panorama options
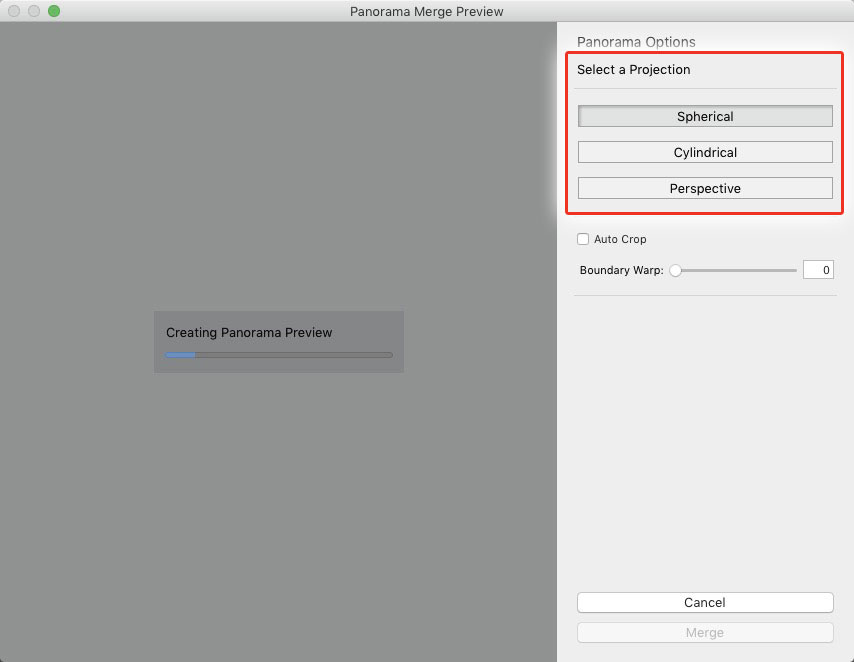
The Panorama dialog will open and you’ll have a short wait while a preview of the panorama is created. You can see the available options at this point, including three projection options. Spherical maps the panorama to a sphere; Cylindrical maps it to a cylinder, with the reference image in the centre. Finally, Perspective creates a bowtie effect with the centre image normal, and the others stretched to fix the perspective.
3. Pick a projection

Spherical is the most common projection and is the default option. It generally works well, but often it’s a good idea to preview the other options as well. For this image, Cylindrical gives you a larger image mapping and seems to retain the height of the view. Perspective doesn’t want to work at all.
4. Auto Crop
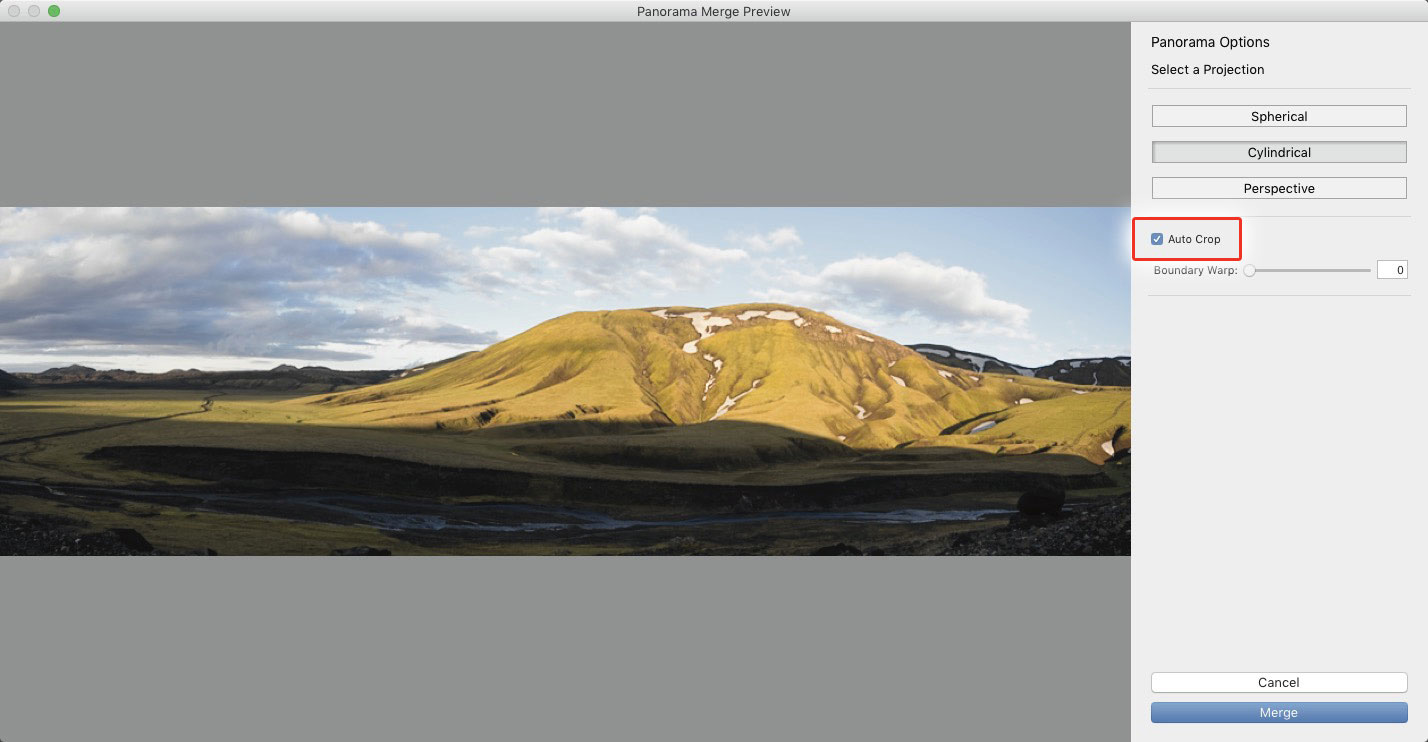
After selecting the most appropriate mapping option and viewing the preview of your combined image, choose Auto Crop. This will find the optimal point to crop to a rectangle and remove the empty pixels that show as white in the preview.
5. Boundary Warp
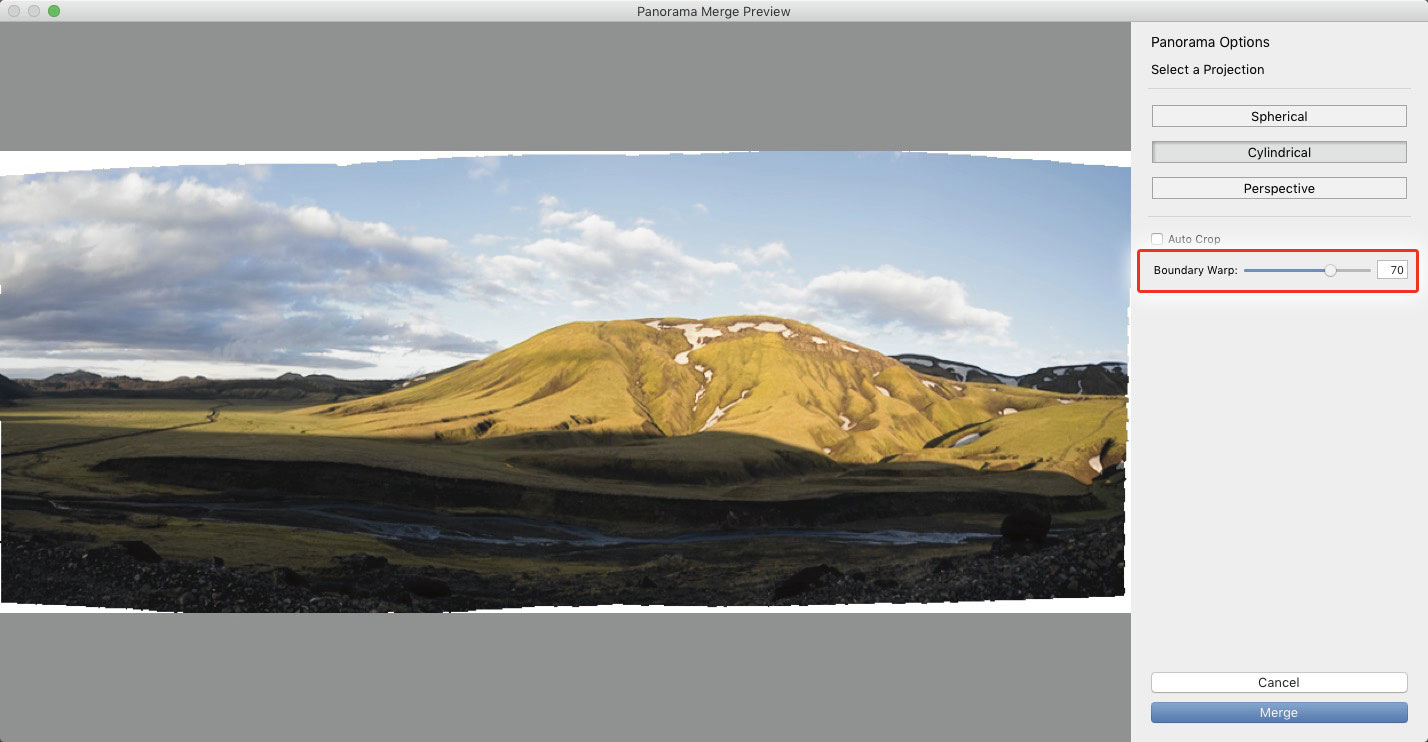
There is another option you could try instead of Auto Crop. Boundary Warp will stretch the pixels out to fill the available frame at 100. It may stretch pixels too much, so you may prefer to use it below 100 and then use Auto Crop to remove the empty areas.
6. Finishing touches
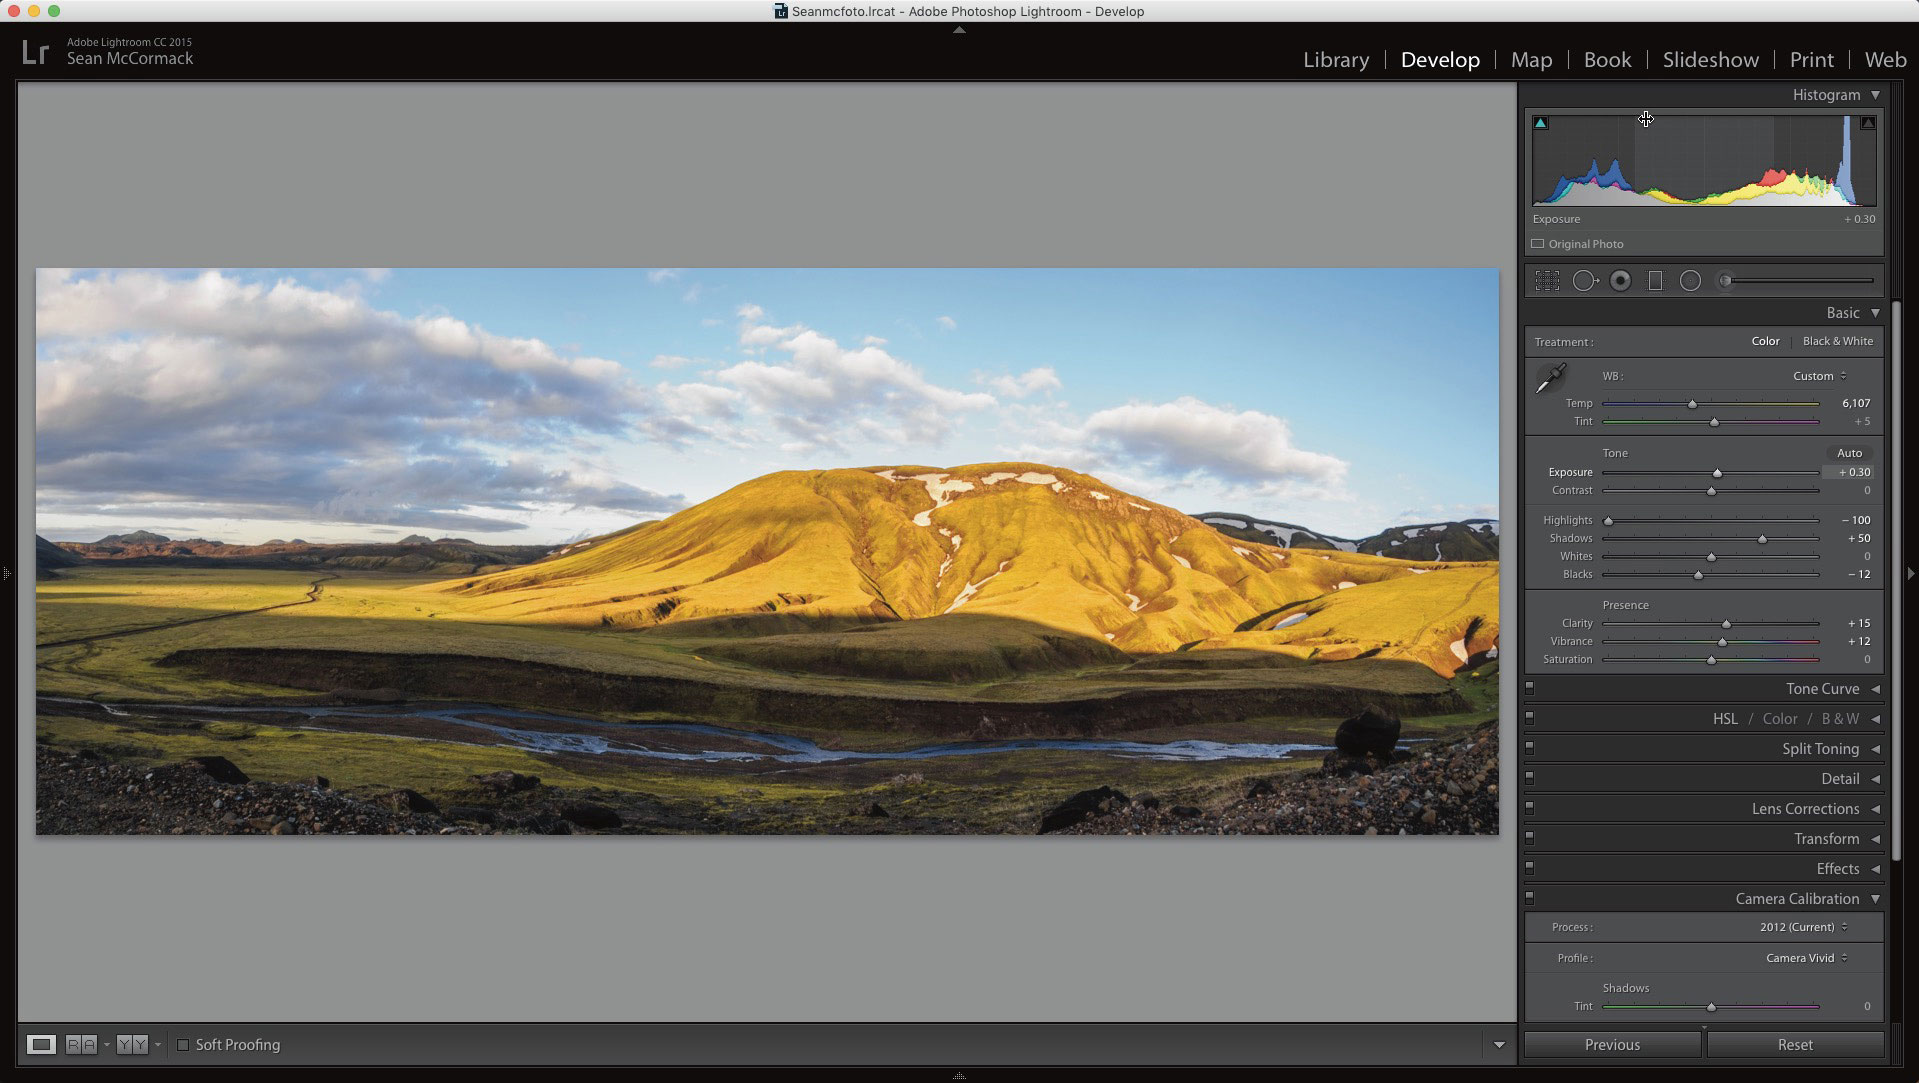
Click Merge to create the panorama. Because the panorama is a DNG file, you can apply a camera profile, like a Vivid or Landscape mode. You have full control over White Balance, so you can easily warm the photo for a sunset look, and do further edits to the file in Lightroom.
Expert tip: Shooting the panorama
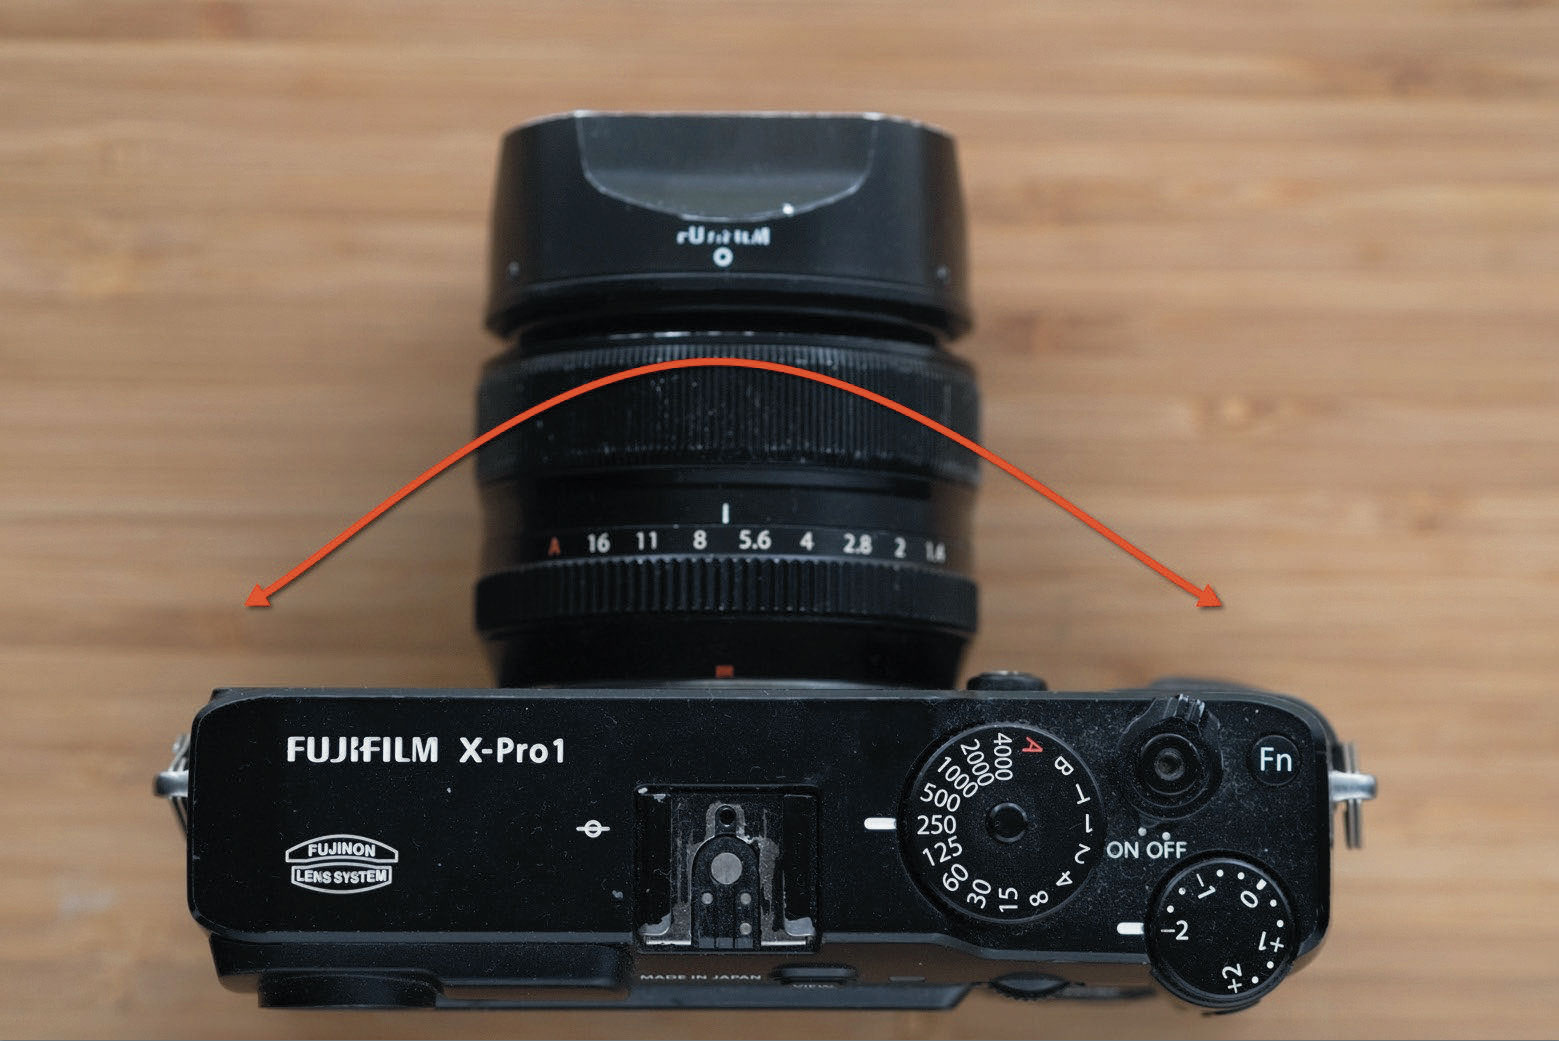
There are a few tips to getting good shots for the panorama. The best way is to use a panoramic head for a tripod. These are a bit expensive and obviously add weight if you’re travelling. If you’re not using a head, try to pivot the camera around the entrance pupil of the lens to avoid getting parallax errors (like seeing a foreground rock merged badly). Roughly speaking, keeping the middle of the lens still will help a lot compared to swinging it around to get the shots. You should overlap shots by at least 30%, if not more, to give Lightroom a better chance at stitching them. For increased resolution, use a shorter lens like a 35mm and rotate the camera vertically, then shoot more overlapping shots.
About Digital Camera magazine
This tutorial originally appeared in Digital Camera Magazine, the monthly newsstand magazine for all photographers. Why not subscribe to a print edition, and have the magazine delivered direct to your door every month?
Alternatively, we have a number of different digital options available, including:
• Apple app (for iPad or iPhone)
• Zinio app (multi-platform app for desktop or smartphone)
• PocketMags (multi-platform app ideal for Android devices)
• Readly (all-you-can-eat digital magazine subscription service)
If you wanted a printed version of any of our most recent issues we have a selection of back issues to choose from in our online store.
How to get Adobe Lightroom
Adobe Lightroom is available in two versions: the regular Adobe Lightroom Classic CC designed for desktop users, which is what we cover in this series, and a new cloud-based Adobe Lightroom CC, which stores your files online and offers a similar but reduced set of features. For regular desktop users we recommend Adobe Lightroom Classic CC.
Adobe offers three subscription based Photography Plans which you can click on below. We recommend either the regular Photography Plan, or the Photography Plan (1TB) which costs more but comes with 1TB online storage in case you decide to go with Lightroom CC.
For this set of tutorials and for anyone who likes to work on a single main computer, we recommend the regular Creative Cloud Photography Plan. This is the cheapest way to get started AND it comes with Photoshop CC too.
Read more:
• This is the best photo-editing software today
• These are the best laptops for photographers right now
• We help you choose the best desktop computers for photo editing
Get the Digital Camera World Newsletter
The best camera deals, reviews, product advice, and unmissable photography news, direct to your inbox!
Sean McCormack is a commercial, and editorial photographer, book author, and regular contributor to Digital Camera magazine based in Galway, Ireland. He has extensive experience with Lightroom, dating back to its original beta version, and has tried out just about every plugin and preset available. His latest book is Essential Development 3: 25 Tips for Lightroom Classic’s Develop Module.

