Lightroom series part 27: How to create a black and white landscape in Lightroom
Convert a regular color image into a moody monochromatic landscape with tonal contrast and dynamic range
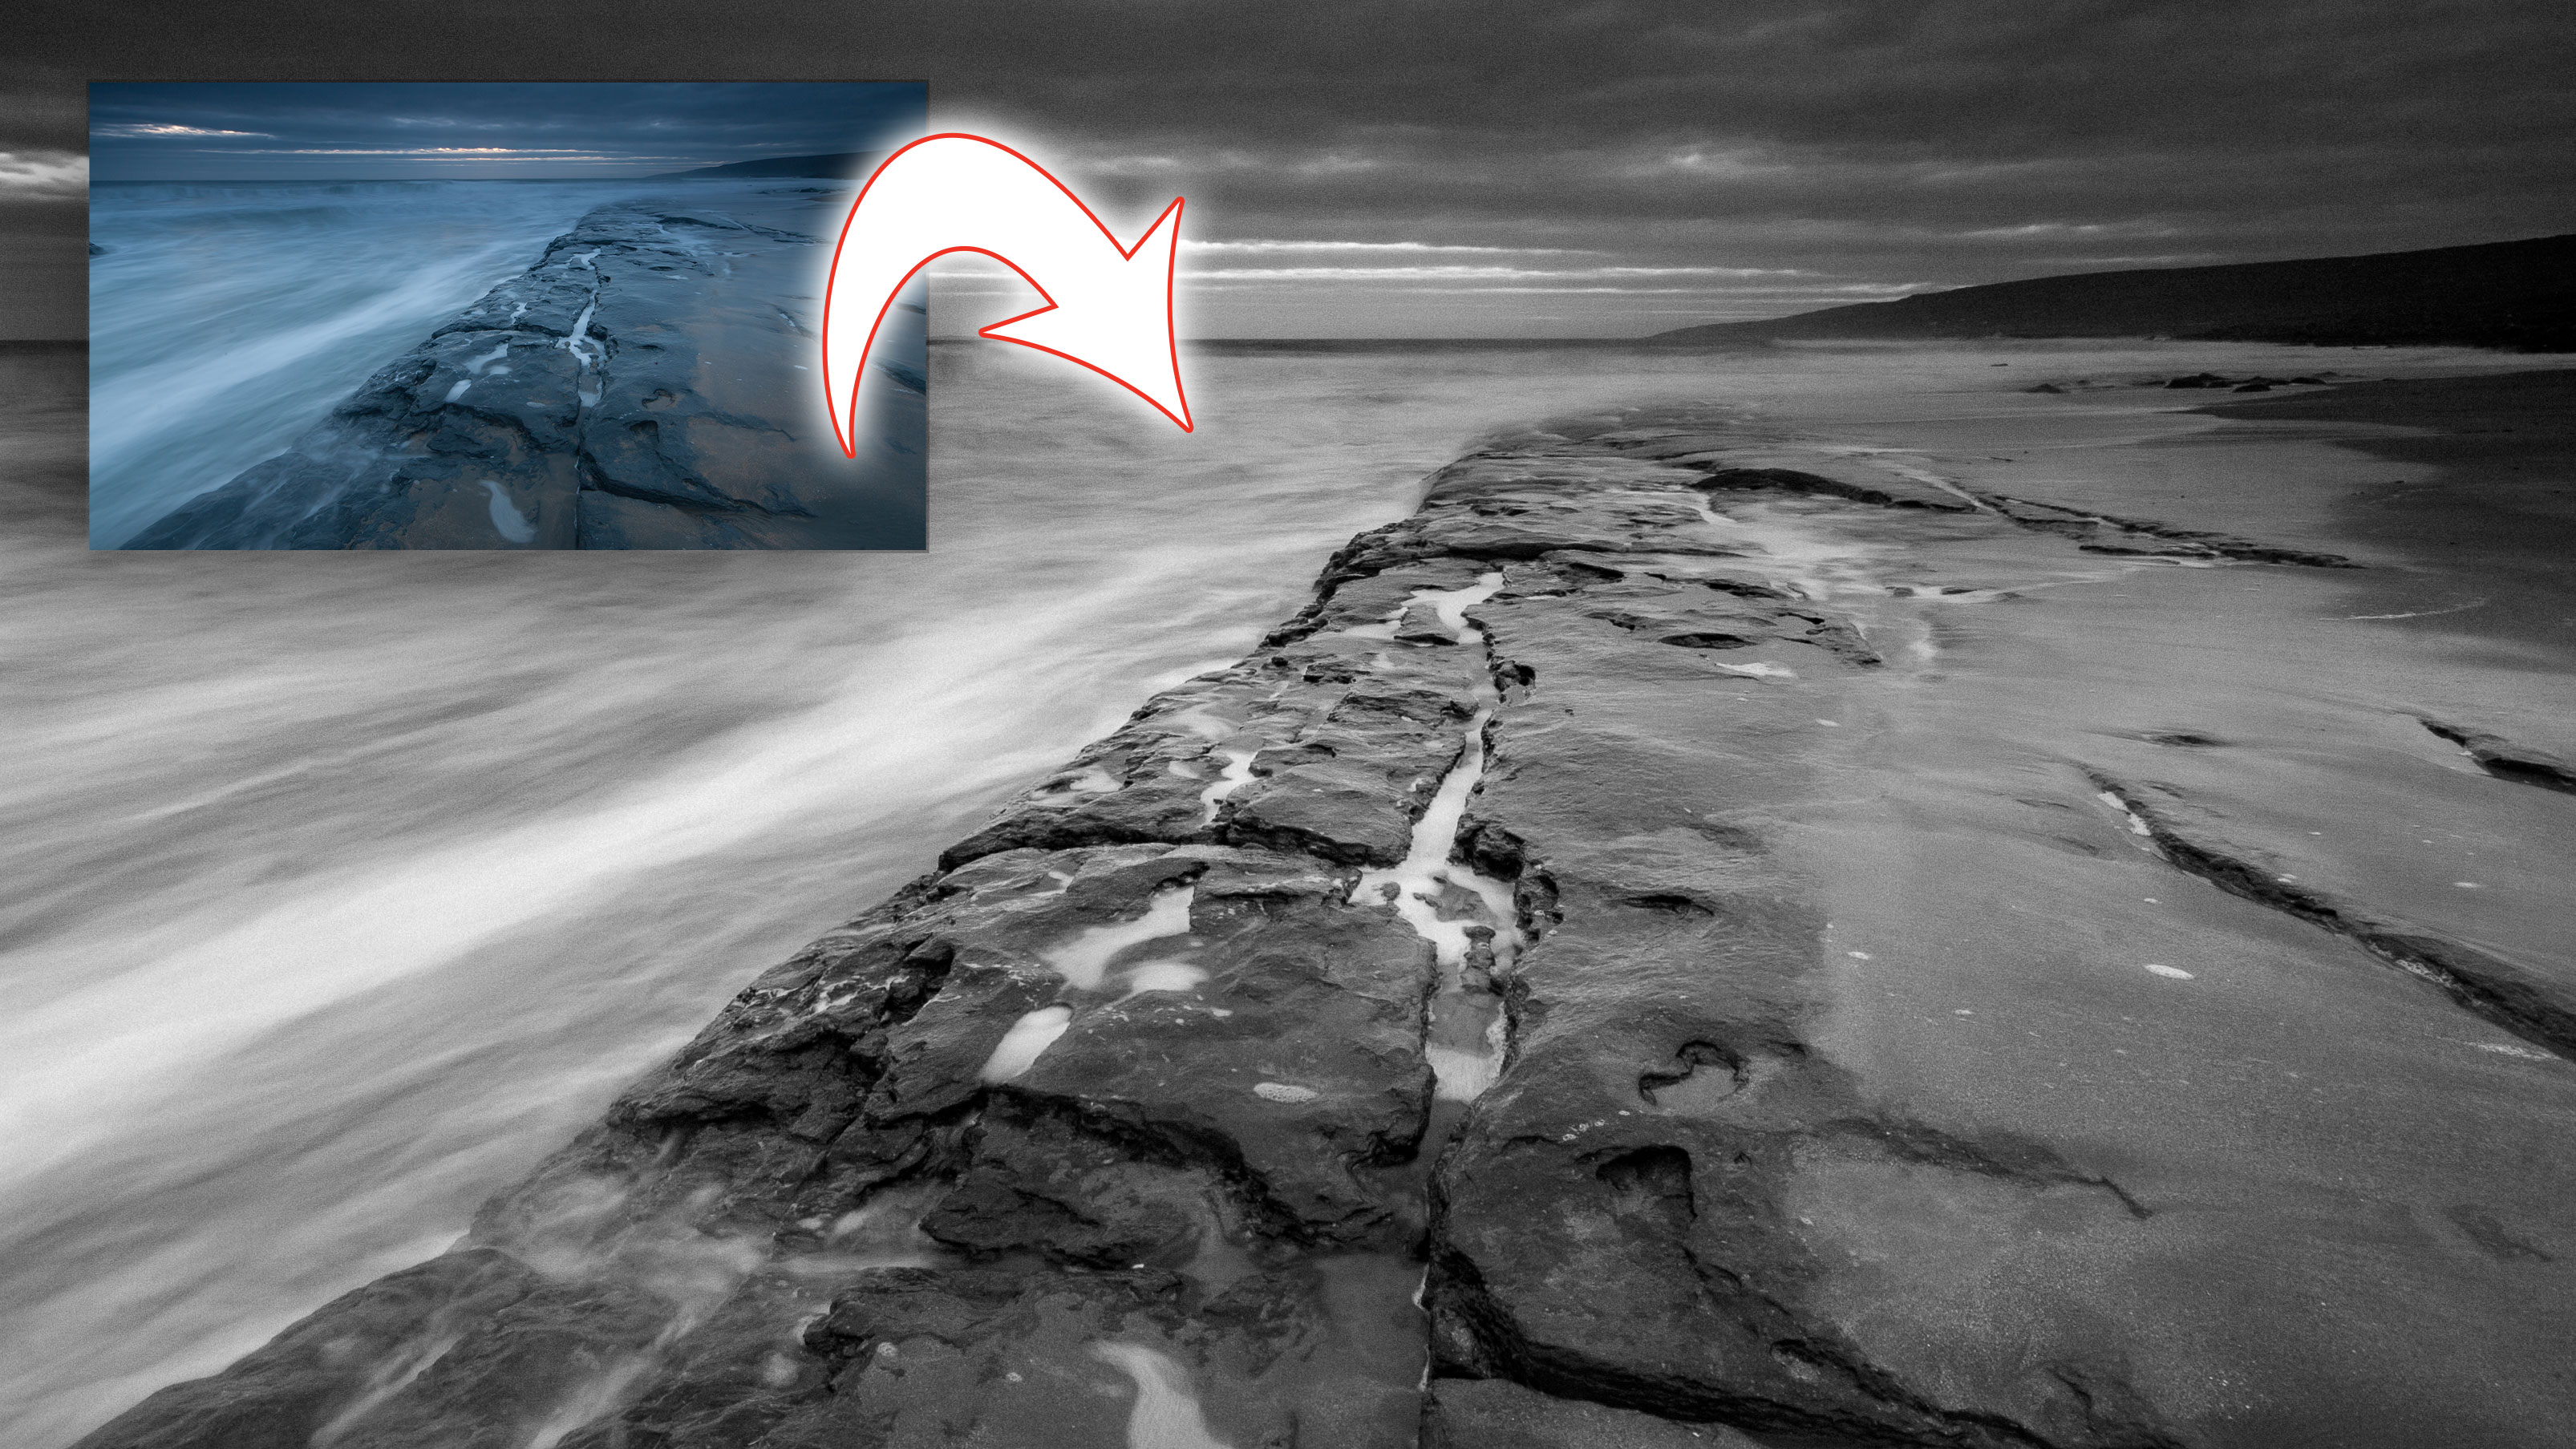
There's something about landscapes in black and white that’s so appealing. Mix in some moody weather and you’ve a great visual recipe.
Welcome to the 27th instalment of our Lightroom series, first published in Digital Camera magazine (see below for subscription offers).
If you are already a Lightroom user, you could discover some new tricks and processes you haven't tried yet. If you don't use Lightroom, then scroll down to the bottom where you'll discover how to get it and which Adobe Photography Plan is best.
Lightroom provides more than one way of creating monochrome images, all with differing effects. You can always remove Saturation globally in Basic, or one channel at a time in the HSL panel. The natural way in Lightroom, though, is to use the B&W panel. Of course, you’ll need to get the photo to its best state before the conversion...
• See more Lightroom tutorials
1. Straighten the shot
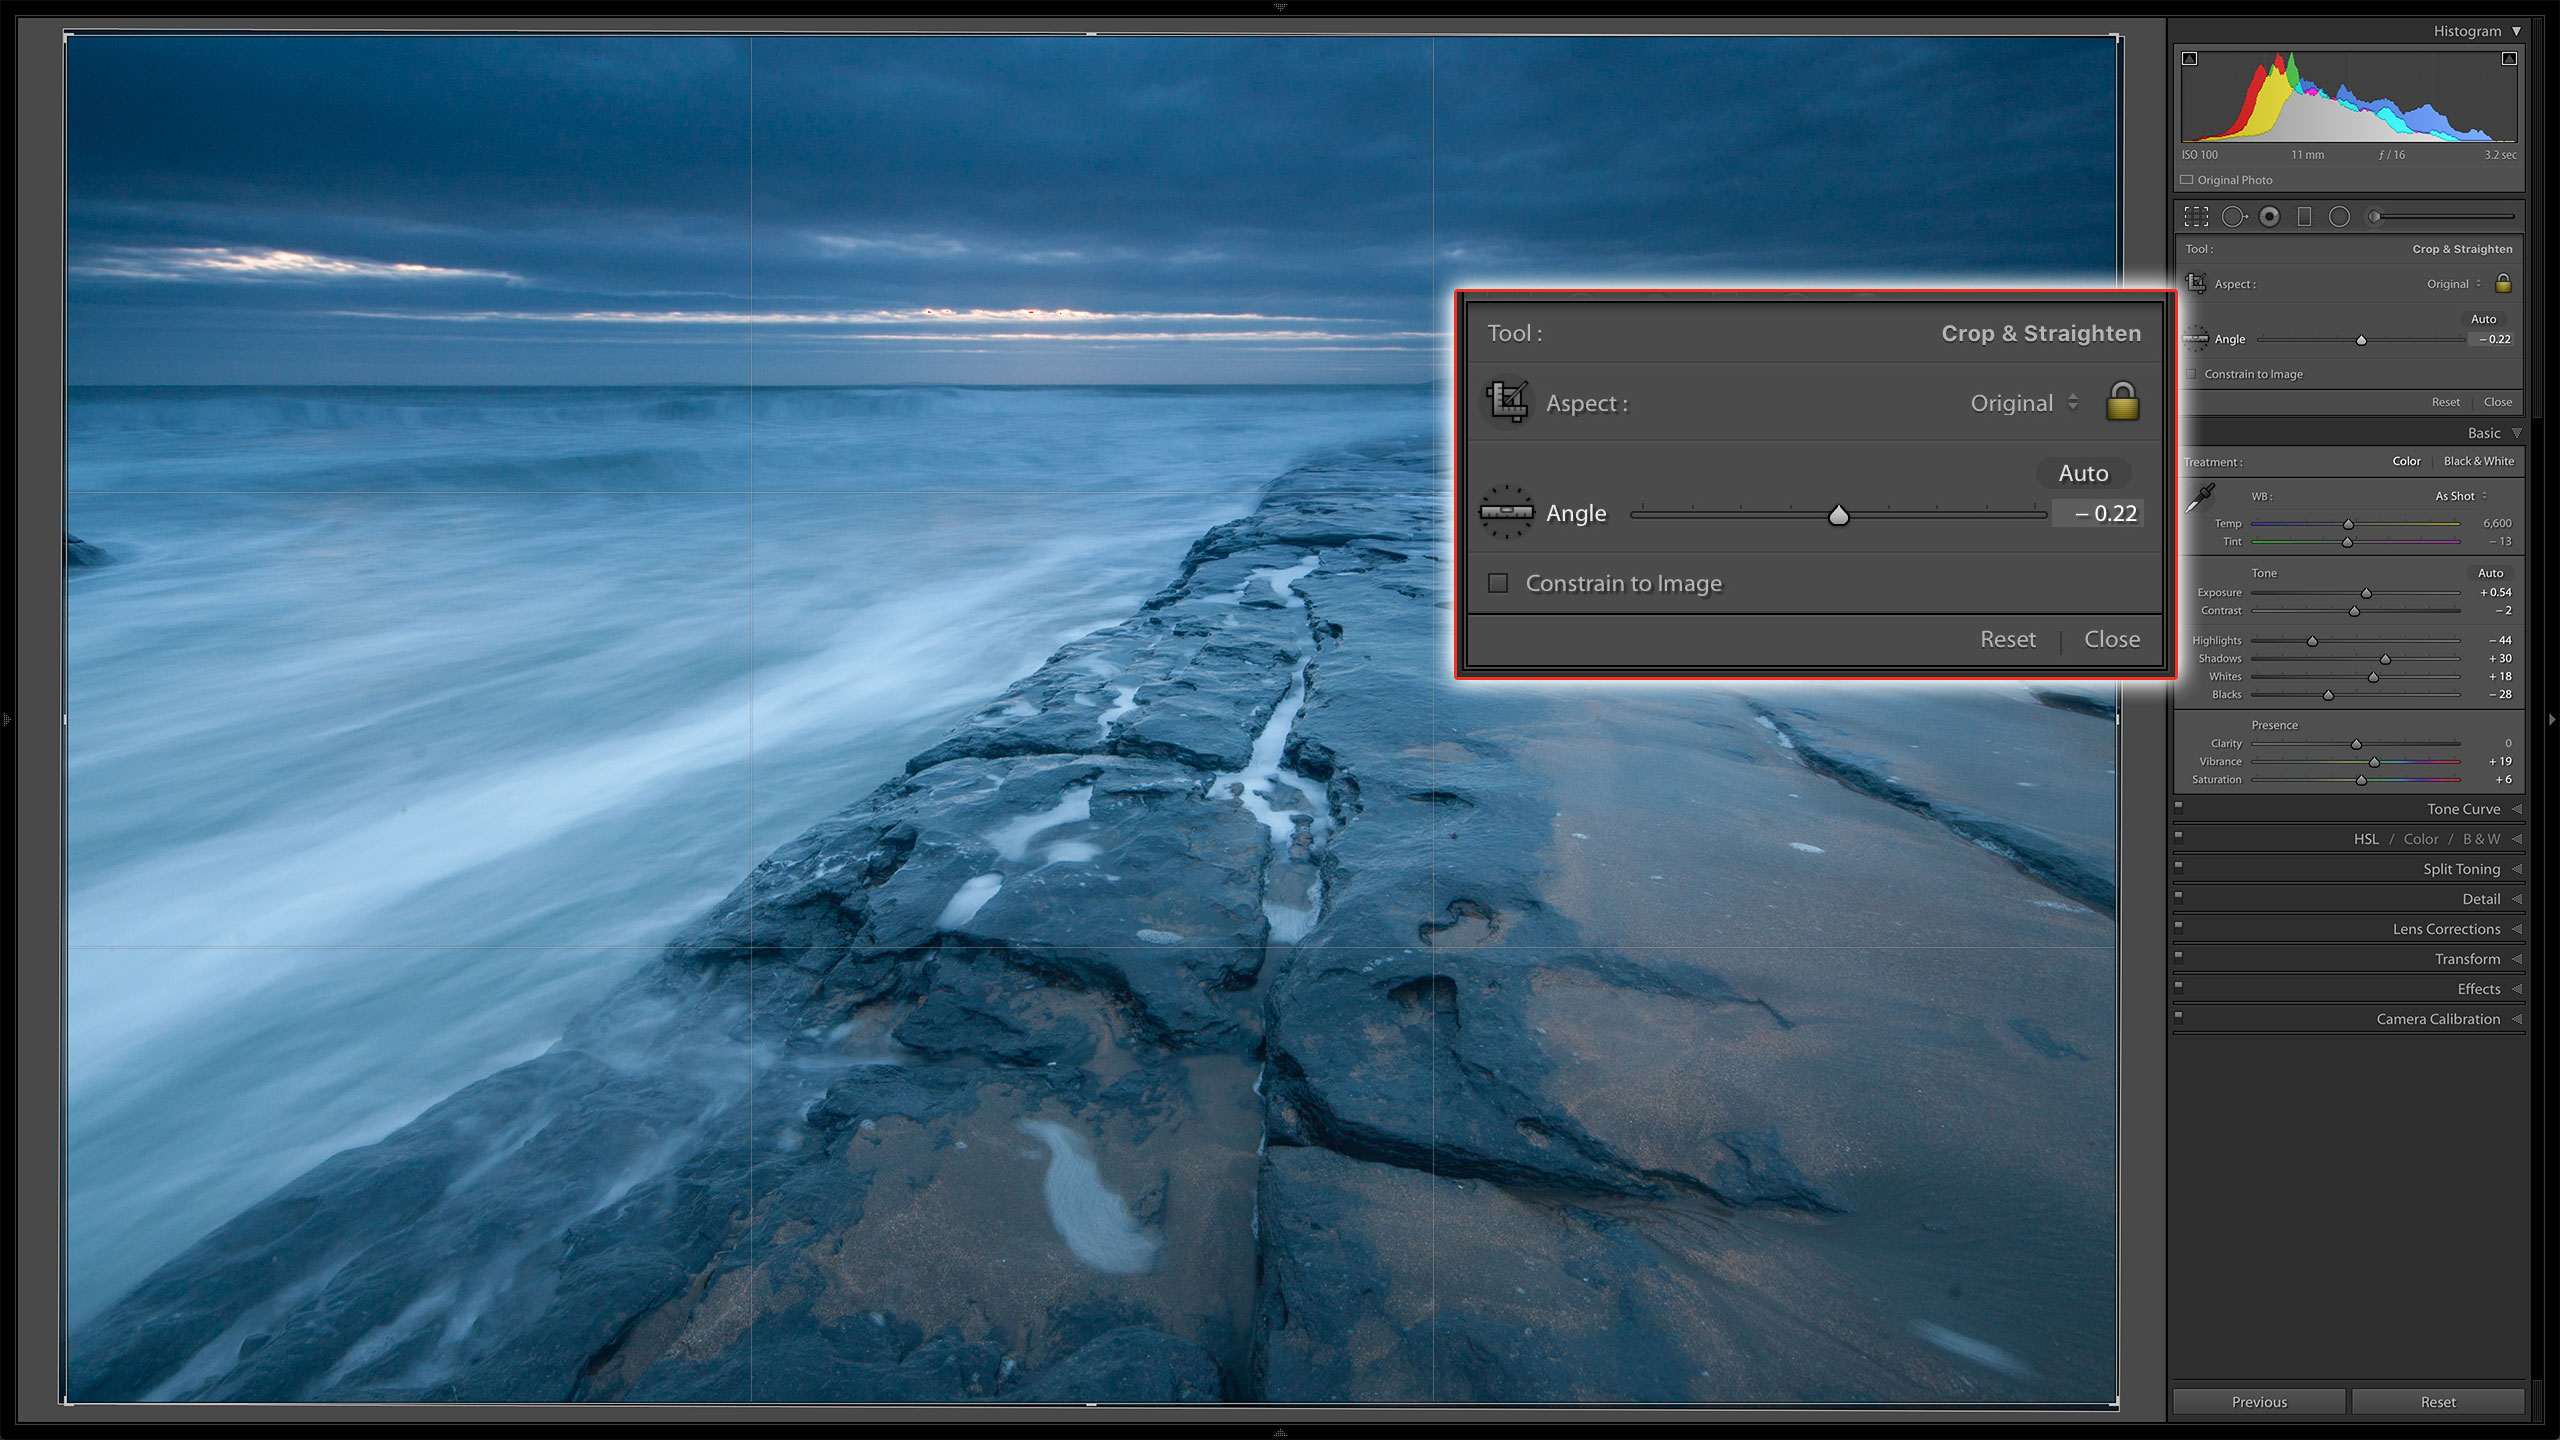
Straighten the photo by using either the Crop tool’s Auto function, or hold down Ctrl/Cmd and drag a line along the horizon to align it correctly.
2. Dynamic range
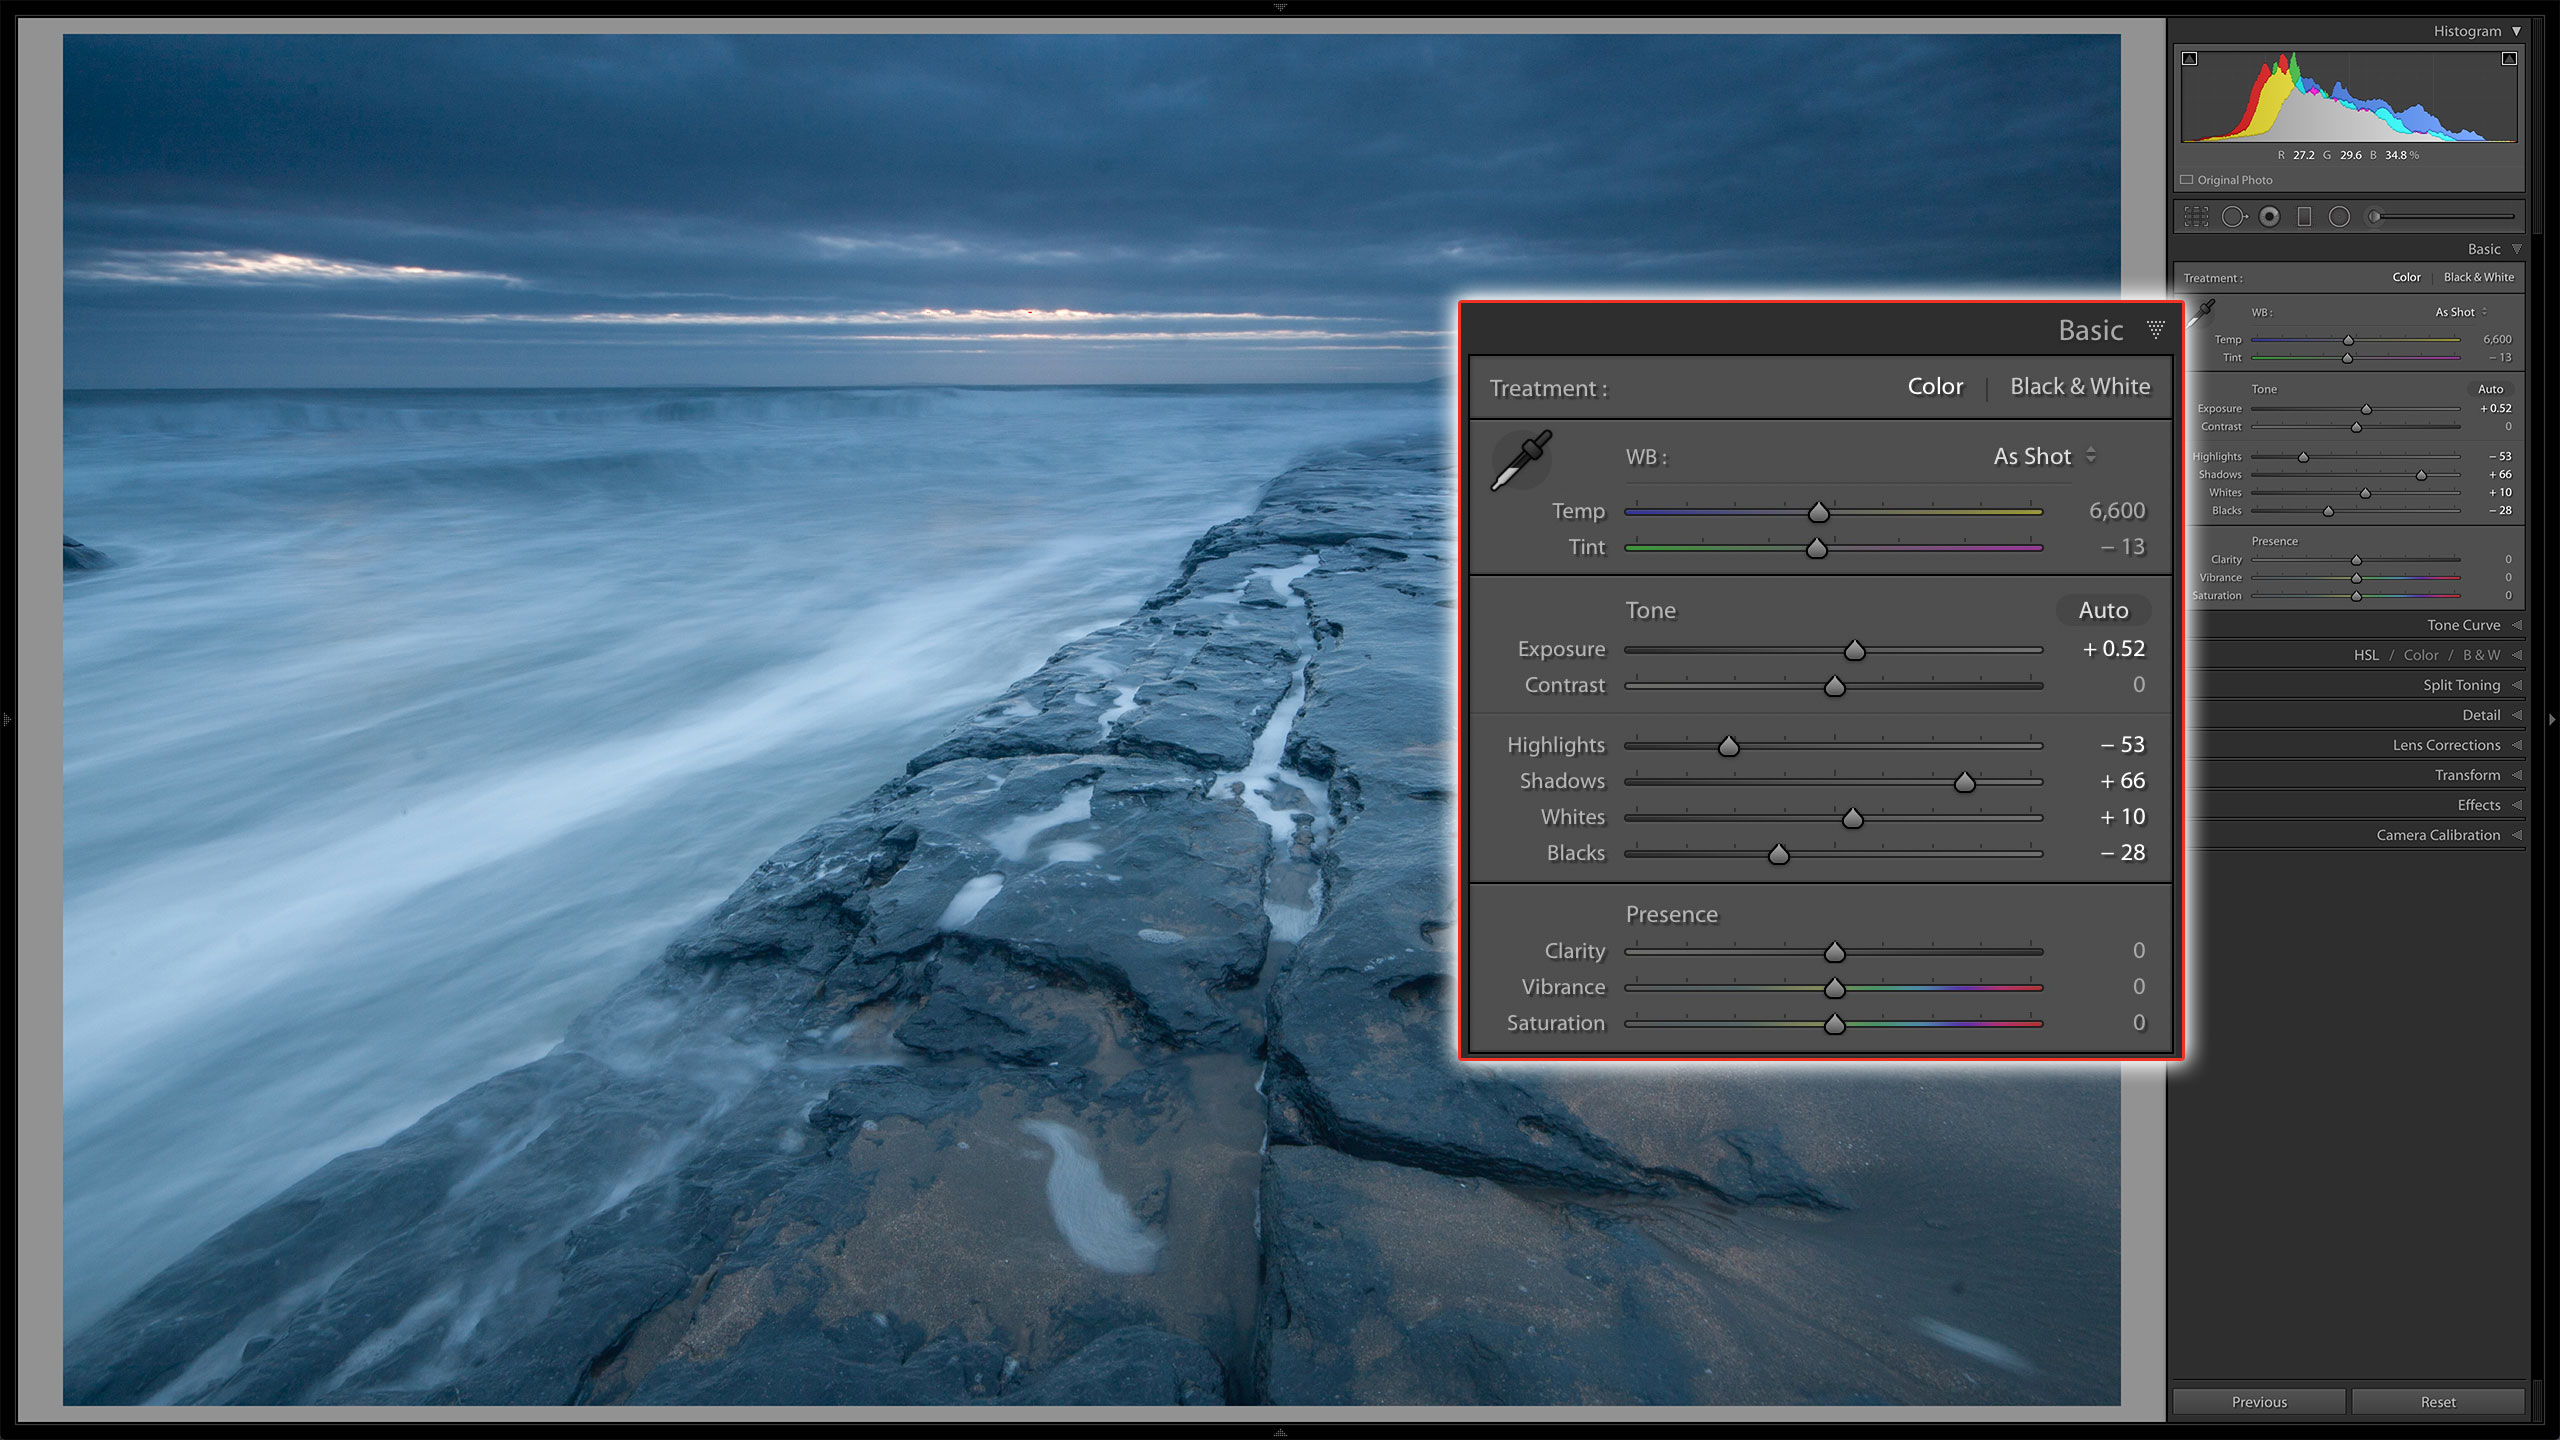
To get the best possible dynamic range, the Auto function in the Basic panel (introduced in Lightroom Classic 7.1) is a great start: it uses Adobe’s Sensei technology to compare the photos with a huge database of image edits.
3. Crop the image
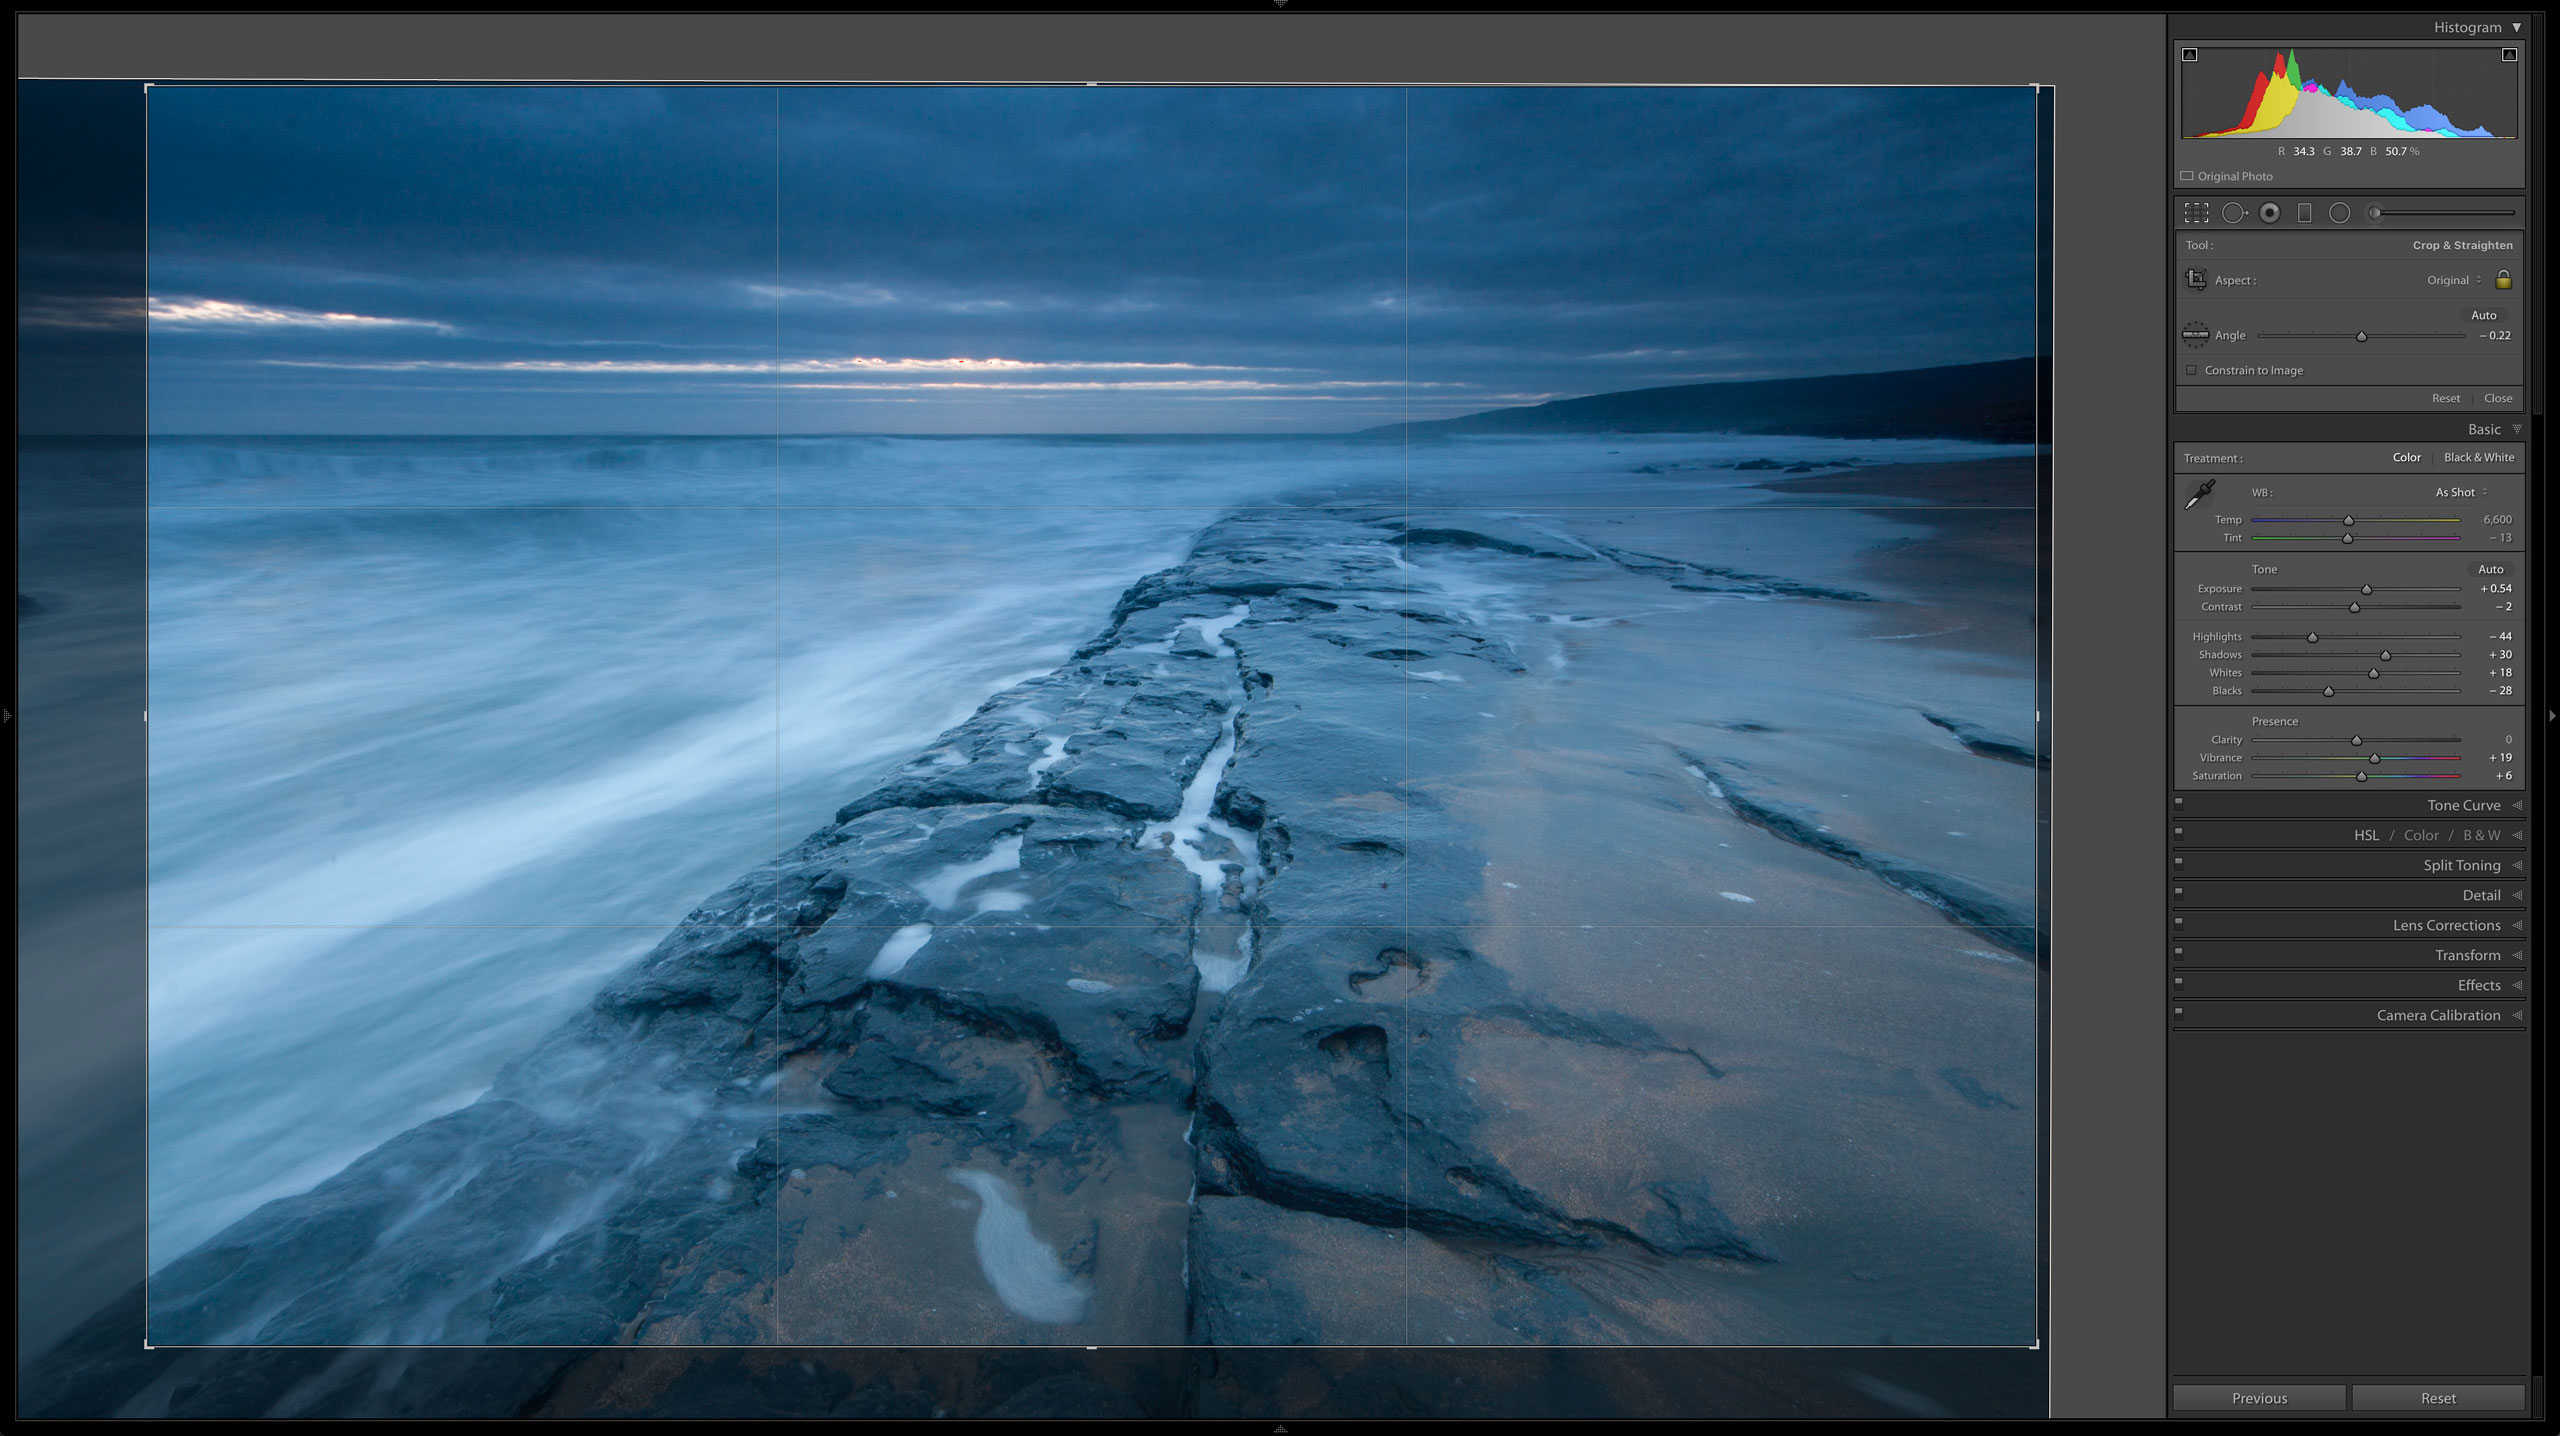
The rock on the left in this picture is a distracting element. Rather than try to eliminate it, I used the Crop tool to zoom into the photo a little and create a more pleasing composition.
4. Spot Removal Tool
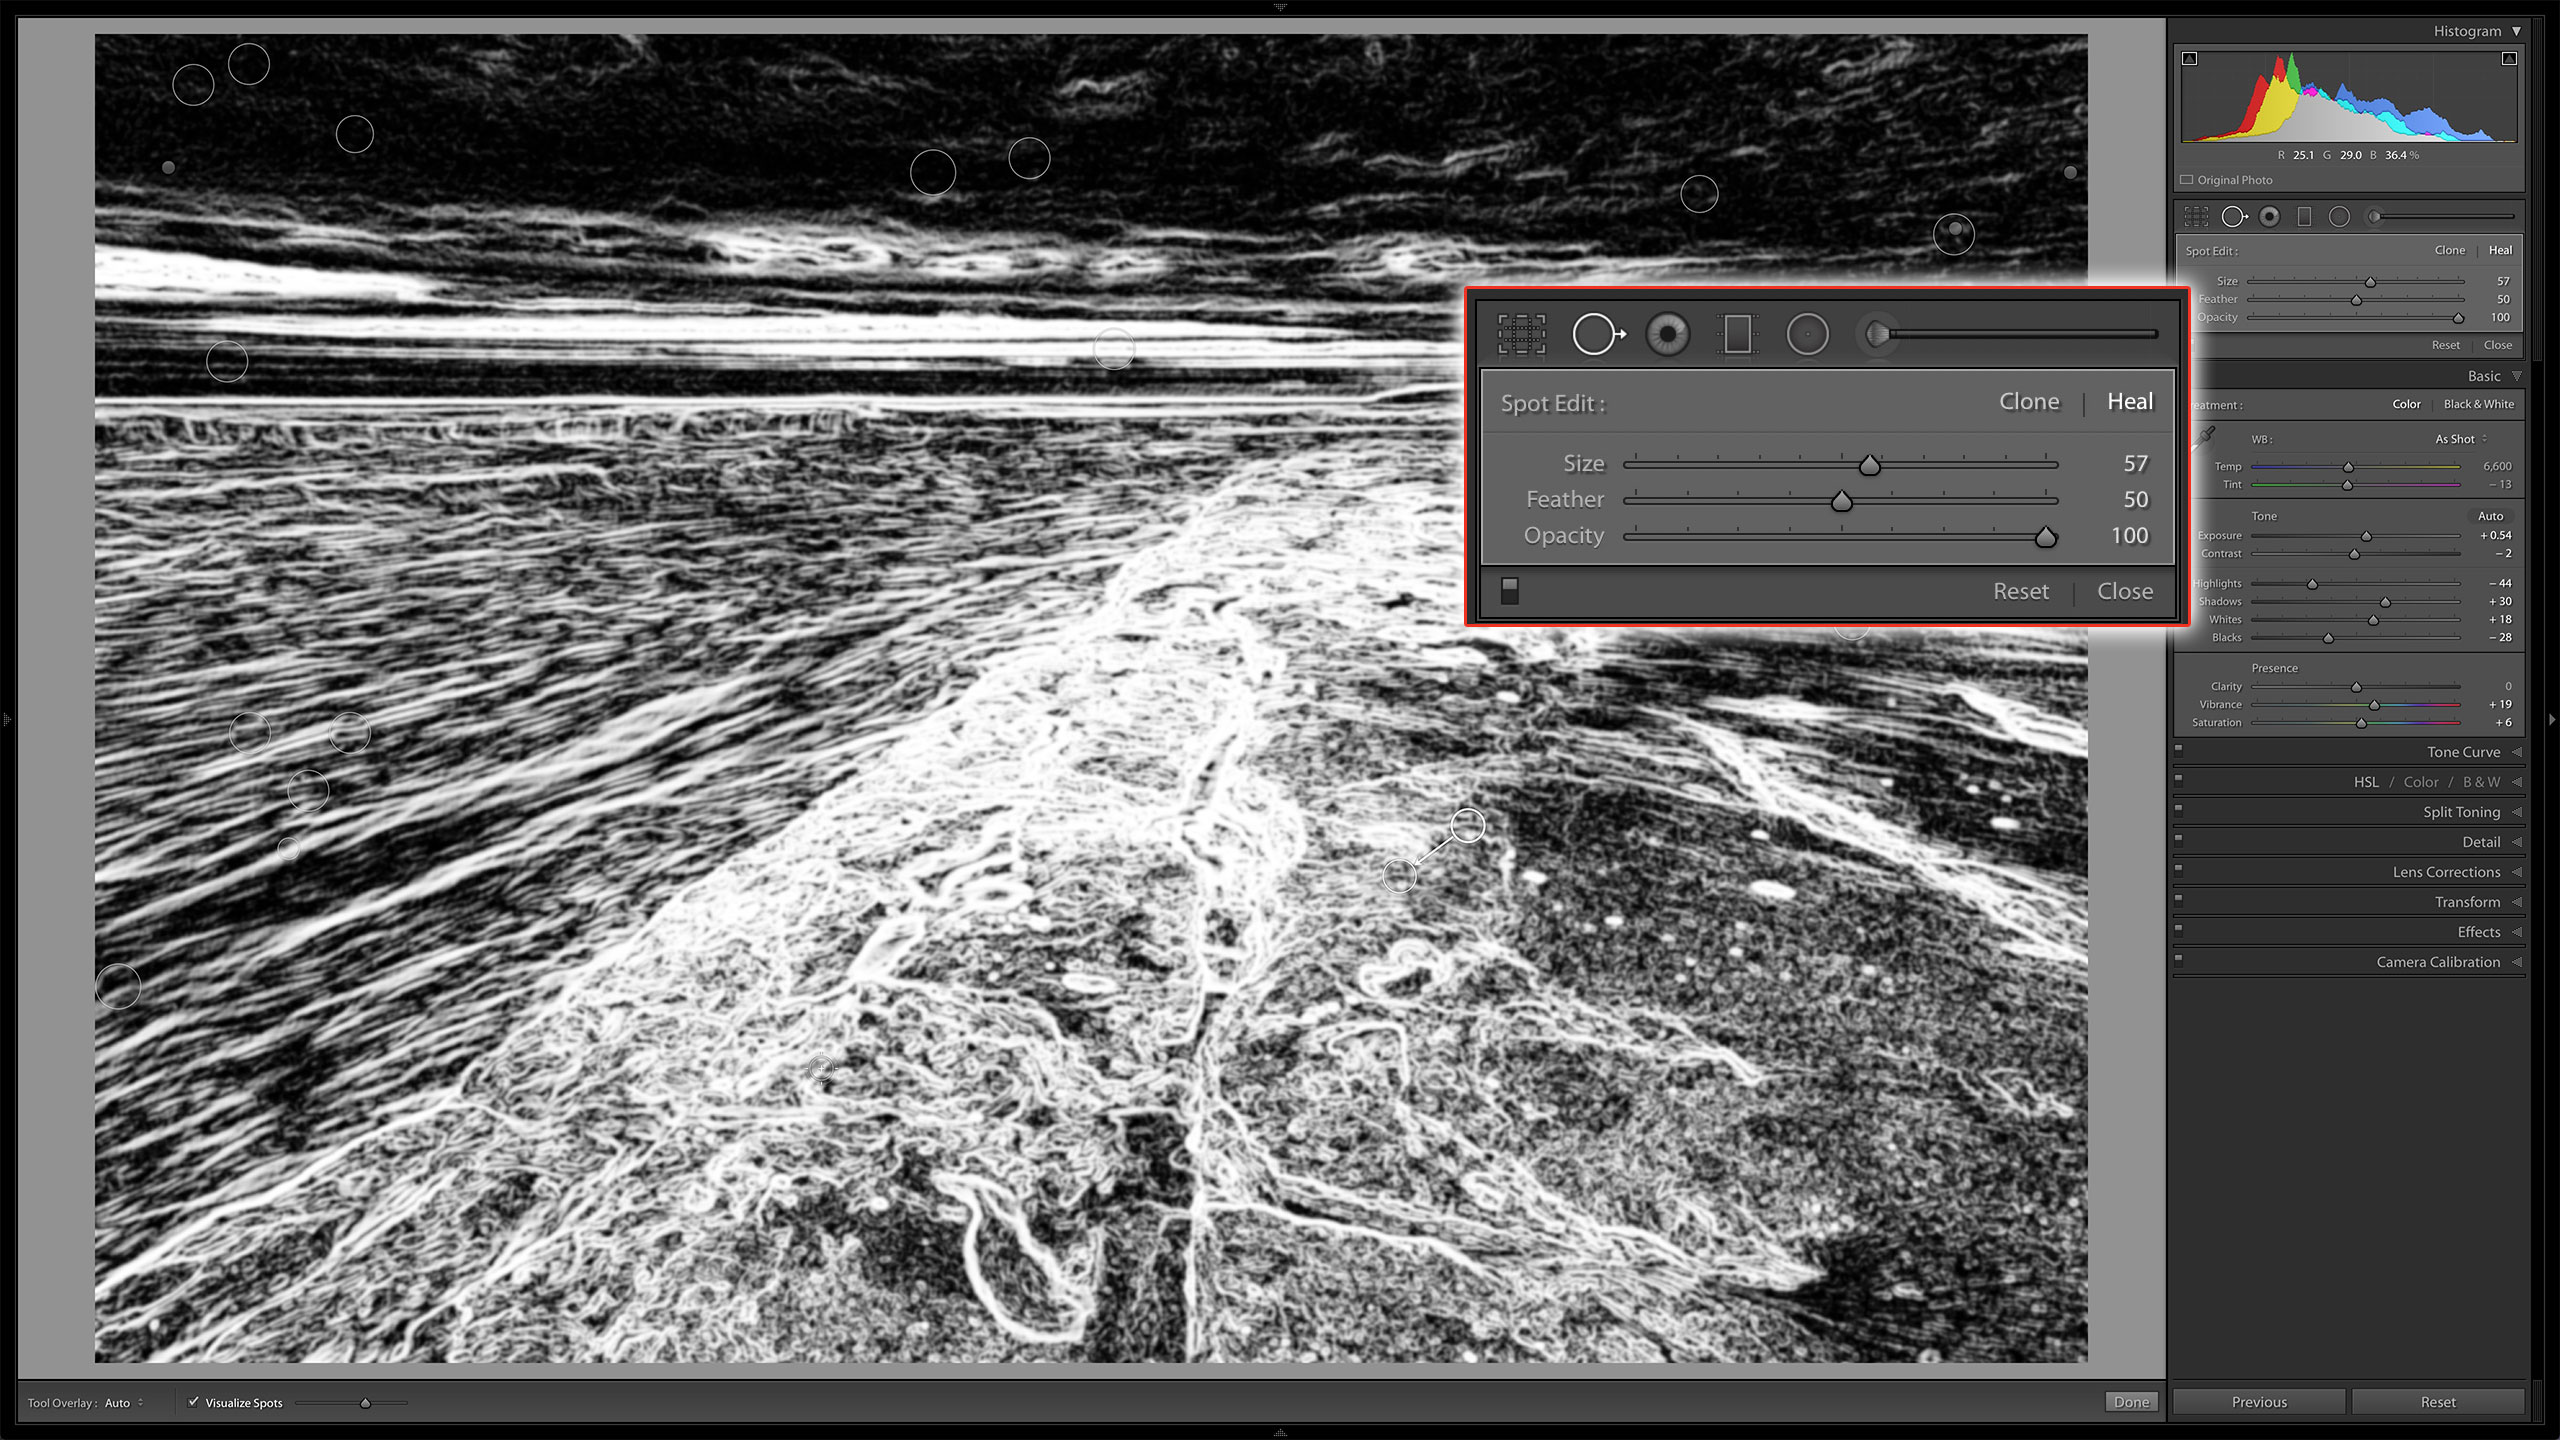
Press Q for the Spot Removal tool. Press A to engage Visual Spots for difficult-to-see spots. Zoom in and use Page Up and Page Down to navigate through the photo. Use the slider in the toolbar to change the intensity of the spots. Click on a spot to remove it.
5. Black and white
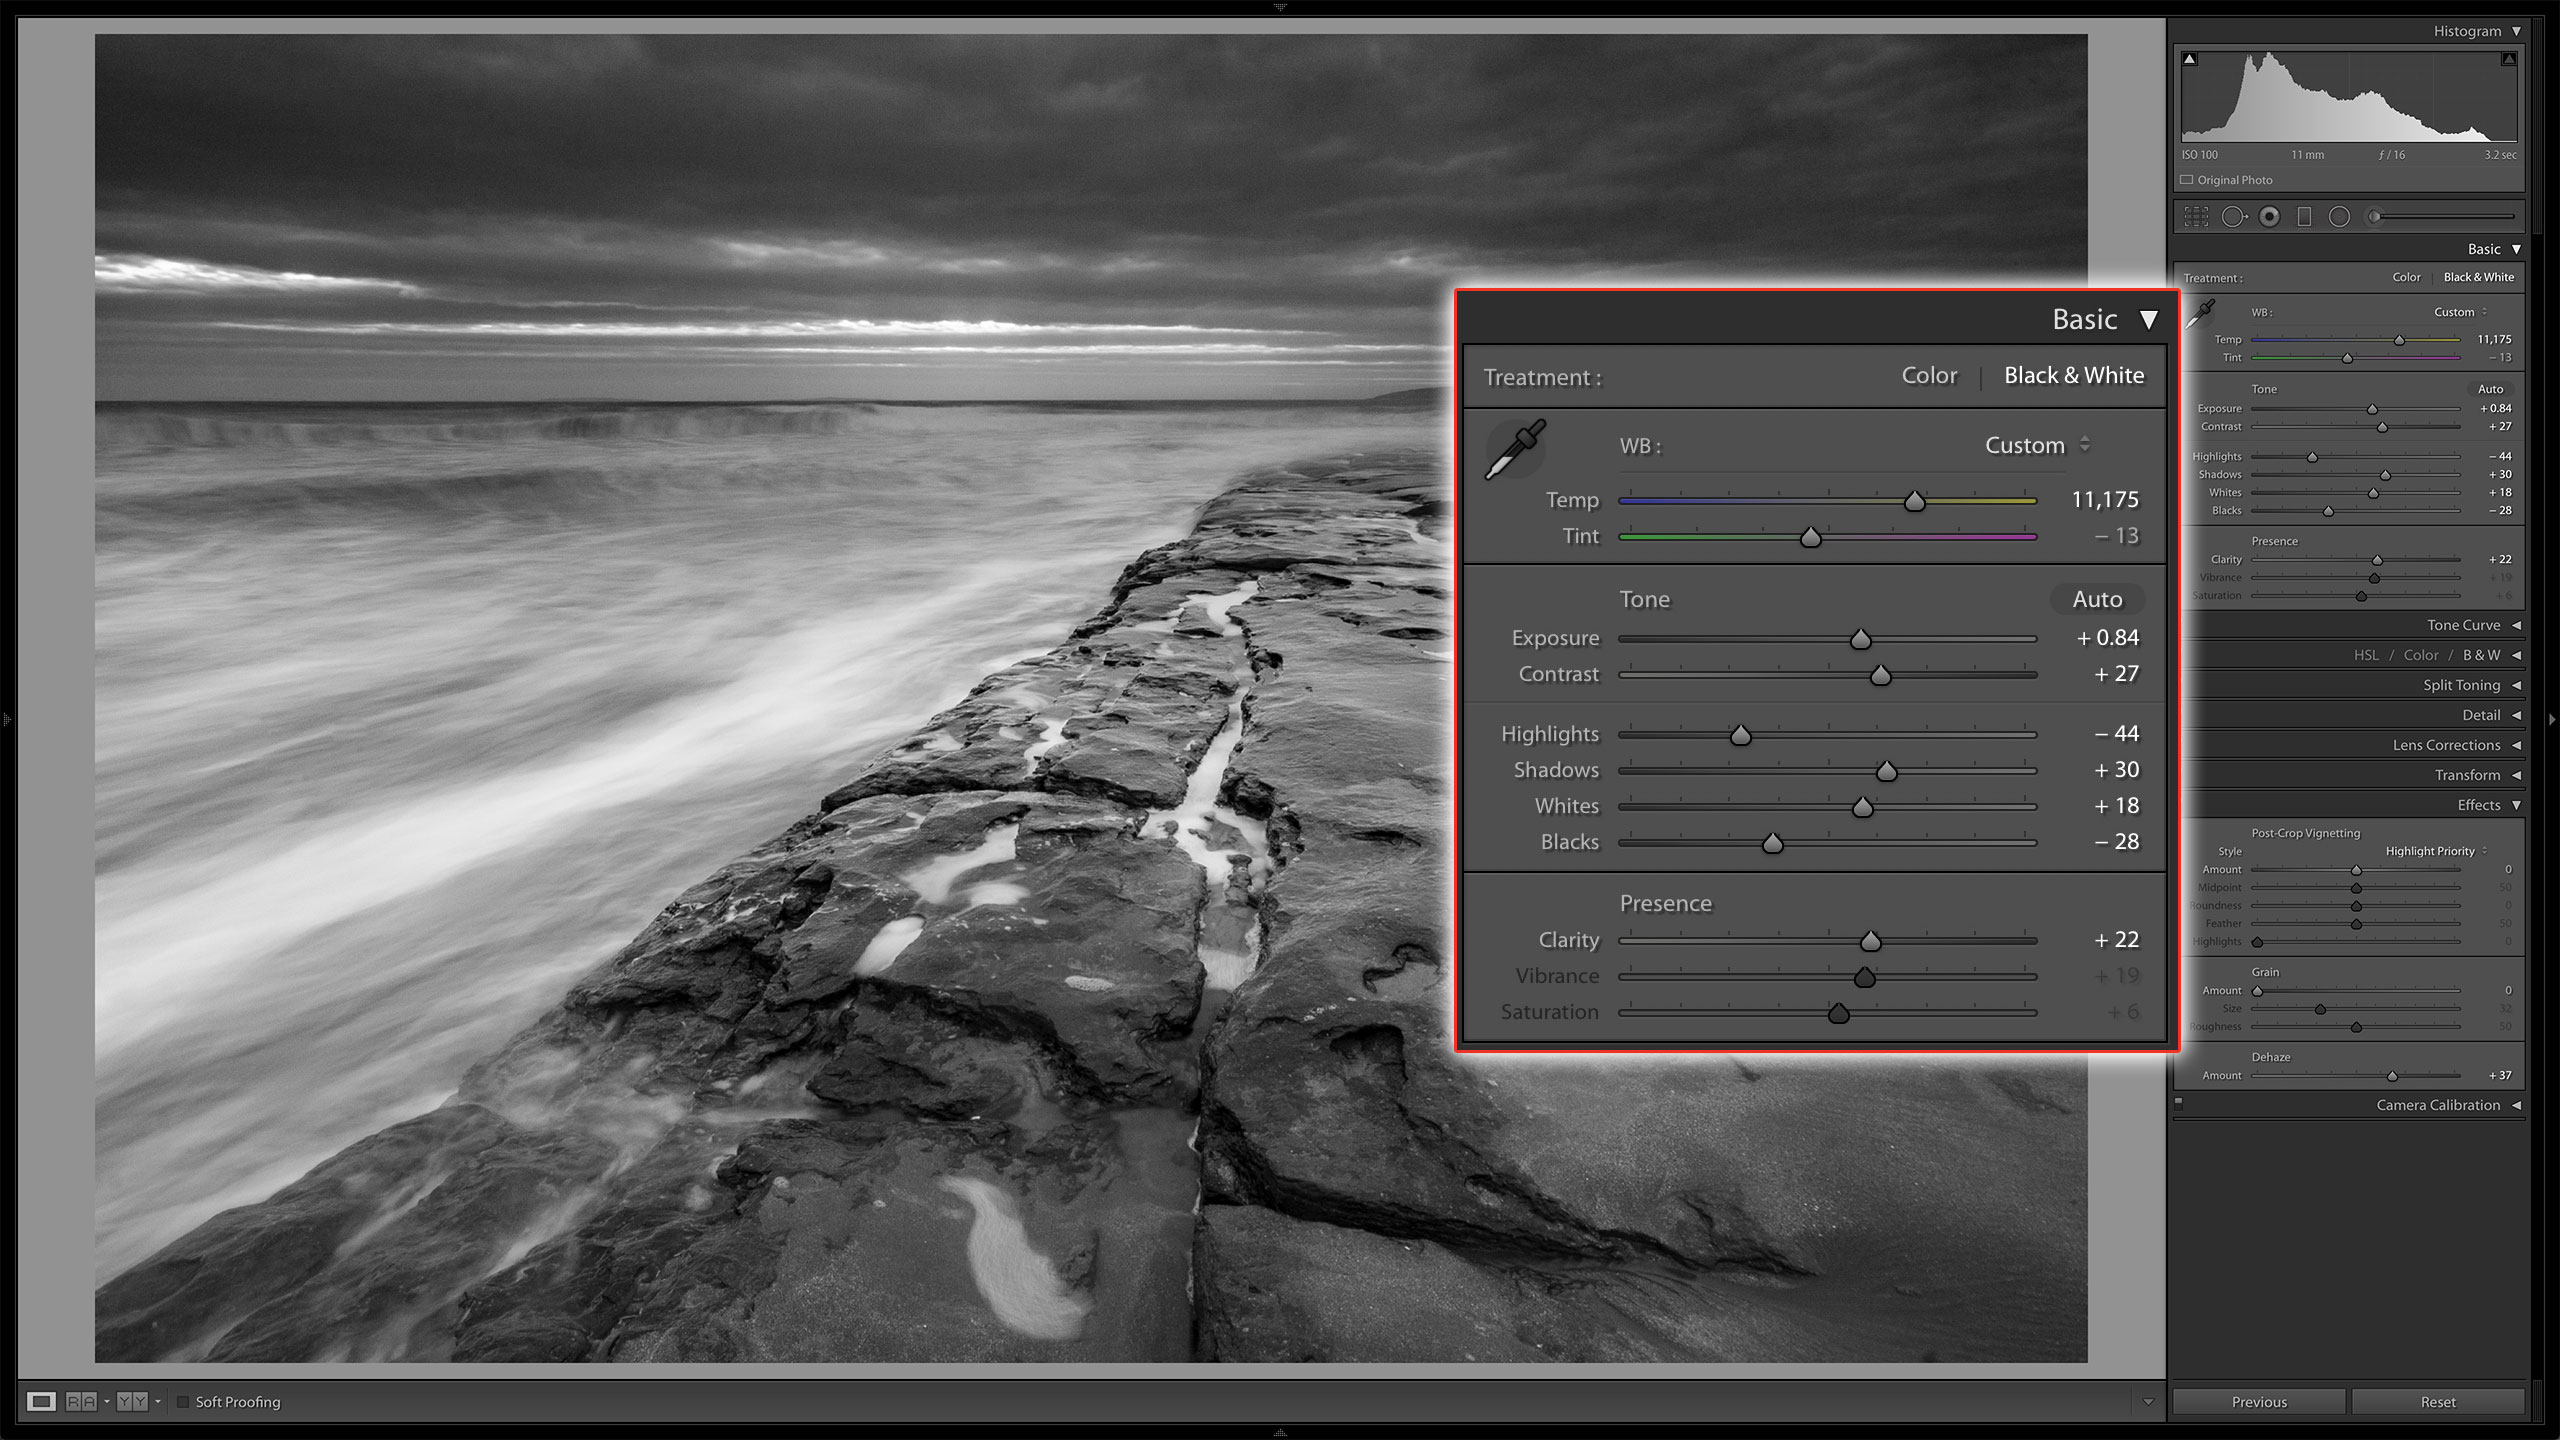
Click B&W in the HSL panel. To reset the sliders, Double-click on Black & White Mix. In the Effects panel, set Dehaze to taste; I used +37 here. This also darkens the image: boosting Exposure by a third of a stop helps. To add impact, increase Contrast and Clarity; I used +27 and +22 respectively. Tweaking White Balance can also change the effect.
6. Final details
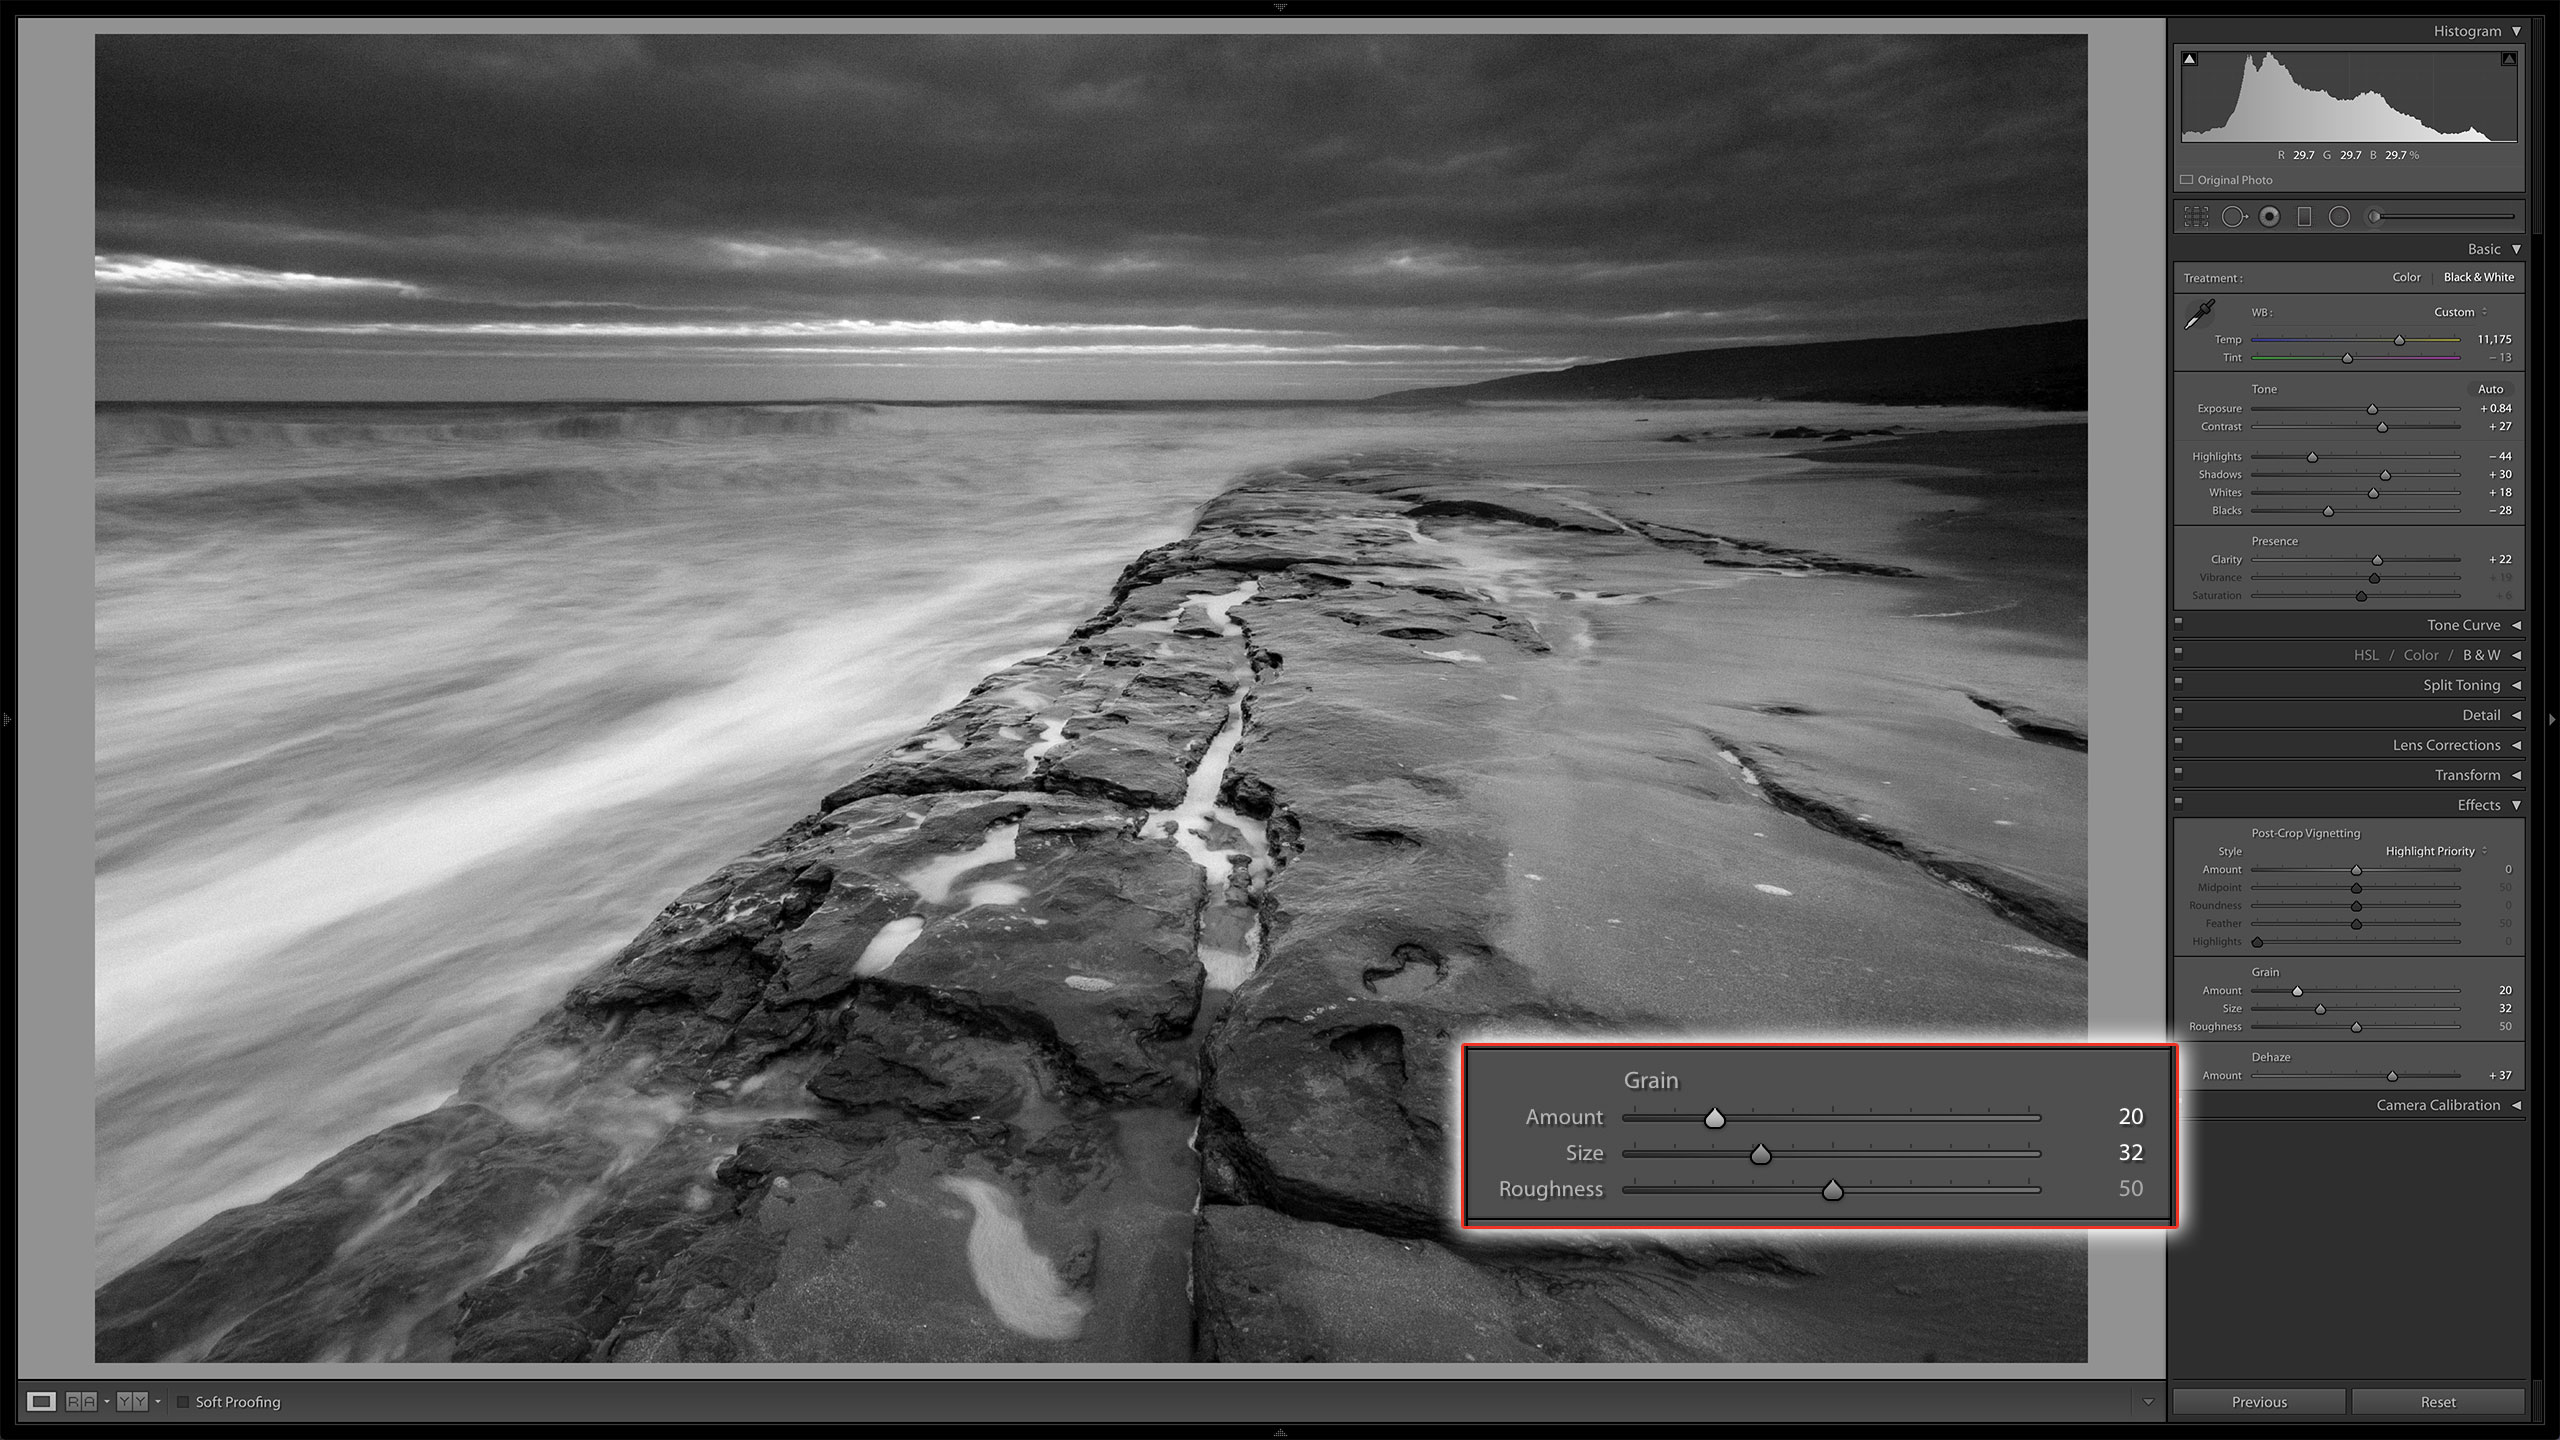
As an atmospheric finishing touch, add some Grain via the Effects panel. +20 looks great here, with a little bump to the Size from 25 to 32. And voilà: you’ve got a beautiful black- and-white landscape.
Expert tip: Preview the effect in-camera
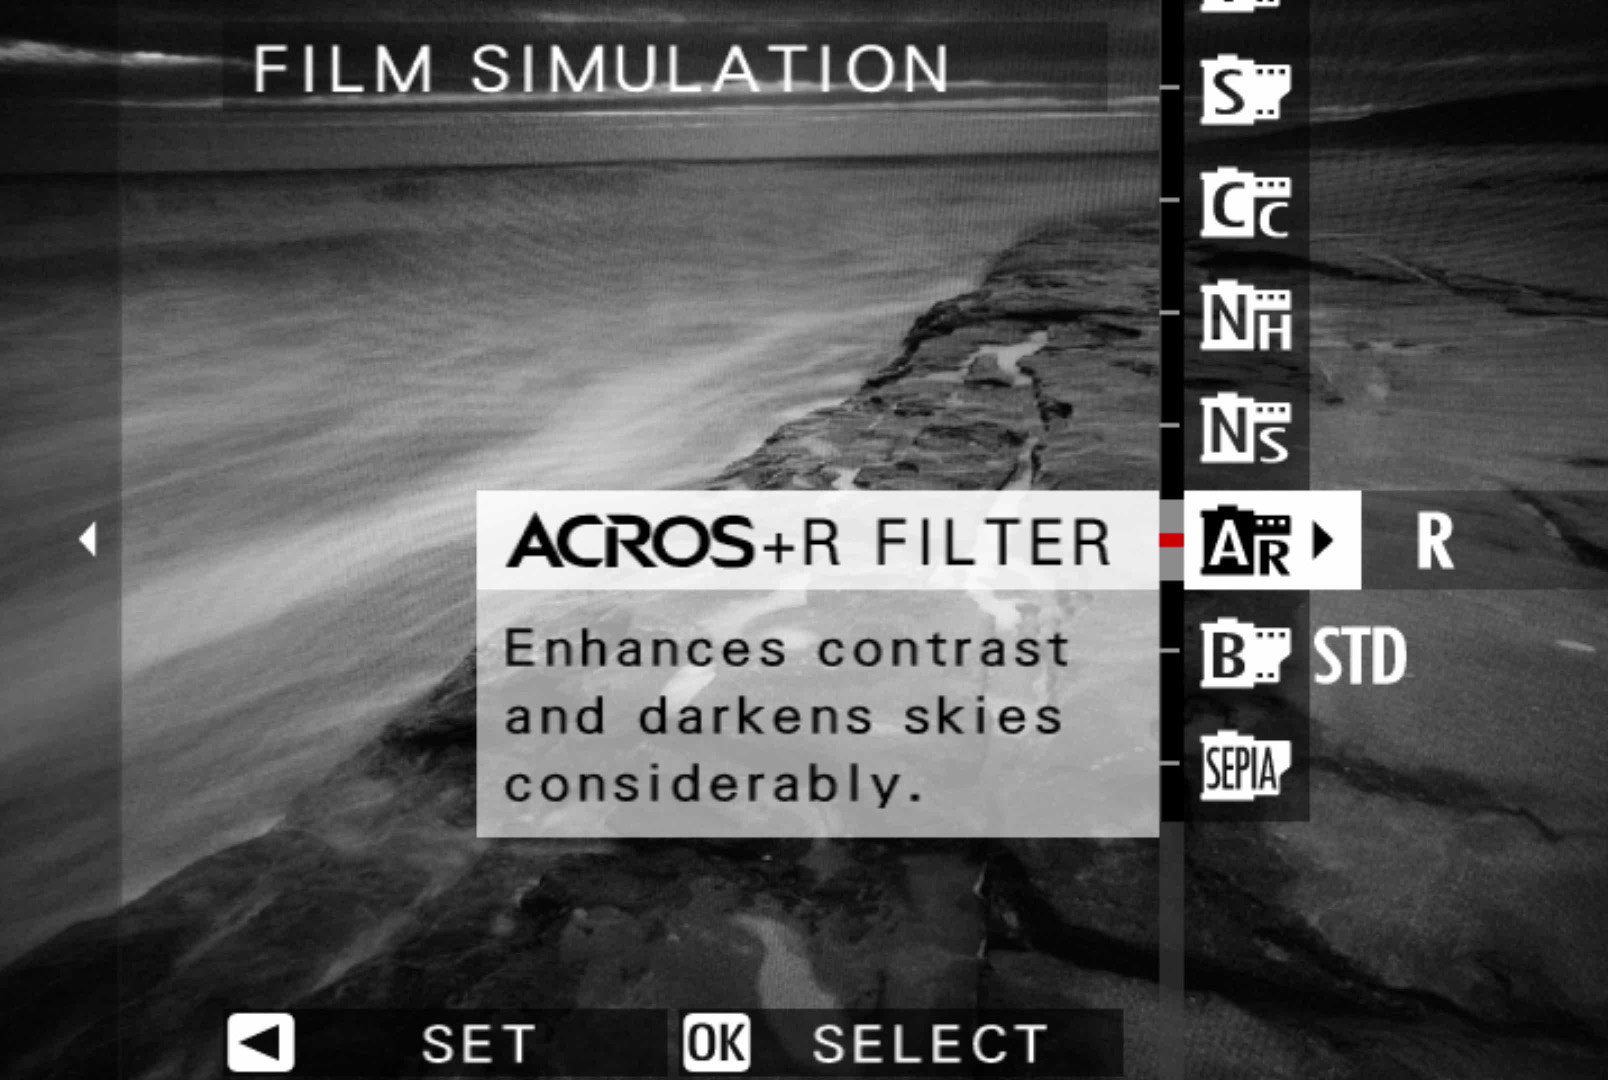
Most cameras offer some way of previewing black-and-white photos in-camera. These renderings are applied to the JPEGs created in-camera, but any raw file you shoot always retains the colour information. With Canon, it’s Picture Styles; with Fujifilm, it’s a Film Emulation like Acros. To help visualise how a scene looks in mono, it can be good to use these while you’re out on location. A side option to go with this is to shoot both raw and JPEG. That way you can have a preview version of a black-and-white photo to get a good starting point for your raw using Lightroom Reference View in the Develop Module.
About Digital Camera magazine
This tutorial originally appeared in Digital Camera Magazine, the monthly newsstand magazine for all photographers. Why not subscribe to a print edition, and have the magazine delivered direct to your door every month?
Alternatively, we have a number of different digital options available, including:
• Apple app (for iPad or iPhone)
• Zinio app (multi-platform app for desktop or smartphone)
• PocketMags (multi-platform app ideal for Android devices)
• Readly (all-you-can-eat digital magazine subscription service)
If you wanted a printed version of any of our most recent issues we have a selection of back issues to choose from in our online store.
How to get Adobe Lightroom
Adobe Lightroom is available in two versions: the regular Adobe Lightroom Classic CC designed for desktop users, which is what we cover in this series, and a new cloud-based Adobe Lightroom CC, which stores your files online and offers a similar but reduced set of features. For regular desktop users we recommend Adobe Lightroom Classic CC.
Adobe offers three subscription based Photography Plans which you can click on below. We recommend either the regular Photography Plan, or the Photography Plan (1TB) which costs more but comes with 1TB online storage in case you decide to go with Lightroom CC.
For this set of tutorials and for anyone who likes to work on a single main computer, we recommend the regular Creative Cloud Photography Plan. This is the cheapest way to get started AND it comes with Photoshop CC too.
Read more:
• This is the best photo-editing software today
• These are the best laptops for photographers right now
• We help you choose the best desktop computers for photo editing
Get the Digital Camera World Newsletter
The best camera deals, reviews, product advice, and unmissable photography news, direct to your inbox!
Sean McCormack is a commercial, and editorial photographer, book author, and regular contributor to Digital Camera magazine based in Galway, Ireland. He has extensive experience with Lightroom, dating back to its original beta version, and has tried out just about every plugin and preset available. His latest book is Essential Development 3: 25 Tips for Lightroom Classic’s Develop Module.

