Lightroom series part 3: Noise reduction sliders in Lightroom and what they do
Discover how Lightroom can help you reduce the artifacts that camera image sensors sometimes add to your shots
Welcome to the third instalment of our 32-part series on Adobe Lightroom Classic. This series first ran in Digital Camera magazine (see how to subscribe below) and we're republishing it with a fresh instalment every day to help keep those coronavirus blues away for all of us in isolation right now.
If you are already a Lightroom user, you could discover some new tricks and processes you haven't tried yet. If you don't use Lightroom, then scroll down to the bottom where you'll discover how to get it and which Adobe Photography Plan is best.
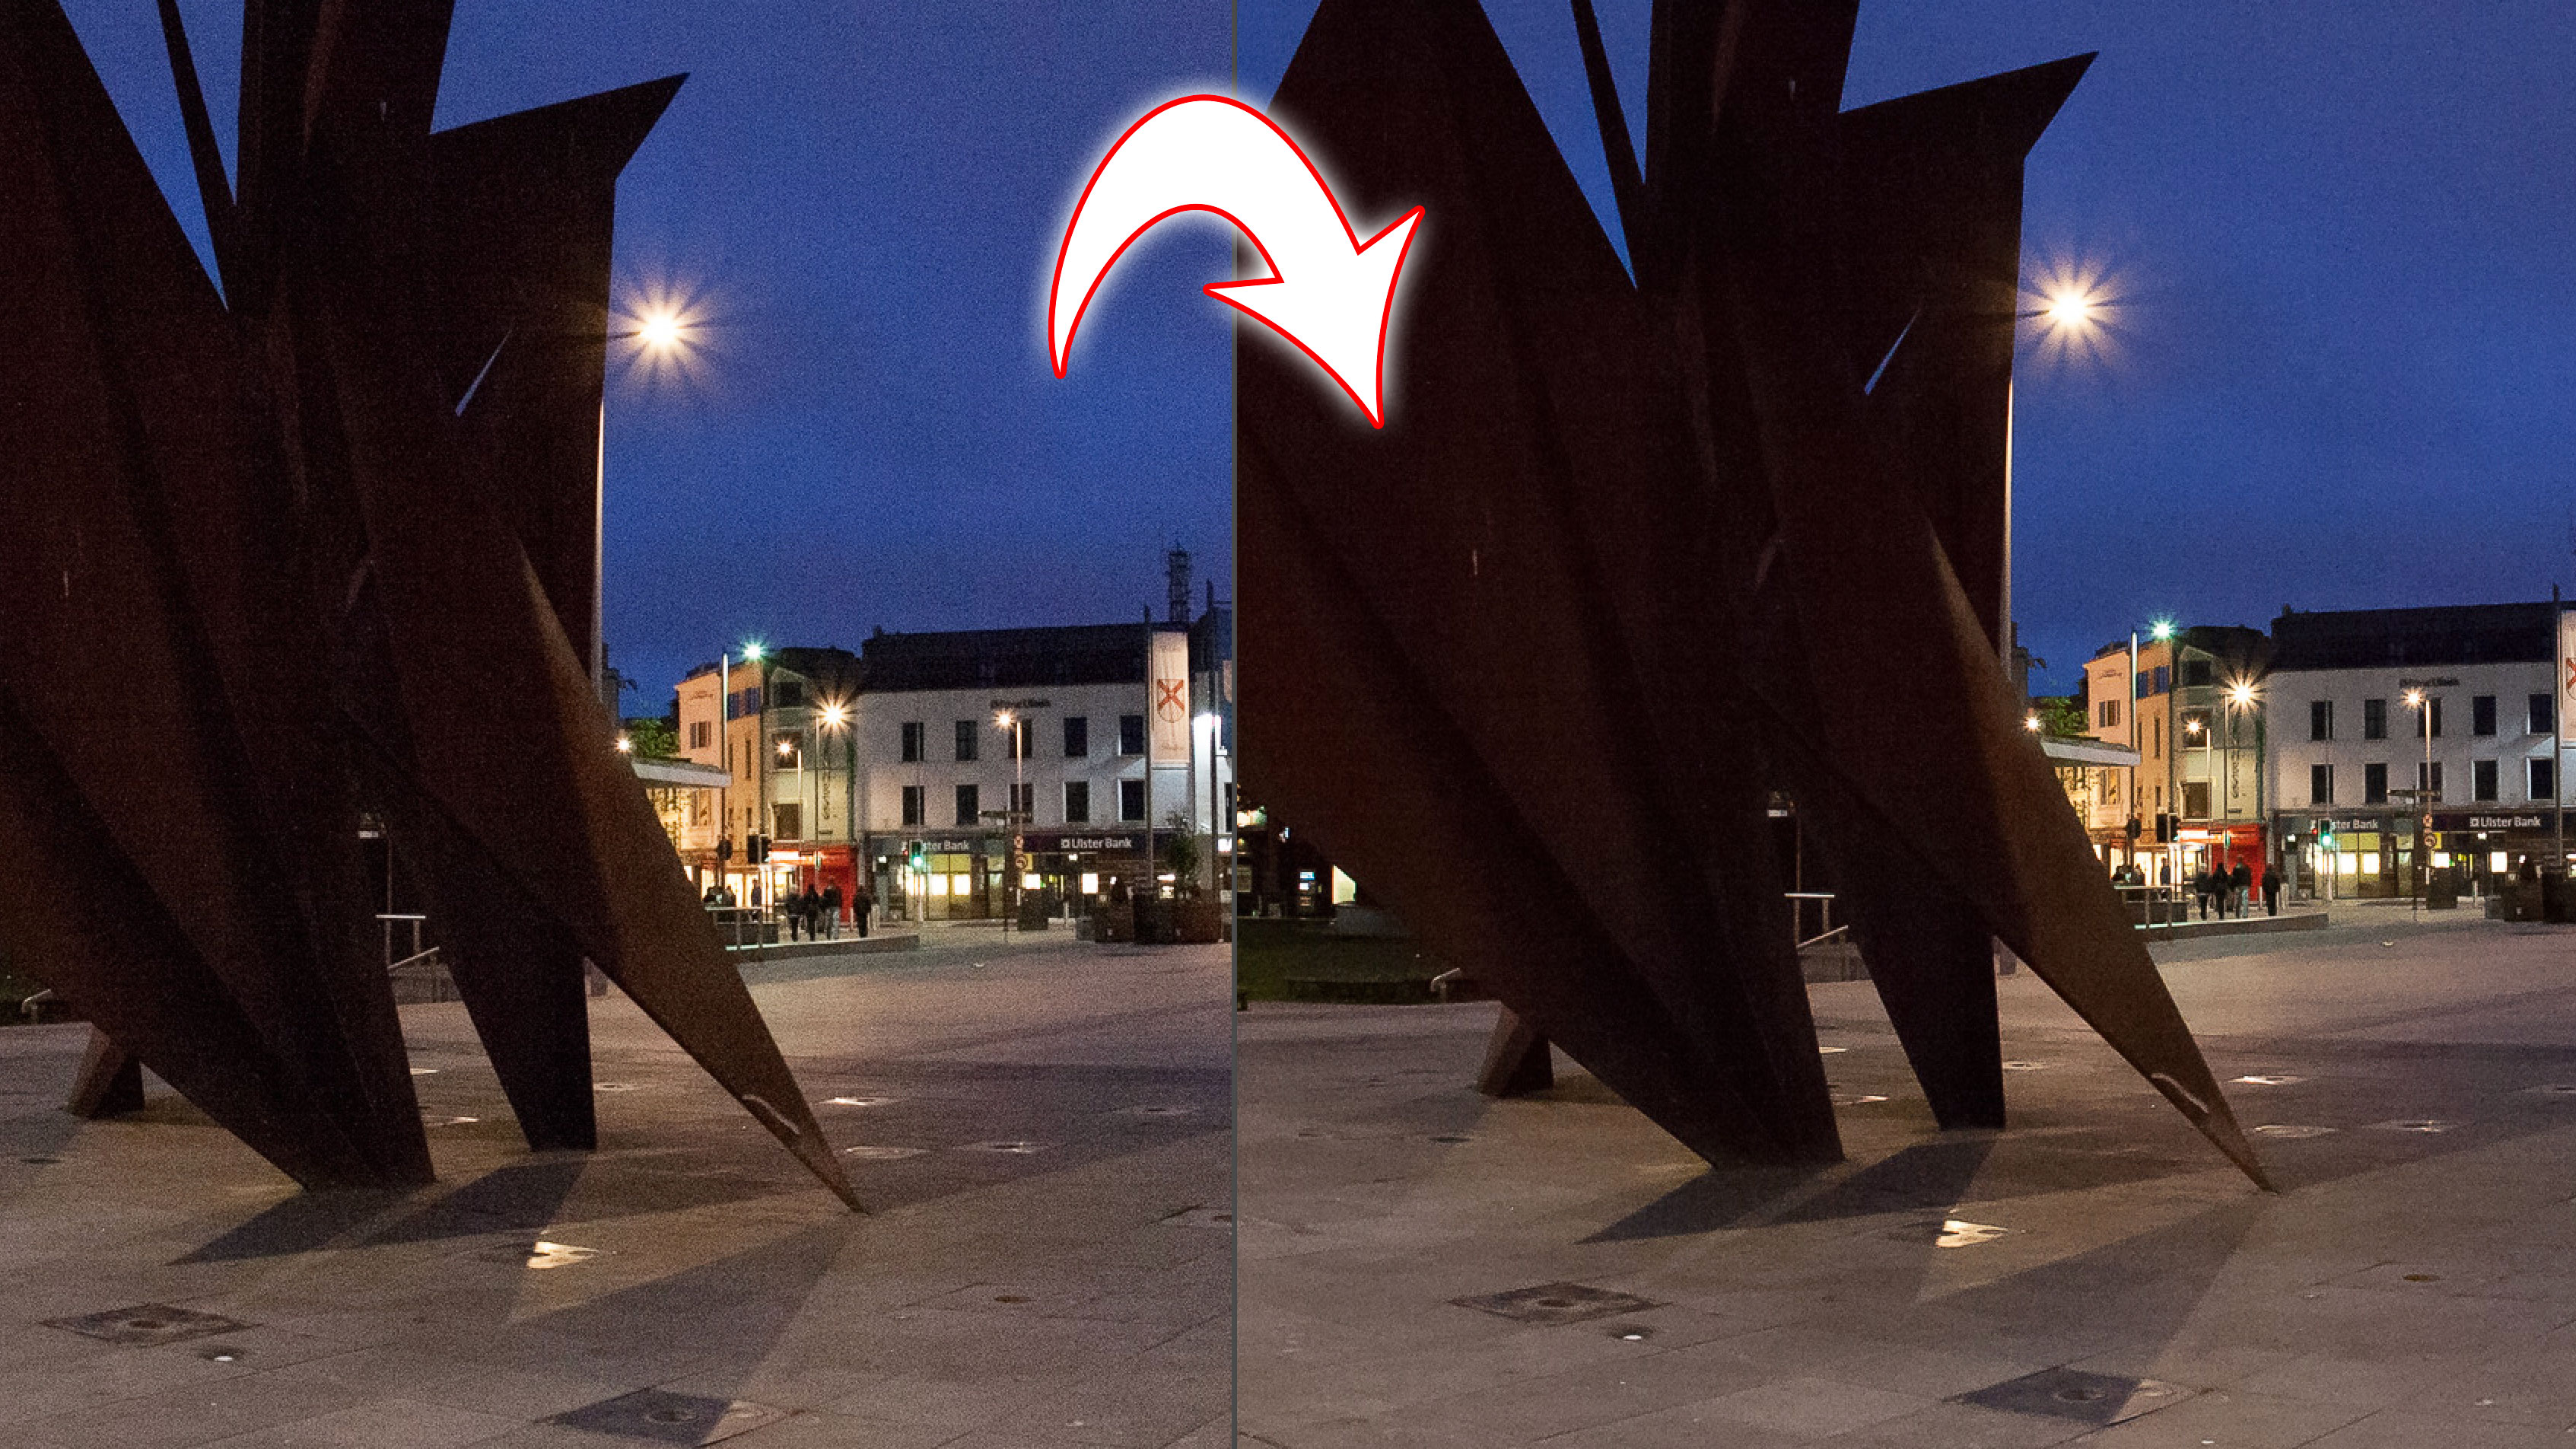
This time we take a look at the age-old problem of noise in digital images shot at high ISO settings. Cameras are getting better all the time, especially at high ISOs, so it’s a wonder we need to talk about noise reduction. But we photographers tend to push our gear to the limit to catch moments that otherwise would be missed, so ISO noise is always going to be an issue. After all, digital noise caused by high ISO settings that get a sharp image will always be preferable to a blurred photo caused by too low a shutter speed.
There are two main types of noise: color and luminance noise. Color noise shows as random pixels in uniform colour areas, whereas luminance noise is changes in brightness in what were uniform areas of tone. It’s the main cause of the grainy look in a photo, but Lightroom enables you to fix these issues separately. Always zoom in to 100% to see the changes.
• See more Lightroom tutorials
Luminance
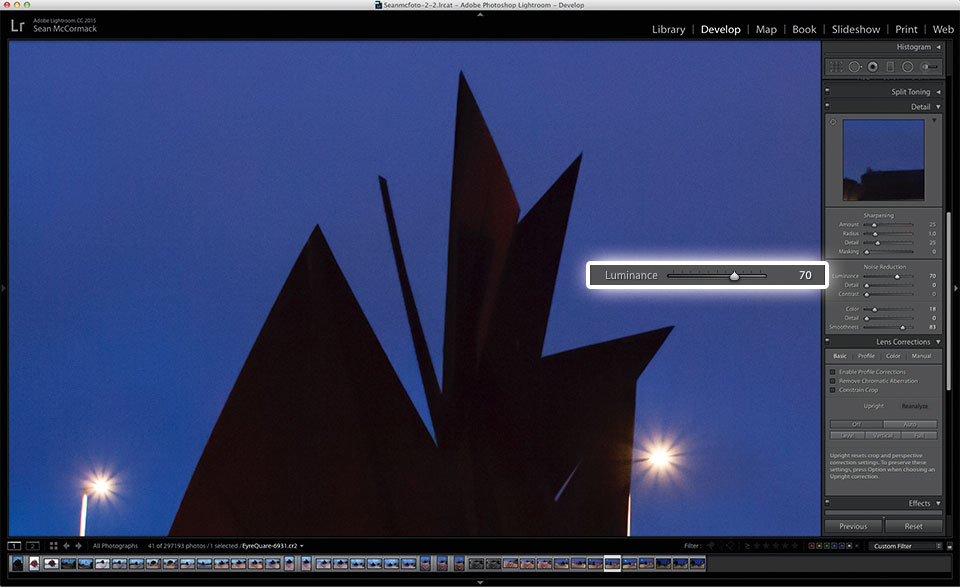
The Luminance slider controls the blurring of the photo to remove grain. It’s 0 by default, which greys out the other controls. As well as removing grain, it also blurs edges in the image.
Luminance Detail
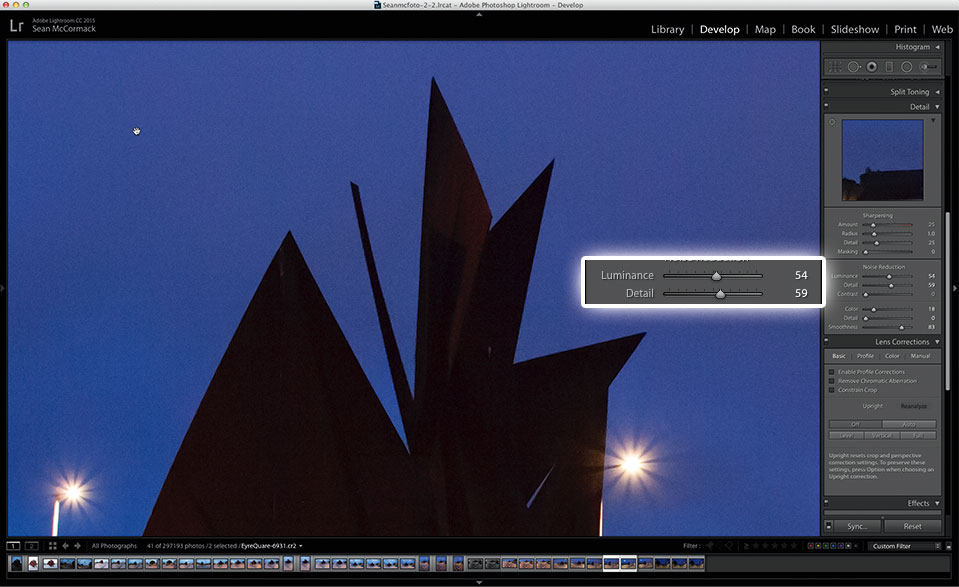
This acts as a threshold slider, meaning that as you go to the right, more detail remains in the image, with less noise reduction applied. To the left, the image is cleaner. It helps keep edges intact.
Luminance Contrast
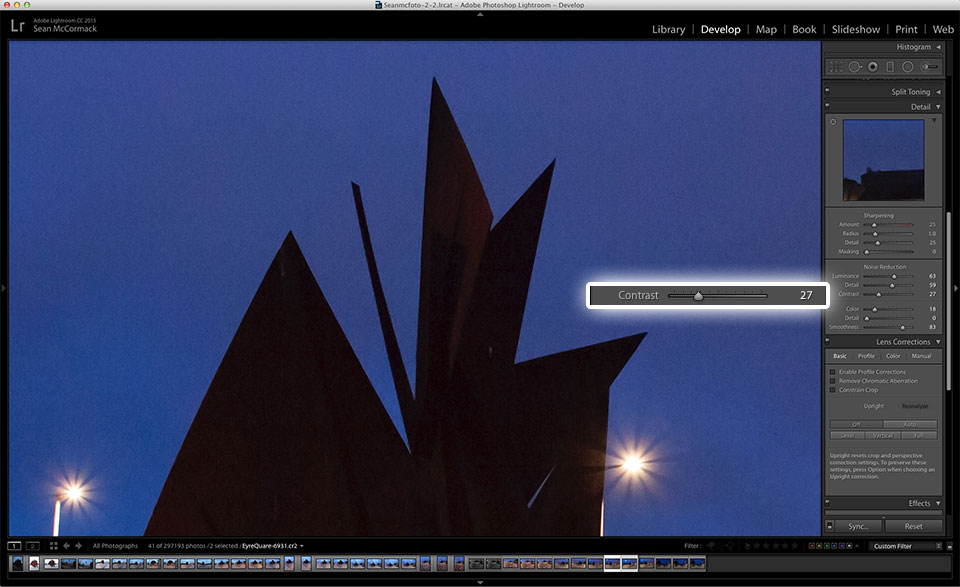
The Luminance Contrast slider helps to restore some of the contrast that blurring removes.
Color noise reduction
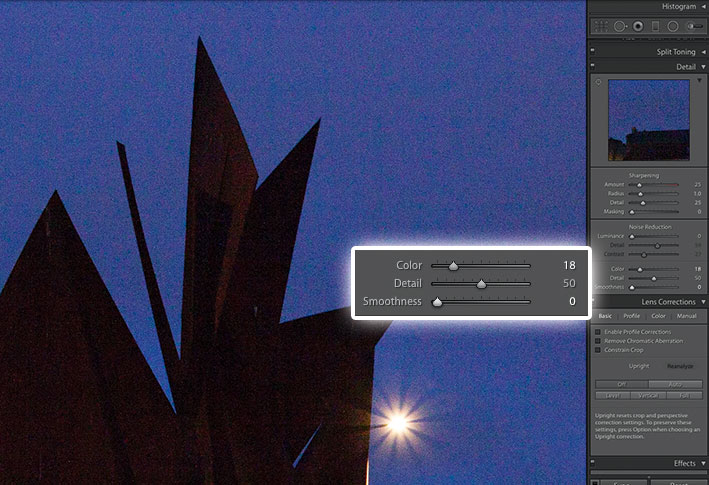
By default, the Color slider is set to 25, which is enough to remove color noise in most images. To see the color noise, reduce to 0. To remove, drag the slider to the right. You usually won’t need to go above 25 to get the effect you need.
The Color Detail slider adjusts the color threshold and protects against smearing on colorful edges. The default is 50. Reducing it can bring back colour noise.
Color Smoothness evens out large areas of colour and has a default of 50, which works well. To see what it does, we can put it at 0, and then slide right until the colour is even. Notice the purple mixed into the blue sky at 0.
Expert tip: Add sharpening to recover edges
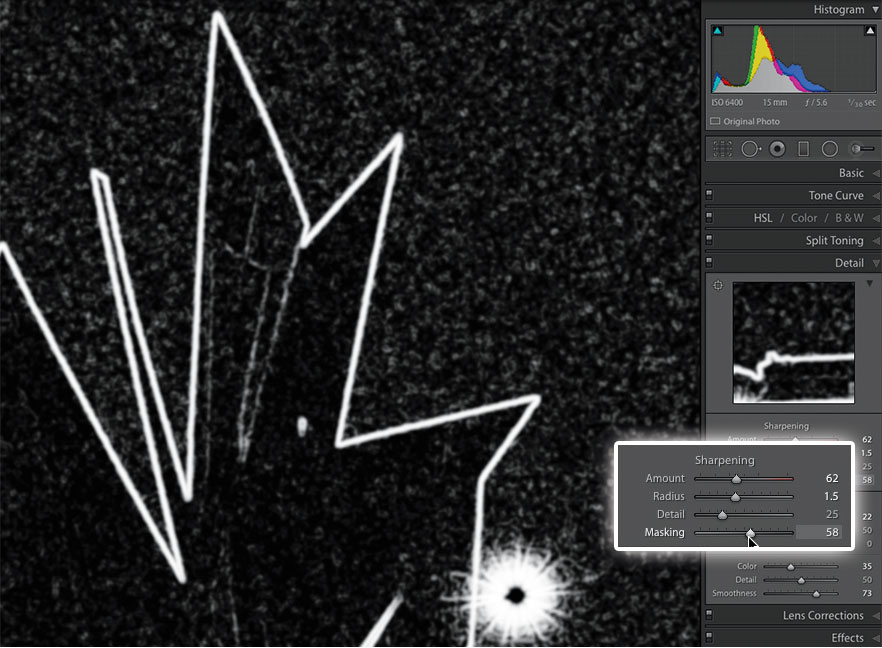
Applying noise reduction essentially blurs the image, so it’s necessary to sharpen the image afterwards to make up for some of the loss of detail. The key ingredients in this are the Amount and Masking sliders.
Masking controls which areas are sharpened, so you need to set this to sharpen only the edges in the photo. Hold down the Alt key as you slide to get a black-and-white preview of these areas. Anywhere that appears as white will be sharpened; black areas will all remain unsharpened.
This prevents areas of continuous tone being sharpened, which would cause noise to re-appear. Set the strength of this sharpening using the Amount slider.
About Digital Camera magazine
This tutorial originally appeared in Digital Camera Magazine, the monthly newsstand magazine for all photographers. Why not subscribe to a print edition, and have the magazine delivered direct to your door every month?
Alternatively, we have a number of different digital options available, including:
• Apple app (for iPad or iPhone)
• Zinio app (multi-platform app for desktop or smartphone)
• PocketMags (multi-platform app ideal for Android devices)
• Readly (all-you-can-eat digital magazine subscription service)
If you wanted a printed version of any of our most recent issues we have a selection of back issues to choose from in our online store.
How to get Adobe Lightroom
Adobe Lightroom is available in two versions: the regular Adobe Lightroom Classic CC designed for desktop users, which is what we cover in this series, and a new cloud-based Adobe Lightroom CC, which stores your files online and offers a similar but reduced set of features. For regular desktop users we recommend Adobe Lightroom Classic CC.
Adobe offers three subscription based Photography Plans which you can click on below. We recommend either the regular Photography Plan, or the Photography Plan (1TB) which costs more but comes with 1TB online storage in case you decide to go with Lightroom CC.
For this set of tutorials and for anyone who likes to work on a single main computer, we recommend the regular Creative Cloud Photography Plan. This is the cheapest way to get started AND it comes with Photoshop CC too.
Read more:
• This is the best photo-editing software today
• These are the best laptops for photographers right now
• We help you choose the best desktop computers for photo editing
Get the Digital Camera World Newsletter
The best camera deals, reviews, product advice, and unmissable photography news, direct to your inbox!
Sean McCormack is a commercial, and editorial photographer, book author, and regular contributor to Digital Camera magazine based in Galway, Ireland. He has extensive experience with Lightroom, dating back to its original beta version, and has tried out just about every plugin and preset available. His latest book is Essential Development 3: 25 Tips for Lightroom Classic’s Develop Module.

