Lightroom series part 32: How to develop your own style in Lightroom
Go beyond cleaning up and photo correction as you discover how to add a distinctive look to every shot you take
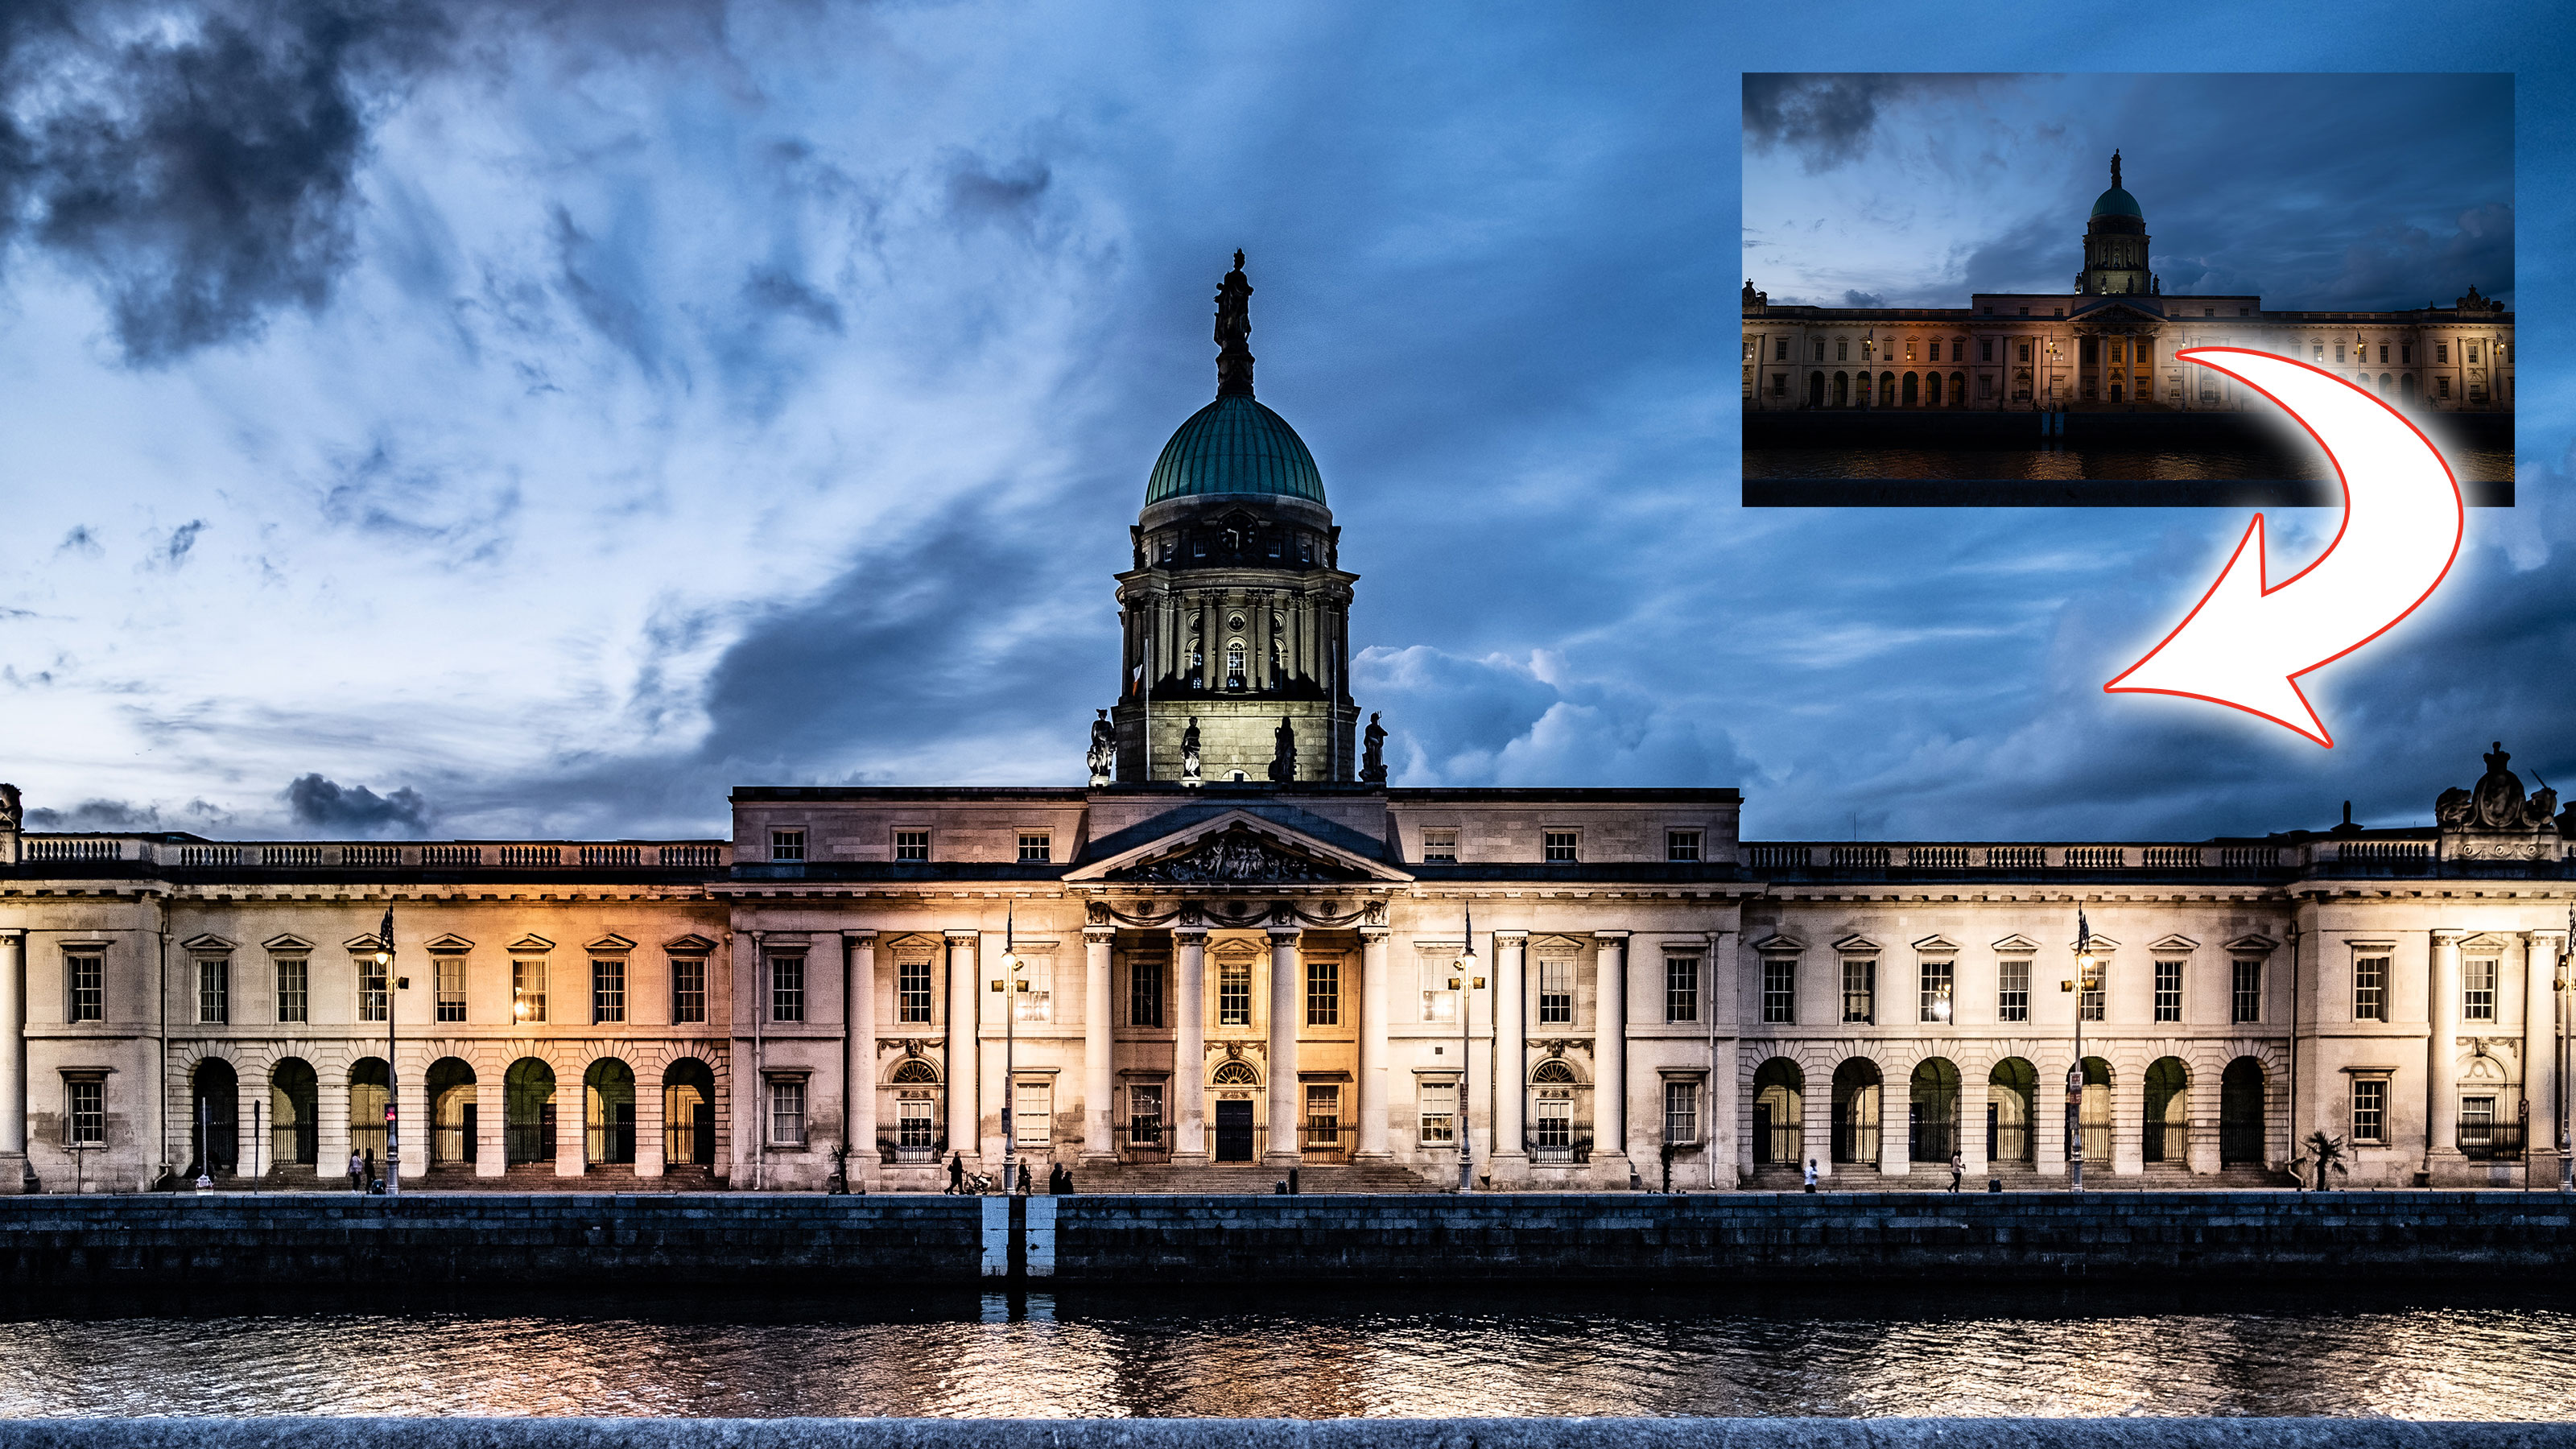
Lightroom isn’t just about doing corrective work to improve the photo you captured. You can also use it to develop your own personal photographic style.
Welcome to the 32nd instalment of our Lightroom series, first published in Digital Camera magazine (see below for subscription offers).
If you are already a Lightroom user, you could discover some new tricks and processes you haven't tried yet. If you don't use Lightroom, then scroll down to the bottom where you'll discover how to get it and which Adobe Photography Plan is best.
Lightroom can be an integral part of your creative process. Artistically speaking, pushing your photo into new spaces makes photography so much fun. You’re not restricted to making things look pretty, you can also add artistic licence.
And here we look at just that in the form of taking a mundane shot of a building and giving it some life – grungy, dirty life – with one or two tricks to help it along the way! We’ll begin with the basic fixes, then get more creative as we go.
• See more Lightroom tutorials
1. The basics
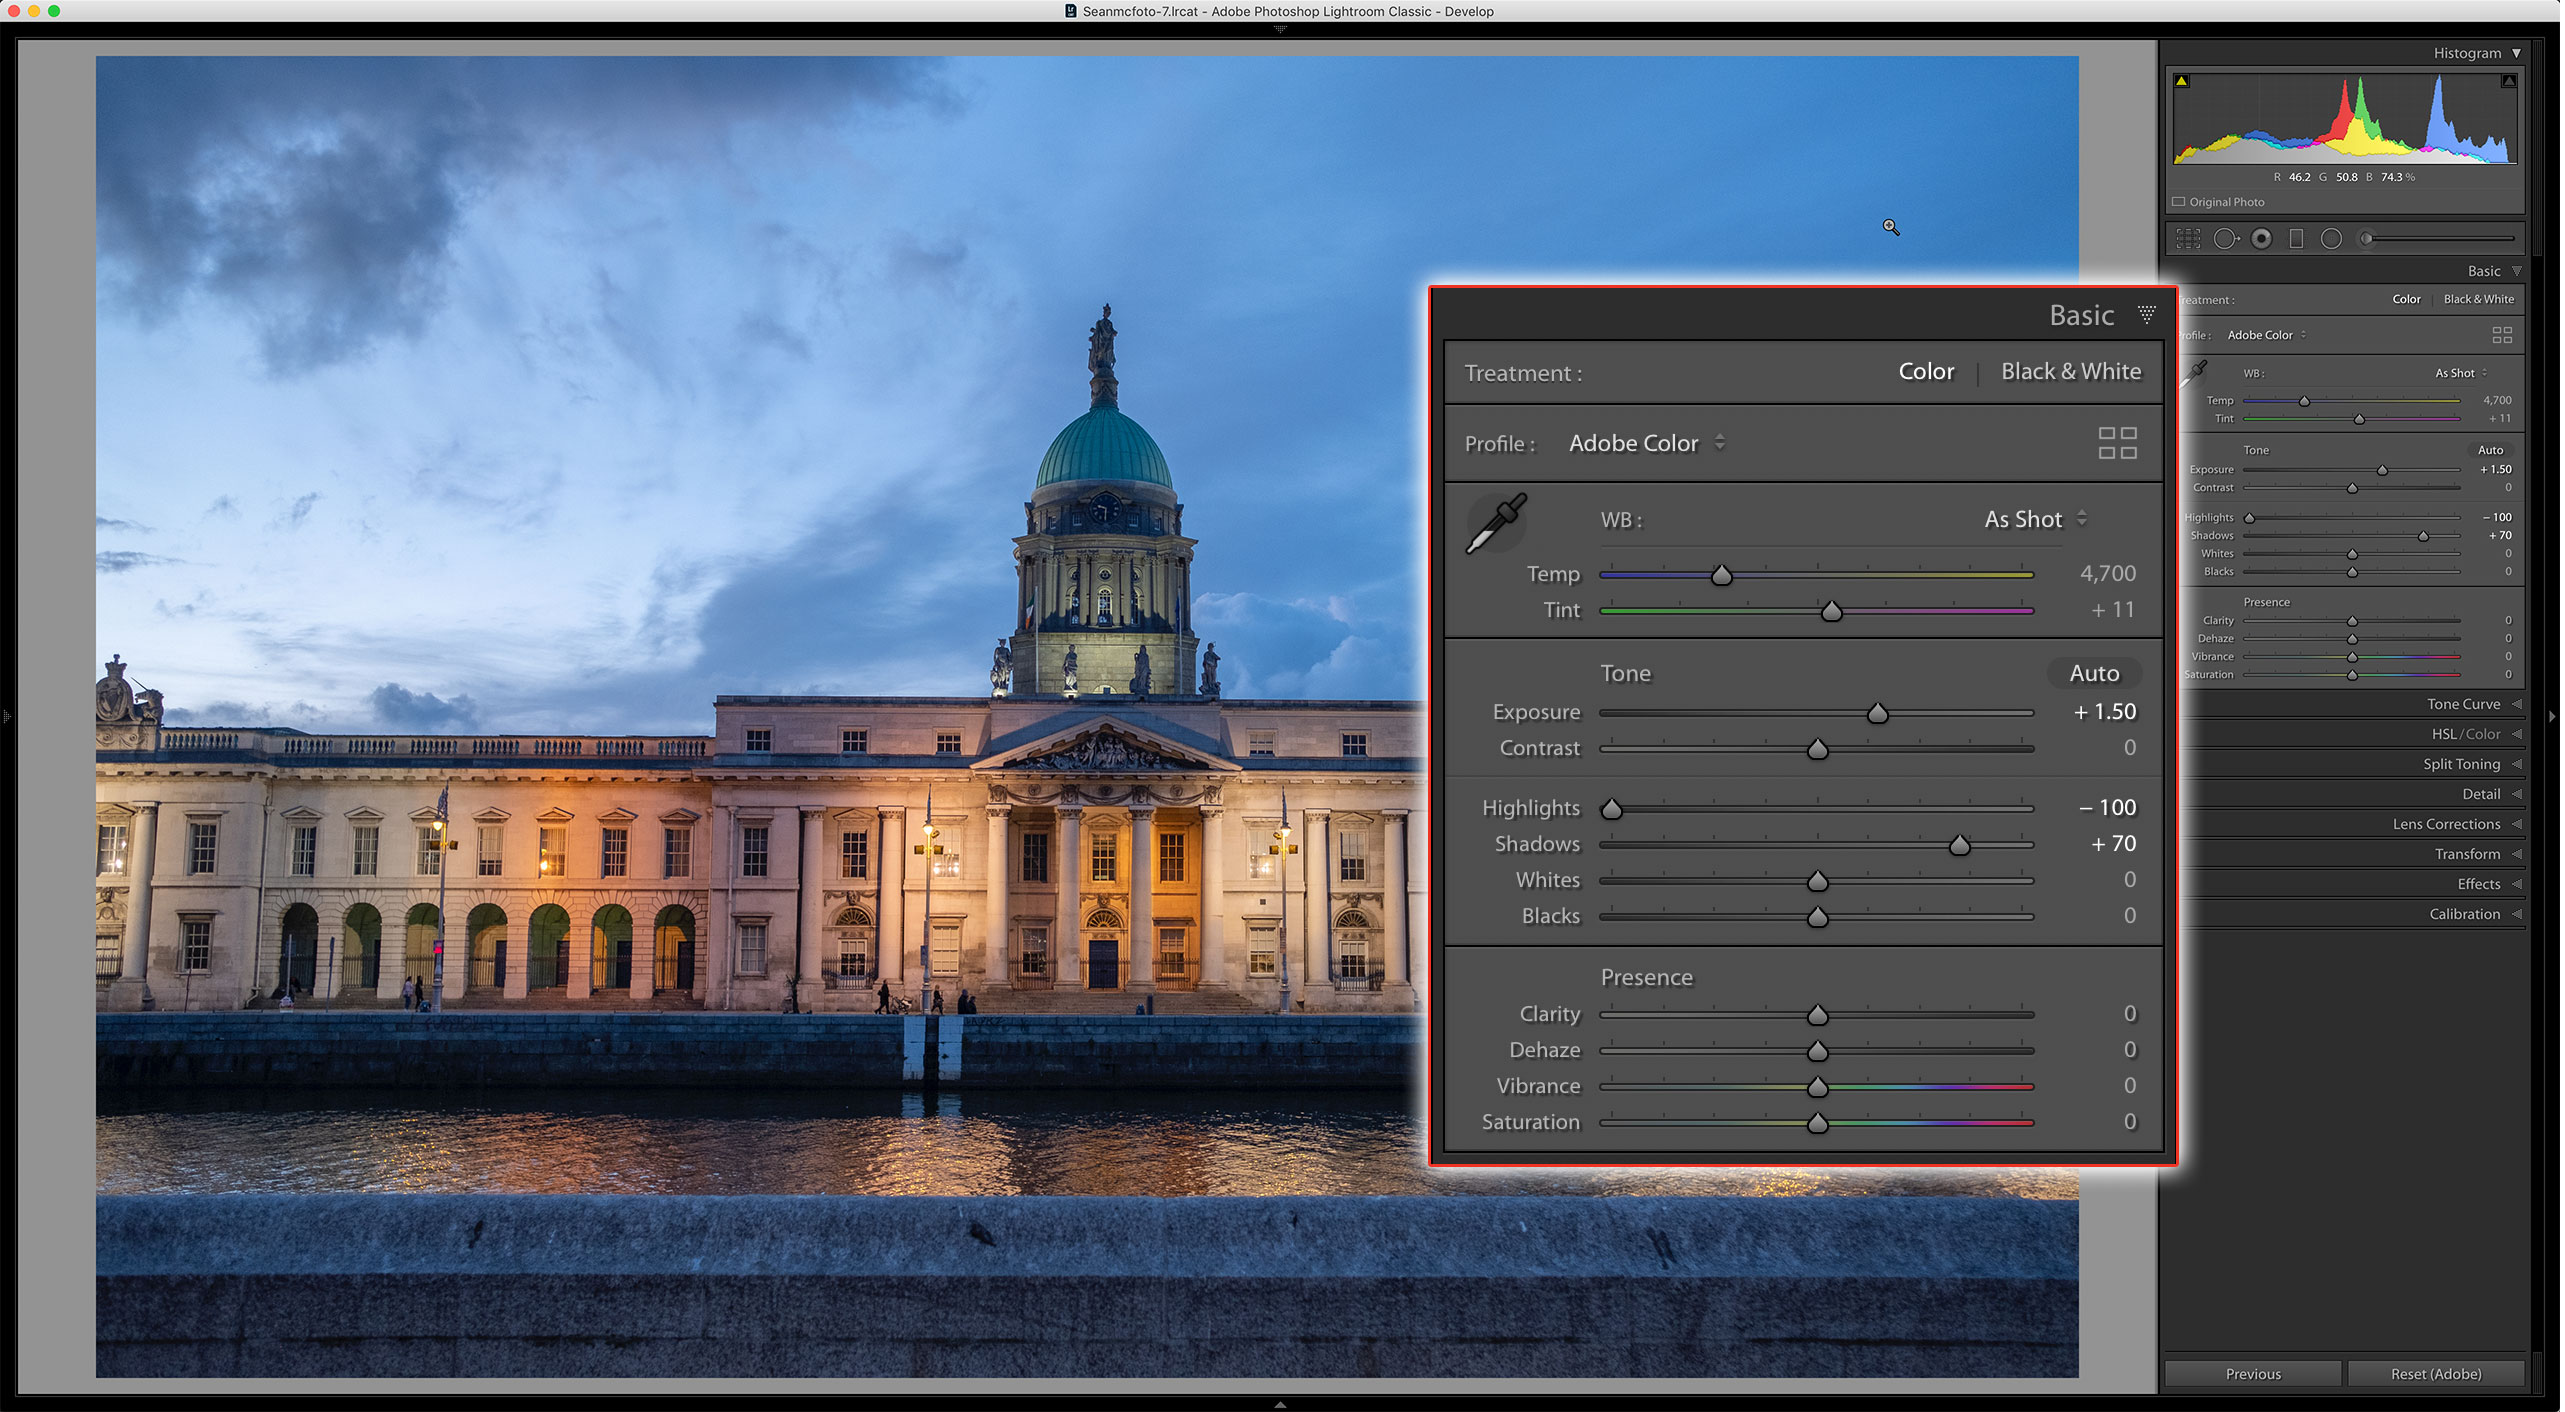
The first job to fix is the basic exposure. The shot is underexposed; I’ll explain why in our Expert Tip. I go to the Basic panel and boost Exposure to 1.5, then set Highlights to -100 to control the lighter parts of the photo and change Shadows to +70.
2. Fix the geometry
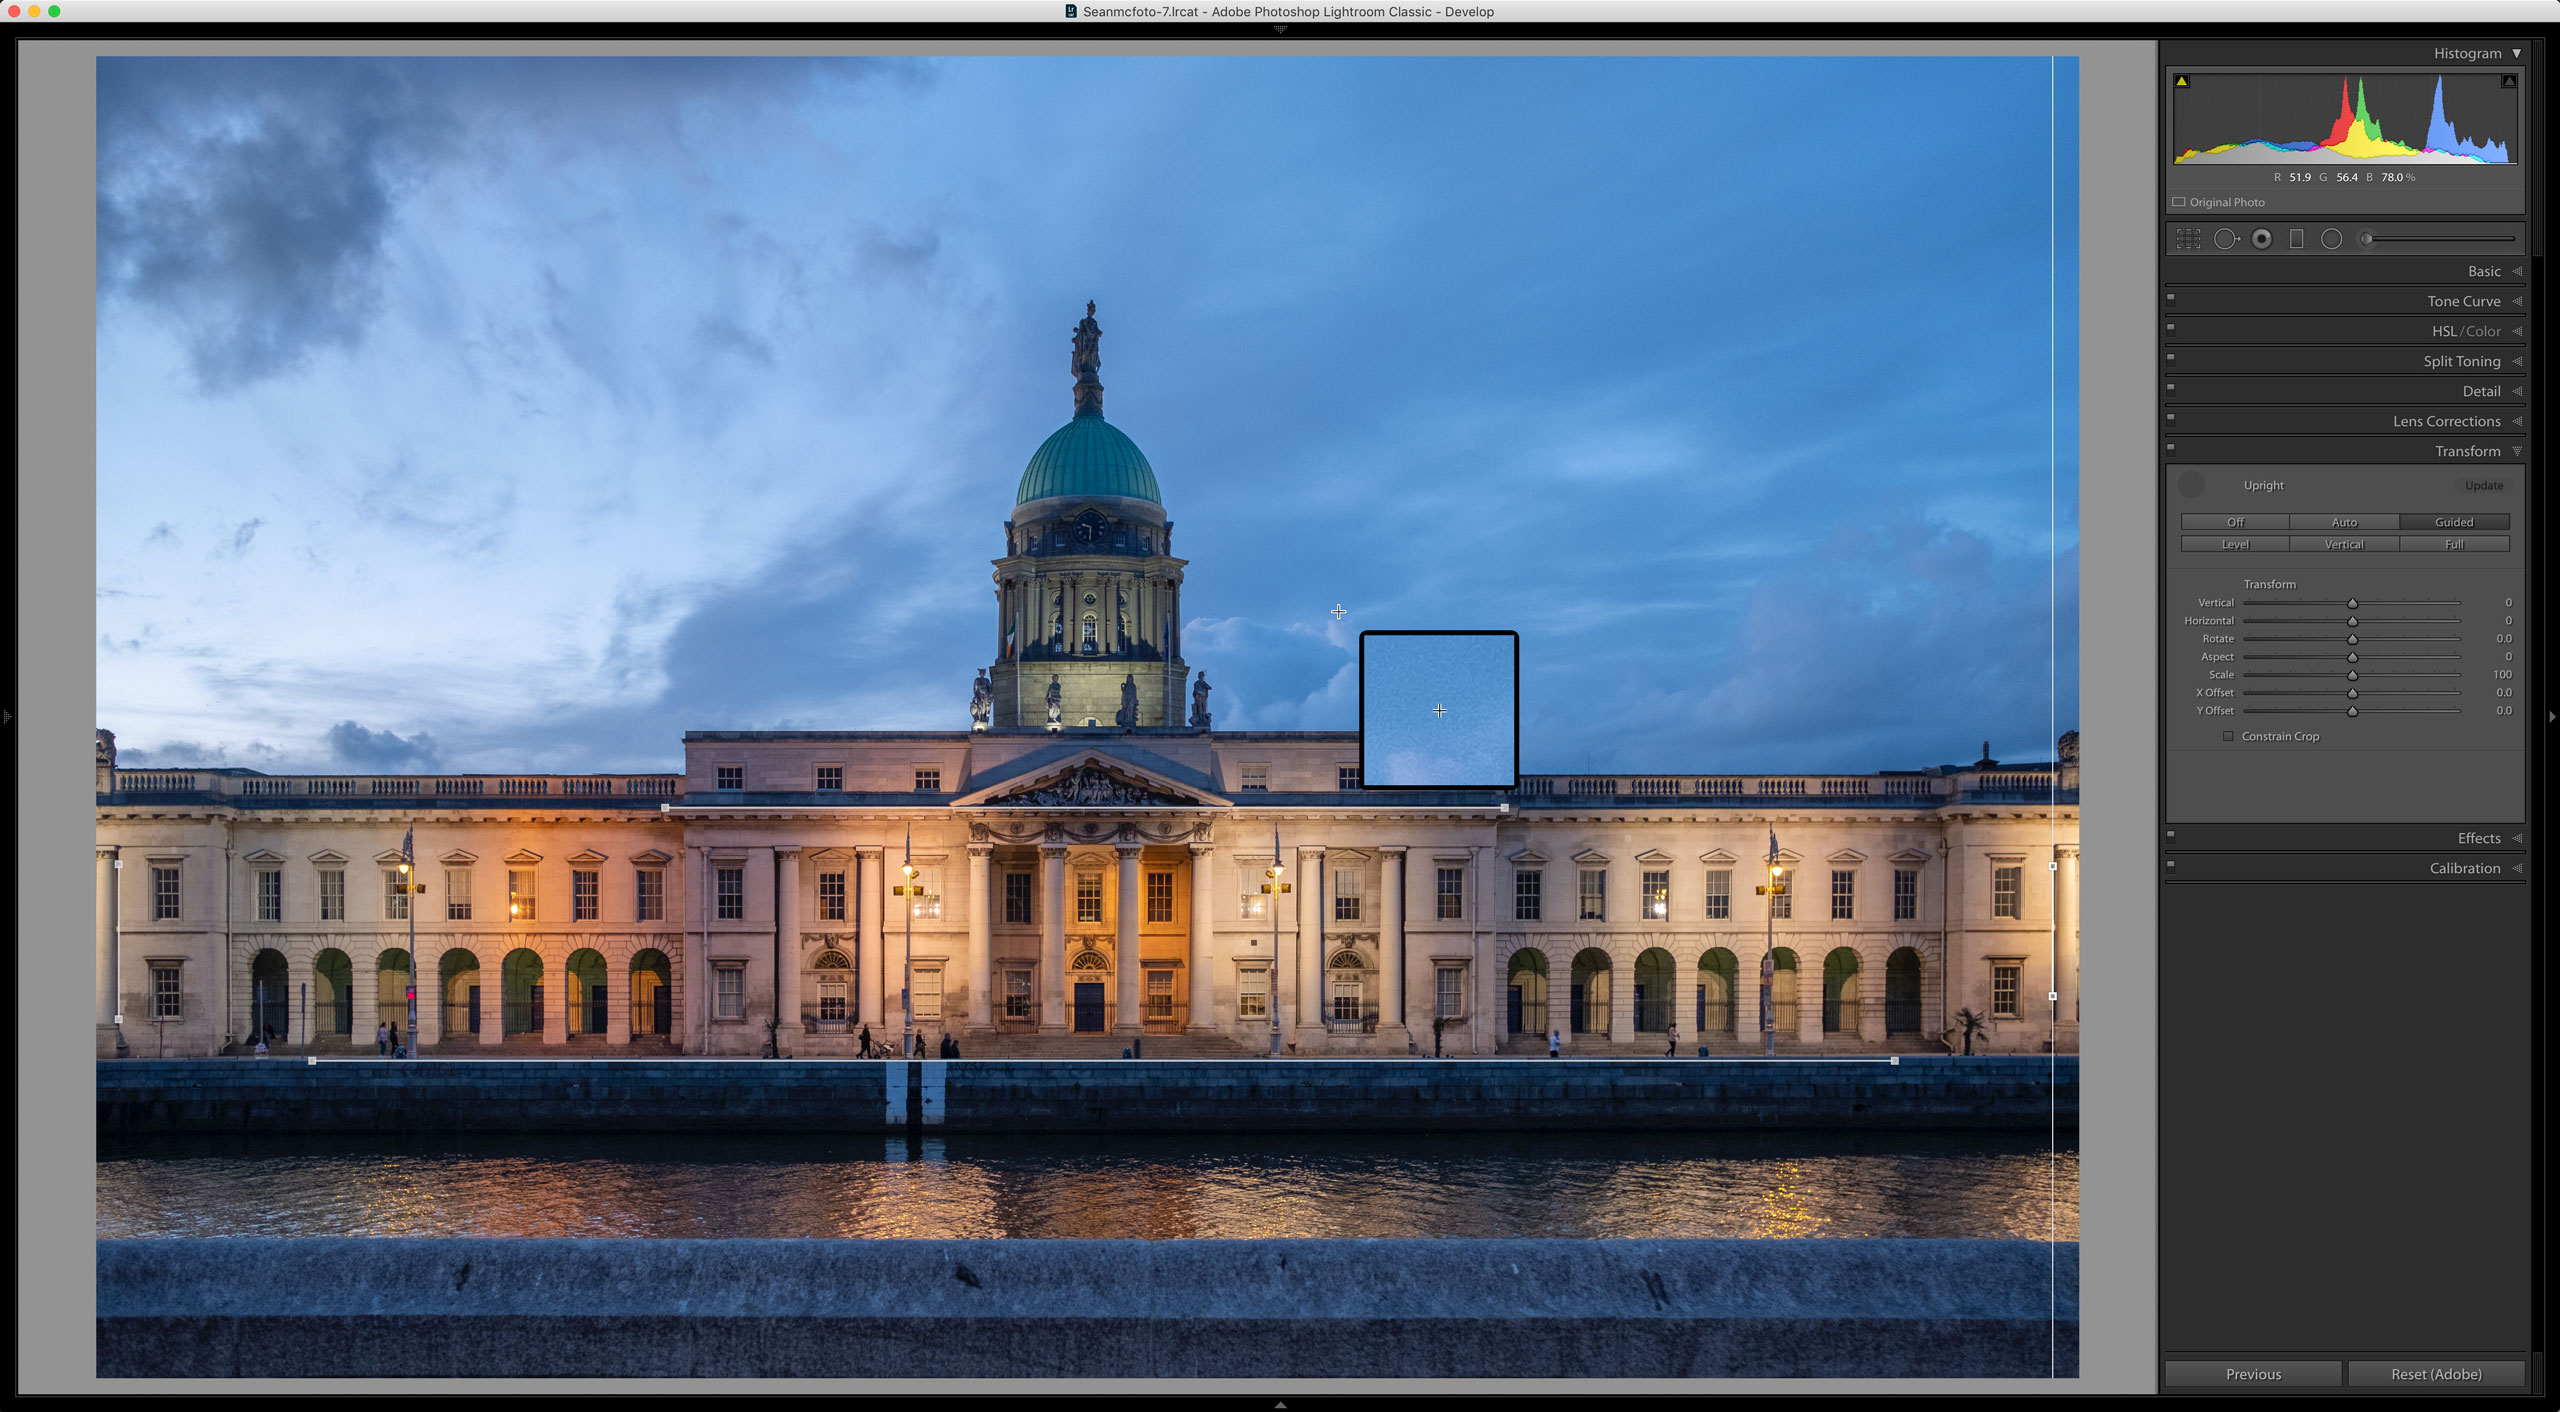
To do this, I go to the Transform panel. This file is a good candidate for using Guided Transform, because it’s shot front-on. I click Guided and drag out four lines – two on the top and bottom of the building where there are obvious lines, and two on the sides.
3. Add grunge
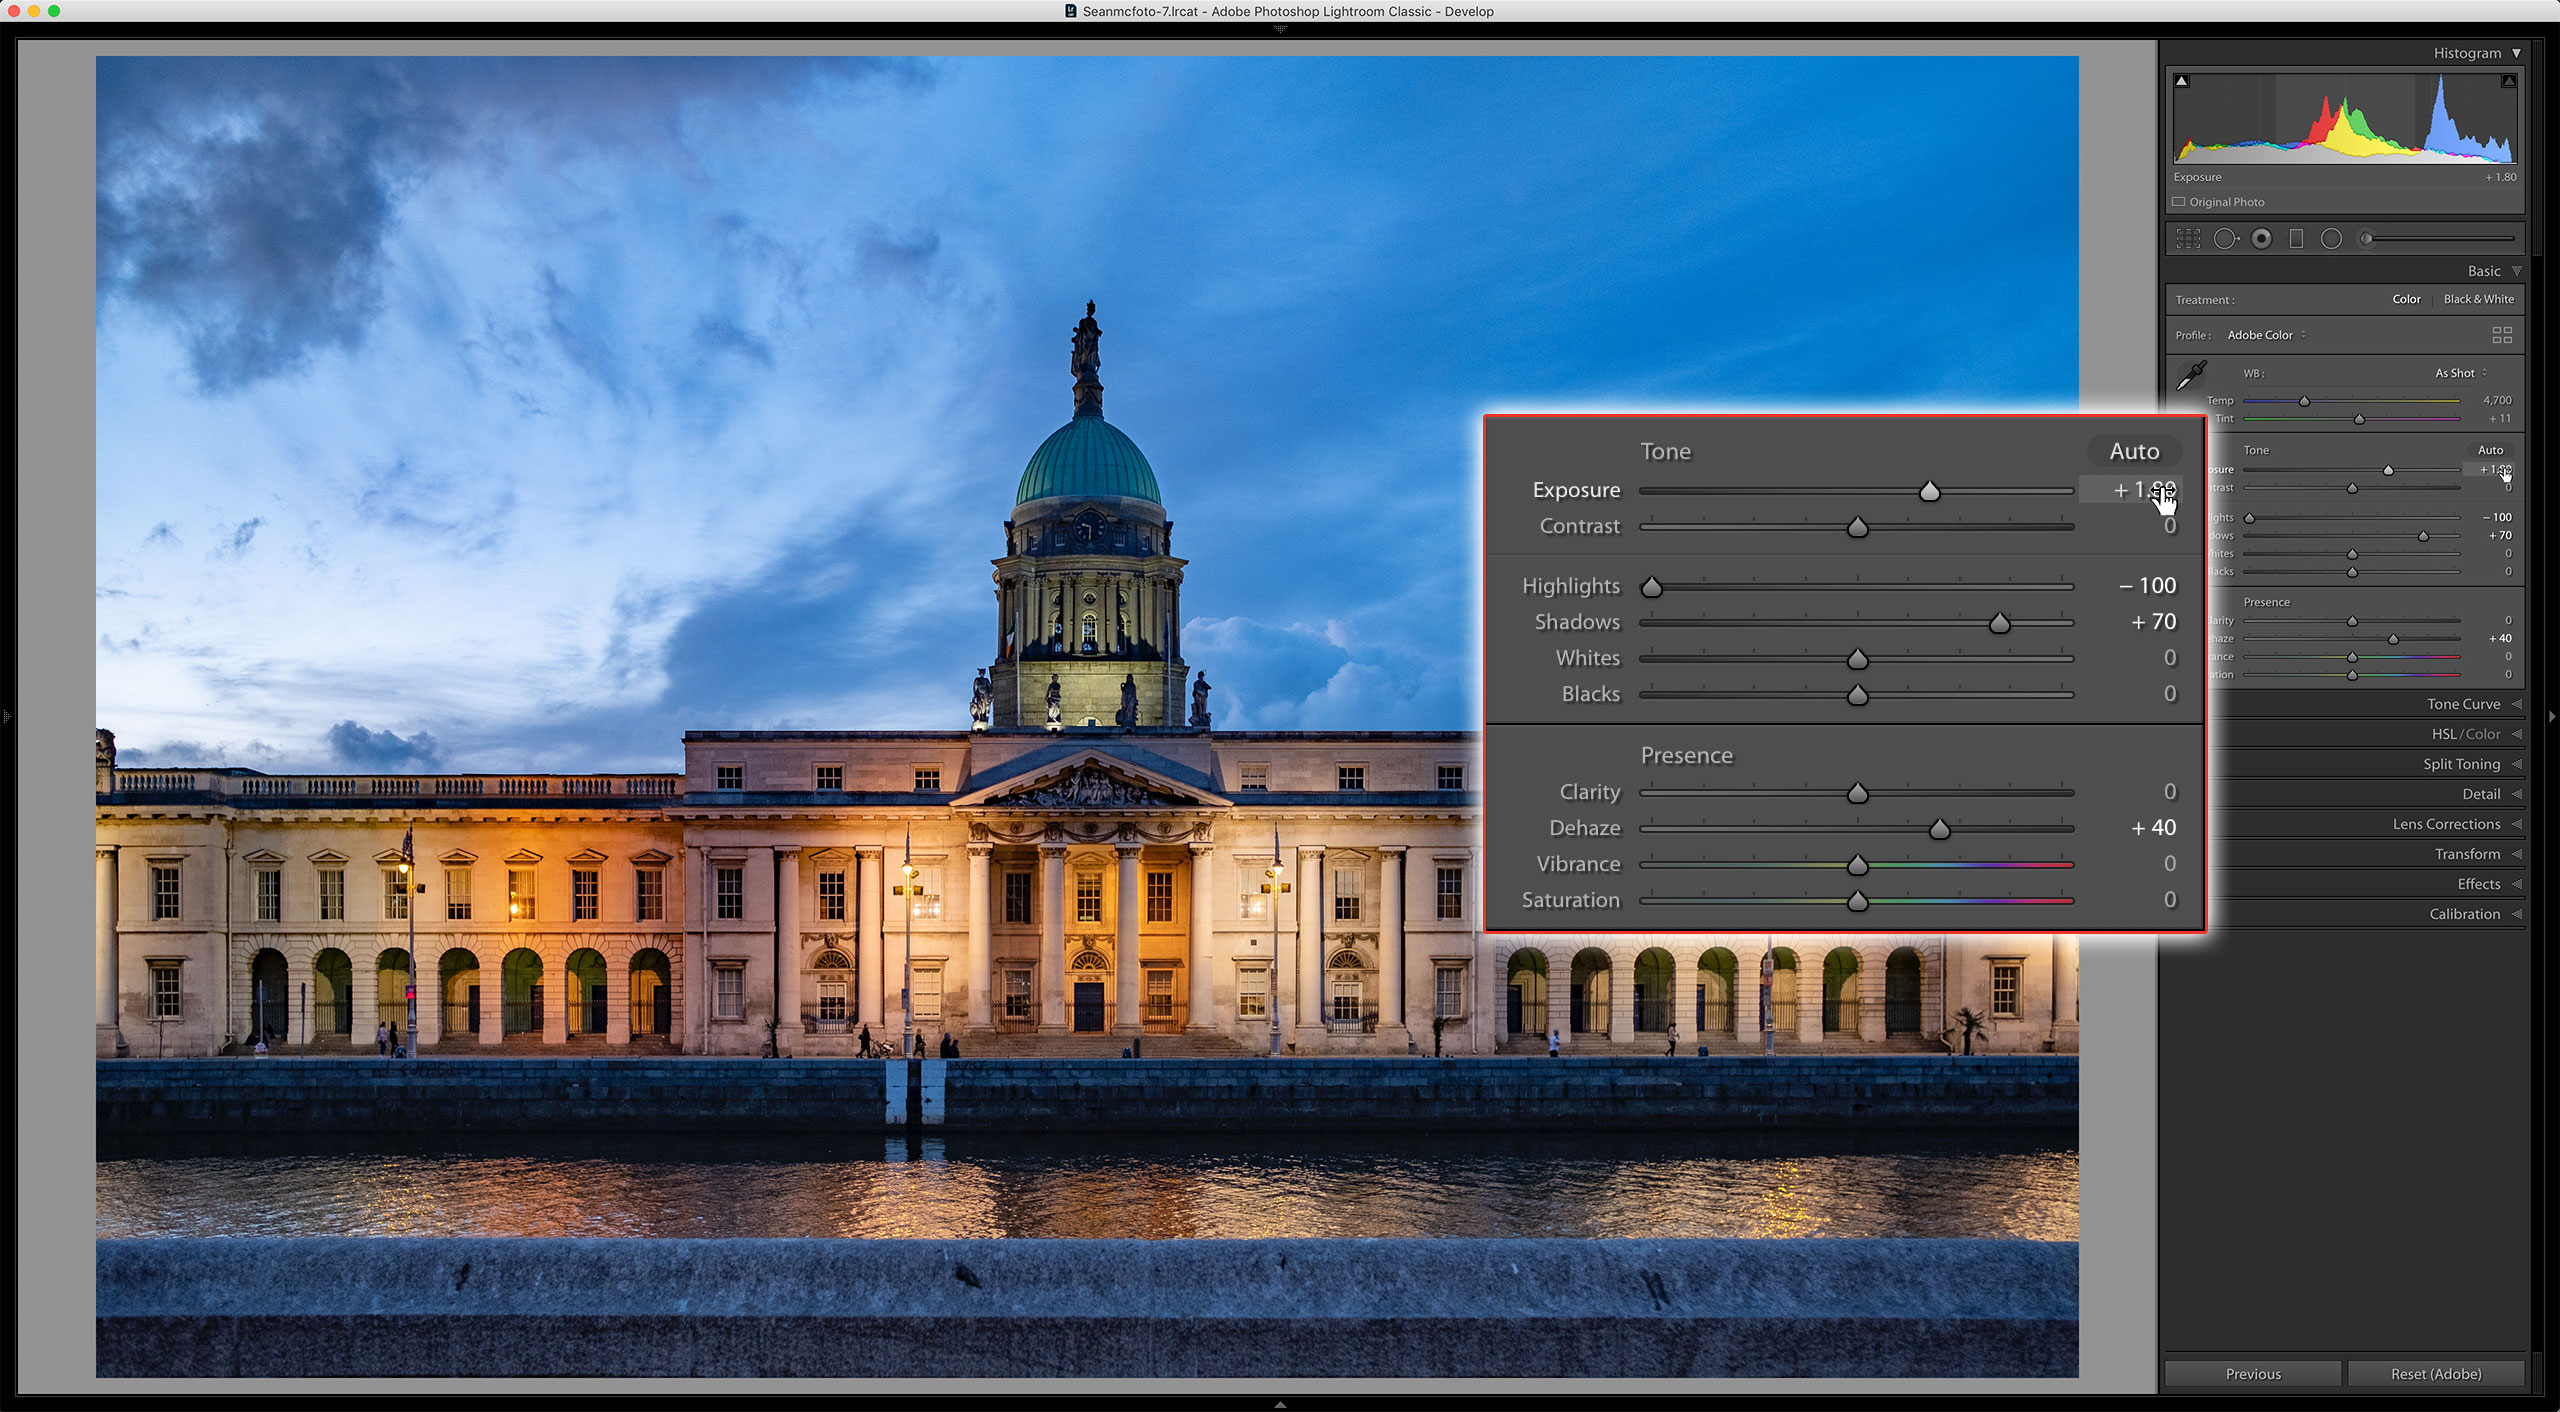
Now for our first dose of grunge! Back in the Basic panel, I add +40 Dehaze. This will increase saturation and contrast in the photo. It also darkens the photo, so I need to add more Exposure. A slight boost to 1.8 will help.
4. True grit
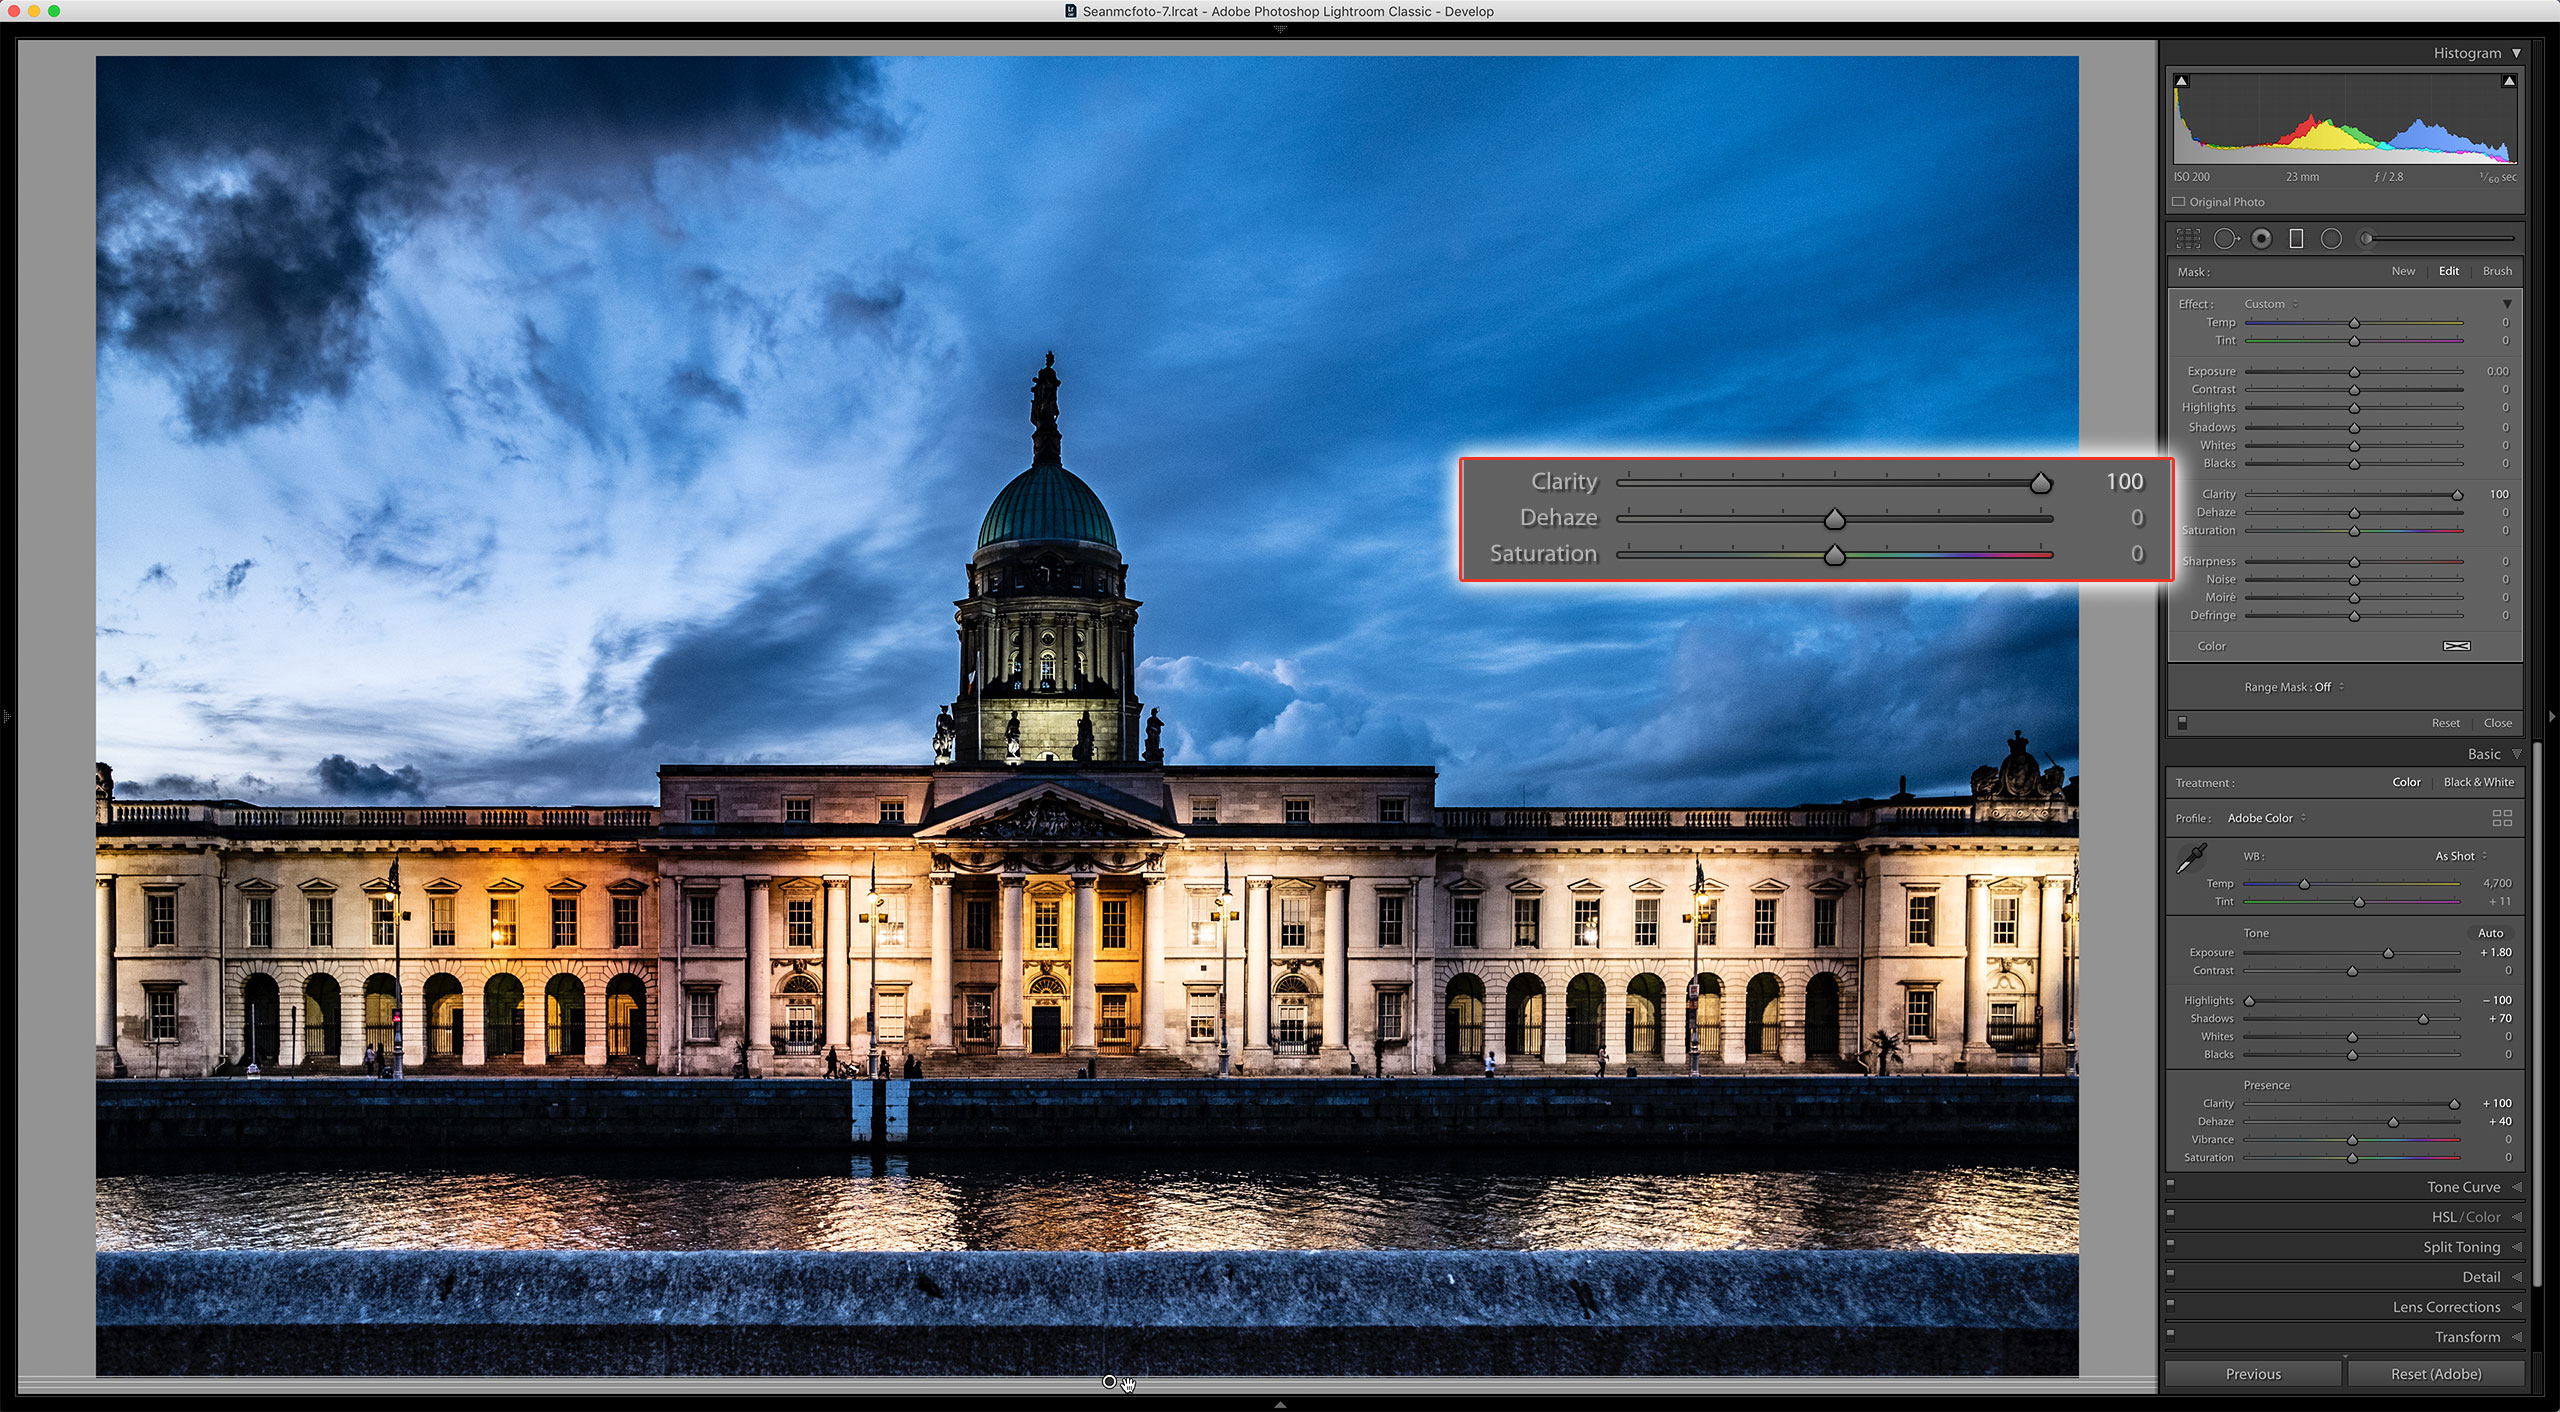
Now I add +100 Clarity. That’s right, all of it. If you don’t think 100 is enough, you can use a little cheat. Open the Graduated Filter. Double-click Effect to reset it, then set Clarity to 100. Shift-click at the bottom of the photo and drag down slightly.
5. Calm it down
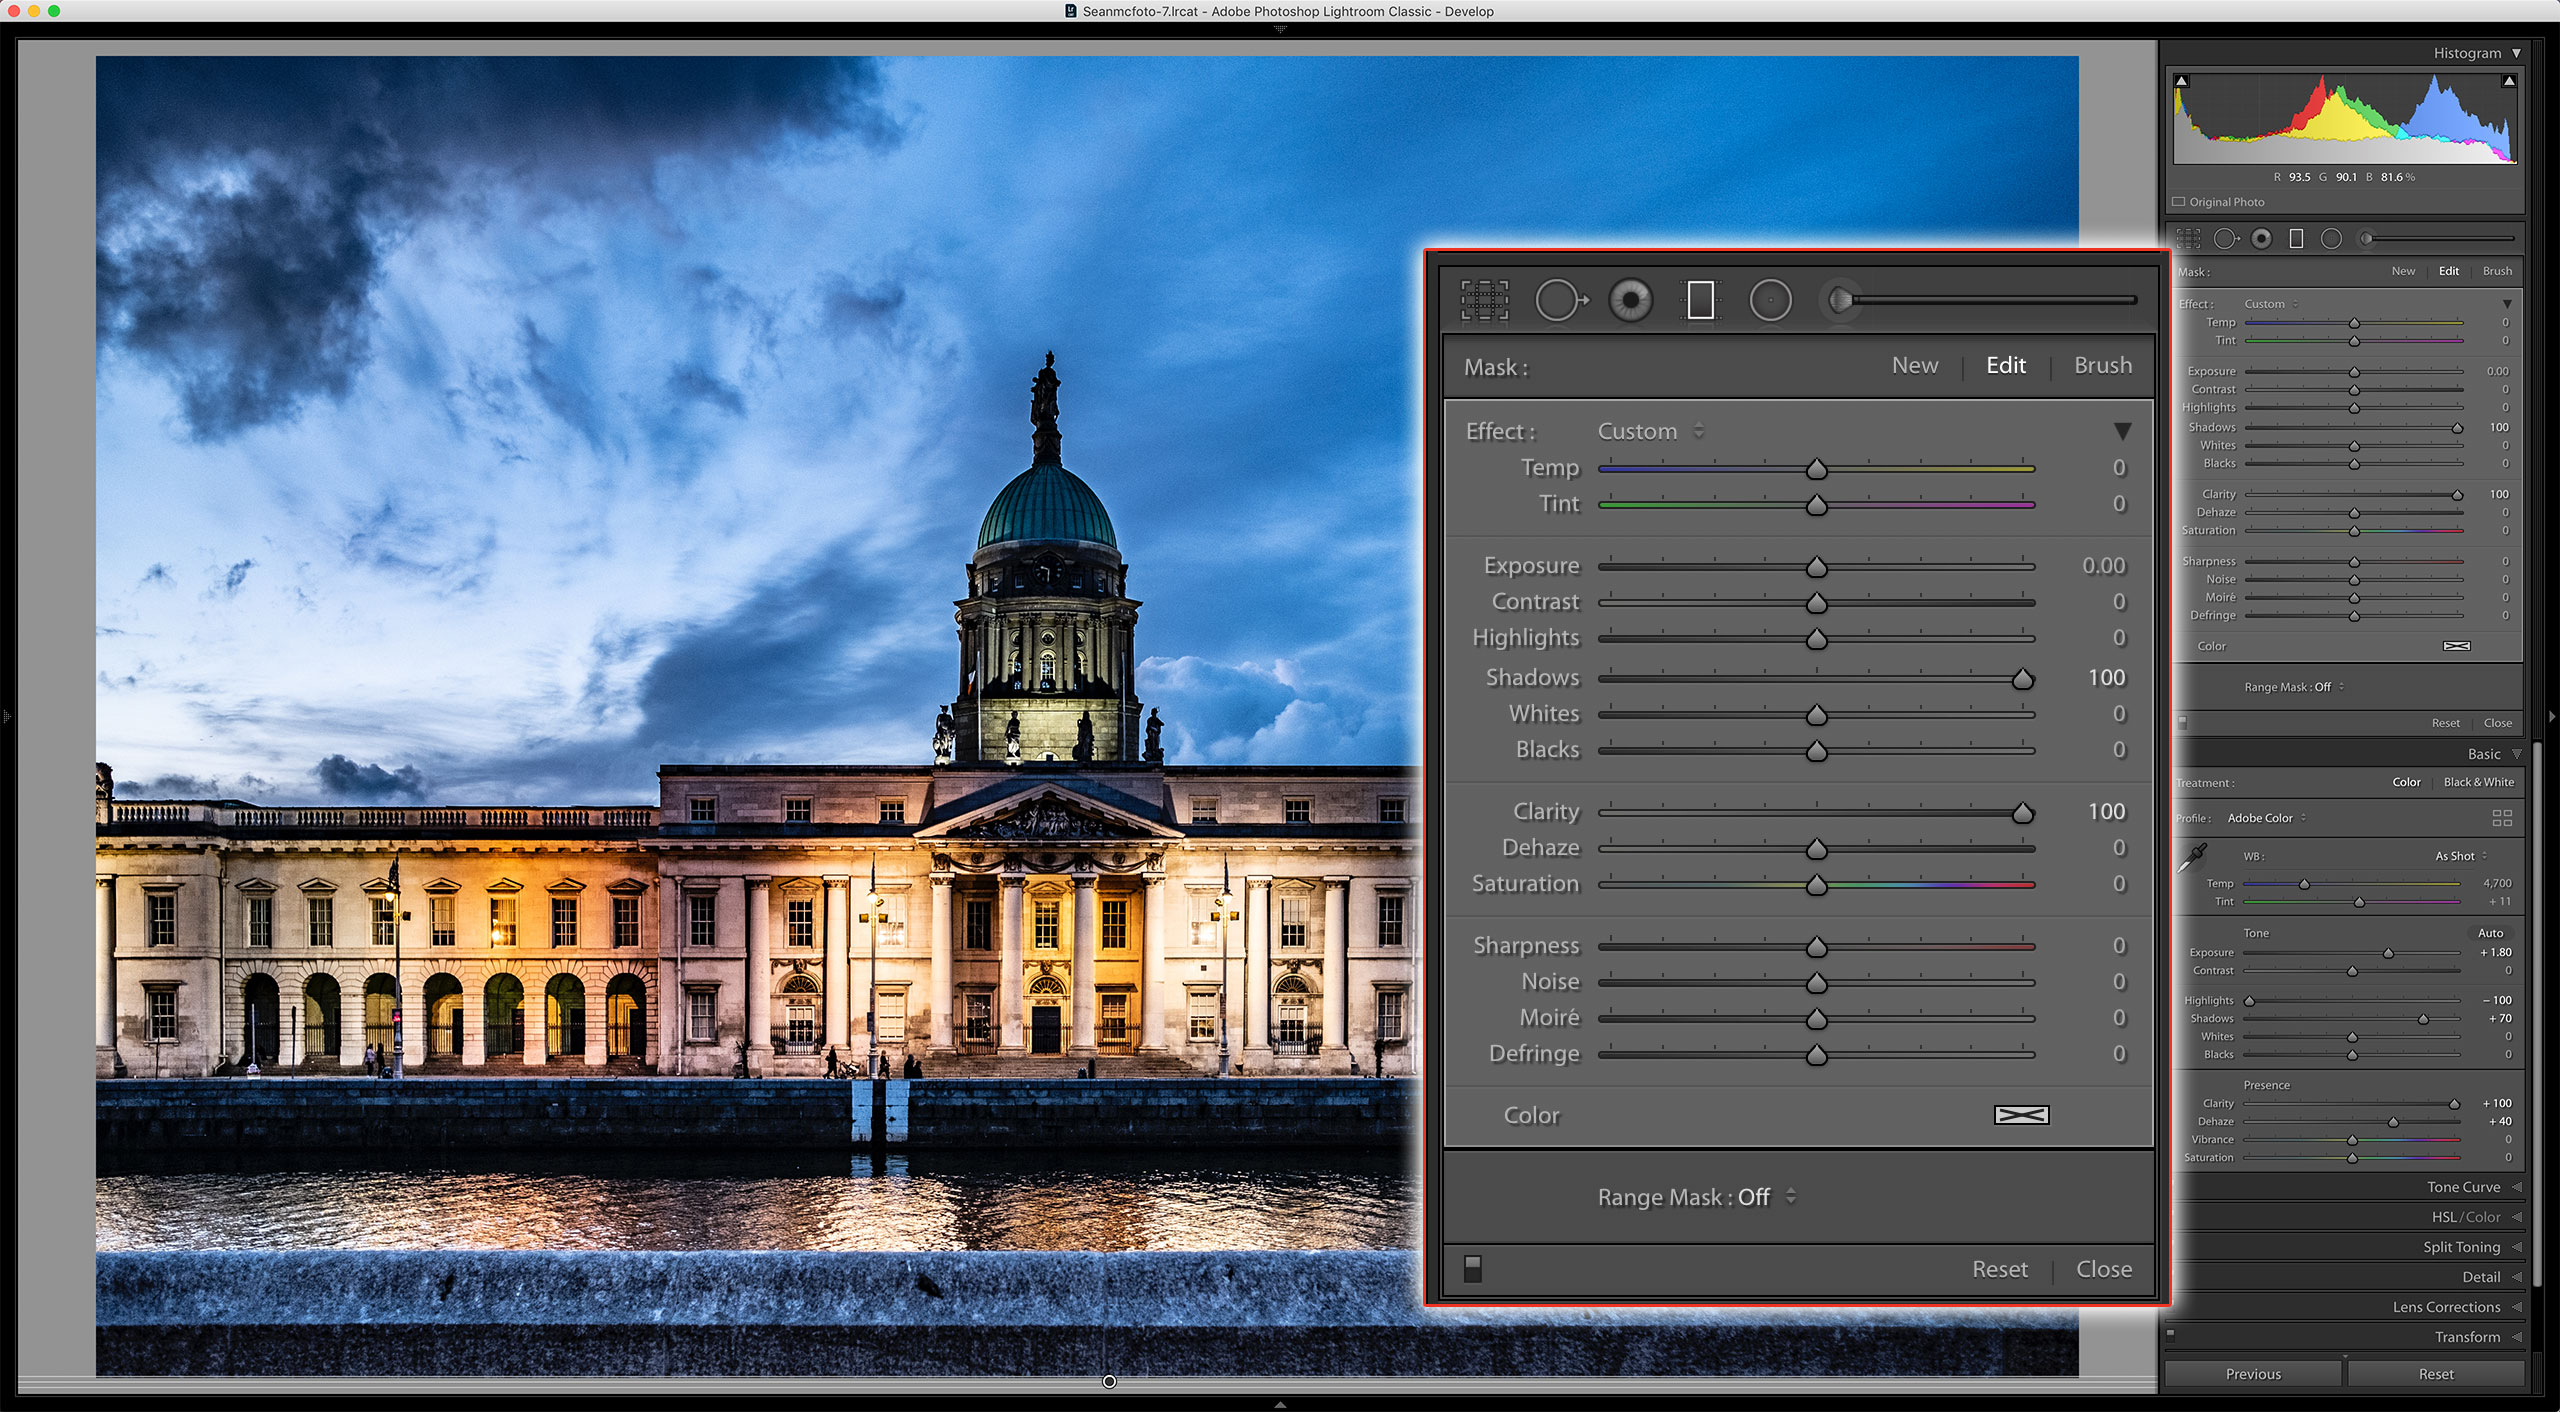
There are two ways to temper the effect of the additional Clarity in this picture. One is to reduce the Clarity amount. The other is to open up the Shadows in the Graduated Filter. For this we’ll set Shadows to +100 as well.
6. Color process
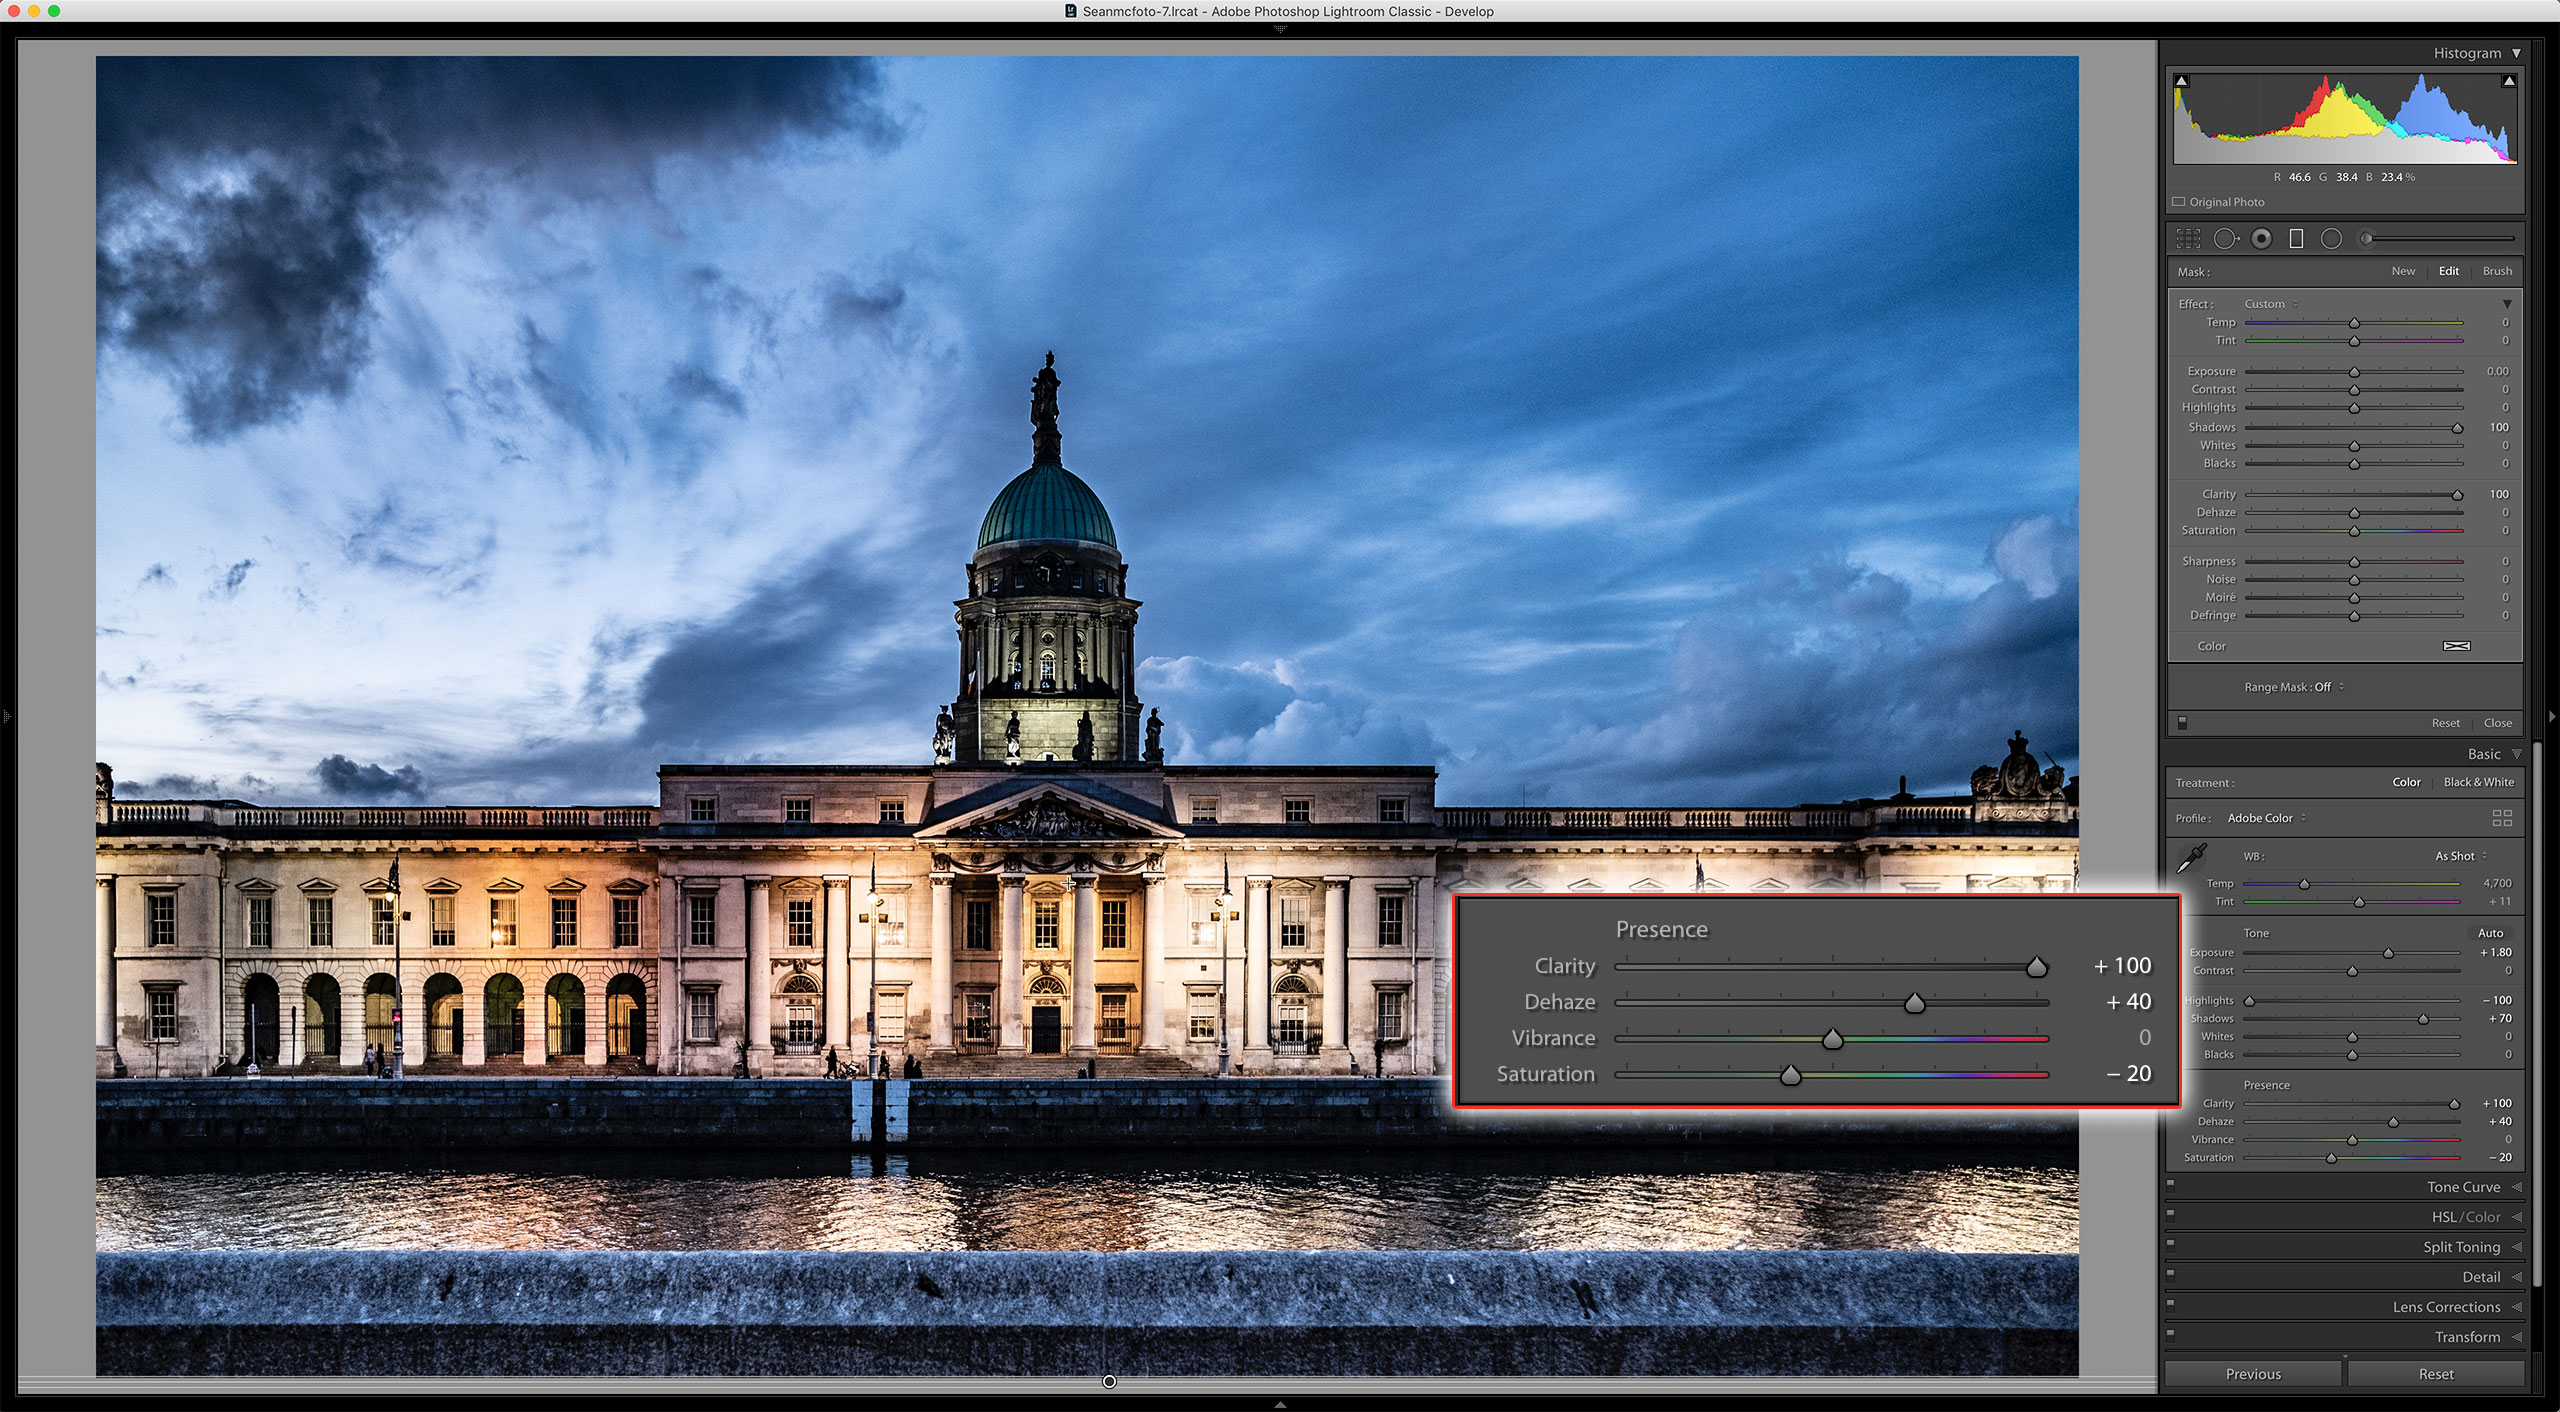
My final task is to work on the overall color in the shot. The additional saturation that’s come from all the processing is too much, so I really need to pull it back and put Saturation at -20 to complete the look.
Expert tip: Underexpose at night
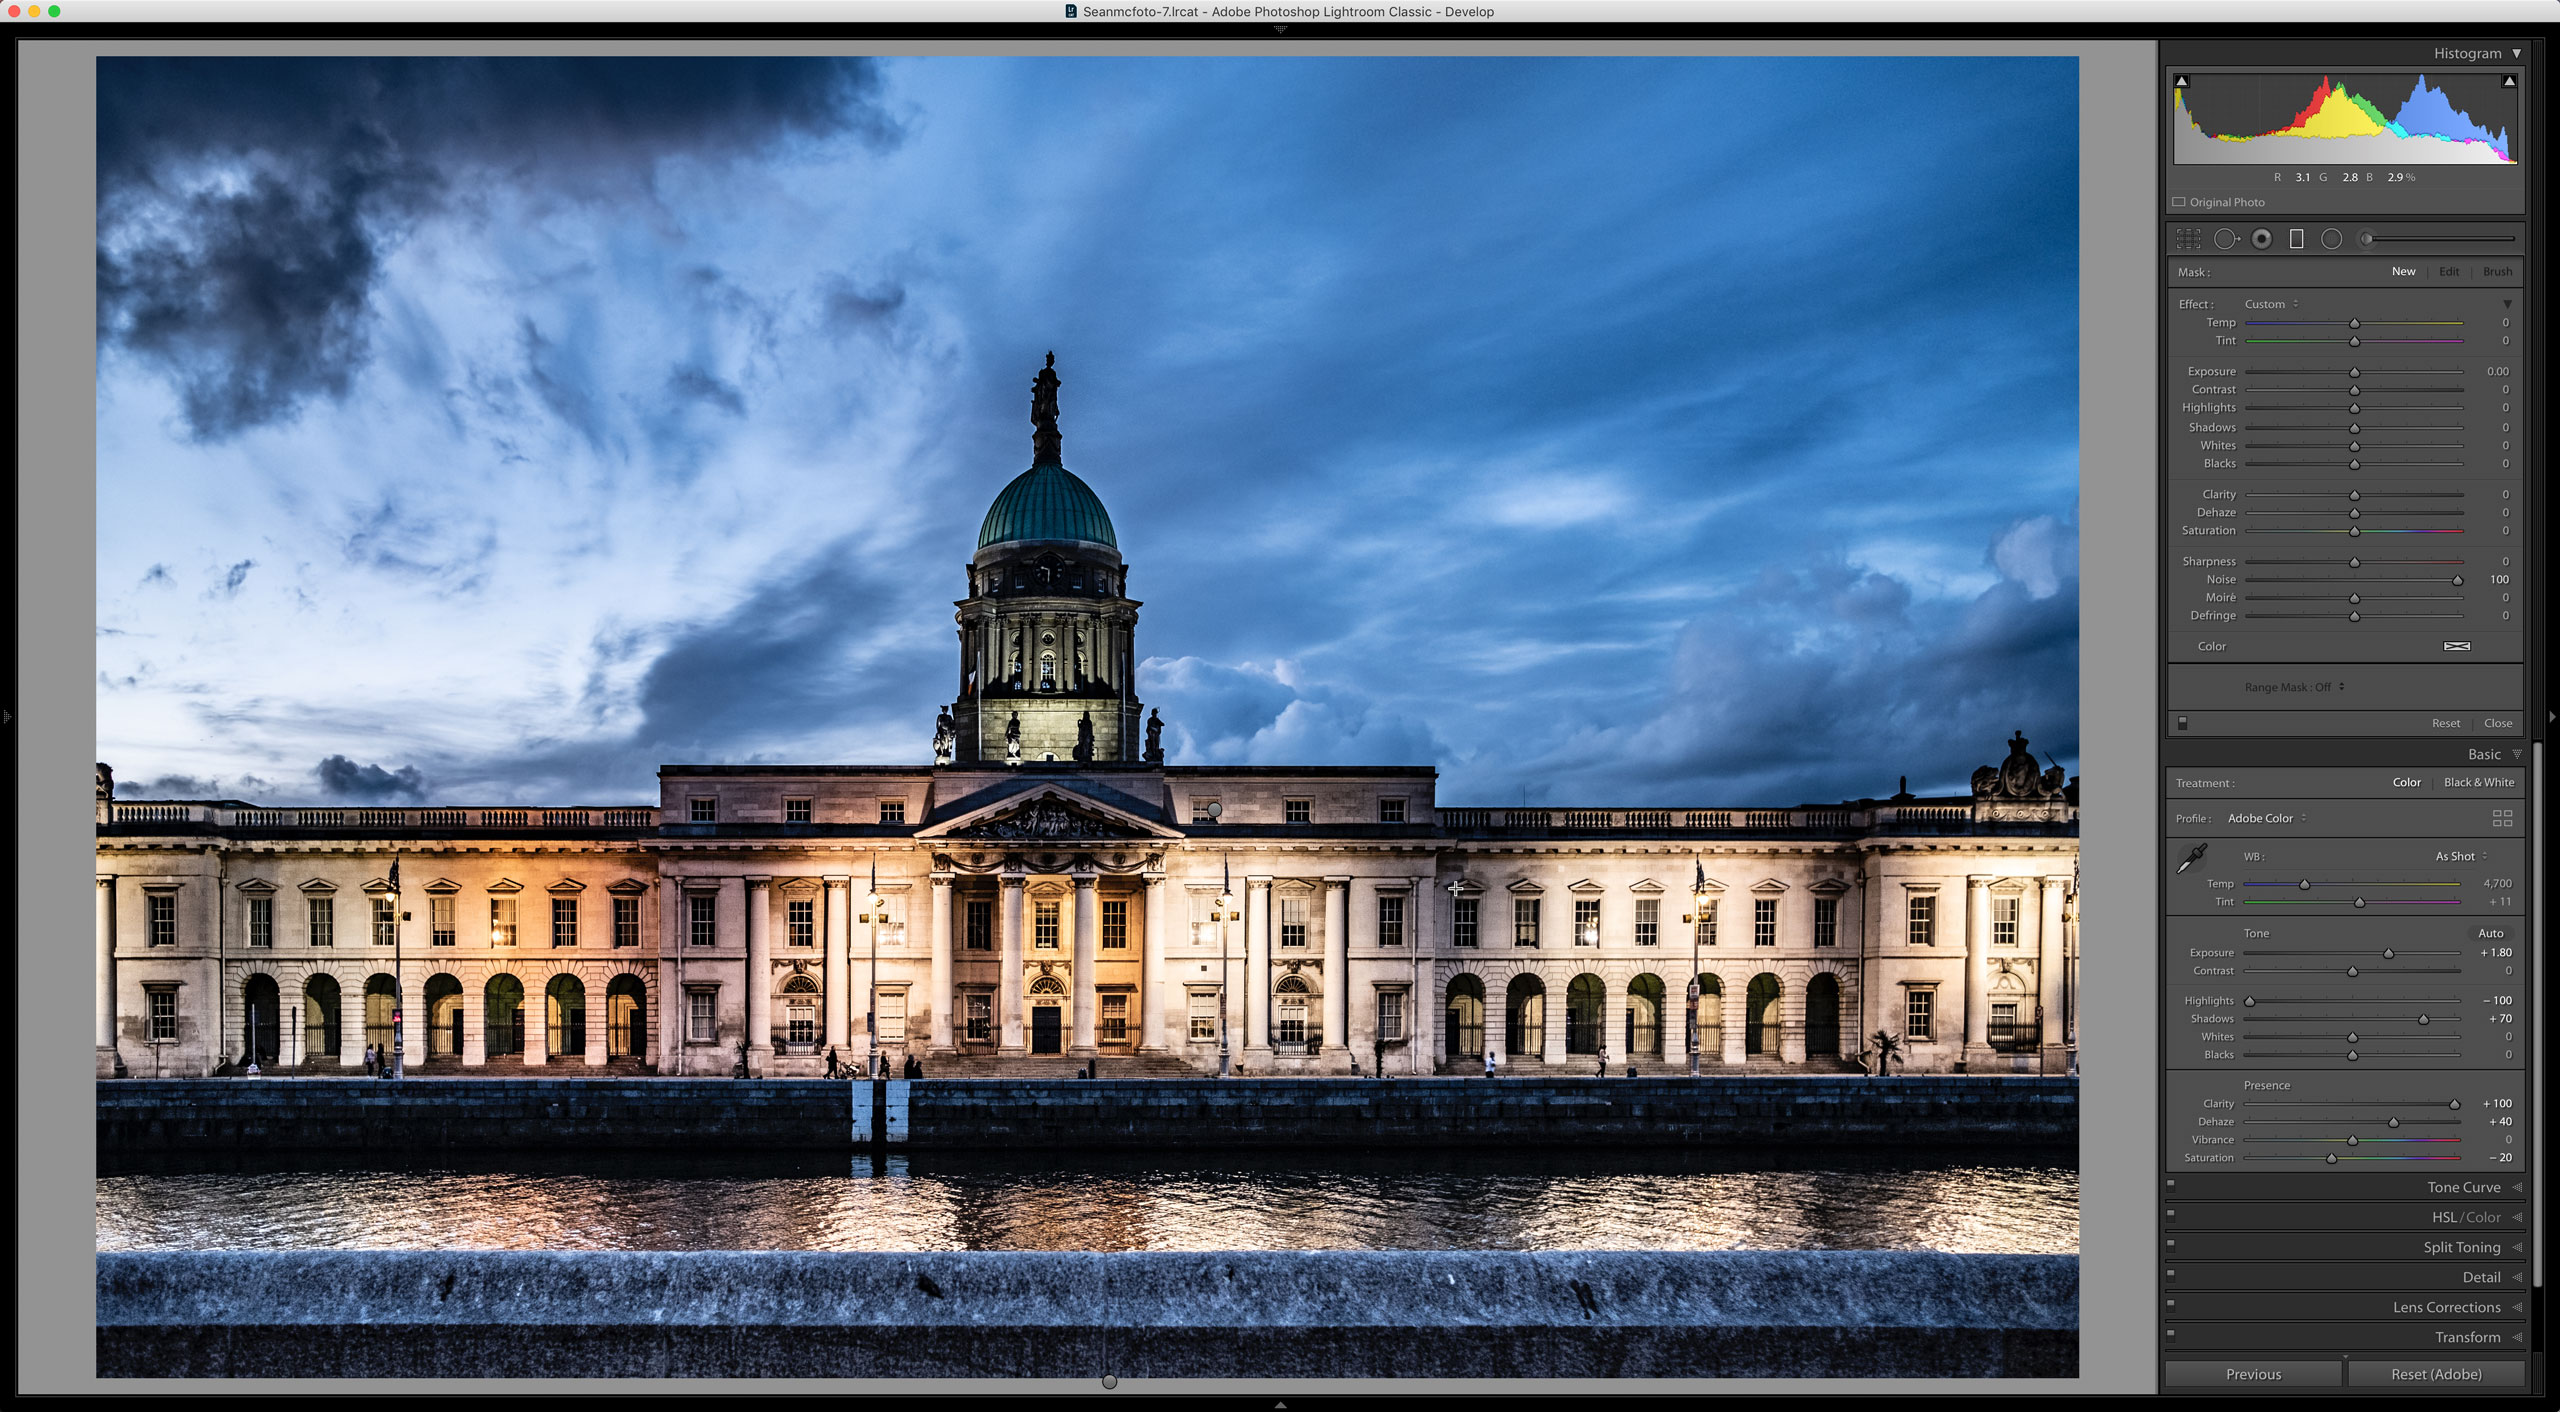
Why was this photo underexposed? First, the shot was handheld. To avoid camera shake, the shutter speed needed to be at around twice the focal length of the lens. A 23mm lens (35mm equivalent) was used, so 1/60 sec was a reasonable choice. Boosting exposure in post processing does introduce noise, but in a more controllable way than doing it in-camera. It’s mostly visible in the sky, so using a Graduated Filter is perfect. Here, I click New for a new grad, double-click Effect to reset, then shift-click and drag the filter down along the top line of the building and set Noise to taste. I click Brush in the Grad, and then, while holding Alt to erase, remove the noise reduction from the dome.
About Digital Camera magazine
This tutorial originally appeared in Digital Camera Magazine, the monthly newsstand magazine for all photographers. Why not subscribe to a print edition, and have the magazine delivered direct to your door every month?
Alternatively, we have a number of different digital options available, including:
• Apple app (for iPad or iPhone)
• Zinio app (multi-platform app for desktop or smartphone)
• PocketMags (multi-platform app ideal for Android devices)
• Readly (all-you-can-eat digital magazine subscription service)
If you wanted a printed version of any of our most recent issues we have a selection of back issues to choose from in our online store.
How to get Adobe Lightroom
Adobe Lightroom is available in two versions: the regular Adobe Lightroom Classic CC designed for desktop users, which is what we cover in this series, and a new cloud-based Adobe Lightroom CC, which stores your files online and offers a similar but reduced set of features. For regular desktop users we recommend Adobe Lightroom Classic CC.
Adobe offers three subscription based Photography Plans which you can click on below. We recommend either the regular Photography Plan, or the Photography Plan (1TB) which costs more but comes with 1TB online storage in case you decide to go with Lightroom CC.
For this set of tutorials and for anyone who likes to work on a single main computer, we recommend the regular Creative Cloud Photography Plan. This is the cheapest way to get started AND it comes with Photoshop CC too.
Read more:
• This is the best photo-editing software today
• These are the best laptops for photographers right now
• We help you choose the best desktop computers for photo editing
Get the Digital Camera World Newsletter
The best camera deals, reviews, product advice, and unmissable photography news, direct to your inbox!
Sean McCormack is a commercial, and editorial photographer, book author, and regular contributor to Digital Camera magazine based in Galway, Ireland. He has extensive experience with Lightroom, dating back to its original beta version, and has tried out just about every plugin and preset available. His latest book is Essential Development 3: 25 Tips for Lightroom Classic’s Develop Module.

