Watch video: How to make ink spatter portraits
Editing your pictures in programs like Adobe Photoshop CC, or even the more budget friendly Photoshop Elements 2020 as we’re using here, doesn’t have to be about creating the most accurate or sharp images. Sometimes it can just be a playground where we can have fun and learn some new editing tricks along the way. Here, we’ll combine a bit of both by incorporating ink splat start images into your own photographs to create some striking graphic art.
We’re giving away 18 ink spatter shots that we’ve created by dropping some black ink, or flinging it from a paint brush, onto a sheet of white A4 paper. You can try this yourself if you’d like to experiment with even more ink effects. Download your start images here.
It’s a fun technique to try if you’d like to start creating composites (combining multiple images using layers) in Photoshop. To begin, download the ink start images and load up a photo you’d like to add them to, or use our start image ‘Portrait.jpg’ and follow the six steps below. You can also watch the video to see how you can do it too. You’ll be making striking ink splash artwork in no time!

01 Open up your image and ink spatters
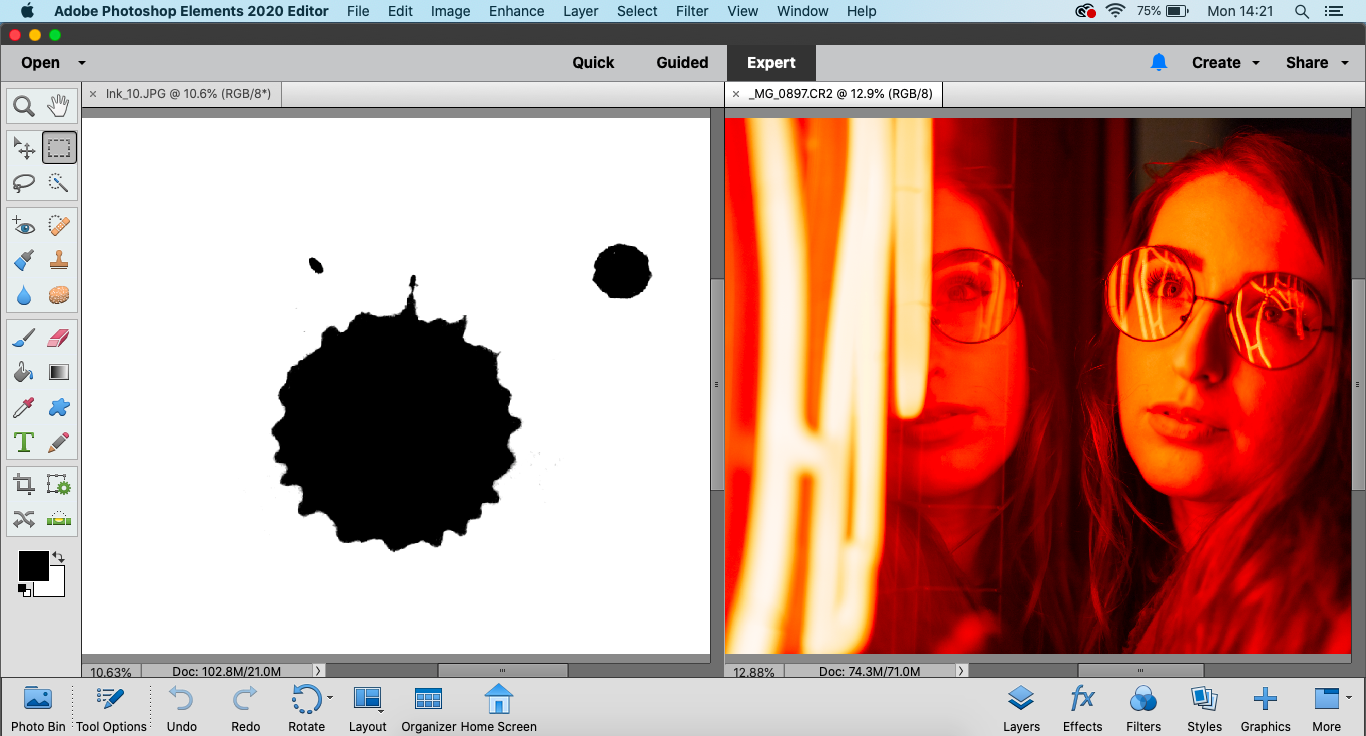
Open up Photoshop Elements and go into the Expert mode tab, then head up to File>Open and find the image you want to work on and open it up. Next, go back to File>Open again, this time finding an ink start image you like. Click here to download them.
02 Create a new document
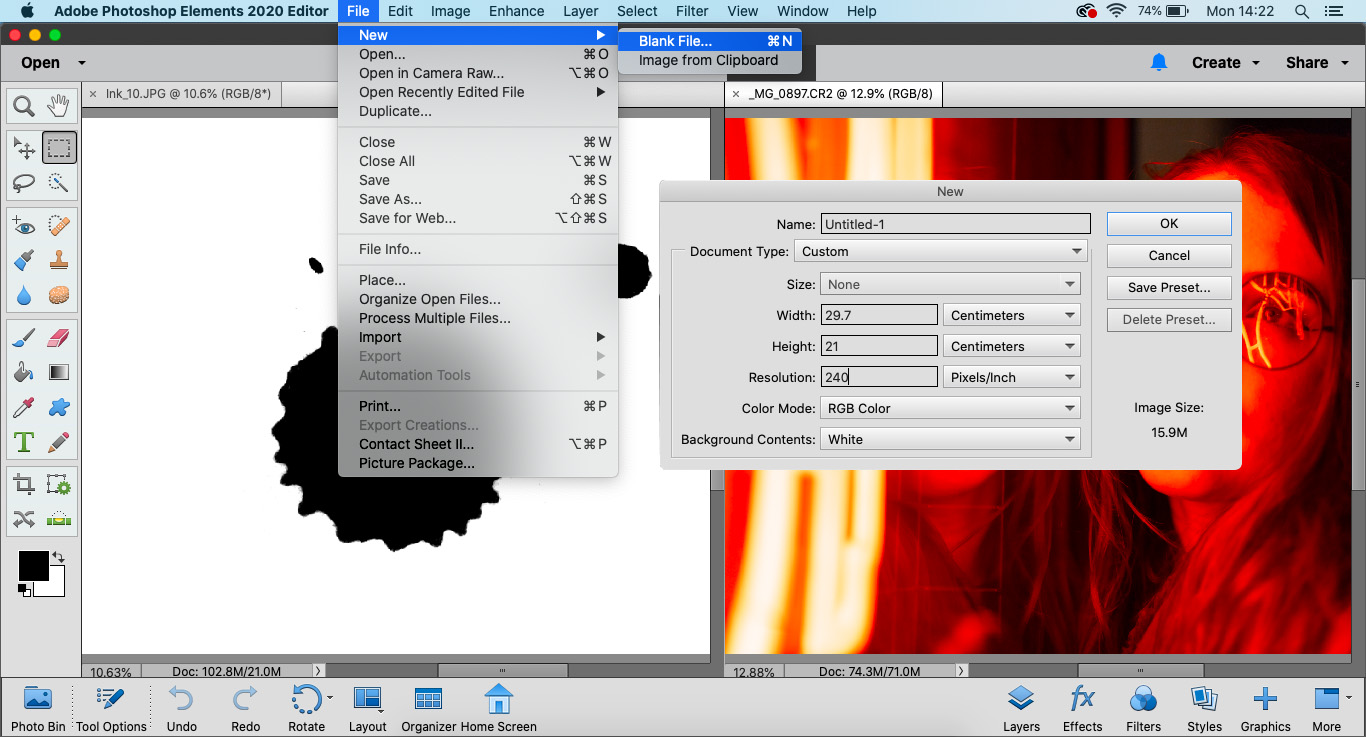
You’ll then want to go to File>New>Blank File and set the Width to 29.7cm and the Height to 21cm, creating an A4-sized document. You can swap the width and height for a portrait shaped canvas. Then, set the Resolution to 240dpi and the Background Contents to White and hit OK.
The best camera deals, reviews, product advice, and unmissable photography news, direct to your inbox!
03 Paste your ink splodge in
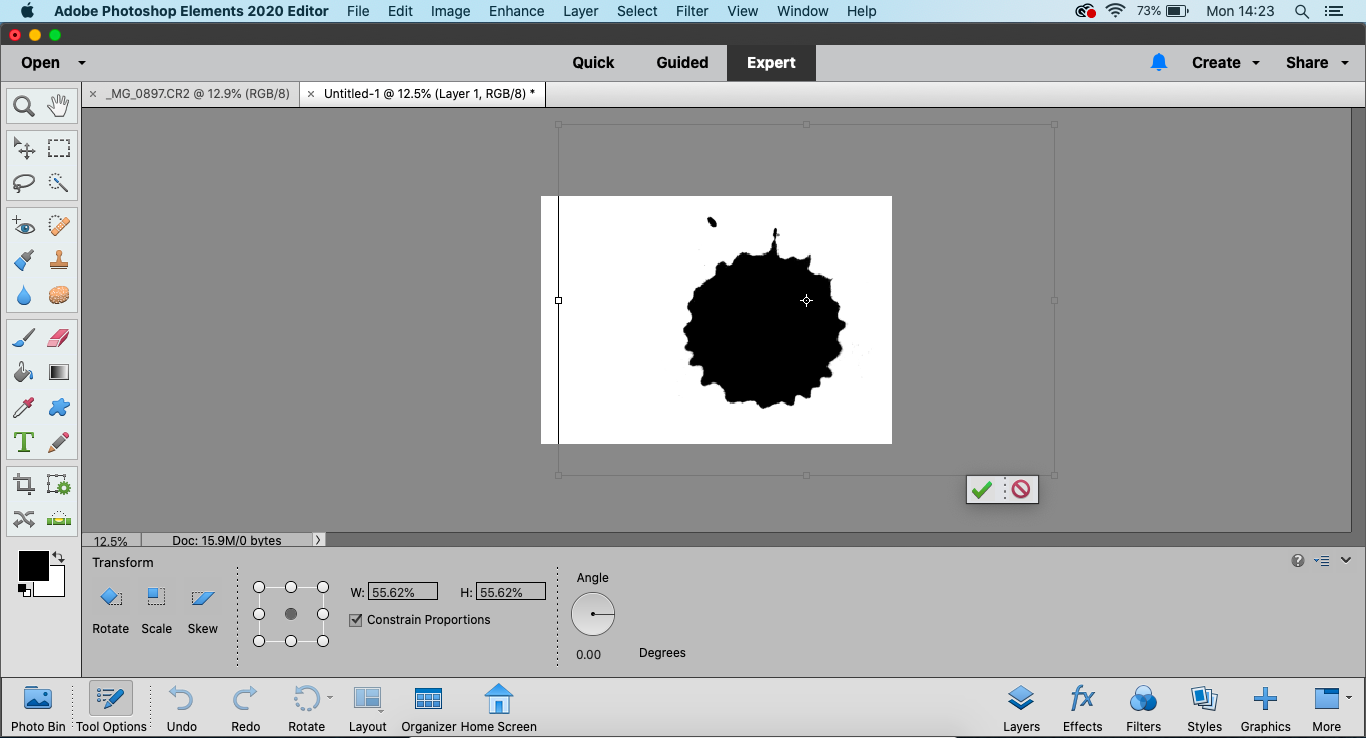
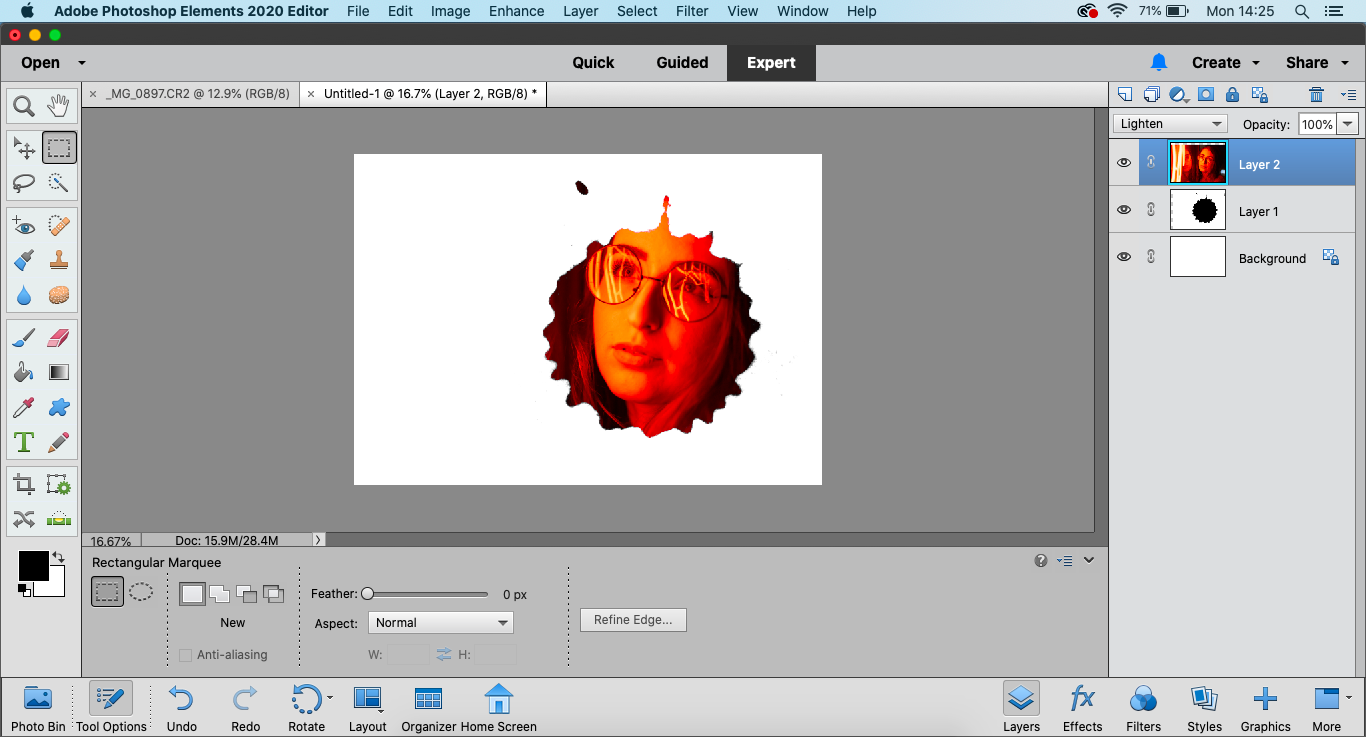
Go back into the ink splodge image and hit Ctrl/Cmd+A to select it, Ctrl/Cmd+C to copy it and then back in your new doc hit Ctrl/Cmd+V to paste it in. Then, hit Ctrl/Cmd+T to put it into Free Transform Mode and resize it to fi t the document by pulling the corners of the bounding box.
04 Paste your picture in and resize
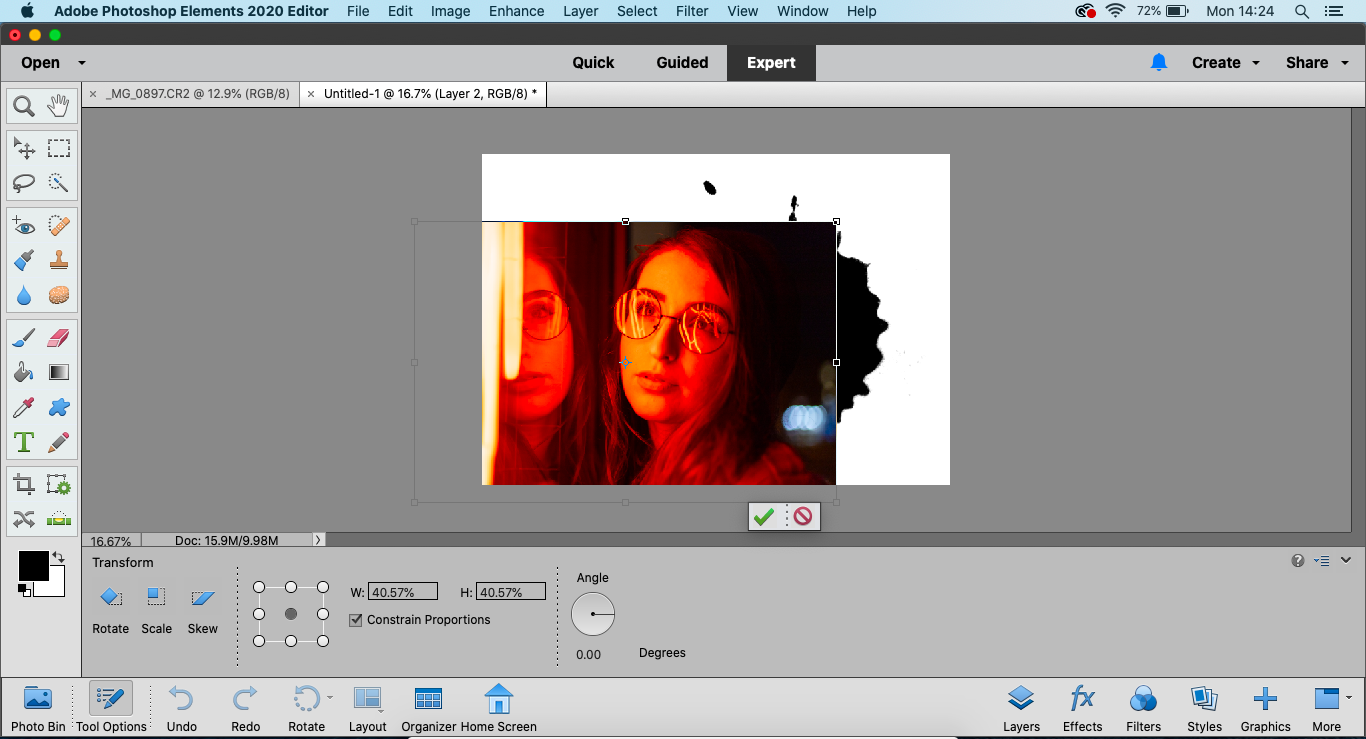
Now, go over to your main image and hit Ctrl/Cmd+A to select it, Ctrl/Cmd+C to copy it and hit Ctrl/Cmd+W to close it down. Then, back in your new document, hit Ctrl/Cmd+V to paste it in and hit Ctrl/Cmd+T to put it into Free Transform Mode and resize it to fit the whole document.
05 Blend your image in
Go over to the Layers panel and change the Blending Mode from Normal to Screen. At this point, you’ll see your picture only appear through the black parts of the ink splodge. Now is a good time to click on each of the layers and resize them with Free Transform Mode to make them perfect.
06 Build up the effect
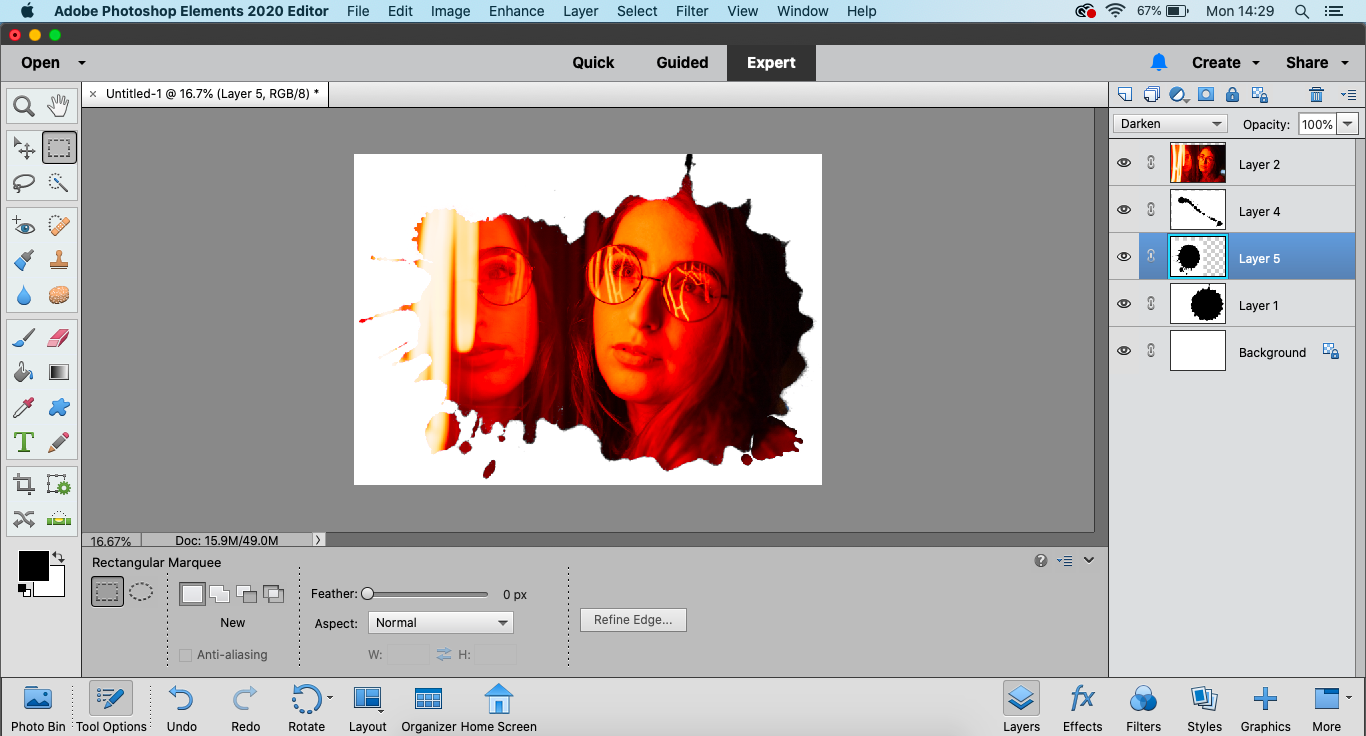
You can build up the effect by copying and pasting in more ink splodges onto the Background Layer. Just change the Blending Mode to Darken, so that the ink splodges start to overlap and then hit Ctrl/Cmd+T to put each splodge into Free Transform Mode to resize and move them as you see fit.
PhotoPlus: The Canon Magazine is the world's only monthly newsstand title that's 100% devoted to Canon, so you can be sure the magazine is completely relevant to your system.
Read more:
The best photo editing software: image editors for novices through to pros
The best photo-editing laptops in 2020: top laptops for photographers
10 best online photography courses – from beginner guides to masterclasses

In addition to being a freelance photographer and filmmaker, Dan is a bona fide expert on all things Canon and Adobe. Not only is he an Adobe-certified Photoshop guru, he's spent over 10 years writing for specialist magazines including stints as the Deputy Editor for PhotoPlus: The Canon Magazine, Technical Editor for Practical Photography and Photoshop Editor on Digital Photo.
