Make a tropical composite in Affinity Photo
Remove a dull, distracting background and drop in a lush replacement using Affinity Photo
Start here
• Affinity Photo tutorials
The tutorials
1. Affinity Photo vs Photoshop
2. RAW editing with Affinity Photo
3. Focus merge with Affinity Photo
4. Replace a sky in Affinity Photo
5. Moody mono in Affinity Photo
6. Six Affinity Photo landscape tips
7. Color correction in Affinity Photo
8. Live Filters in Affinity Photo
9. Create a classic wet plate look
10. Remove objects in Affinity Photo
11. Paint an abstract portrait
12. Enhance skintones in Affinity Photo
13. Create HDR in Affinity Photo
14. Replace a sky in Affinity Photo
15. Affinity Photo double exposures
16. Affinity Photo Denoise tool
17. Affinity Photo retouching
18. Restore old family portraits
19. Change clothes in Affinity Photo
20. Create super-charged sunsets
21. Fix faces with a flourish
22. Get creative with composites
23. Liquify faces with Affinity Photo
24. Make a tropical composite
25. Let it snow in Affinity Photo
26. Create an immaculate conception
Watch video: Make a tropical composite in Affinity Photo
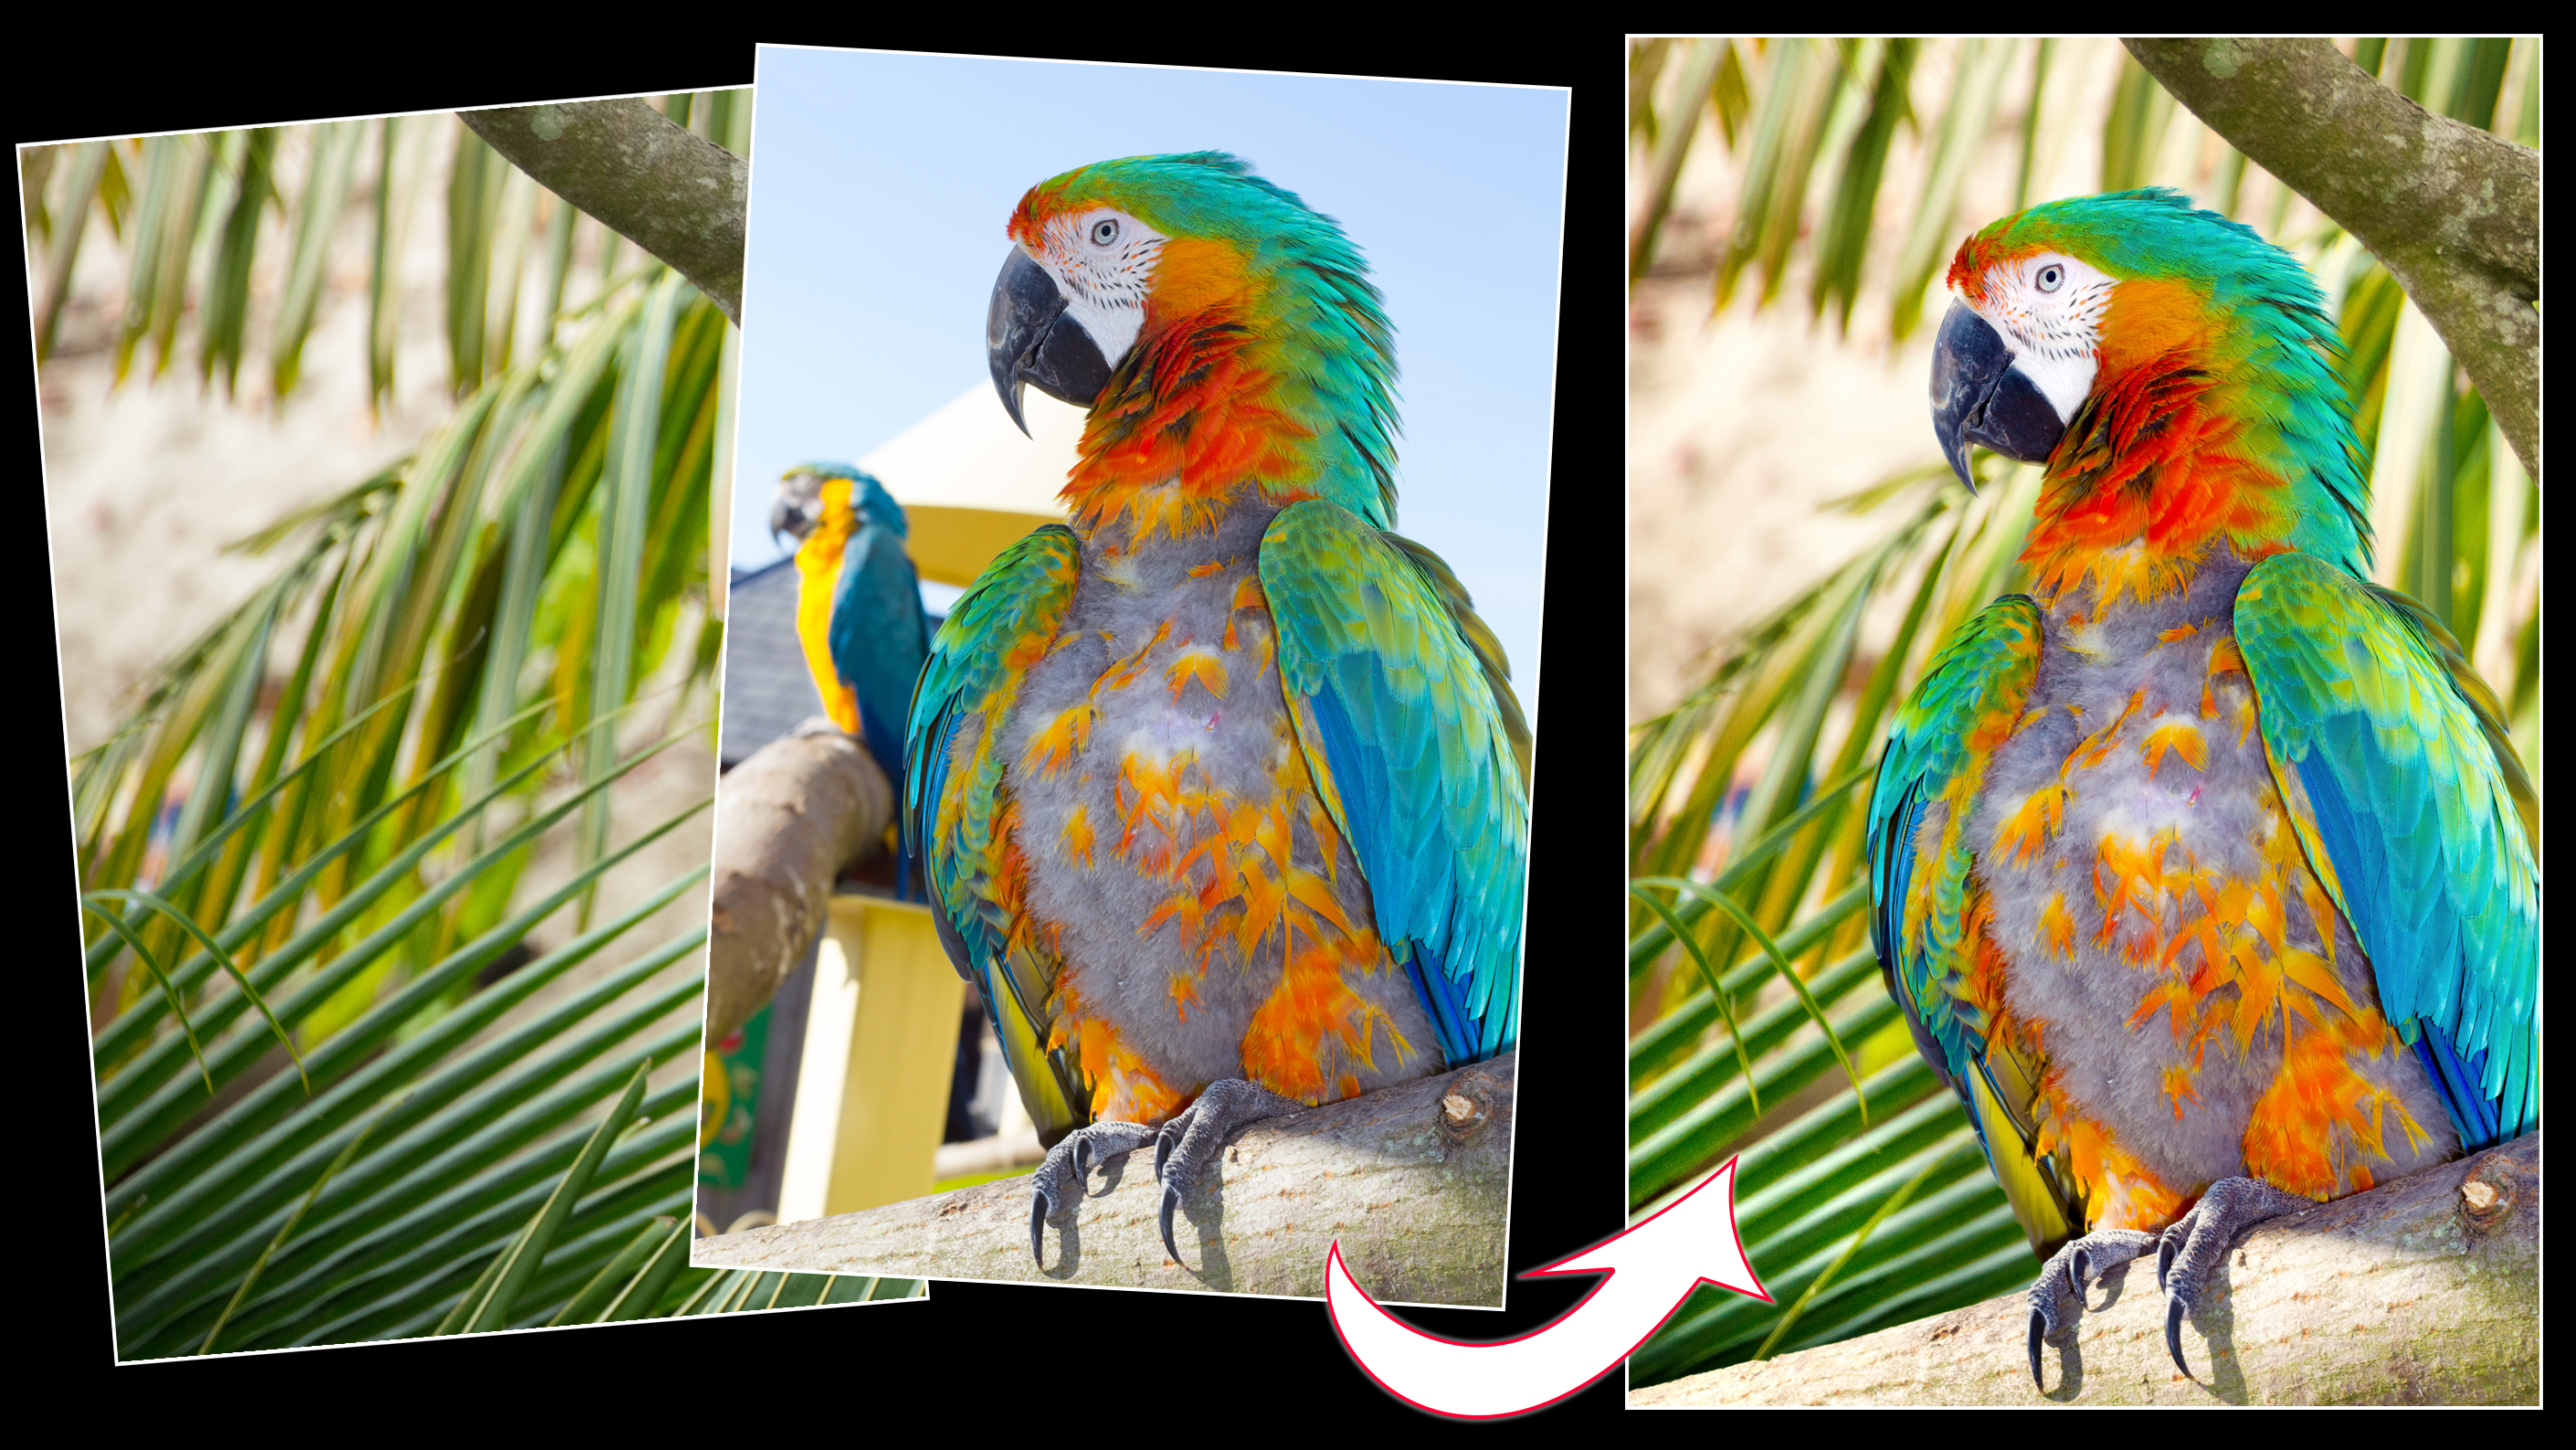
Replacing a backdrop is a fun way to transform your photos, and it’s a fairly straightforward task with Affinity Photo’s clever selection tools. Whether you want to transport your subject to a faraway place or simply make an accurate cutout, this technique will give you results in minutes.
We’ll begin here by selecting the bird using the handy Selection Brush. This can lock on to the edges of the figure, enabling us to isolate it with a few clicks. Once done, we can improve our selection using the Refine control, which lets us knock out all the messy, fine bits of background that show through the bird’s feathers.
Automated tools can only get us so far and, as such, we may need to finish off our cutout manually by painting on a layer mask to fine-tune what is hidden or revealed. Thankfully this shouldn’t take too long, as Affinity Photo’s intelligent selection tools will do most of the heavy lifting for us. Once done, we can simply drop in another image and transport our subject to a tropical paradise.
Matching up the two images can take a little work, as we want the perspective and depth of field to fit with each. It helps to pick a background scene with areas that are out-of-focus like this as it makes the composite look much more realistic. It also helps if the lighting in each picture matches. Here both scenes are in sunlight, so they fit together that little bit more naturally.
Read more:
Step 1: Select the bird
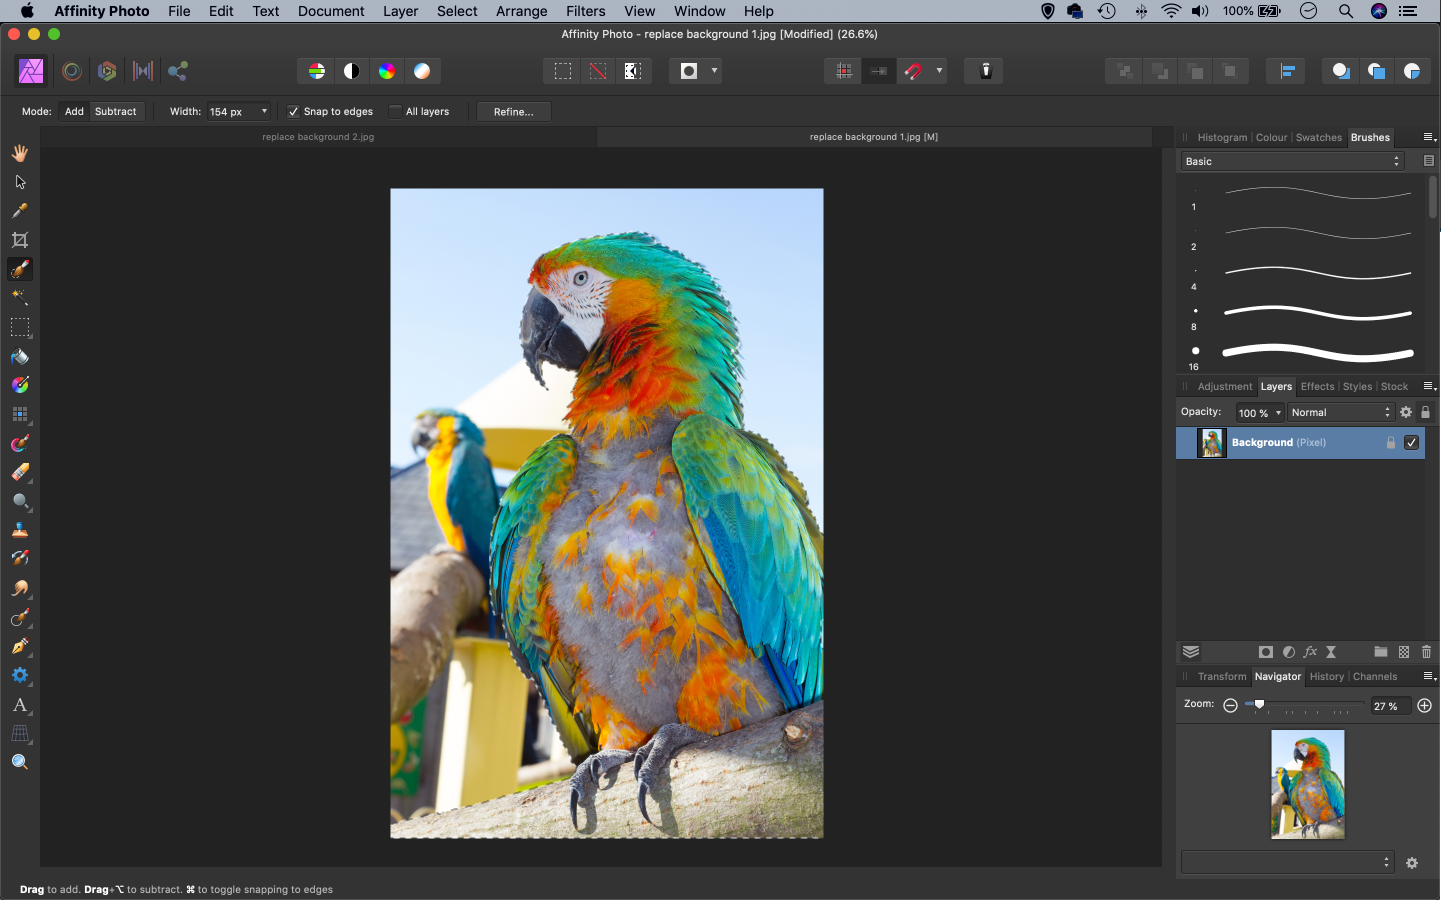
Open the bird shot into Affinity Photo then, ensuring you’re in the Photo Persona, grab the Selection Brush from the toolbar. Check ‘Snap to Edges’ in the options at the top and paint over the bird and perch to select it. If the tool picks up parts of the background, hold Alt and paint to subtract them.
Step 2: Use the Refine tool
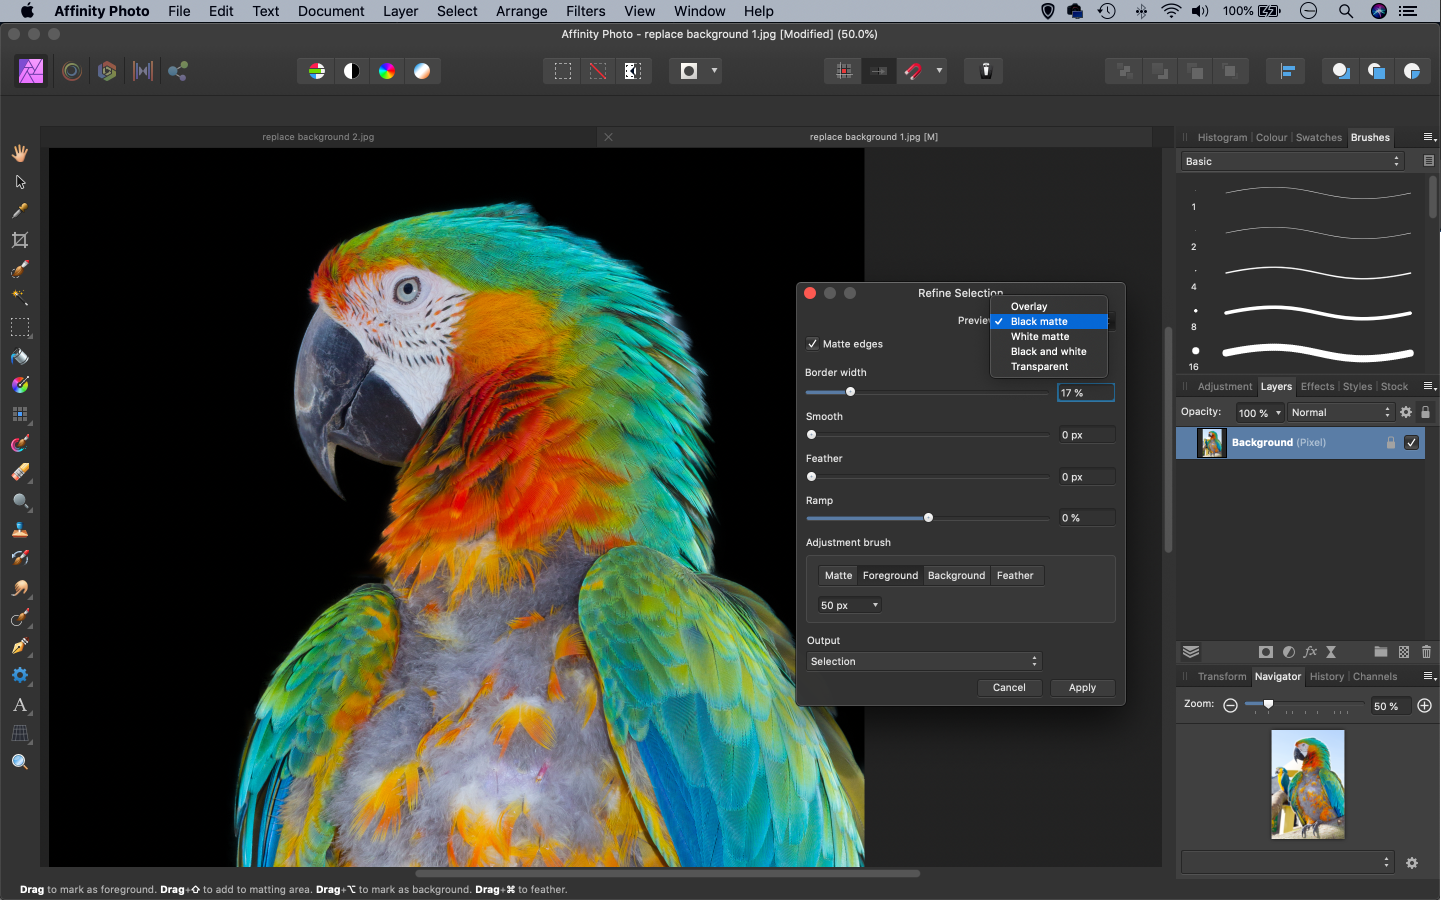
Click Refine in the options at the top. Choose an overlay from the dropdown that gives you the best contrast between subject and background – we chose black. Increase the Border Width slider to expand the area of refinement, so that it covers the longer feathers and picks up all the fine detail.
Step 3: Fine-tune the edges
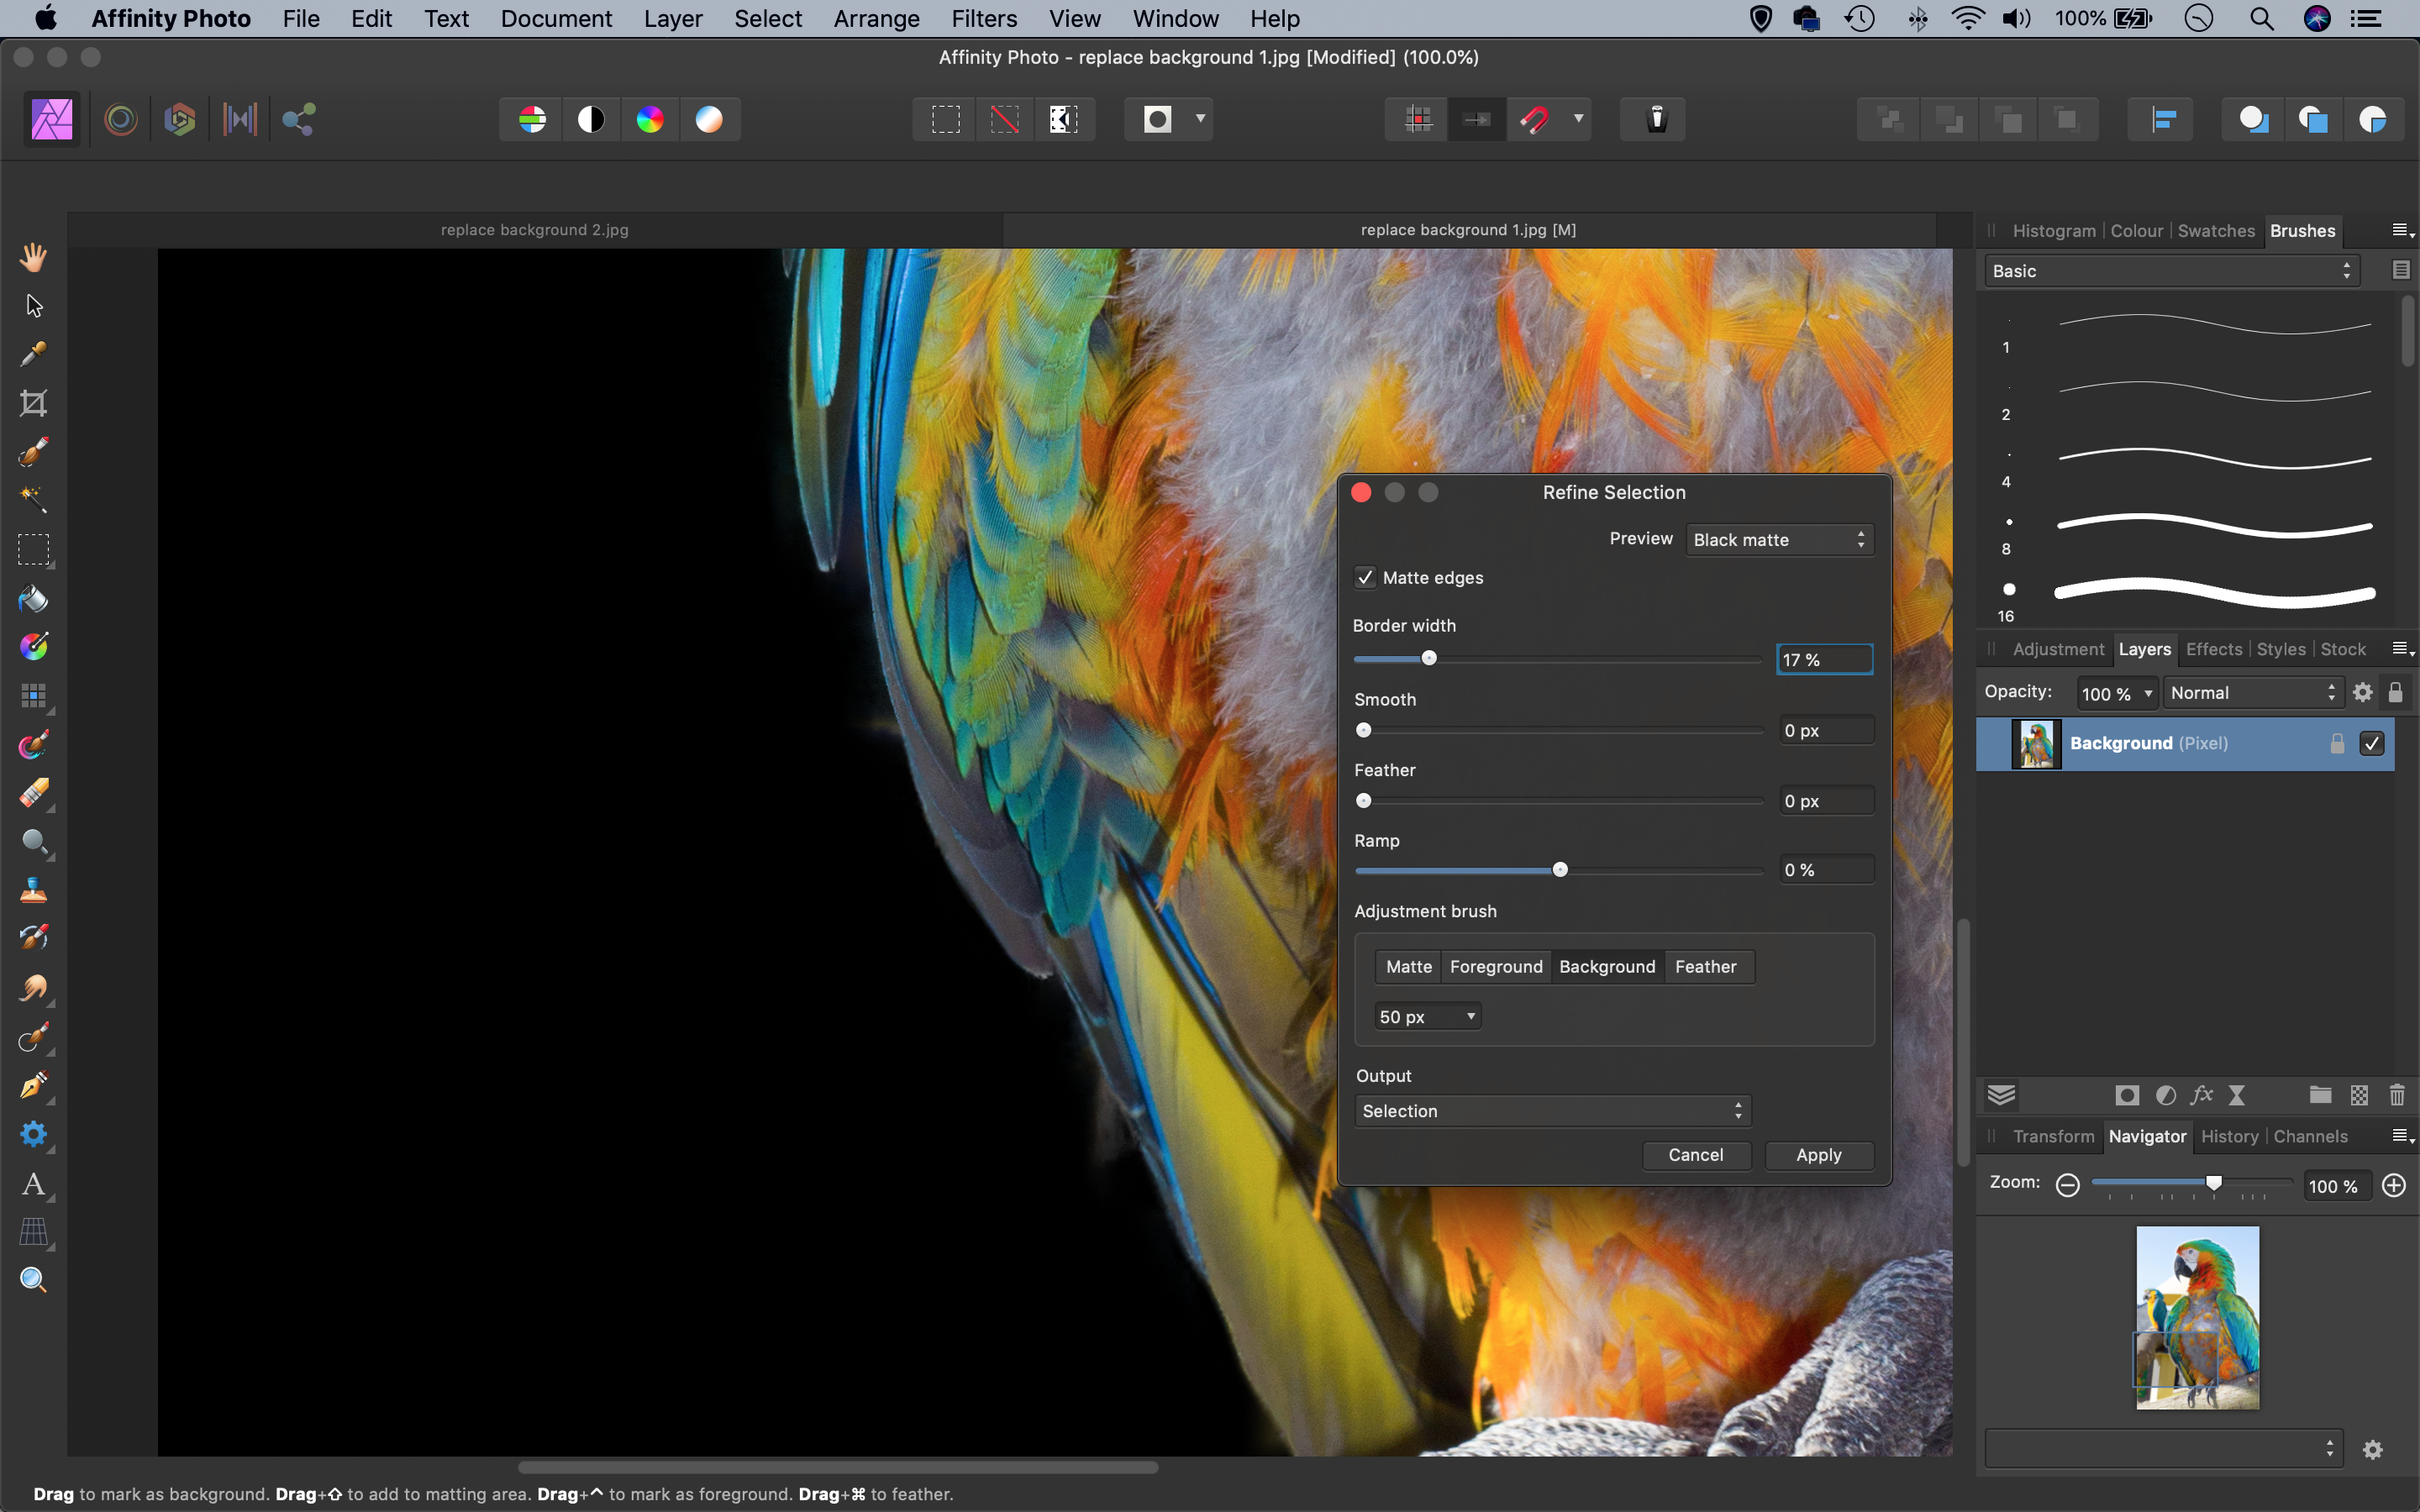
The Adjustment Brush options in the Refine dialogue let you improve your cutout by painting over areas you want to include or exclude from the selection. Zoom in with Cmd/Ctrl and +, then check the edges and paint with the Foreground or Background brush to fine-tune the edges.
Step 4: The new backdrop
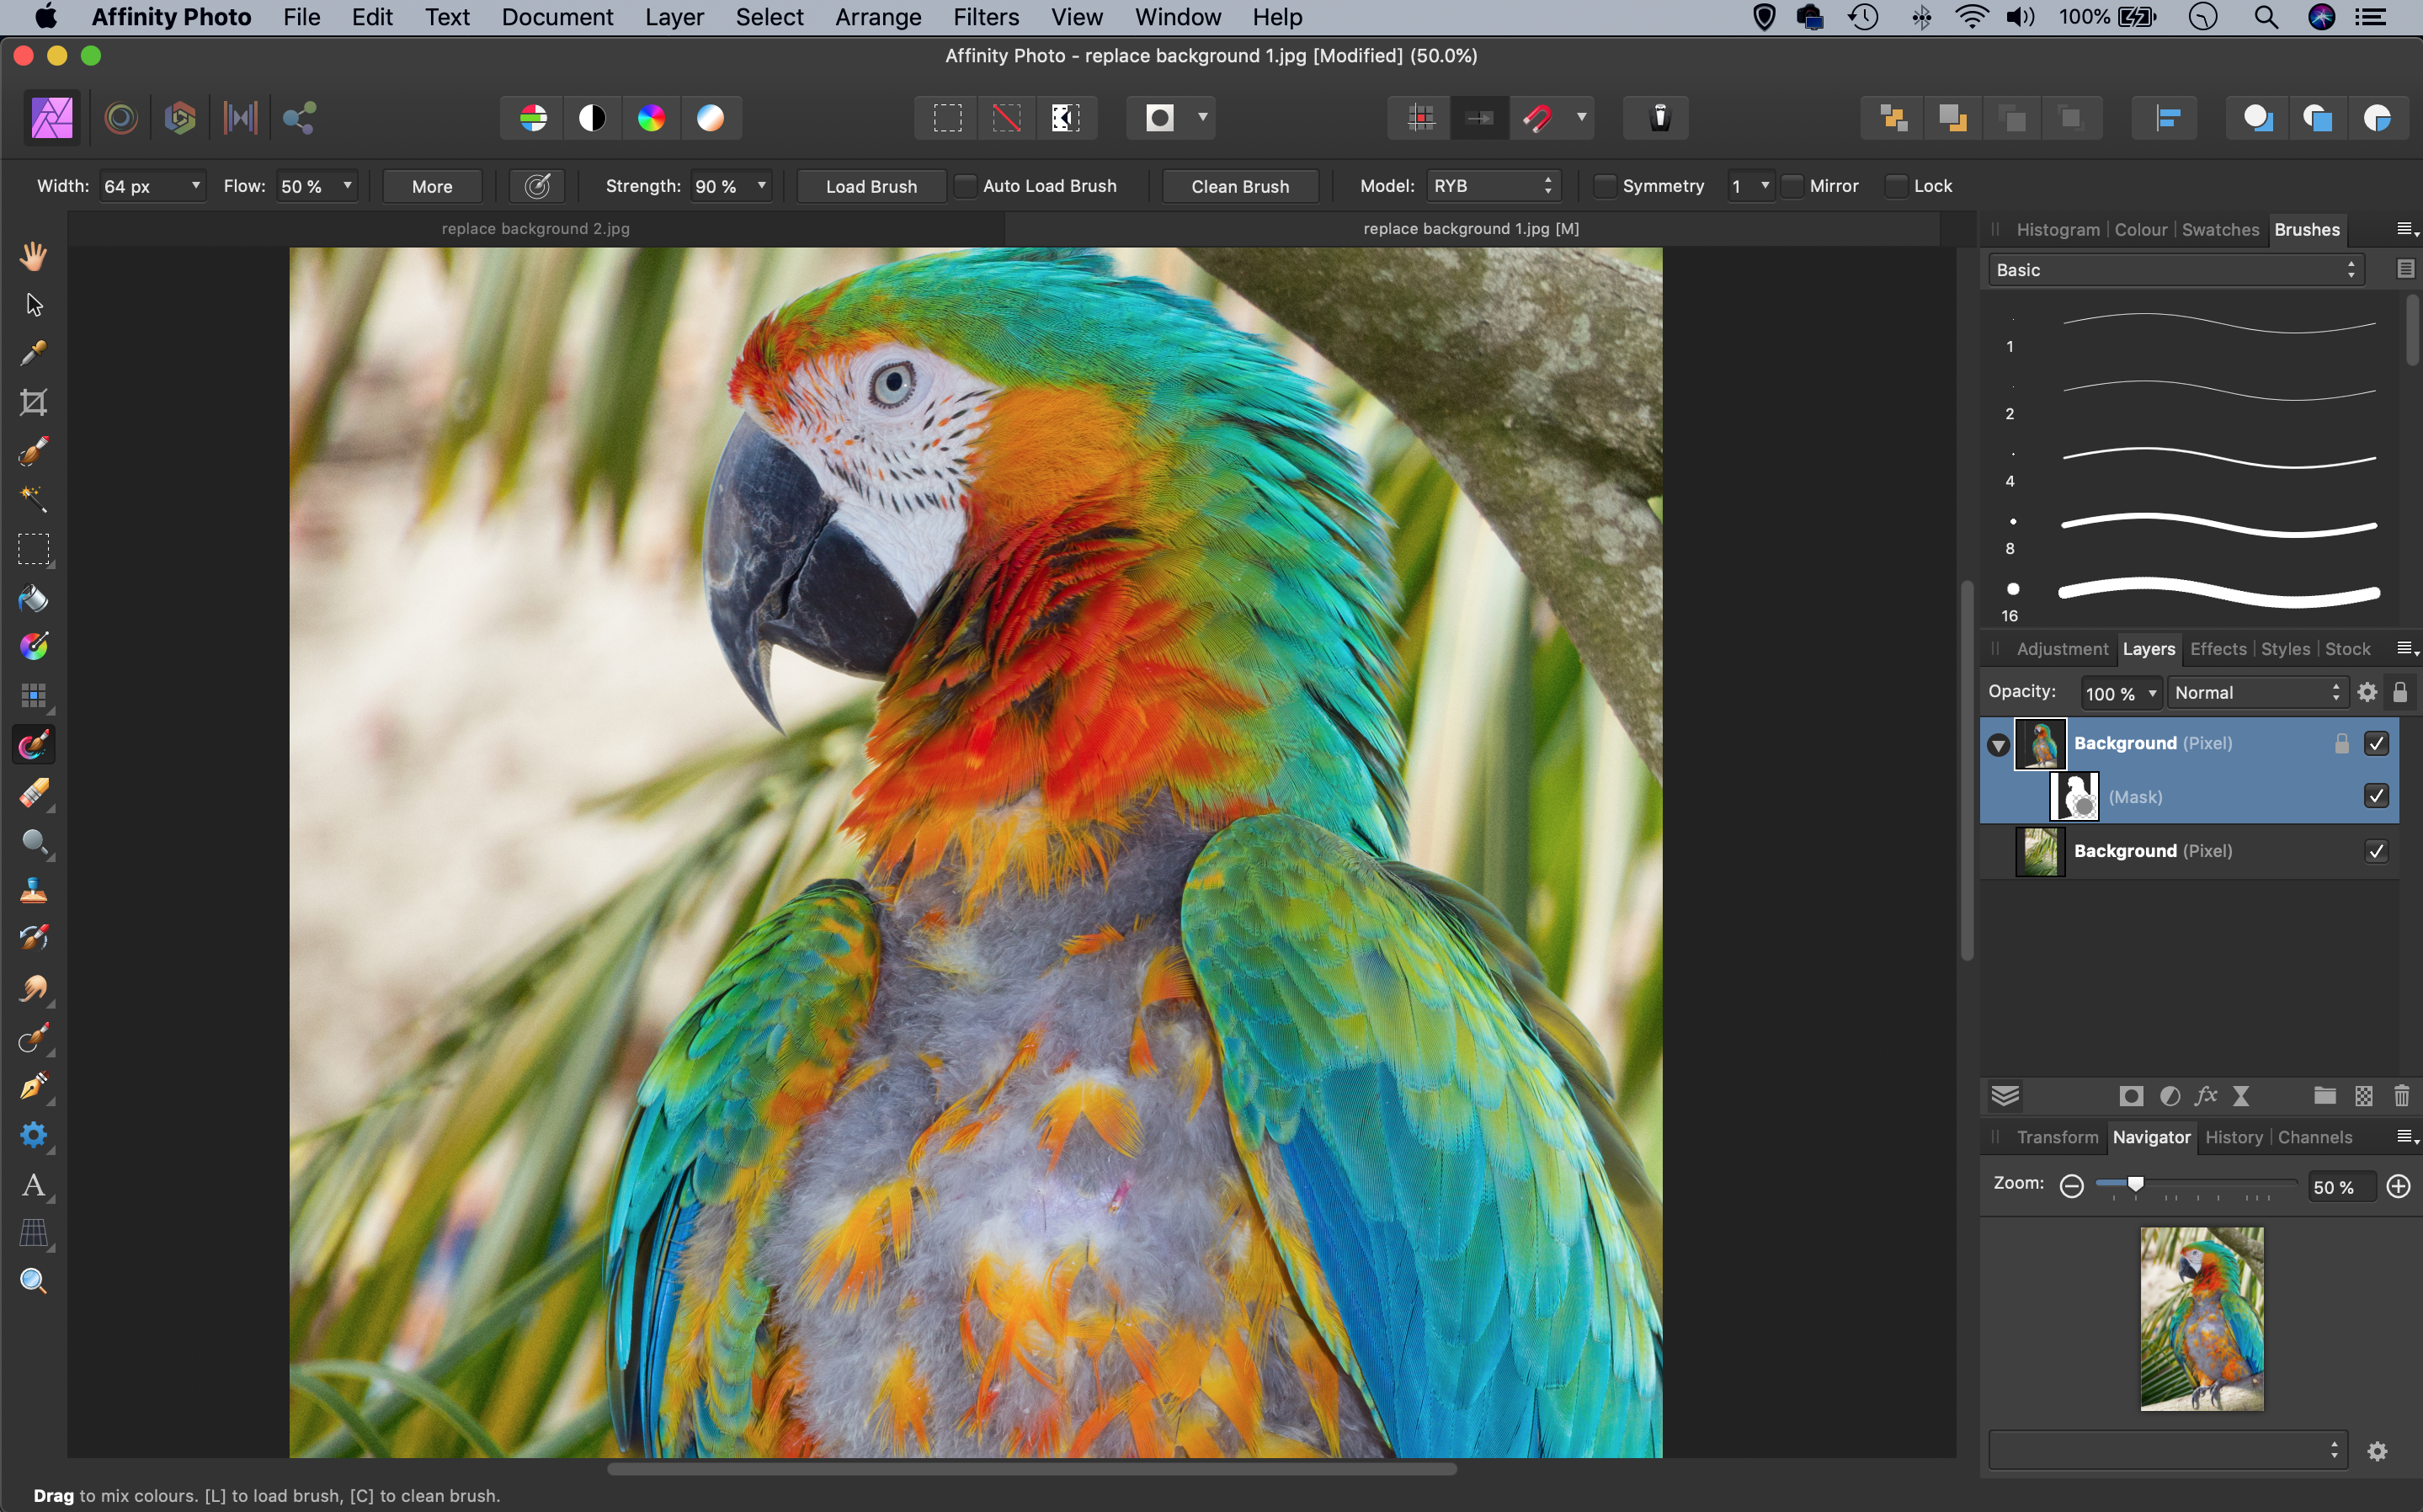
Choose Output: Mask and hit Apply. Open the image with the new background then Copy (Cmd/Ctrl+C) and Paste (Cmd/Ctrl+V) the new picture into the bird image. Drag the bird layer above the other one so it sits on top. If you need to resize or reposition the backdrop, highlight the layer, grab the Move tool and drag the bounding box.
Step 5: Perfect the mask
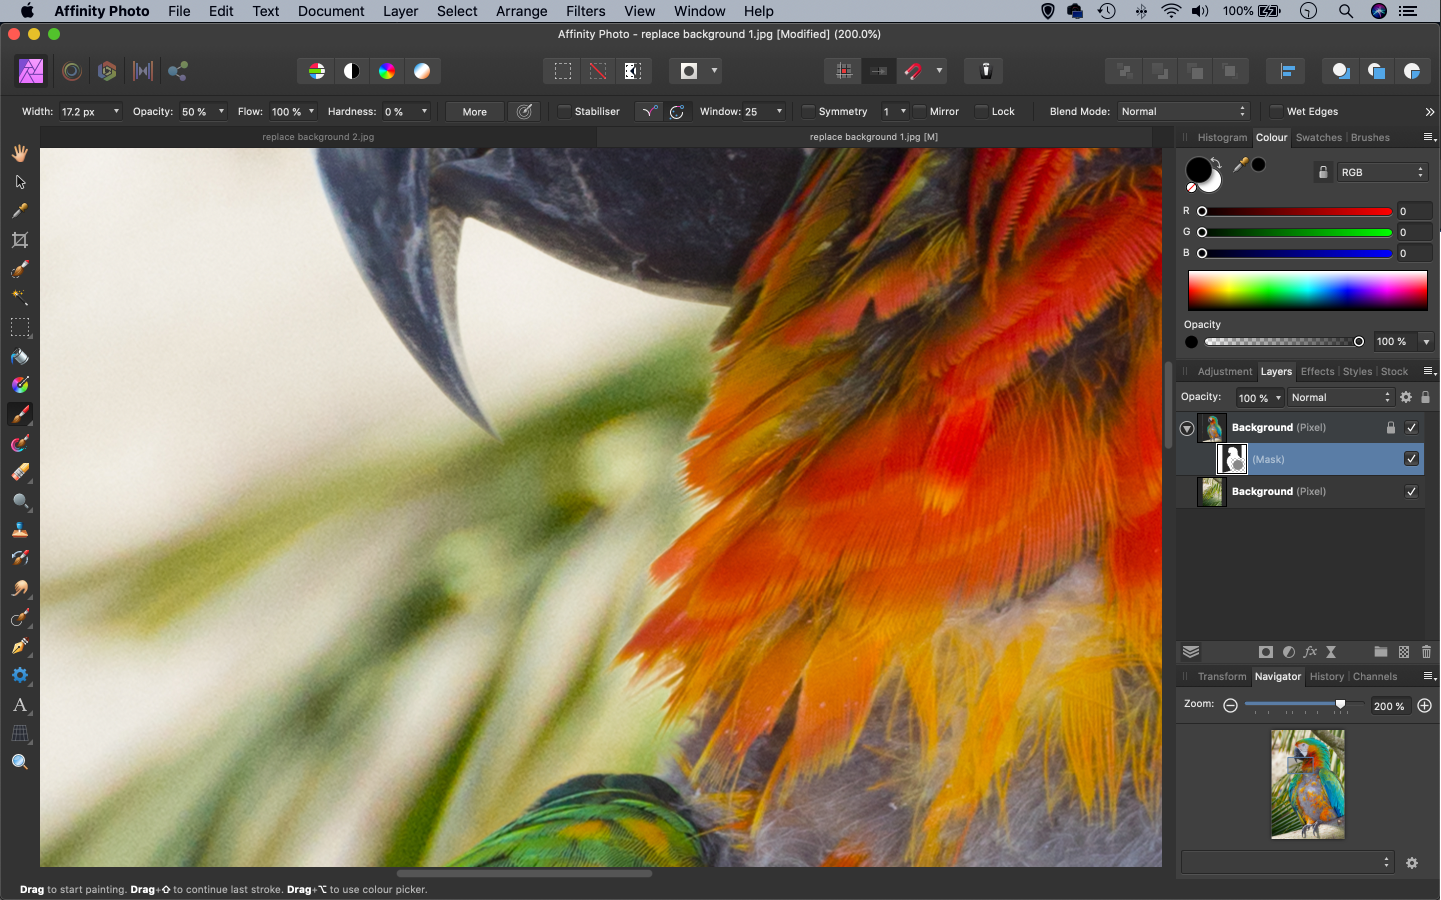
Highlight the mask thumbnail on the bird layer then zoom in close to check that the two images blend together seamlessly. You might see bright halos around some of the edges of the bird, if so grab the Brush tool, hit 5 for 50% brush opacity and paint with black to gradually remove them.
Step 6: Tone the composite
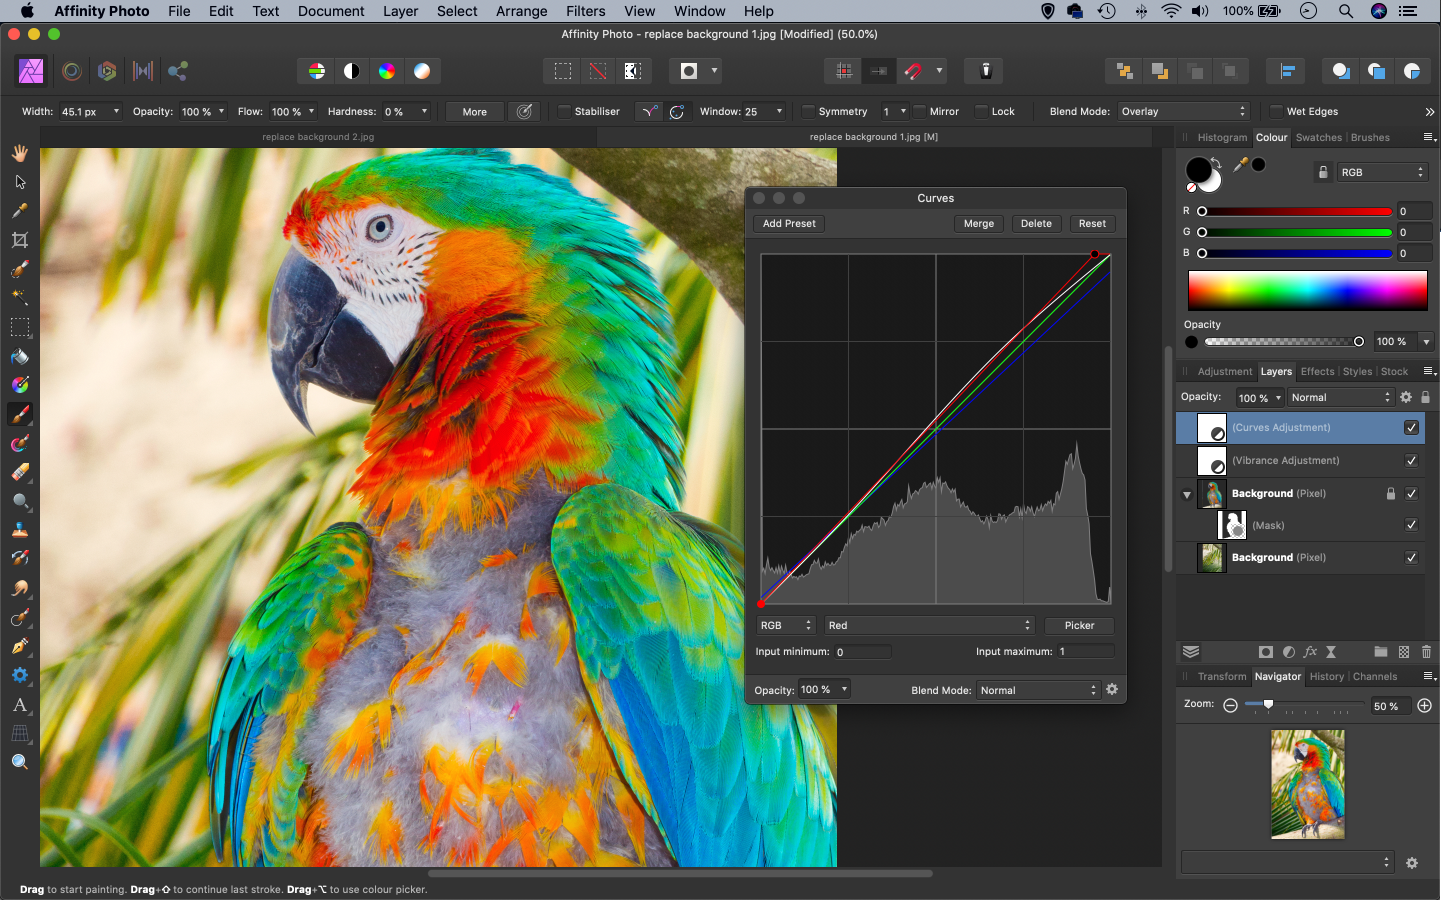
Click the Adjustment icon in the Layers panel and choose Vibrance. Increase vibrance and saturation to enhance the colours. Next, add a Curves adjustment layer. Boost the contrast by plotting an S-shaped curve line, then try adding a subtle colour shift by targeting and tweaking the individual colour channels as shown.
Quick tip
The powerful Refine tool should be used on any cutout in Affinity Photo that needs precision. It works by seeking out details around the edge of a selected area that should be included or excluded, based on the surrounding pixels. The Border Width control lets you expand the search area for these details. The Adjustment Brush buttons let you manually paint over parts that you know should be excluded or included in the selection. Once done, you can output your selection as a mask to complete your cutout by hiding everything outside the selected area.
About N-Photo magazine
This tutorial originally appeared in N-Photo, the monthly newsstand magazine for Nikon photographers. Why not subscribe to a print edition, and have the magazine delivered direct to your door every month?
Alternatively, we have a number of different digital options available, including:
• Apple app (for iPad or iPhone)
• Zinio app (multi-platform app for desktop or smartphone)
• PocketMags (multi-platform app ideal for Android devices)
• Readly (all-you-can-eat digital magazine subscription service)
If you wanted a printed version of any of our most recent issues we have a selection of back issues to choose from in our online store.
Read more:
• Photography tips and tutorial videos
• The best photo editing tools and accessories
• The best desktop computers for photo editing
• The best photo-editing laptops right now
• The best photo editing software today
Get the Digital Camera World Newsletter
The best camera deals, reviews, product advice, and unmissable photography news, direct to your inbox!
N-Photo: The Nikon Magazine is a monthly publication that's entirely dedicated to Nikon users. As a 100% independent magazine, you can be assured of unbiased opinion from a trustworthy team of devoted photography experts including editor Adam Waring and Deputy Editor Mike Harris.
Aimed at all users, from camera newcomers to working pros, every issue is packed with practical, Nikon-specific advice for taking better photos, in-depth reviews of Nikon-compatible gear, and inspiring projects and exciting video lessons for mastering camera, lens and Photoshop techniques.
Written by Nikon users for Nikon users, N-Photo is your one-stop shop for everything to do with cameras, lenses, tripods, bags, tips, tricks and techniques to get the most out of your photography.

