Make brilliant fantasy imagery using the latest features in Photoshop CC
We use some of the newest features in Photoshop CC to turn a portrait into an amazing composite image
Watch video: How to create composites in Photoshop CC
Those with an Adobe Creative Cloud subscription can take advantage of a range of constant new updates and features to Photoshop CC. In 2020 we saw Select Subject get an update. First introduced in 2018, the command uses artificial intelligence to isolate your subject with an automatic selection. It’s always been an impressive tool, but the latest updates take it to a whole new level of excellence, because now it can cut out hair.
The results are often excellent, even on windswept hair like the above. With a single click, we can now make a complex cut-out and isolate a person from their background. This will save time for those who already know how to cut out hair using Select and Mask, but it’s perhaps more useful for those who don’t know how. Within seconds, even a Photoshop novice can make a precise cut-out.
Elsewhere, there are more powerful updates to get stuck into. Camera Raw has been given a completely new look that brings it in line with Lightroom. What’s more, both Lightroom and Camera Raw now offer localized hue adjustments. So, after making a local adjustment with the Adjustment Brush, Graduated Filter or Radial Filter, you can now change the colors in the affected area with relative ease.
In this tutorial, we’ll explain how to use some of the latest features to create fantastic portrait composites. Along the way we’ll encounter the key new features and enhanced tools, from new cropping aids and local hue edits in Camera Raw to automated portrait selections and clever curves adjustments.
01 Better Camera Raw cropping
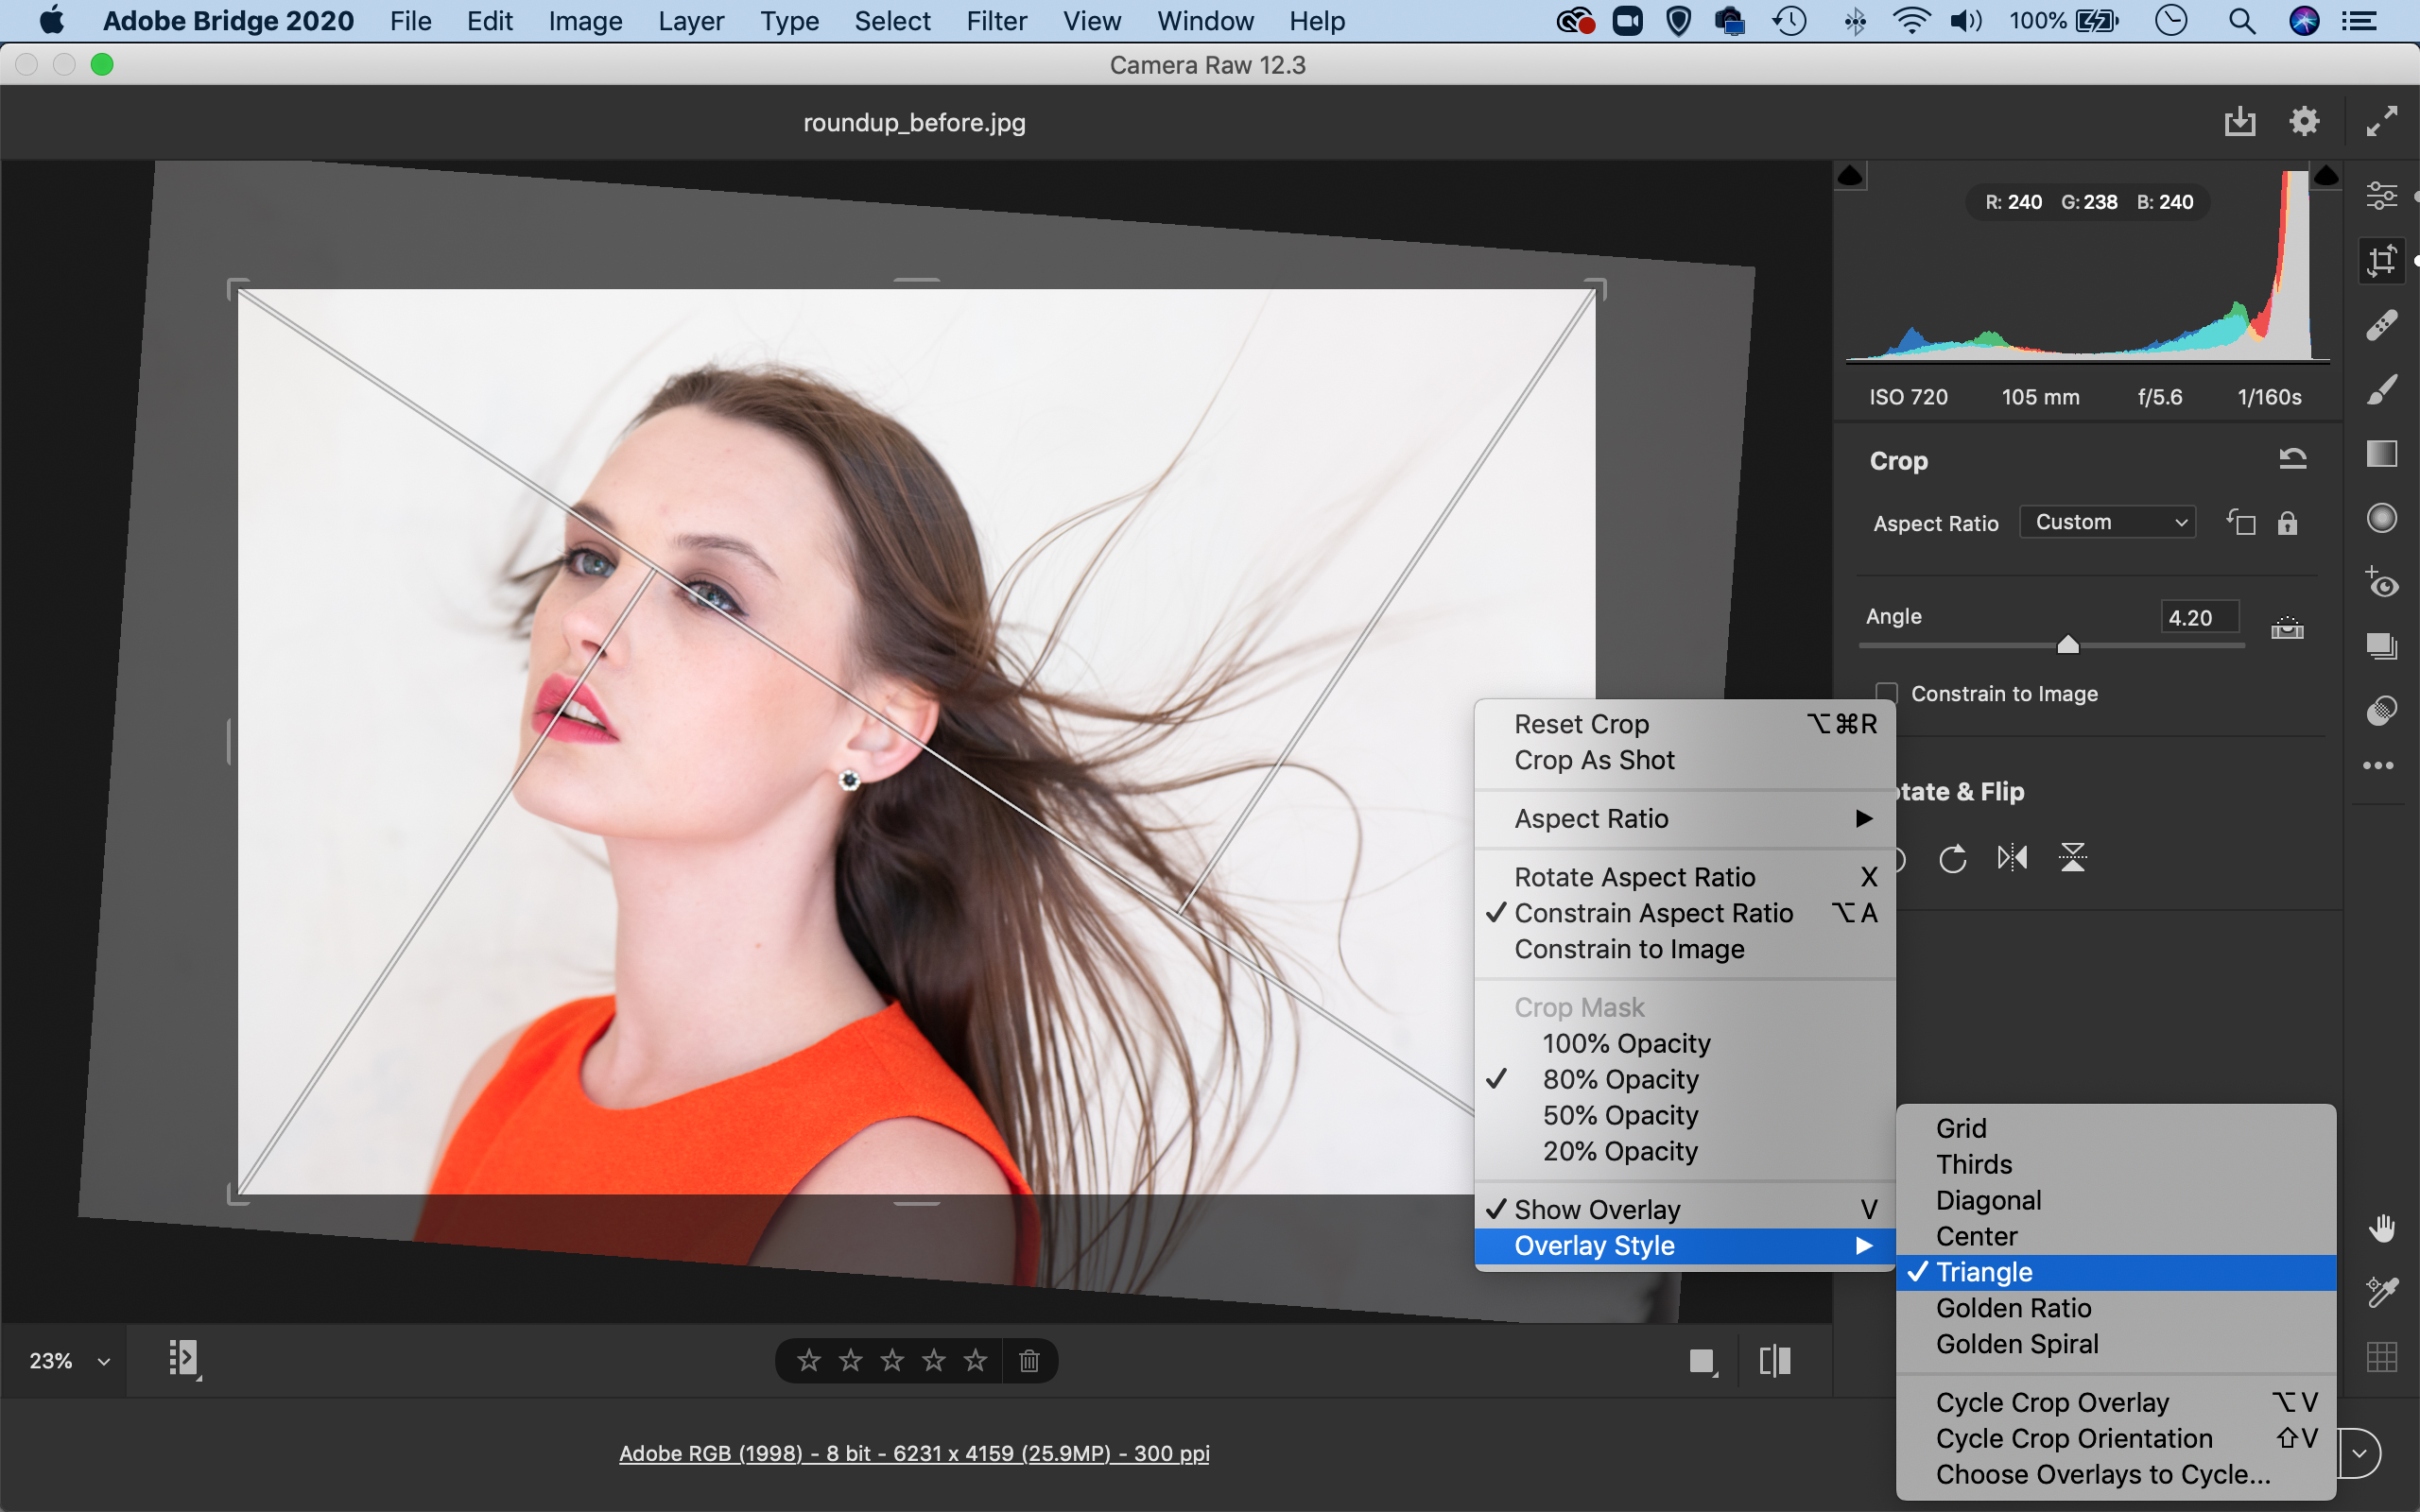
Open the image into Camera Raw. The toolbar is now on the right edge, grab the Crop tool. You can right-click to choose from a range of new crop overlays to aid your cropping. When rotating, the image now rotates rather than the crop box.
02 Colour-changing controls
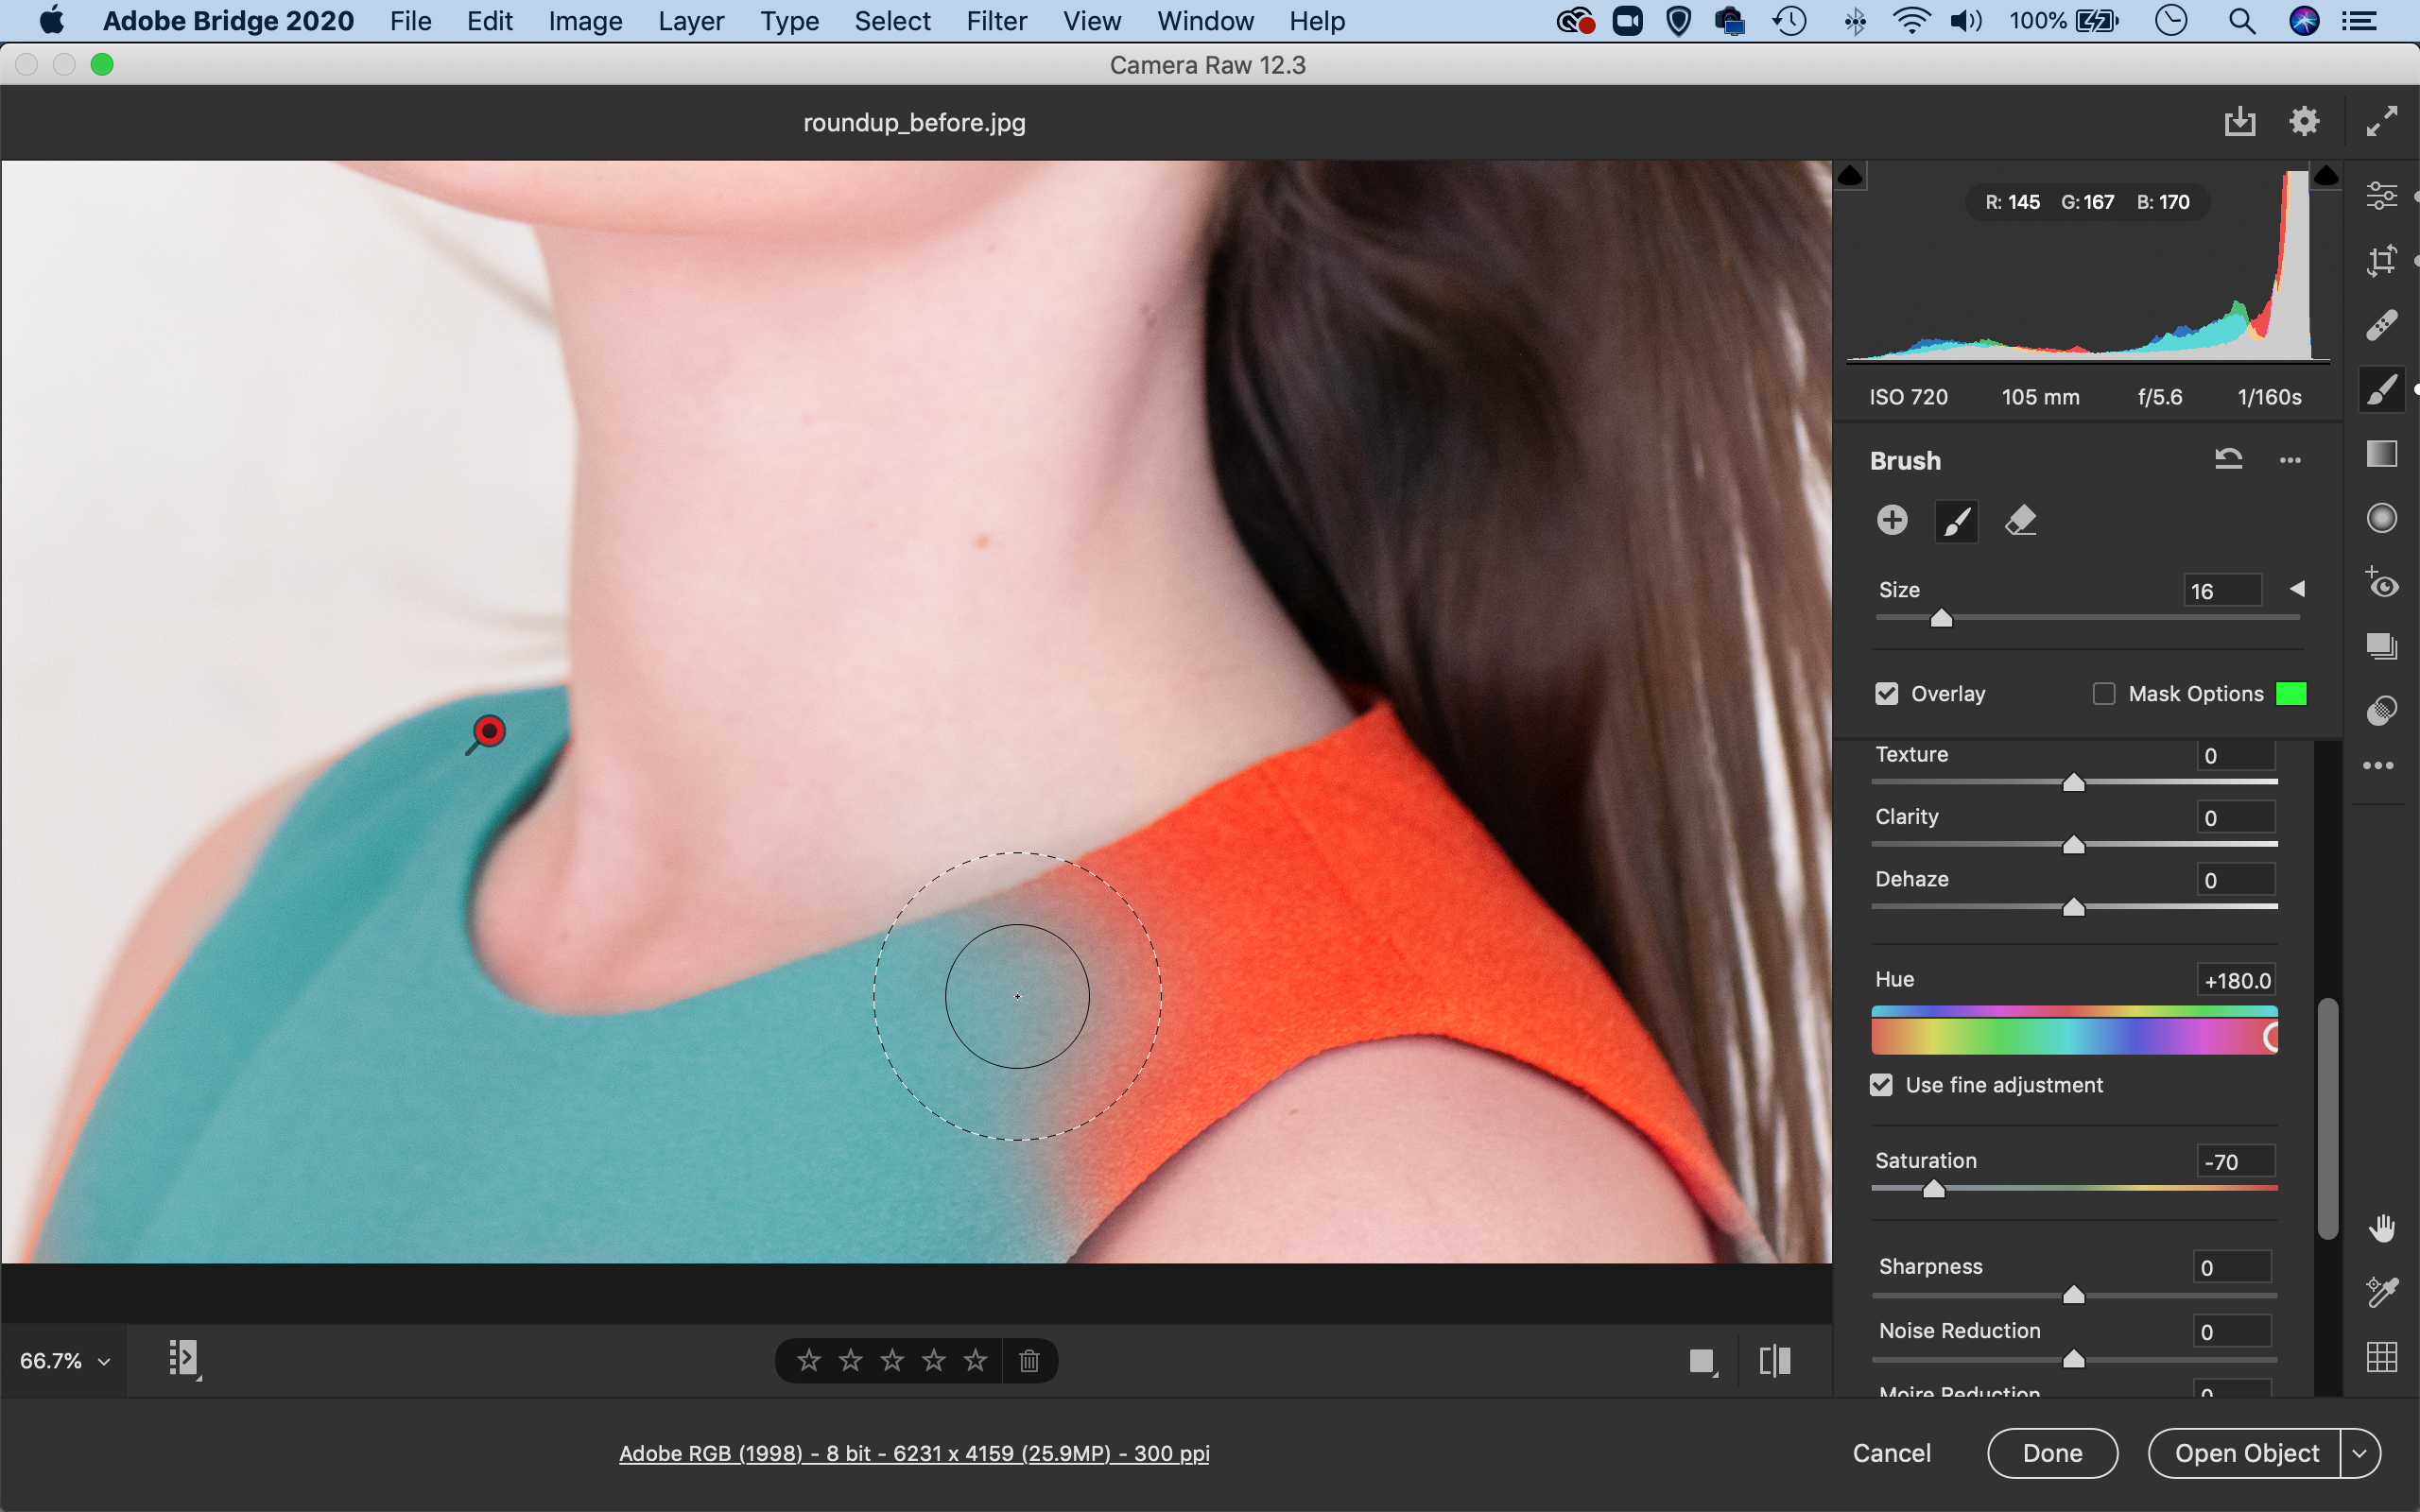
We can use the new local hue adjustment control to change the colors in parts. Grab the Adjustment Brush and paint over the clothes (check Auto-Mask in the brush settings to lock on to the colors). Go to the Hue box to alter them, then tweak it by lowering Saturation.
03 Fine hue adjustments
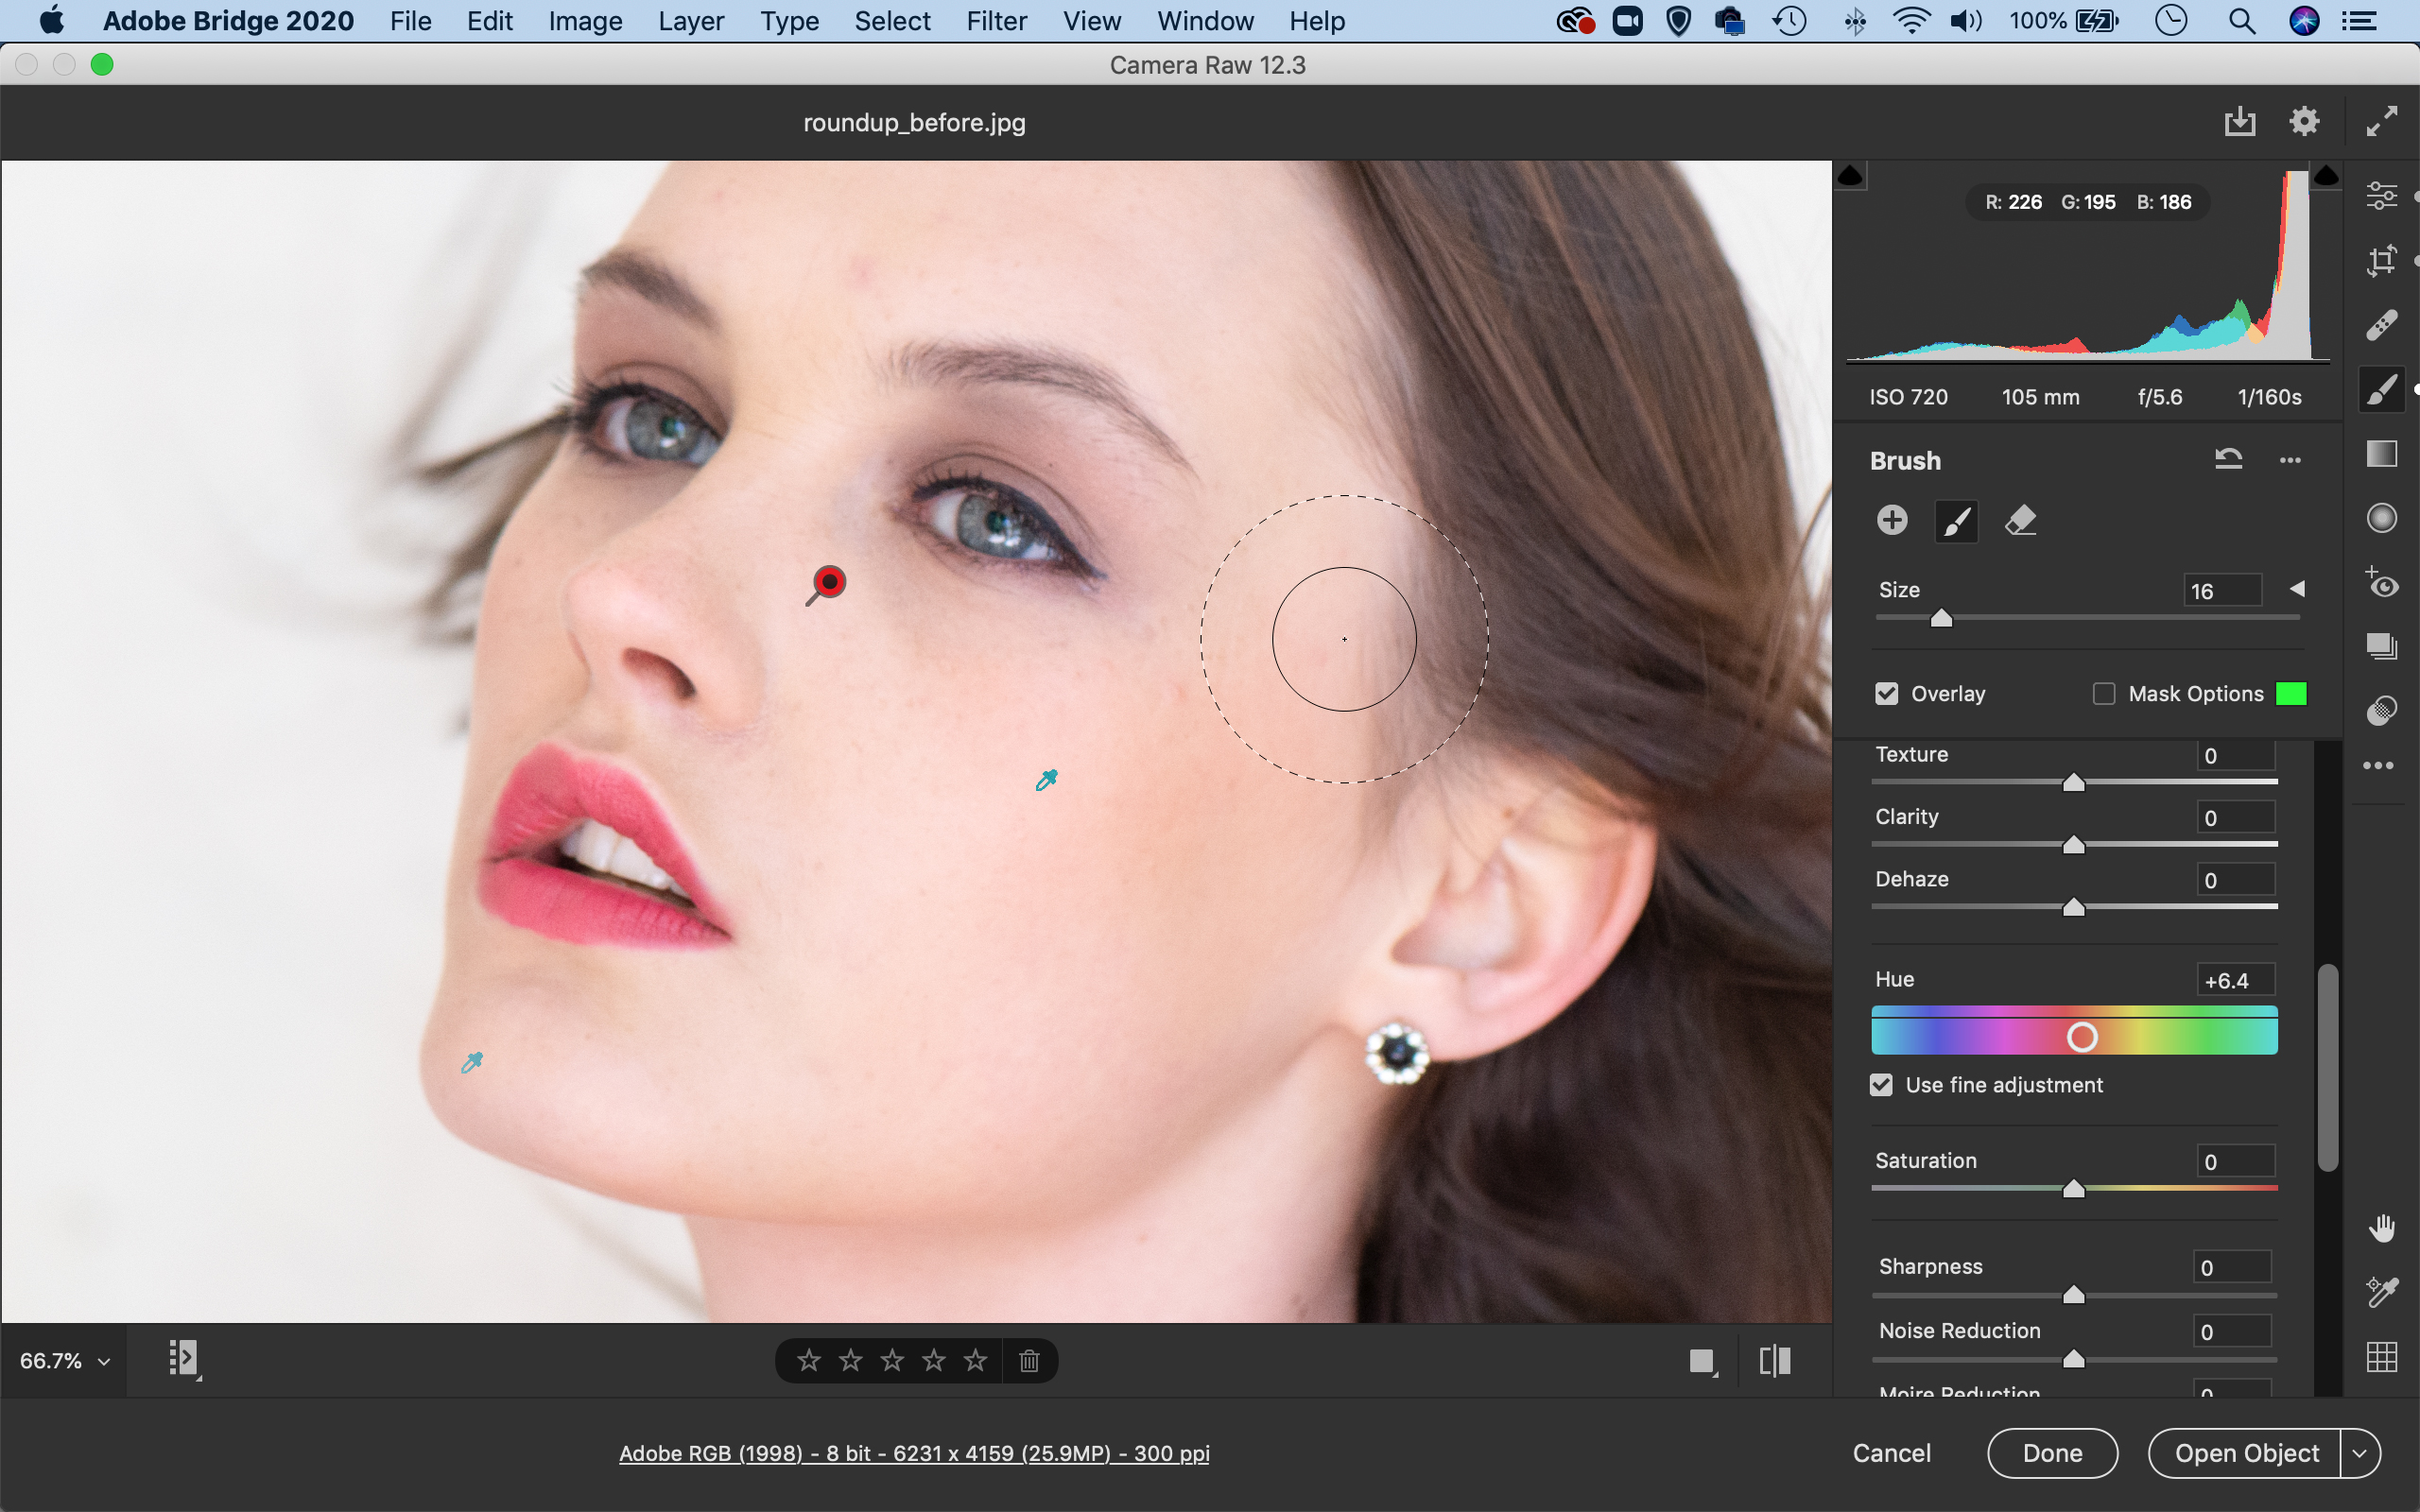
The hue command can also be useful for subtle color tweaks like shifting skin tones. Click New and paint over the face, then use Range Mask: Color to make it precise. Go to the Hue control and check ‘Use Fine Adjustment’, then drag right to add some warmth.
04 Enhanced auto selections
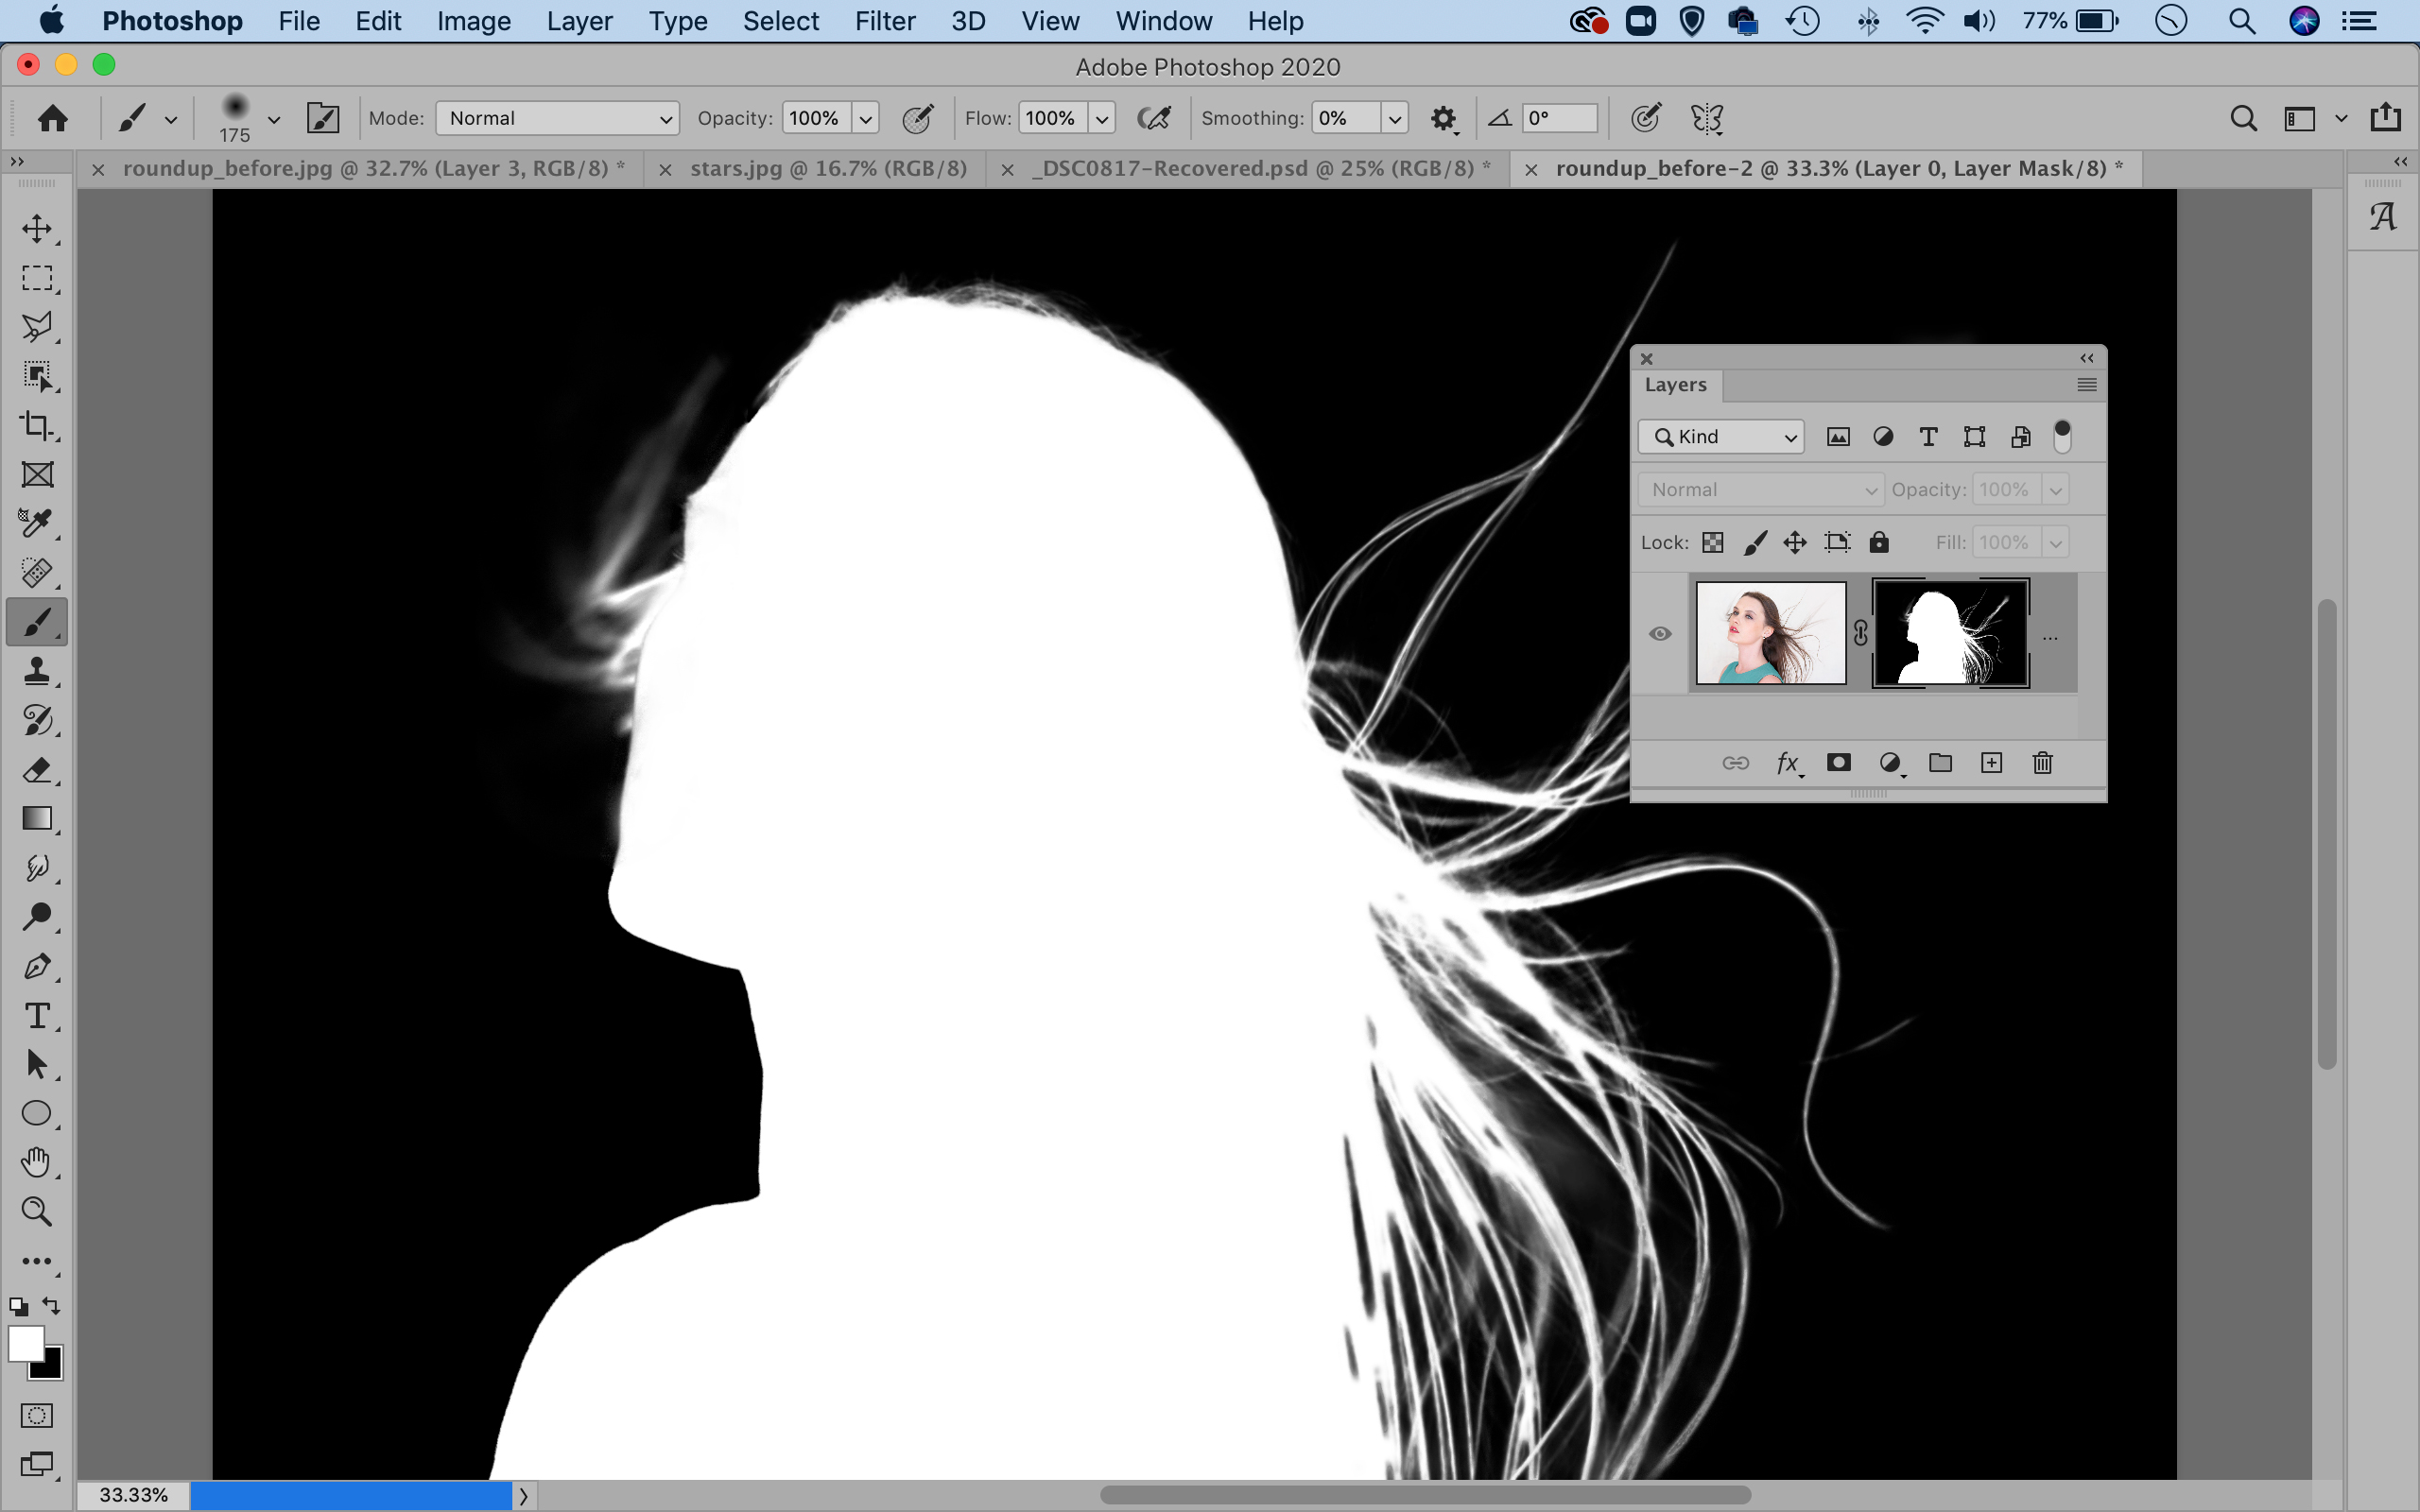
The Select Subject command isolates a person, including stray hairs. Open the shot in Photoshop and go to Select > Subject (or click the Select Subject button that appears when using a selection tool). Click the Add Layer Mask icon to convert selection to mask.
05 Create a new backdrop
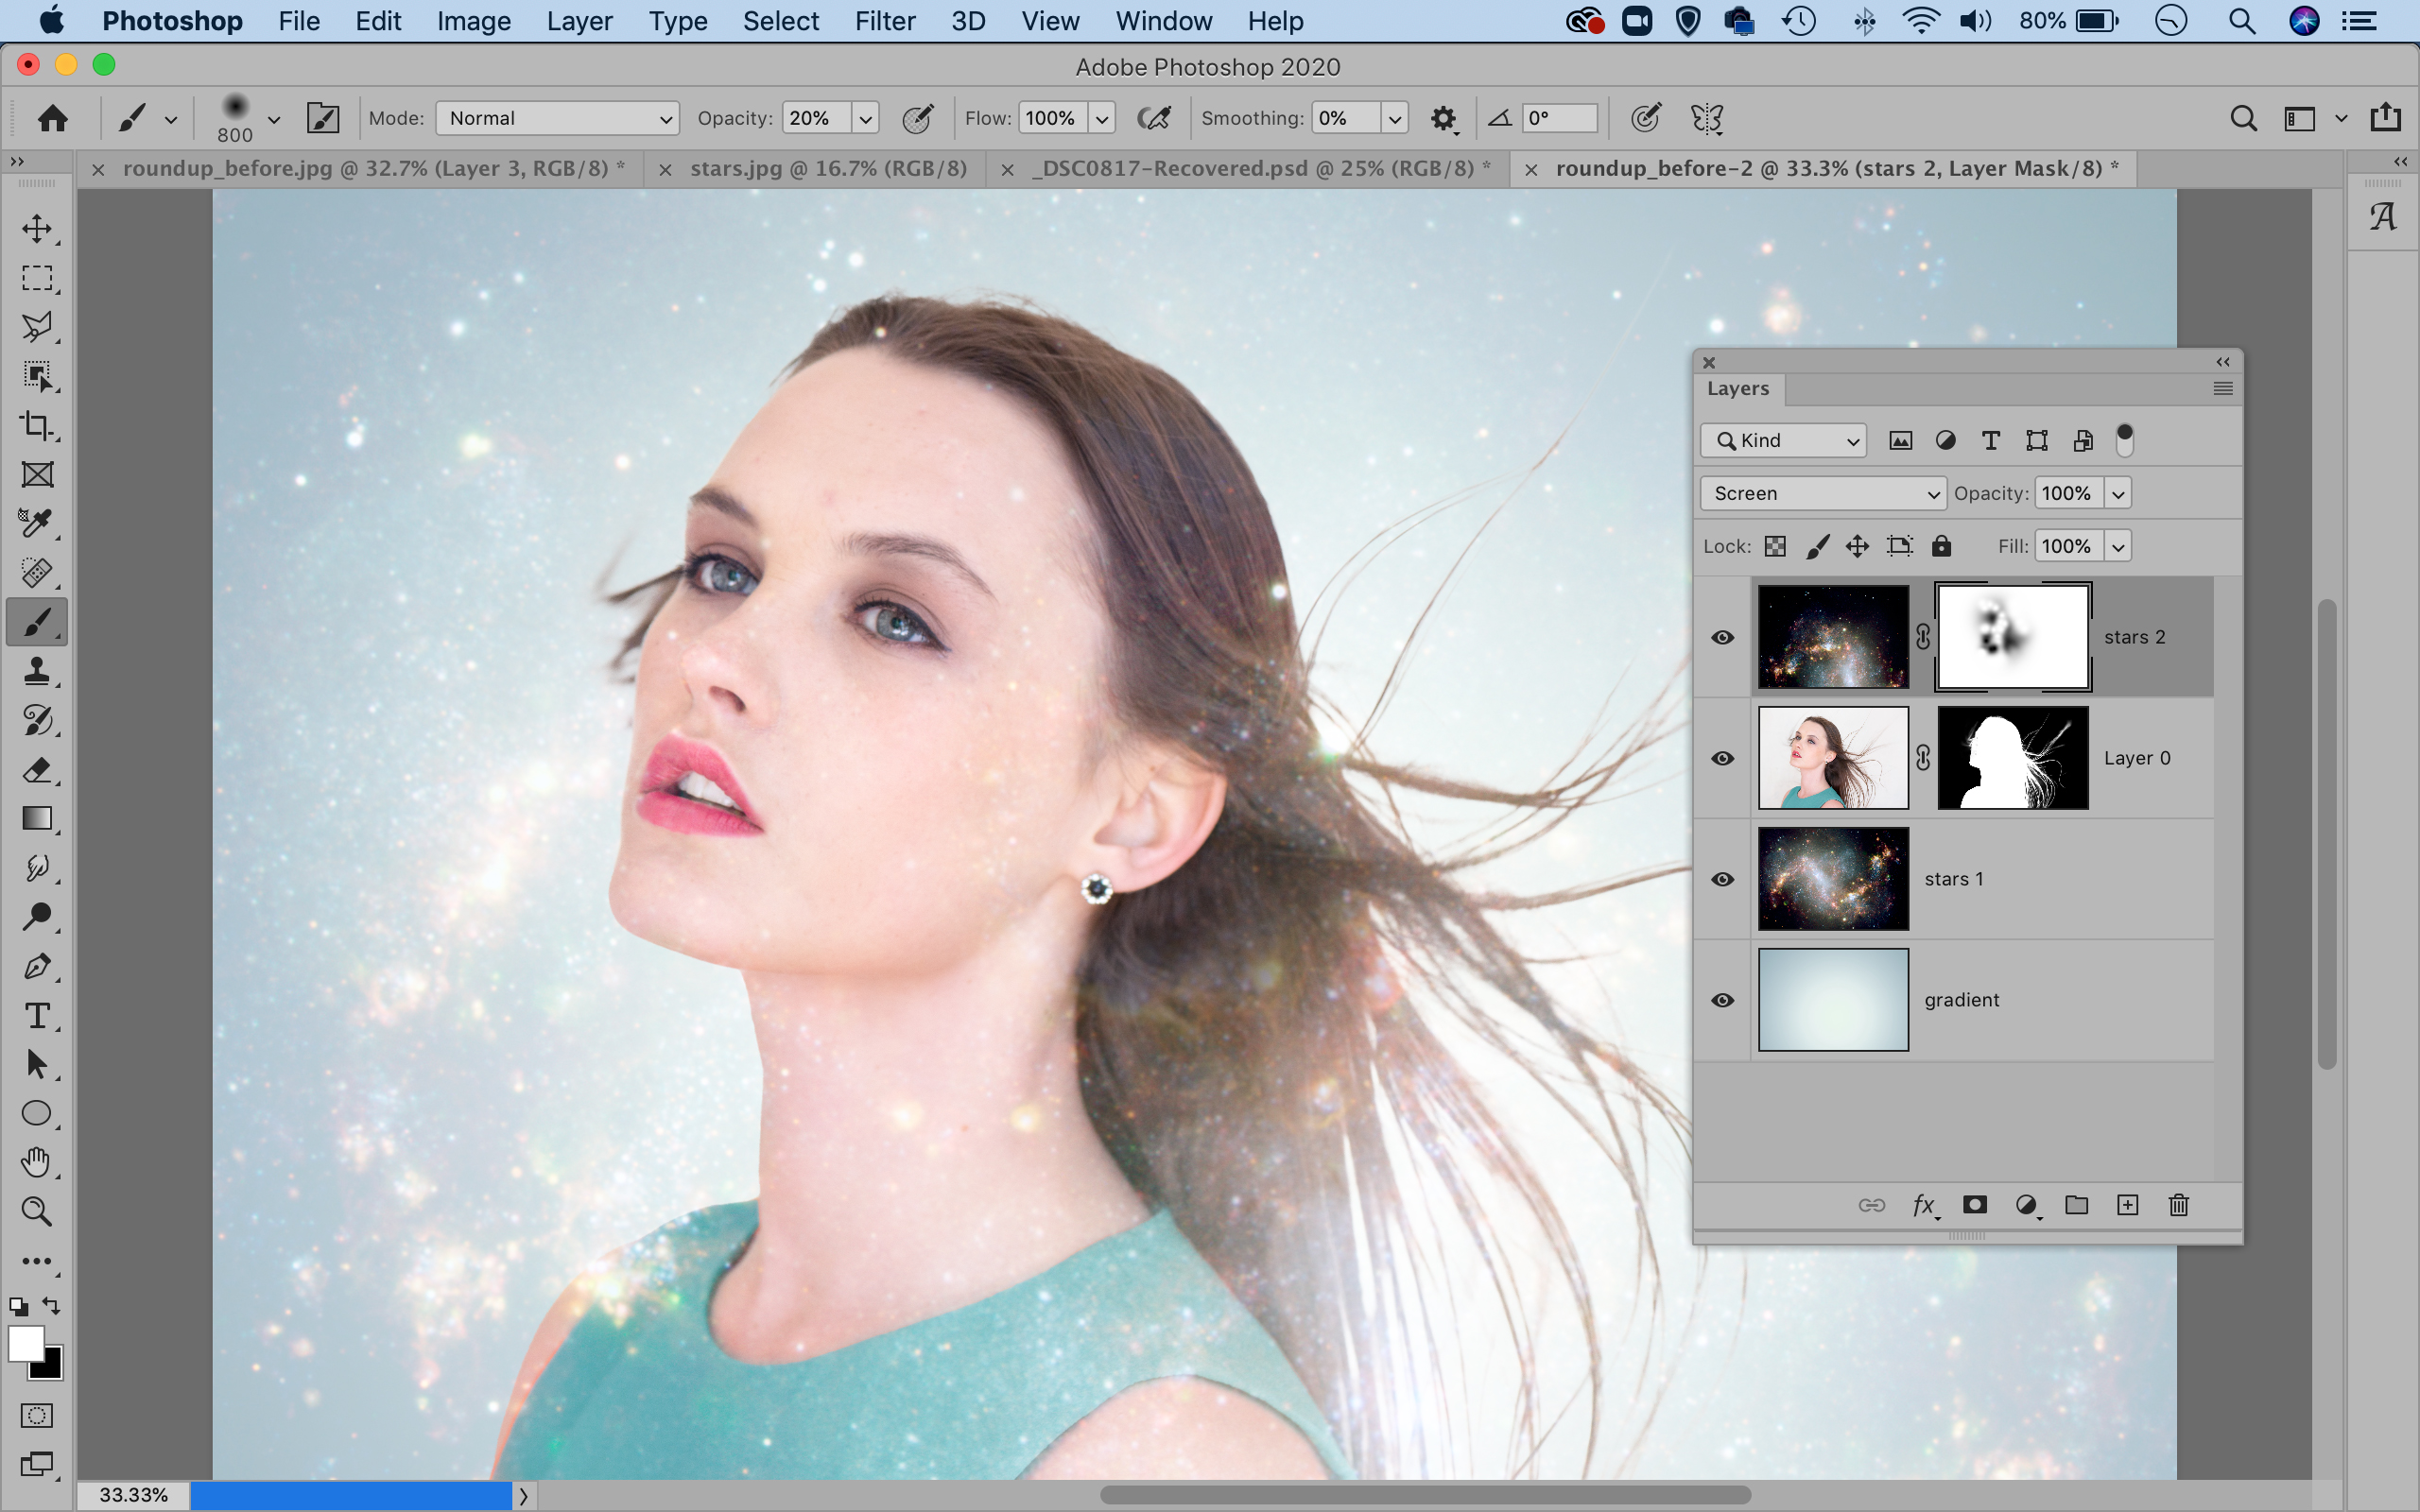
Copy and paste in the star shot. Make two copies and drag one layer below the portrait, the other above. Set the bottom to Screen blend mode. Add a new layer at the bottom and drag a circular gradient. Add a mask to the top layer and paint black to hide parts.
06 Revamped Curves
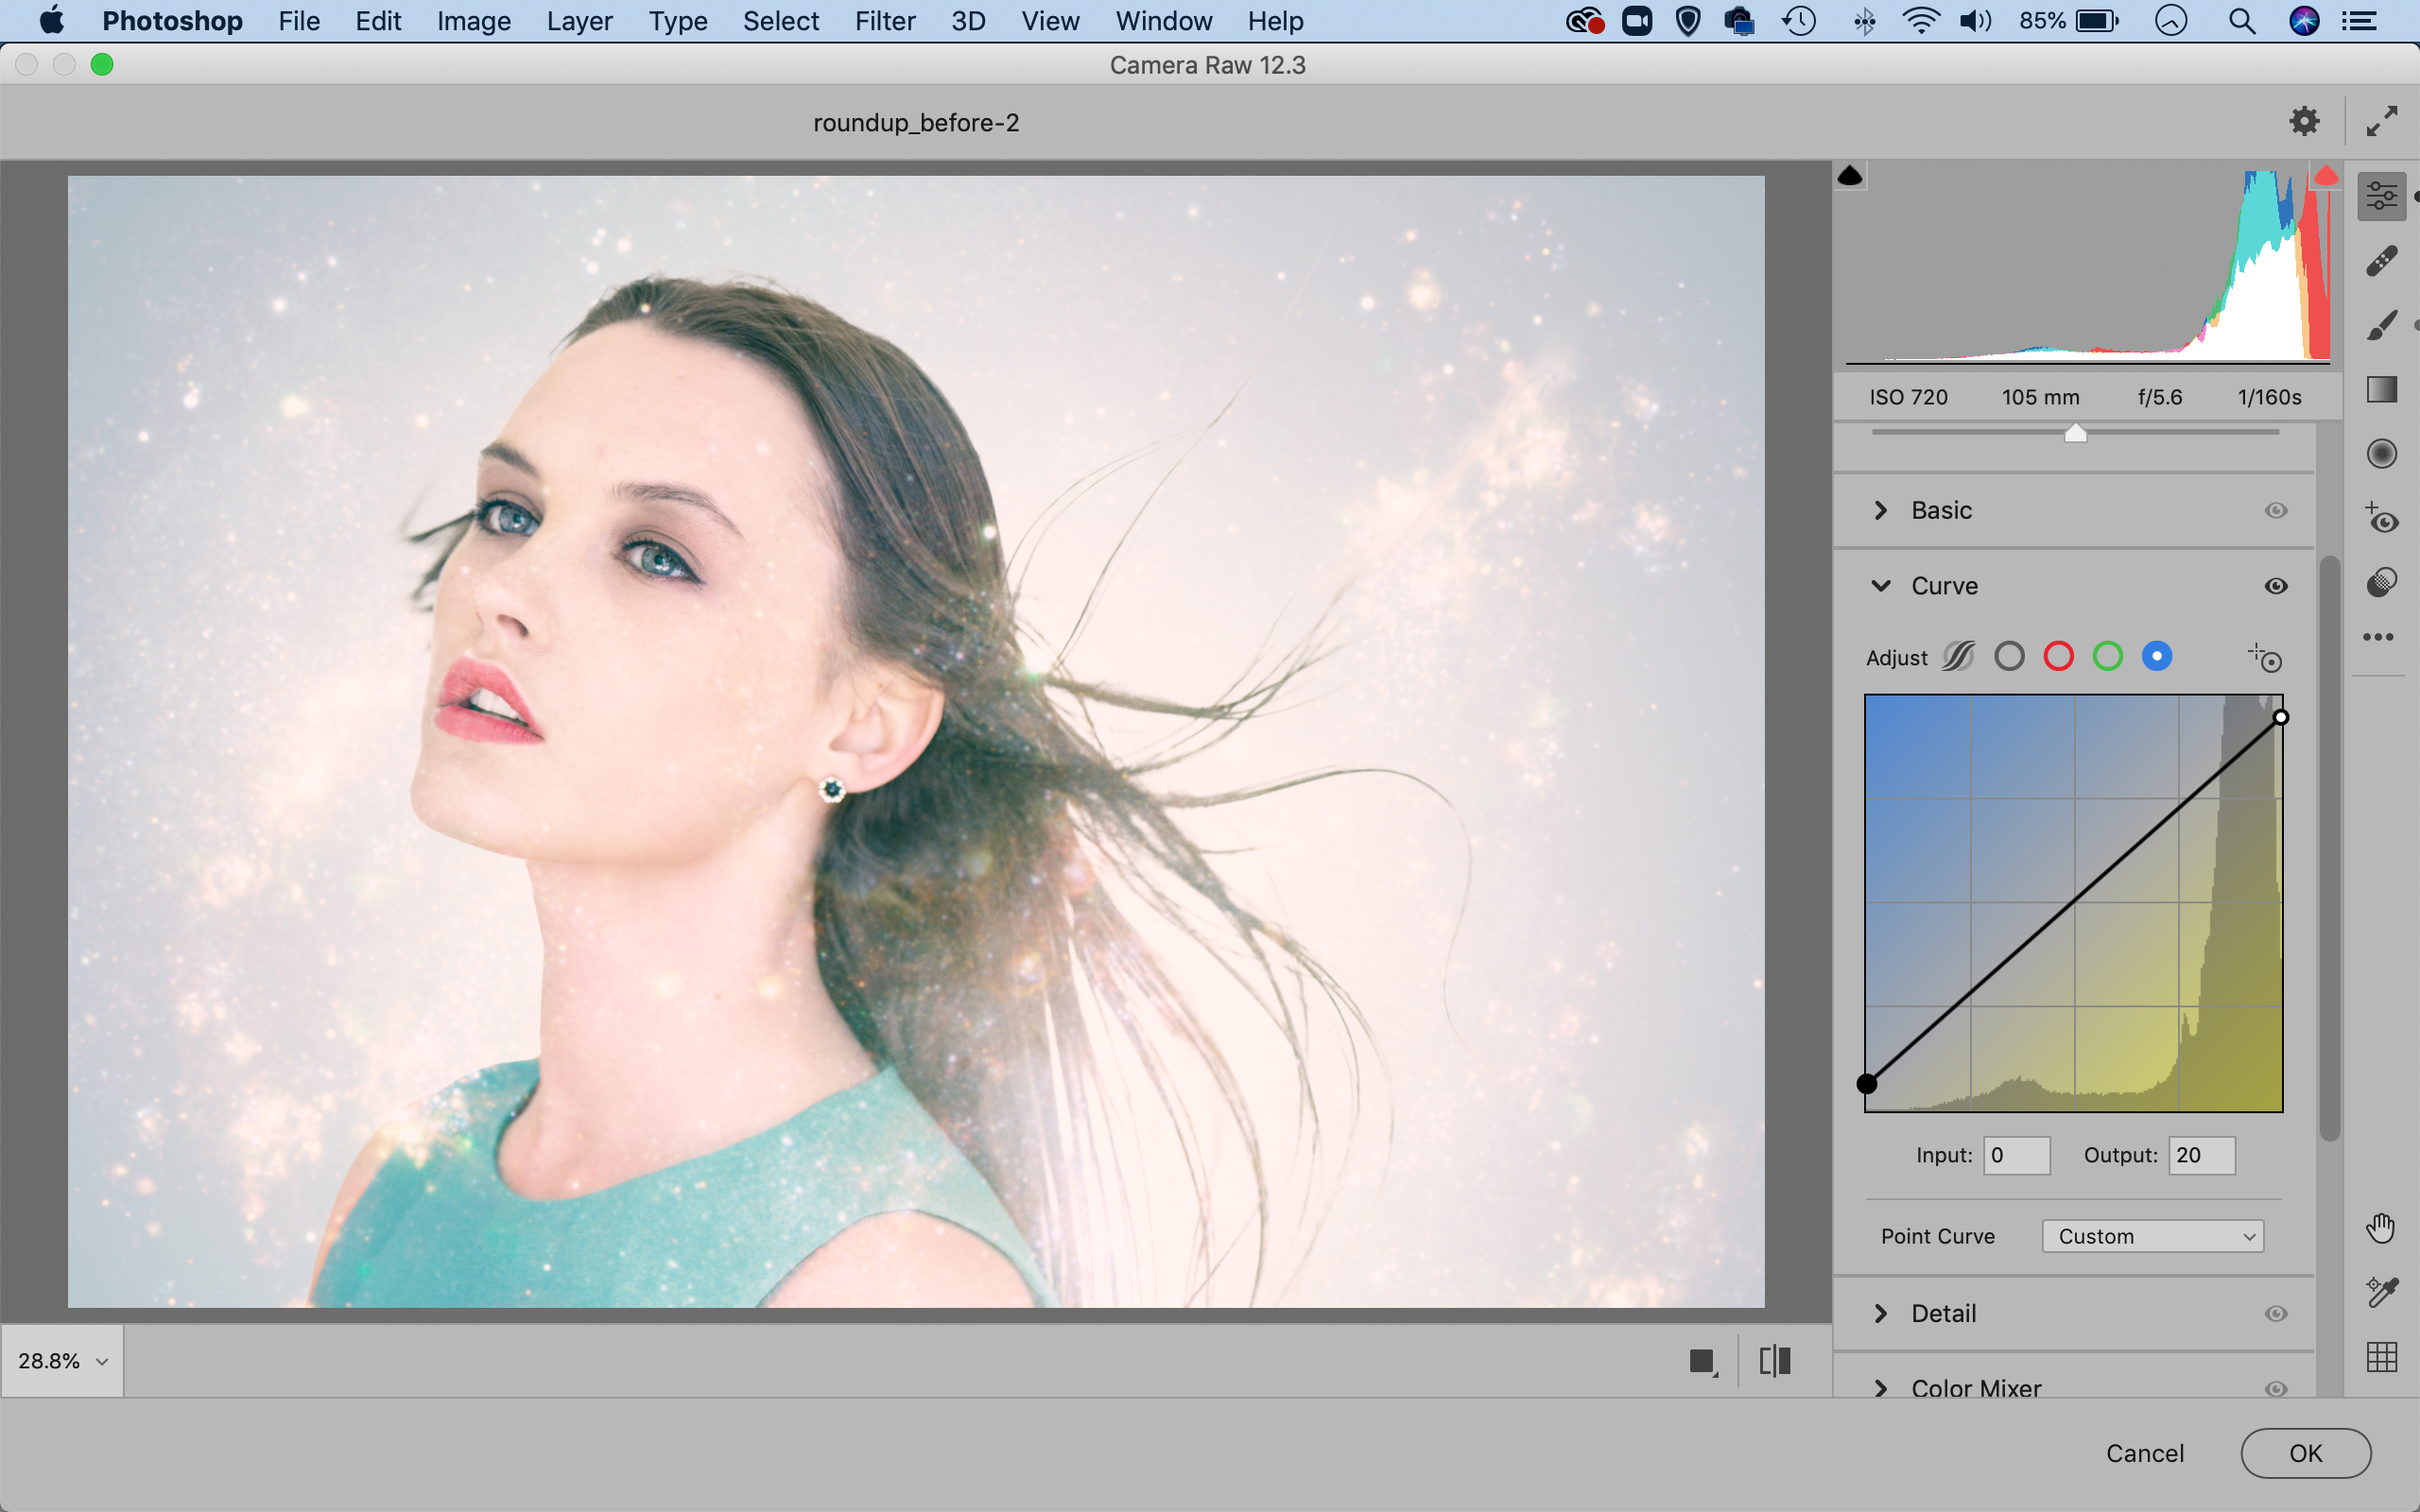
Merge a new layer with Cmd / Ctrl + Shift + Alt + E. Go to Filter > Camera Raw filter. Click Curve, then select the blue channel and adjust the line as shown, using the new color gradient overlay as a guide. Next, right click and ‘copy settings’ then paste on the green channel.
PhotoPlus: The Canon Magazine is the world's only monthly newsstand title that's 100% devoted to Canon, so you can be sure the magazine is completely relevant to your system.
Read more:
The best photo editing software: image editors for novices through to pros
The best photo-editing laptops: top laptops for photographers
10 best online photography courses – from beginner guides to masterclasses
Get the Digital Camera World Newsletter
The best camera deals, reviews, product advice, and unmissable photography news, direct to your inbox!
The lead technique writer on Digital Camera Magazine, PhotoPlus: The Canon Magazine and N-Photo: The Nikon Magazine, James is a fantastic general practice photographer with an enviable array of skills across every genre of photography.
Whether it's flash photography techniques like stroboscopic portraits, astrophotography projects like photographing the Northern Lights, or turning sound into art by making paint dance on a set of speakers, James' tutorials and projects are as creative as they are enjoyable.
He's also a wizard at the dark arts of Photoshop, Lightroom and Affinity Photo, and is capable of some genuine black magic in the digital darkroom, making him one of the leading authorities on photo editing software and techniques.


