Make magnificent motion blur effects to add a sense of speed in Affinity Photo
Add panning motion blur effects to moving subjects and get to grips with live filters in Affinity Photo
Watch video: Add motion blur effects in Affinity Photo
A touch of motion blur can create a sense of action with vehicles and other moving objects in your photos. Shooting for panning blur involves using a fairly slow shutter speed (usually around 1/100 to 1/20 sec, depending on the speed of the object), then panning the camera in sync with the object.
If the timing and panning is right, the object will come out sharp and the background will be blurred by the movement of the camera. However, it can be tricky to get it perfect in-camera. So if you want to add the motion blur effect to images afterwards, Affinity Photo offers a host of useful tools.
In this project we’ll show you how it’s done. For a realistic panning blur effect we need our car to be sharp and everything else blurred, so we begin by cutting out the car with precise selection tools. We can start our selection with the fantastic Selection Brush, then perfect it with the Refine command. Once done, we can blur everything behind the car.
The Motion Blur live filter is ideal, as it lets us blur along a linear angle. We can then use another live filter – the Radial Blur filter – to make the wheels appear to spin. Along the way we’ll encounter many key editing tools, useful whether you want to add a panning blur to a car or simply get to grips with live filters and selections in Affinity Photo.
01 Select the car
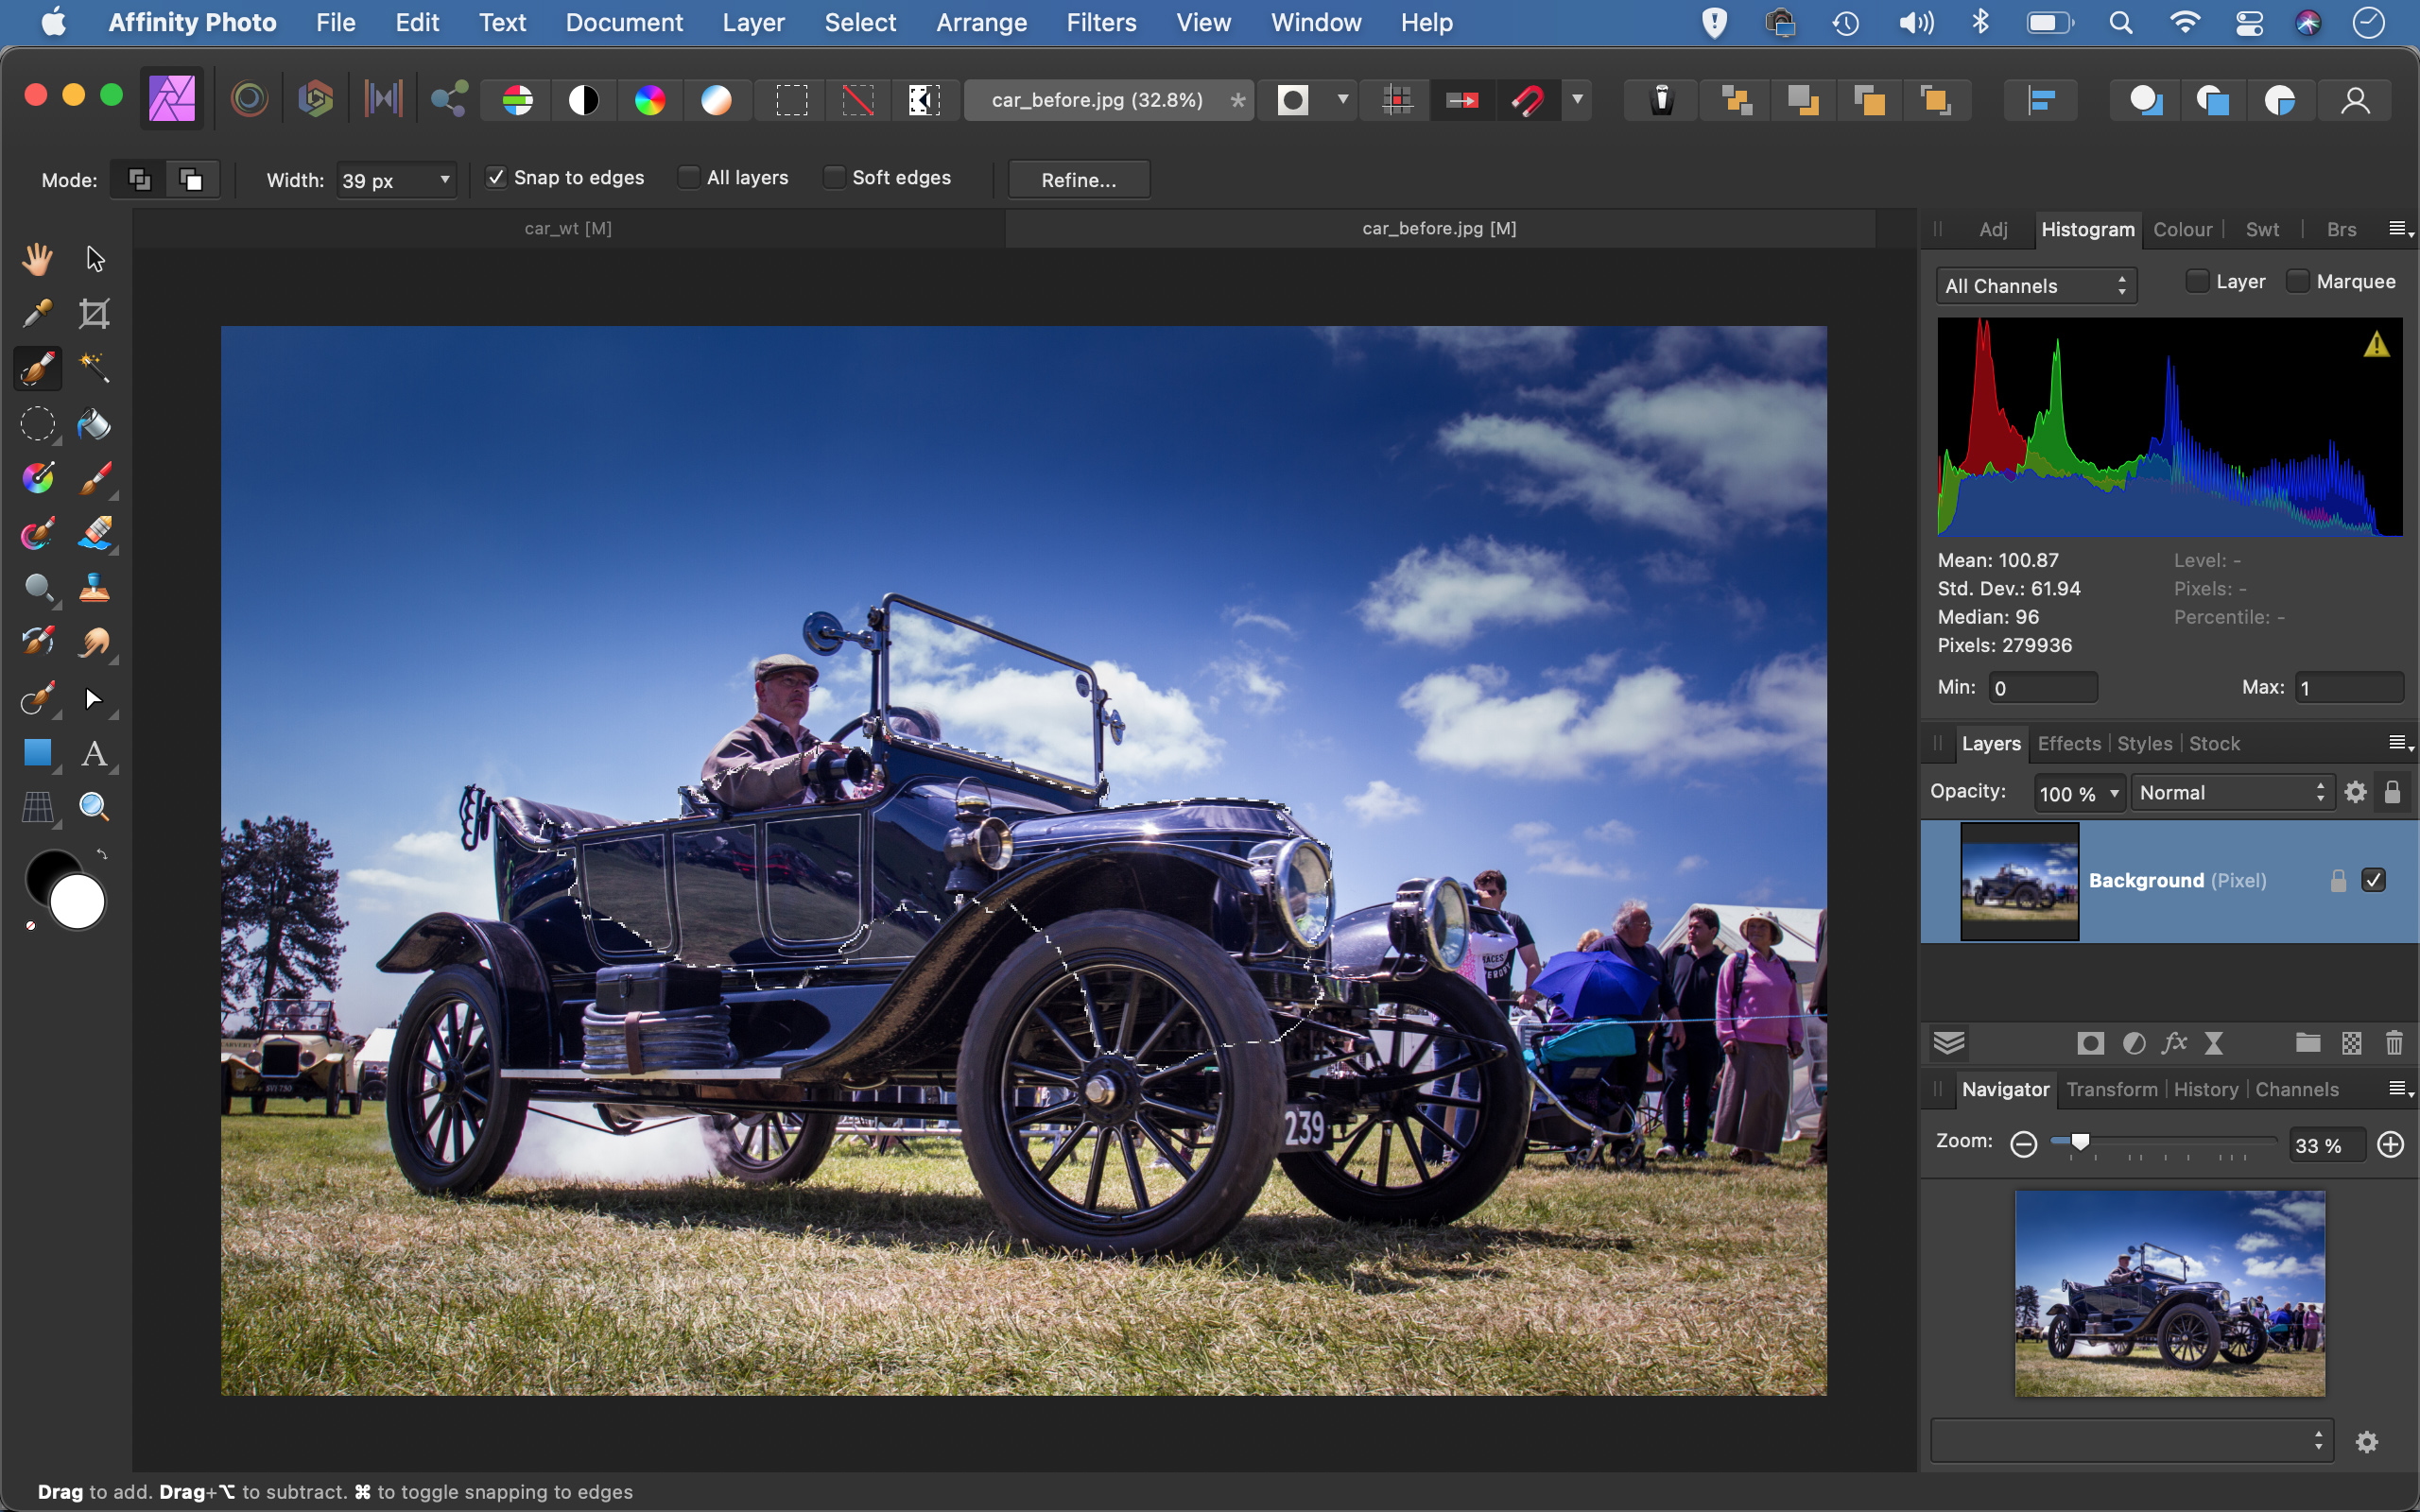
Open up your car image or download our start image here then grab the Selection Brush tool and make sure ‘Snap to Edges’ is checked in the tool options. Paint over the car to select it. Use the ] and [ keys to resize the brush tip and hold Alt to subtract areas if the tool includes unwanted details. Continue until the car is selected.
02 Improve the selection
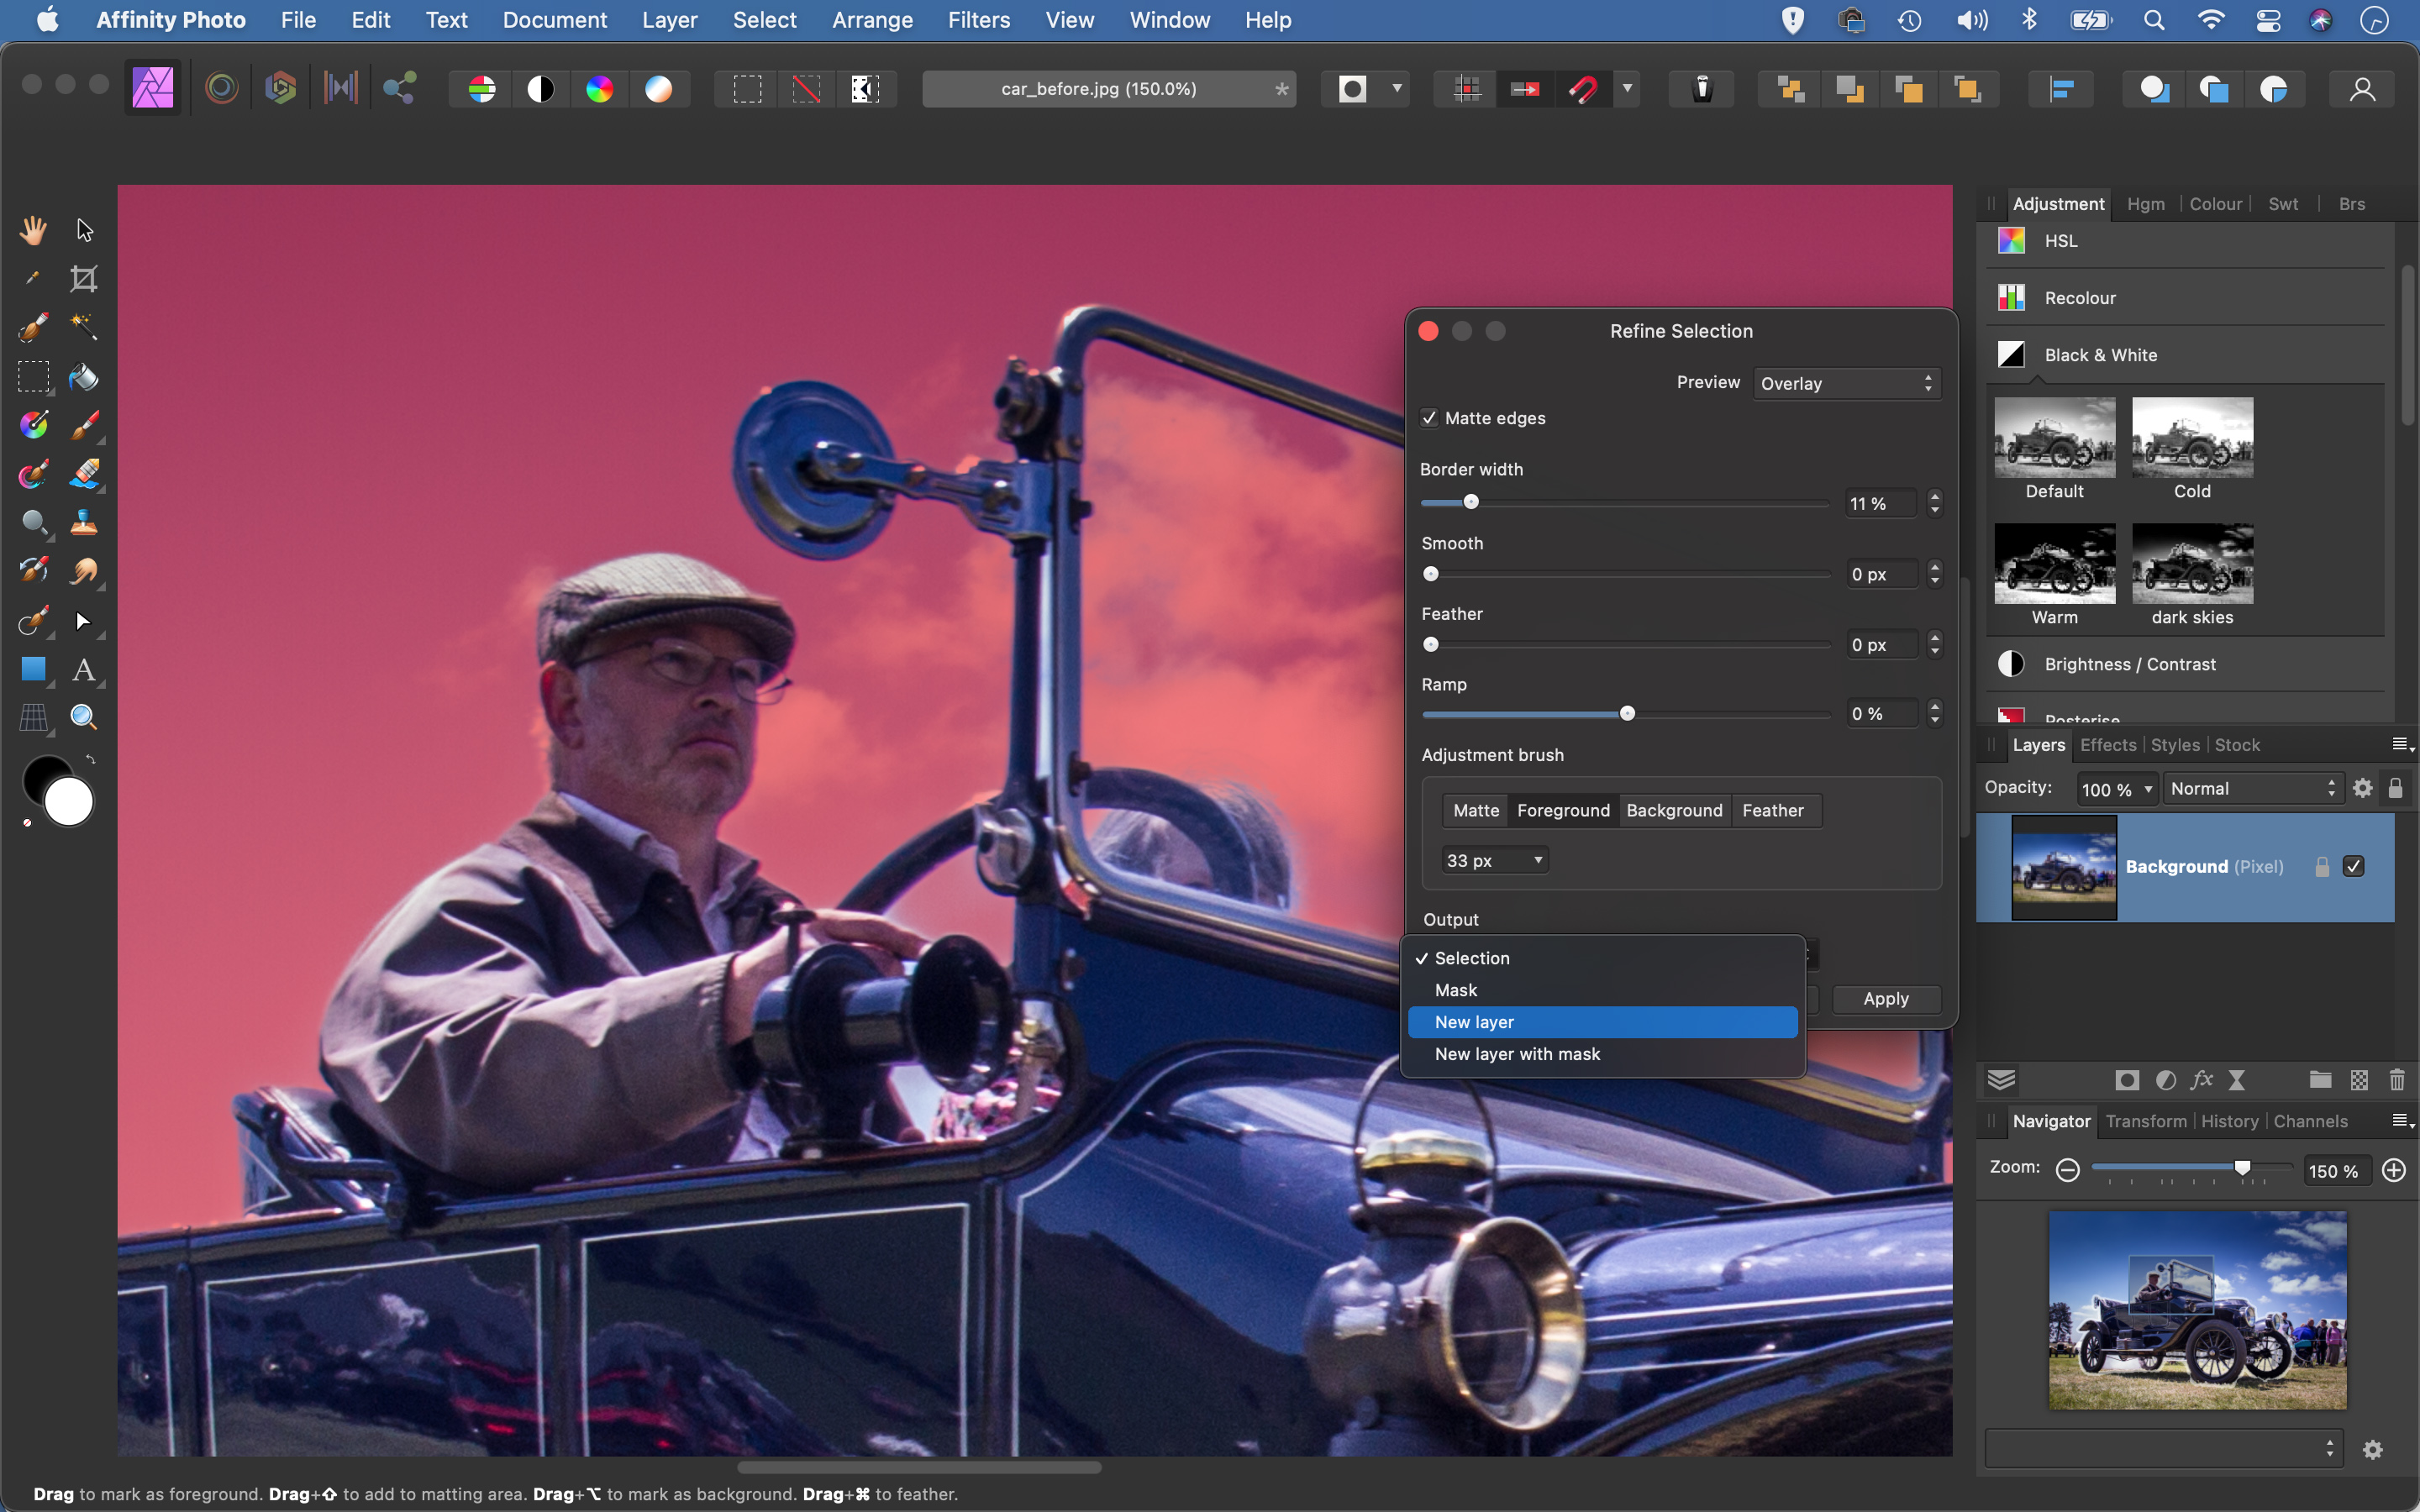
Click the Refine button. Increase the Border Width to expand the area of refinement along the selection, use the Matt brush to tidy messy spots. Use the Foreground and Background brushes to signify different areas. Set the Output to ‘New Layer’ and hit Apply.
03 Fill behind the car
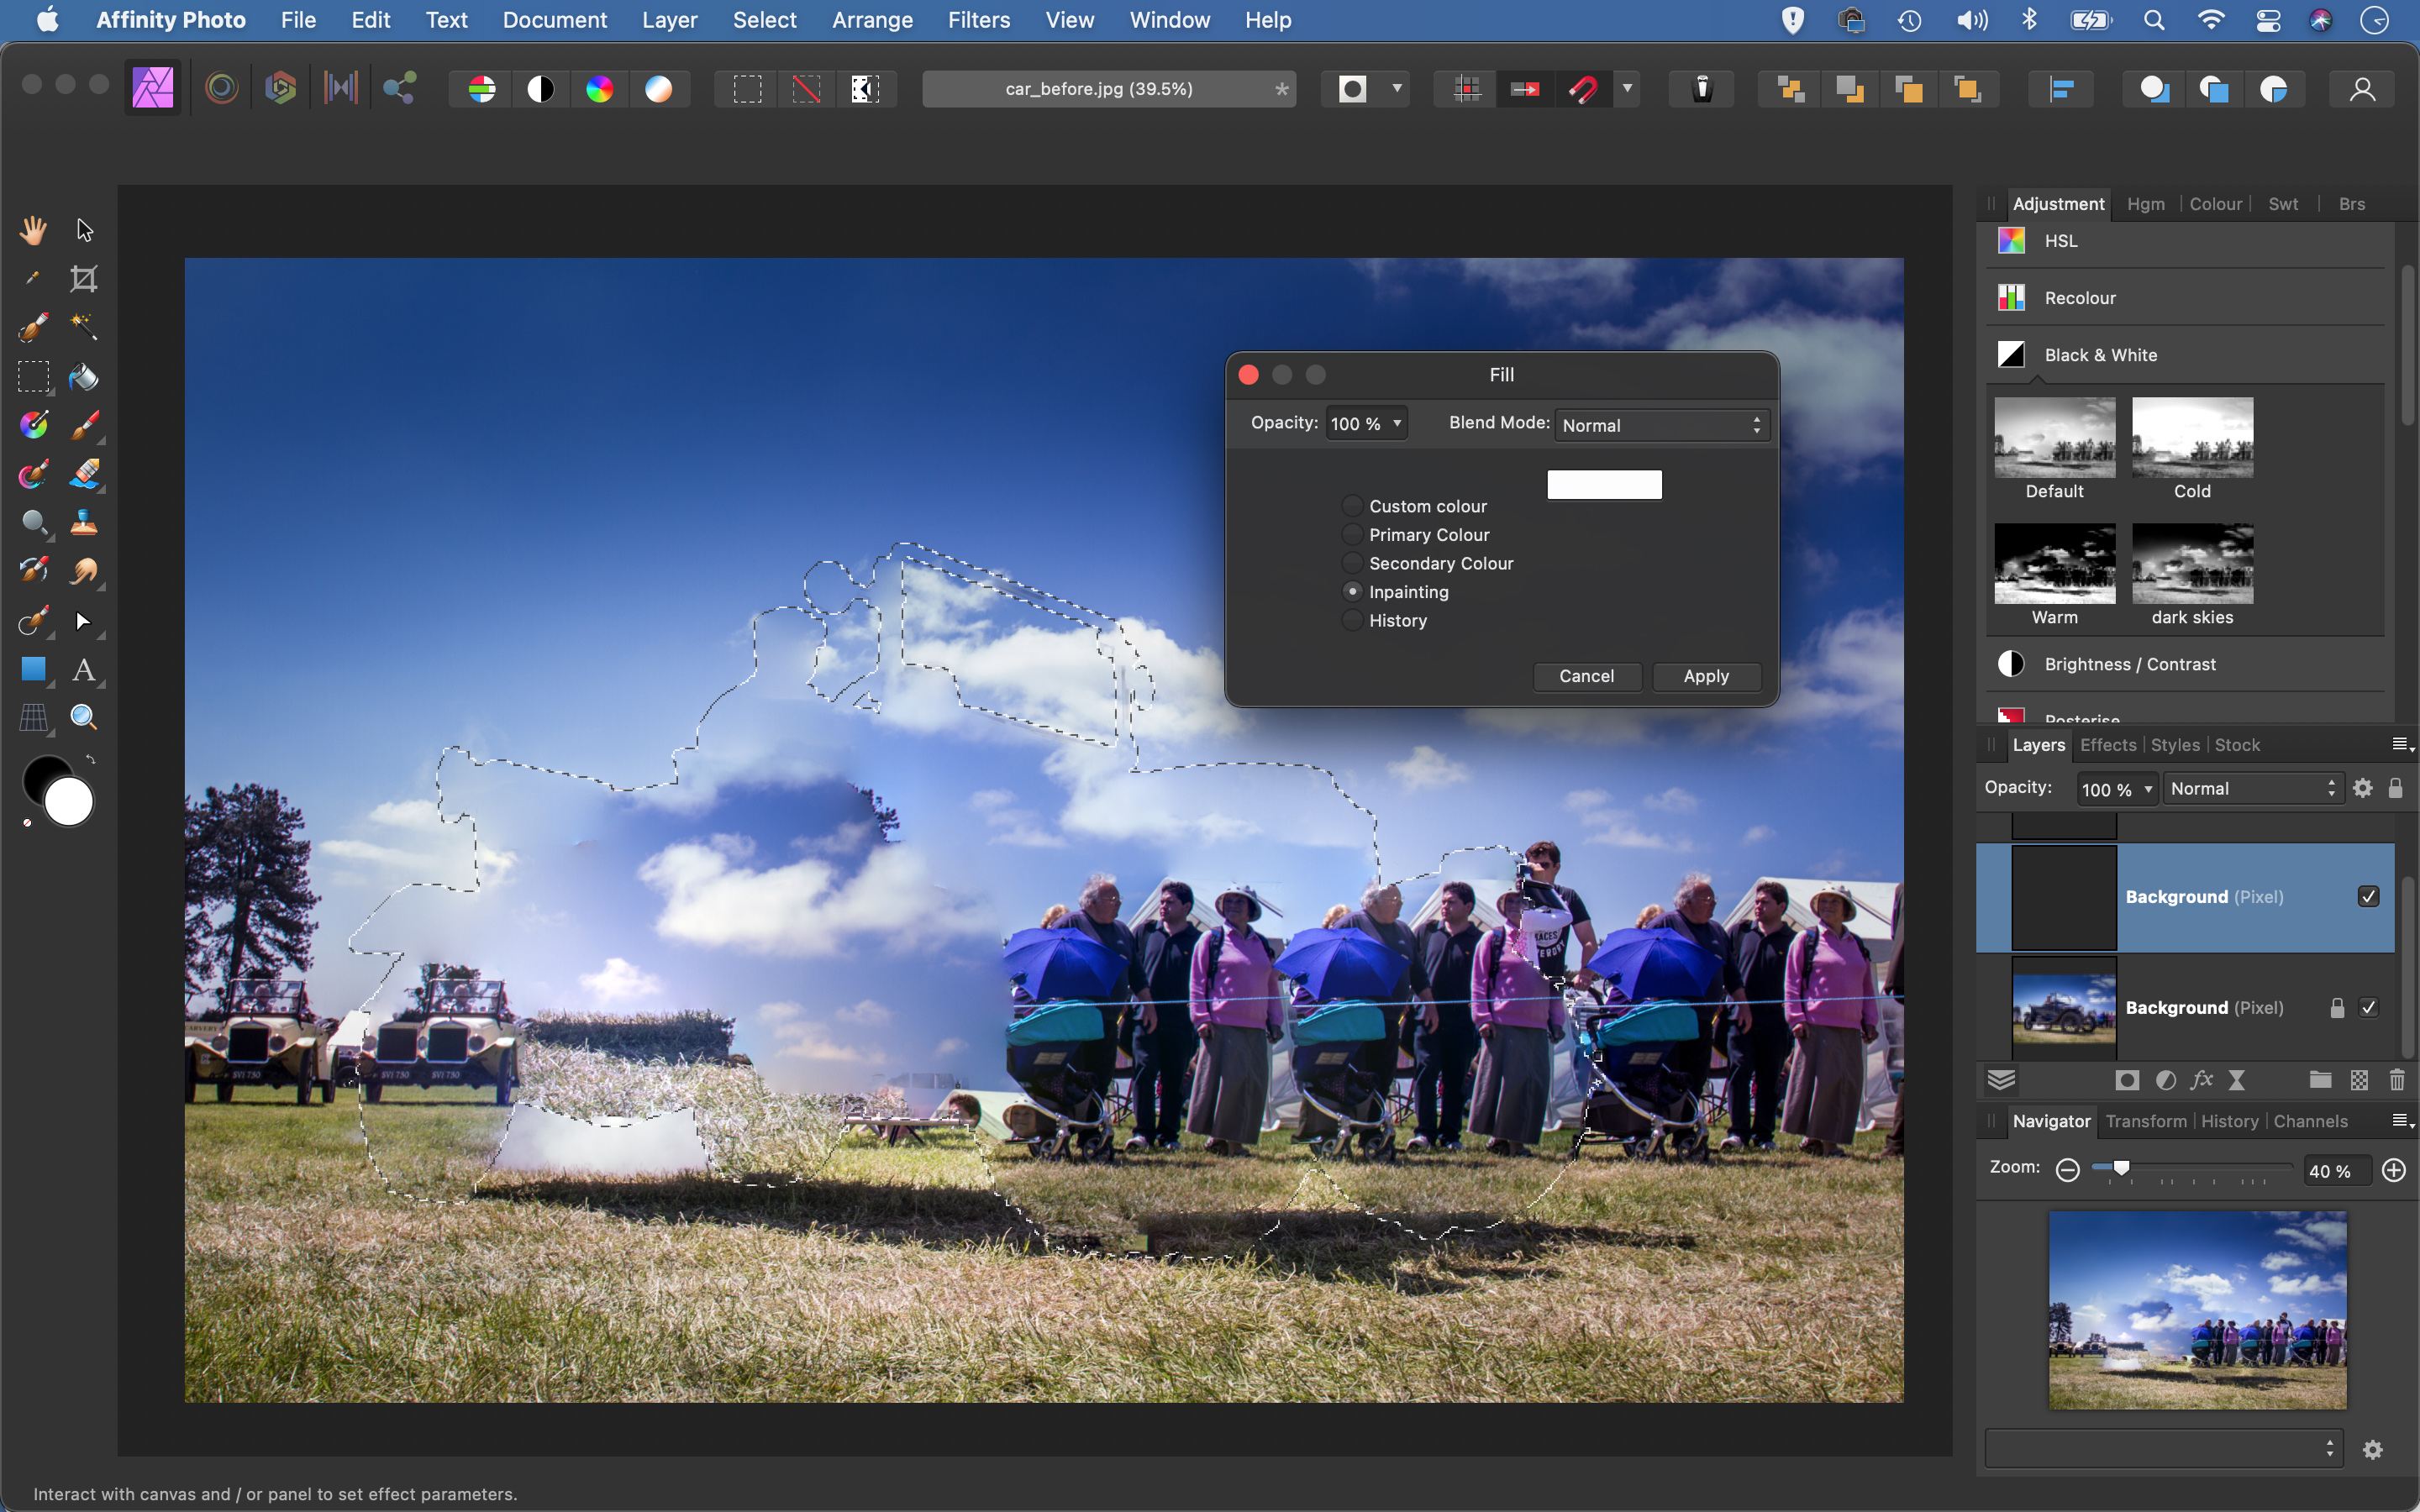
Highlight the ‘Background’ layer and duplicate with Cmd/Ctrl + J, hold Cmd/Ctrl and click the thumbnail of the cutout car layer to load a selection. Go to Select > Grow/Shrink and expand the selection edge by a few pixels. Go to Edit > Fill. Check ‘Inpainting’ and Apply.
04 Create the panning blur
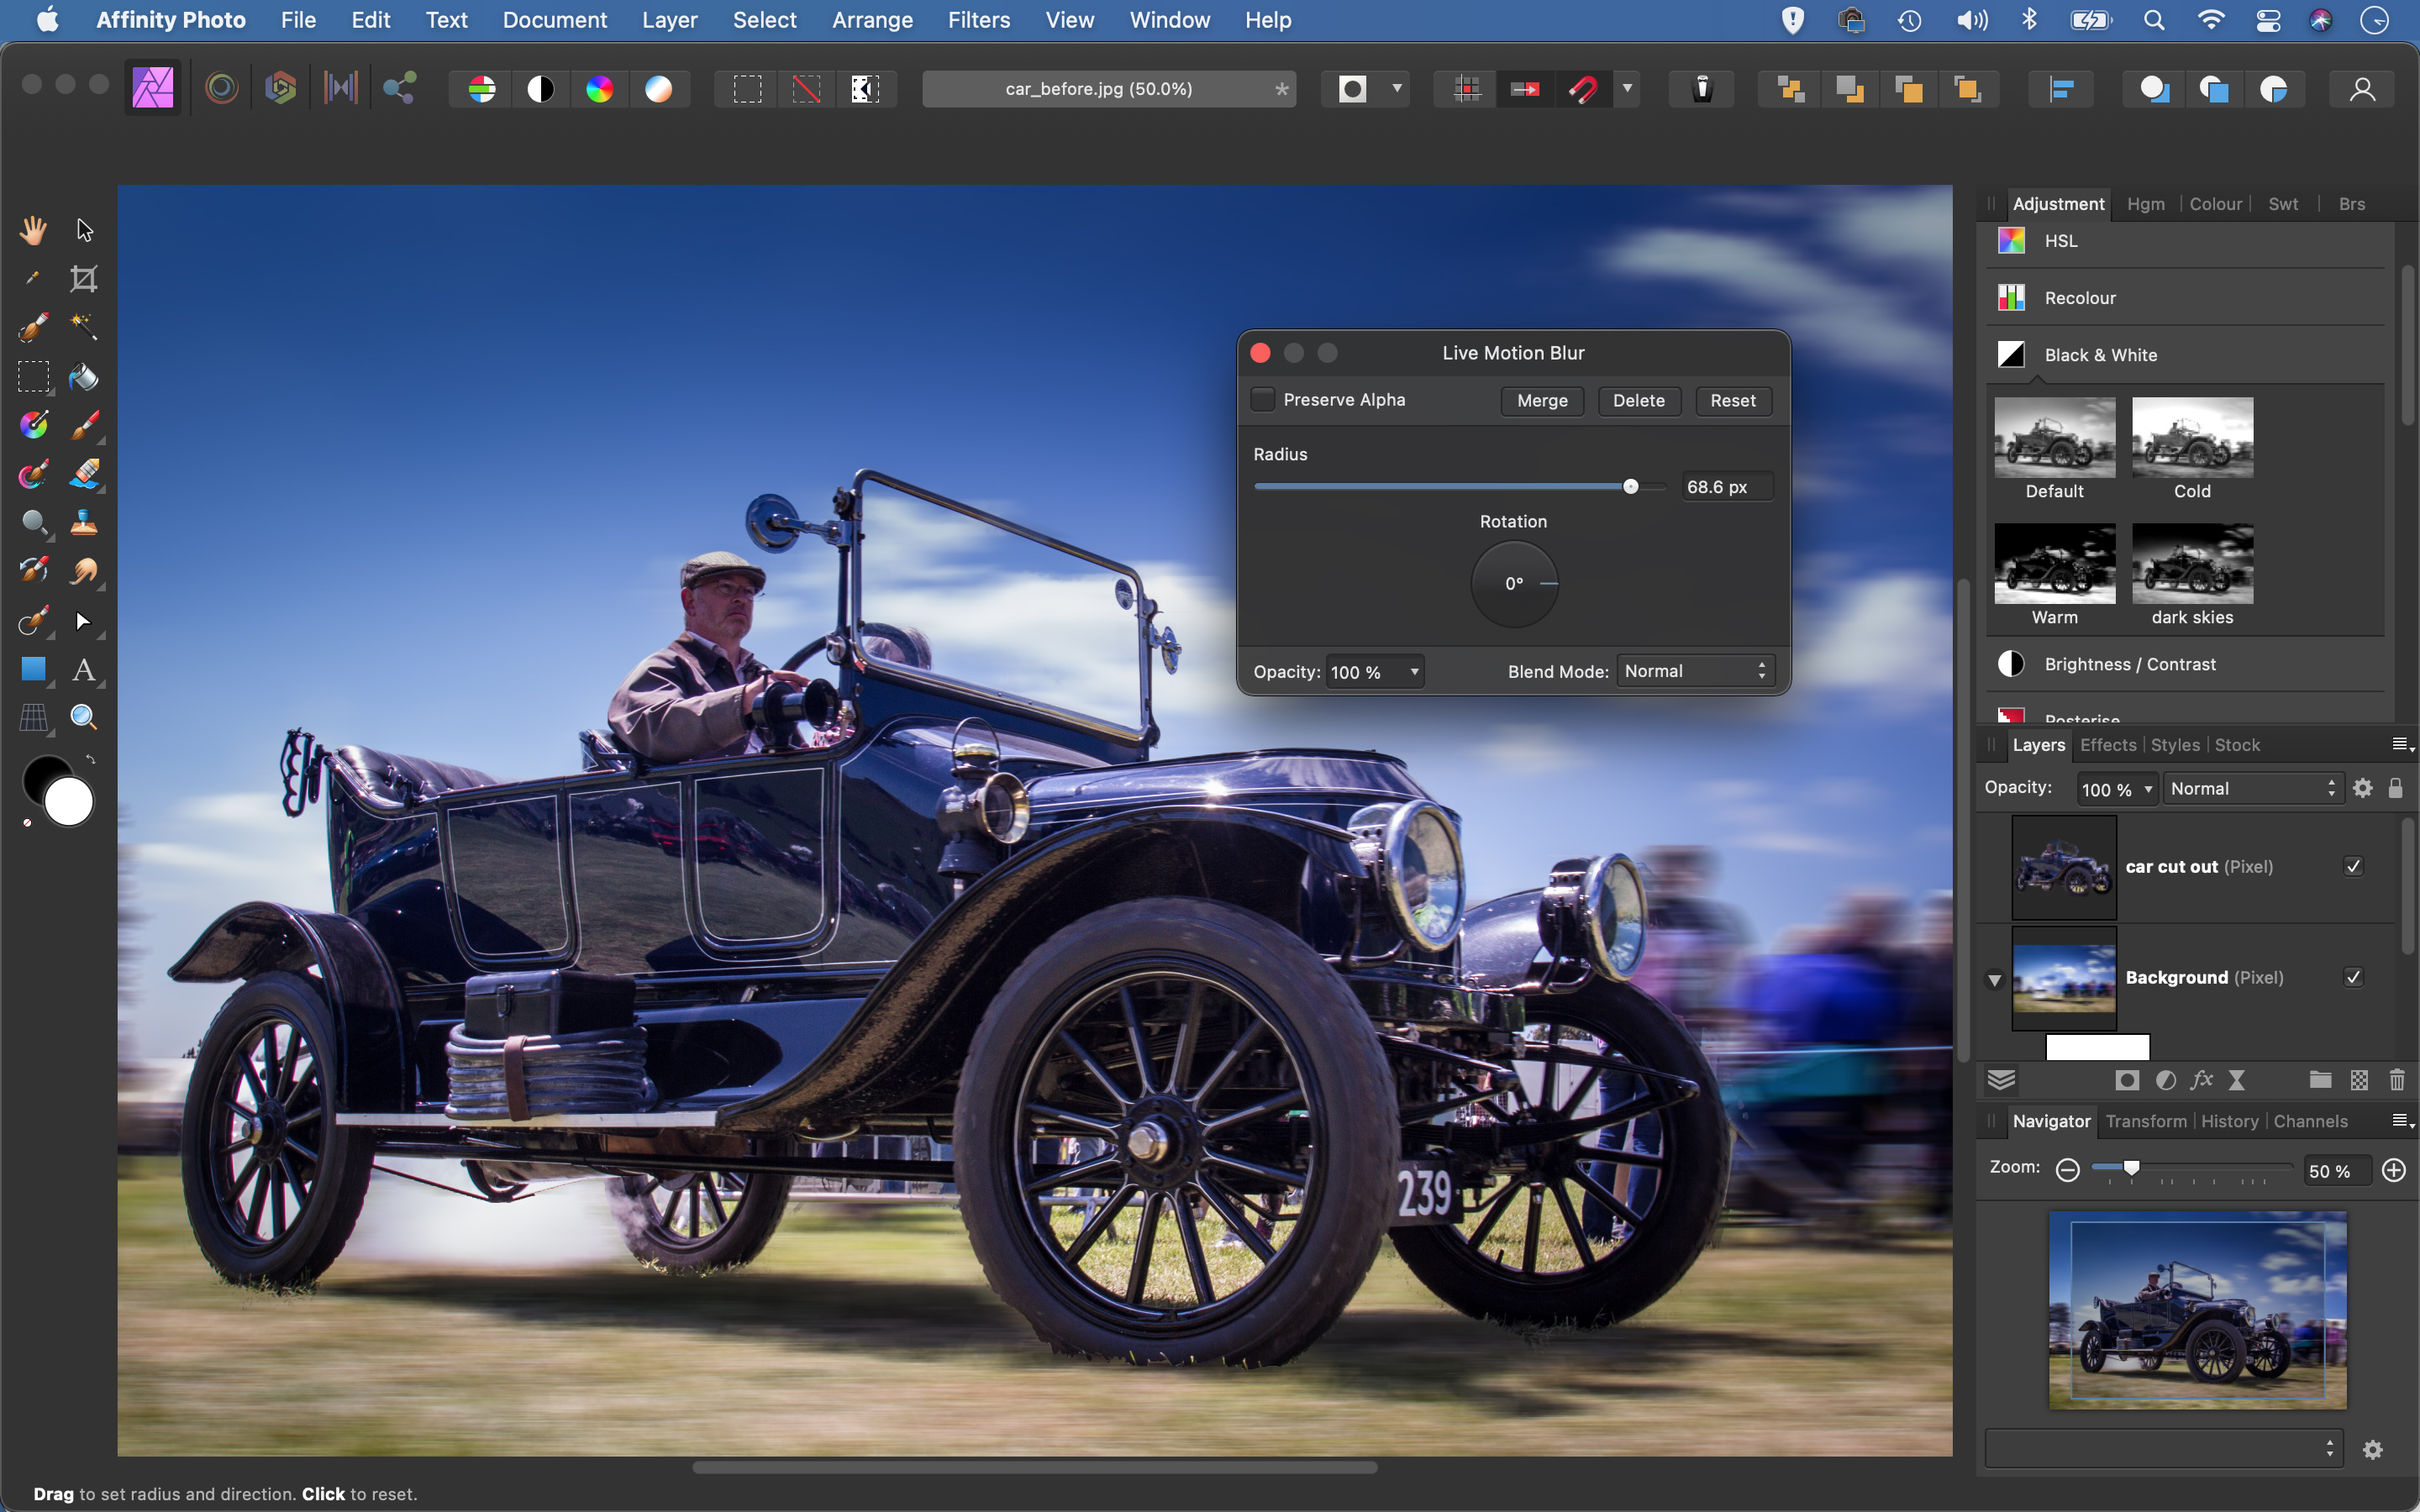
Go to Layer > New Live Filter Layer > Blur > Motion Blur. Up the Radius and use the Rotation setting to control the direction and strength of the blur. There may be bits that stick out – highlight the top layer, add a layer mask and paint black to hide parts of the car layer.
05 Go for a spin
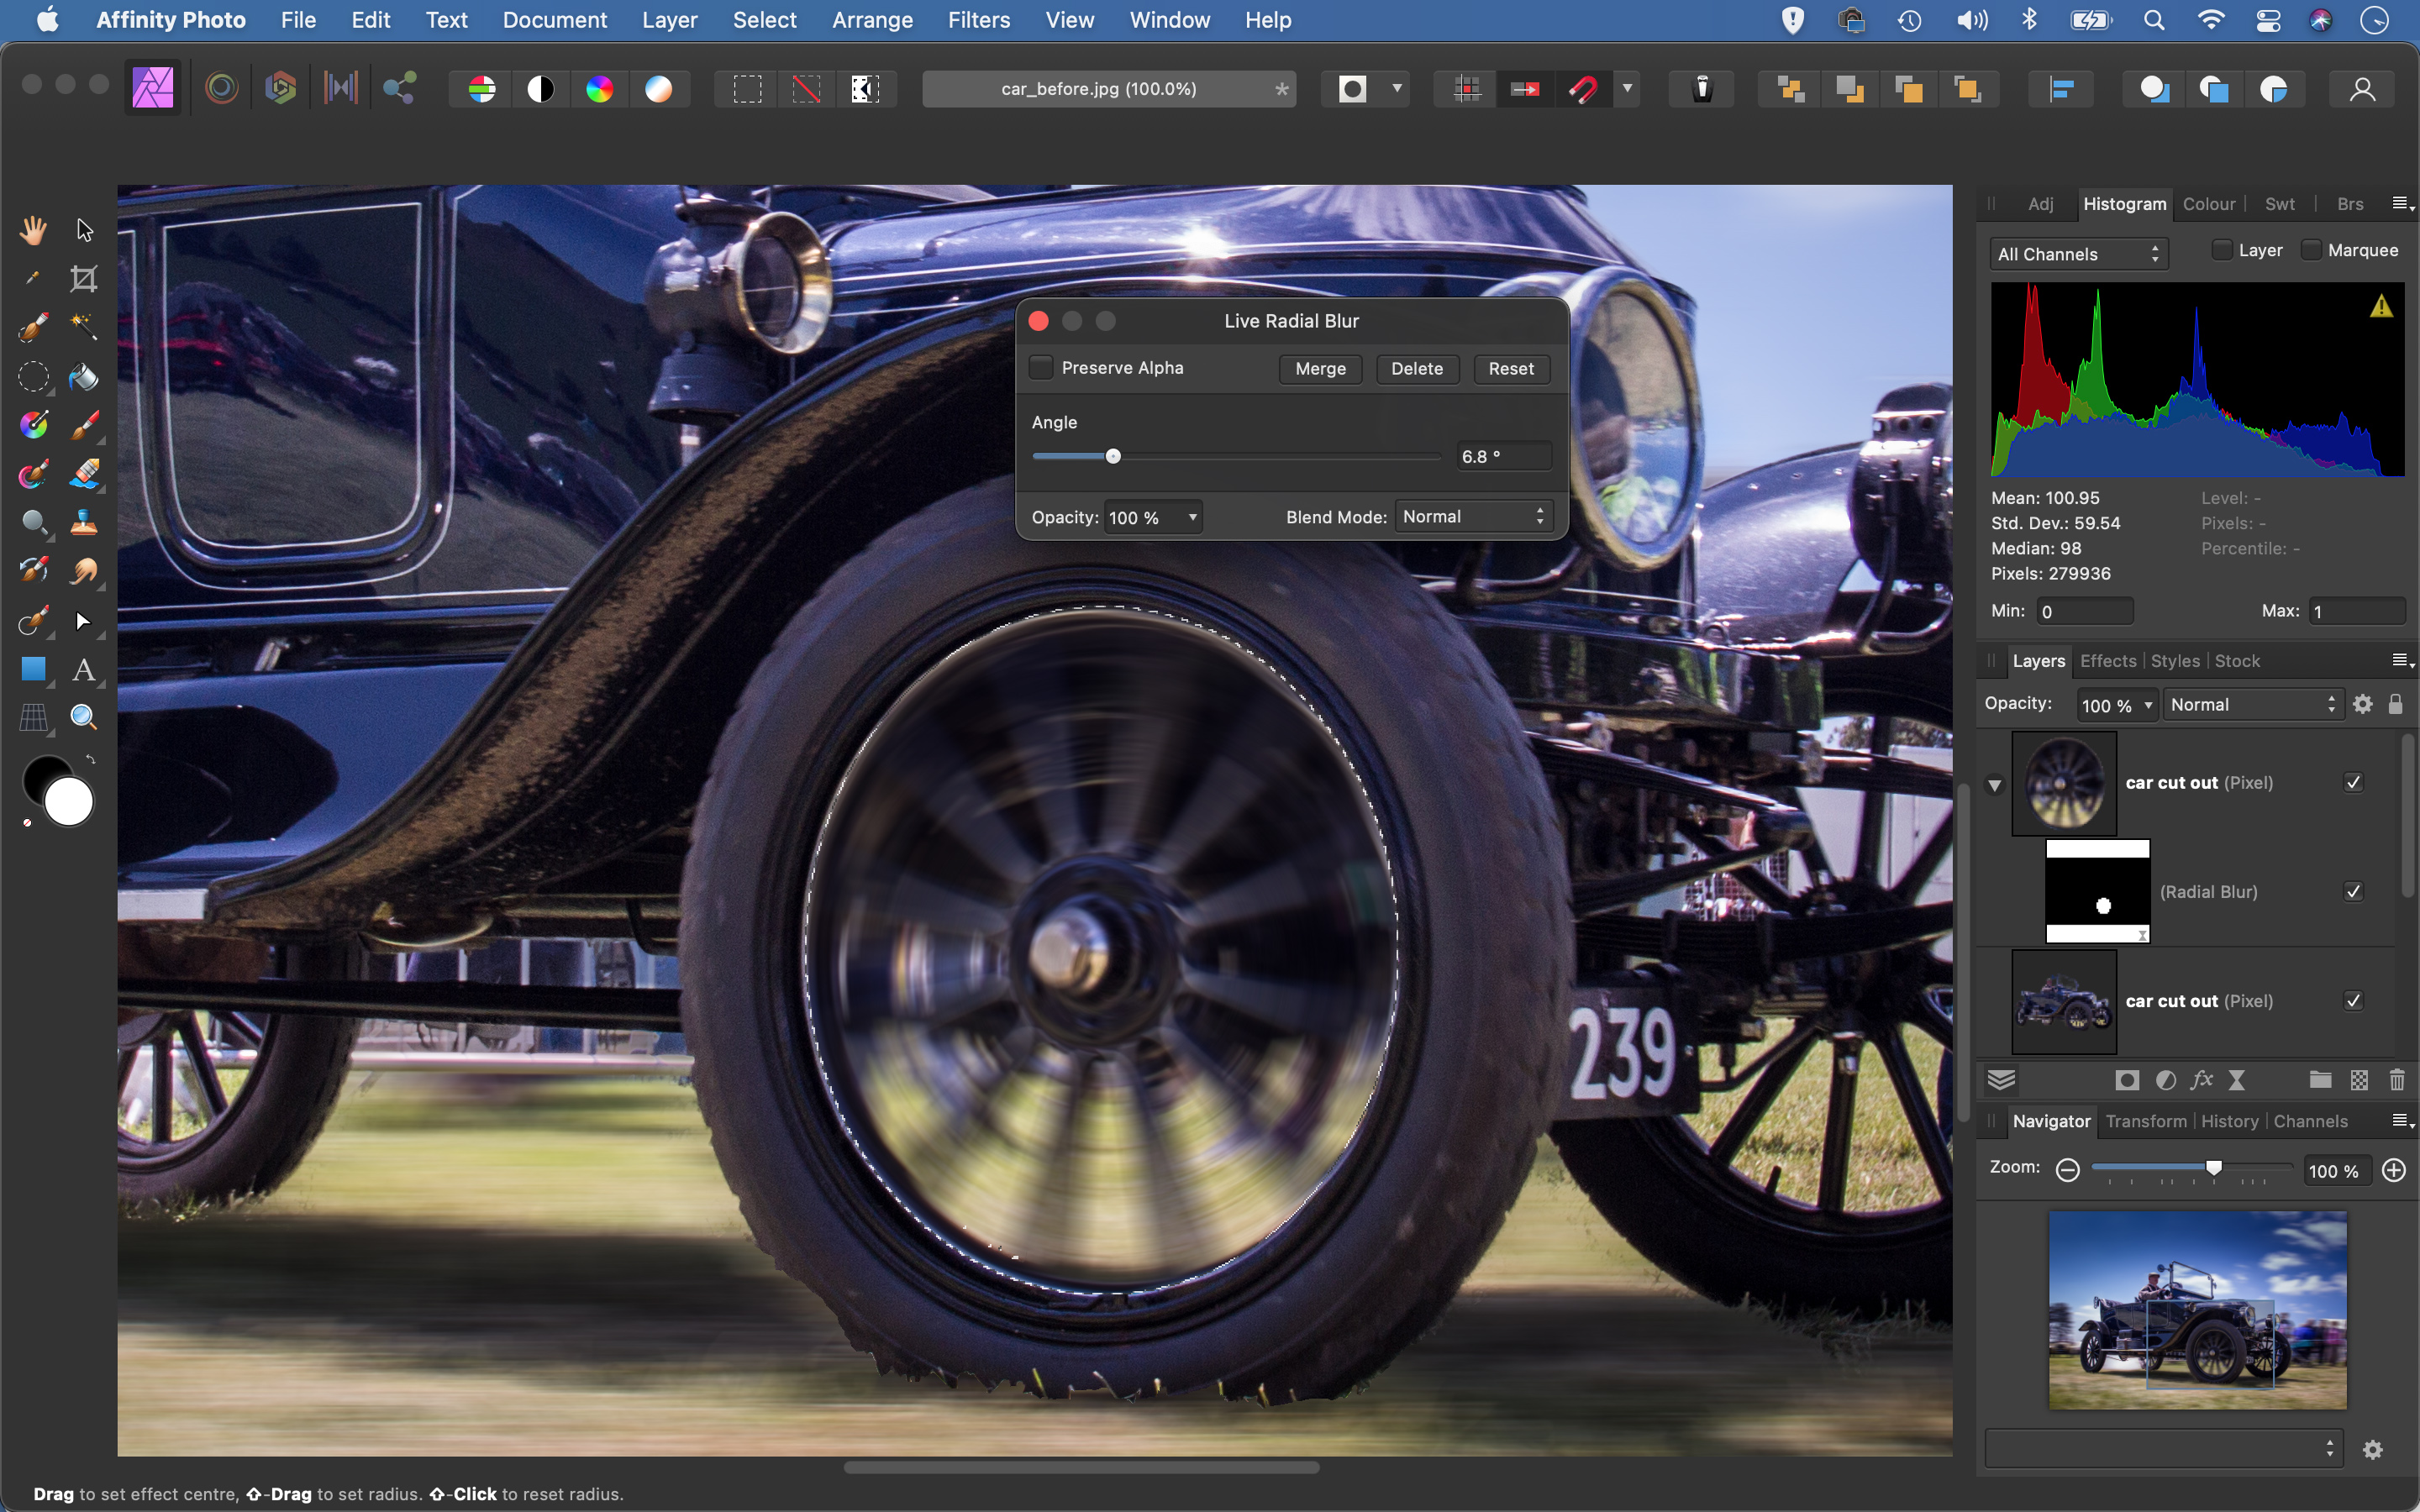
Highlight the cutout car layer, then grab the Elliptical Selection tool and drag a circle over a wheel. Hit Cmd/Ctrl + J to copy the area to a new layer, go to Layer > New Live Filter Layer > Blur > Radial Blur. Up the Radius to about 9 and drag to align the blur with the wheel.
06 Add the finishing touches
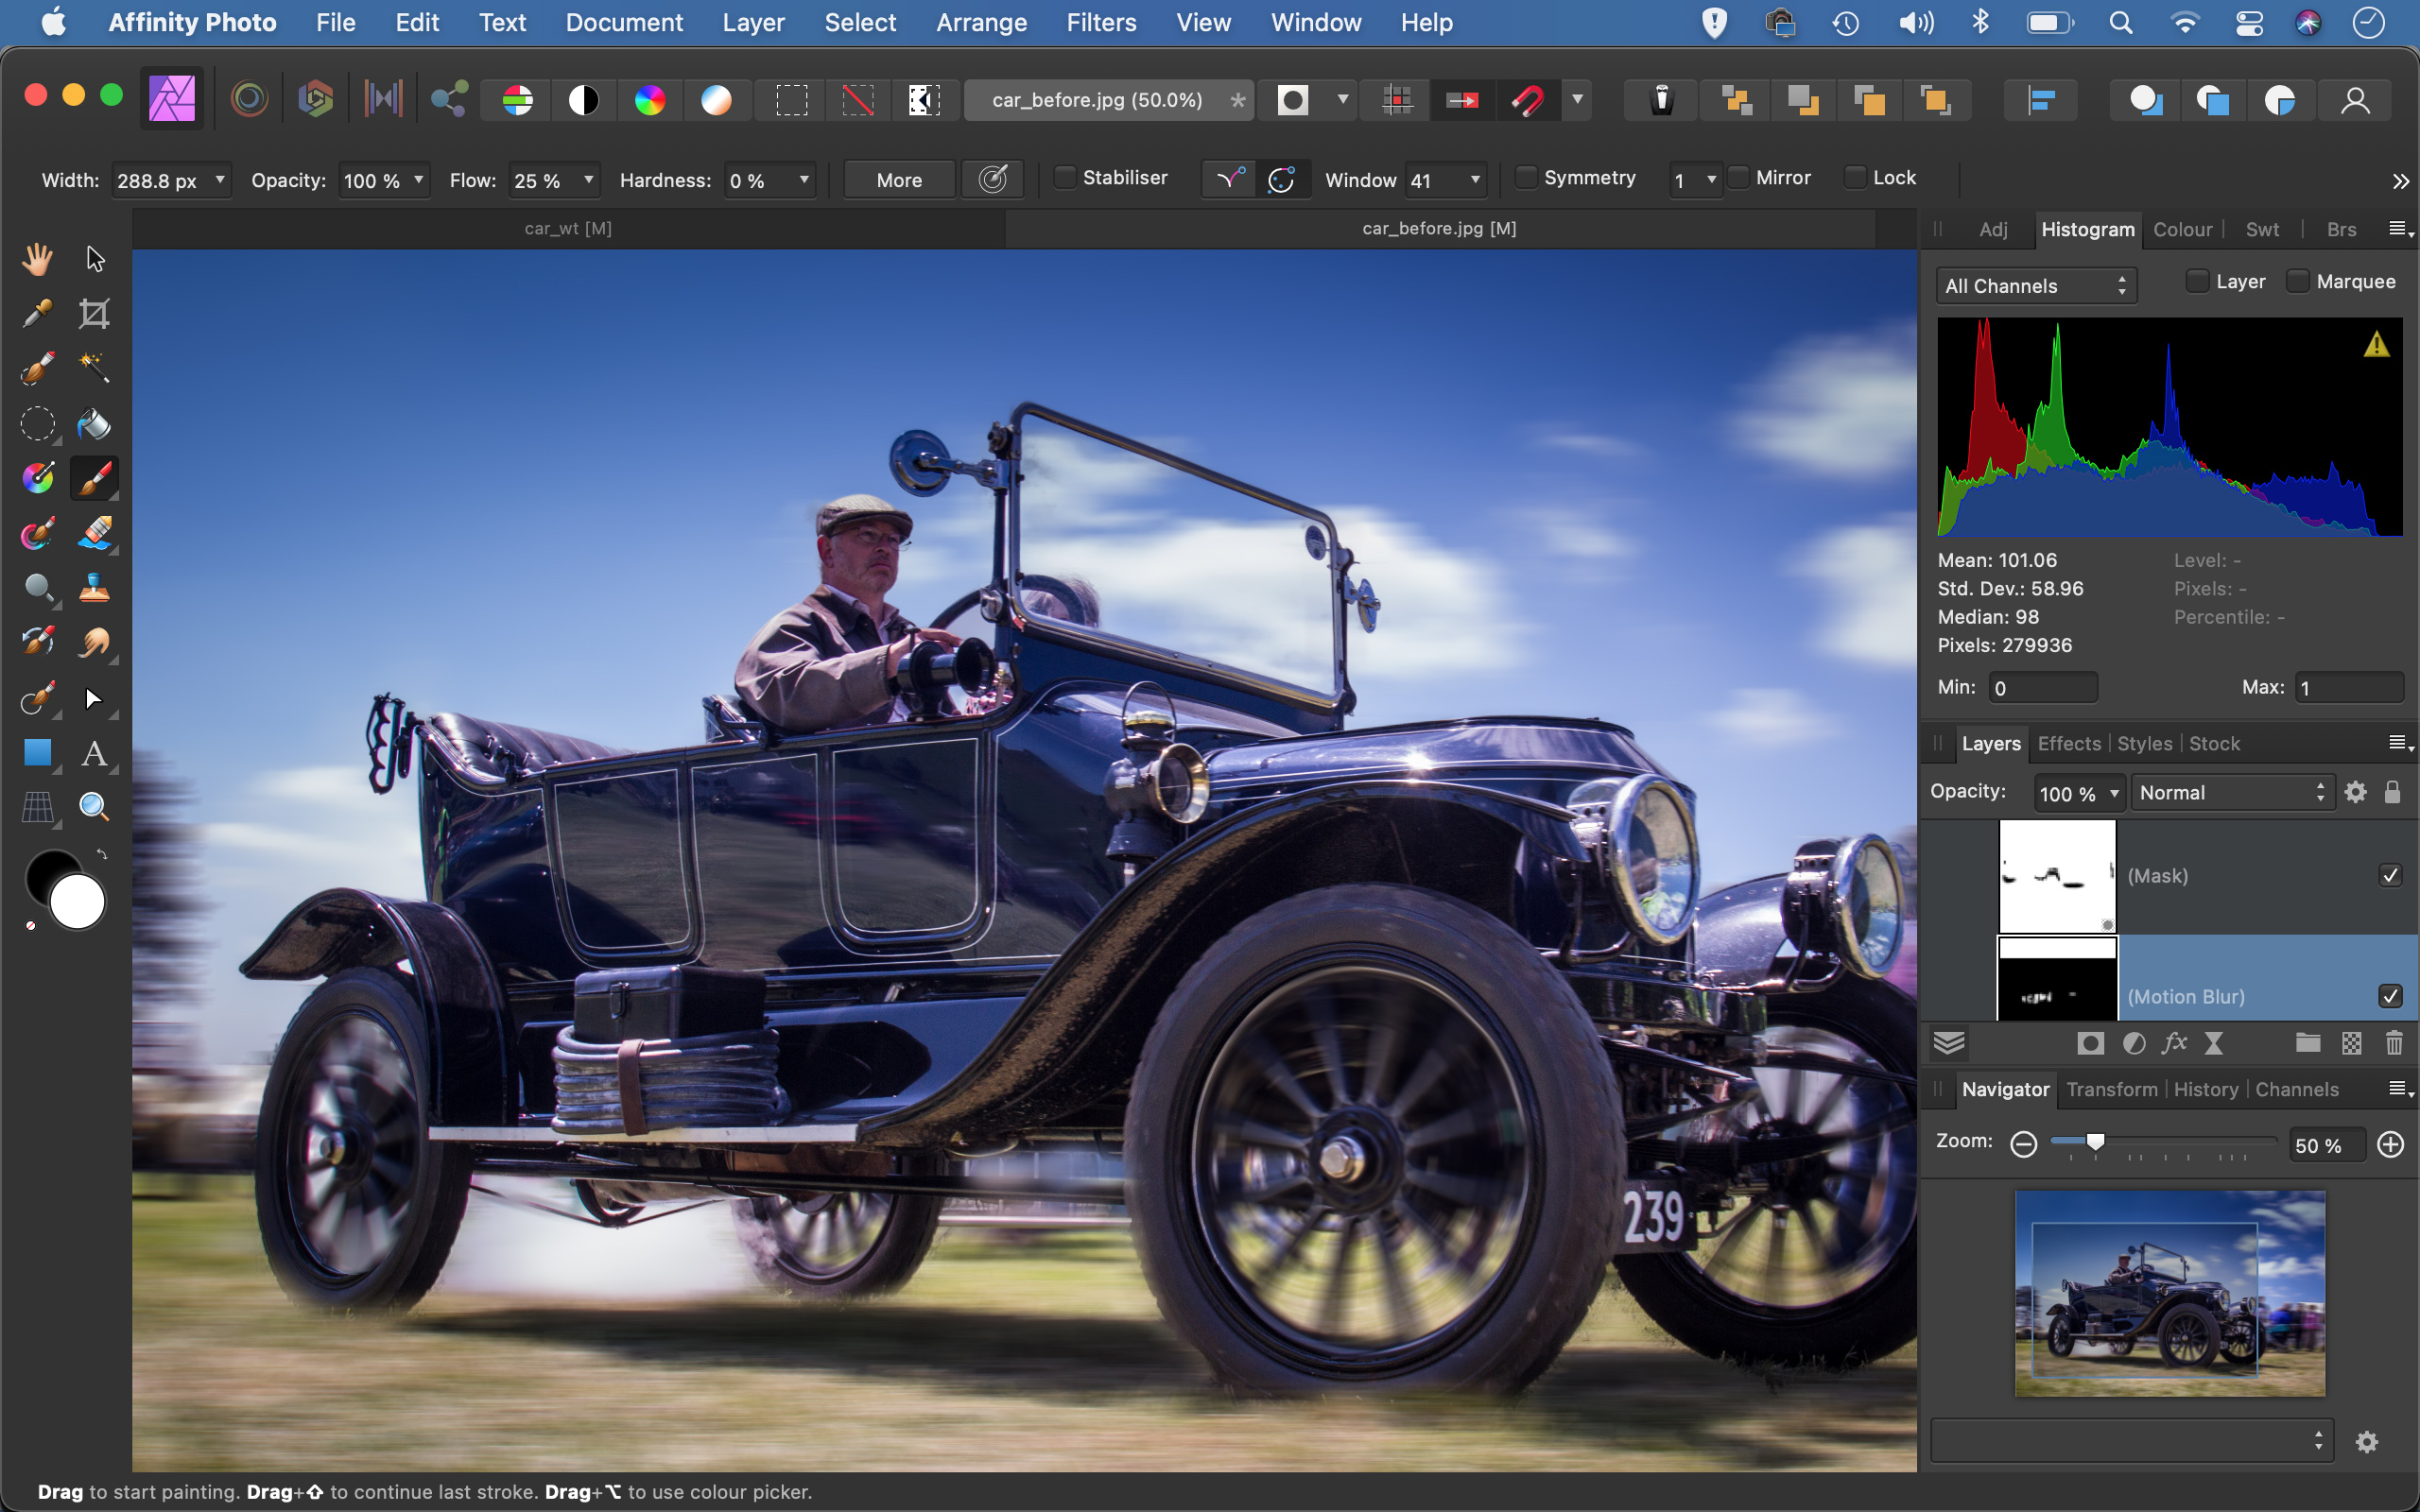
Repeat the radial blur effect over the other wheels. If you need to hide parts of the radial blur, highlight the Live Filter effect layer then paint with black to hide it or white to reveal. Add motion blur to any other areas that may need it, like the reflections in the paintwork.
PhotoPlus: The Canon Magazine is the world's only monthly newsstand title that's 100% devoted to Canon, so you can be sure the magazine is completely relevant to your system.
Read more:
The best photo editing software: image editors for novices through to pros
The best photo-editing laptops: top laptops for photographers
10 best online photography courses – from beginner guides to masterclasses
Get the Digital Camera World Newsletter
The best camera deals, reviews, product advice, and unmissable photography news, direct to your inbox!
The lead technique writer on Digital Camera Magazine, PhotoPlus: The Canon Magazine and N-Photo: The Nikon Magazine, James is a fantastic general practice photographer with an enviable array of skills across every genre of photography.
Whether it's flash photography techniques like stroboscopic portraits, astrophotography projects like photographing the Northern Lights, or turning sound into art by making paint dance on a set of speakers, James' tutorials and projects are as creative as they are enjoyable.
He's also a wizard at the dark arts of Photoshop, Lightroom and Affinity Photo, and is capable of some genuine black magic in the digital darkroom, making him one of the leading authorities on photo editing software and techniques.


