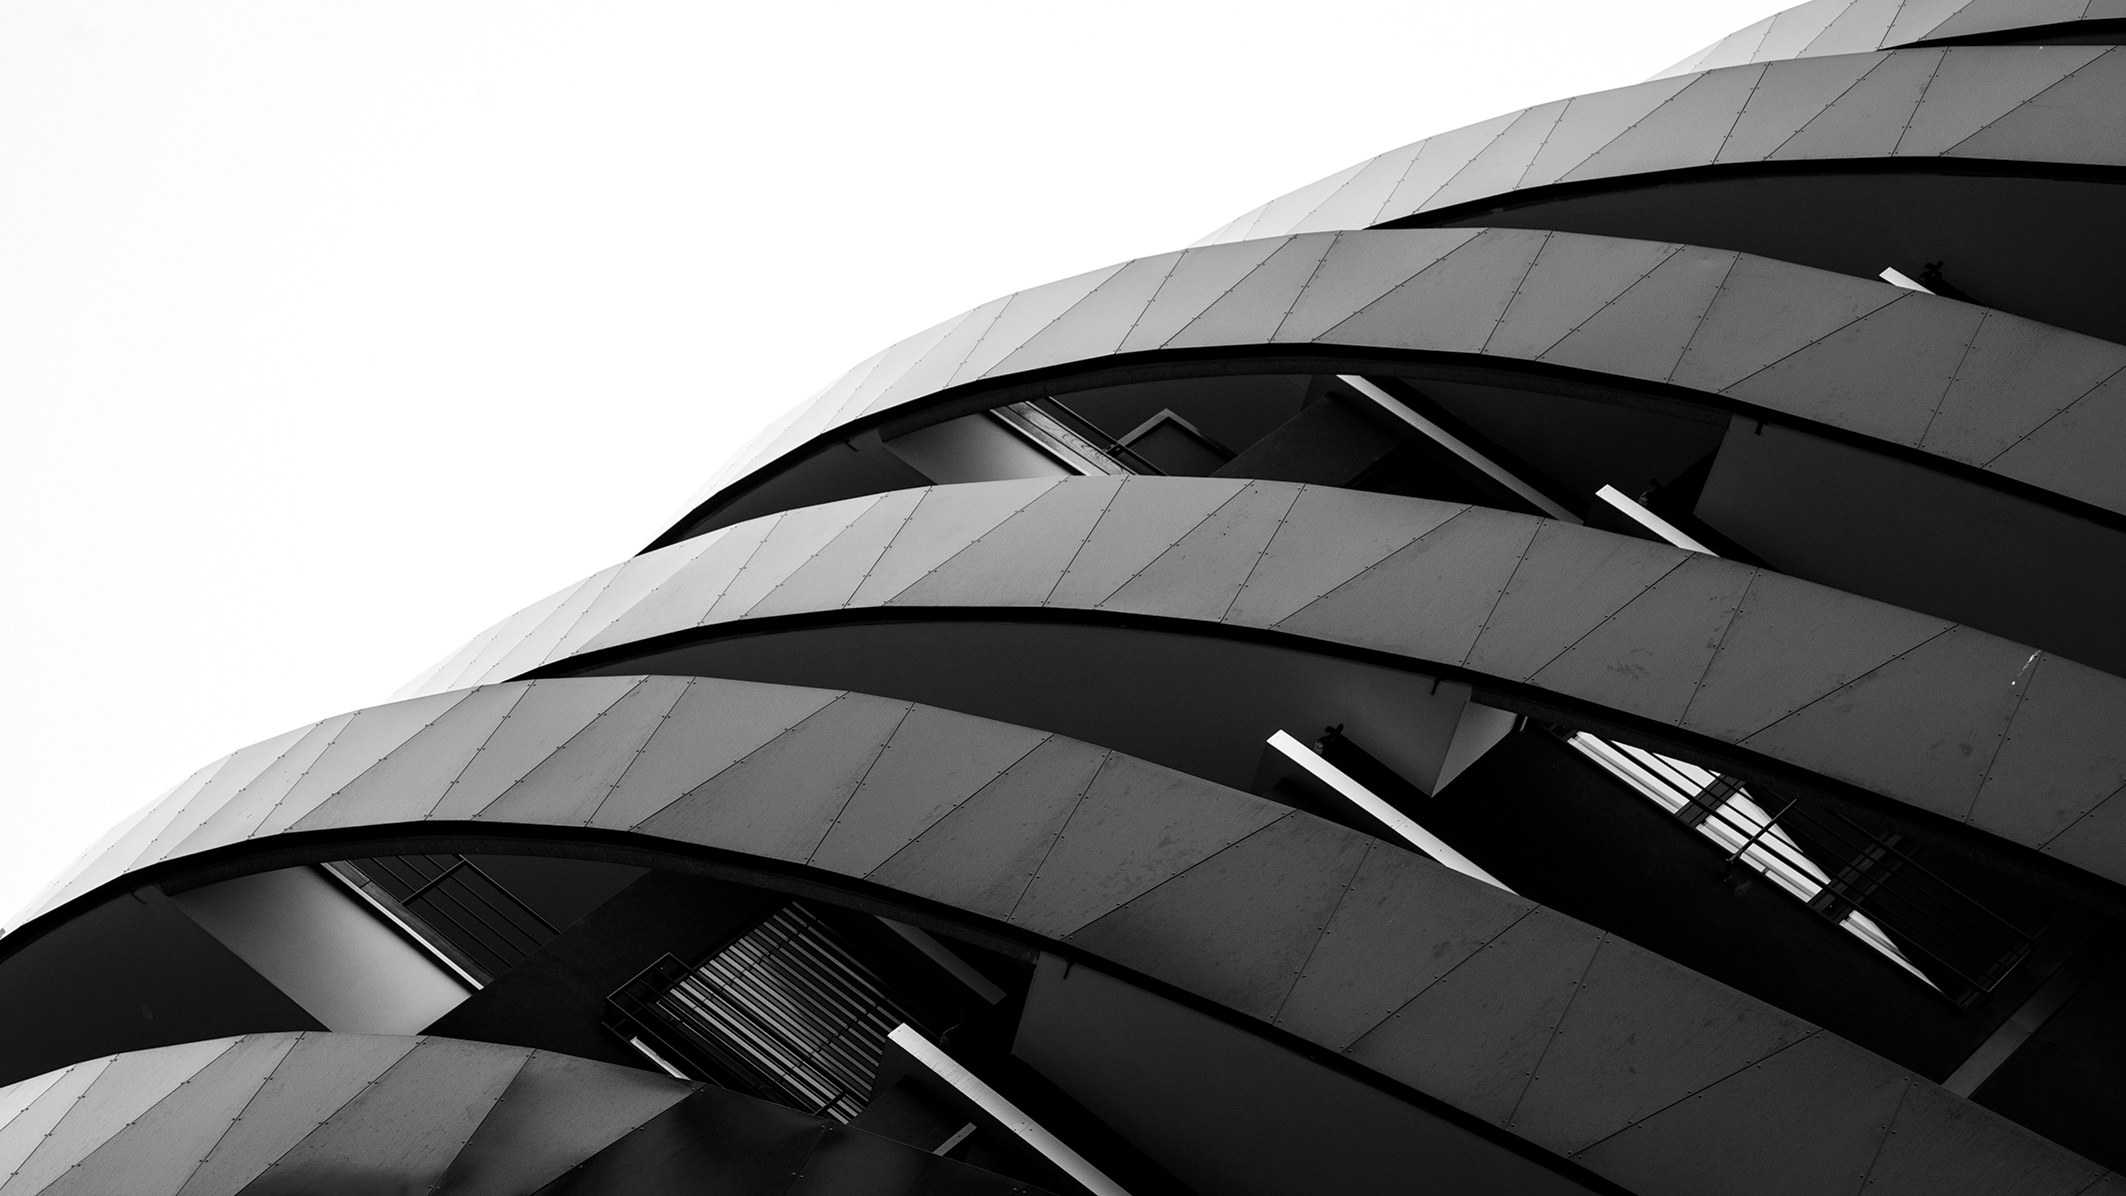
Make striking double exposures and learn key layer skills in Affinity Photo
Combine double exposure images the modern way for an old-school film effect, and learn key layer skills in Affinity Photo
Watch video: Create double exposures in Affinity Photo
Double exposures are among the easiest of effects to try out on your photos. The act of blending two images into one is not only eye-catching, but also enables you to explore conceptual themes in your photography.
Through your choice of photos, you can create conceptual images that spark ideas and pose questions. You could evoke an atmosphere of big-city melancholy like this, or juxtapose themes.
The technique is simple in Affinity Photo, and offers an ideal introduction to several layer tools and tricks. We begin by copying one image on top of another, so that they each sit on their own layer. Once done, we can use a layer blending mode to merge them, so that the lighter parts of each image show through, like an old film camera double exposure.
After this, we can fine-tune the blend by tweaking the positioning and using a layer mask to control which parts are visible. Finally, we can add a black-and-white effect to help everything gel together.
The real skill here is in choosing images that work in harmony with one another. Strong, bold shapes, like the silhouetted couple and the building here, tend to work very well – you can download both start images (double_1.jpeg and double_2.jpeg) here. But it’s worth experimenting with different photos in your own image library to see which works best.
Of course, not only do we have the freedom to try out different photos, we can also experiment with the positioning and sizing of them, so that we can line up each picture to create a satisfying whole, or even narrative.
01 Copy and blend

Open our start images (download here) or ones you’d like to use, copy one with Cmd/Ctrl+C, go to the other image and paste with Cmd/Ctrl + V. Go to the Layers panel, click the Blend Mode dropdown and change Normal to Screen. This combines the brightness values of each frame.
02 Adjust the positioning
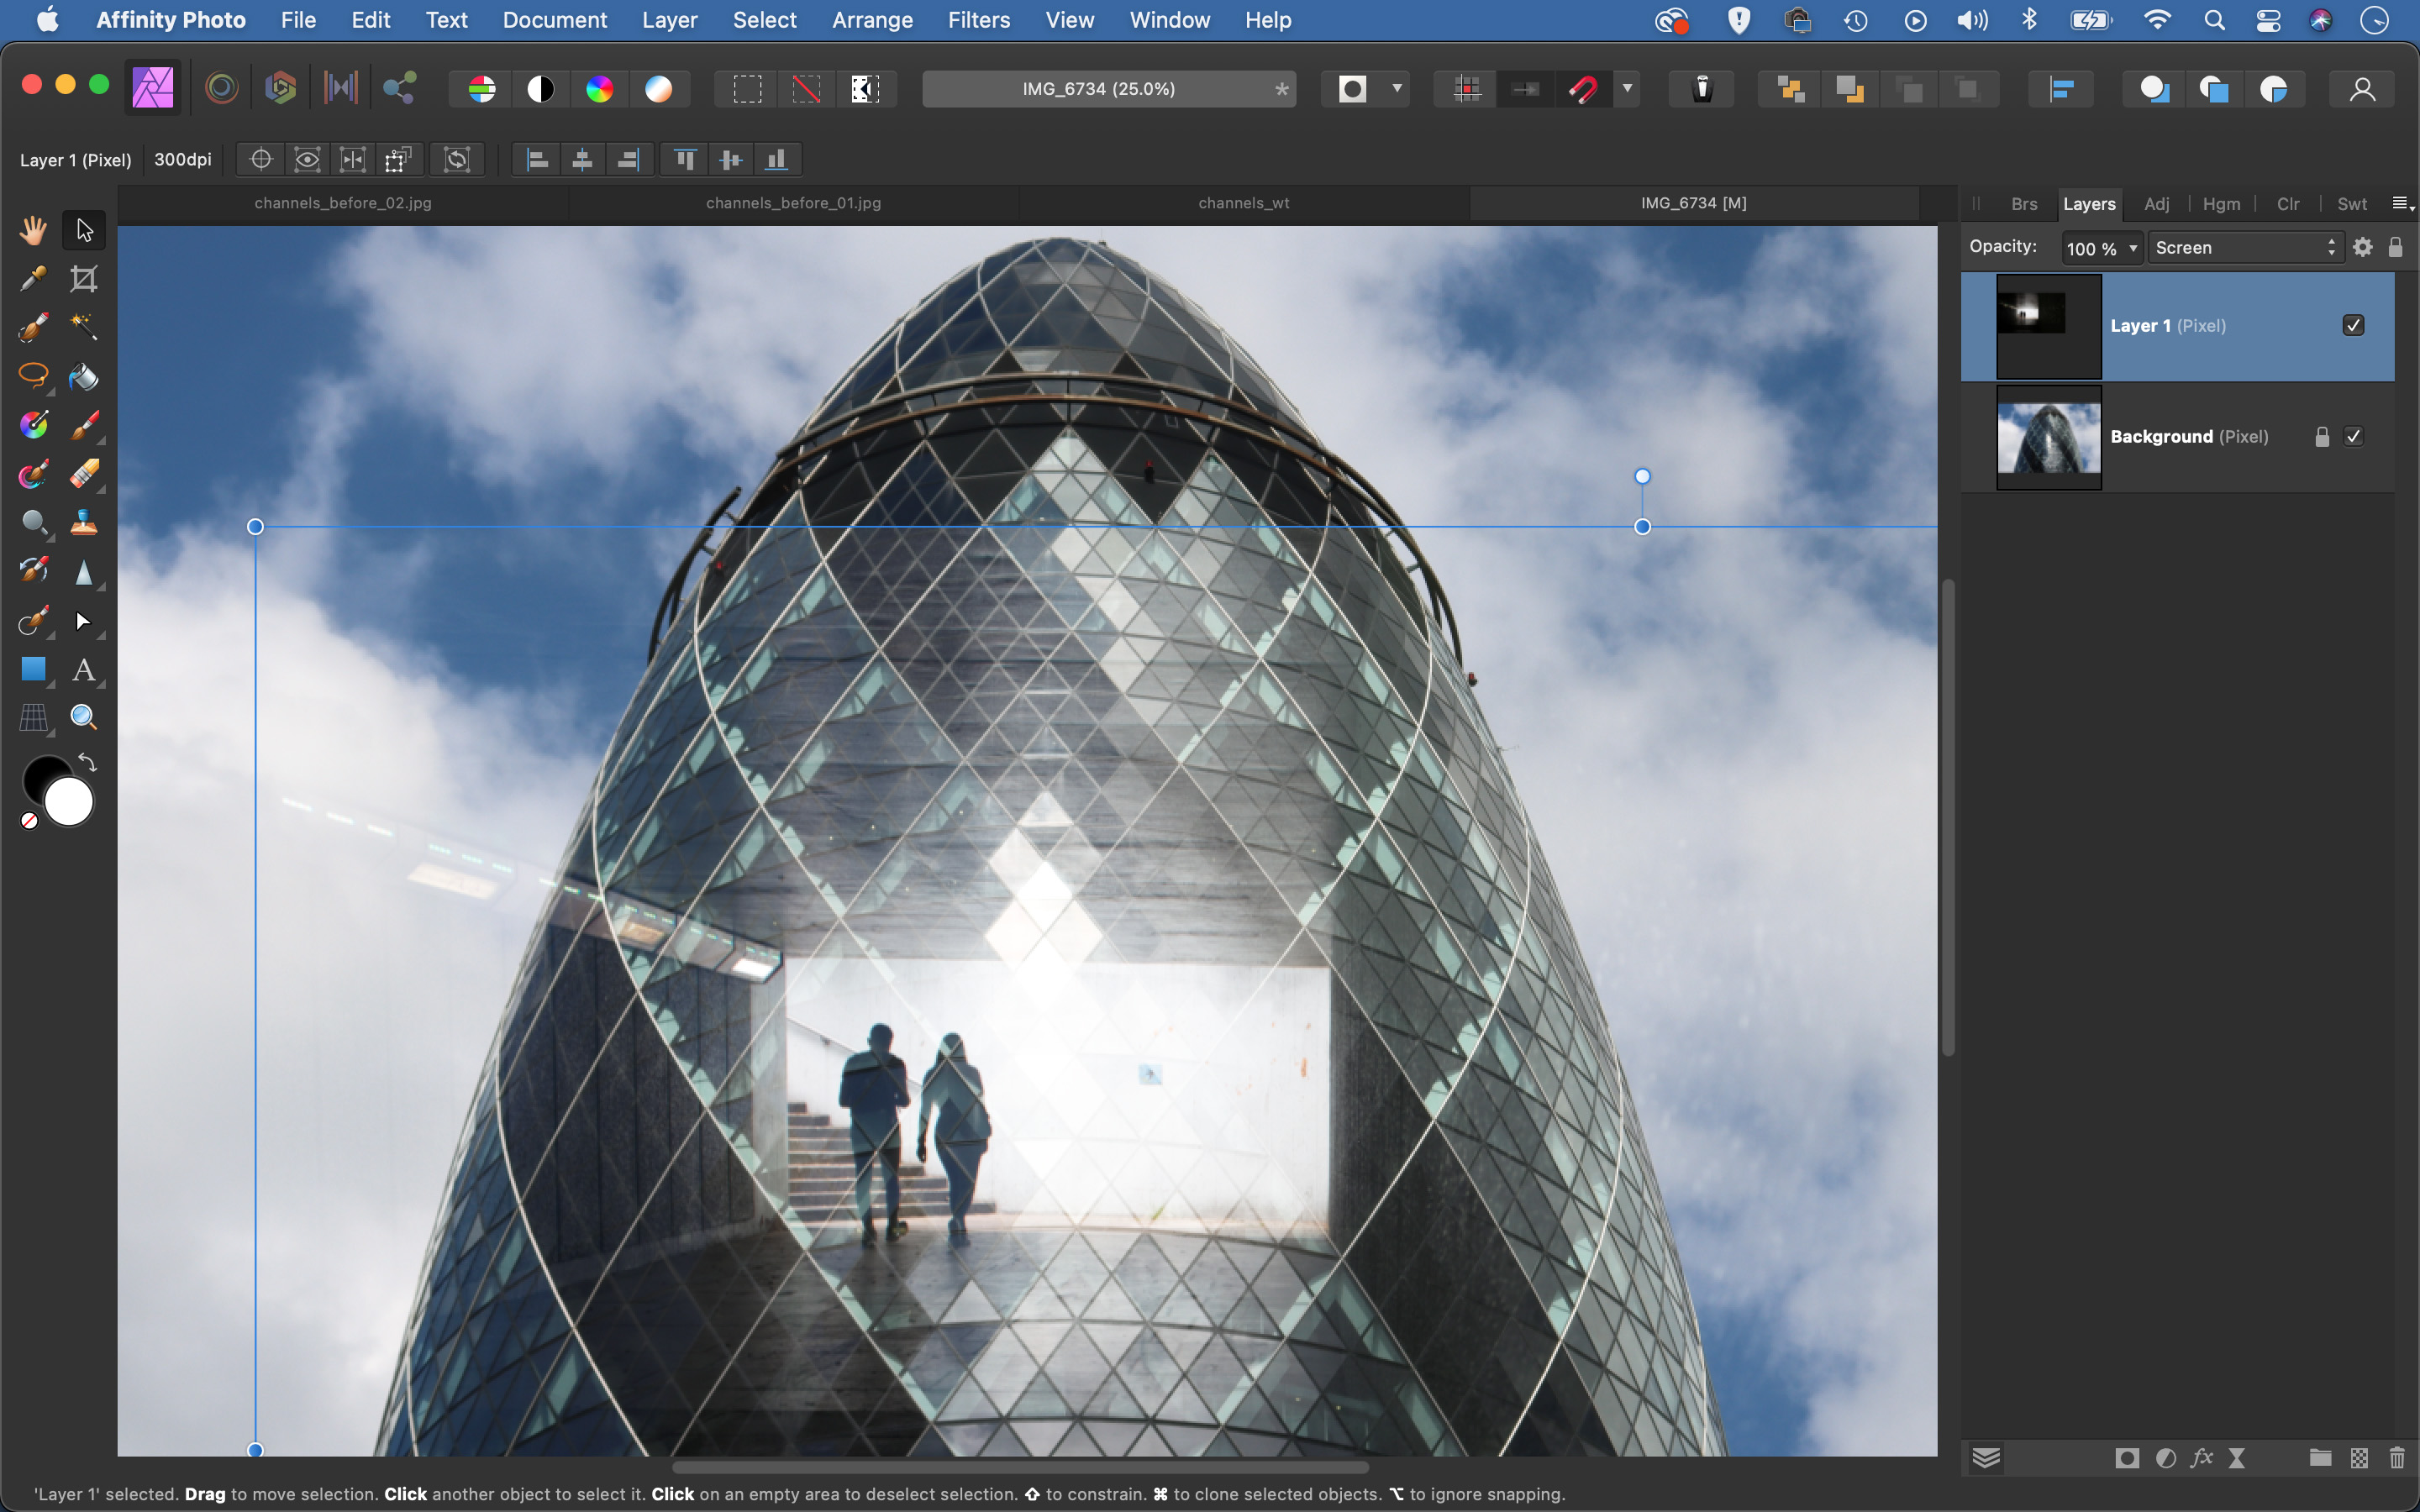
With the top layer highlighted, grab the Move tool from the toolbar on the left. Drag the shot to change the positioning, and if you want to resize the image drag the corner of the bounding box. Tweak the placement until the images fit in a way that you like.
03 Add a layer mask
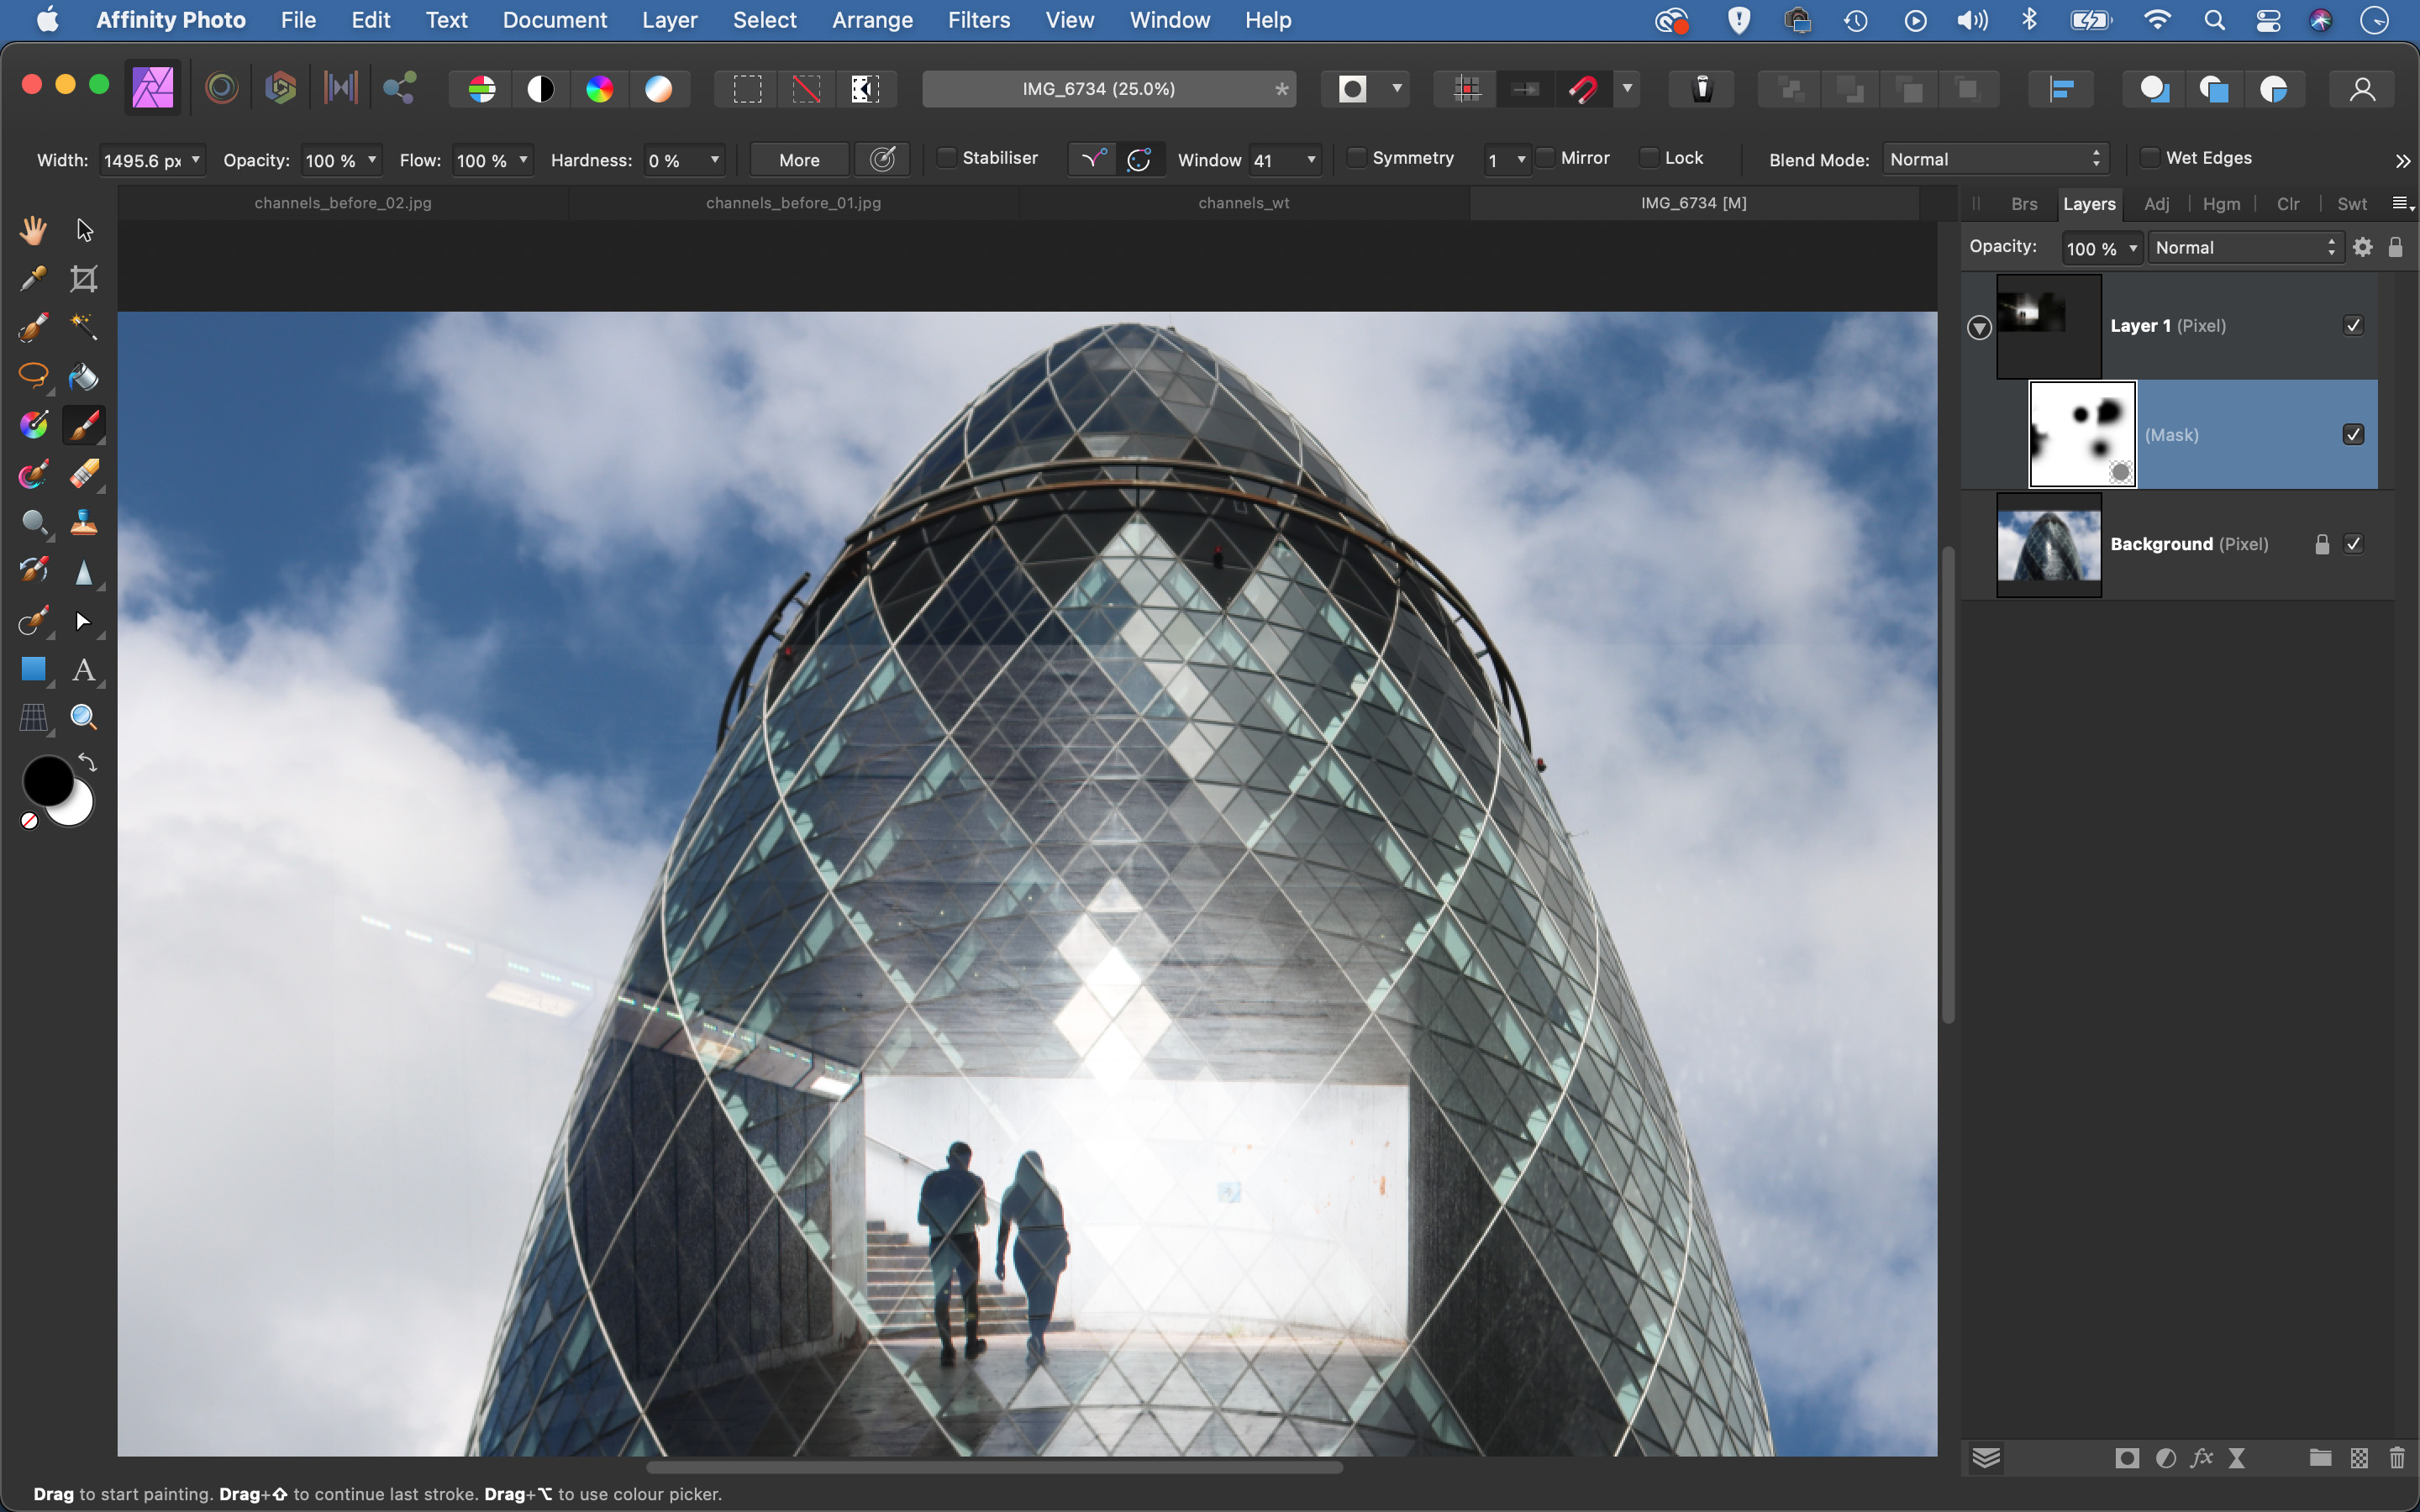
The edges of the top layer here look messy, so let’s hide them. Click the Layer Mask icon at the bottom of the Layers panel to add a mask to the top layer. Get the Brush tool, set the color to black and lower the brush hardness to 0%, paint to hide the edges of the layer.
04 Convert to mono
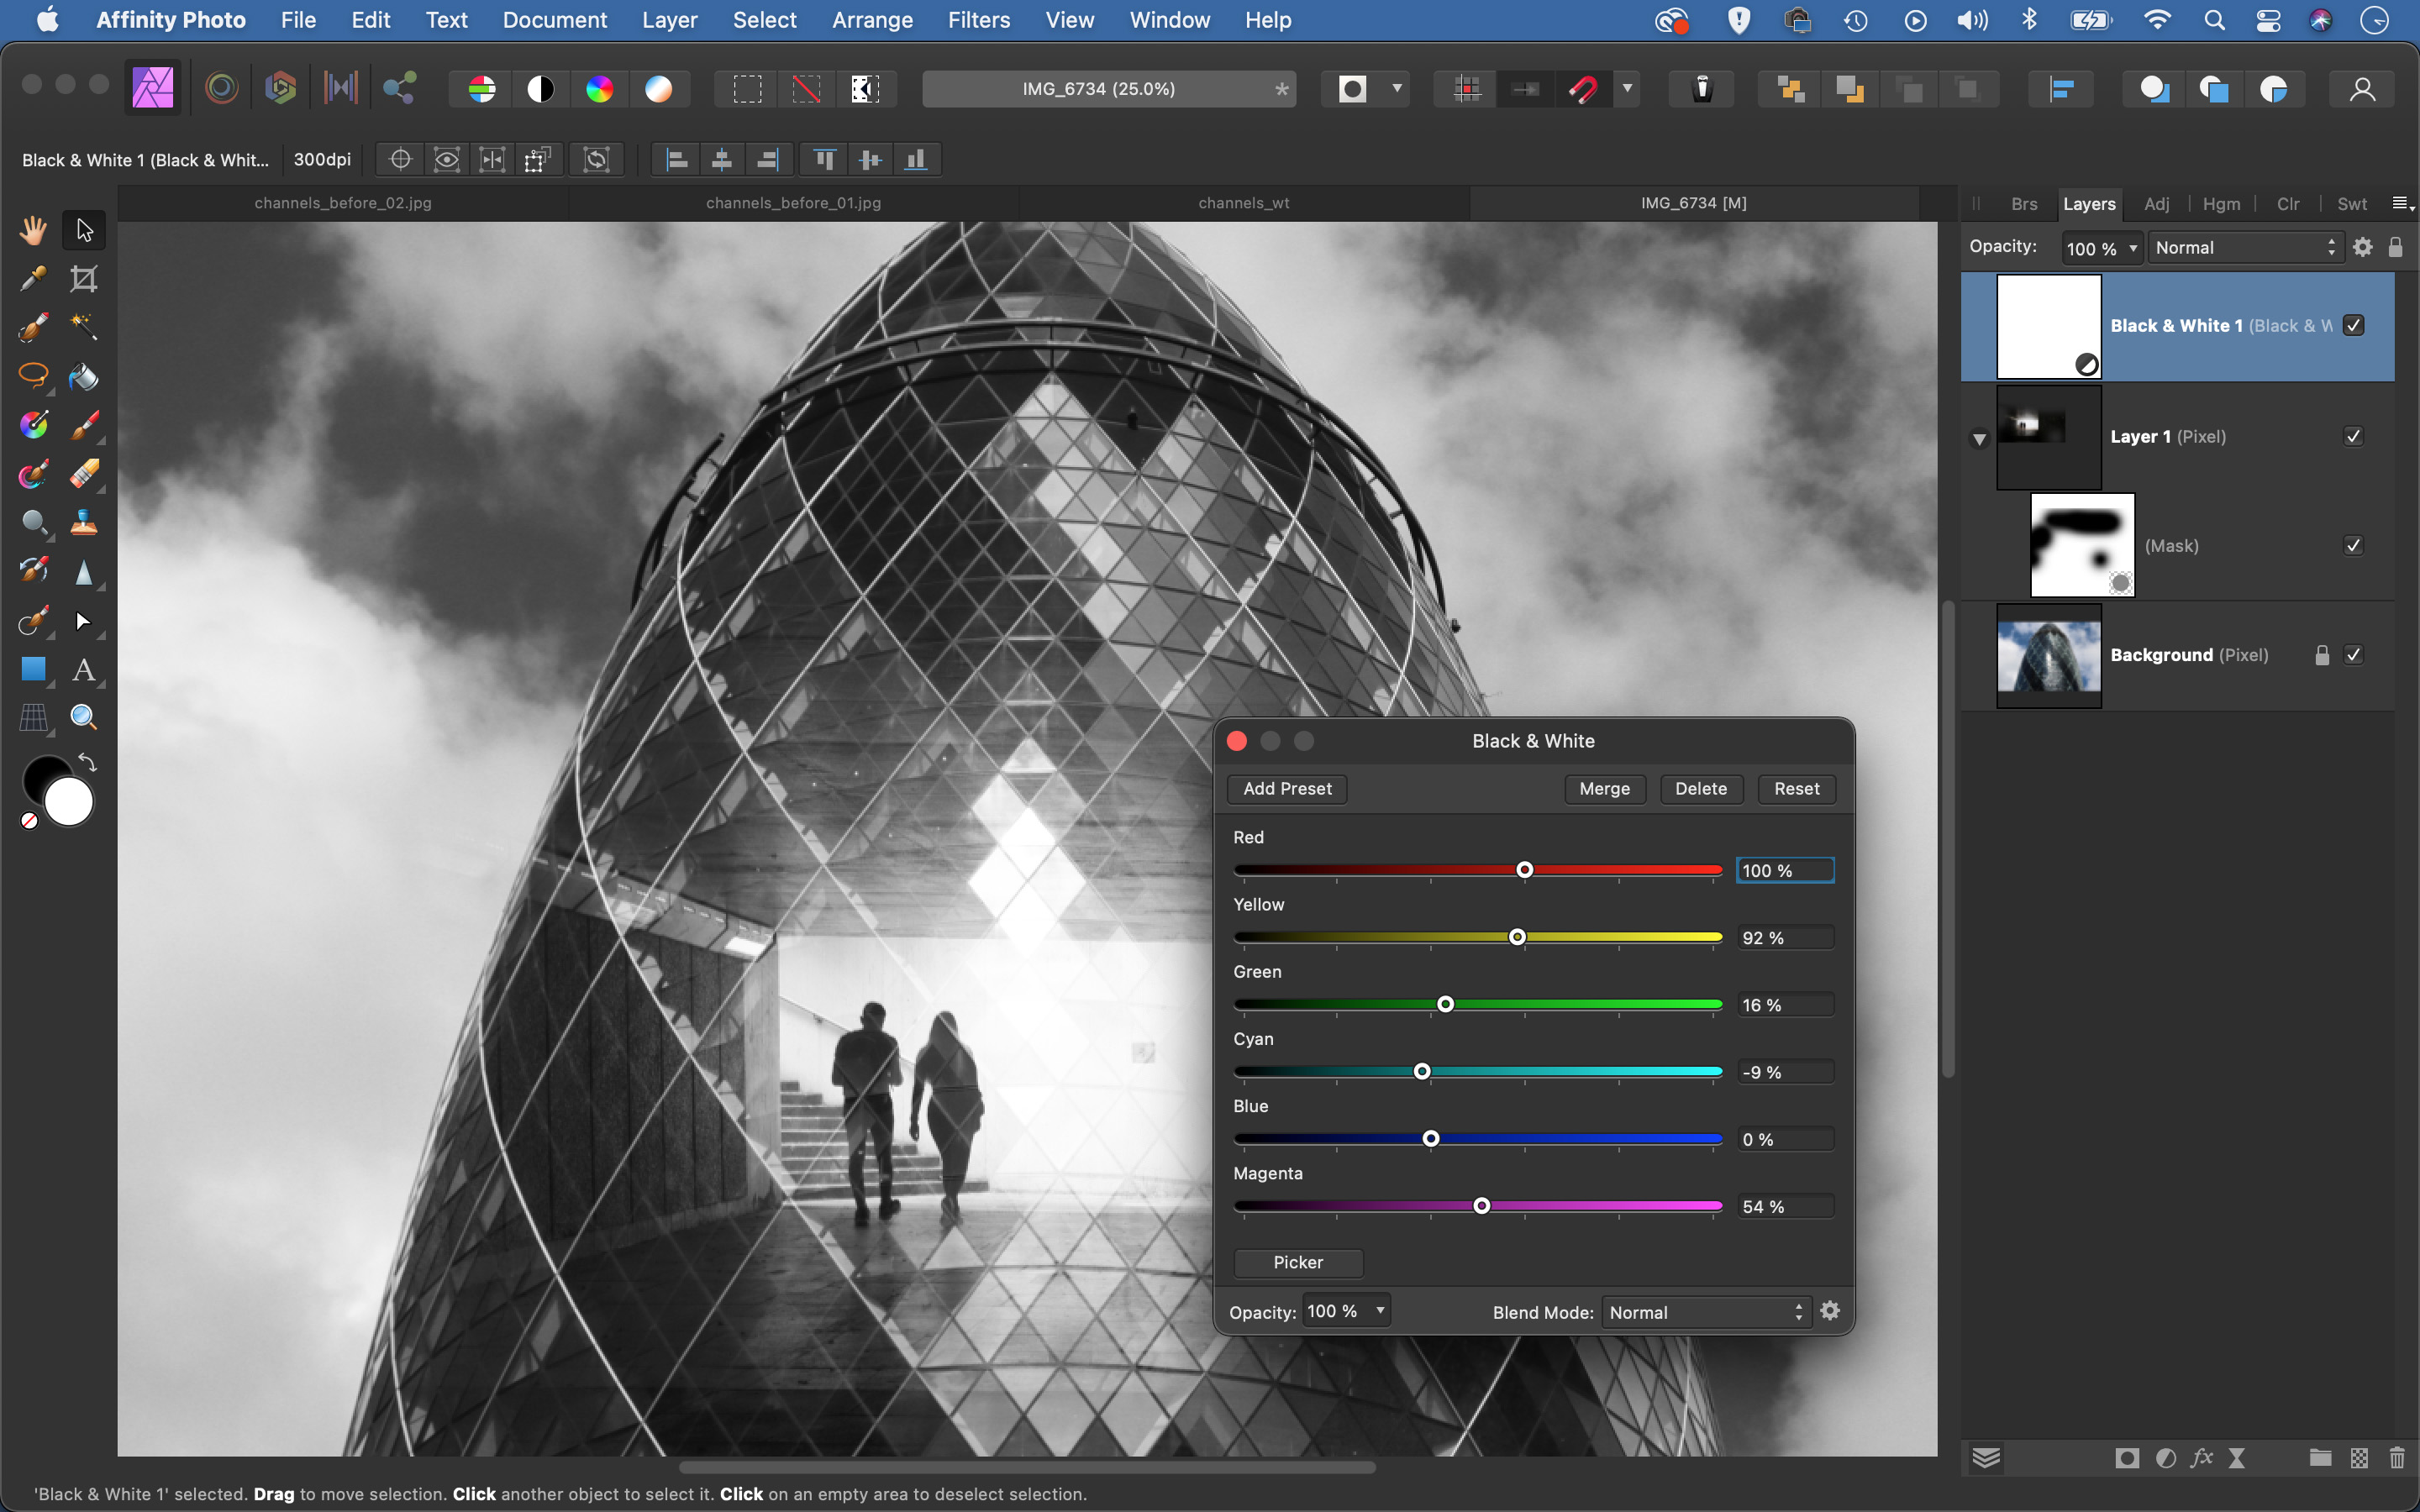
We can use an Adjustment Layer to convert the image to monochrome. With the top layer highlighted, click the Adjustment icon in the Layers panel and choose Black and White. Fine-tune the black and white sliders to control the brightness of the color ranges.
05 Fine-tune the brightness
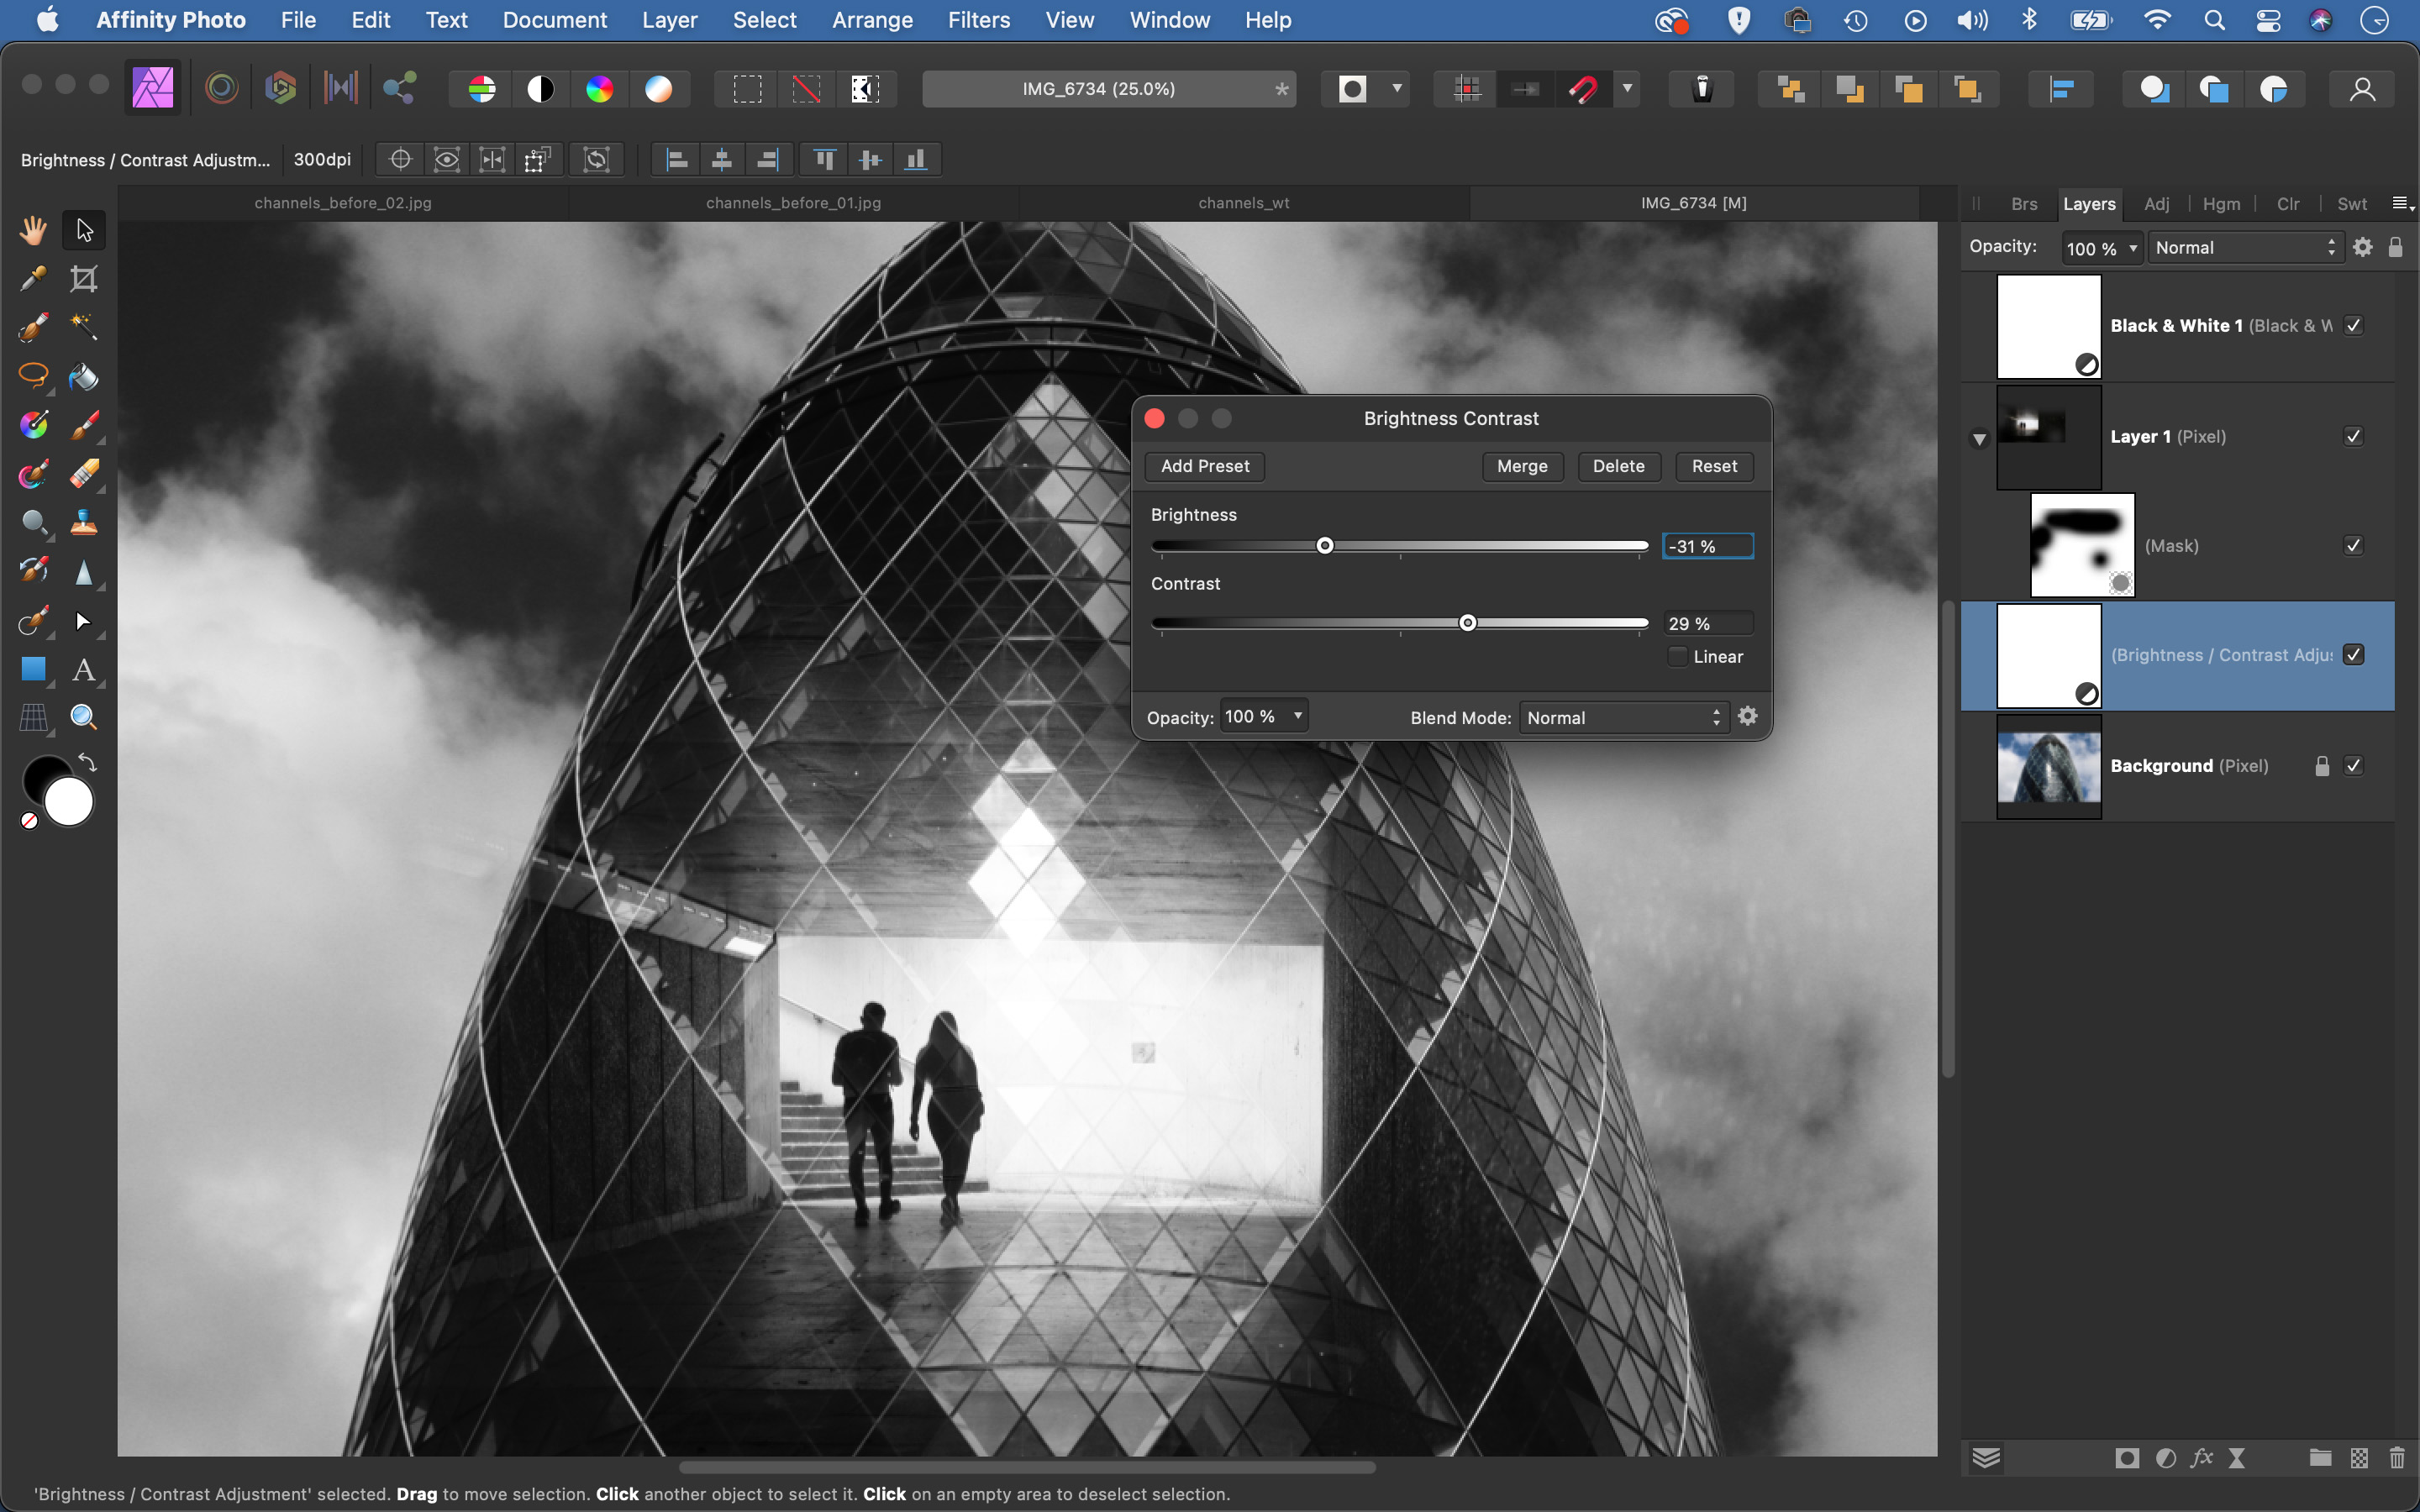
When making double exposures we double up the brightness of our images, so we often need to darken one or both frames. Highlight the bottom layer then click the Adjustment icon and choose ‘Brightness and Contrast’. Lower the brightness until it looks right.
06 Add a split-tone treatment
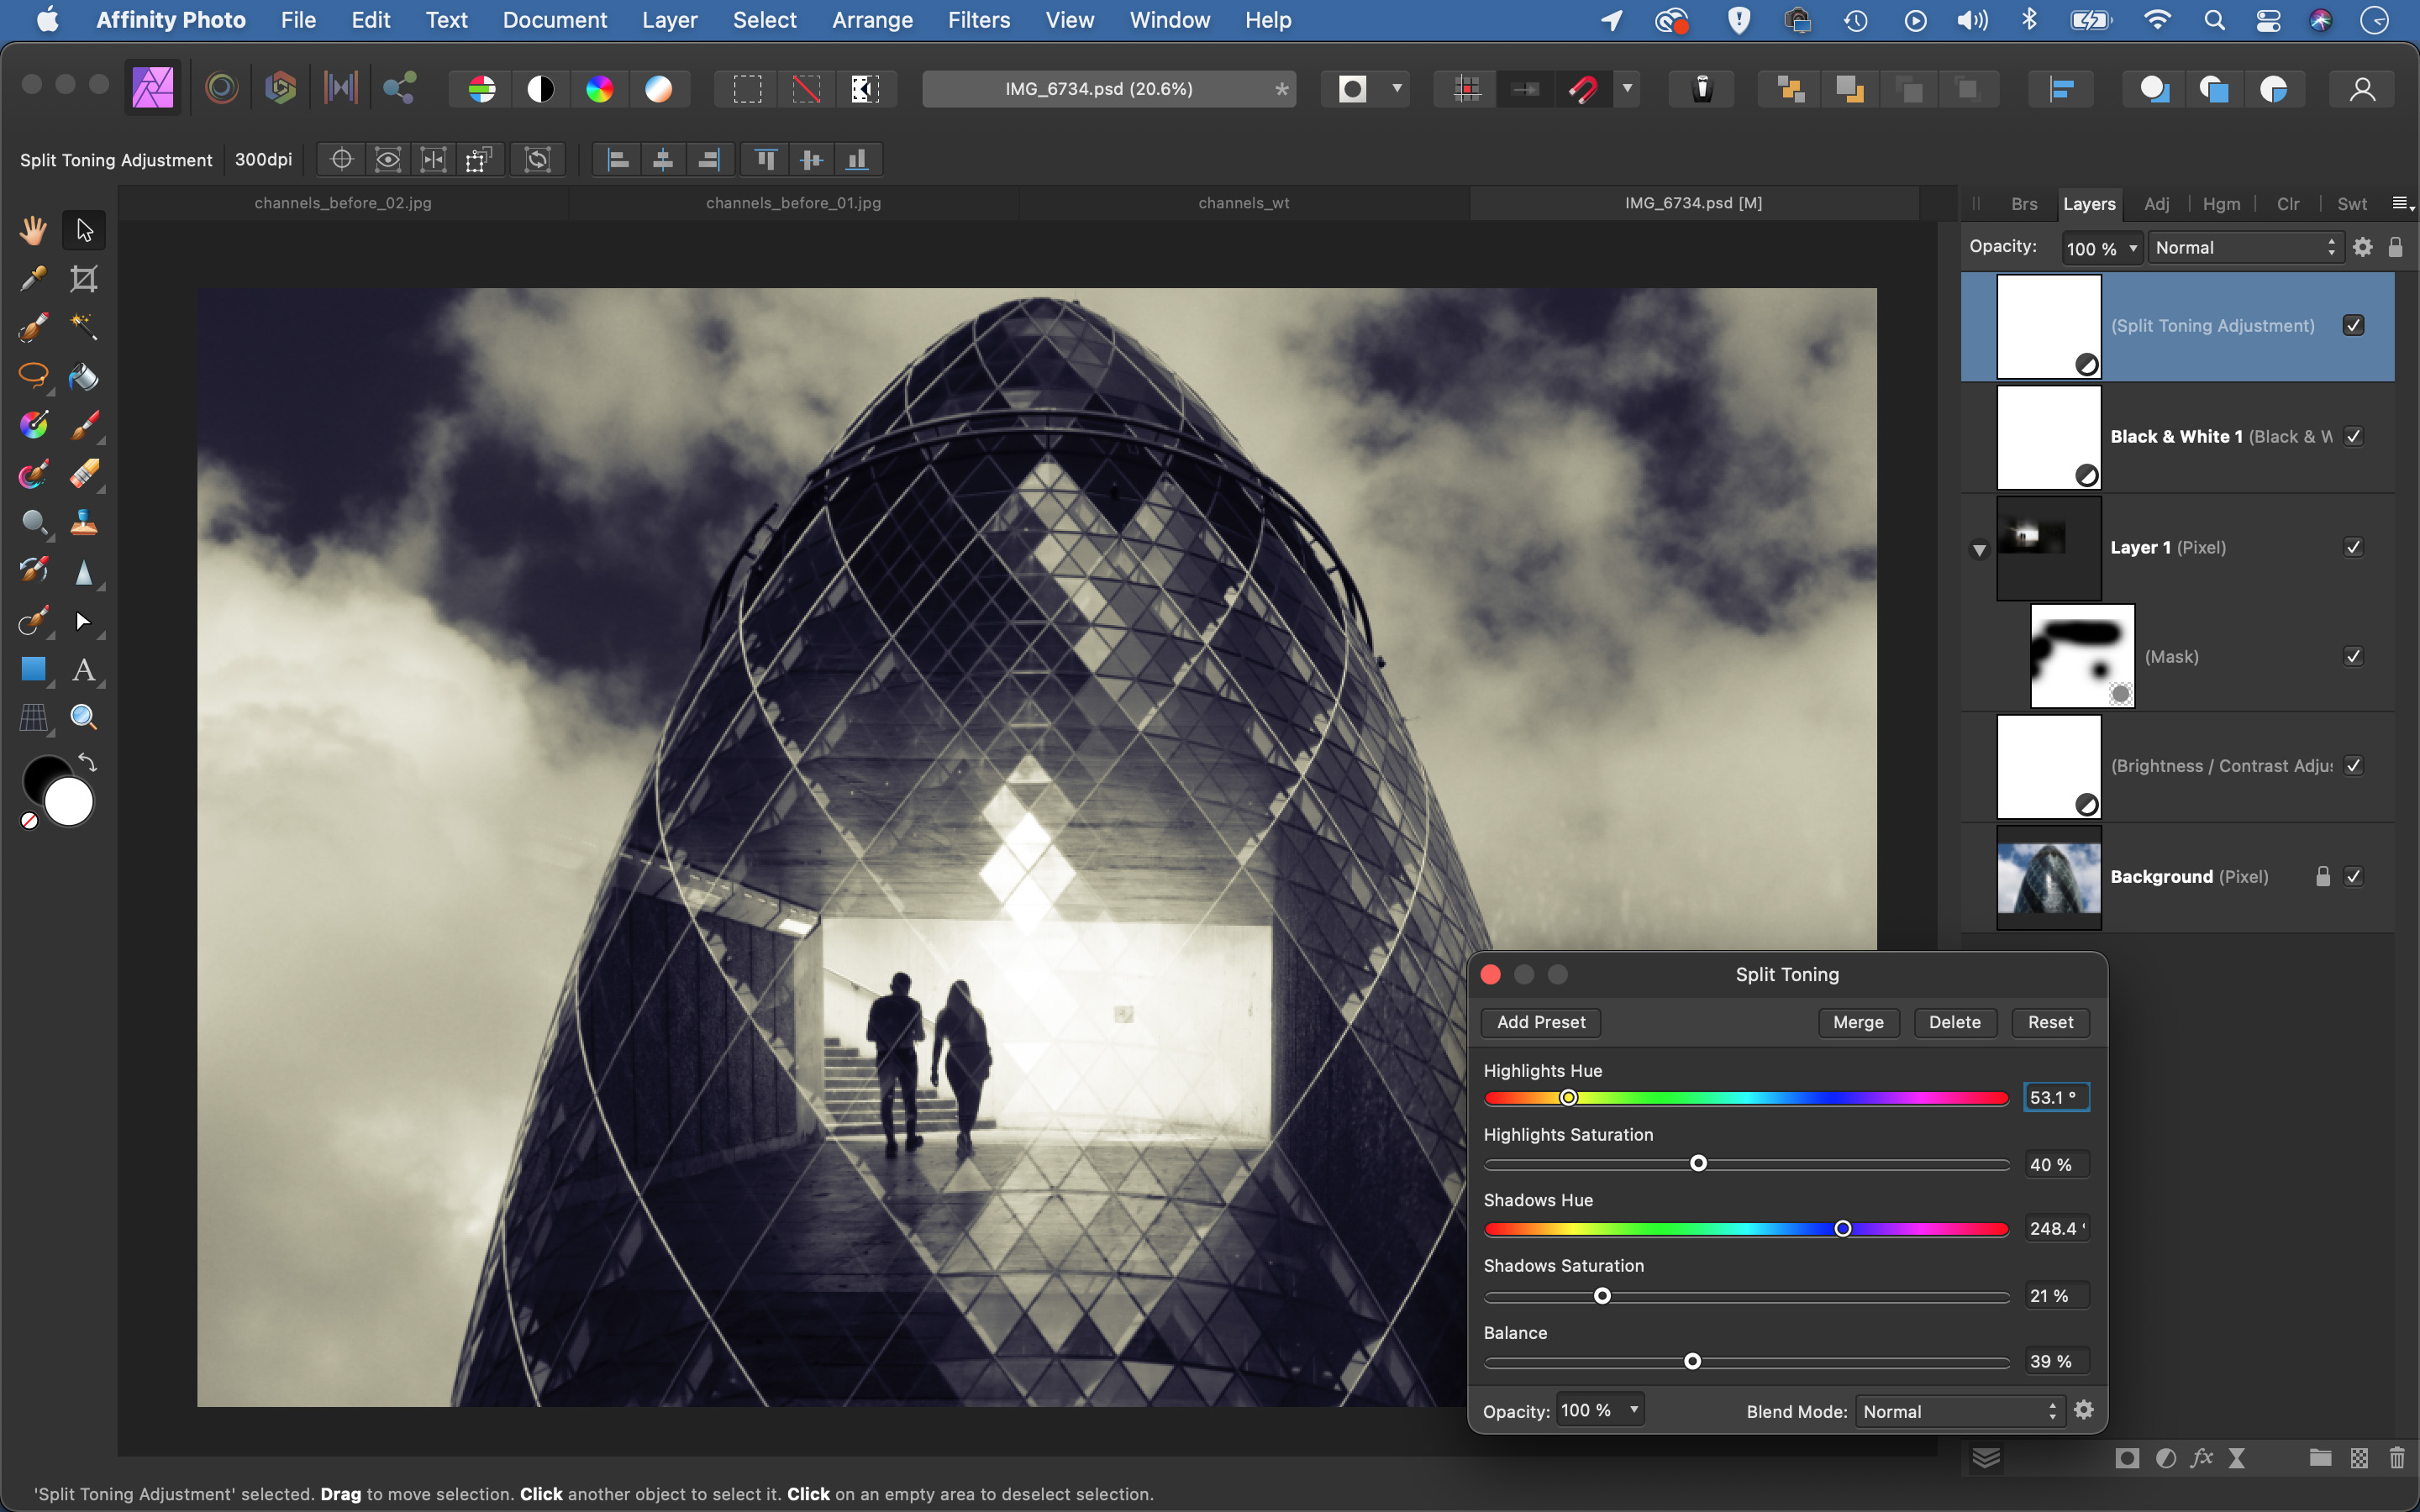
Click the Adjustment icon again and choose Split Toning. Use the sliders to add a tint to both the highlights and the shadows and adjust the strength with the Saturation sliders. Make any other tonal changes you like to finish off the image.
• See more of our Affinity Photo tutorials
PhotoPlus: The Canon Magazine is the world's only monthly newsstand title that's 100% devoted to Canon, so you can be sure the magazine is completely relevant to your system.
Read more:
Best photo-editing laptops
Best photo editing software
Best online photography courses
Get the Digital Camera World Newsletter
The best camera deals, reviews, product advice, and unmissable photography news, direct to your inbox!
The lead technique writer on Digital Camera Magazine, PhotoPlus: The Canon Magazine and N-Photo: The Nikon Magazine, James is a fantastic general practice photographer with an enviable array of skills across every genre of photography.
Whether it's flash photography techniques like stroboscopic portraits, astrophotography projects like photographing the Northern Lights, or turning sound into art by making paint dance on a set of speakers, James' tutorials and projects are as creative as they are enjoyable.
He's also a wizard at the dark arts of Photoshop, Lightroom and Affinity Photo, and is capable of some genuine black magic in the digital darkroom, making him one of the leading authorities on photo editing software and techniques.


