
When you return from your summer holidays you may find you have a collection of shots that feature strong contrast between light and shade, which is where the Nikon Capture NX-D comes in handy.
In urban locations, such as narrow city streets, you’ll often be faced with the challenge of capturing shadow detail without overexposing sunlit highlights. Here our Nikon has metered the scene to capture detail in the brightest highlights, causing the shaded areas to be plunged into darkness.
We could have opened up the aperture or slowed down the shutter speed to reveal more shadow detail, but this would have caused the highlights to become clipped.
Capture NX-D has all the tools you need to get a more balanced exposure in a high-contrast scenario. You could try using the Tone/Detail panel’s Shadow Protection slider to selectively lighten the underexposed shadows without blowing out the correctly exposed highlights.
However, in cases of extreme contrast you’ll end up with flat, washed-out shadows that lack colour. Fortunately you can remap specific tonal levels with more control and accuracy using the Levels & Curves palette.
This powerful tool helps you target and lighten the problematic shadows without overexposing the already healthy highlights.
Video tutorial: Learn to master Curves in Capture NX-D
Step-by-step: Correct exposure using Curves
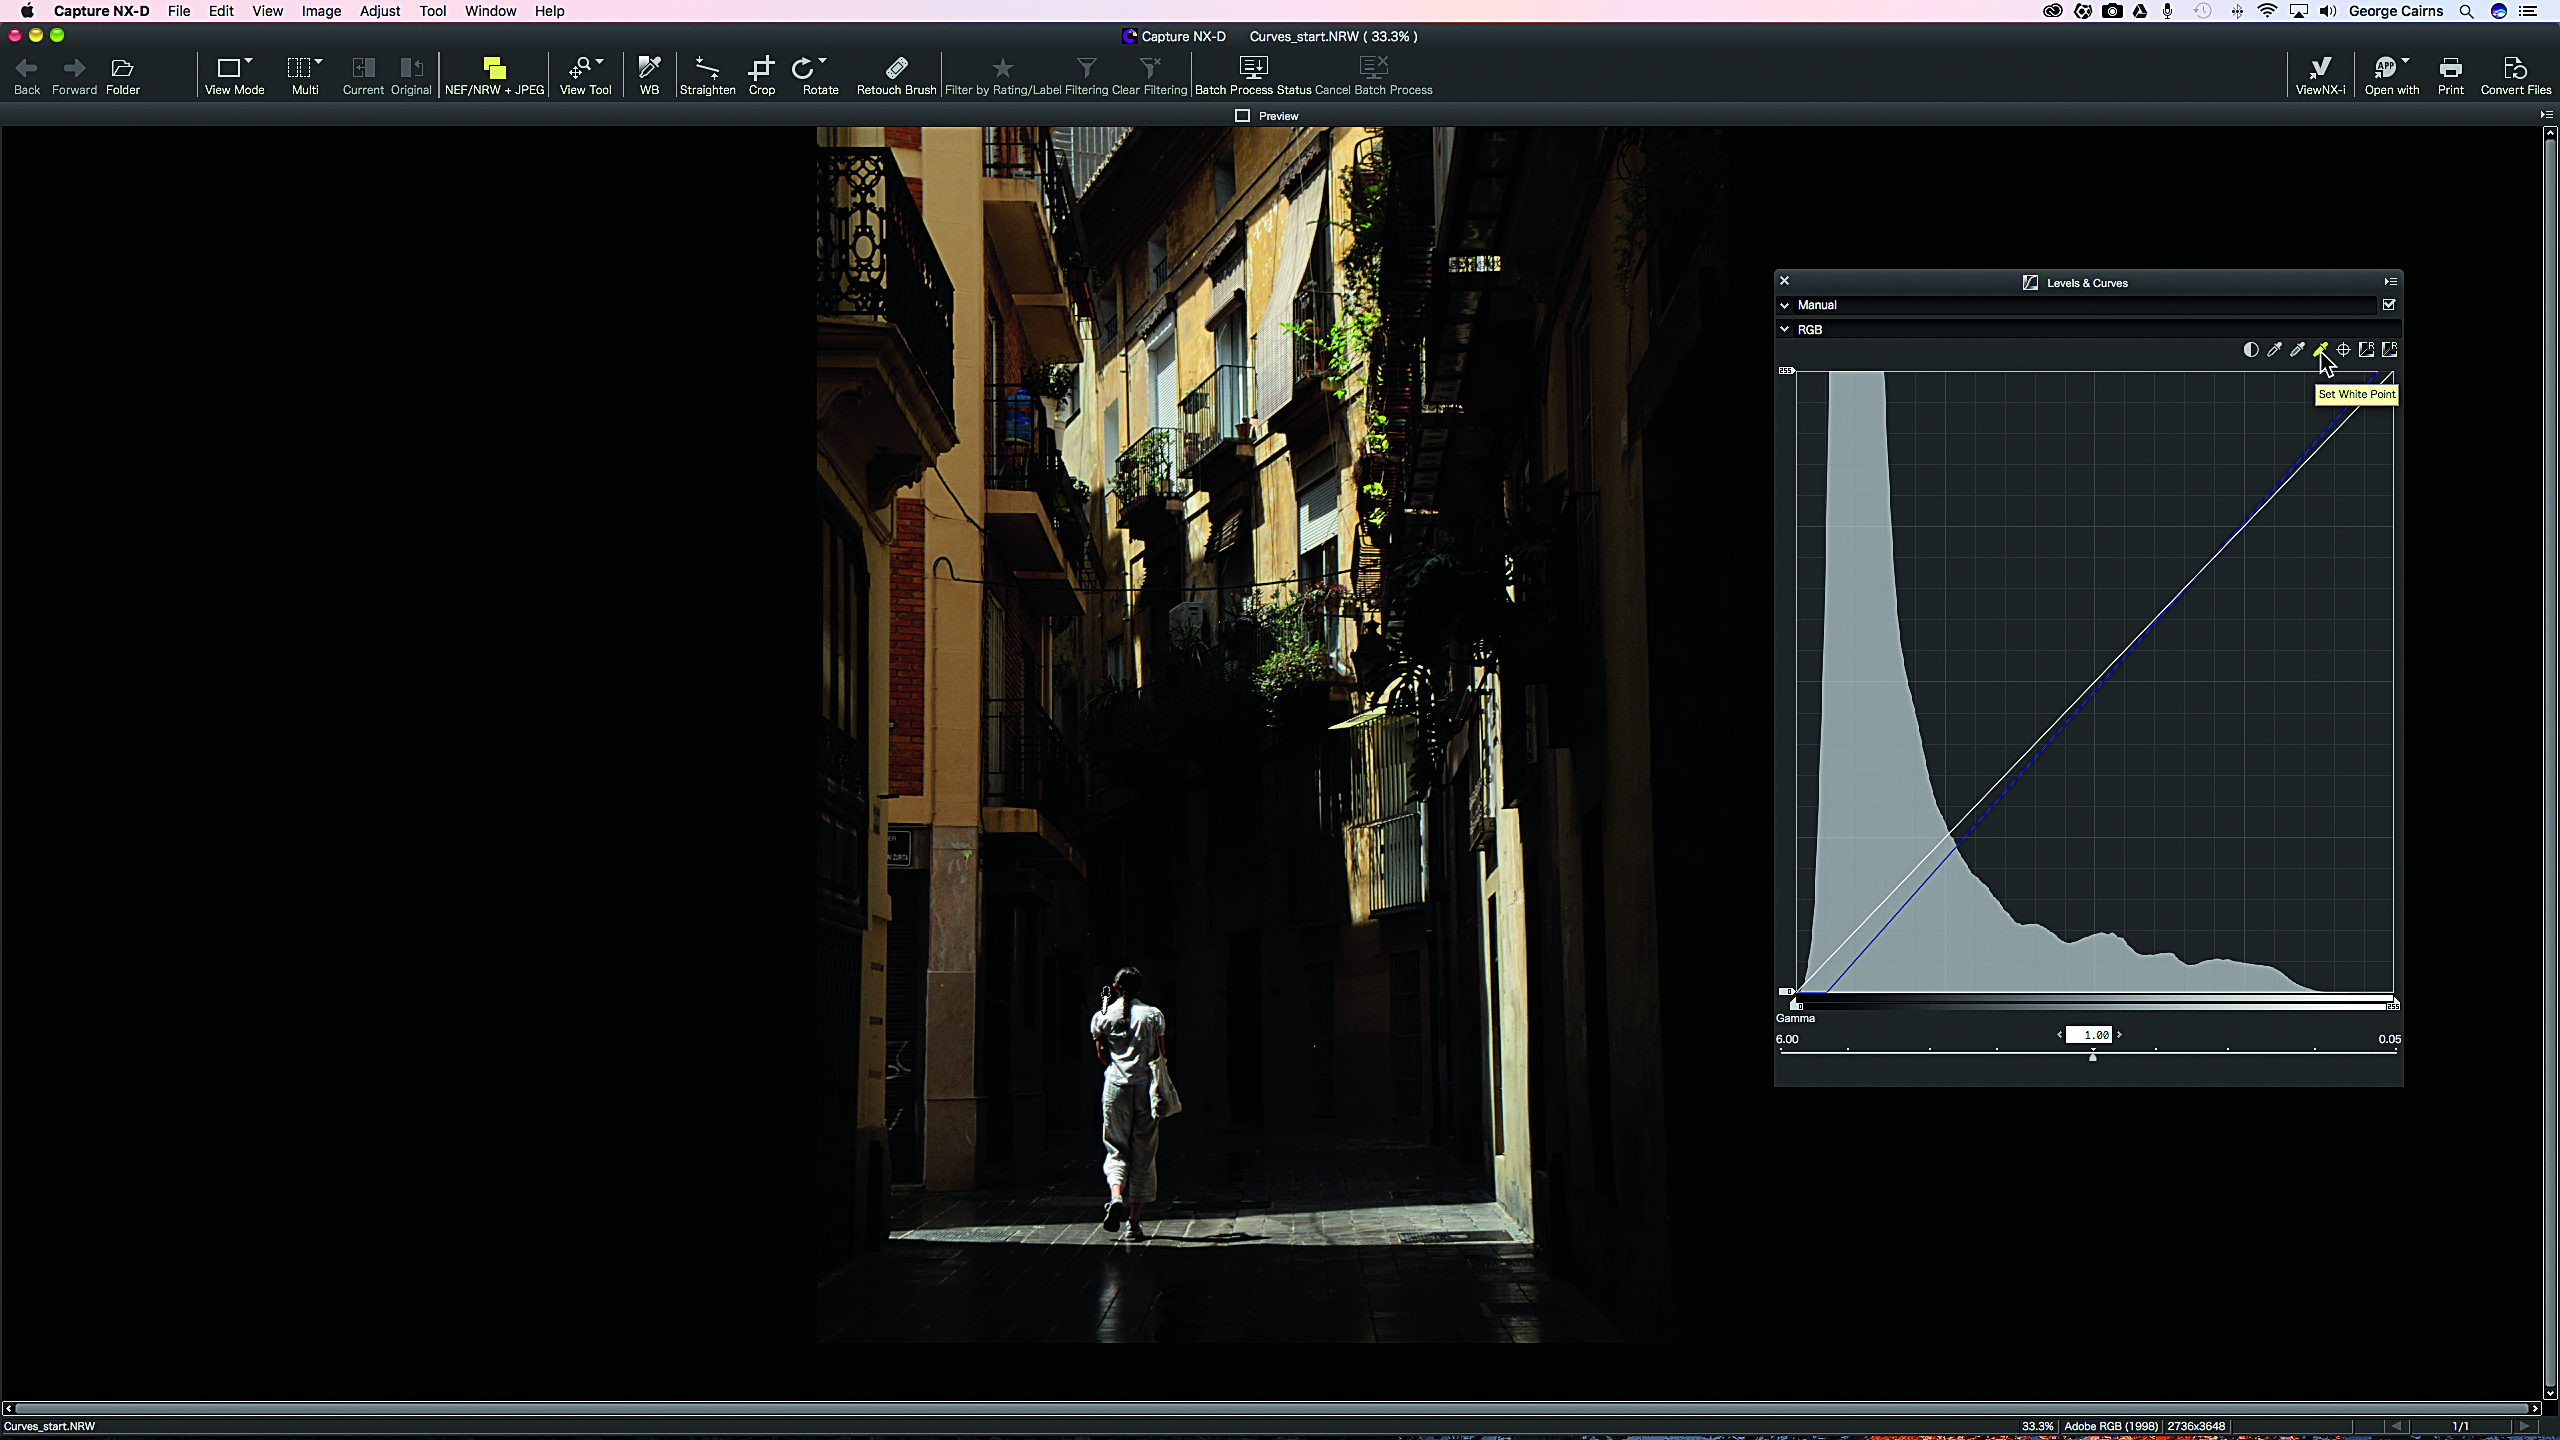
1: Set the tonal extremes
If you want to follow our tutorial using the same image we edited, you can download and open our tutorial file. In the Edit panel, click the Levels & Curves icon. Select the Set Black Point eyedropper. Click on the image to define the darkest area (such as the black door near the bottom). Select the Set White Point eyedropper to sample the brightest highlight.
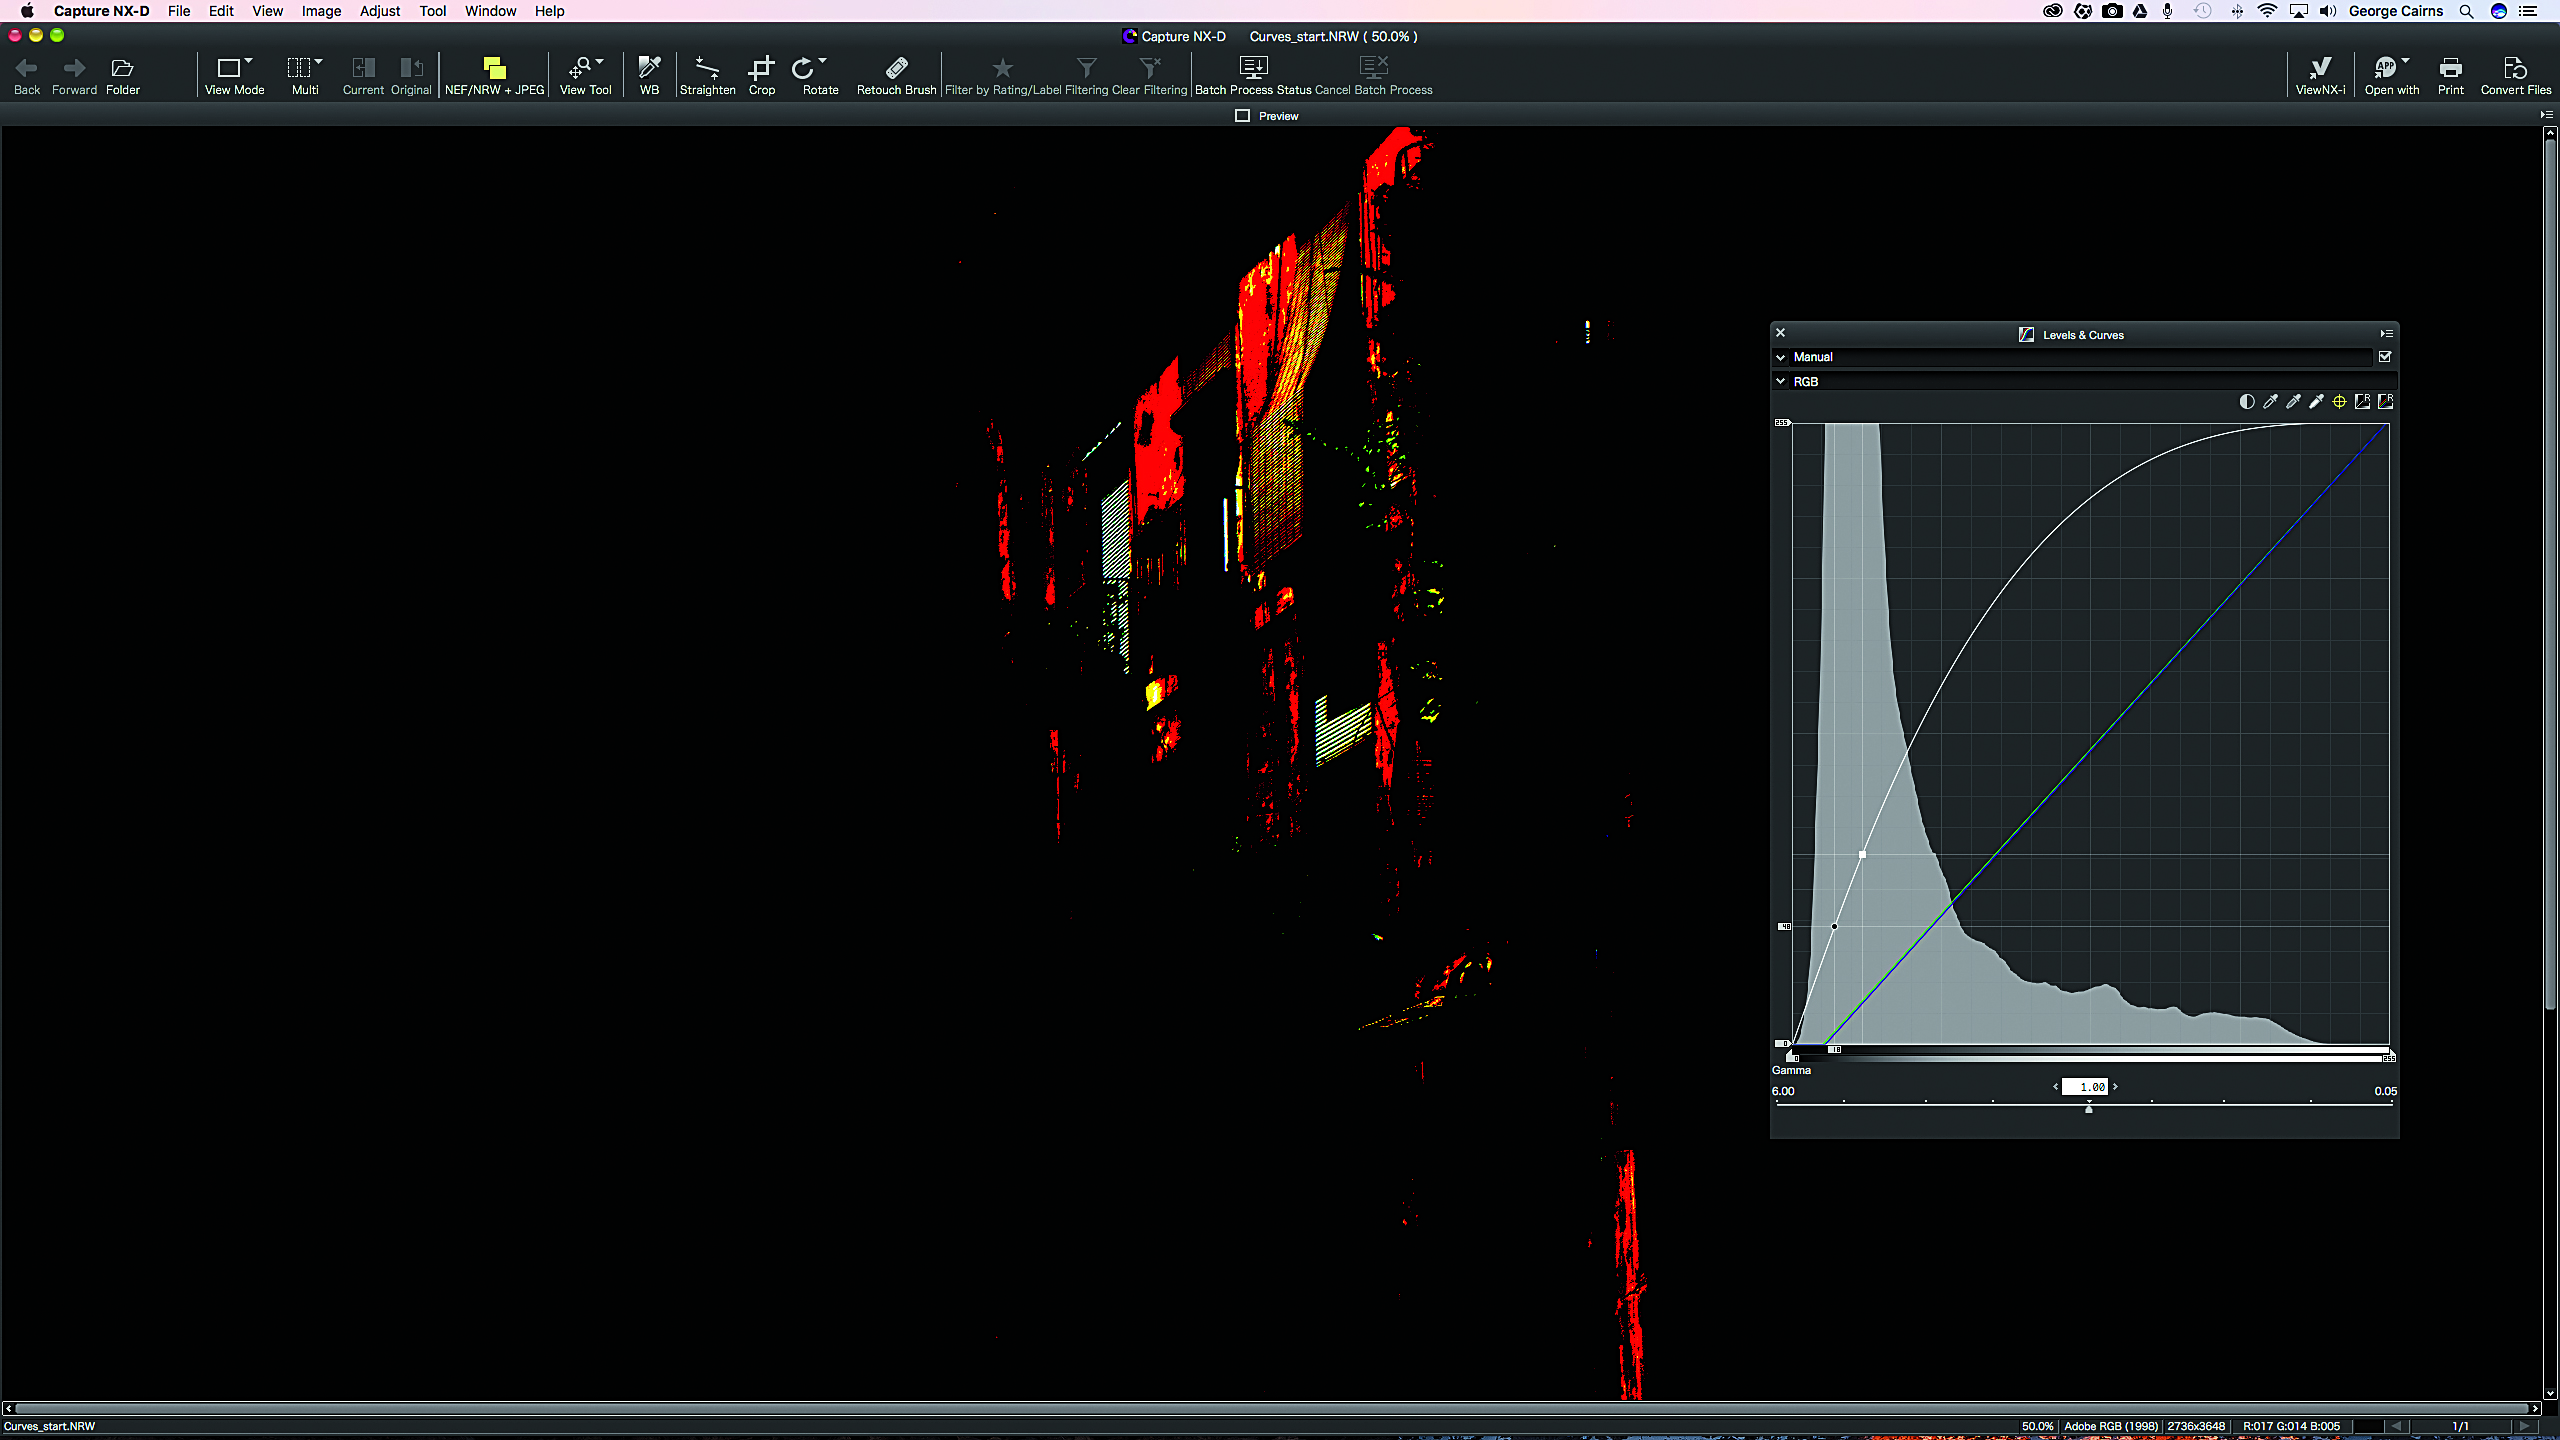
A photograph’s tones are represented by a range of levels. Black shadows have a level of 0, while pure white highlights max out at 255. All other tones fall between these two values. Tones with values near the extreme ends of the Level scale are liable to clipping (so will print out with no detail). The Show Lost Highlights and Show Lost Shadows commands help us to avoid clipping in the darkest and brightest parts of a shot.
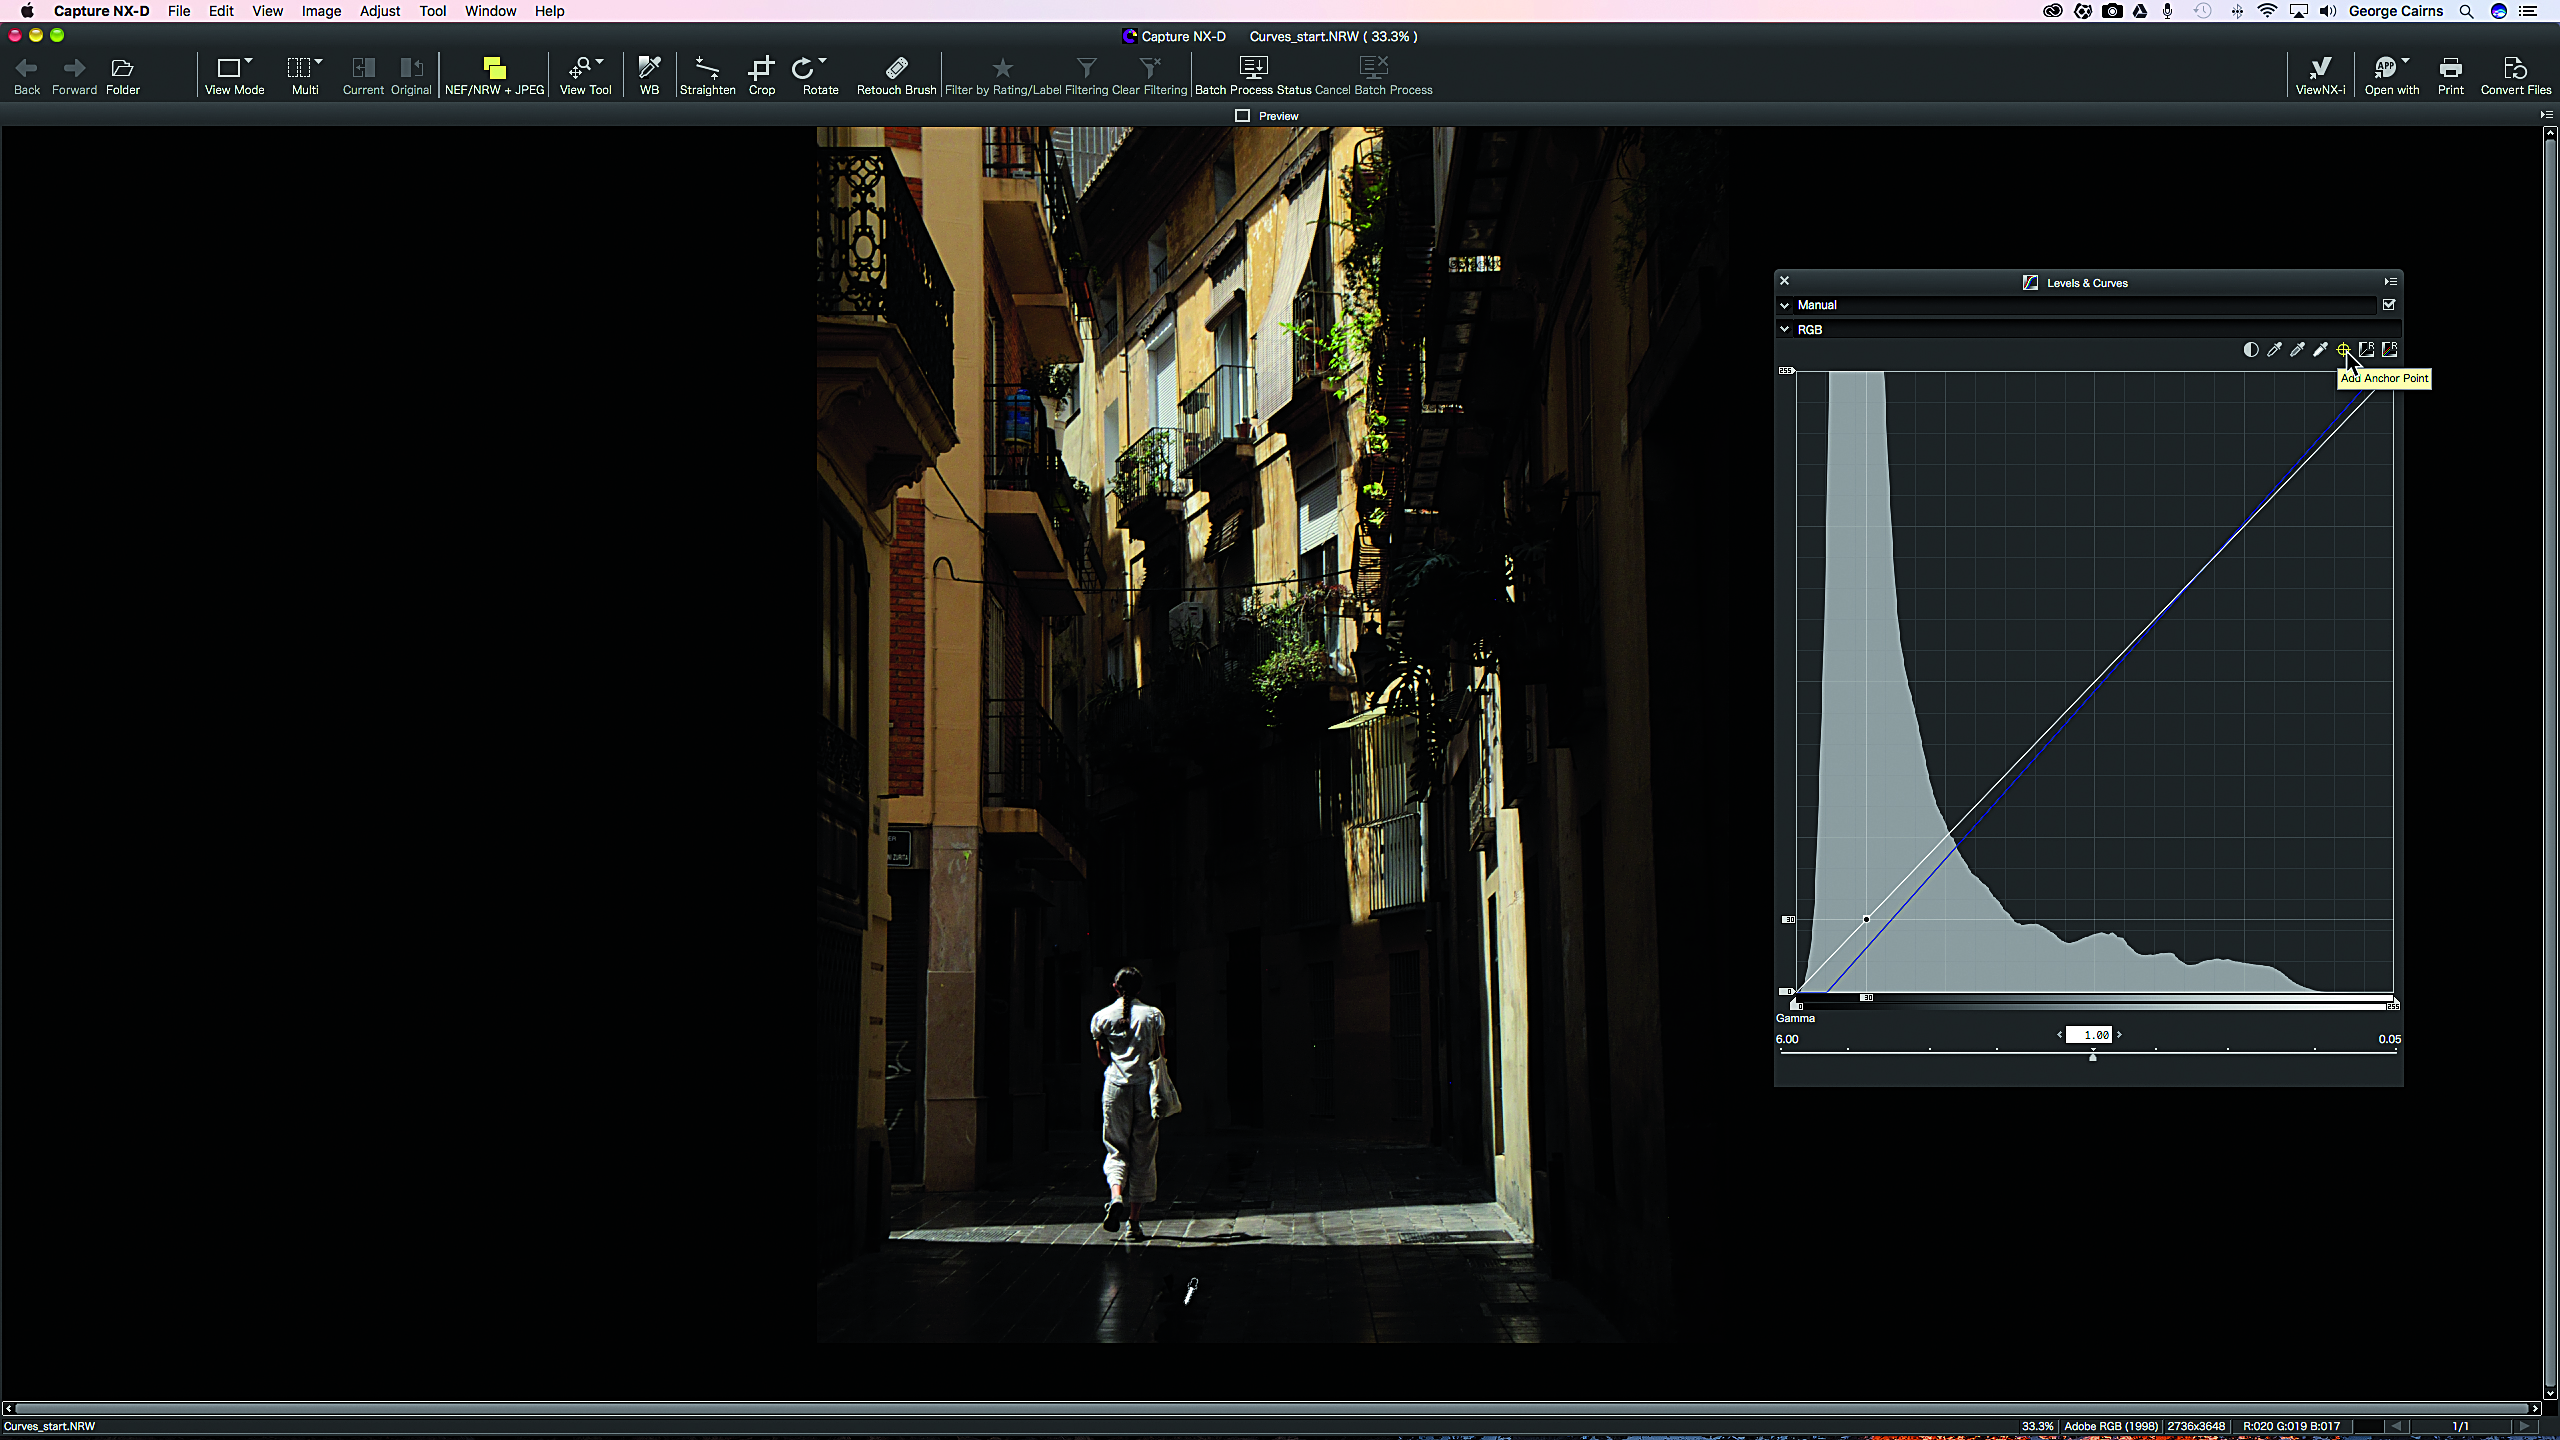
2: Add a control point
Select the Add Anchor Point tool. As you move the cursor around the image you’ll see a circular point move up and down the diagonal Curve. This indicates the levels of the areas that the cursor is overlapping. Click on a foreground shadow to add a square control point to the Curve.
3: Remap the shadow levels
The sampled shadow anchor point should have an input level of around 30 (on the histogram graph’s x-axis). Drag the anchor point upward so that the y-axis shows a level of 75. This creates a Curve that remaps the shot’s shadow and midtones to lighter levels.
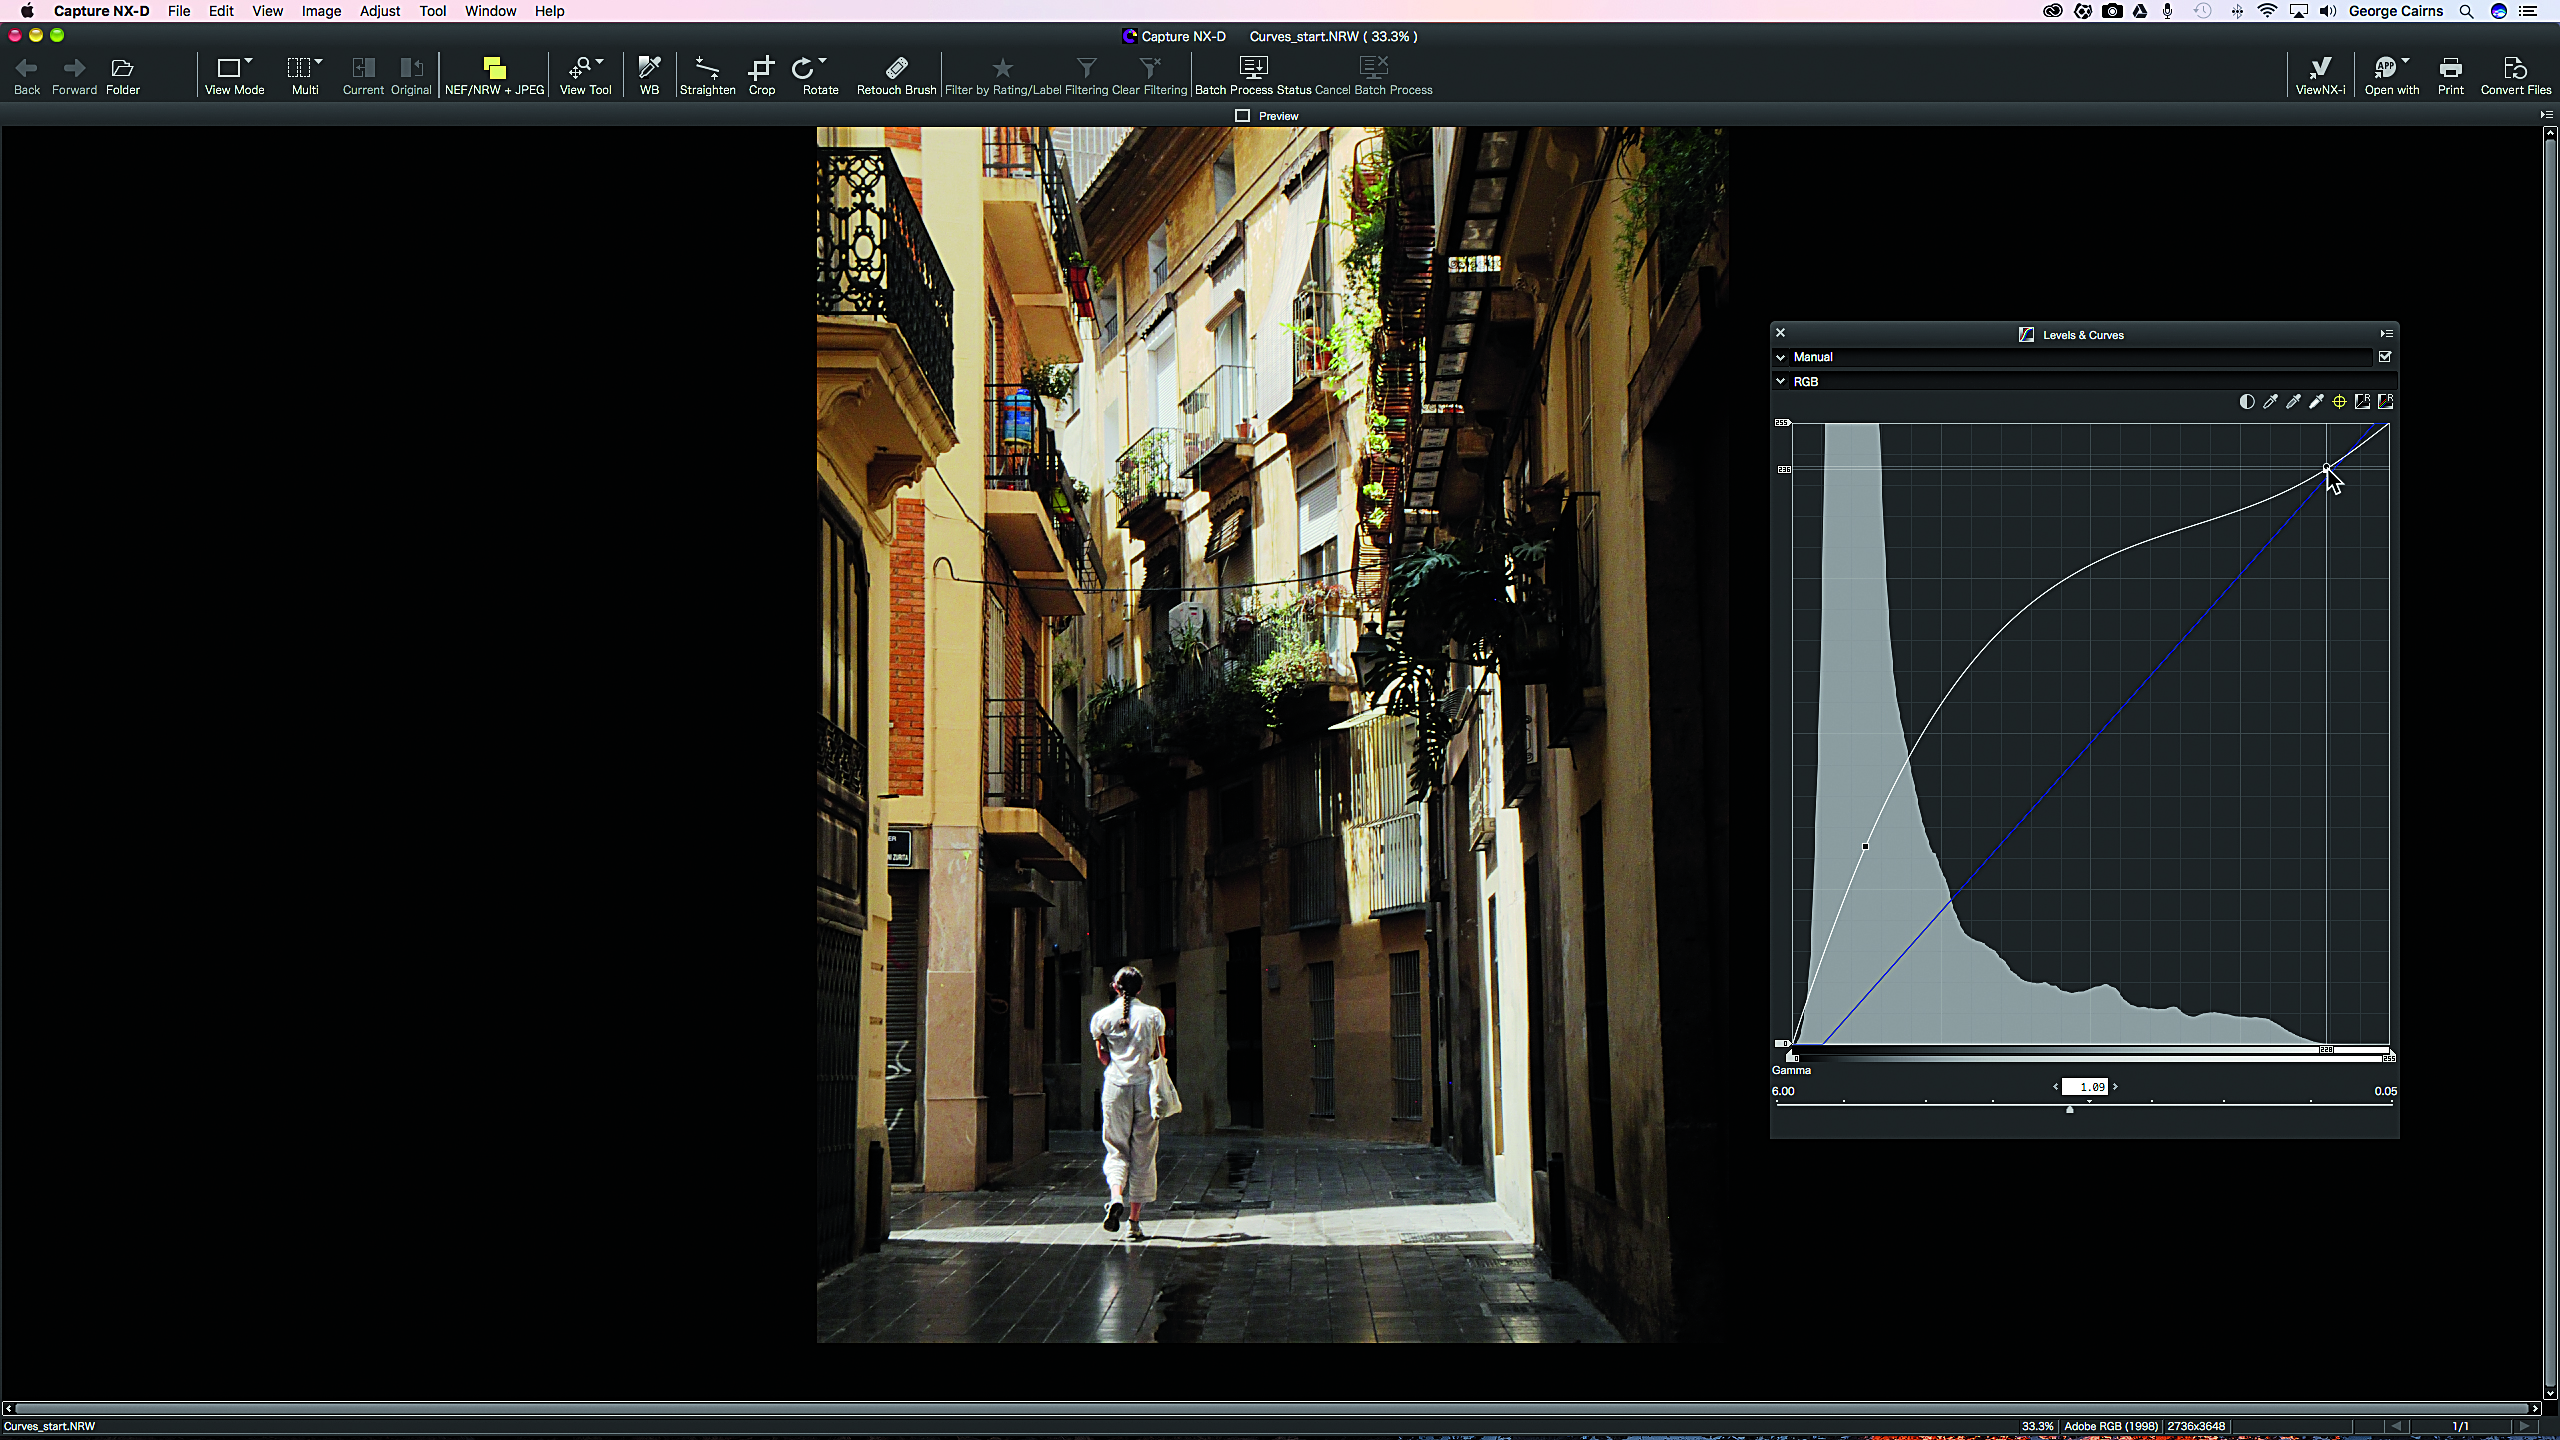
4: Recover highlight detail
To stop brighter highlights being overexposed, click on an area such as a sunlit white window to add a highlight-controlling anchor point. Drag this point down to selectively claw back highlight detail. Boost midtones by dragging the Gamma slider left to 1.09.

Bonus step: Metering tips
If a shot’s highlights are overexposed it may be impossible to recover detail in the brightest areas, even with the Highlight Protection slider set to maximum. If shadows are underexposed, however, some detail can usually be teased out.
In high-contrast situations, it therefore makes sense to set your Nikon to Manual mode and meter the scene to expose for the brightest areas, such as the sky here. You’ll get a more precise reading for these areas if you use Spot metering mode.
Read more:
Using Control Points in Nikon Capture NX-D
The best Nikon lenses
How to capture landmarks lit with artificial light
How to capture city landmarks at night
Get the Digital Camera World Newsletter
The best camera deals, reviews, product advice, and unmissable photography news, direct to your inbox!
N-Photo: The Nikon Magazine is a monthly publication that's entirely dedicated to Nikon users. As a 100% independent magazine, you can be assured of unbiased opinion from a trustworthy team of devoted photography experts including editor Adam Waring and Deputy Editor Mike Harris.
Aimed at all users, from camera newcomers to working pros, every issue is packed with practical, Nikon-specific advice for taking better photos, in-depth reviews of Nikon-compatible gear, and inspiring projects and exciting video lessons for mastering camera, lens and Photoshop techniques.
Written by Nikon users for Nikon users, N-Photo is your one-stop shop for everything to do with cameras, lenses, tripods, bags, tips, tricks and techniques to get the most out of your photography.

