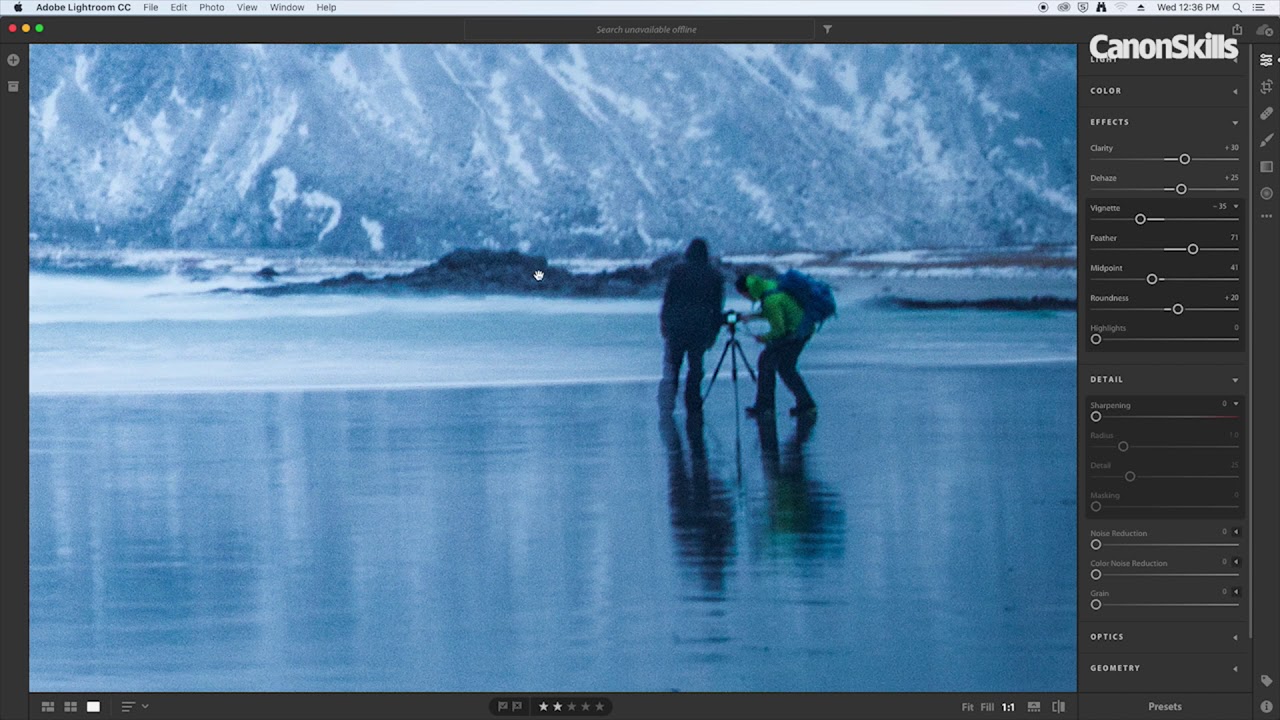
Watch video: Use the Effects and Detail panel in Lightroom
The Effects and Detail panels are two features of Lightroom CC that, although not new, work together seamlessly to powerfully bring out new details and depth to shots. They combine a lot of useful but incremental adjustments that include changing contrast, sharpness and noise for a drastically different photograph.
You might find these areas useful when working on a photo like ours here – something hazy, distant, lacking contrast or definition. Sometimes haze can enhance an image, but in this case we have two people towards the right of the frame that we want to highlight. The mountains behind the subjects are covered with cloud, which makes them somewhat less impressive.
So we’re going to give this shot a boost of sharpness for a more striking and appealing result…
1. Clarity
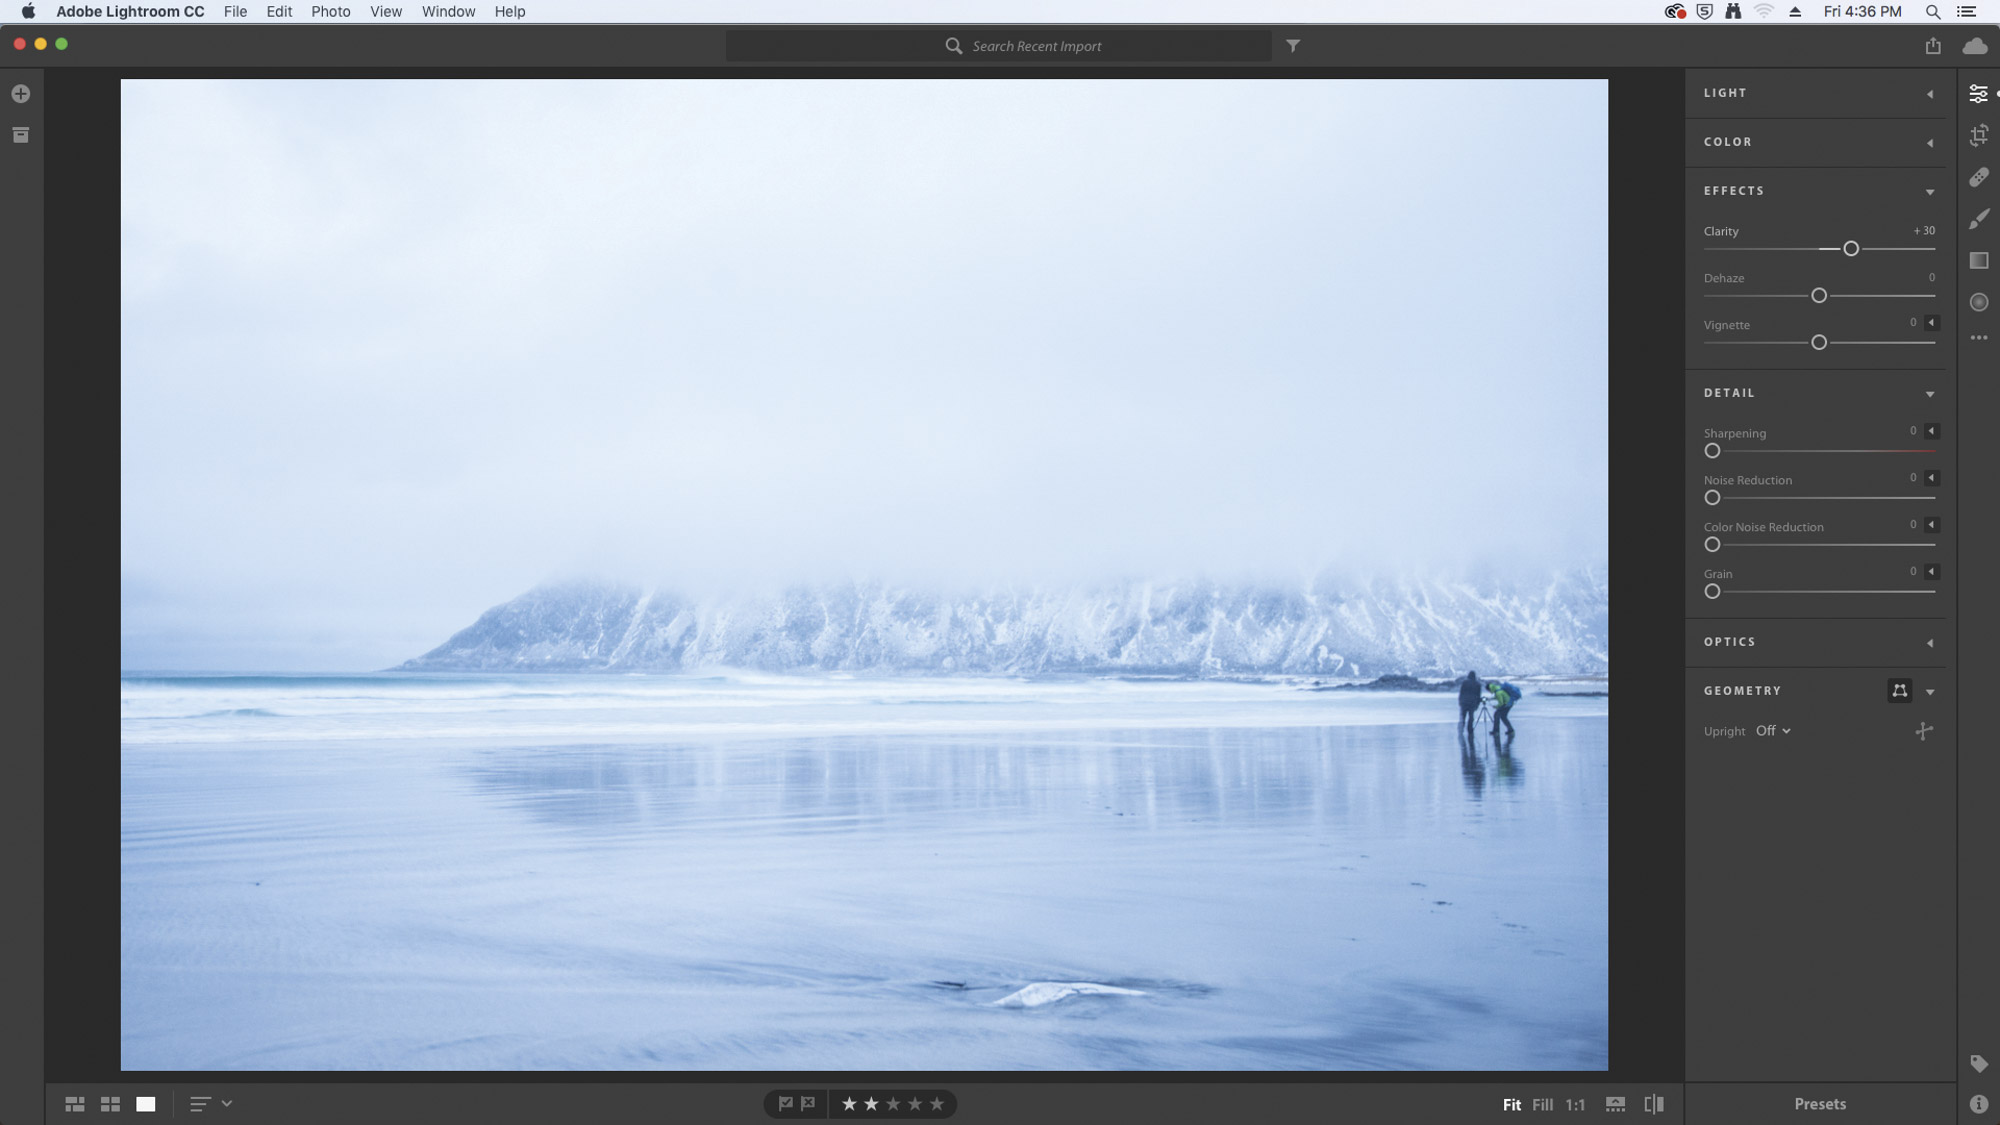
If you want to increase midtone contrast then you’ll need to alter the Clarity slider. This gives a stronger definition to the midtone shades (rather than highlights or shadows) by increasing the pixels’ brightness / darkness. Be careful not to overdo it, as it’s a powerful tool, so subtlety is the key here.
2. Dehaze
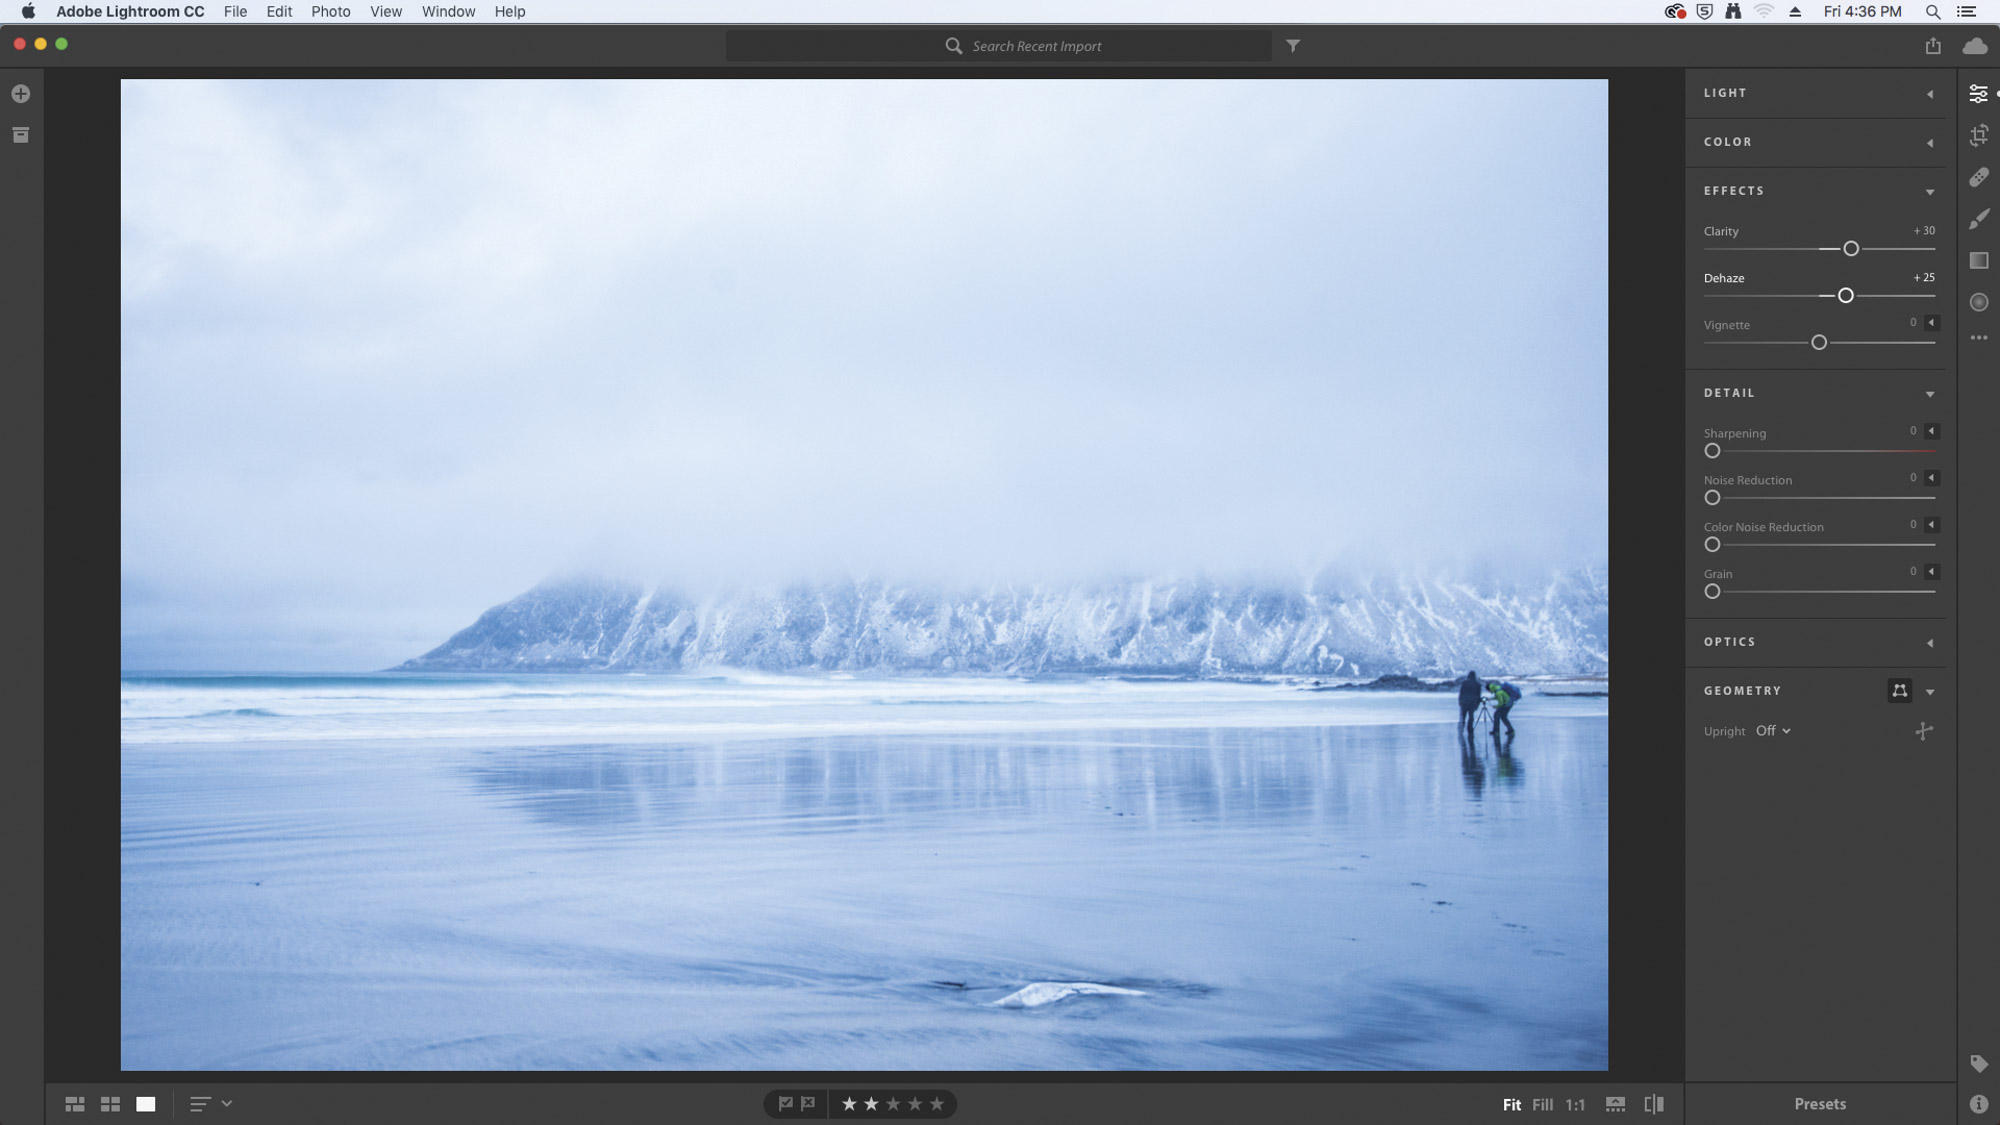
The Dehaze slider is an impressive, and selective, localized contrast effect that analyses the image before working on it, and clears up misty shots. Use it to reduce or increase fog and haze in your shot.
3. Vignette
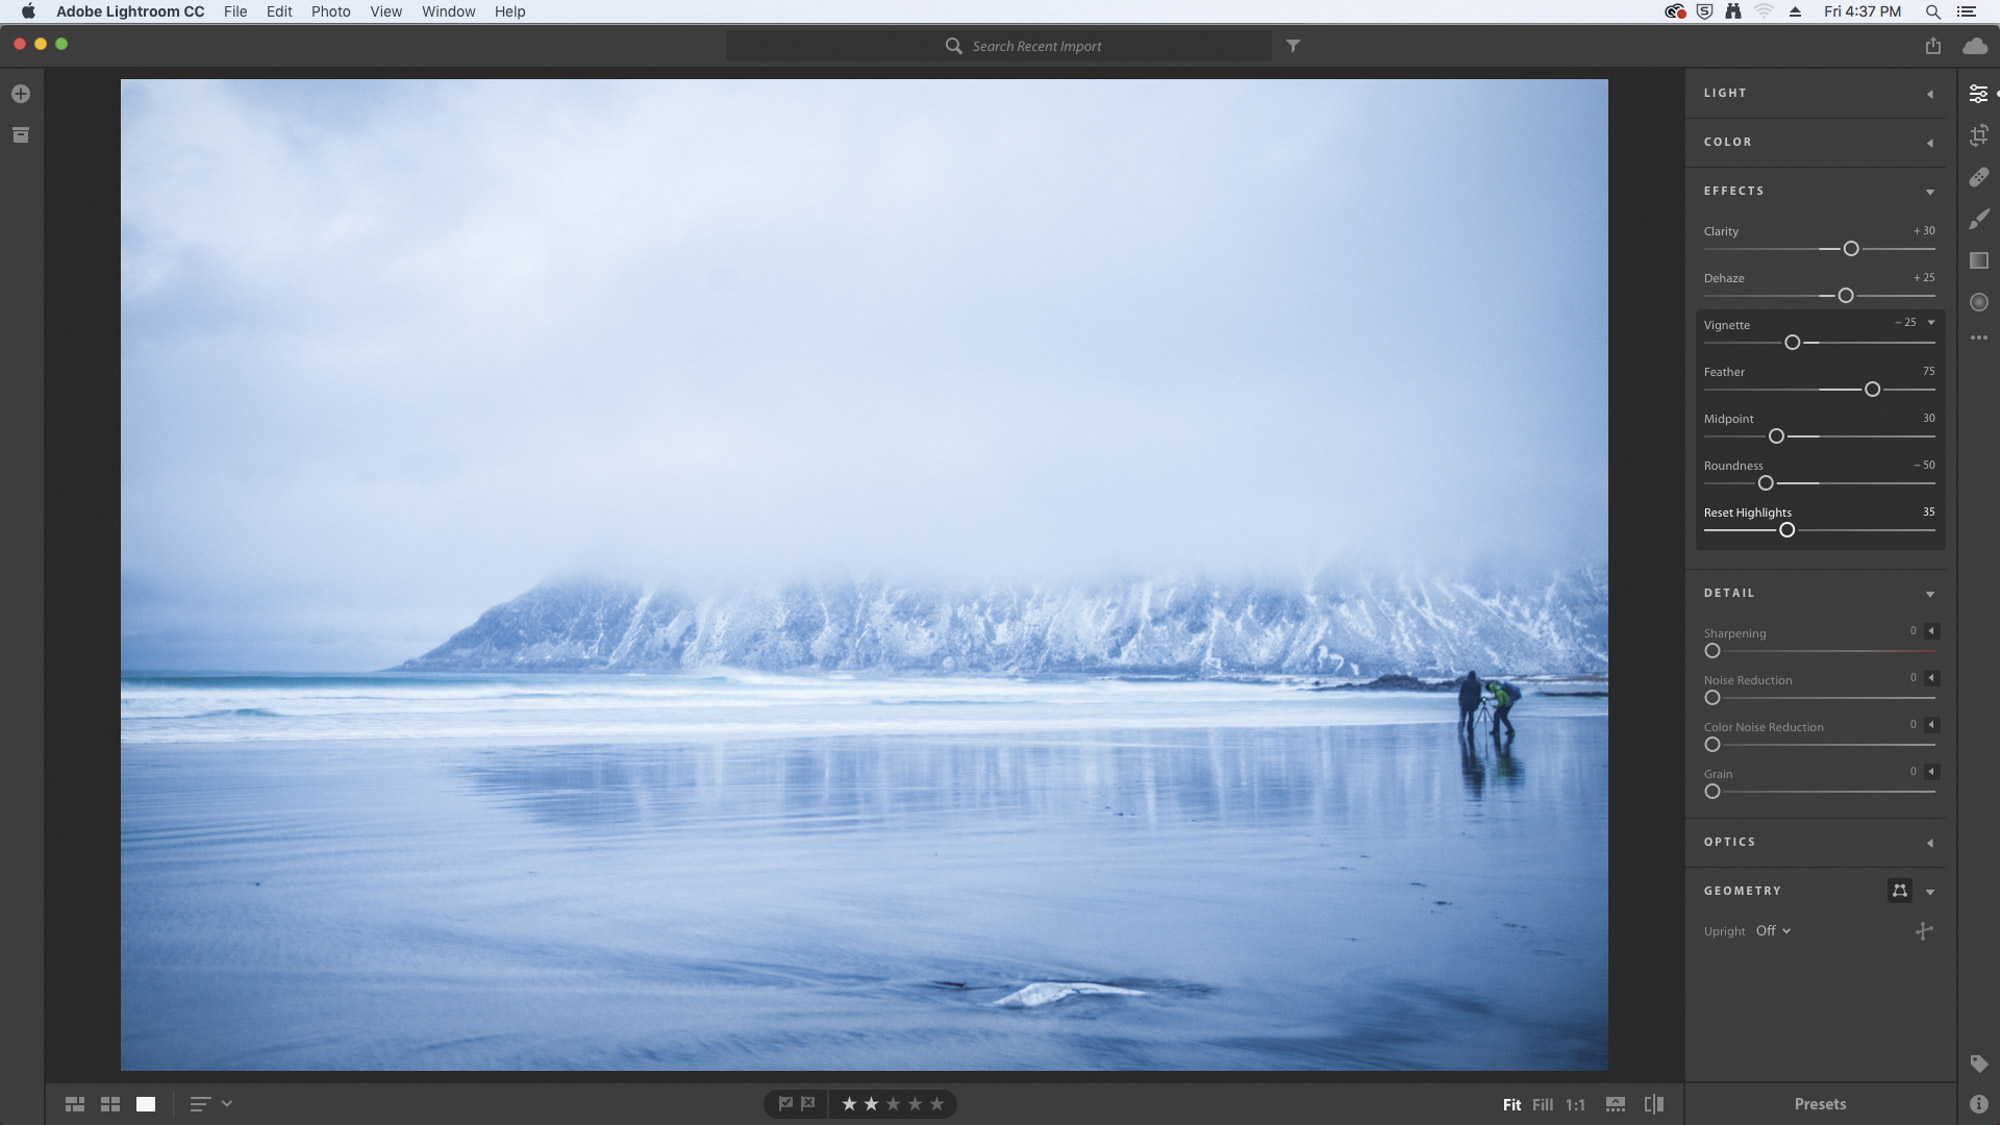
Create a dark band around the edge of your image by pushing the slider to negative values as we have here (-25), or a lighter band with a positive setting. This will draw attention to the center of the image, and comes with a variety of options to adjust its transition into the frame – you can even alter its shape.
4. Detail panel

Here we can increase image sharpness, alter the sharpening radius size, control the Detail slider’s accuracy, and alter the threshold of areas not affected with the Masking slider. We’ve increased Sharpening to define edges of the scene with a radius of 2 because most of the subject is far away.
5. Noise reduction
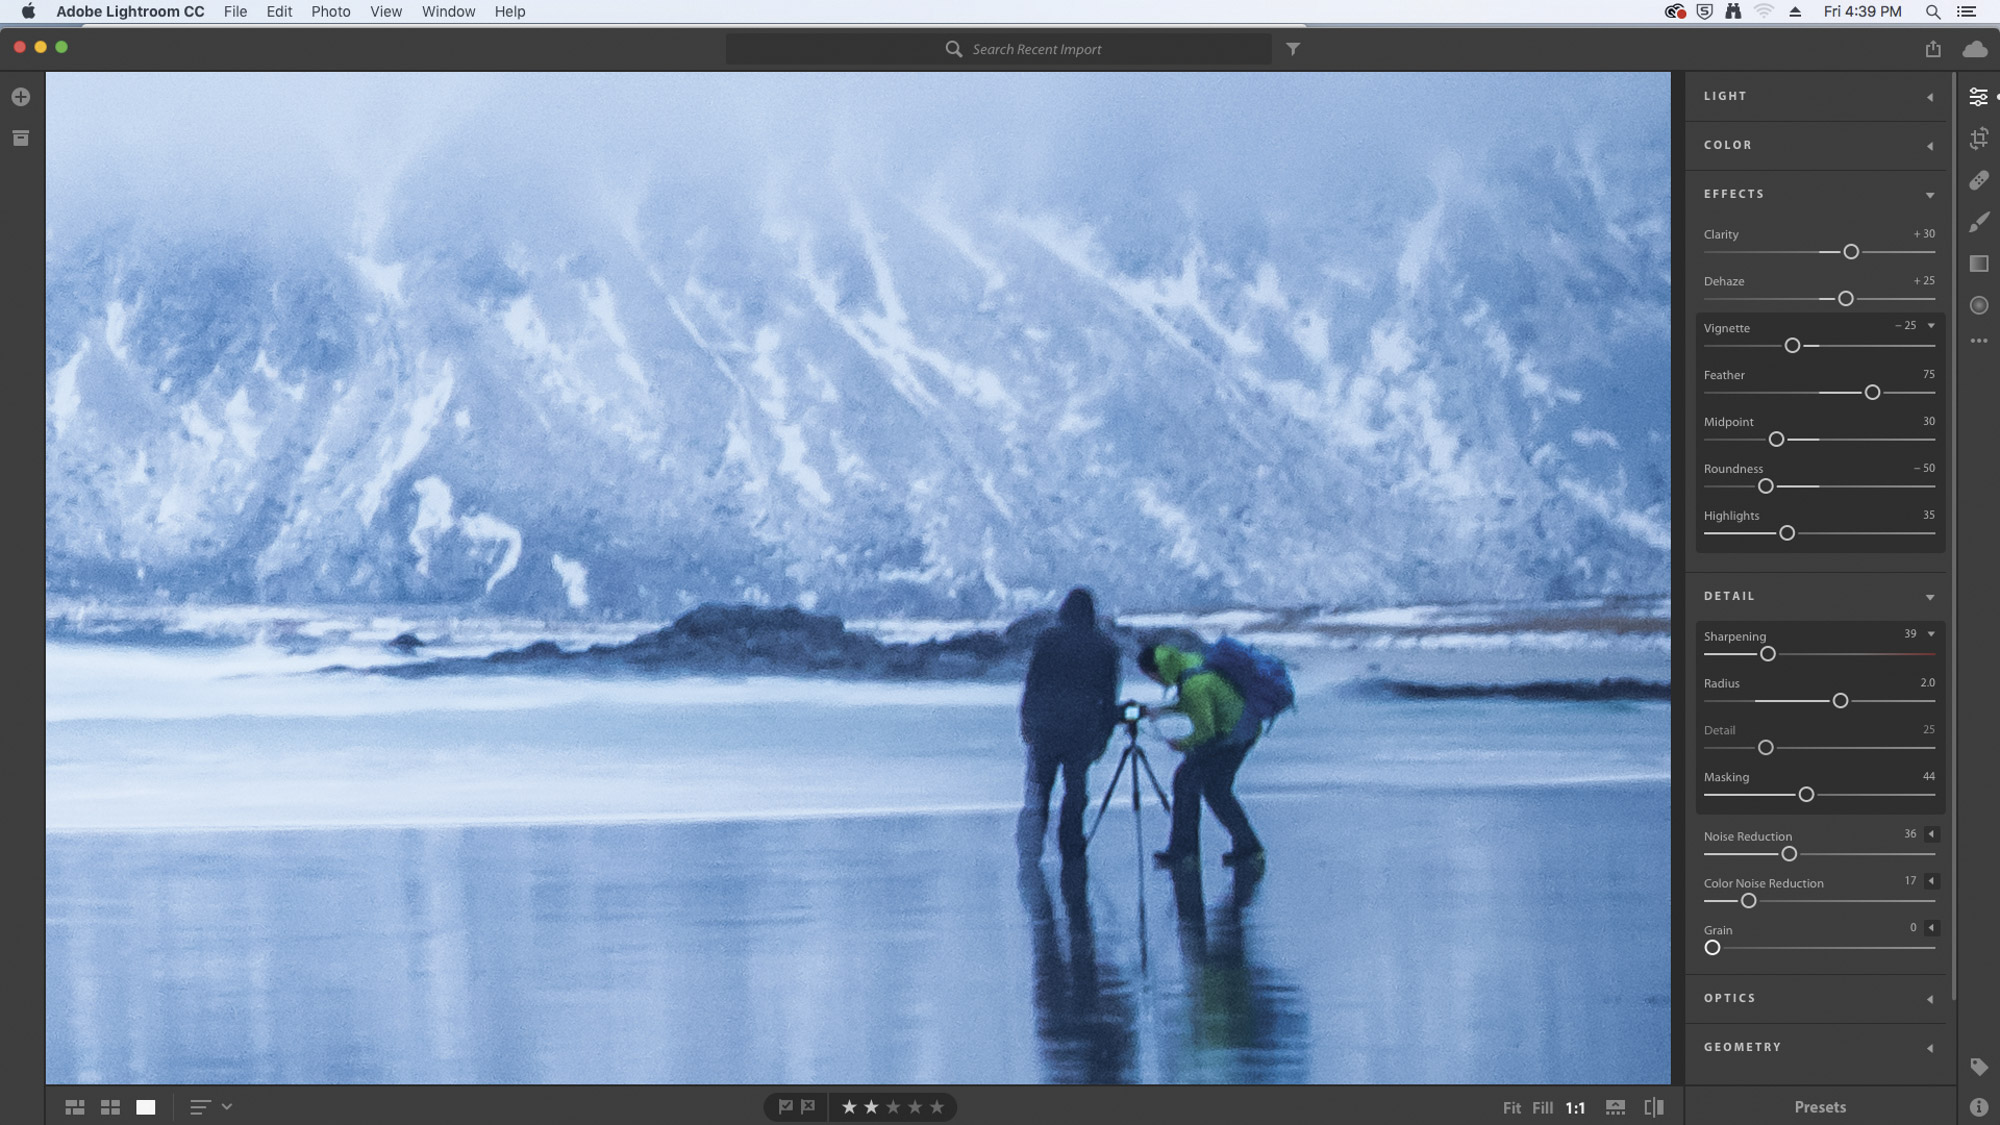
After sharpening an image, we often find that noise has been introduced to the shot. To fix this, increase the Noise Reduction slider; we’ve adjusted to 36. Color Noise Reduction will help tone down the color noise more apparent in JPEGs, but we found a little so increased it to 17. Be careful: you can definitely overuse the tool!
6. Grain
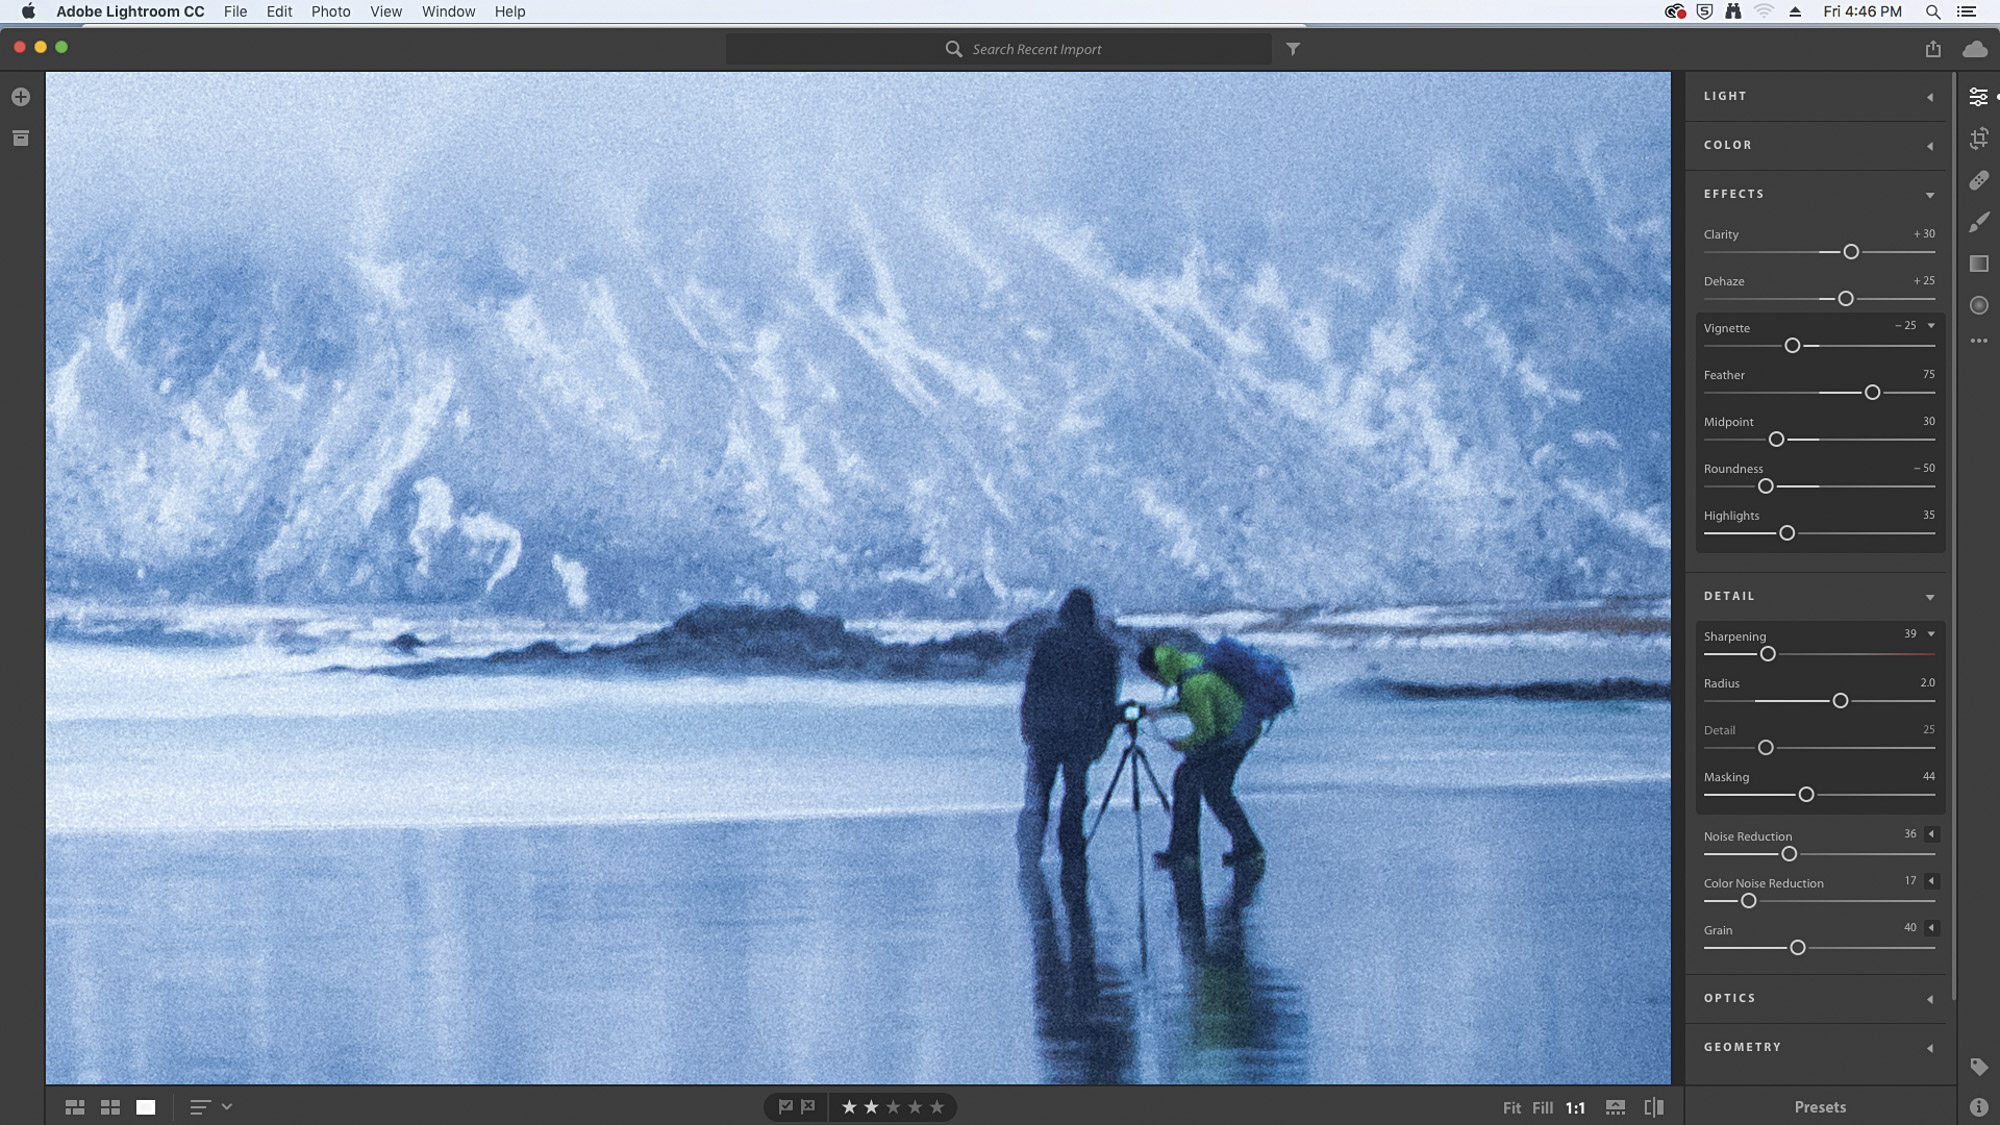
At this point it’s worth adding some noise – or, as the slider is named, Grain. It may sound crazy to add noise after removing it, but the Grain slider introduces a uniform and controlled grain, which looks much nicer than the original noise we removed, and you can vary the amount by as much or as little as you want.
PhotoPlus: The Canon Magazine is the world's only monthly newsstand title that's 100% devoted to Canon, so you can be sure the magazine is completely relevant to your system.
If you enjoyed this tutorial but want a bit more power from your laptop, why not look at the best photo-editing laptops? If you're really keen to improve your skills further than online photography courses could be the way to go.
Get the Digital Camera World Newsletter
The best camera deals, reviews, product advice, and unmissable photography news, direct to your inbox!
PhotoPlus: The Canon Magazine is the world’s only 100% Canon-focused title on the newsstand. Launched in 2007, for 14 years it has delivered news, reviews, buying guides, features, inspirational projects and tutorials on cameras, lenses, tripods, gimbals, filters, lighting and all manner of photography equipment.
Aimed squarely at enthusiast photographers who use the Canon DSLR or mirrorless camera systems, all content is tailored to Canon users – so everything from techniques to product tests are tailored to those using the EOS camera system.
Editor Peter Travers brings 14 years of experience as both a journalist and professional photographer, with Technique Editor Dan Mold shoring up the magazine with his 6 years of expertise.
