Modify Channels in Affinity Photo to make intricate selections, fast!
Learn how to modify Channels in Affinity Photo to make incredibly intricate selections in just a few seconds
Watch video: Use Channels in Affinity Photo
One of the things that sets Affinity Photo apart from other image editors is its selection tools, which enable you to make all kinds of intricate selections and cut-outs. But, good as they are, they’re not the only way to make a precise selection; sometimes you’re better off using Channels.
Our starting image of the trees here is a good example (download start images here). If we were to try to select all the sky using normal selection tools, like the Magic Wand or Selection Brush, then it would take a long time to pick out all the bits that show through the palm leaves.
However, by turning to Channels instead we can isolate parts of the image based on color and brightness, which makes things quicker and more precise. In this project we’ll look at how to use Channels to isolate the original dull sky and drop in a much more interesting background.
We begin by choosing the channel that gives us the greatest contrast between land and sky, then modify it to increase the contrast so that one part is white, the other black. It’s this contrast that enables us to make a precise selection. Then we can blend our two layers with a mask and tone them to match. Whether you want to replace a sky like this, mask a person with tricky hair, or make all manner of precise cutouts, the Channels technique is a great trick to understand and employ.
01 Copy and paste
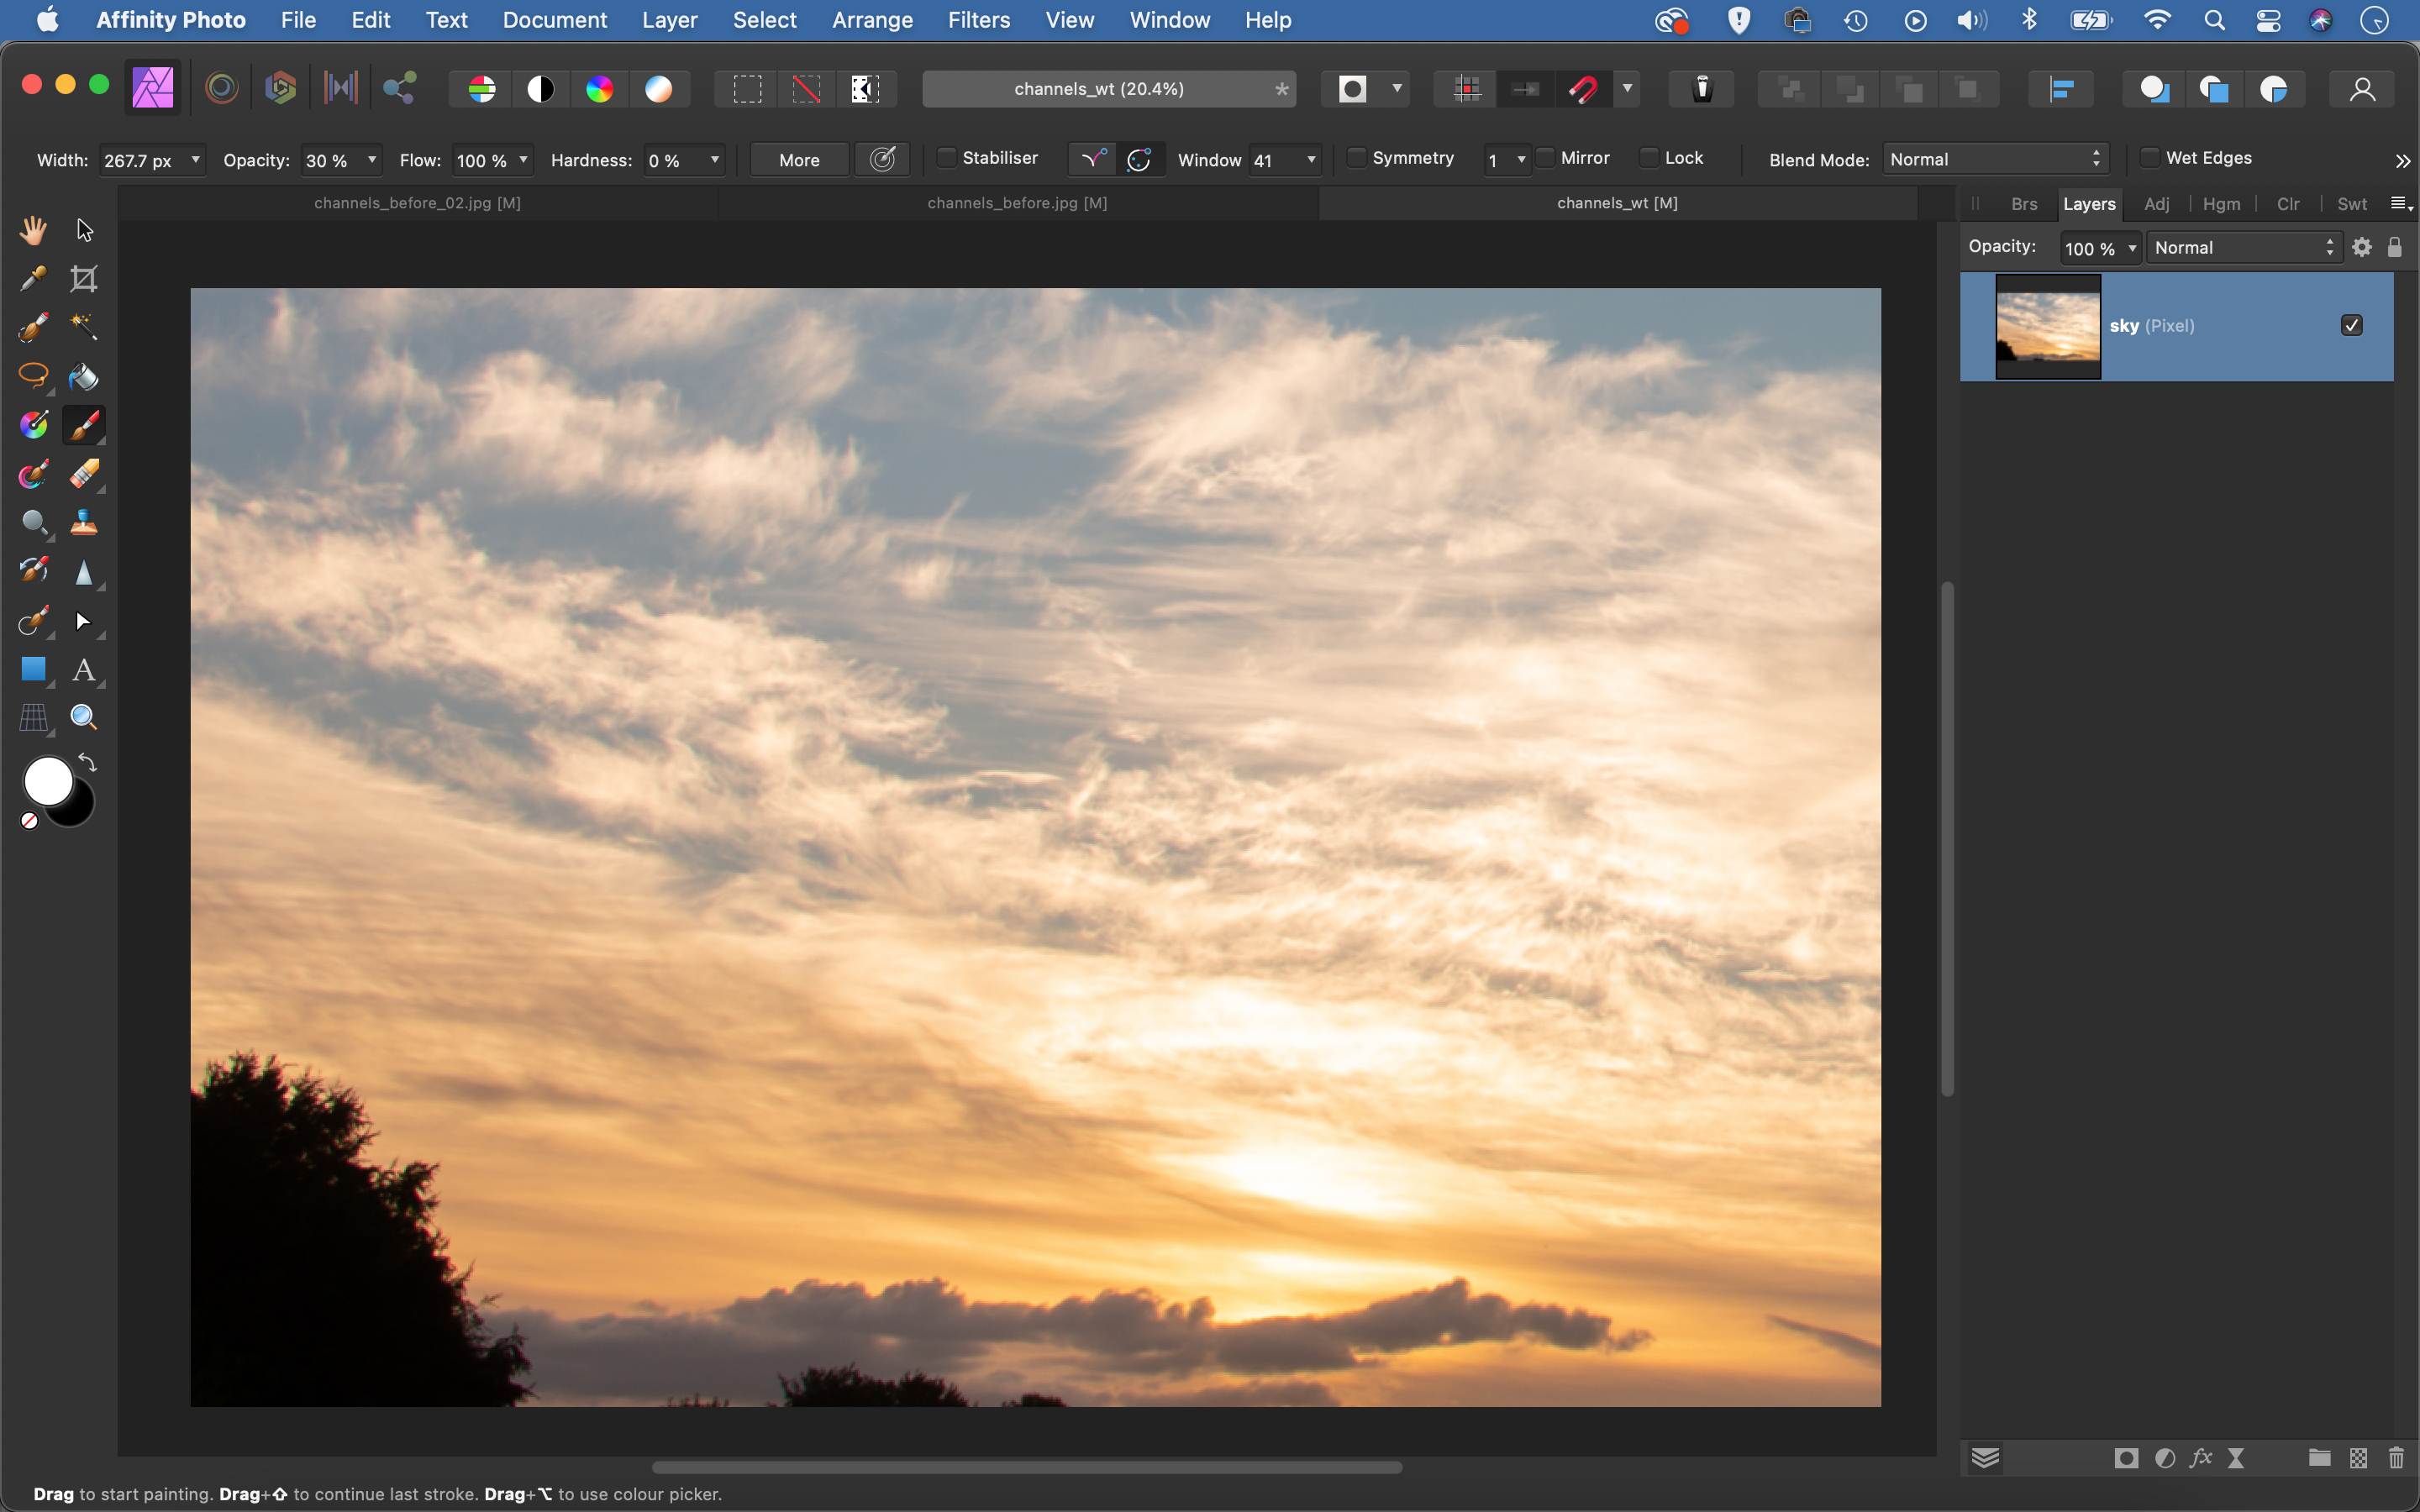
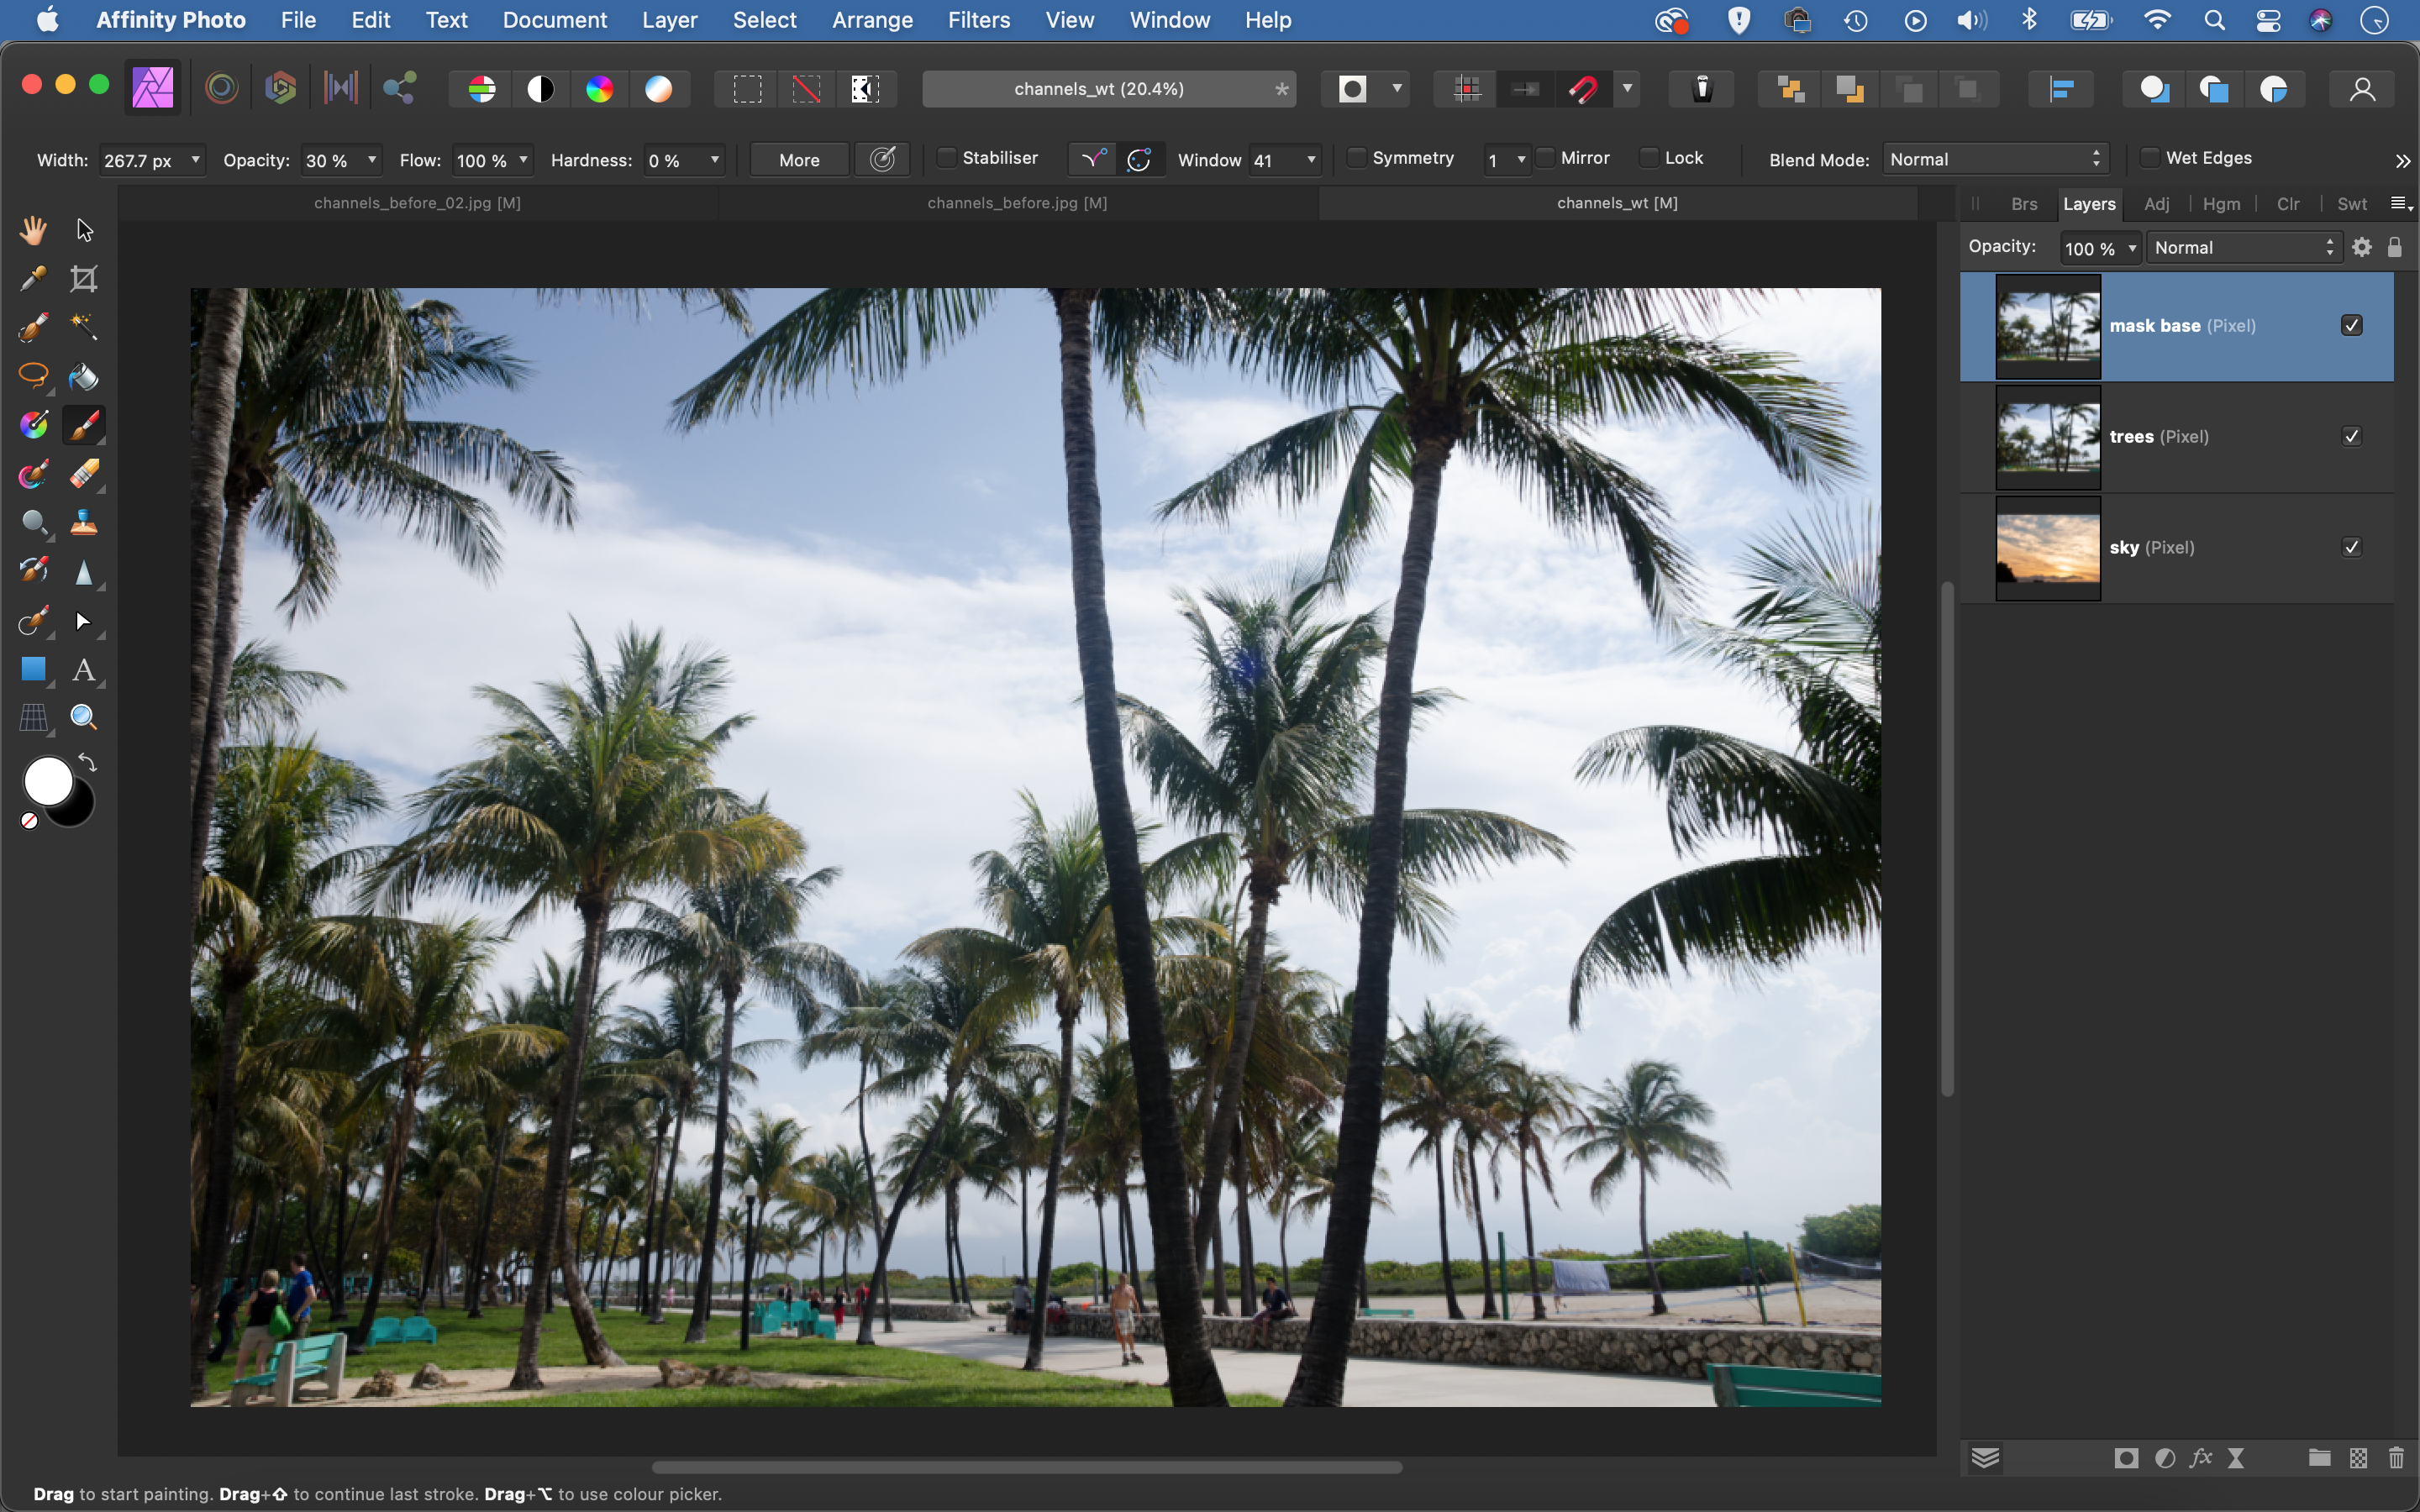
Download the start images here and then open channels_before 01 and 02 into Affinity Photo. Go to the 01 image, copy (Cmd/Ctrl + C), then go to the sky image and paste (Cmd/Ctrl + V). Press Cmd/Ctrl + J to make a duplicate of the trees image, so that there are two tree layers and one sky layer below.
02 Check the channels
Go to the Channels panel (View > Studio > Channels), then click through each of the Composite Red, Green and Blue channels. We’re looking for the channel that gives us the greatest contrast between the trees and sky. With skies, this is likely the Blue channel.
03 Clear red and green
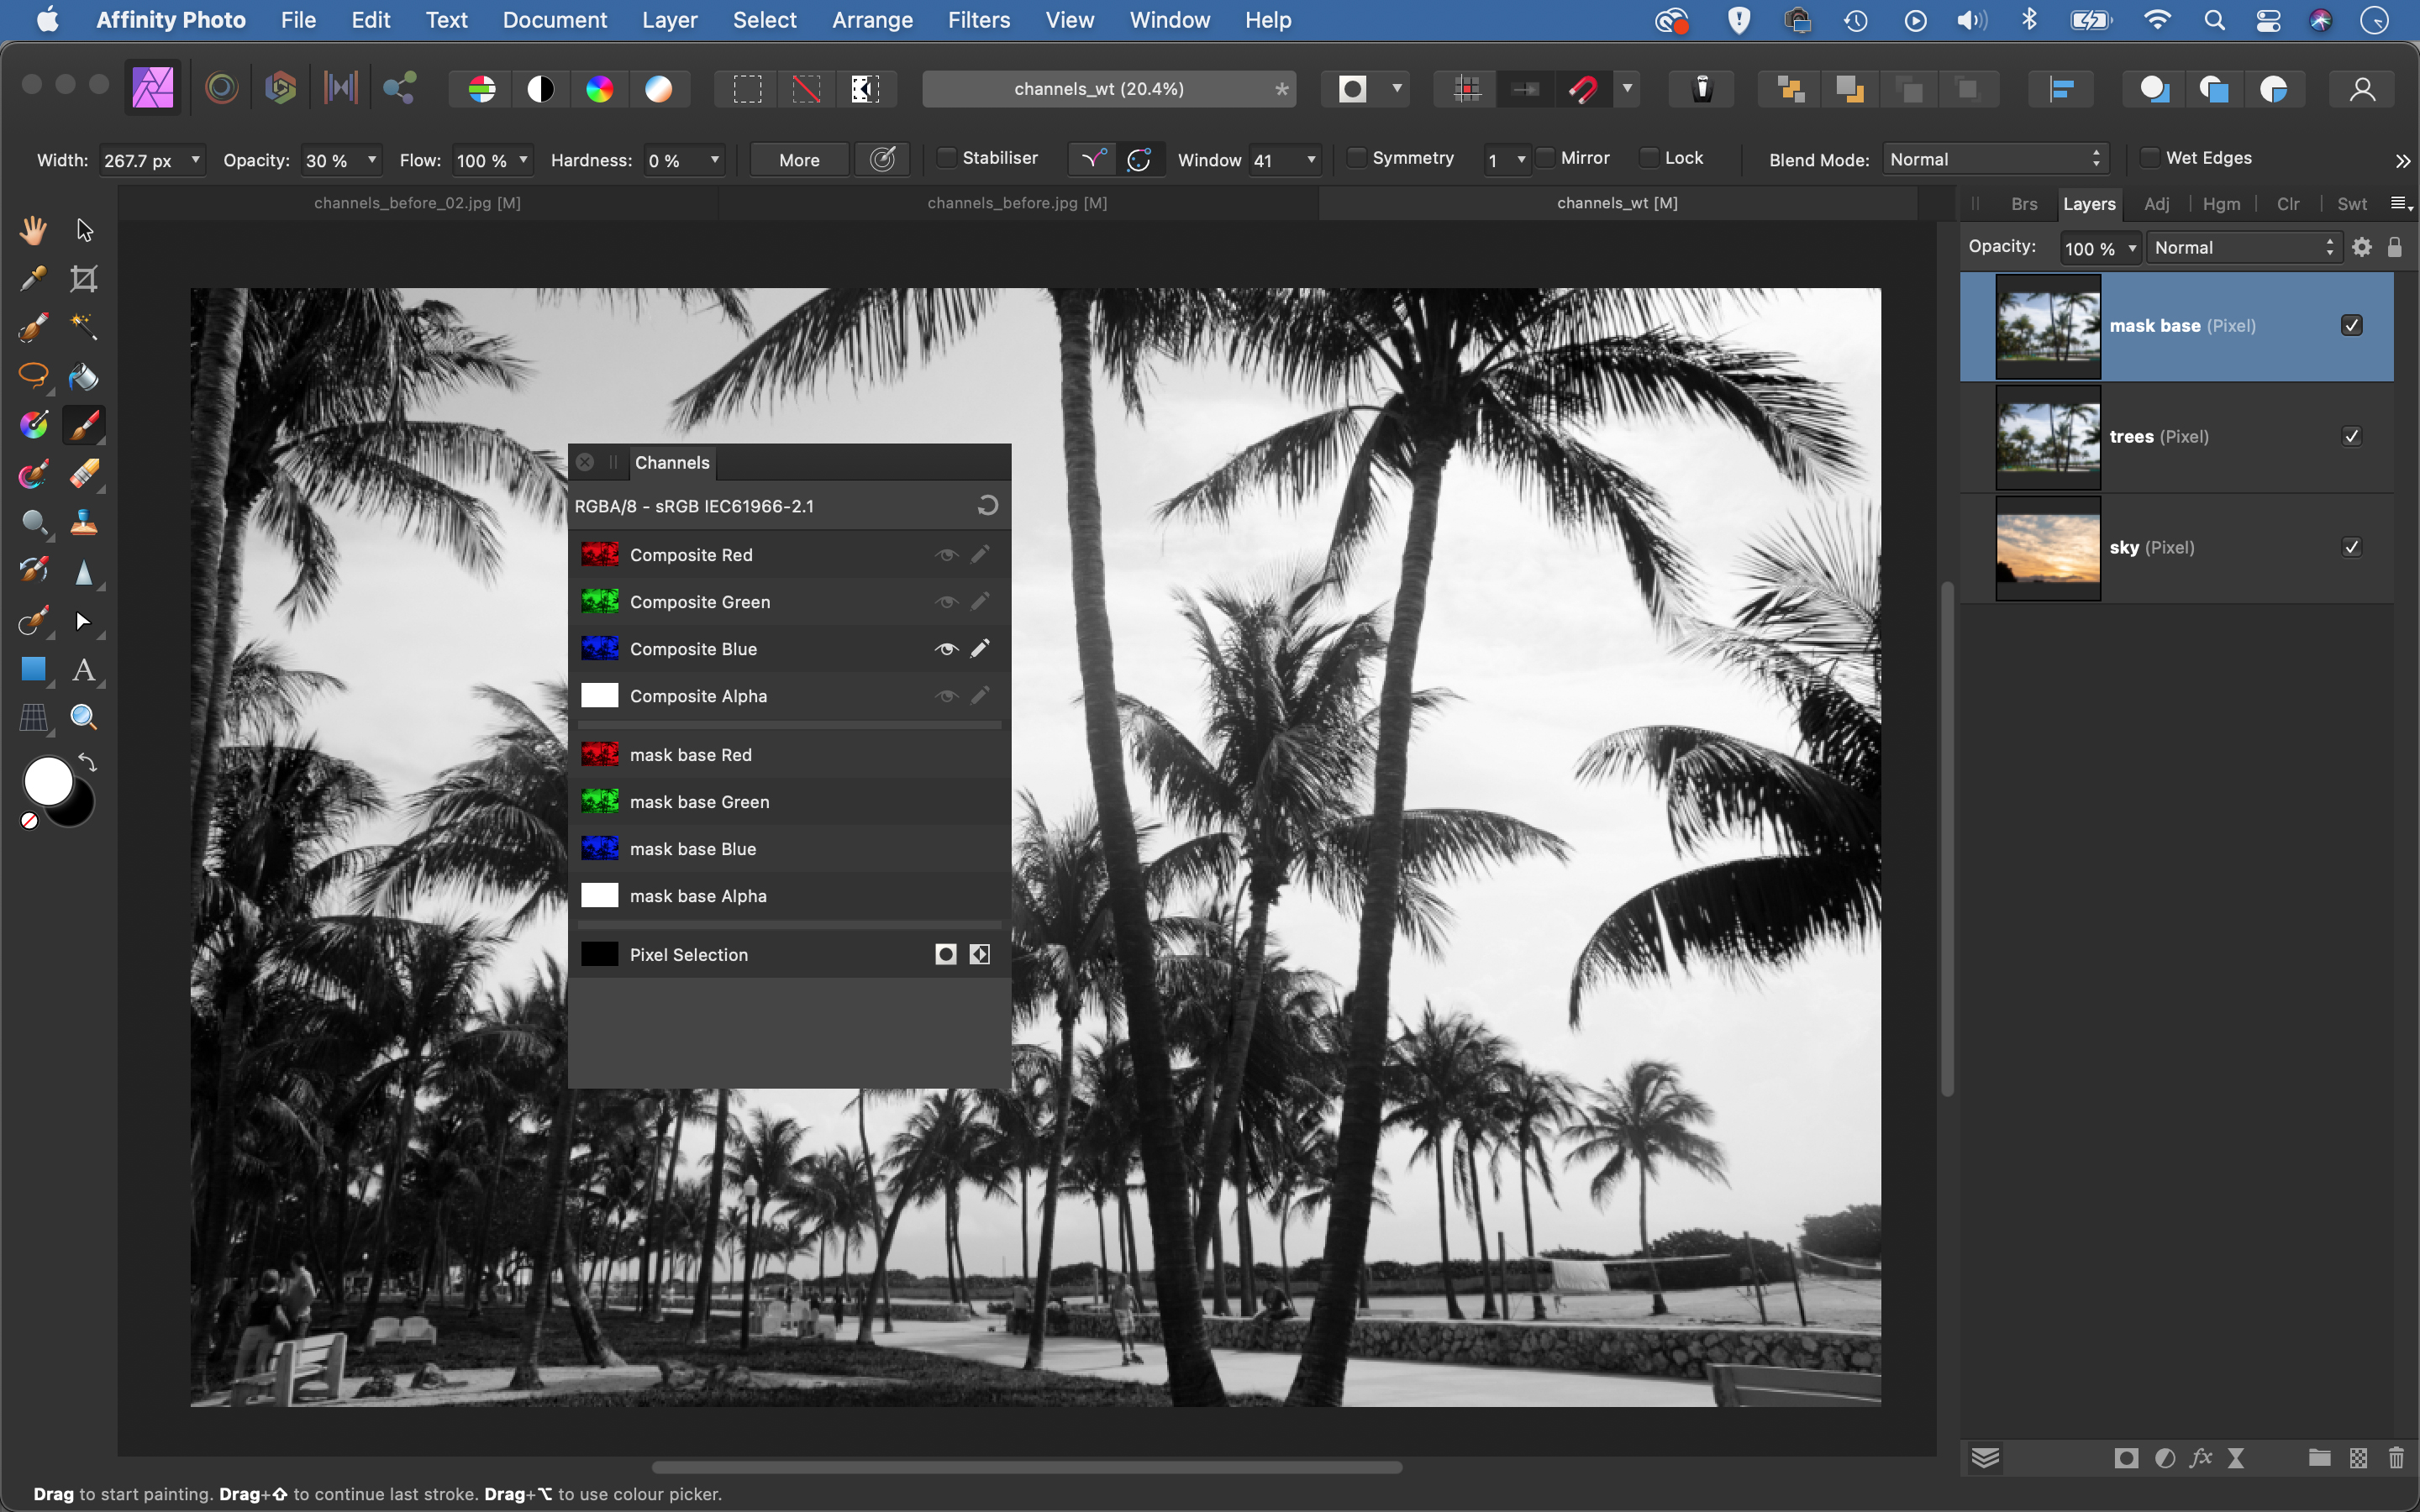
We can use our top layer as a template for selections. Right-click the Red channel and clear, repeat for the Green channel, so only the Blue remains. Highlight the Composite Blue channel. Hit Cmd/Ctrl + L for Levels and bring in the blacks and whites to increase contrast.
04 Tidy up the channel
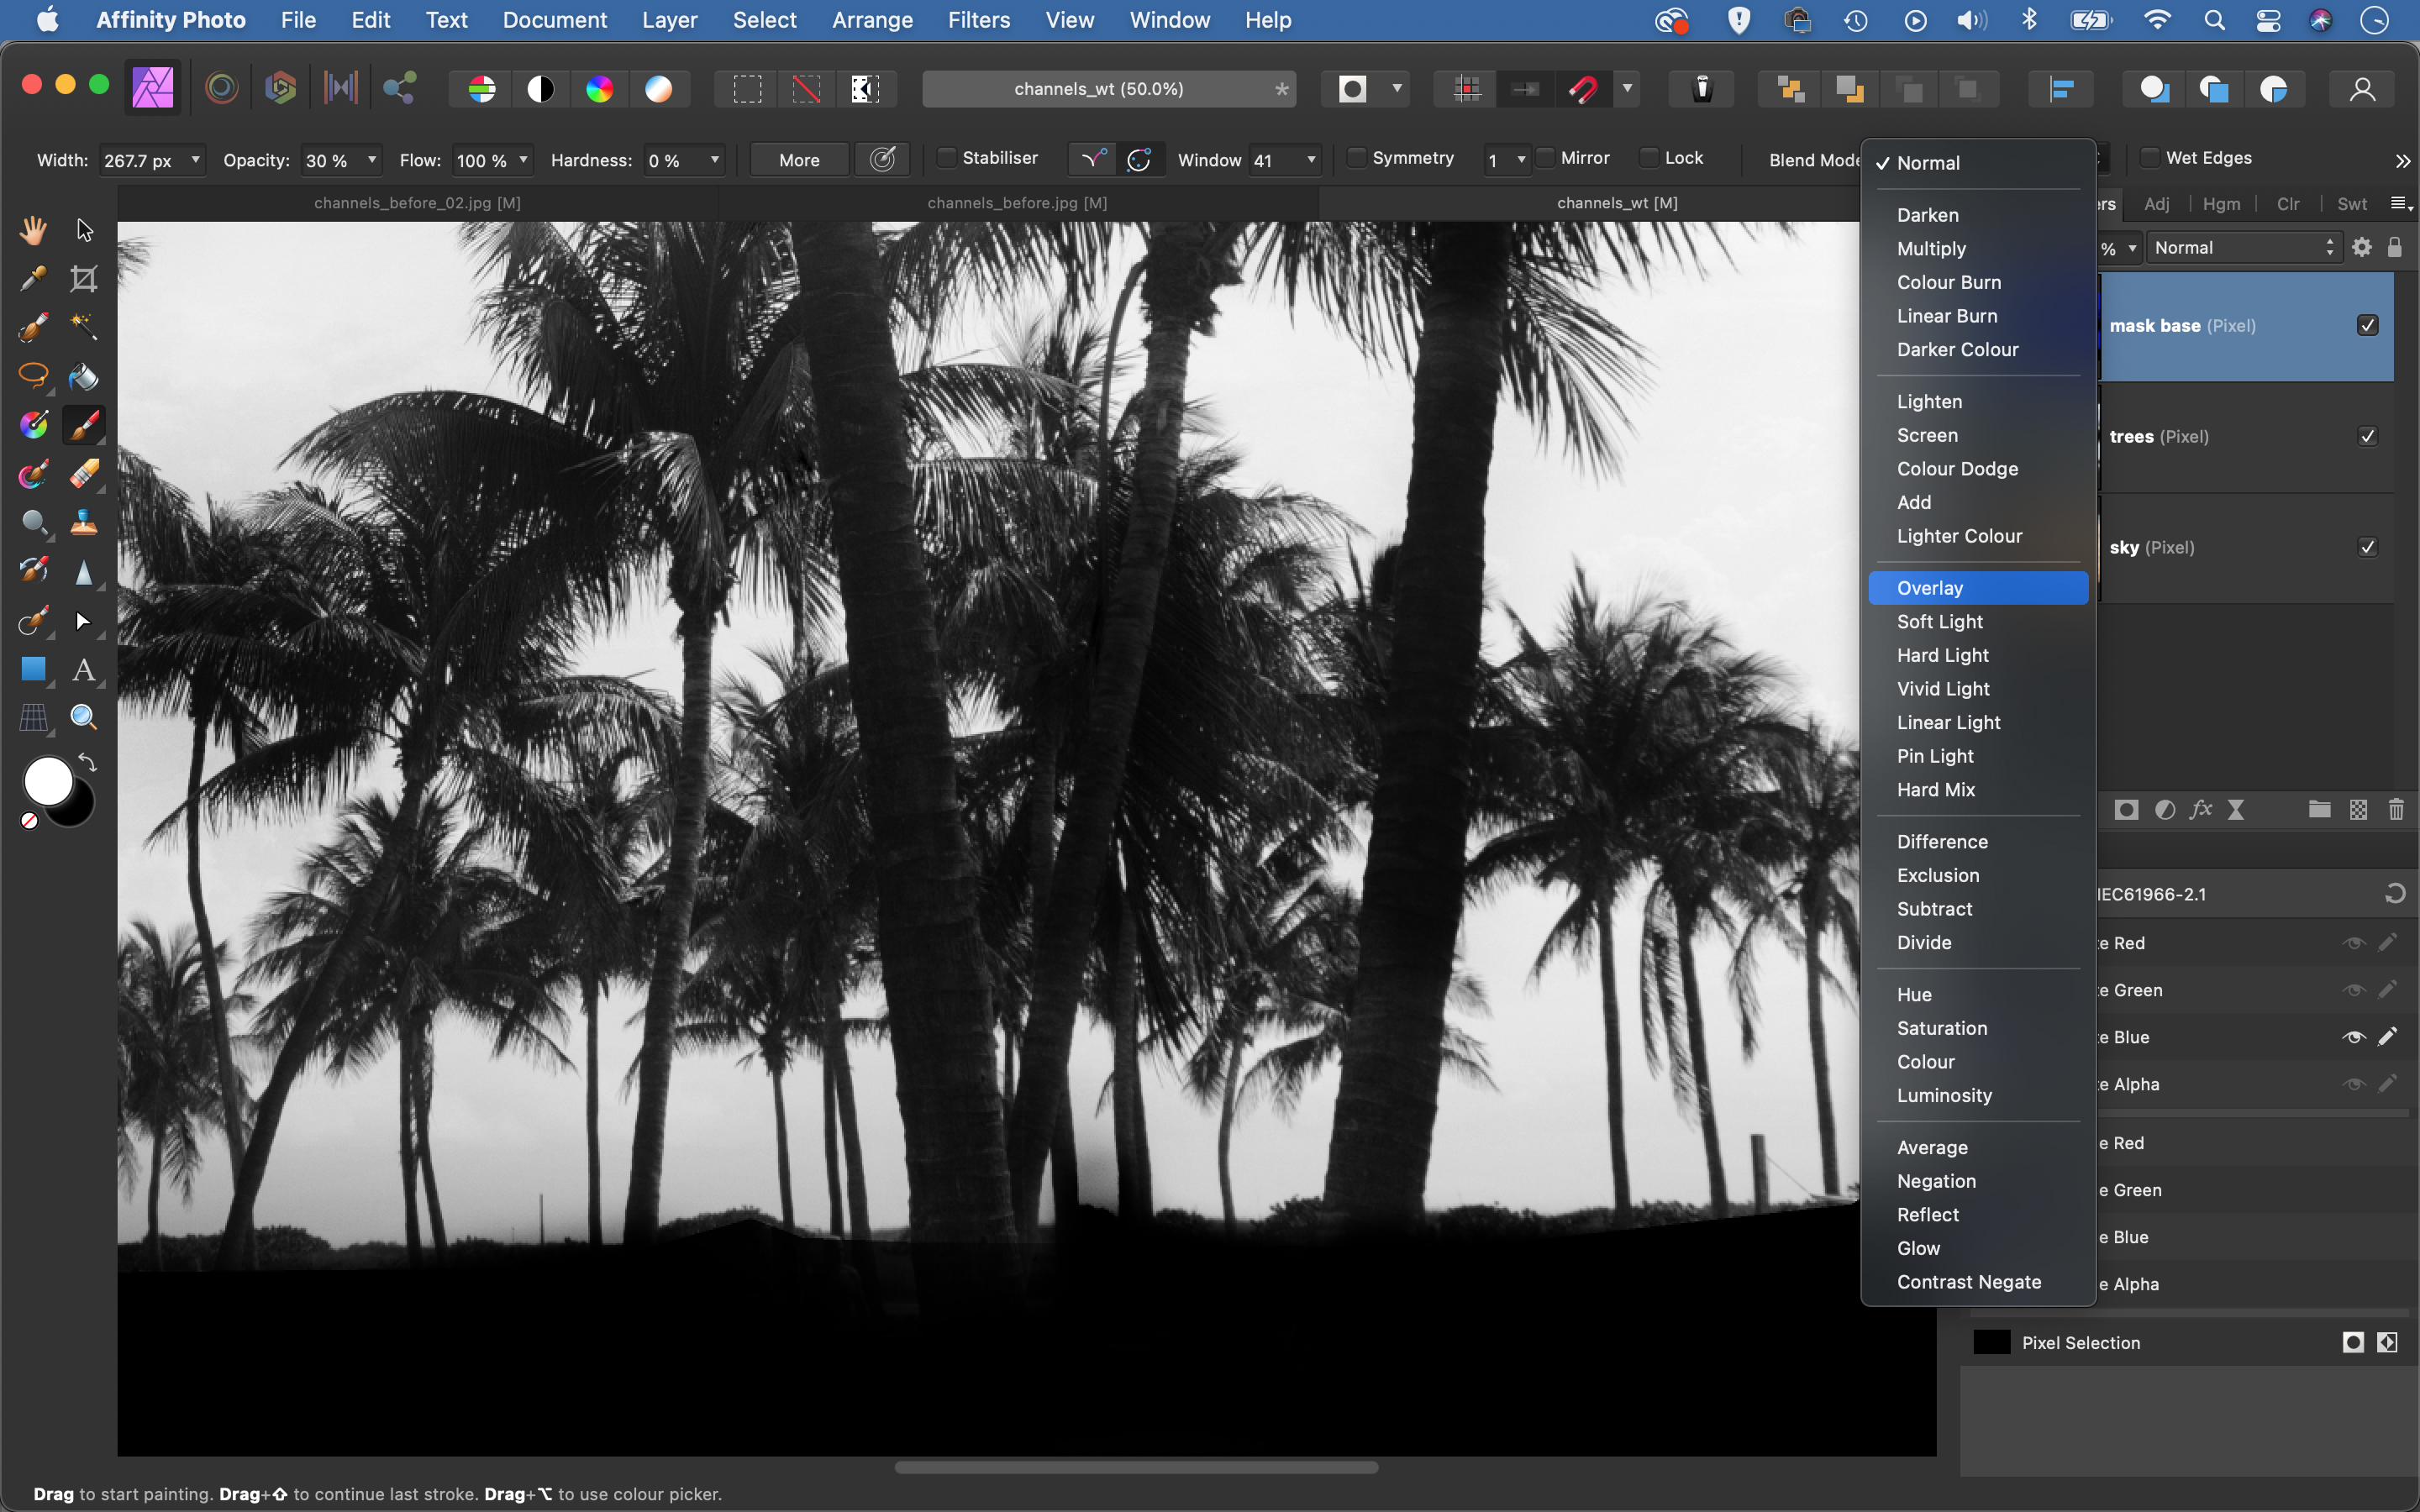
Grab the Brush tool and paint black over the foreground details. Paint white over any parts of the sky that are grey; try changing the brush blend mode to Overlay for this, as it lets you target the whites without affecting the blacks (and vice-versa).
05 Make a mask
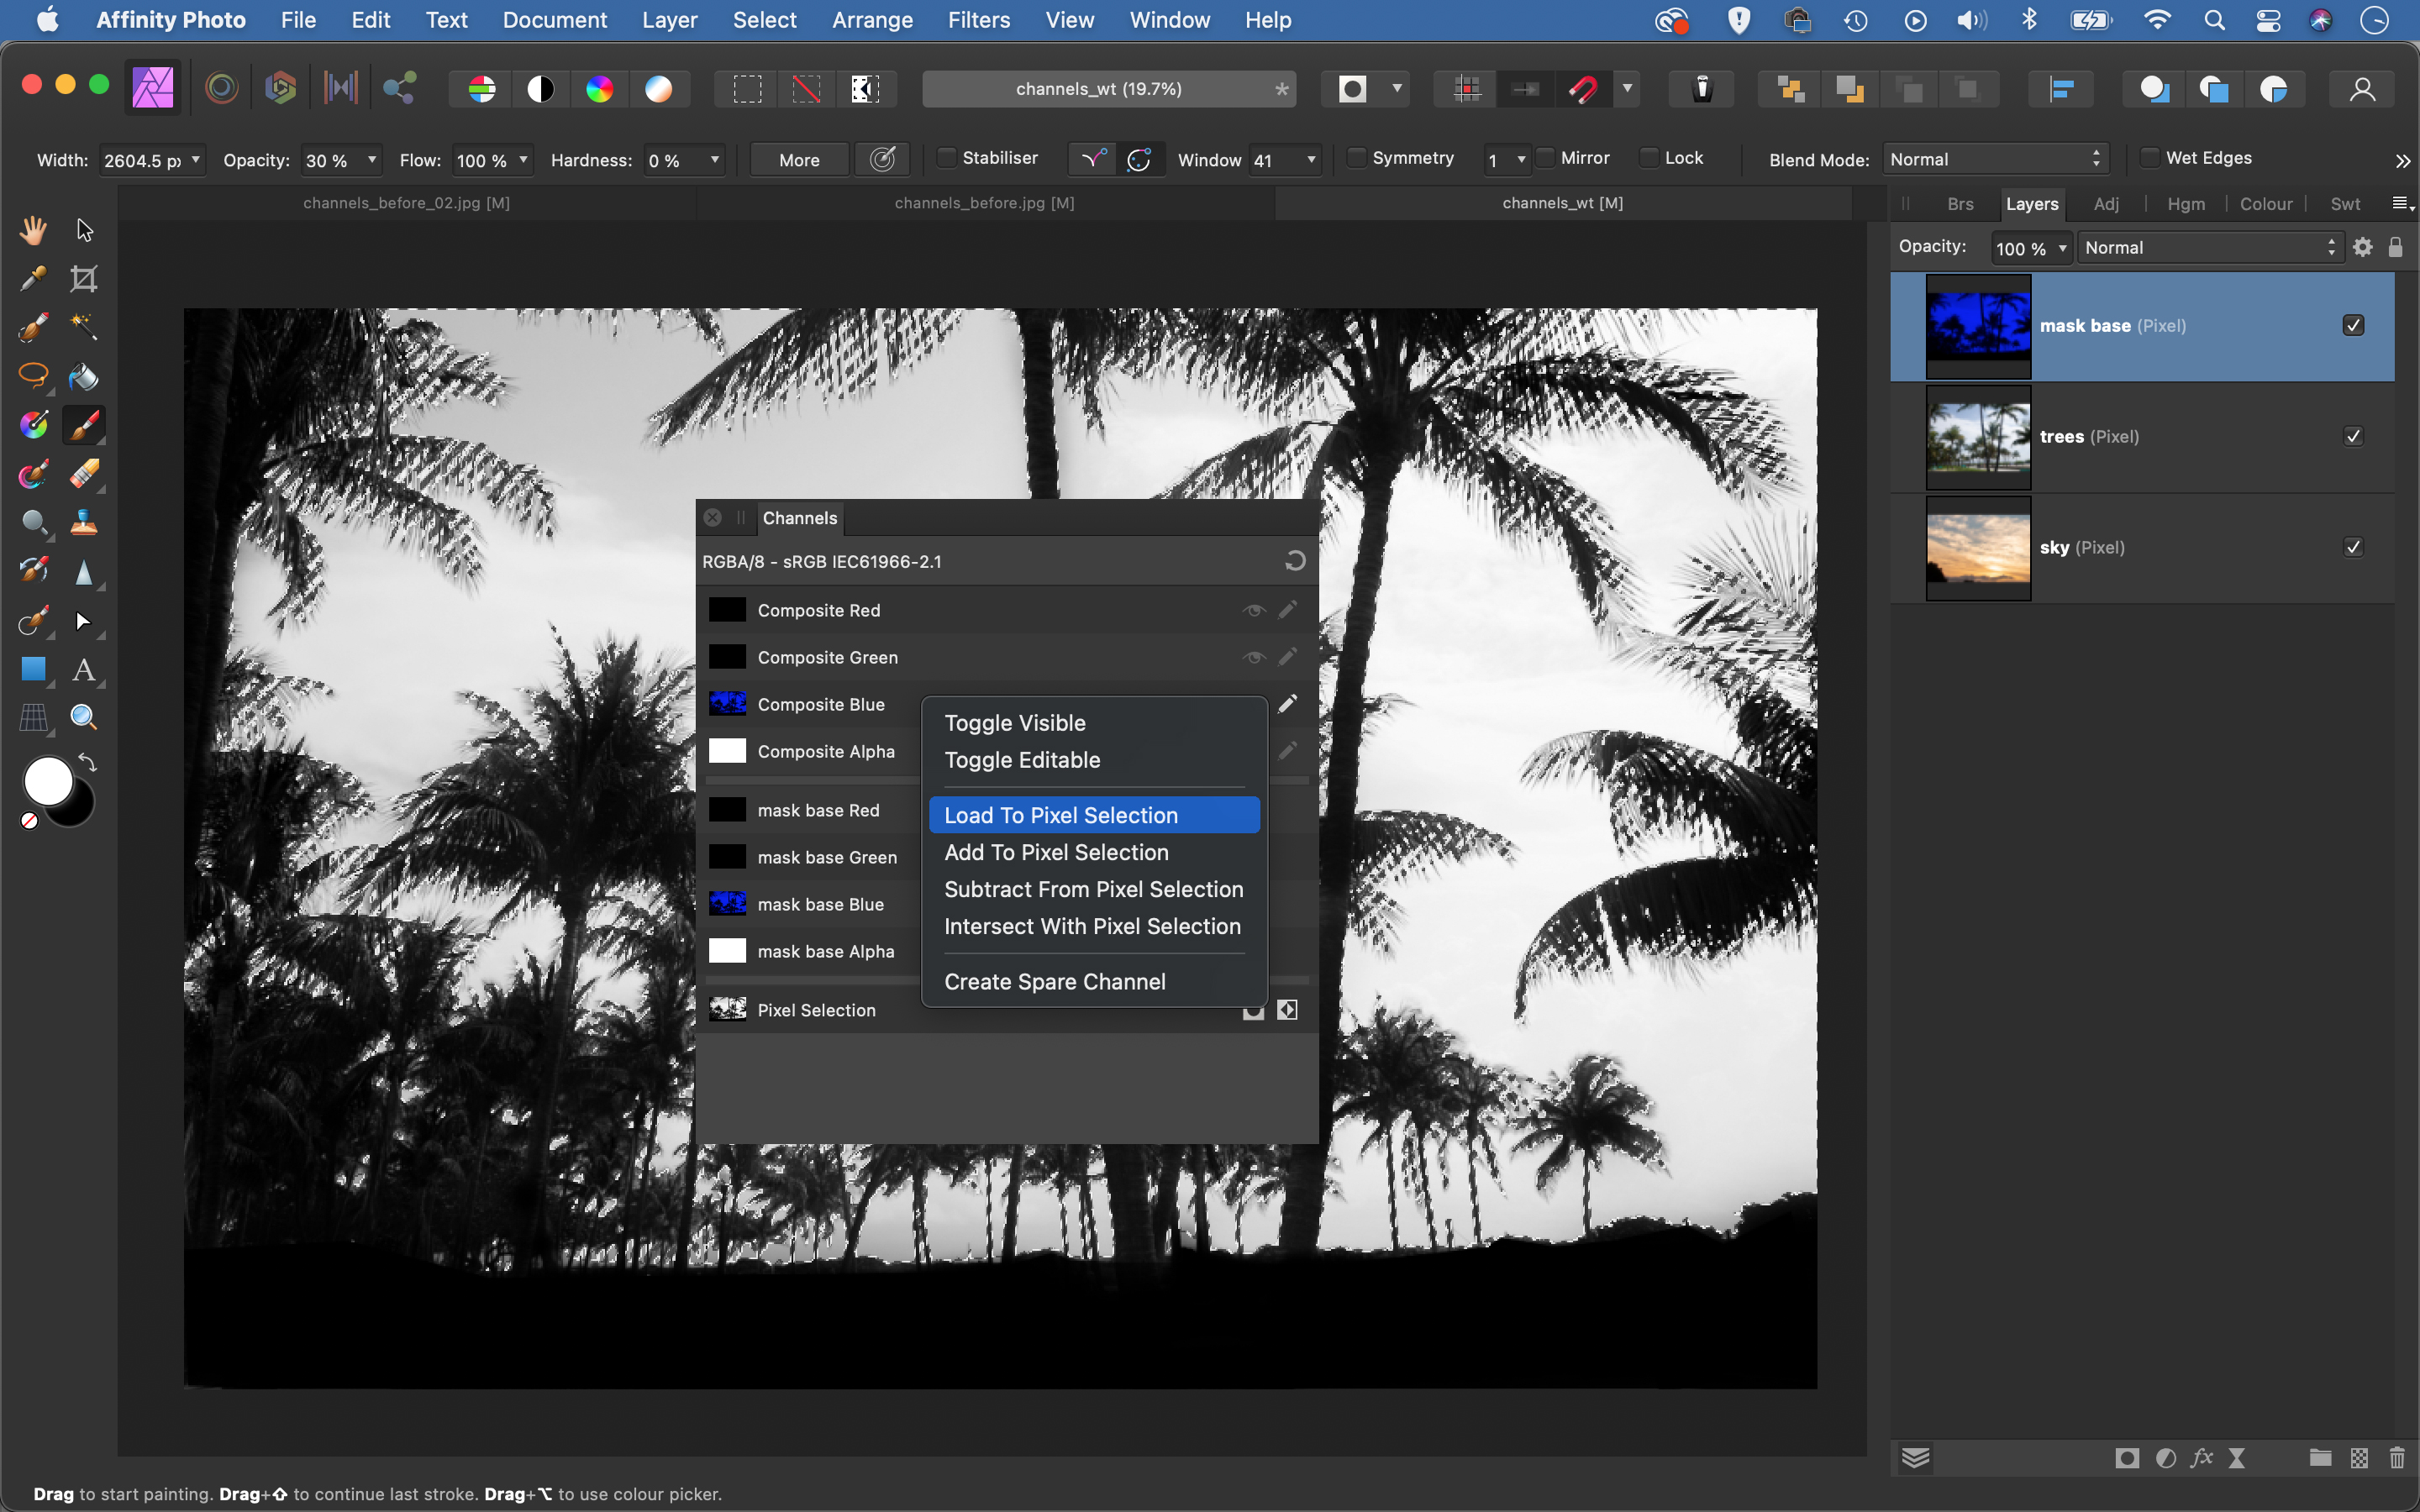
Right-click the Composite Blue channel and ‘Load To Pixel Selection.’ Hide the top layer and reveal the layer below (toggle on the Red and Green Composite channels). Go to Select > Invert Pixel Selection, click the Add Mask icon to convert the selection to a mask.
06 Fine-tune the mask
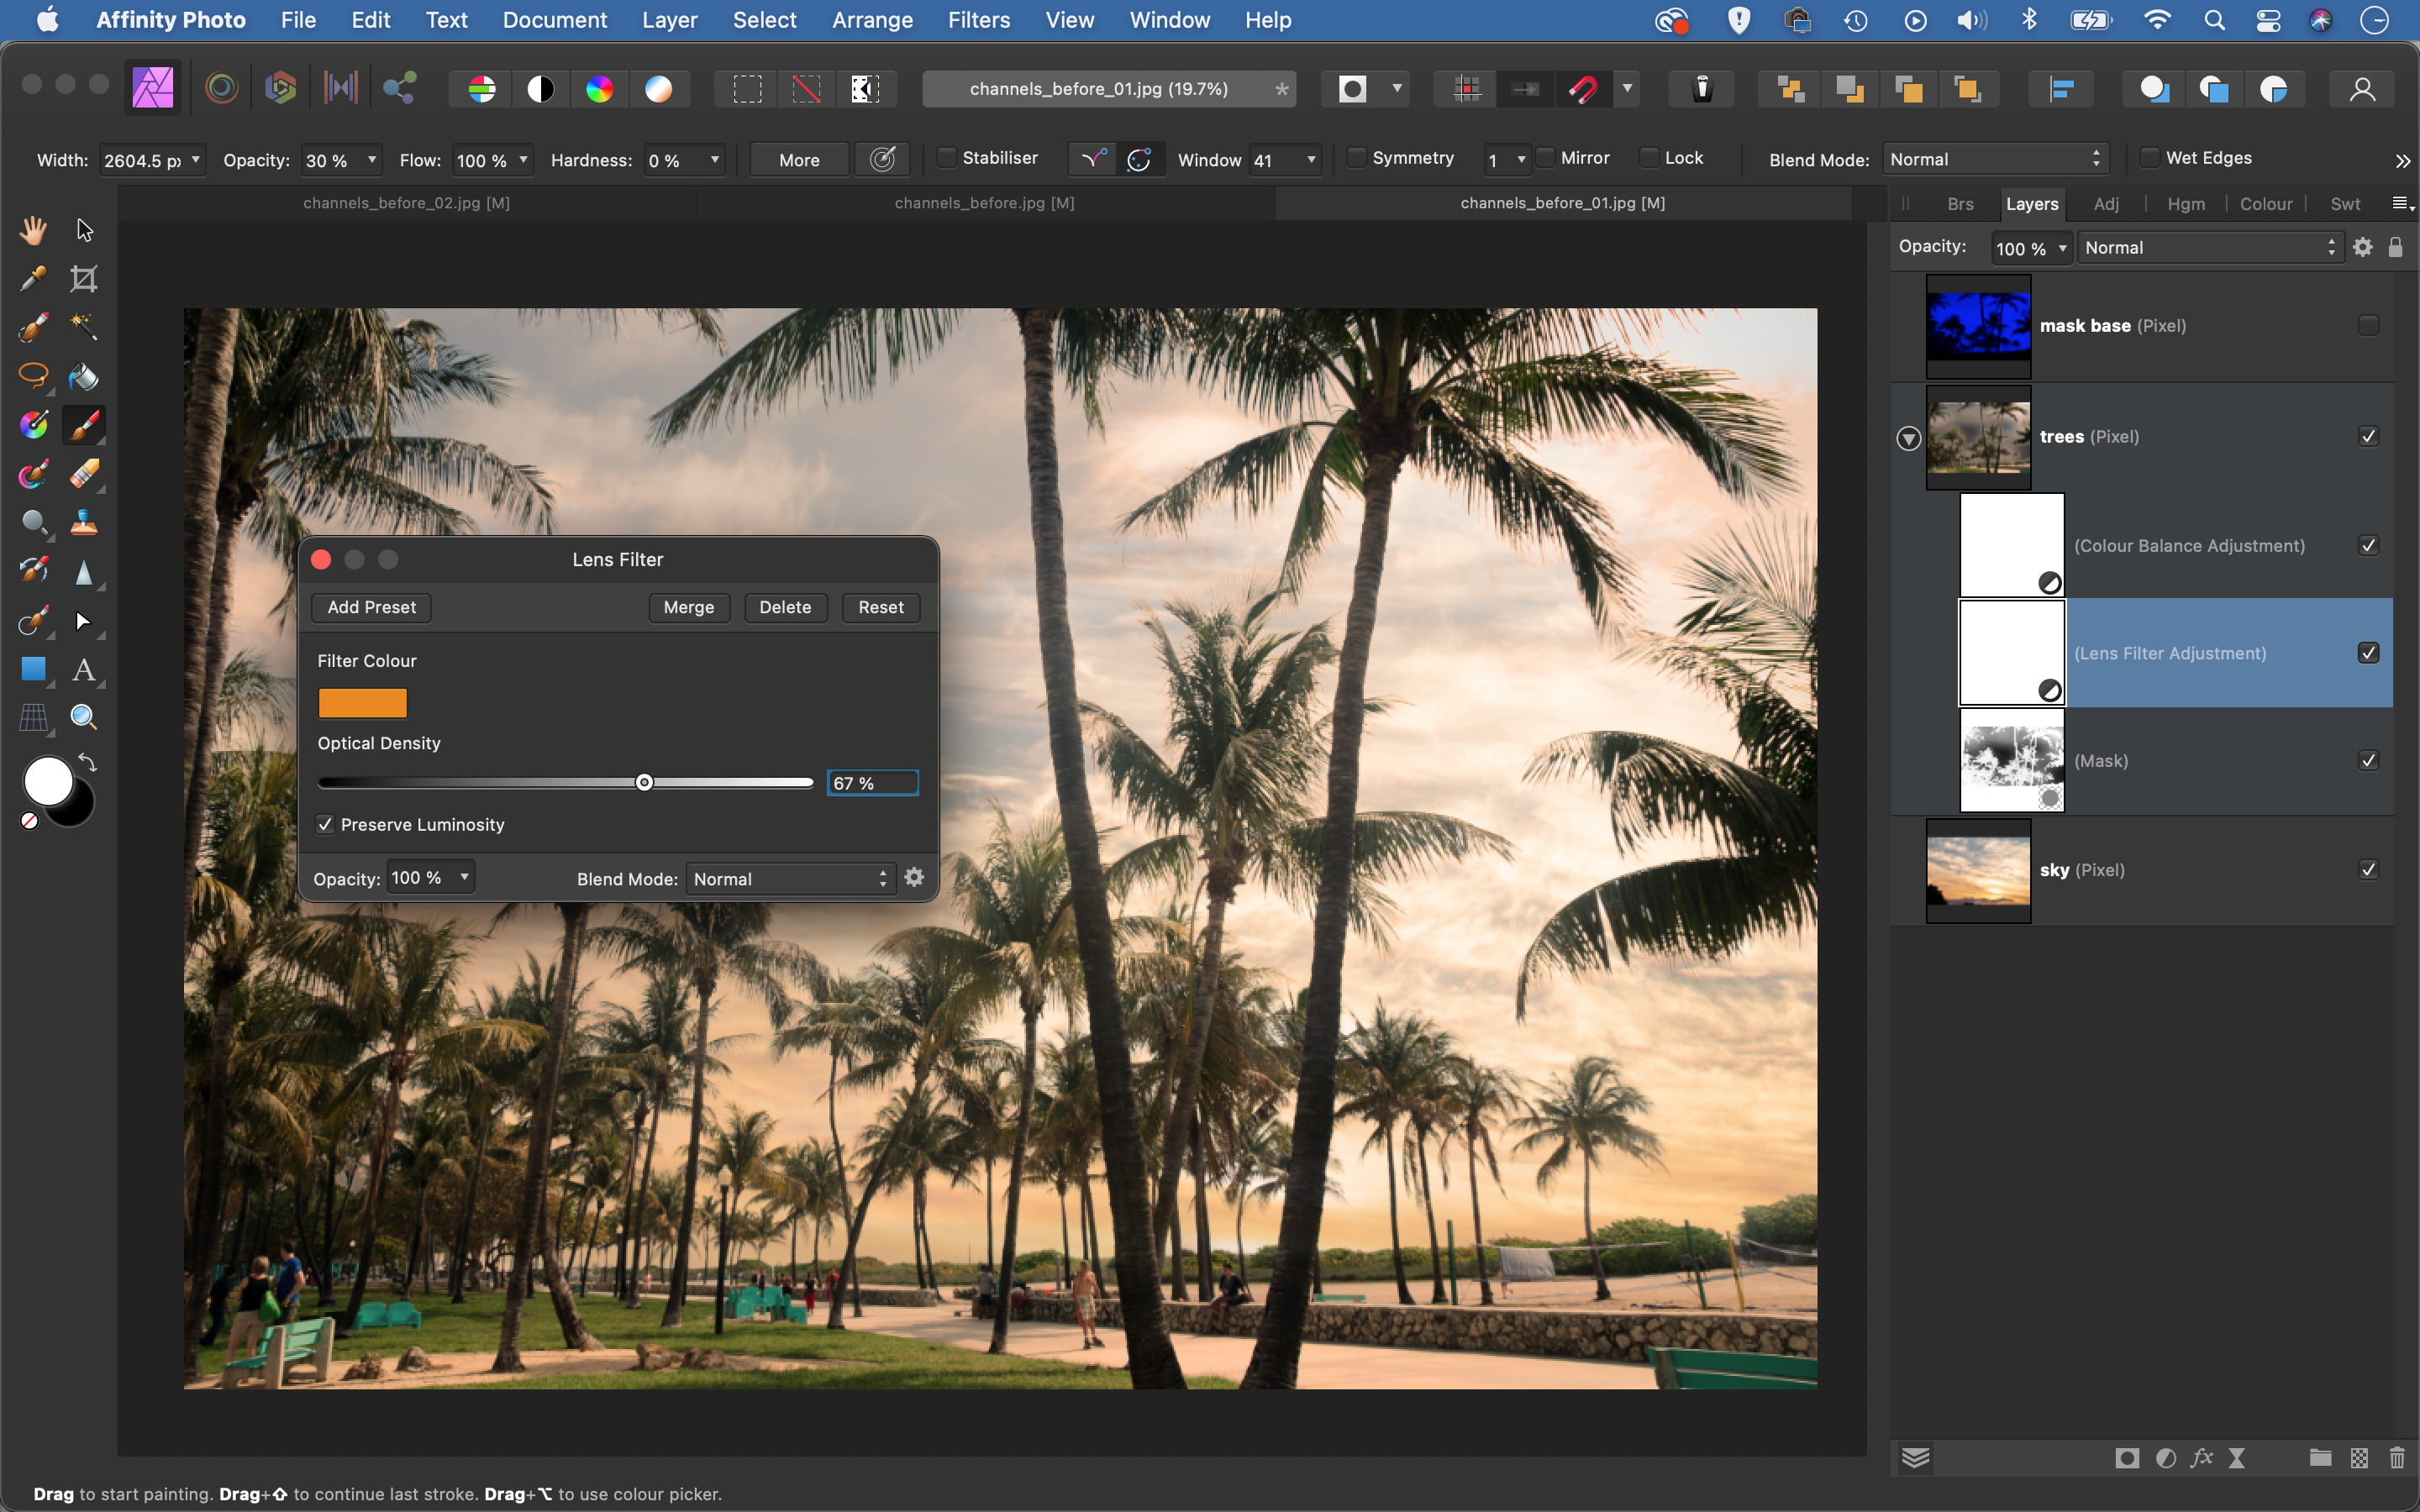
If the mask needs any tweaking, paint with white to reveal, or black to hide. Finally, add a Photo Filter adjustment layer, drag it into the trees layer and warm the trees to match the sky. Make any other tonal changes you like to finish.
• See more of our Affinity Photo tutorials
PhotoPlus: The Canon Magazine is the world's only monthly newsstand title that's 100% devoted to Canon, so you can be sure the magazine is completely relevant to your system.
Read more:
Best photo-editing laptops
Best photo editing software
Best online photography courses
Get the Digital Camera World Newsletter
The best camera deals, reviews, product advice, and unmissable photography news, direct to your inbox!
The lead technique writer on Digital Camera Magazine, PhotoPlus: The Canon Magazine and N-Photo: The Nikon Magazine, James is a fantastic general practice photographer with an enviable array of skills across every genre of photography.
Whether it's flash photography techniques like stroboscopic portraits, astrophotography projects like photographing the Northern Lights, or turning sound into art by making paint dance on a set of speakers, James' tutorials and projects are as creative as they are enjoyable.
He's also a wizard at the dark arts of Photoshop, Lightroom and Affinity Photo, and is capable of some genuine black magic in the digital darkroom, making him one of the leading authorities on photo editing software and techniques.


