Paint with light at night to create incredible patterns and reflections
James Paterson shows you how to create vibrant abstract shapes over water by painting with light
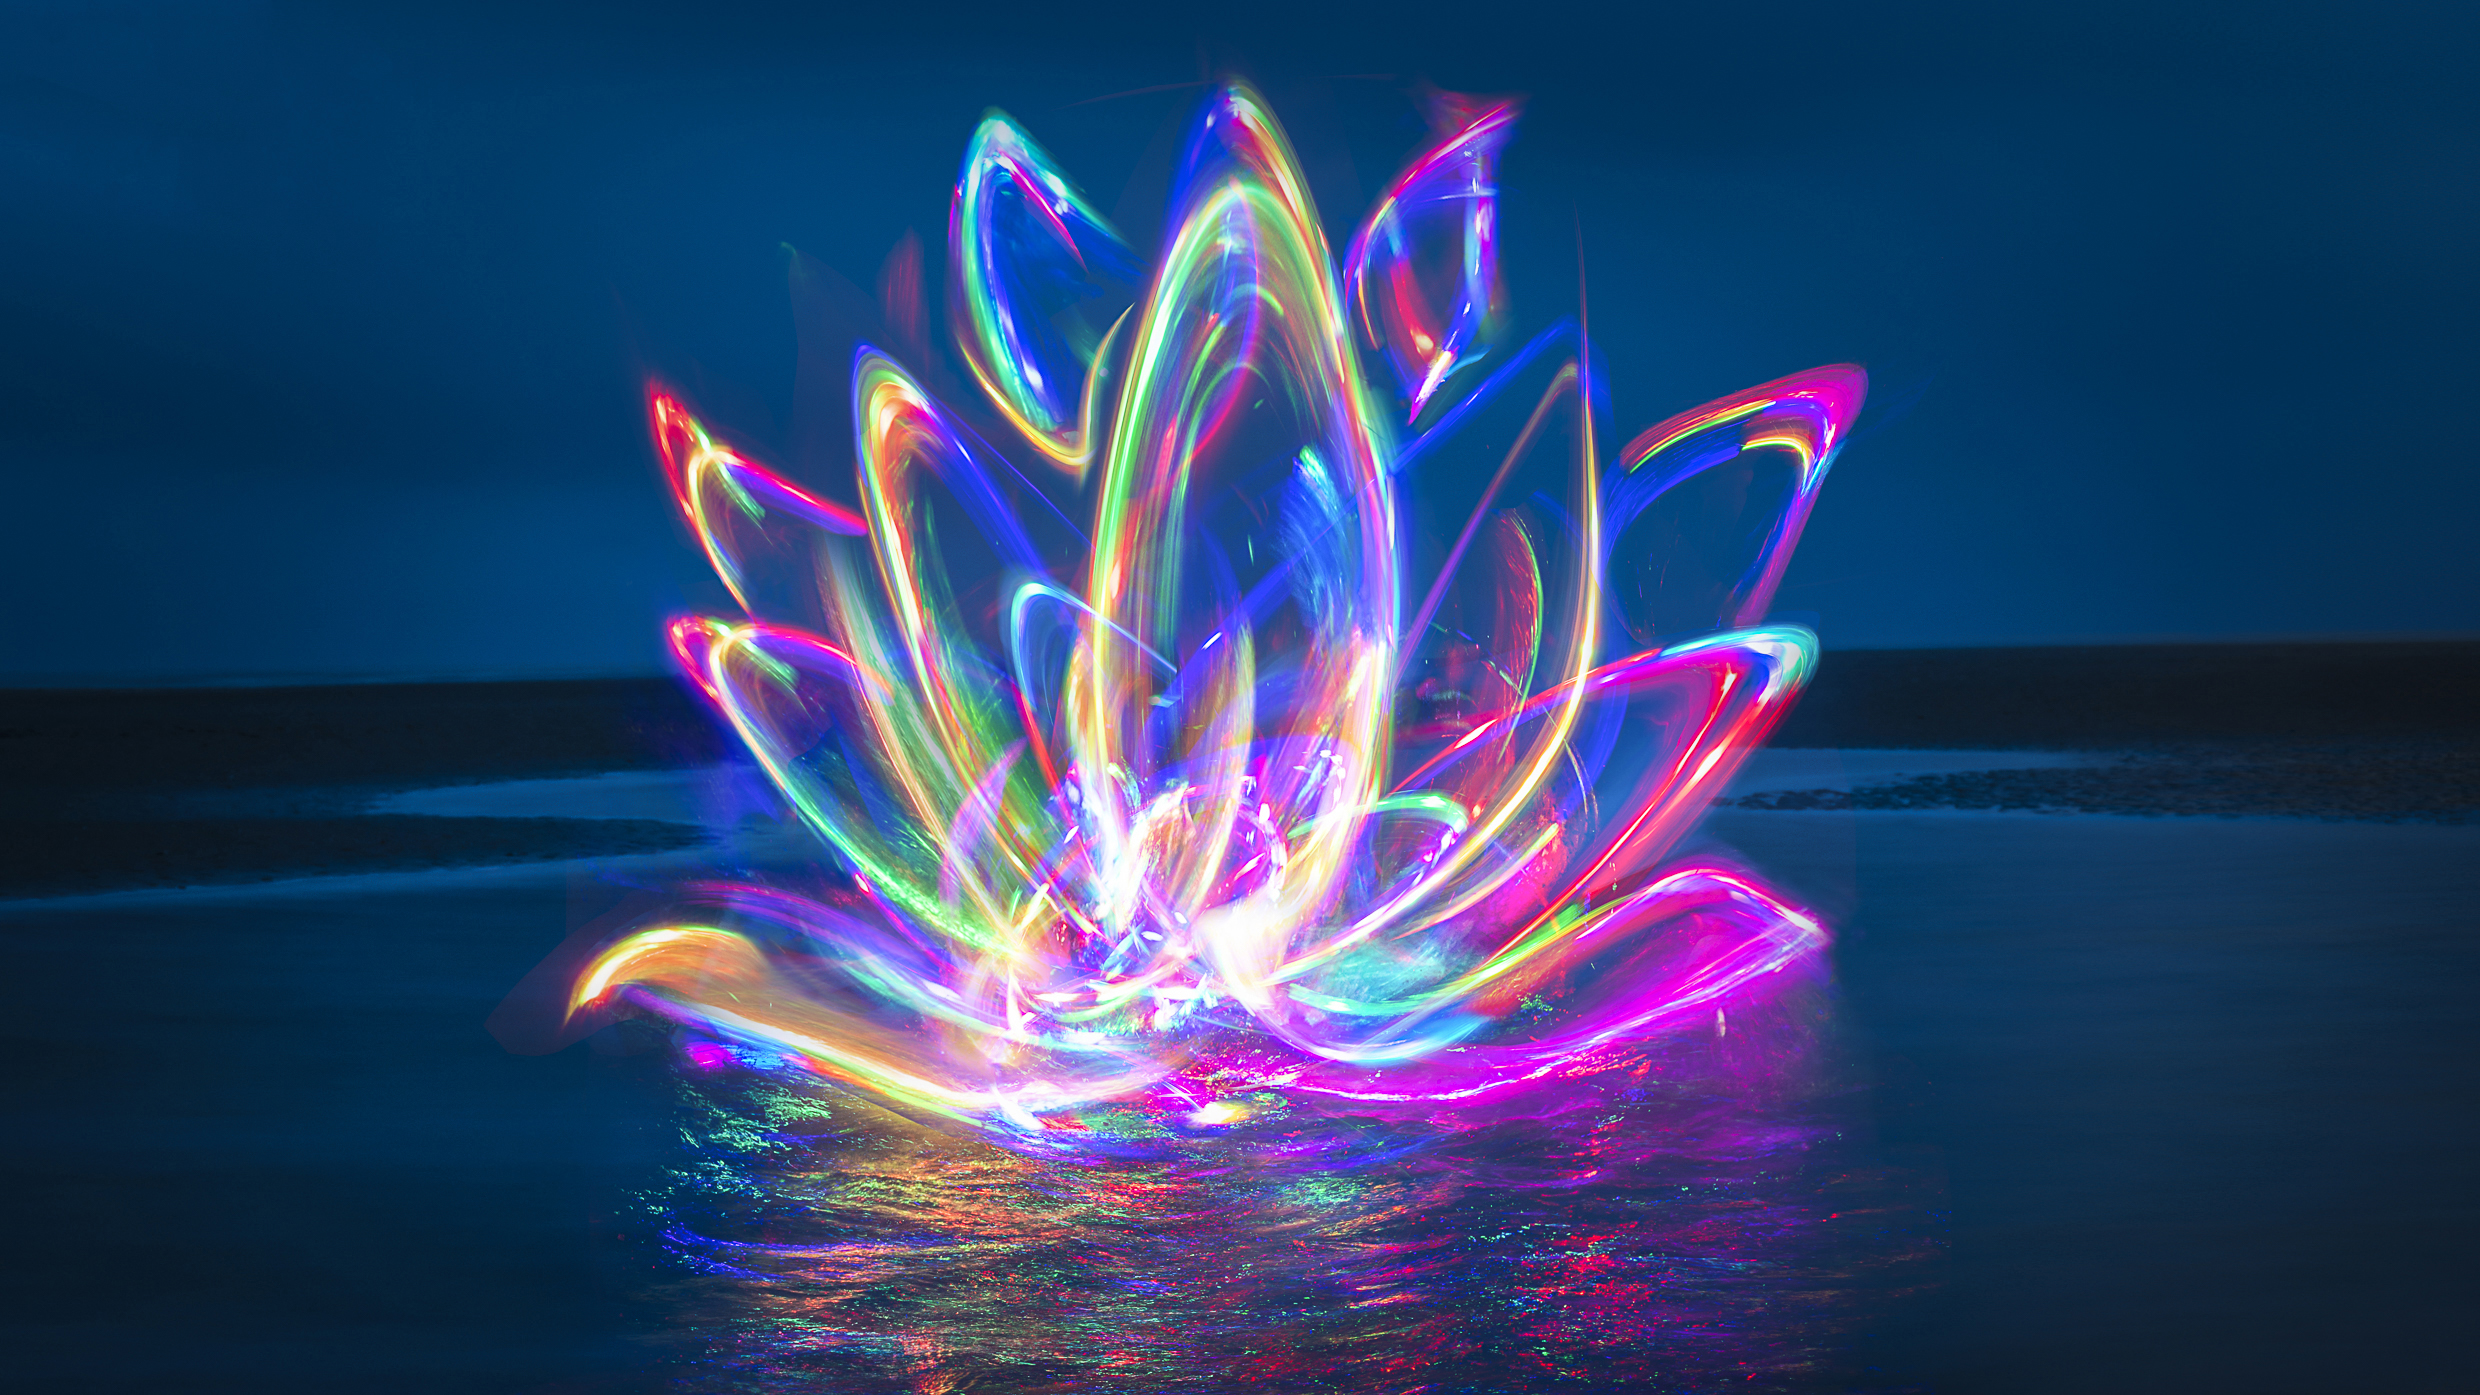
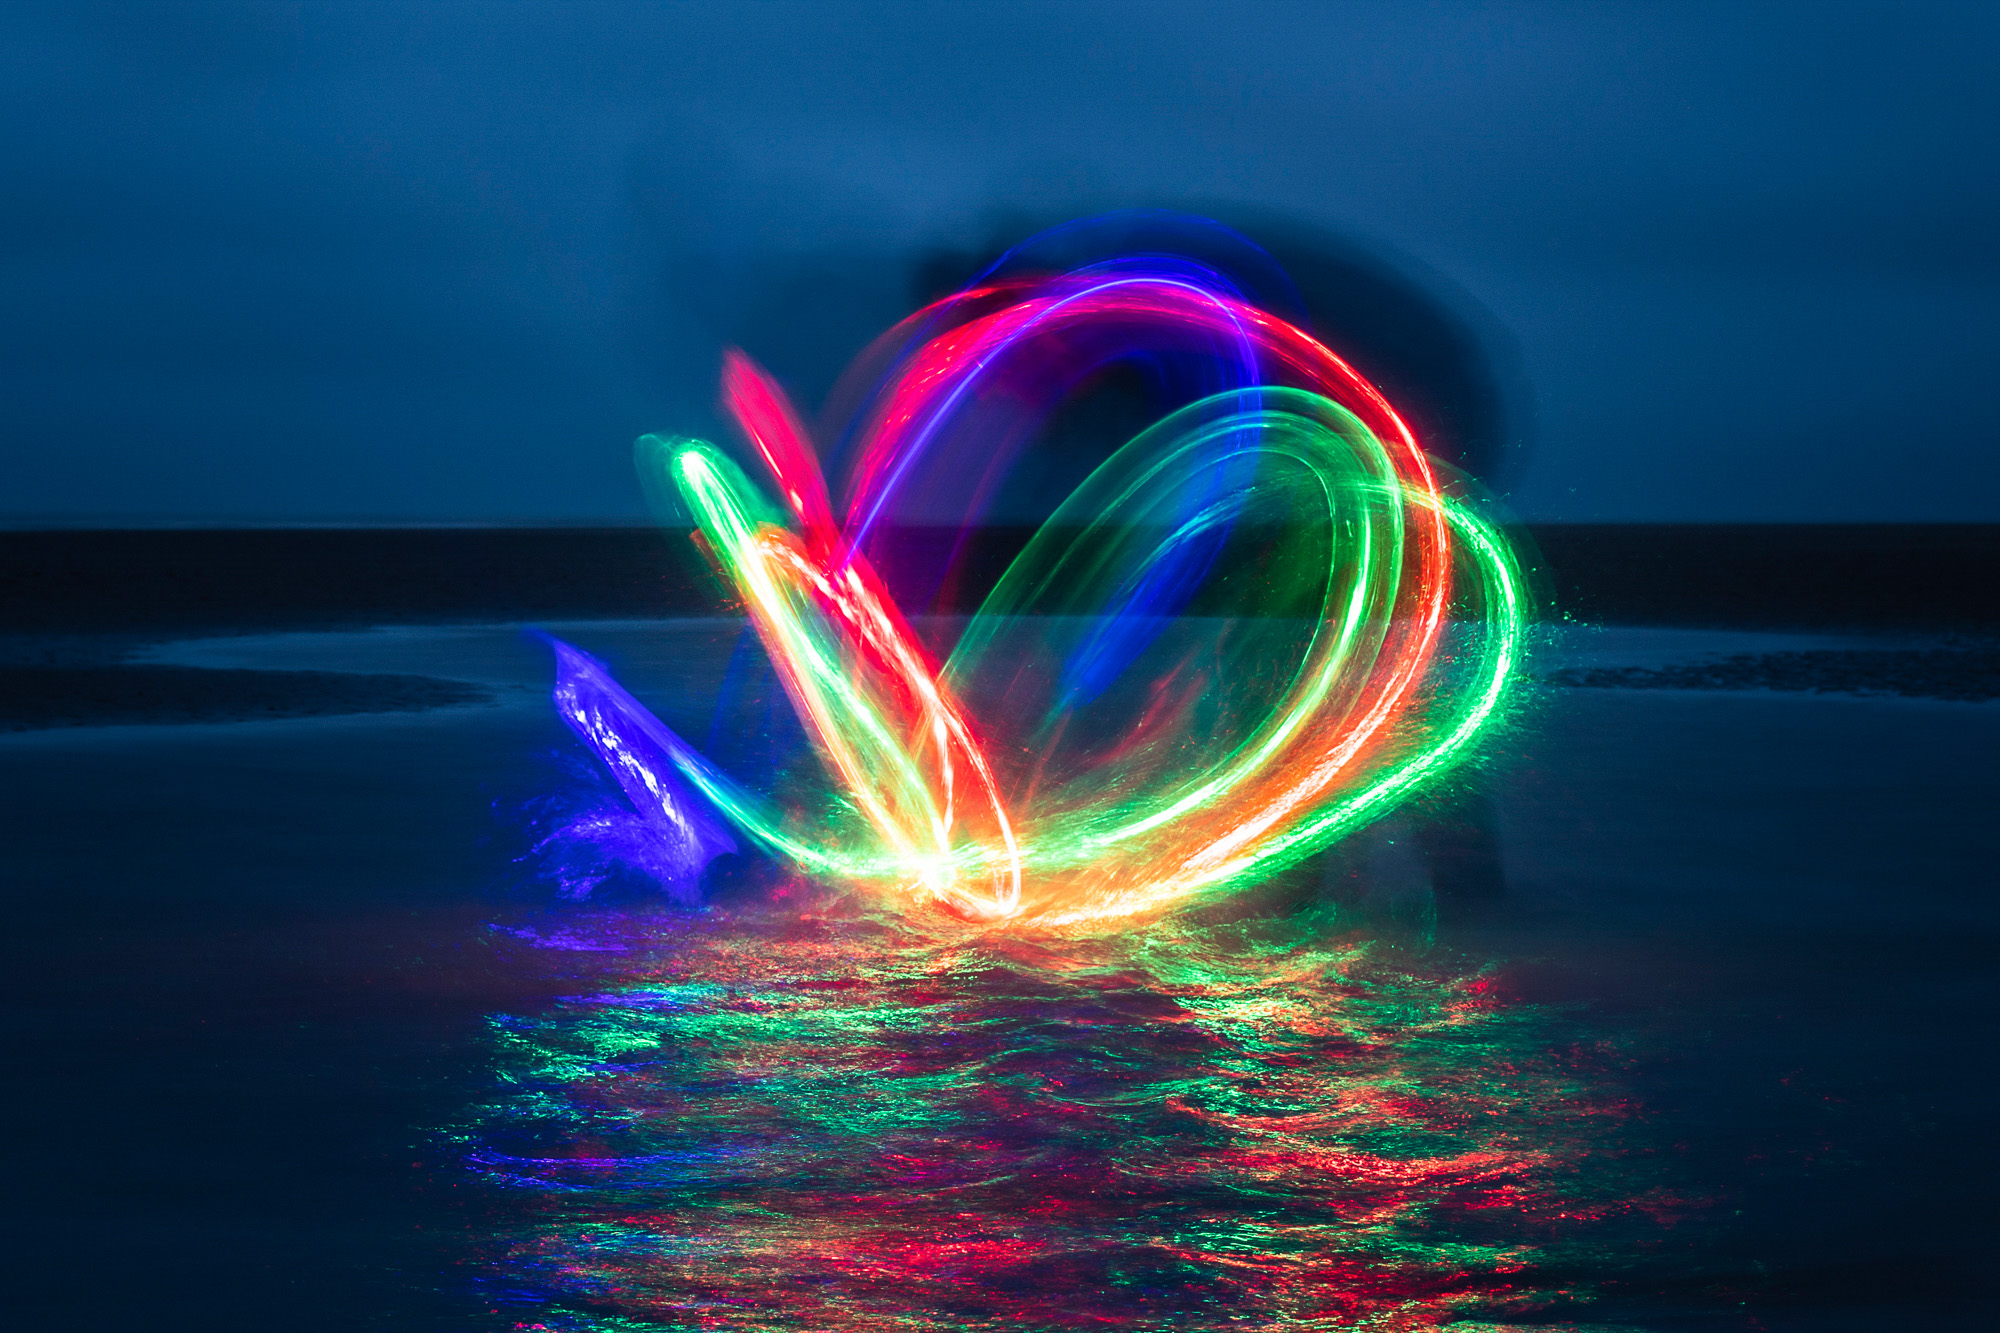
There are lots of reasons to go to the beach, but flinging around a disco light in the dark is probably among the more unusual pastimes. However, while it might get you a few funny looks, it can lead to wonderfully vibrant photos with a difference.
In this project we’ll look at how to create long-exposure light paintings with a combination of shooting and Photoshop skills. This begins with an after-dark shoot, during which we swing a torch or other suitable light source around to create swirling patterns.
The beach setting isn’t essential, it can be done in your back garden, a dark room or any dim setting. But to add an extra sparkle to our painting we can splash around in the shallows with our colourful light. This way, the colourful light source creates vibrant reflections in the water.
When swirling a torch around in the dark over the course of a 3-second exposure it can be tricky to predict how the finished light painting will turn out, especially if you have a face full of sea water.
But one of the great things about light painting is how easy it is to combine several shots into one eye-catching whole with simple layer blending skills in Photoshop. And if we want to take it further, we can warp and reshape the colourful flowing lines. We’ve chosen to create an abstract water lily flower here, but you can use the same skills to make any shape you choose.
Read more: How to paint landscapes with torchlight
1. Prepare the light
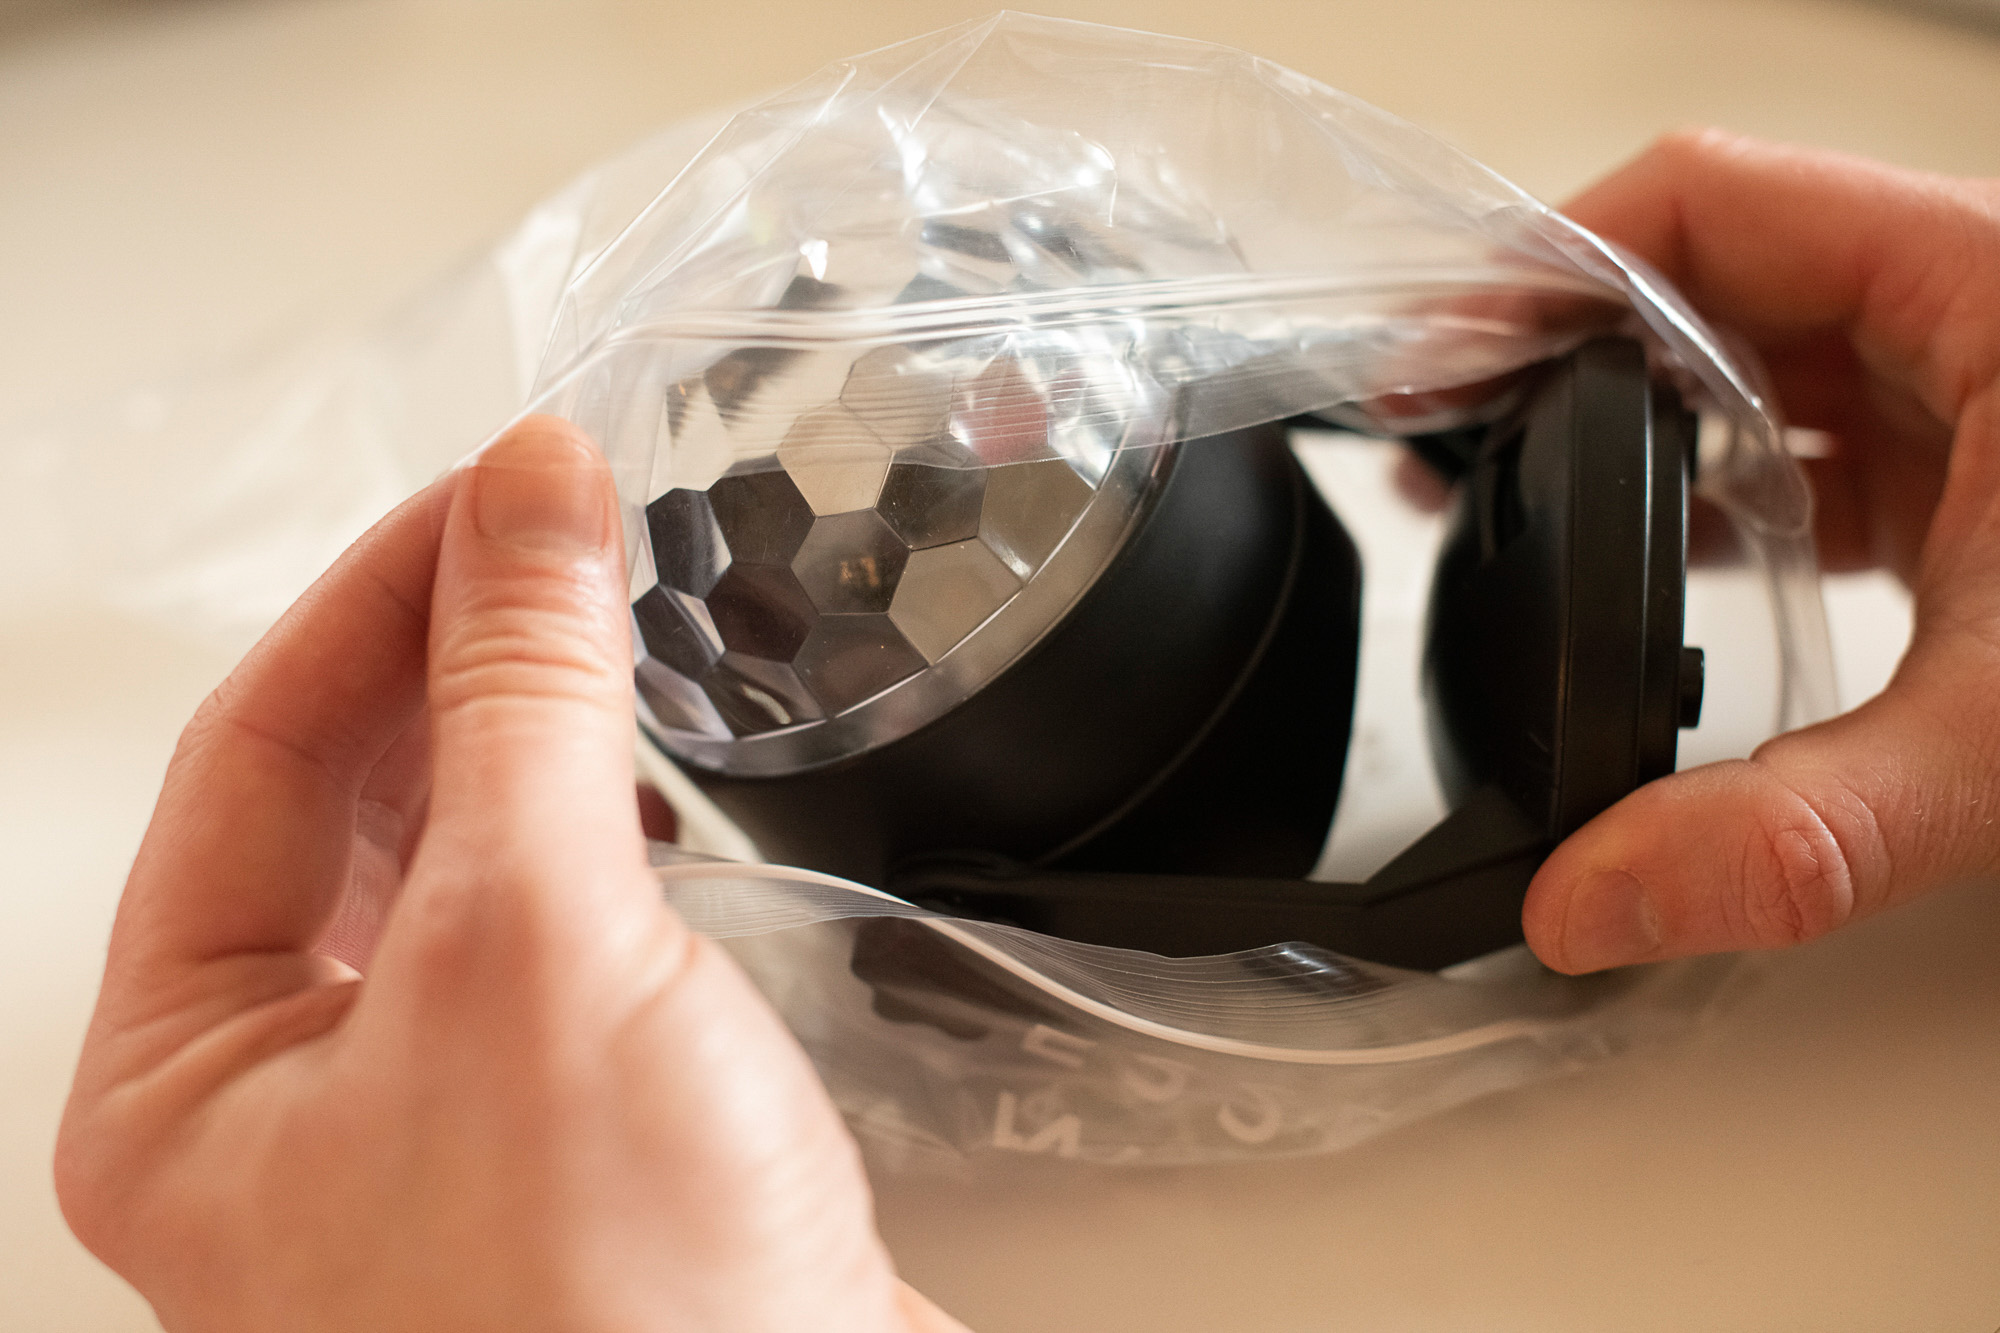
Unless your light source is waterproof you’ll need a watertight bag. We chose to use a battery-powered disco light, you can buy these for a few pounds on Amazon or similar online stores. We placed the light inside two clear plastic bags, tied tightly to a piece of string so that we could swing the light around.
The best camera deals, reviews, product advice, and unmissable photography news, direct to your inbox!
2. Set an interval timer
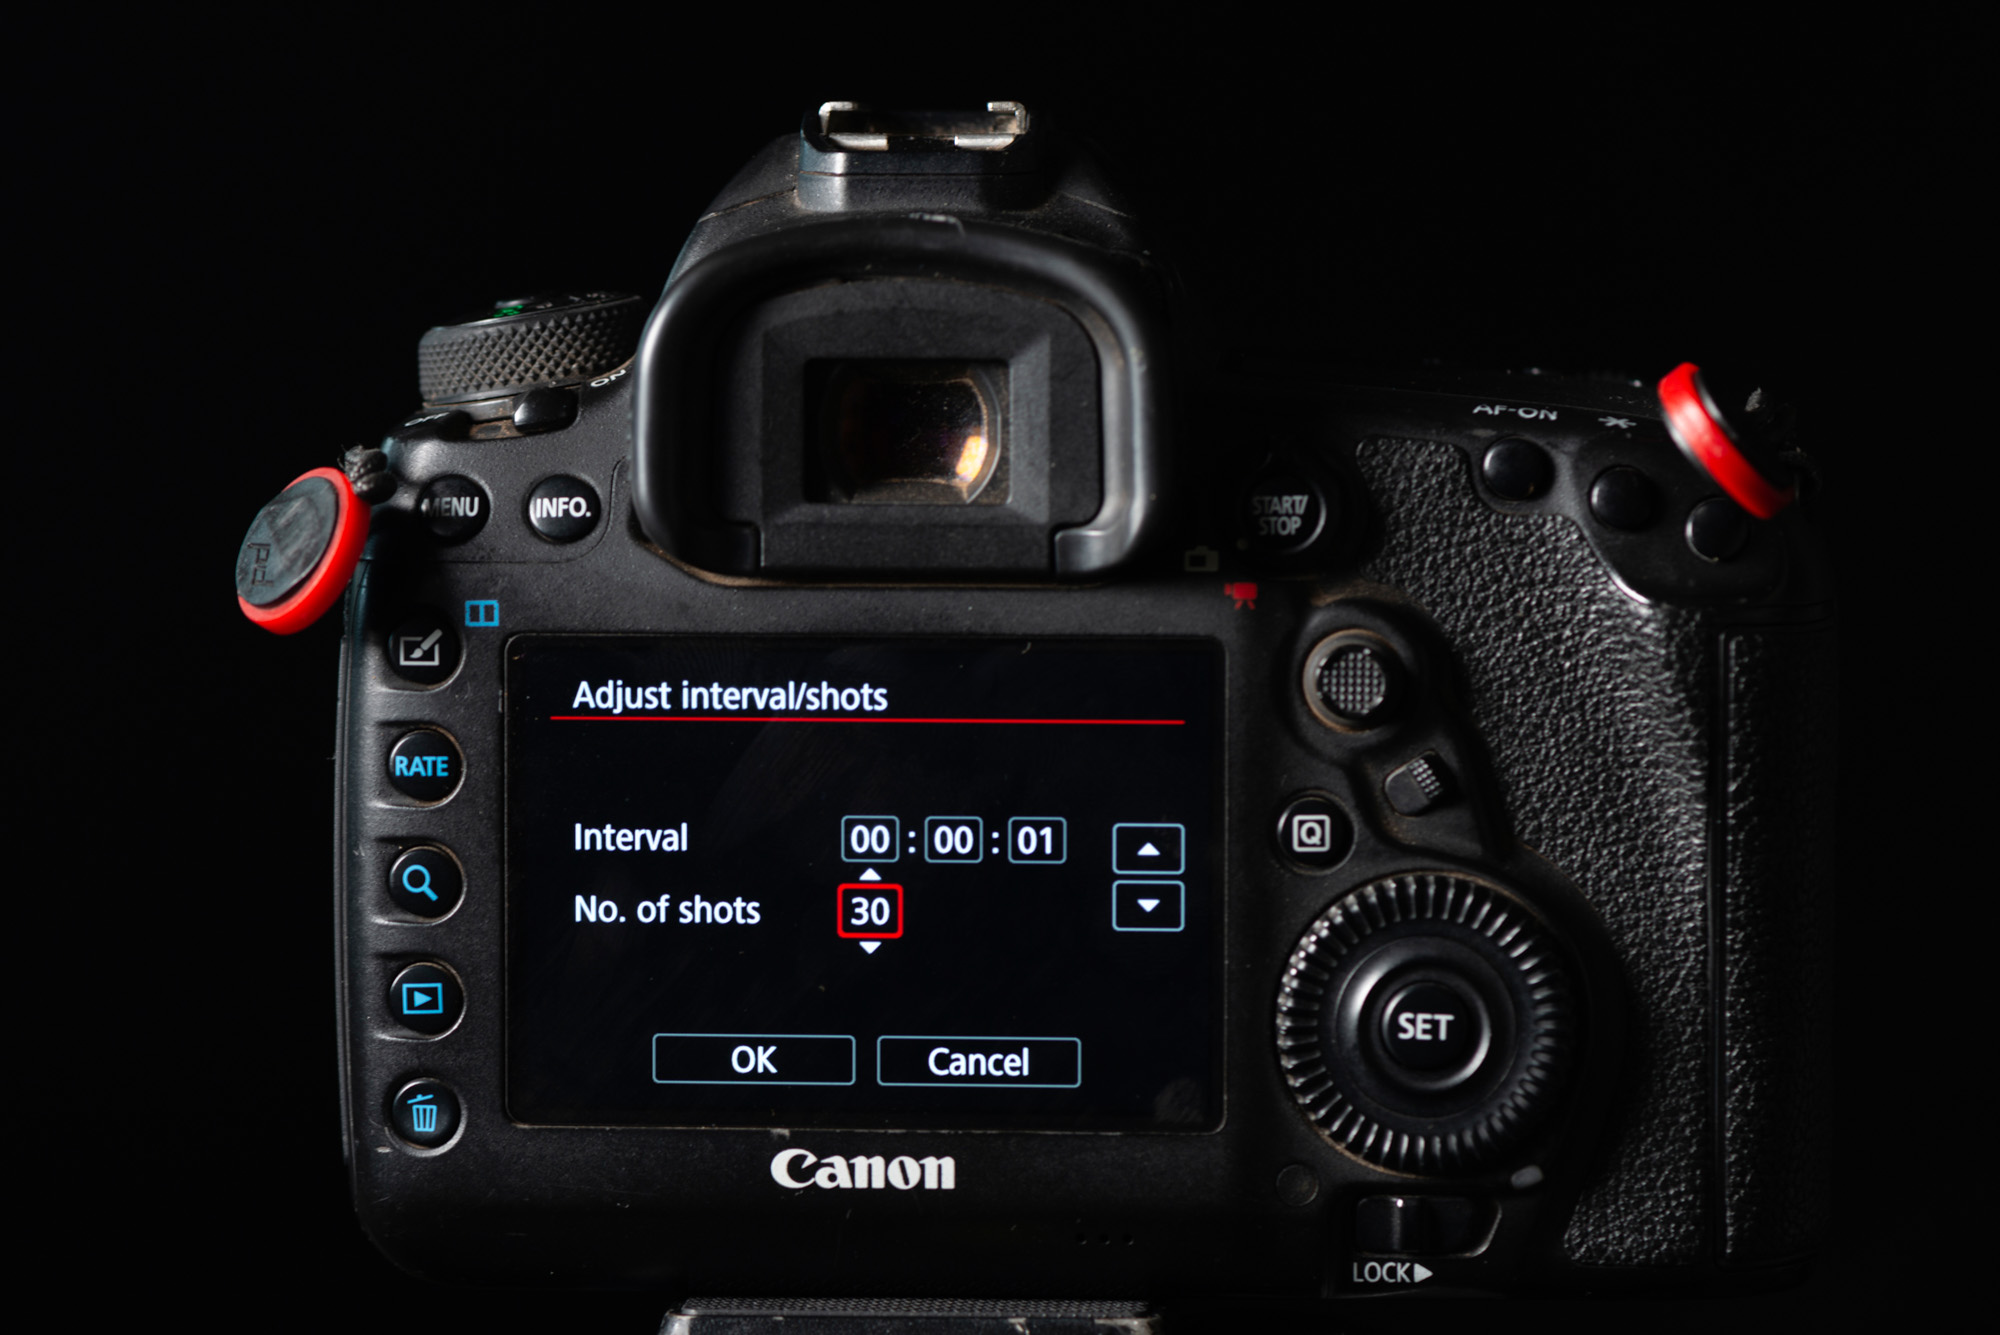
If you’re shooting solo, you won’t want to constantly go back and forth to the camera. Better to set the camera firing exposures at intervals so that you can continue shooting for a few minutes while you concentrate on the light painting. Use the interval timer feature on your camera to shoot continuously.
3. Exposure settings
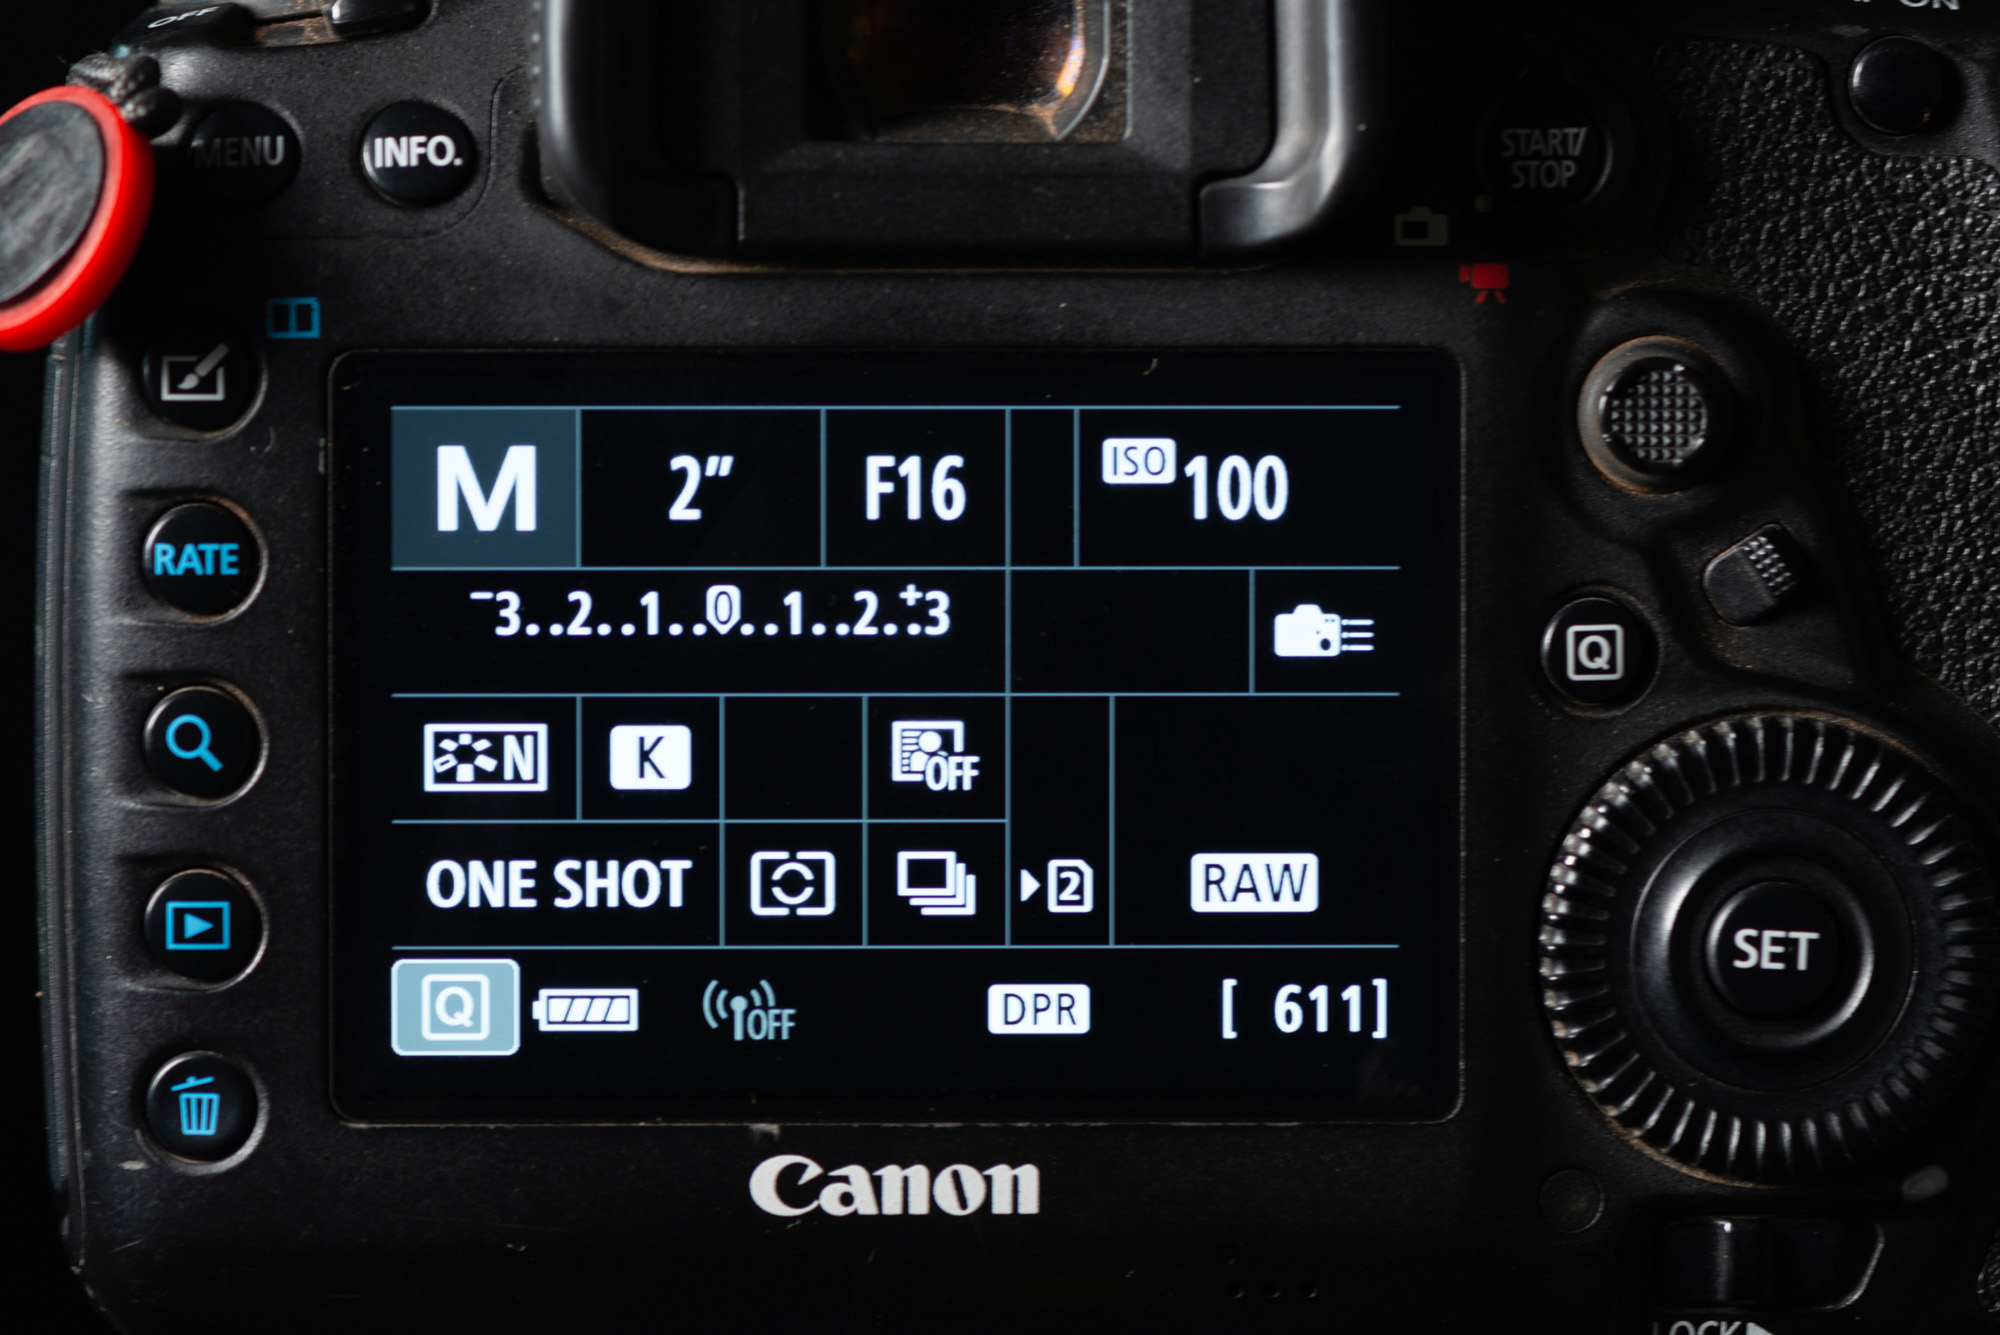
An exposure length of 2 or 3 seconds is ideal; we set our camera to Manual mode with ISO100, aperture at f/16 and shutter speed of 2 seconds, then took a test shot and tweaked the ISO if necessary. The narrow aperture helps to ensure there’s plenty of depth of field, so it won’t matter if the focus is slightly off.
4. Capture fading light
The scene will be more atmospheric if you can capture the fading daylight in the background, or perhaps the last colors of a vibrant sunset. So try to time it so that the last glimmers of twilight play a part. Here we waited 20 minutes after sunset, but if it’s a clear sky you might want to try a bit later.
5. Keep moving
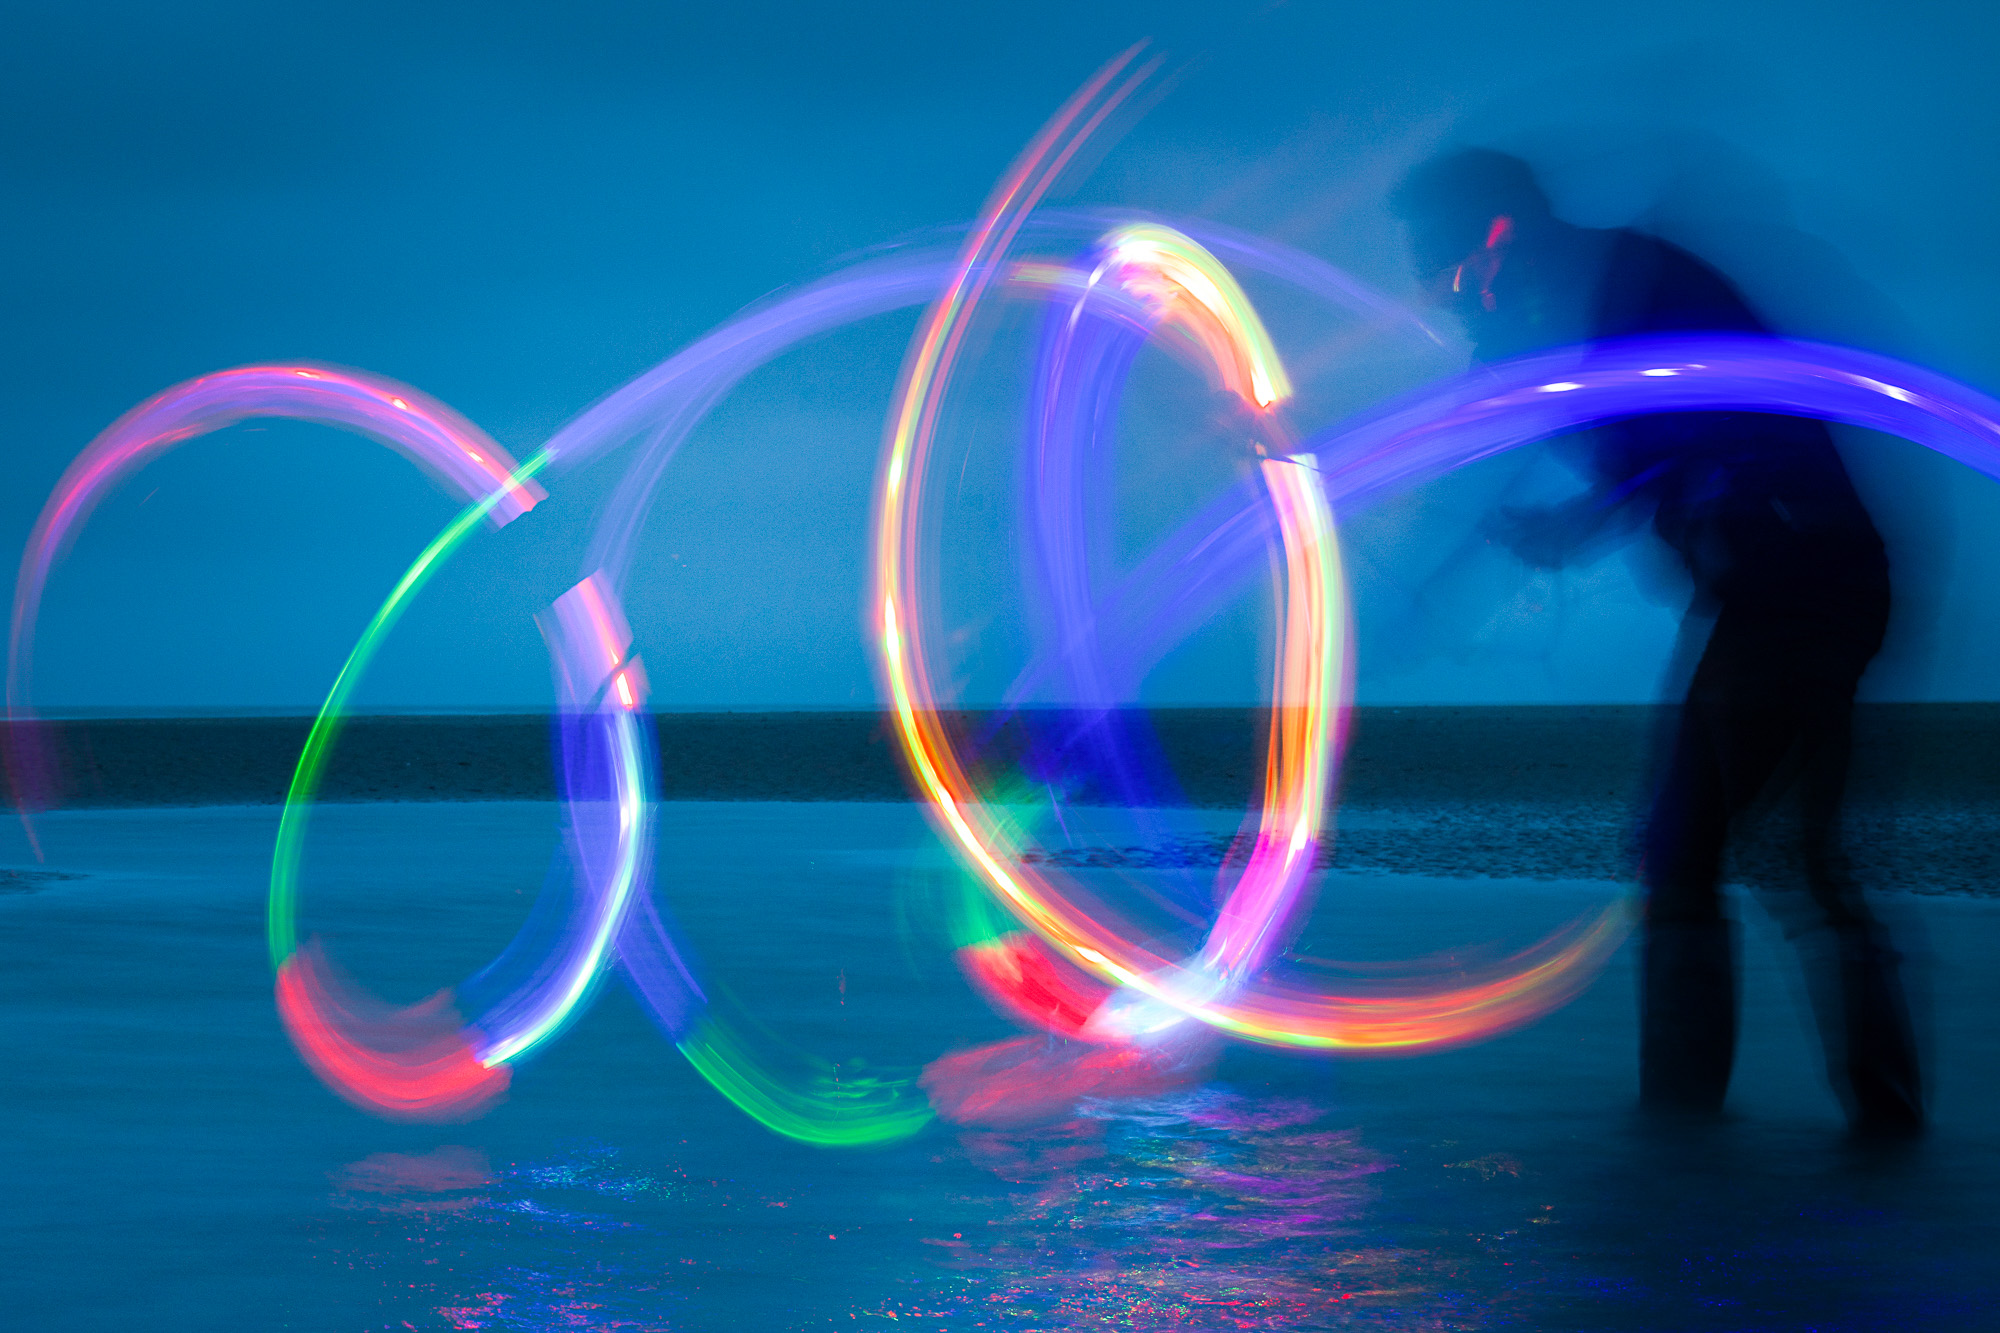
Moving from side to side can help to make you invisible in the shot. If you get your body between the torch and the camera then there will be abrupt gaps in the painting, as shown here. Shoot an empty frame and use it as a base for the effect.
6. Make a splash
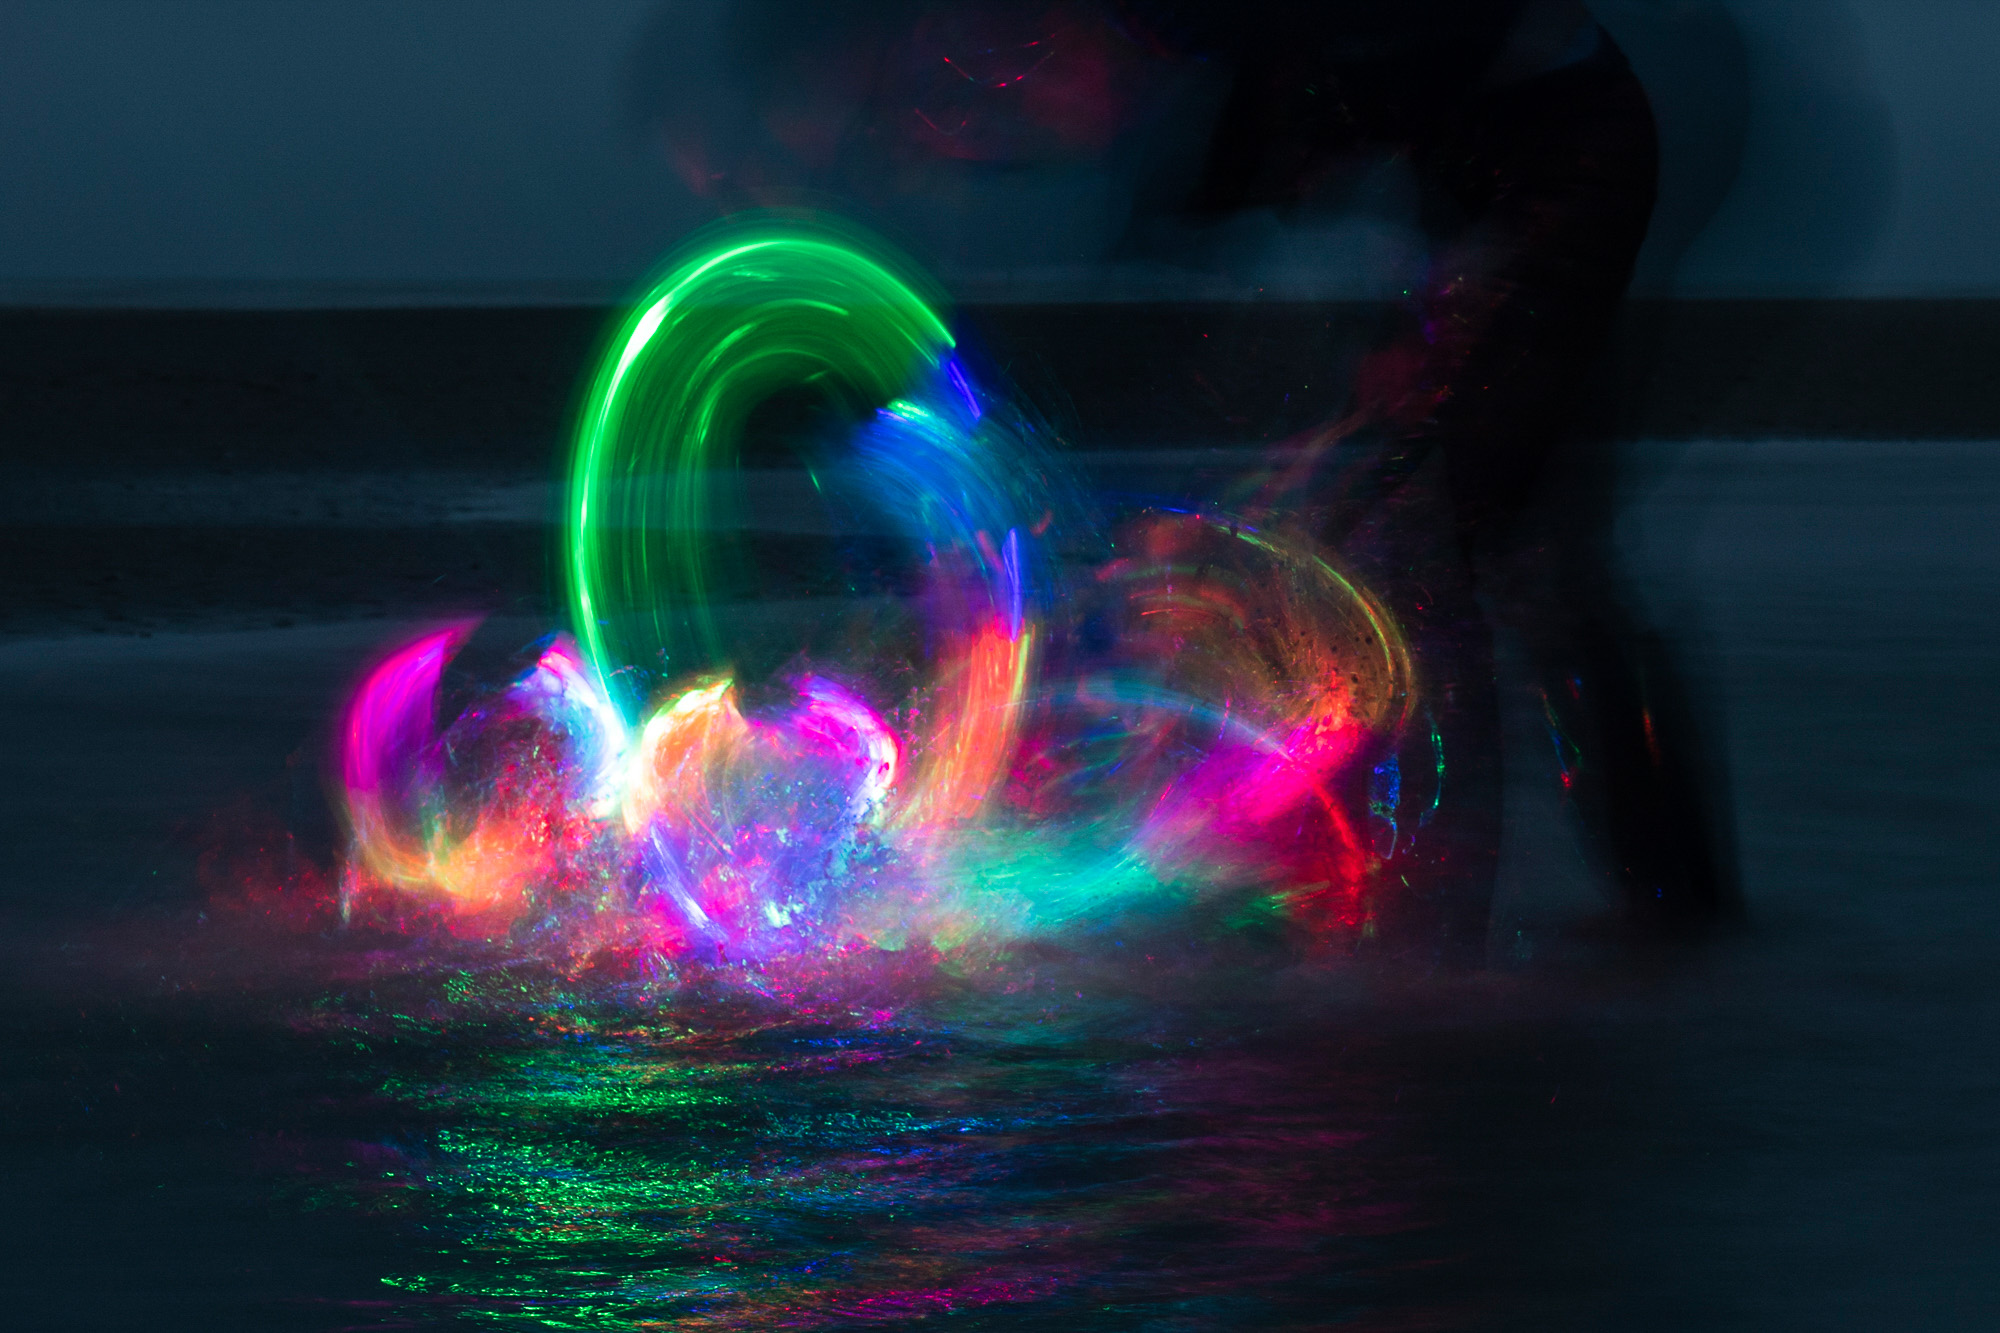
Splashing the torch into the water will create attractive sprays and splashes of colour that help to add to the vibrant effect. If you have a shape in mind – like our water lily shape we created – then try to mimic the outline of it with your light painting ‘strokes’.
7. Position the shape
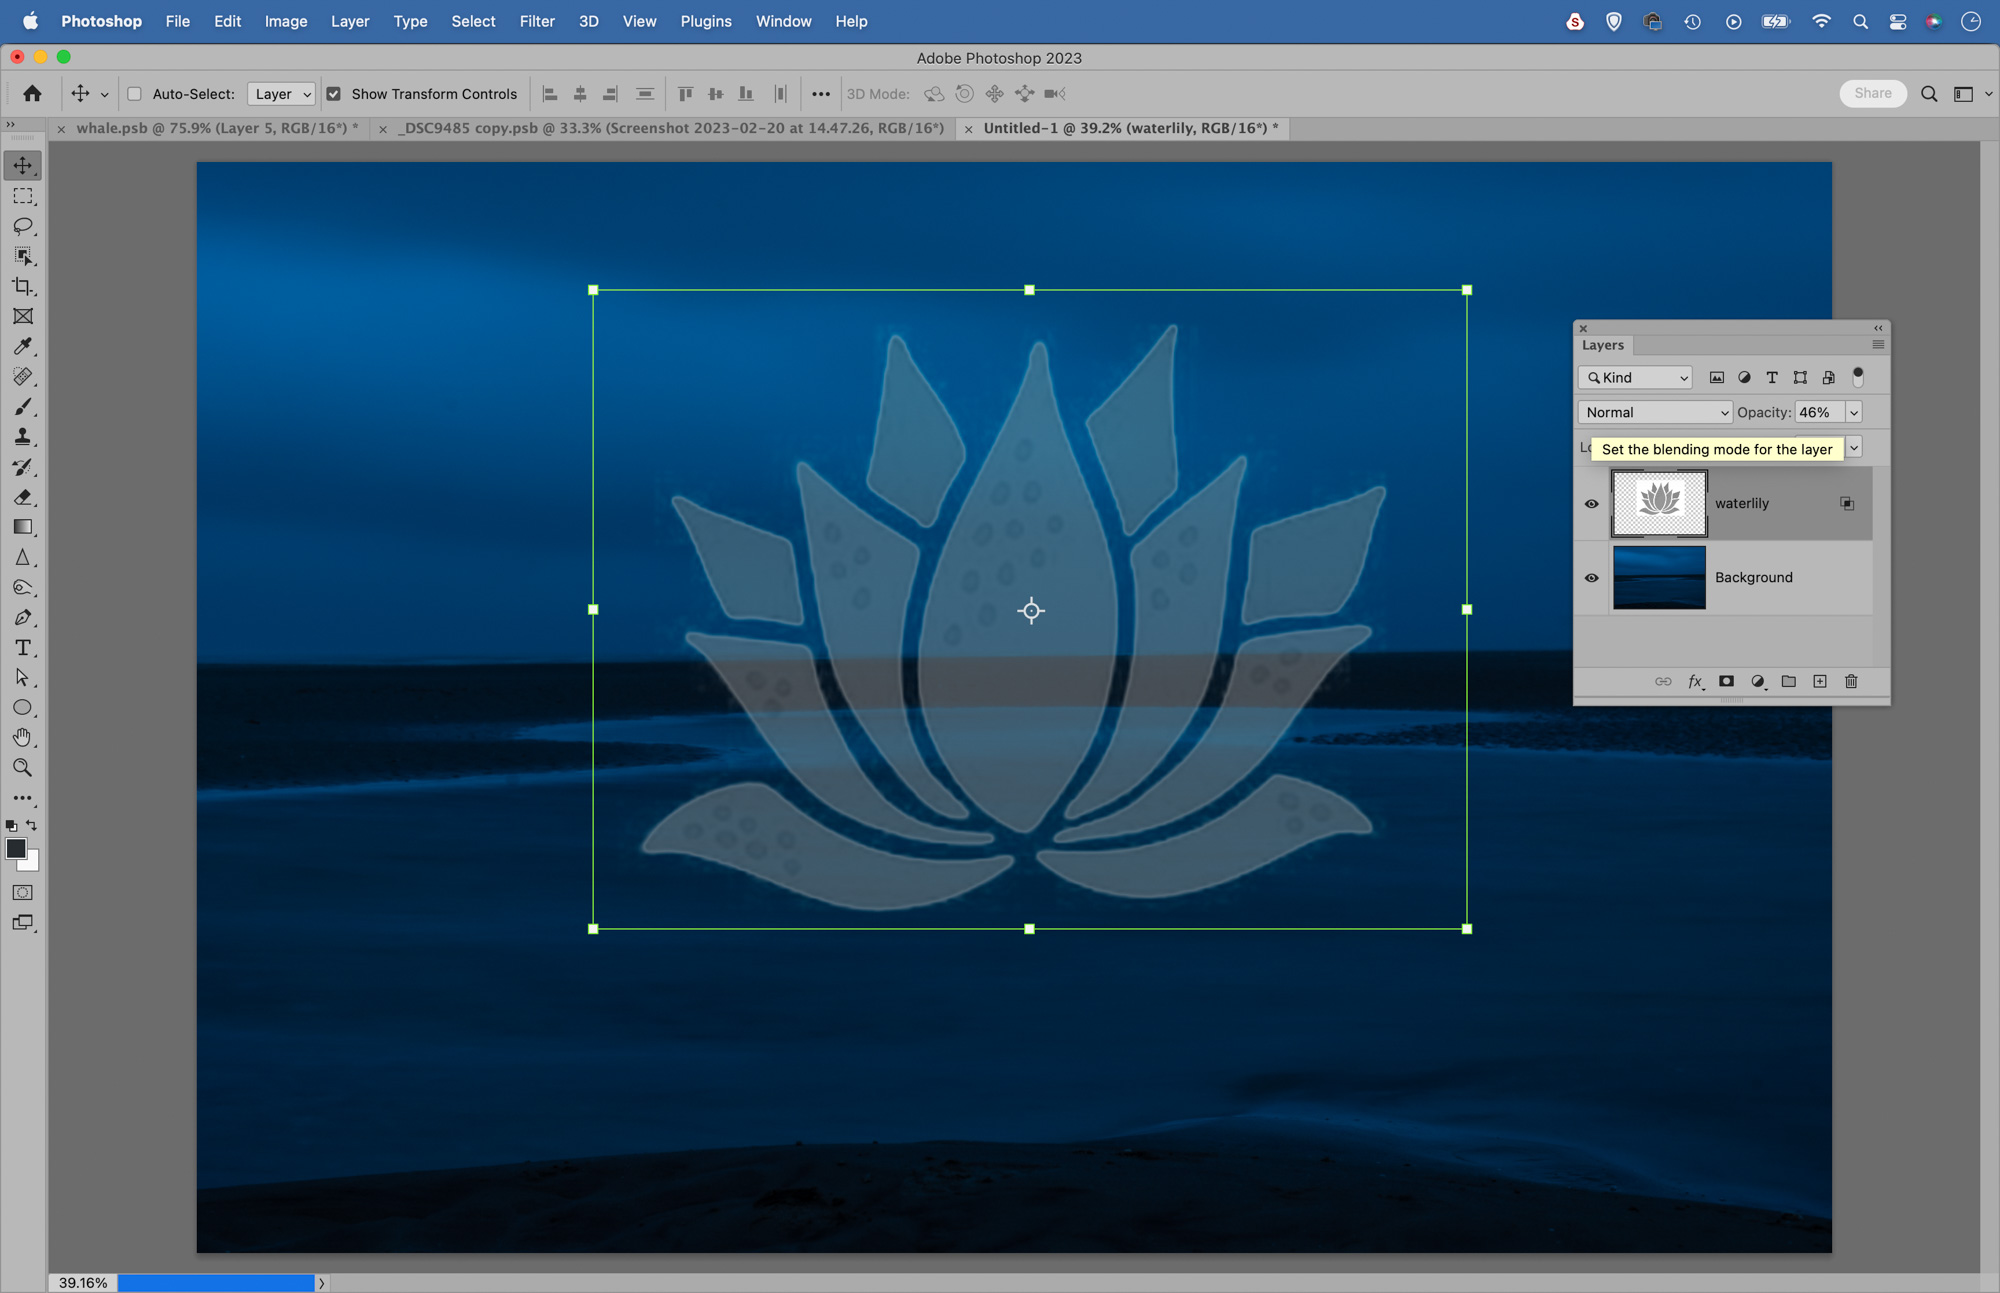
Open a frame of the empty scene. Next open an image of the shape you want to use – we chose a water lily. Grab the Move tool and drag the shape into the scene to copy it over. Hit Cmd/Ctrl+T to transform, then resize and position the shape. Go to the Layers Panel and reduce the opacity.
8. Choose a painting
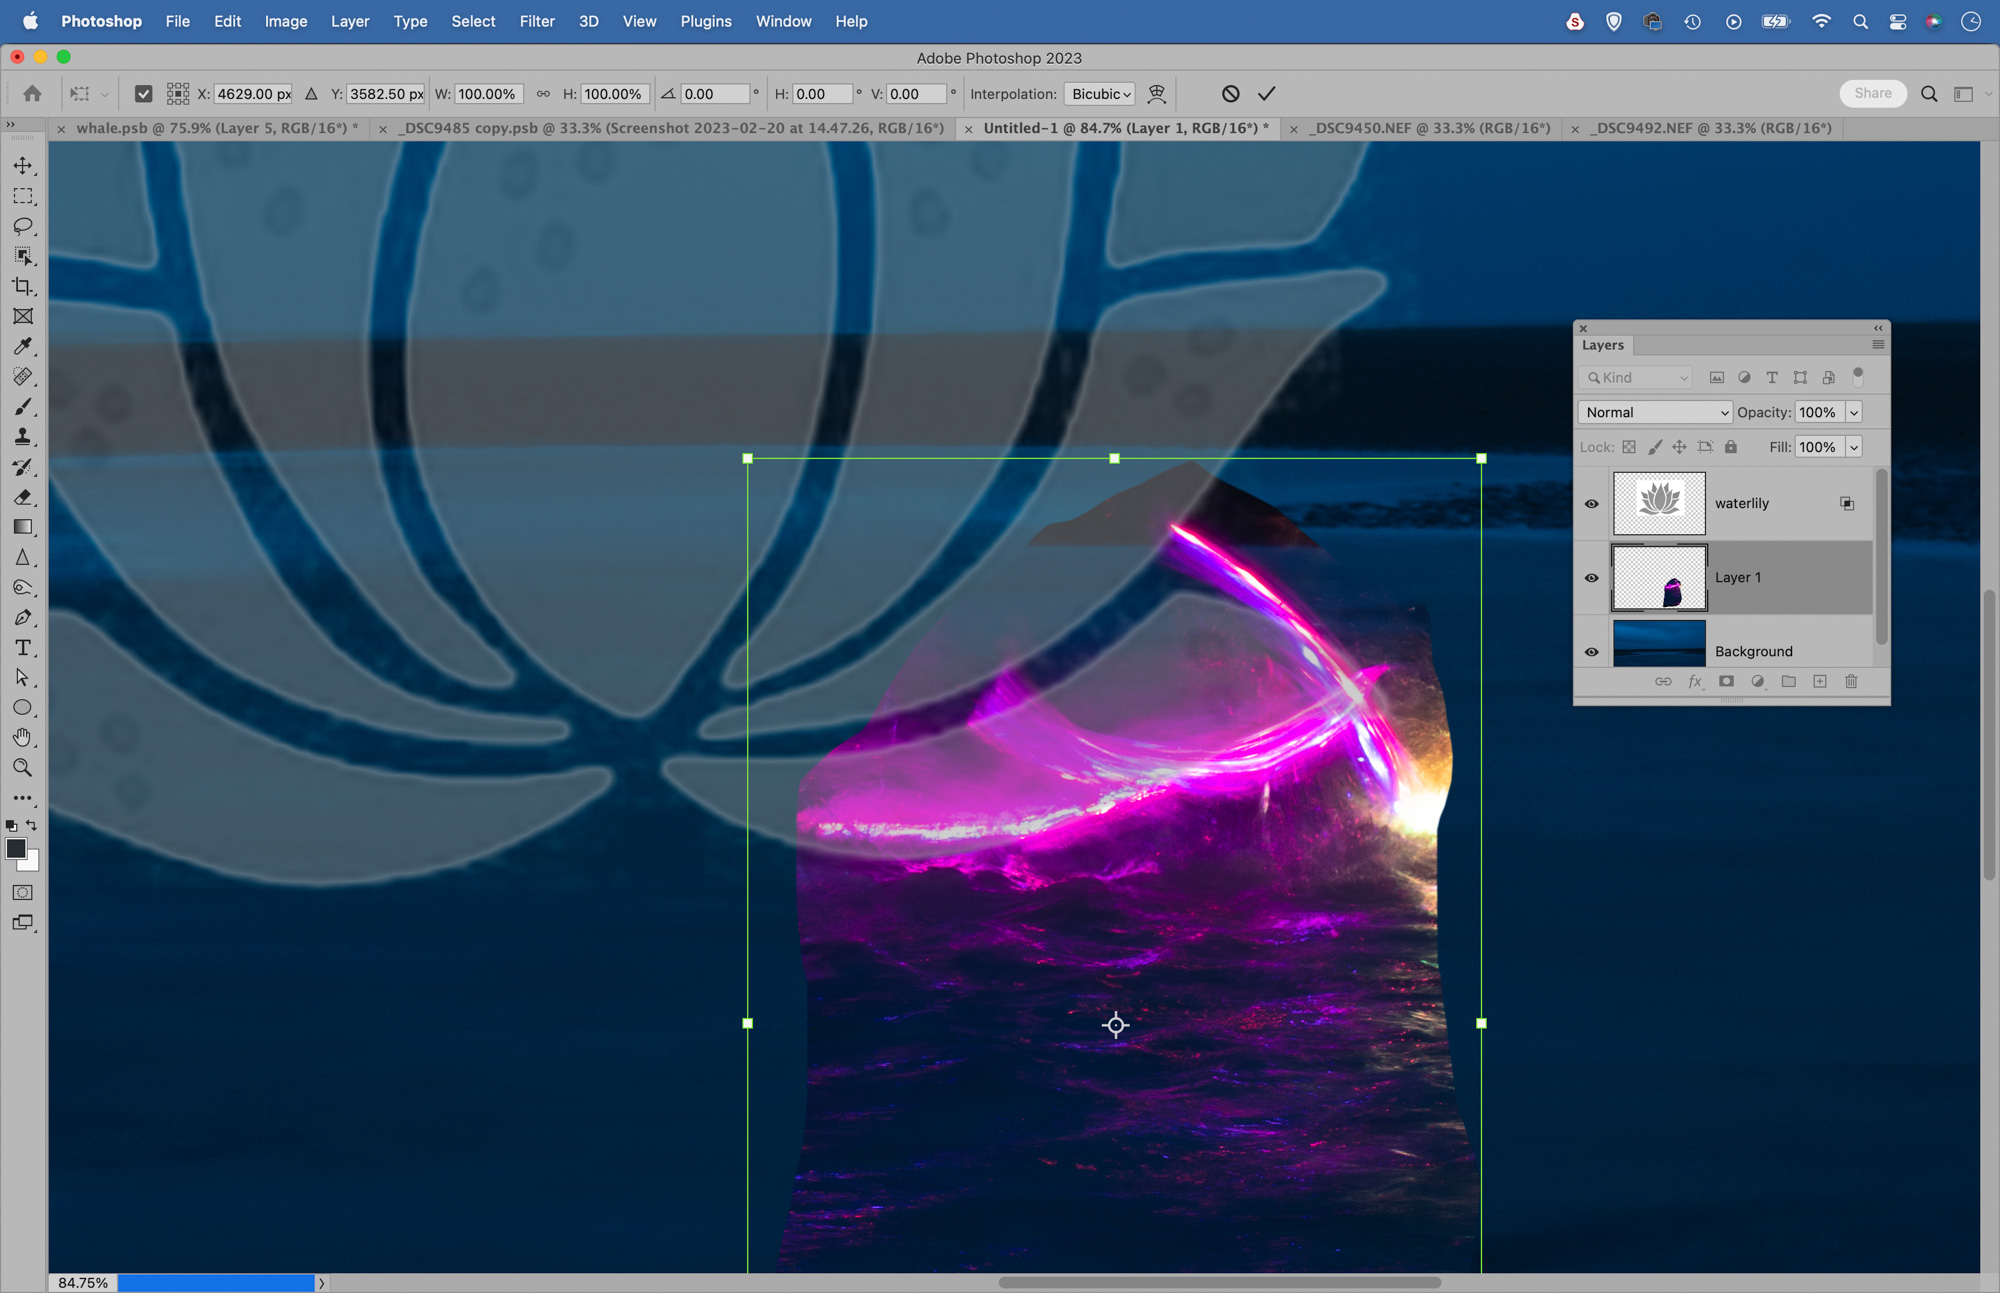
Find a suitable flowing line in your set of images that roughly mimics part of the shape. Make a rough selection of it with the Lasso tool then copy (Cmd/Ctrl+C) and Paste (Cmd/Ctrl+V) it into the empty image. Grab the Move tool and position it roughly in place.
9. Warp the painting
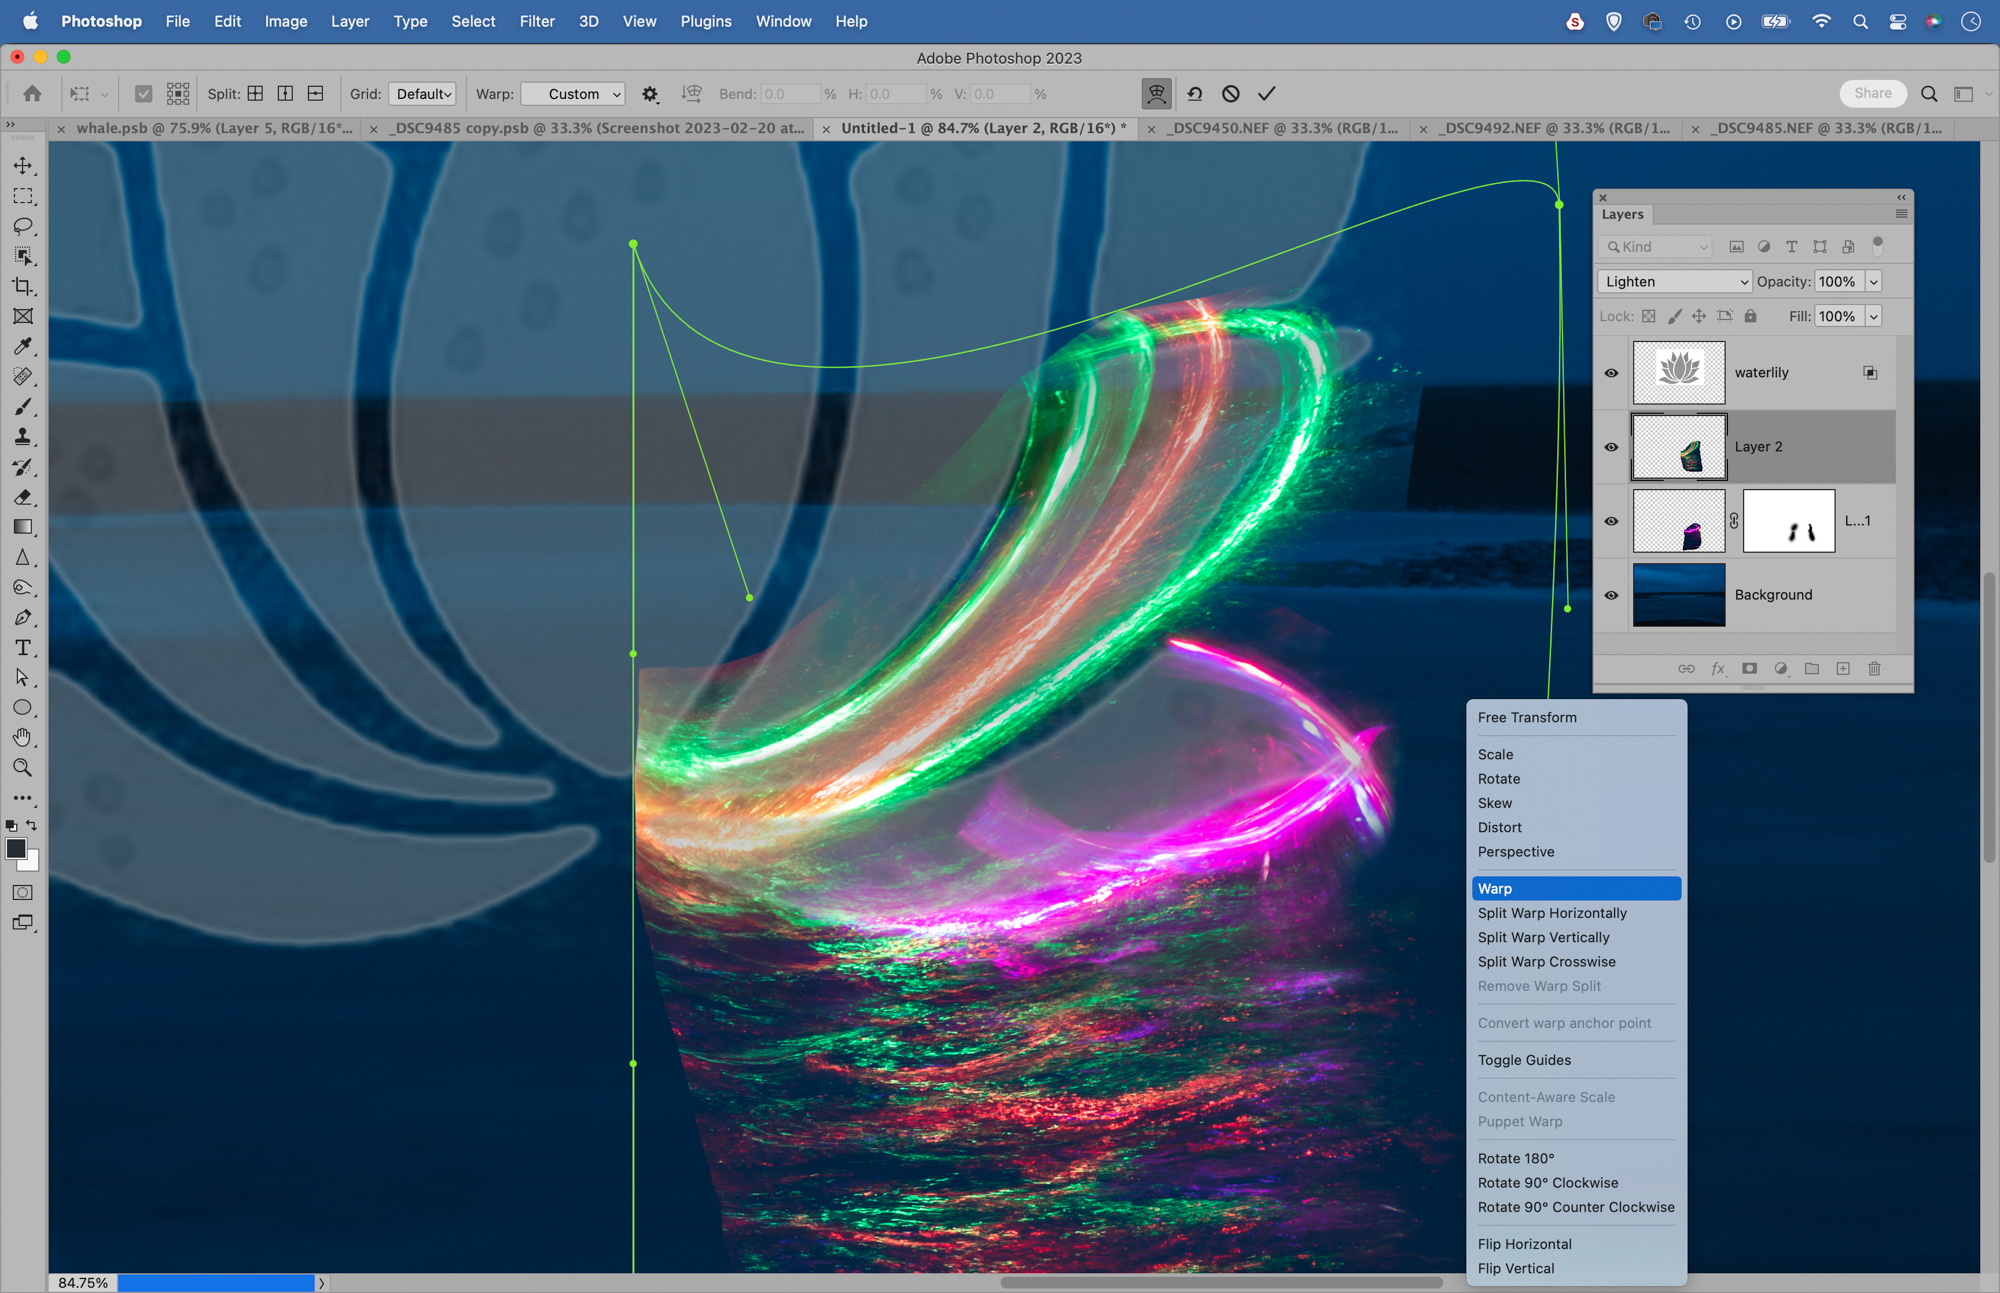
Set the layer blend mode to Lighten. Hit Cmd/Ctrl+T to transform then right-click and choose Warp. Drag the layer to match the shape. Next add a layer mask and paint with a black brush to hide any parts you don’t want. Add more lines in the same way to build up the shape.
10. Reshape the layers in Photoshop
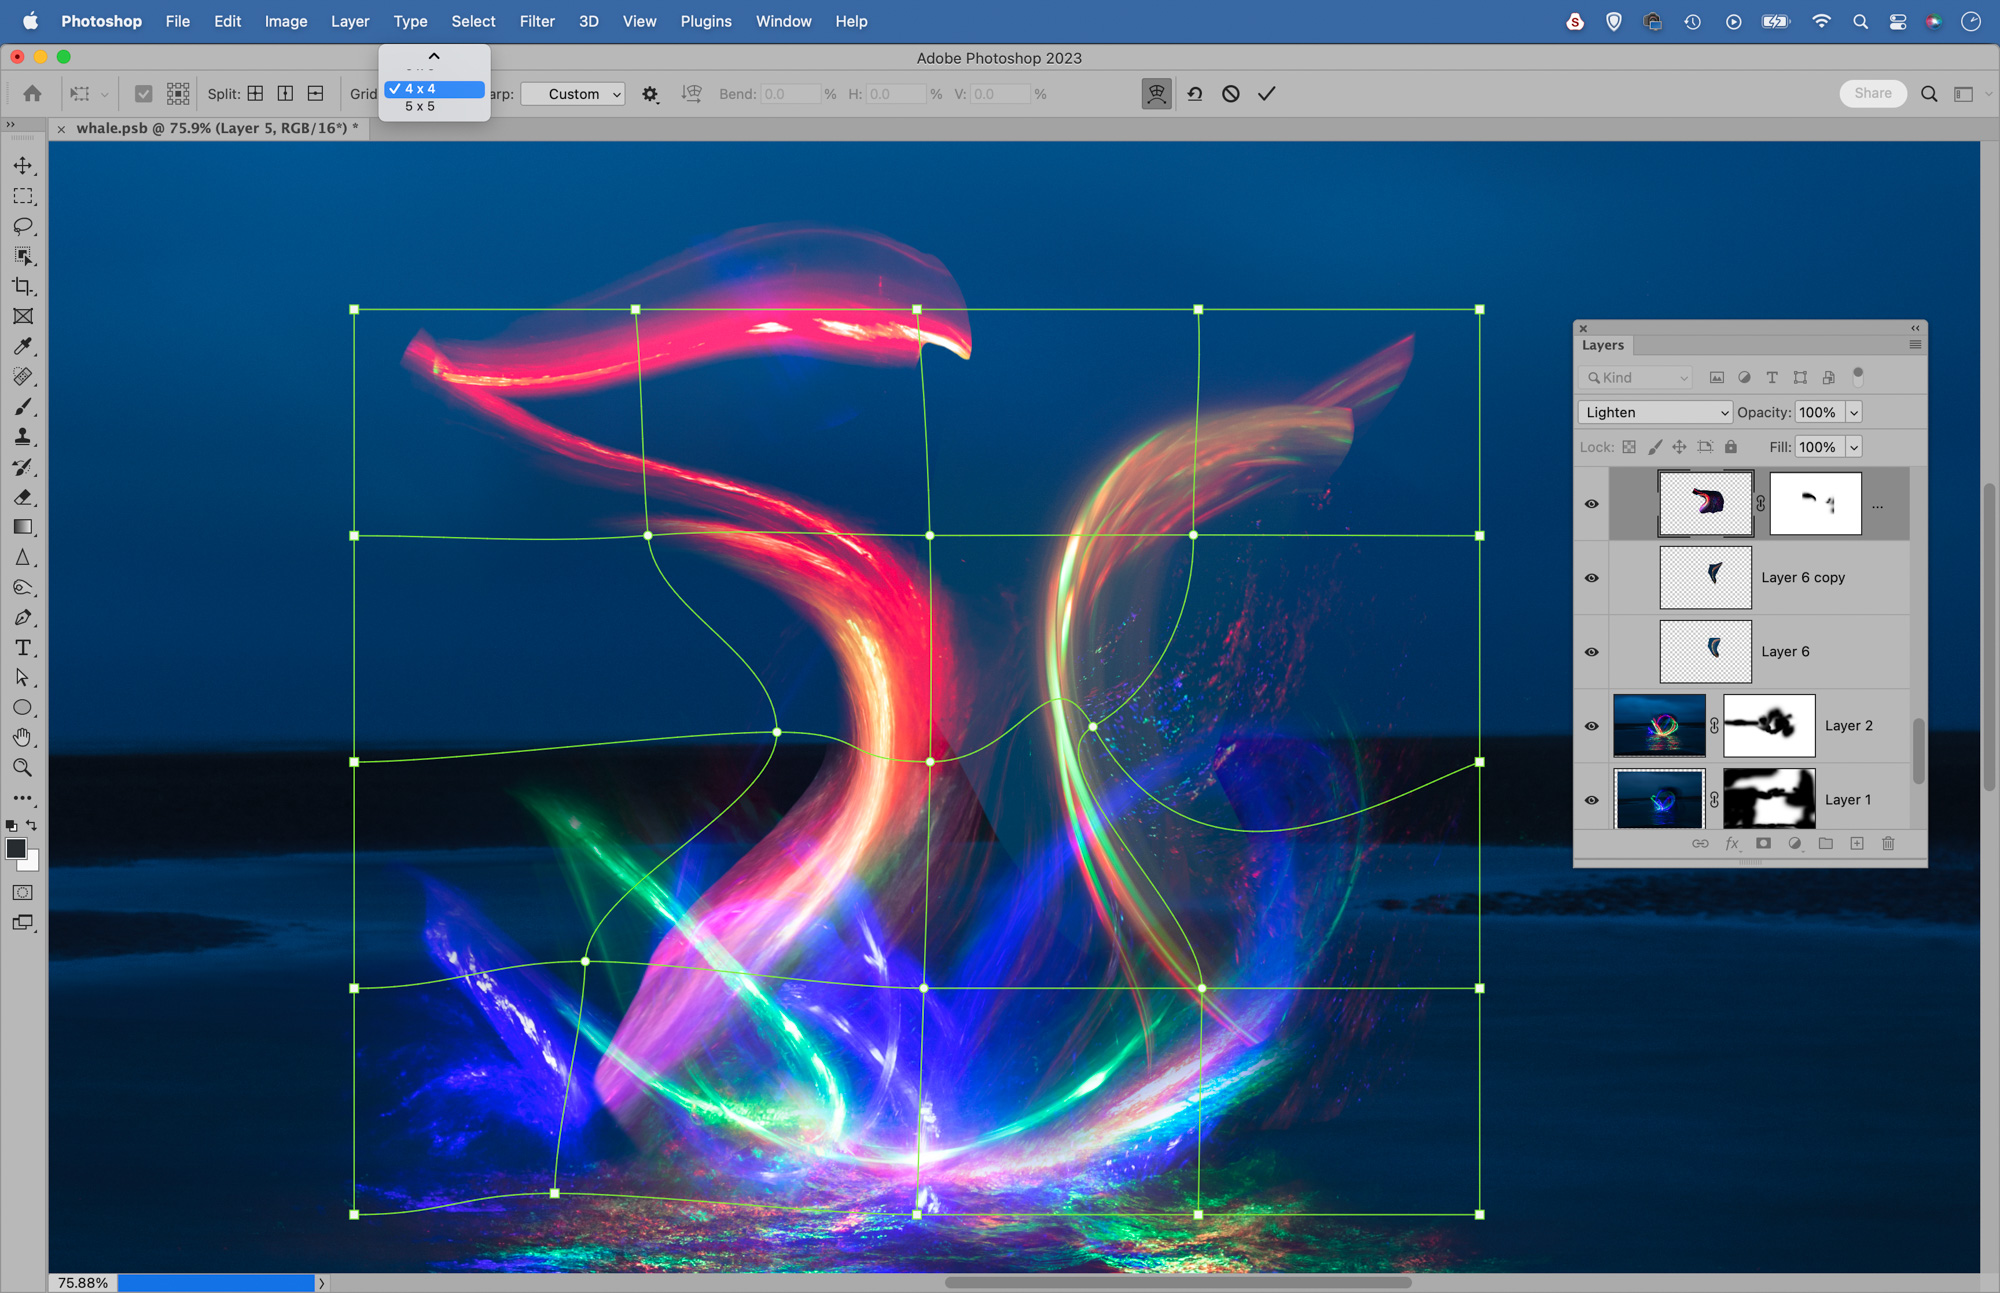
The Warp command in Photoshop is fantastic for reshaping layers. To initiate it, either go to Edit > Transform > Warp or instead right-click while transforming a layer to access the Warp feature. There are a few crucial controls. First, the grid at the top left lets you set how many segments your warp box has. The more segments, the tighter the changes you can make.
As well as choosing from a standard grid like 3x3, you can also Cmd/Ctrl+click to add your own anchor points anywhere on the layer. Then you can either drag a single point, or hold Shift and drag a box to highlight several anchor points then move them all at once. If you’re after more pixel-pushing controls, head to the Liquify command (Filter>Liquify) for a range of powerful options.
PhotoPlus: The Canon Magazine is the world's only monthly newsstand title that's 100% devoted to Canon, so you can be sure the magazine is completely relevant to your system.
These are the best cameras for portraits and the best portrait photography tips. You might also like the best photo editing software and the best photo-editing laptops.
The lead technique writer on Digital Camera Magazine, PhotoPlus: The Canon Magazine and N-Photo: The Nikon Magazine, James is a fantastic general practice photographer with an enviable array of skills across every genre of photography.
Whether it's flash photography techniques like stroboscopic portraits, astrophotography projects like photographing the Northern Lights, or turning sound into art by making paint dance on a set of speakers, James' tutorials and projects are as creative as they are enjoyable.
He's also a wizard at the dark arts of Photoshop, Lightroom and Affinity Photo, and is capable of some genuine black magic in the digital darkroom, making him one of the leading authorities on photo editing software and techniques.
