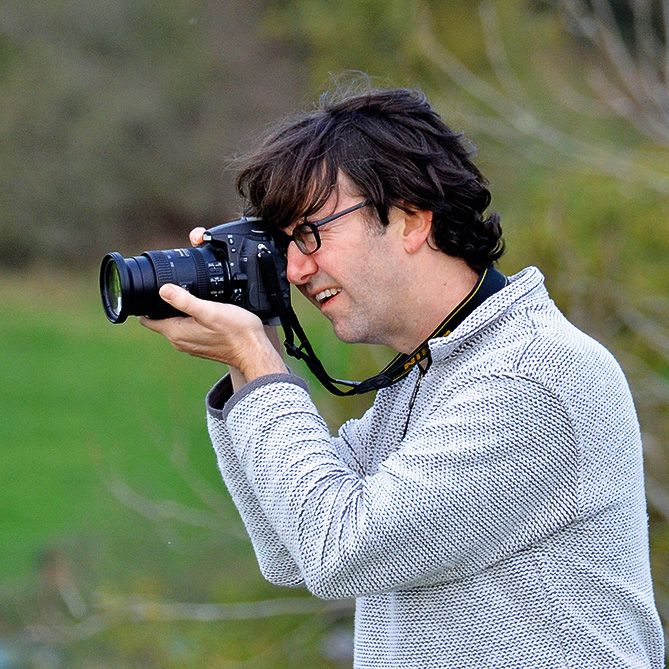
Perfect the strobist look with off-camera flash photography
Off-camera flash is one of the easiest ways to get amazing portraits, as Chris Rutter demonstrates
Watch the video: perfect the strobist look with off-camera flash photography
If your only experience of using flash is the disappointing result you got with it fitted to the camera’s hotshoe, you’ll be amazed at how you can transform your photos by simply taking your flash off-camera.
With a few simple photography tips you can create a range of lighting effects, from using flash to fill in the harsh shadows you get in bright sunlight, to the much more dramatic results of underexposing the background and employing the flash as your main light source.
This second effect has become popular among a group of photographers known as strobists. They practise the art of off-camera flash and have a vibrant and enthusiastic online community, largely thanks to a blog by American photographer David Hobby.
His no-nonsense explanations helped demystify the techniques and technology needed to master this once ‘secret’ art. Here, we show how you can get the strobist look using automatic TTL exposure metering with wireless-compatible flashguns for your system.
01 Prepare the built-in flash
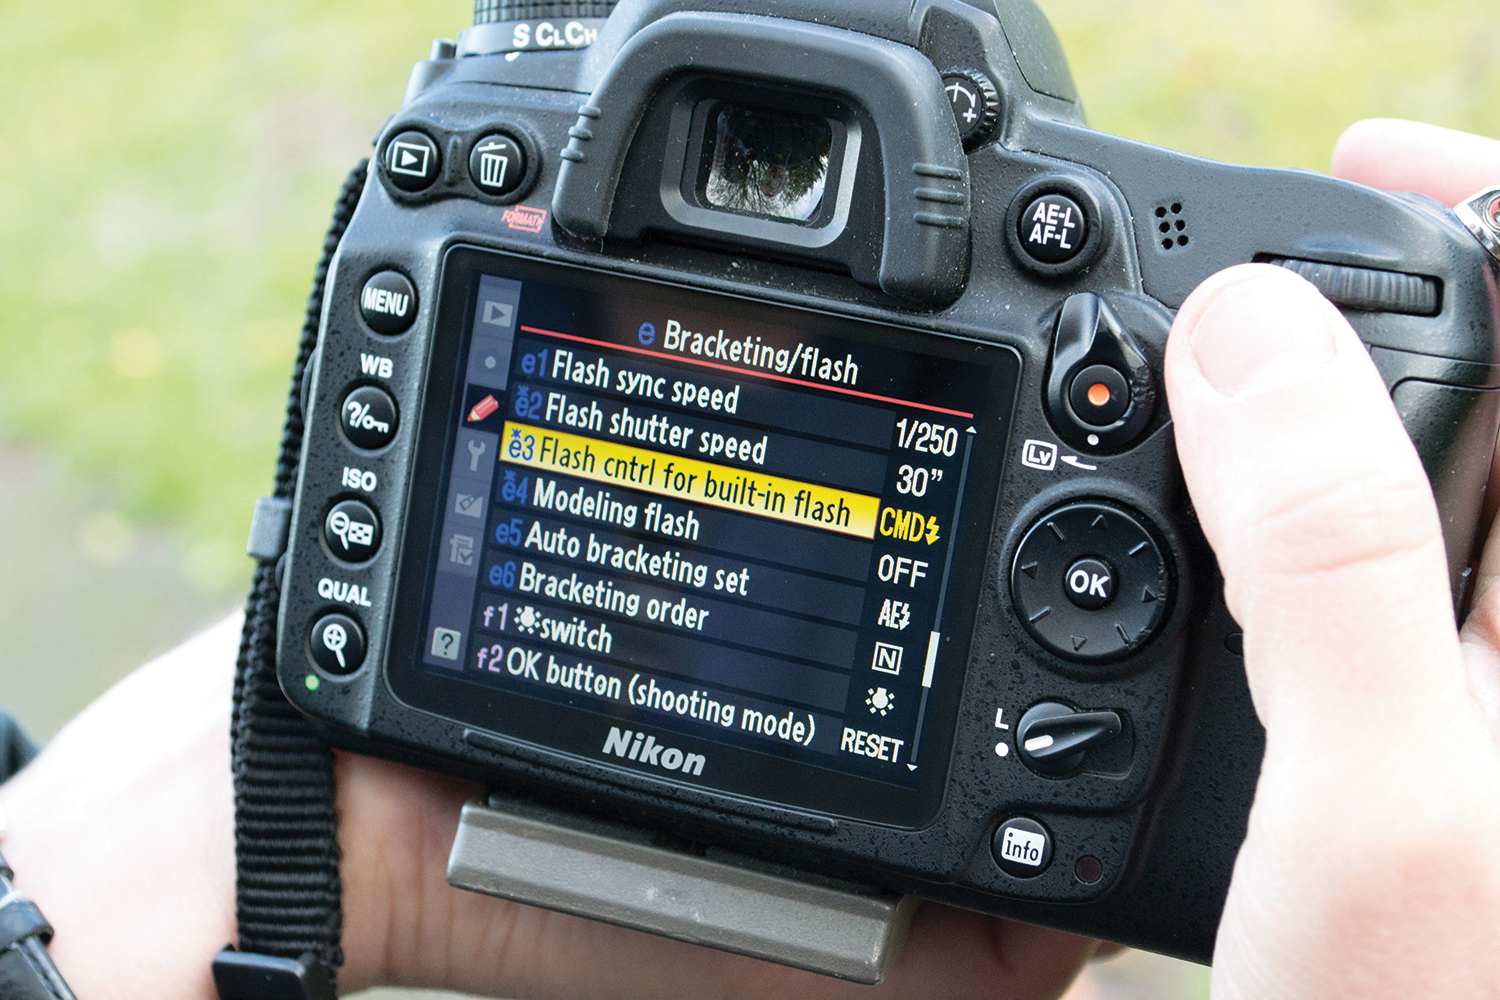
When setting up your camera to command the wireless flash system, you need to turn off any built-in flash. The exact menu will differ depending on your camera, but on our Nikon body we're going to the Bracketing/flash section of the Custom Shooting menu, entering the Commander section, then changing the built-in flash setting to Off (--).
02 Set the group and channel
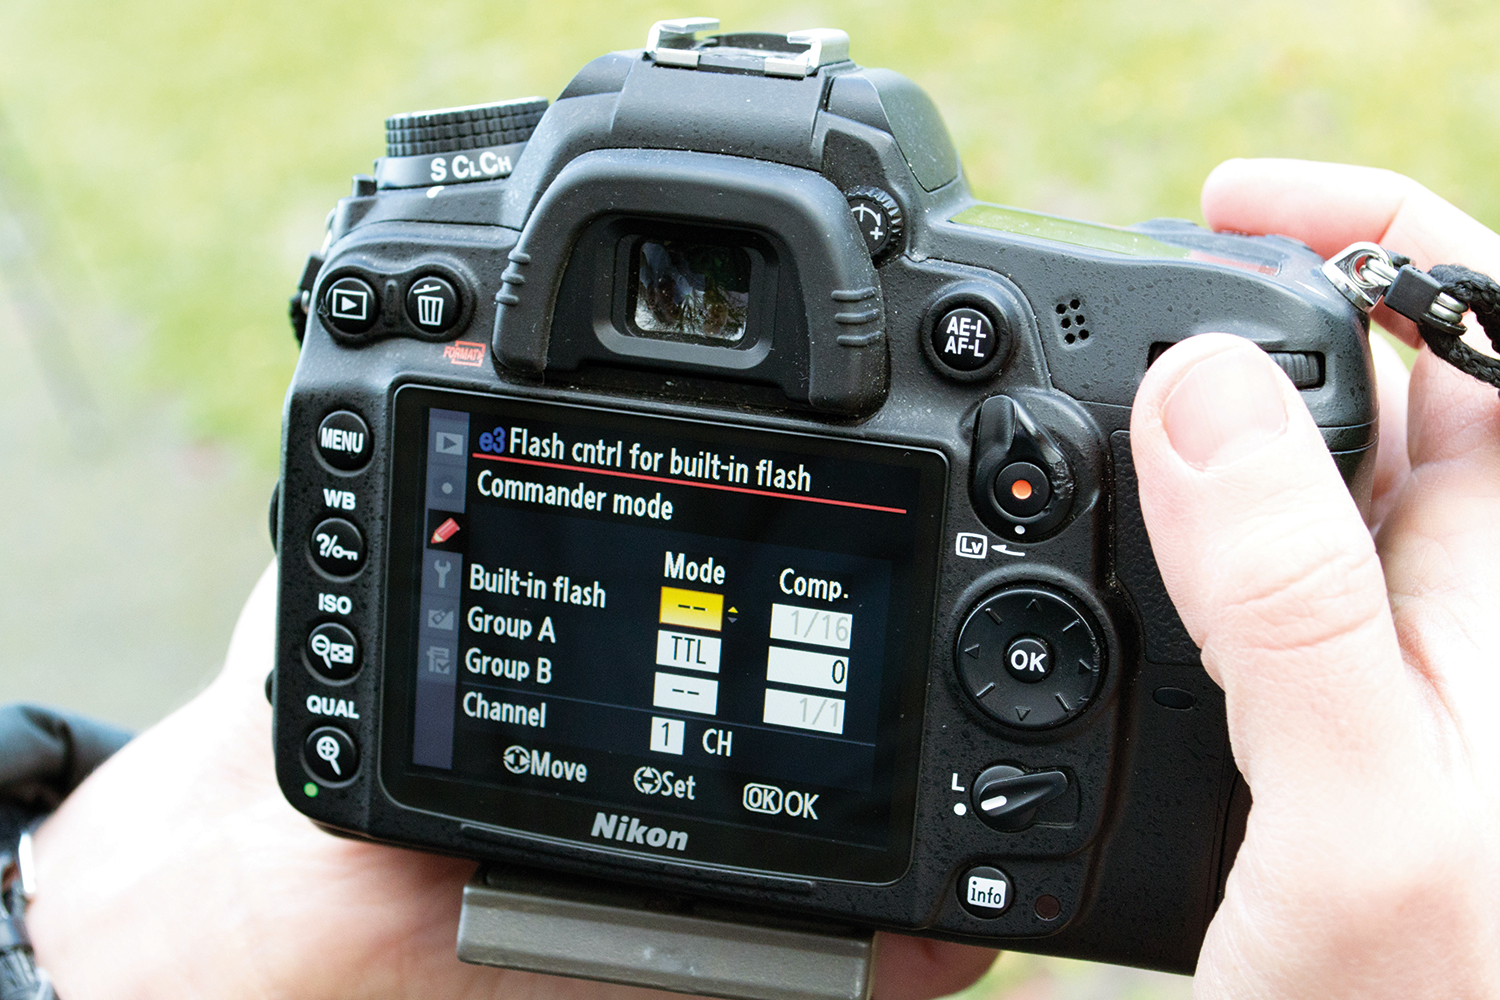
You now need to select the settings that will control the off-camera flash. Scroll down to the Group A settings and select TTL. Here you can also change the channel that controls the external flash. In this case, it’s Channel 1.
03 Set up the flashgun
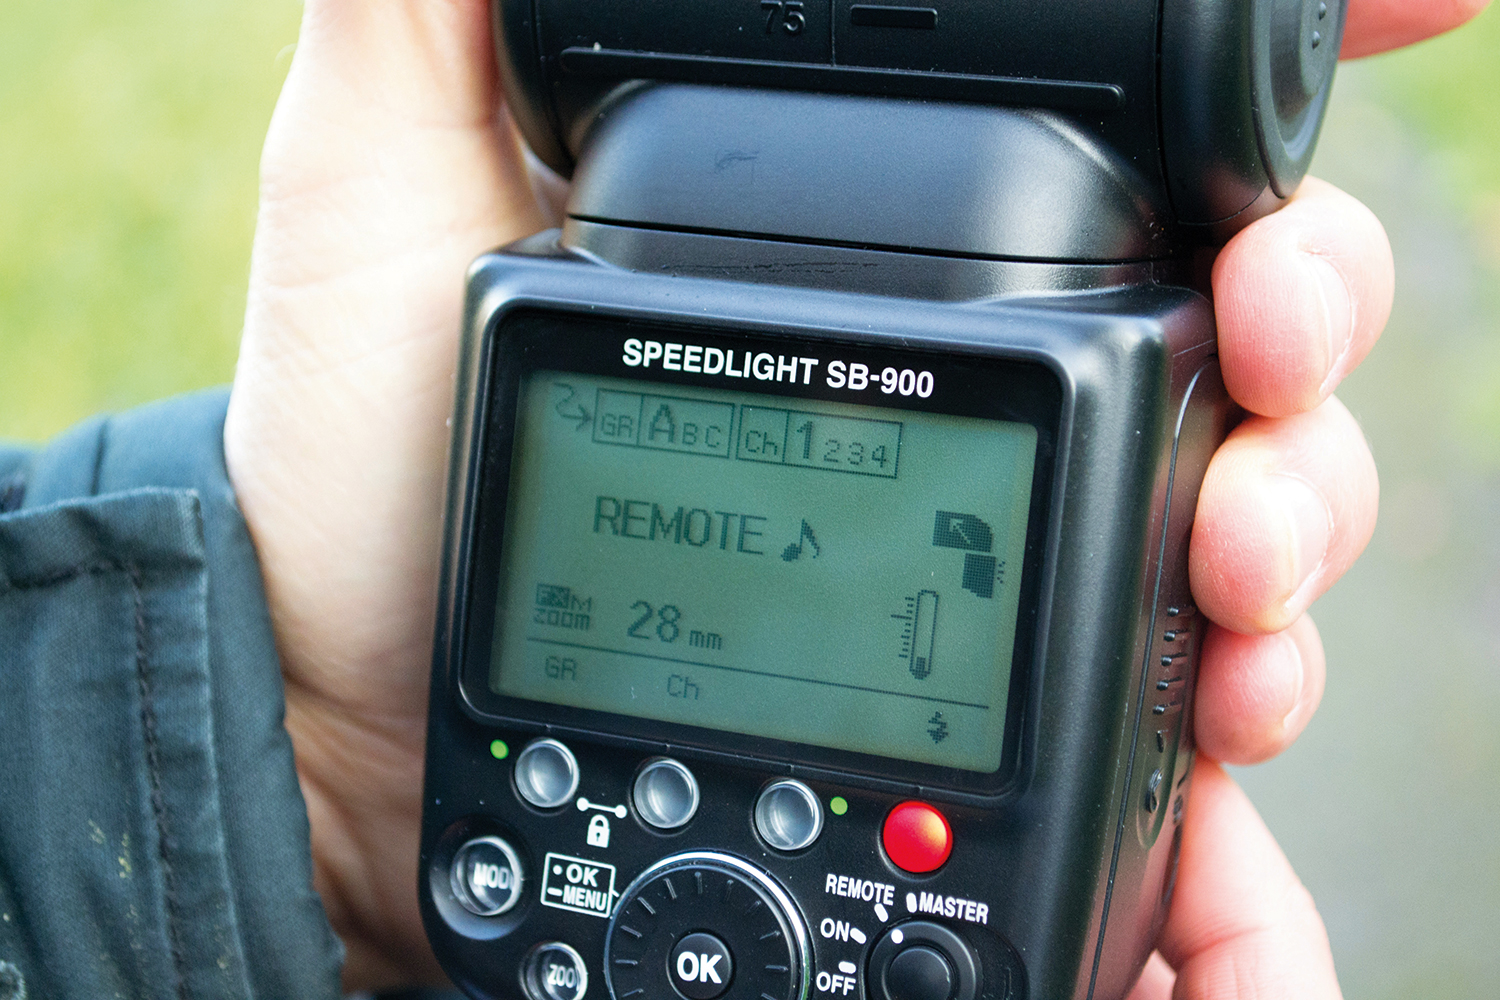
On your wireless flashgun, make sure it's set to Remote. Now select the same group and channel settings that you used on the camera, in this case making sure that the Group is set to A and the Channel is set to 1.
04 Position and soften the flash
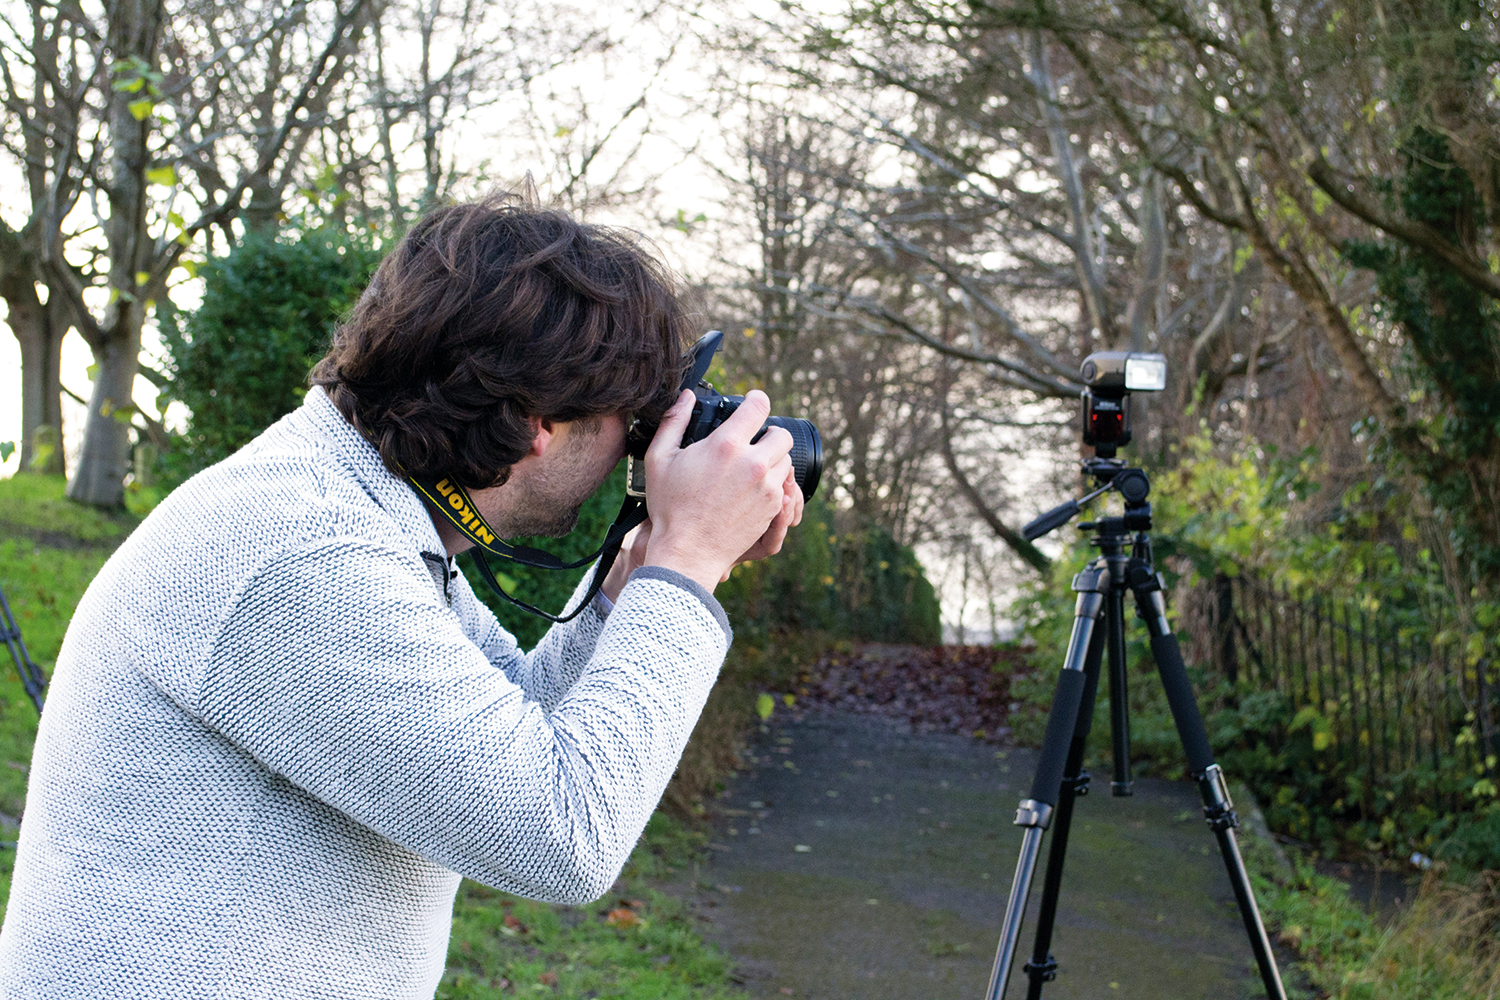
Now that the basic off-camera settings are done, you can position the flash either on a lighting stand or a normal tripod. For our shot, we’re going to place the flash to the left and slightly above the subject to create dramatic side-lighting, making sure that the flash is just out of frame.
05 Underexpose the background
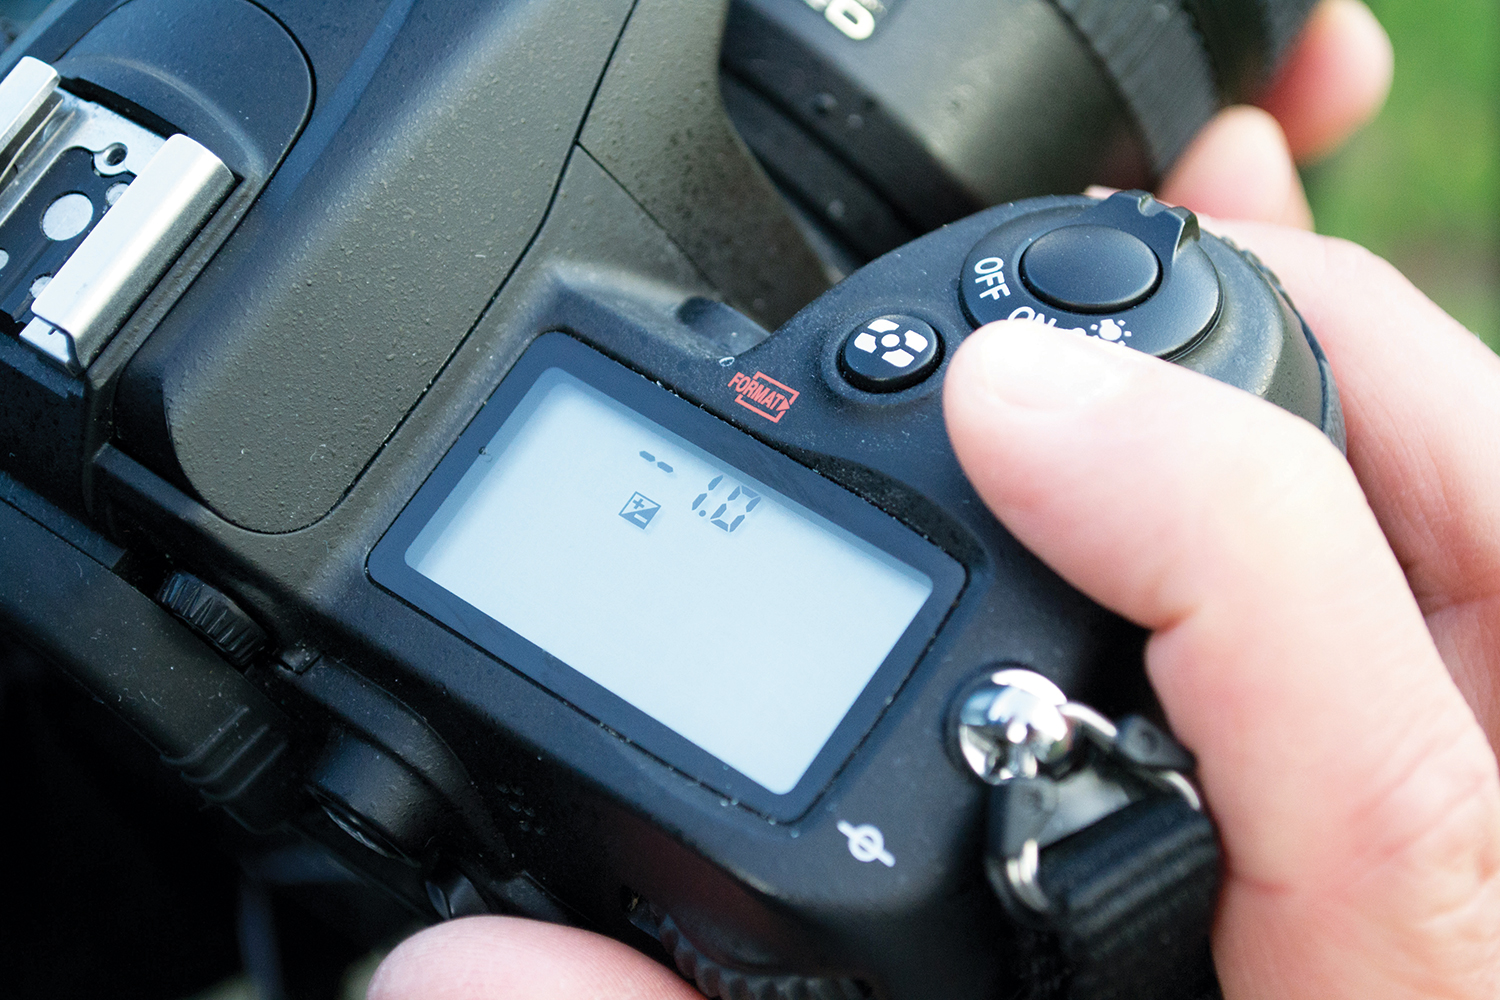
With the camera set to f/8 on Aperture Priority mode, take a test shot – if you're not using radio triggers, the wireless system will need a direct line of sight between the front of the flash and the camera. To give our shot more impact, we’ll underexpose the background by setting the exposure compensation to -1 stop.
06 Adjust the flash exposure
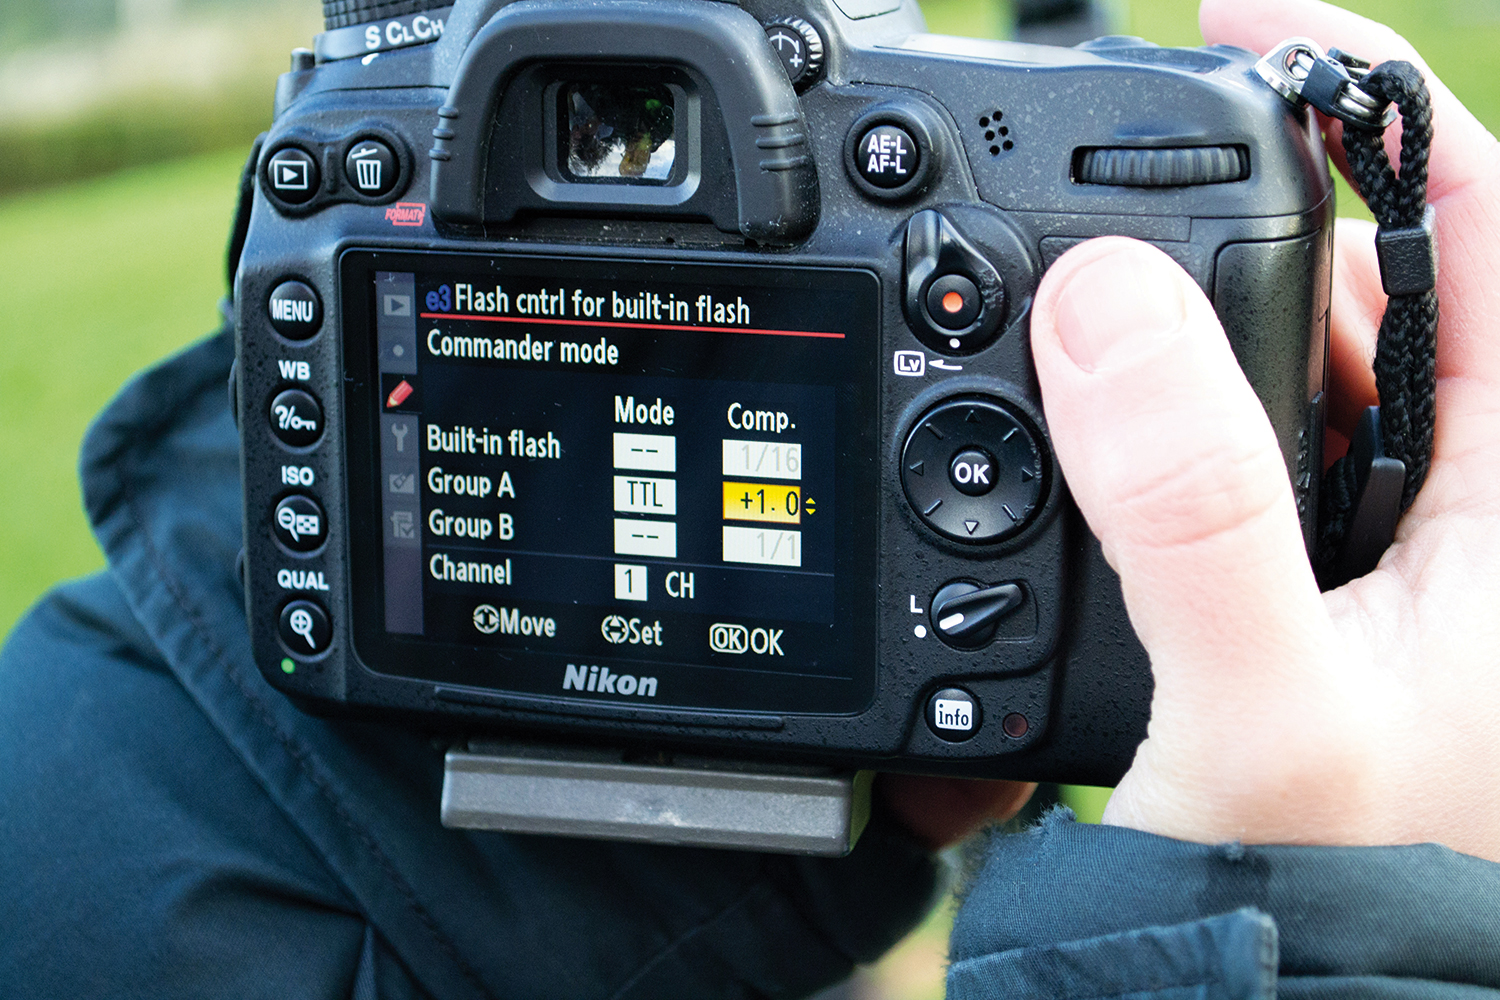
This underexposure will affect both the flash and the ambient exposure, so we need to increase the exposure from the flash to properly expose the subject. Go into the Commander setting on the camera and adjust the exposure compensation setting of Group A to +1 stop.
Get the Digital Camera World Newsletter
The best camera deals, reviews, product advice, and unmissable photography news, direct to your inbox!
I’ve been interested in the art and craft of photography since I pestered my parents to buy me a ‘proper’ camera aged about 10. Armed with my new Zorki 4k camera, I set out on a photographic journey that continues to this day. I learned the ‘nuts and bolts’ of the craft by doing a photographic degree at the University of Westminster, and have been involved in the photographic industry since then. For the last 12 years I have combined taking photos with writing articles and features for some of the UKs best-selling photographic magazines, including Practical Photography, Digital Camera and N-Photo. During this time I have also had two photography books published by Rotovision, on color and composition, and spent three years as a professional car photographer, working for evo magazine. All of this means that I have experience of shooting almost every type of subject, but I always come back to my first love – landscapes (and particularly the British landscape. I know live in on the Isle of Skye in Scotland.
