Photoshop tutorial: Enhance a dull sky in your landscapes
Enhance a dull sky in your landscapes by dropping in a dramatic sunset with simple Photoshop CC skills
The best camera deals, reviews, product advice, and unmissable photography news, direct to your inbox!
You are now subscribed
Your newsletter sign-up was successful
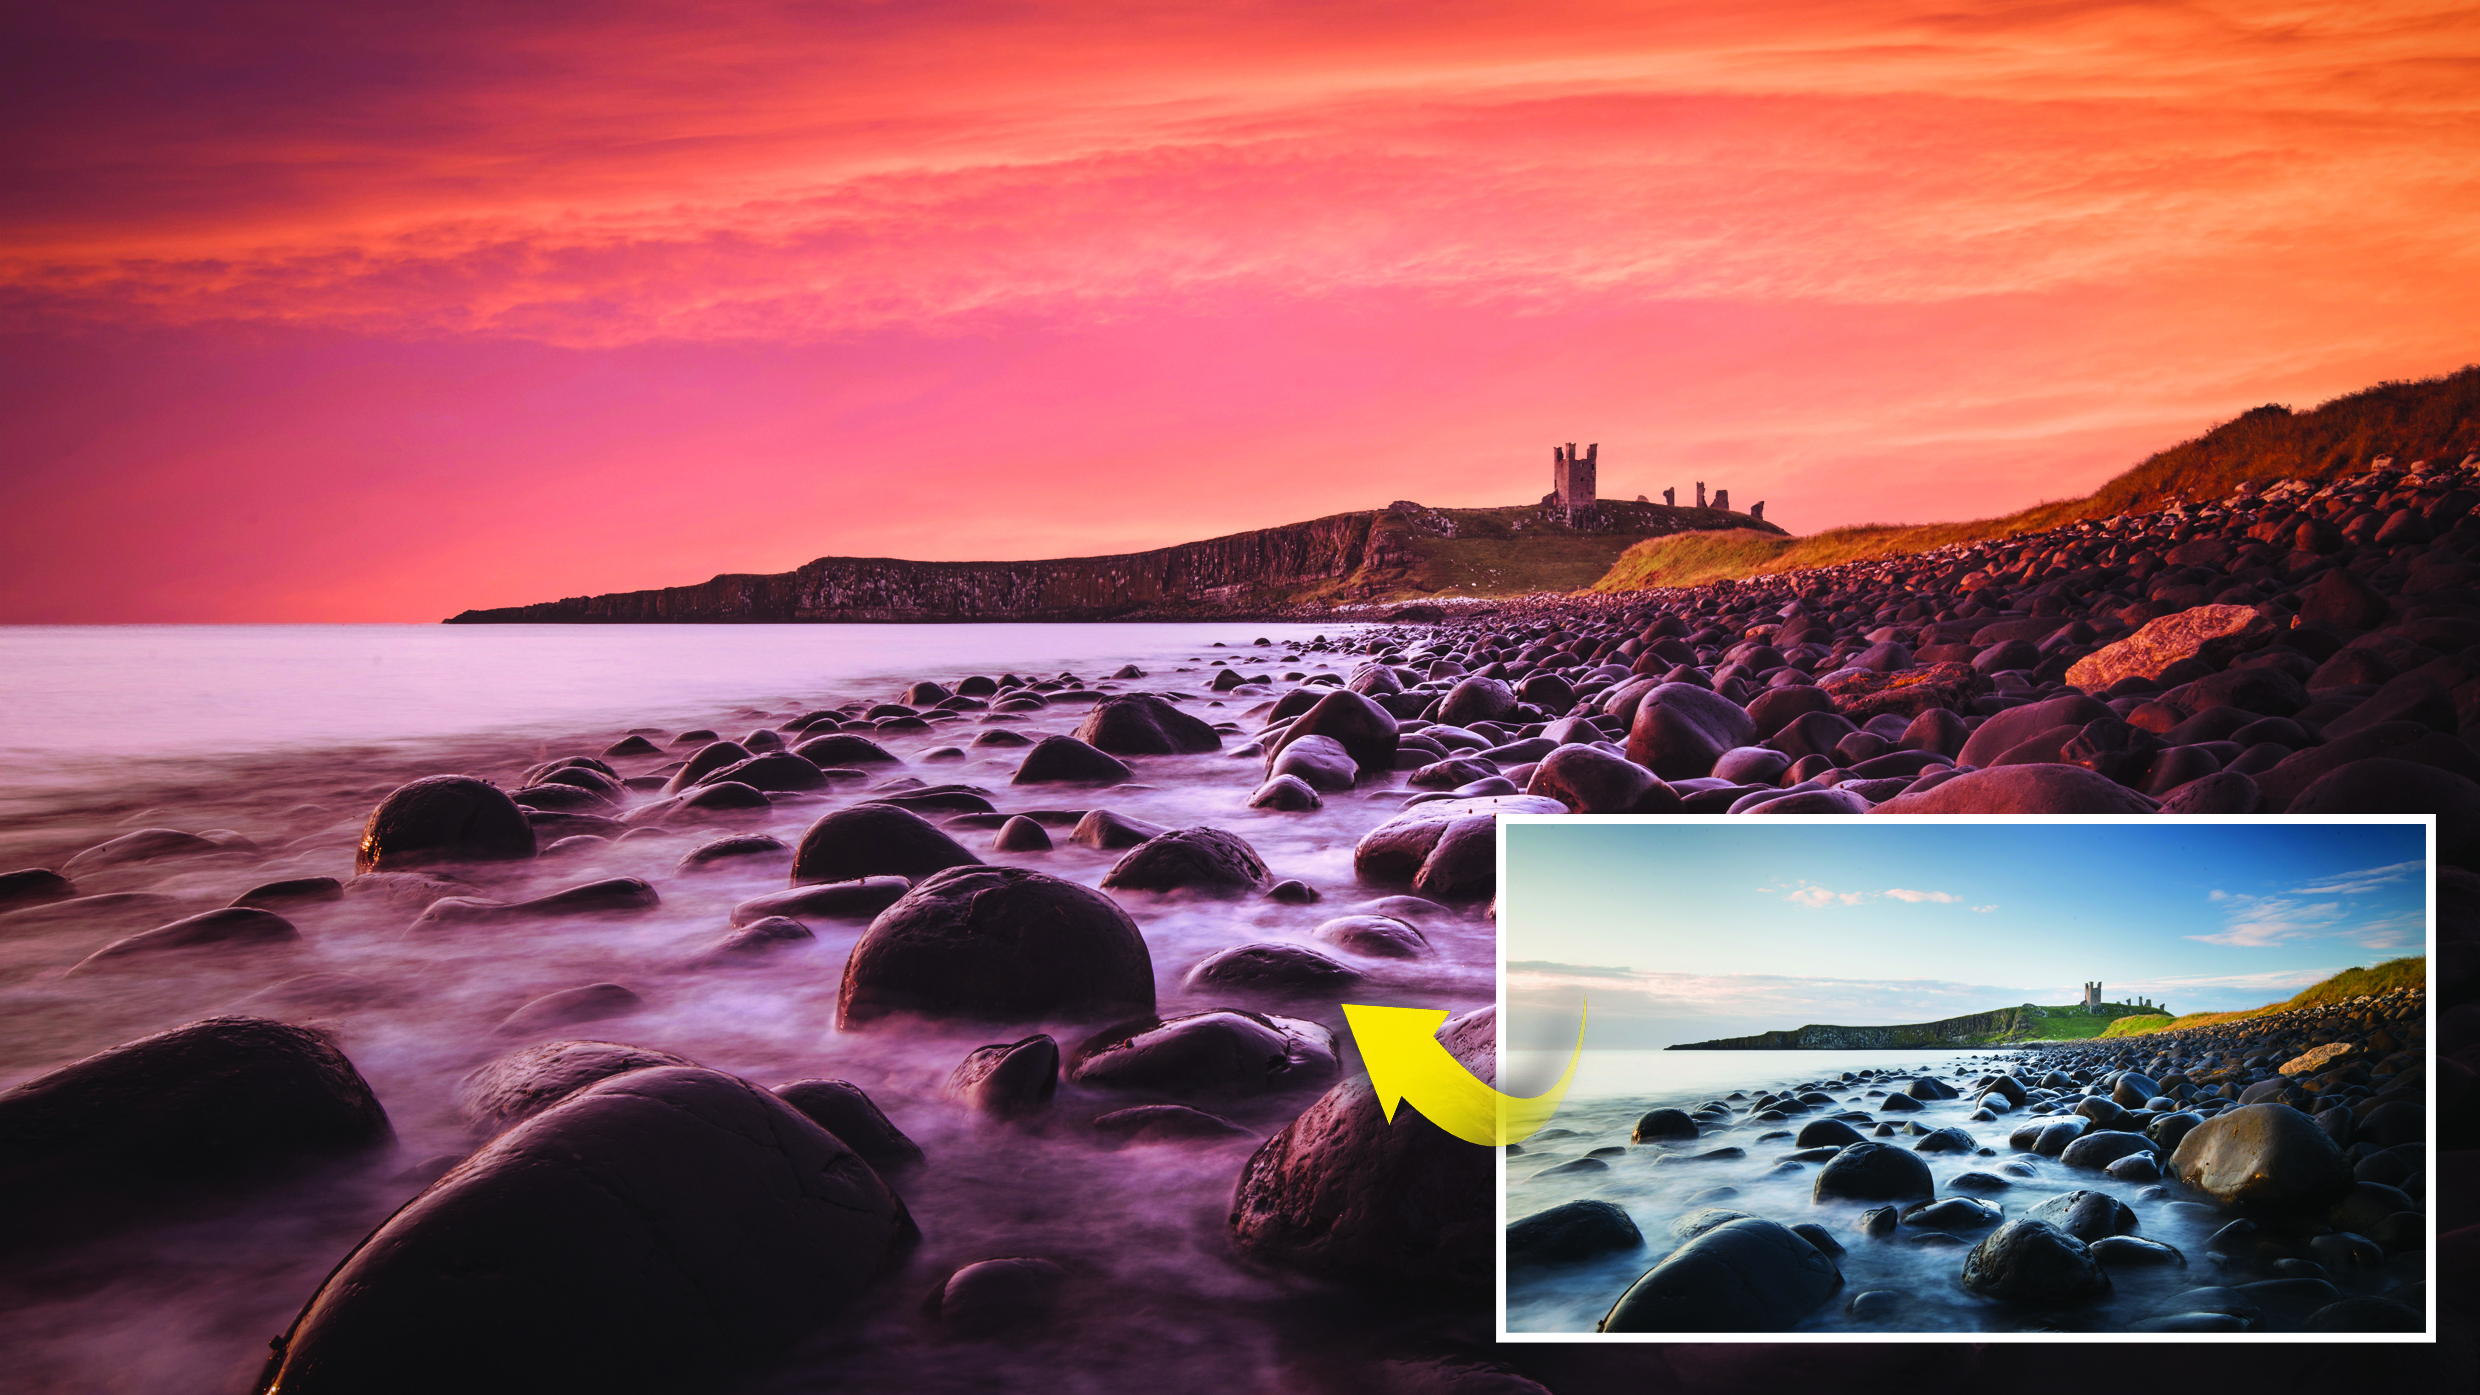
Sunrise and sunset may be the best times of the day for landscape photography, but they can be rather inconvenient. In this project, there’s no need to get up before the crack of dawn or wait all day for the setting sun. Instead, we’ll show you how to fake it in Photoshop CC.
Of course, there’s no real substitute for being there, taking the shot, and experiencing the moment. But if that’s not possible, then there’s always the option to fake it later using the best photo editing software. Purists would call this downright cheating, but the only naughty act would be to pass it off as a genuine capture rather than a composite (as the infamous winner of the 2012 landscape photographer of the year found out when stripped of his title for digitally altering clouds in a photo of Lindisfarne).
Besides, as long as you can get past the moral scruples about sky replacement, there are other benefits to a Photoshop project such as this. It introduces fundamental Photoshop skills like making selections, layer masking, and blending modes.
Article continues belowWe’ll begin here by selecting the sky using the excellent Select and Mask command, which not only gives us a great tool for making the selection – the Quick Selection brush – but also allows us to refine the edge of the selection for a seamless cutout.
Once done, we can drop in our new sunset. From here on, it’s all about matching the tones so the whole thing is natural.
1. Mask the sky
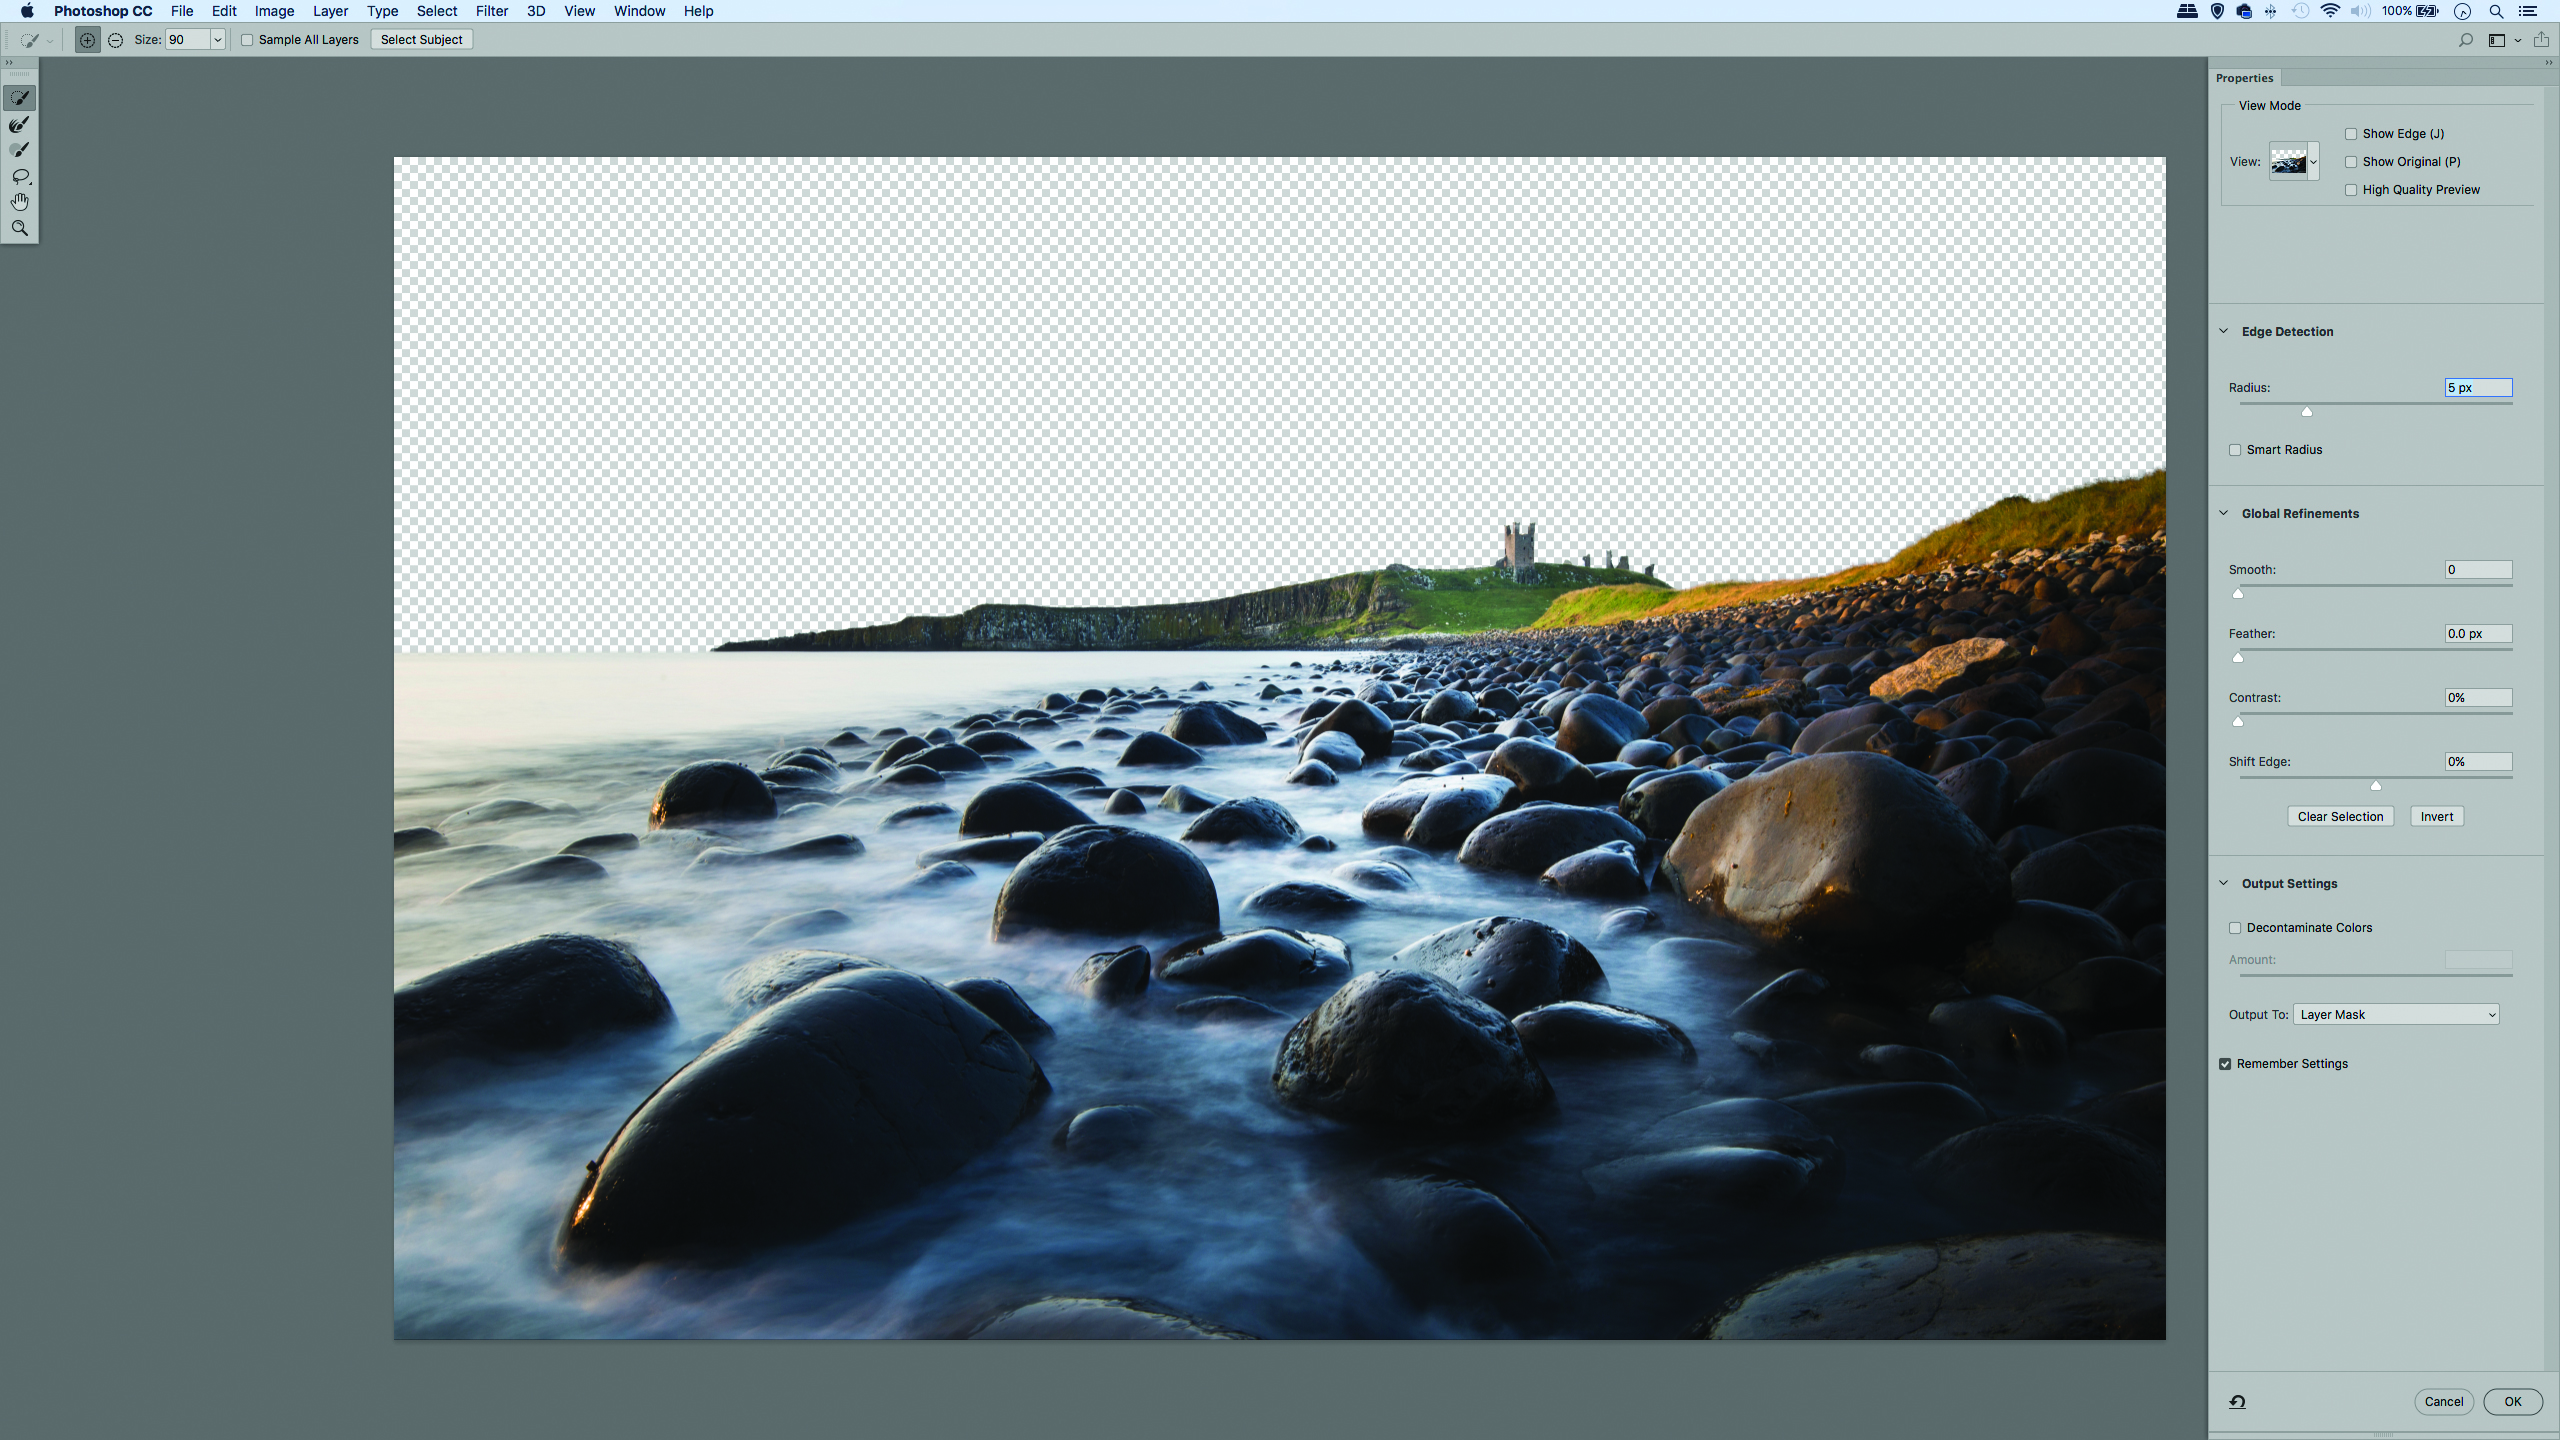
Download the start images and open them into Photoshop. Then go to Select>Select and Mask. Get the Quick Selection tool and paint the sky to select it. Click the Invert button and increase the Radius to about 5px to improve the edges. Choose Output to: Layer Mask click OK.
2. Drop in the sky
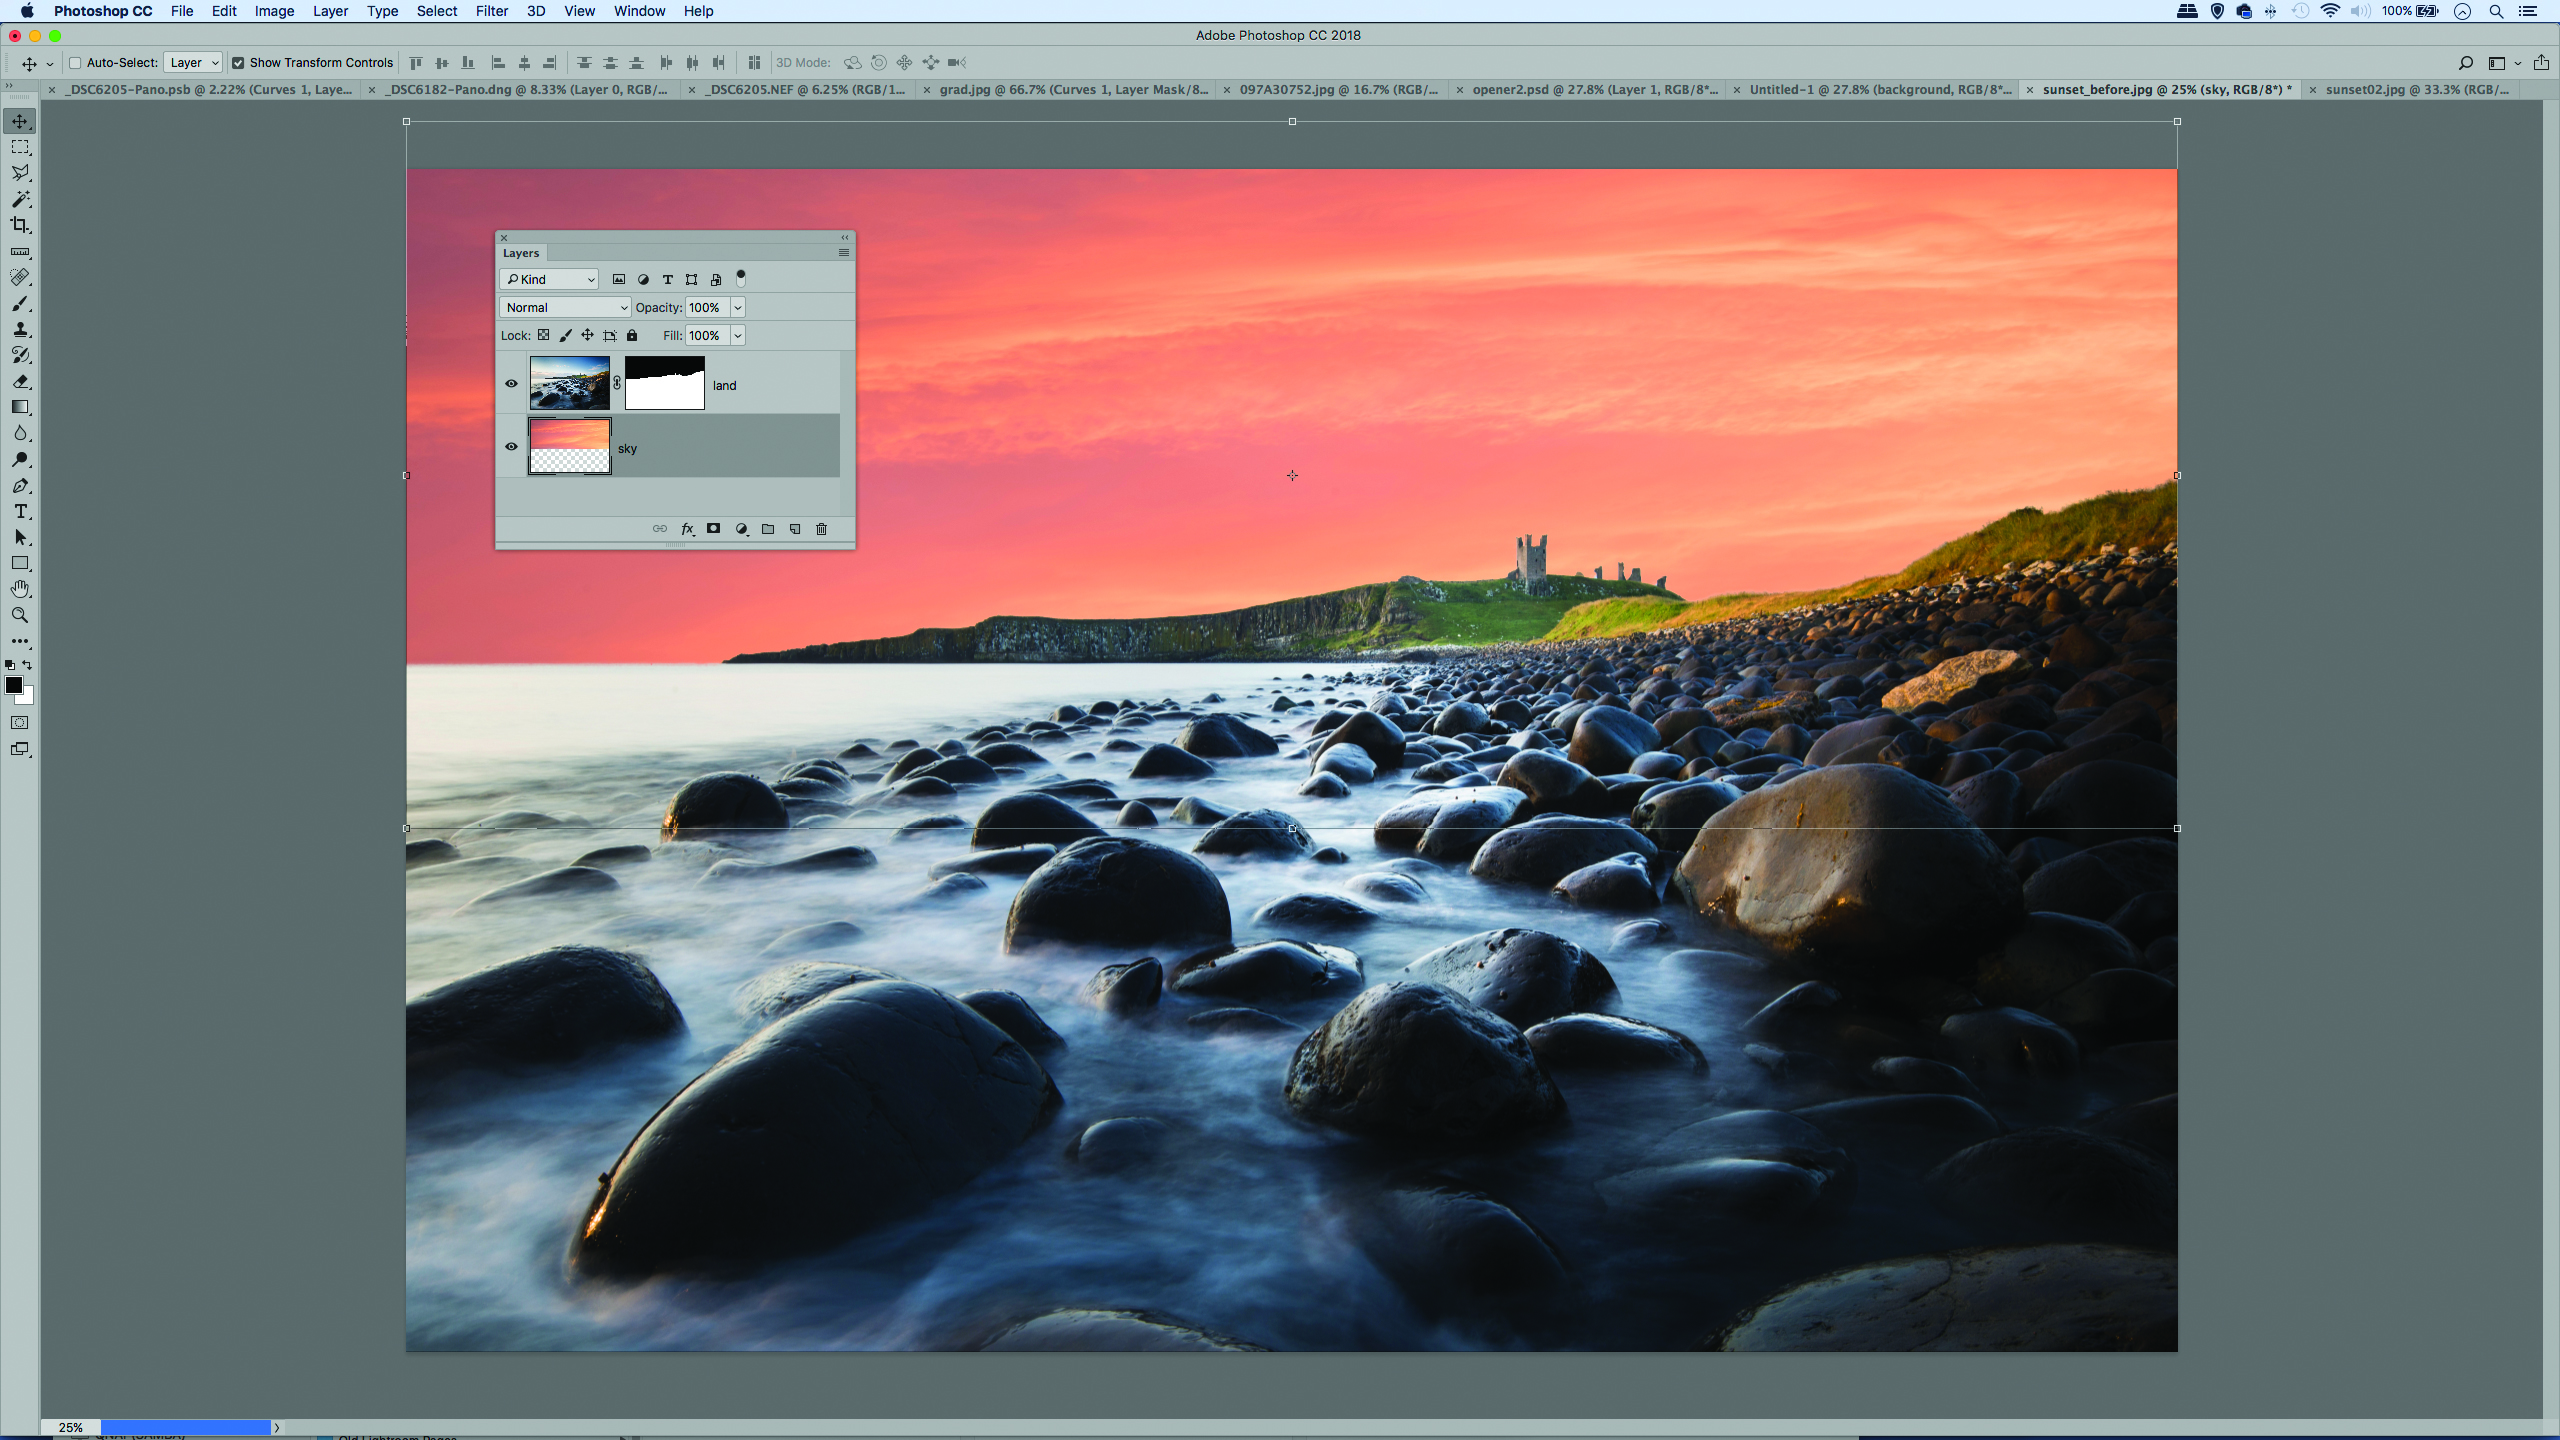
Go to the 02 image and use the Move tool to drag the sunset to the tab of the 01 image then down into the window to copy it. Go to Layers Panel, drag the sunset layer below the land layer and use the Move tool to position the sky. If you need to resize hit Cmd/Ctrl+T.
The best camera deals, reviews, product advice, and unmissable photography news, direct to your inbox!
3. Tone the land
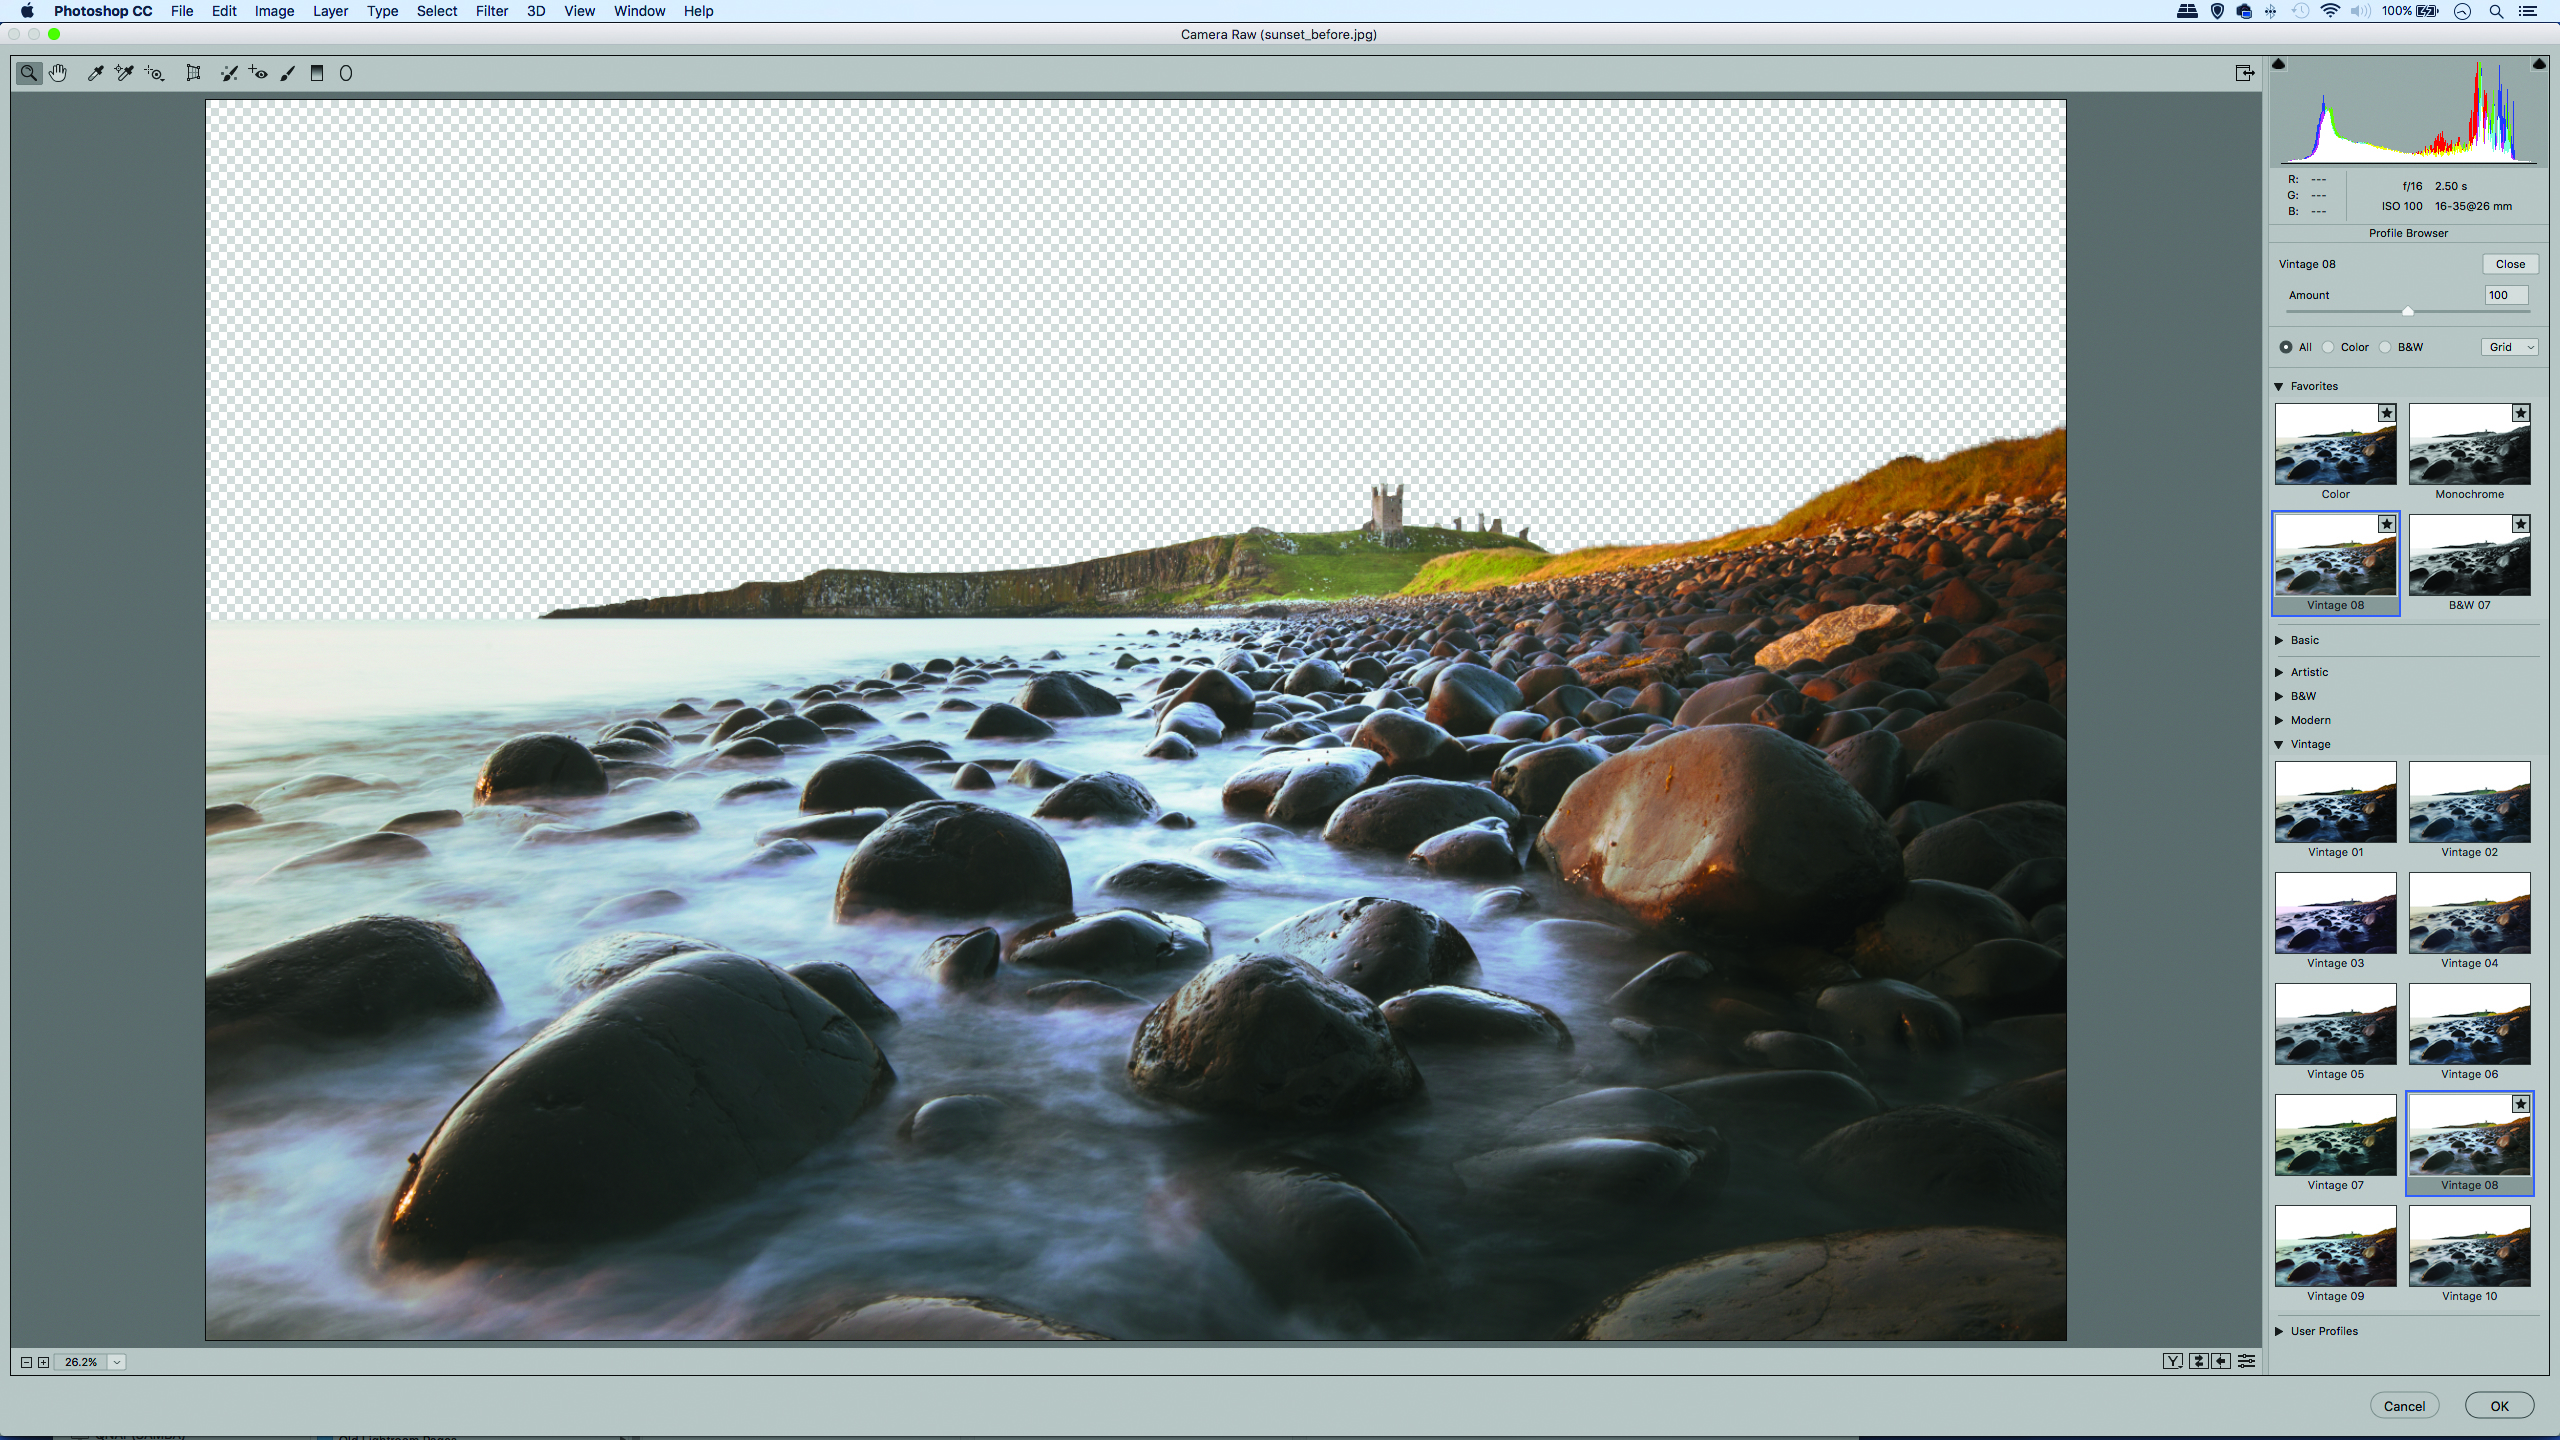
Right-click the land layer and ‘Convert to Smart Object’ then go to Filter> Camera Raw Filter. We’ll use the filter to make it look as if the land is bathed in a warm glow from the sky. Begin by choosing a Profile in the Basic Panel. The Vintage08 profile works here.
4. Add warmth and color
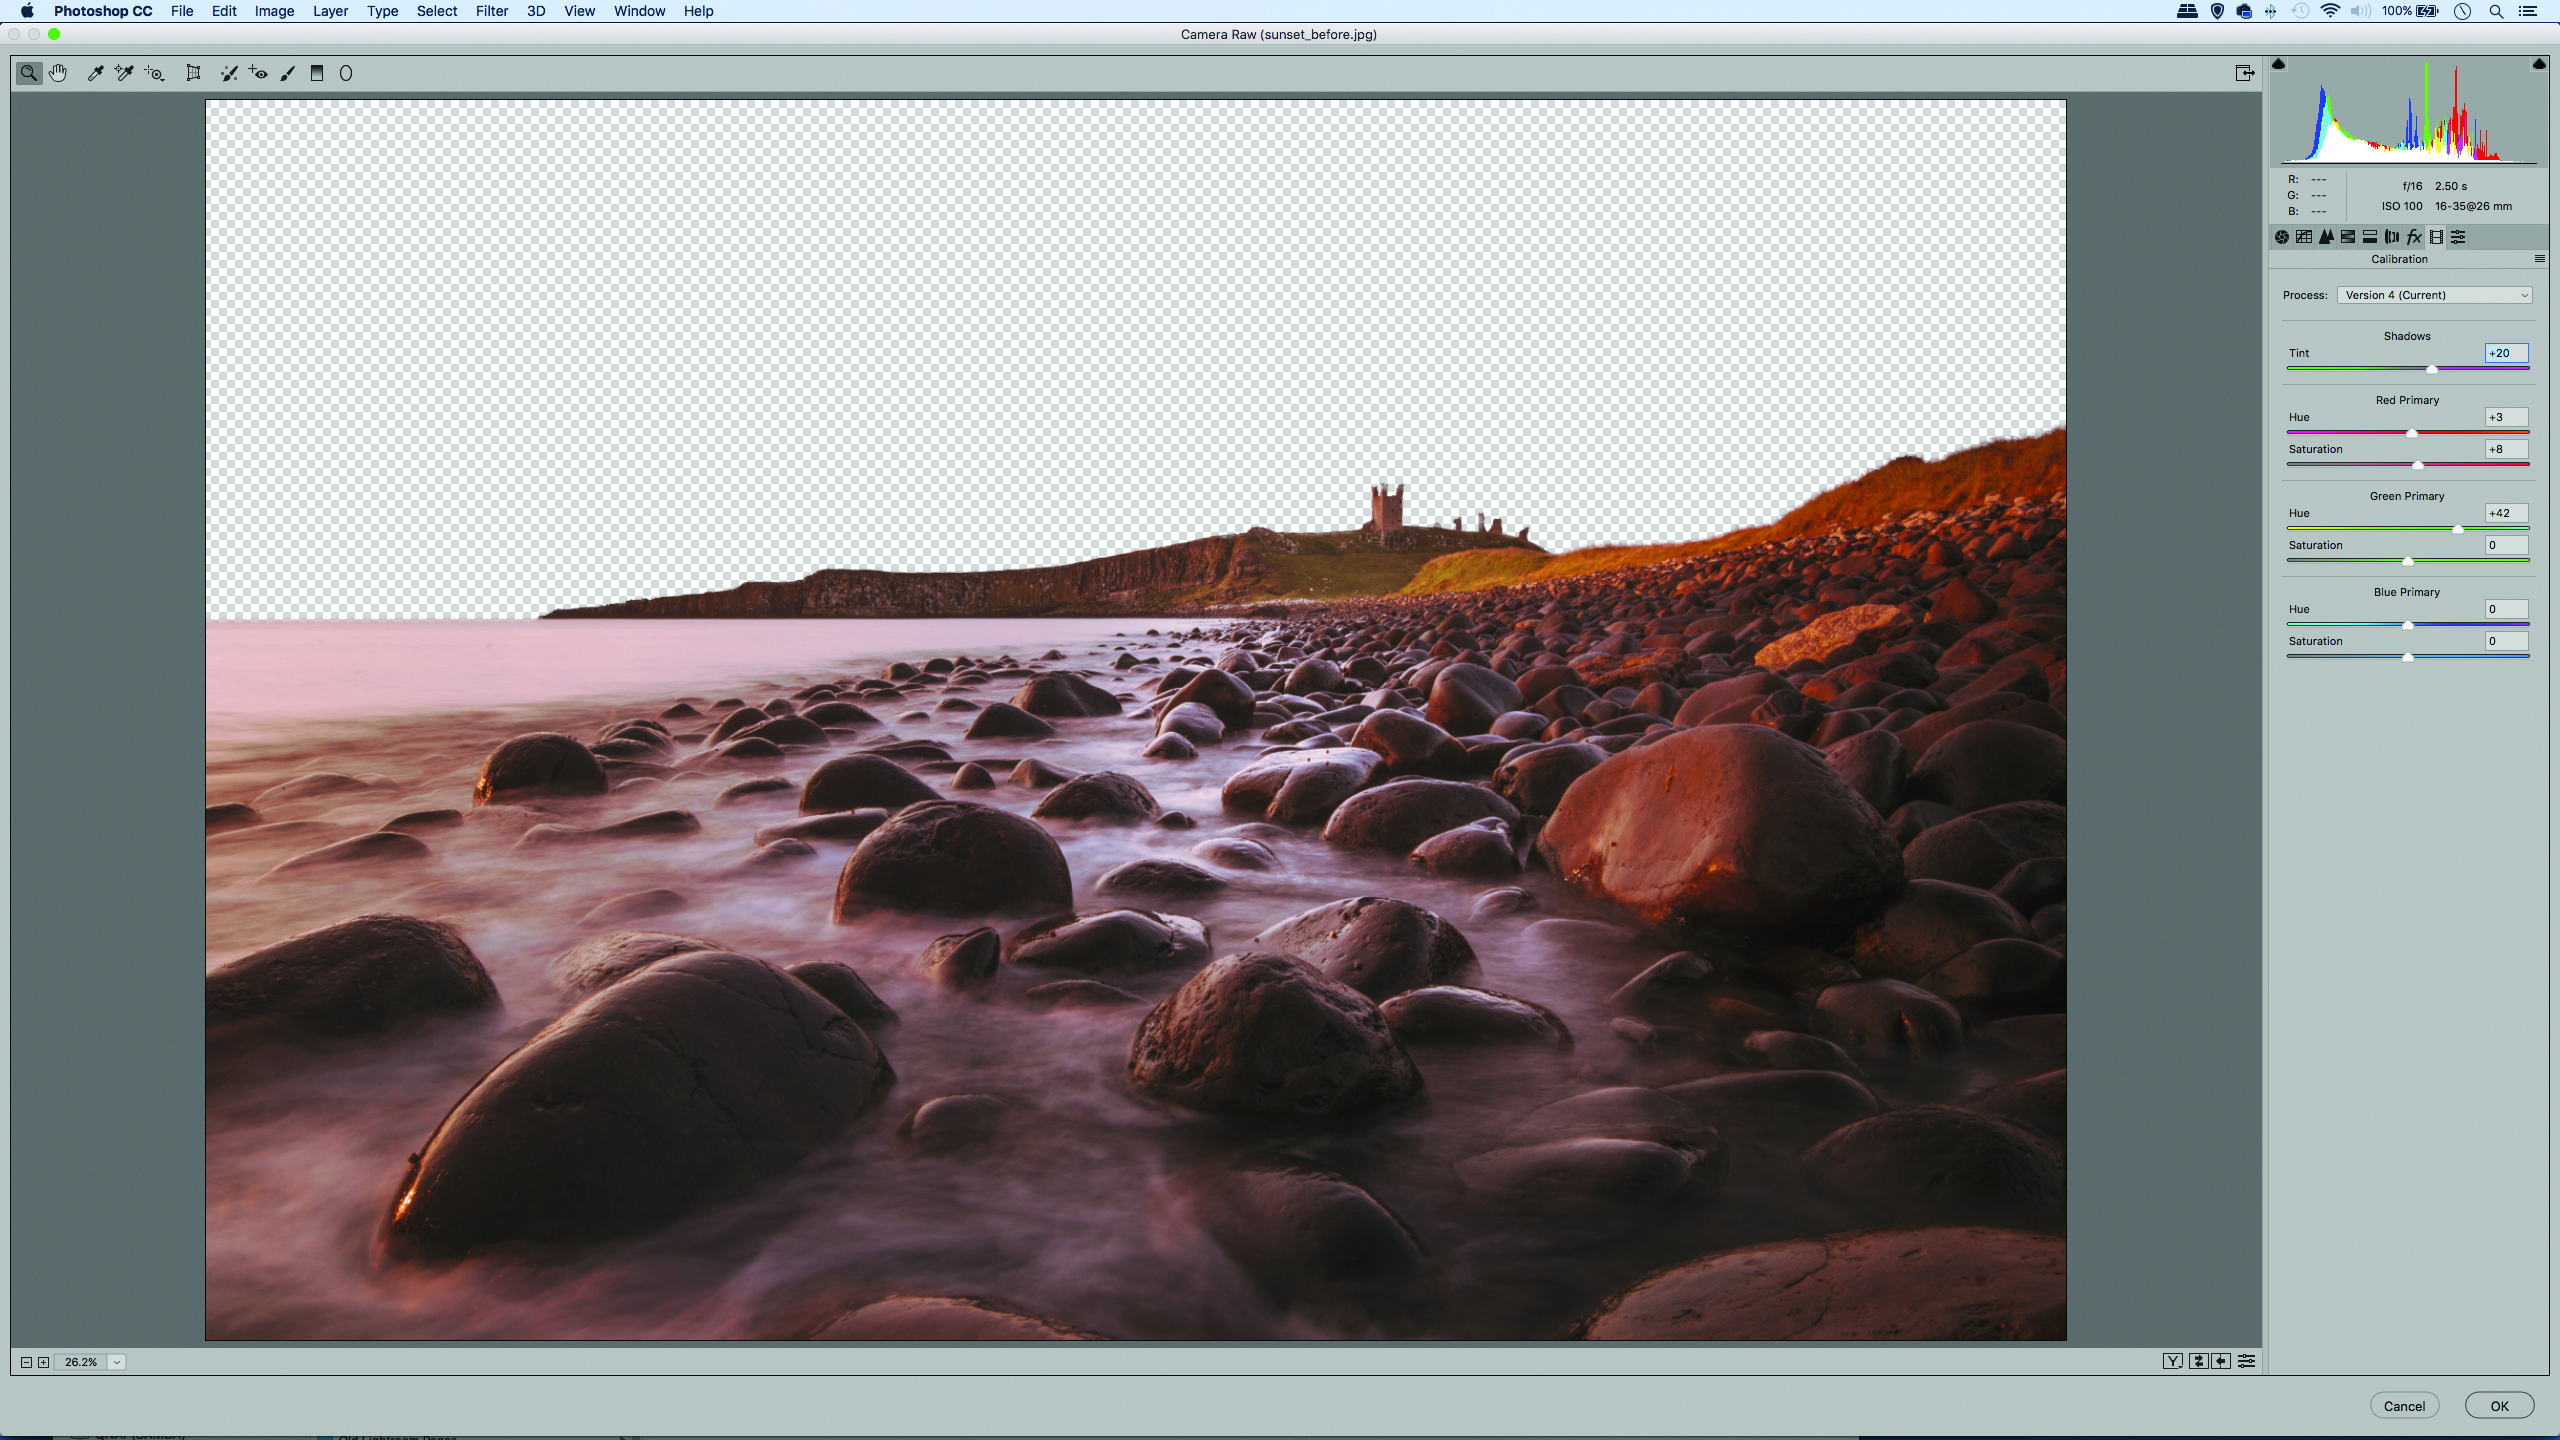
Use the White Balance sliders in Raw’s Basic panel to warm the image – we set Temperature +25, Tint +49, and Exposure to -1.20. Next head to the Camera Calibration panel. Tweak the Hue and Saturation sliders on Red and Green as shown to alter colors.
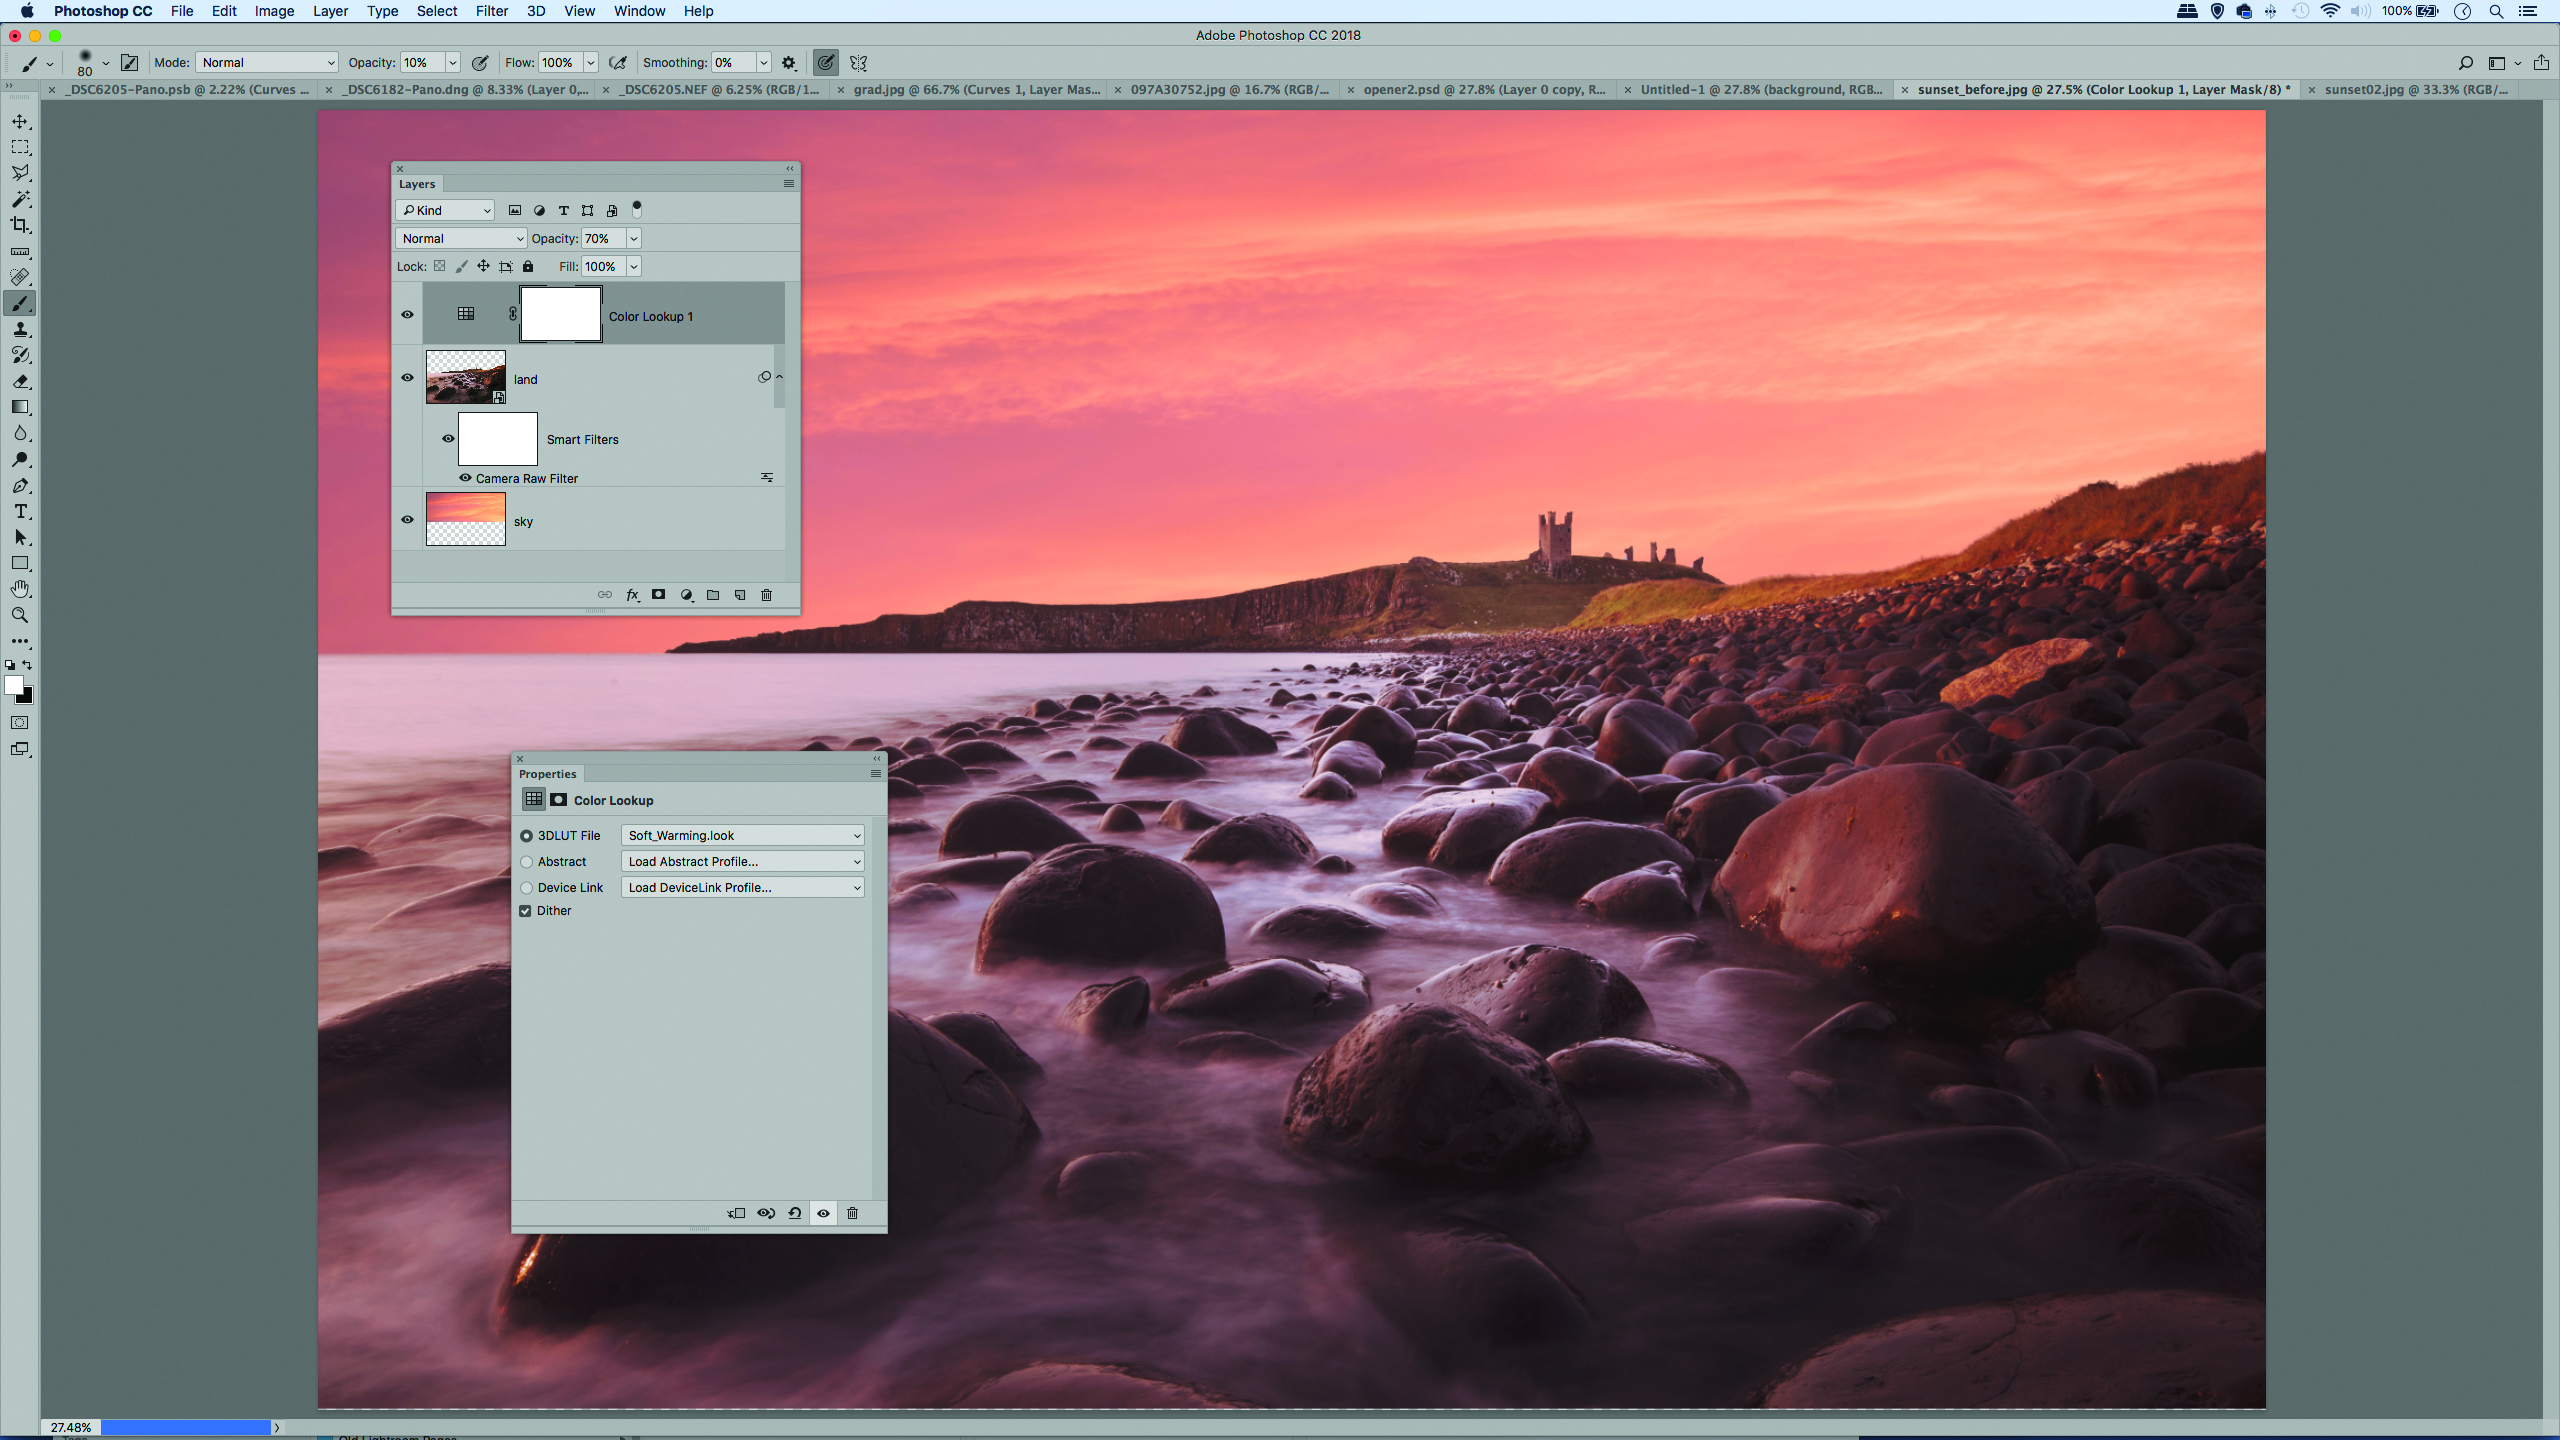
5. Tone with Color Lookup
Check the tones match (if not, double-click the Camera Raw Smart Filter in the Layers panel). Click Create Adjustment Layer icon in the Layers panel and choose Color Lookup. Select the ‘Soft Warming Look’ preset within 3DLUT and lower the opacity to 70%.
6. Make final tweaks
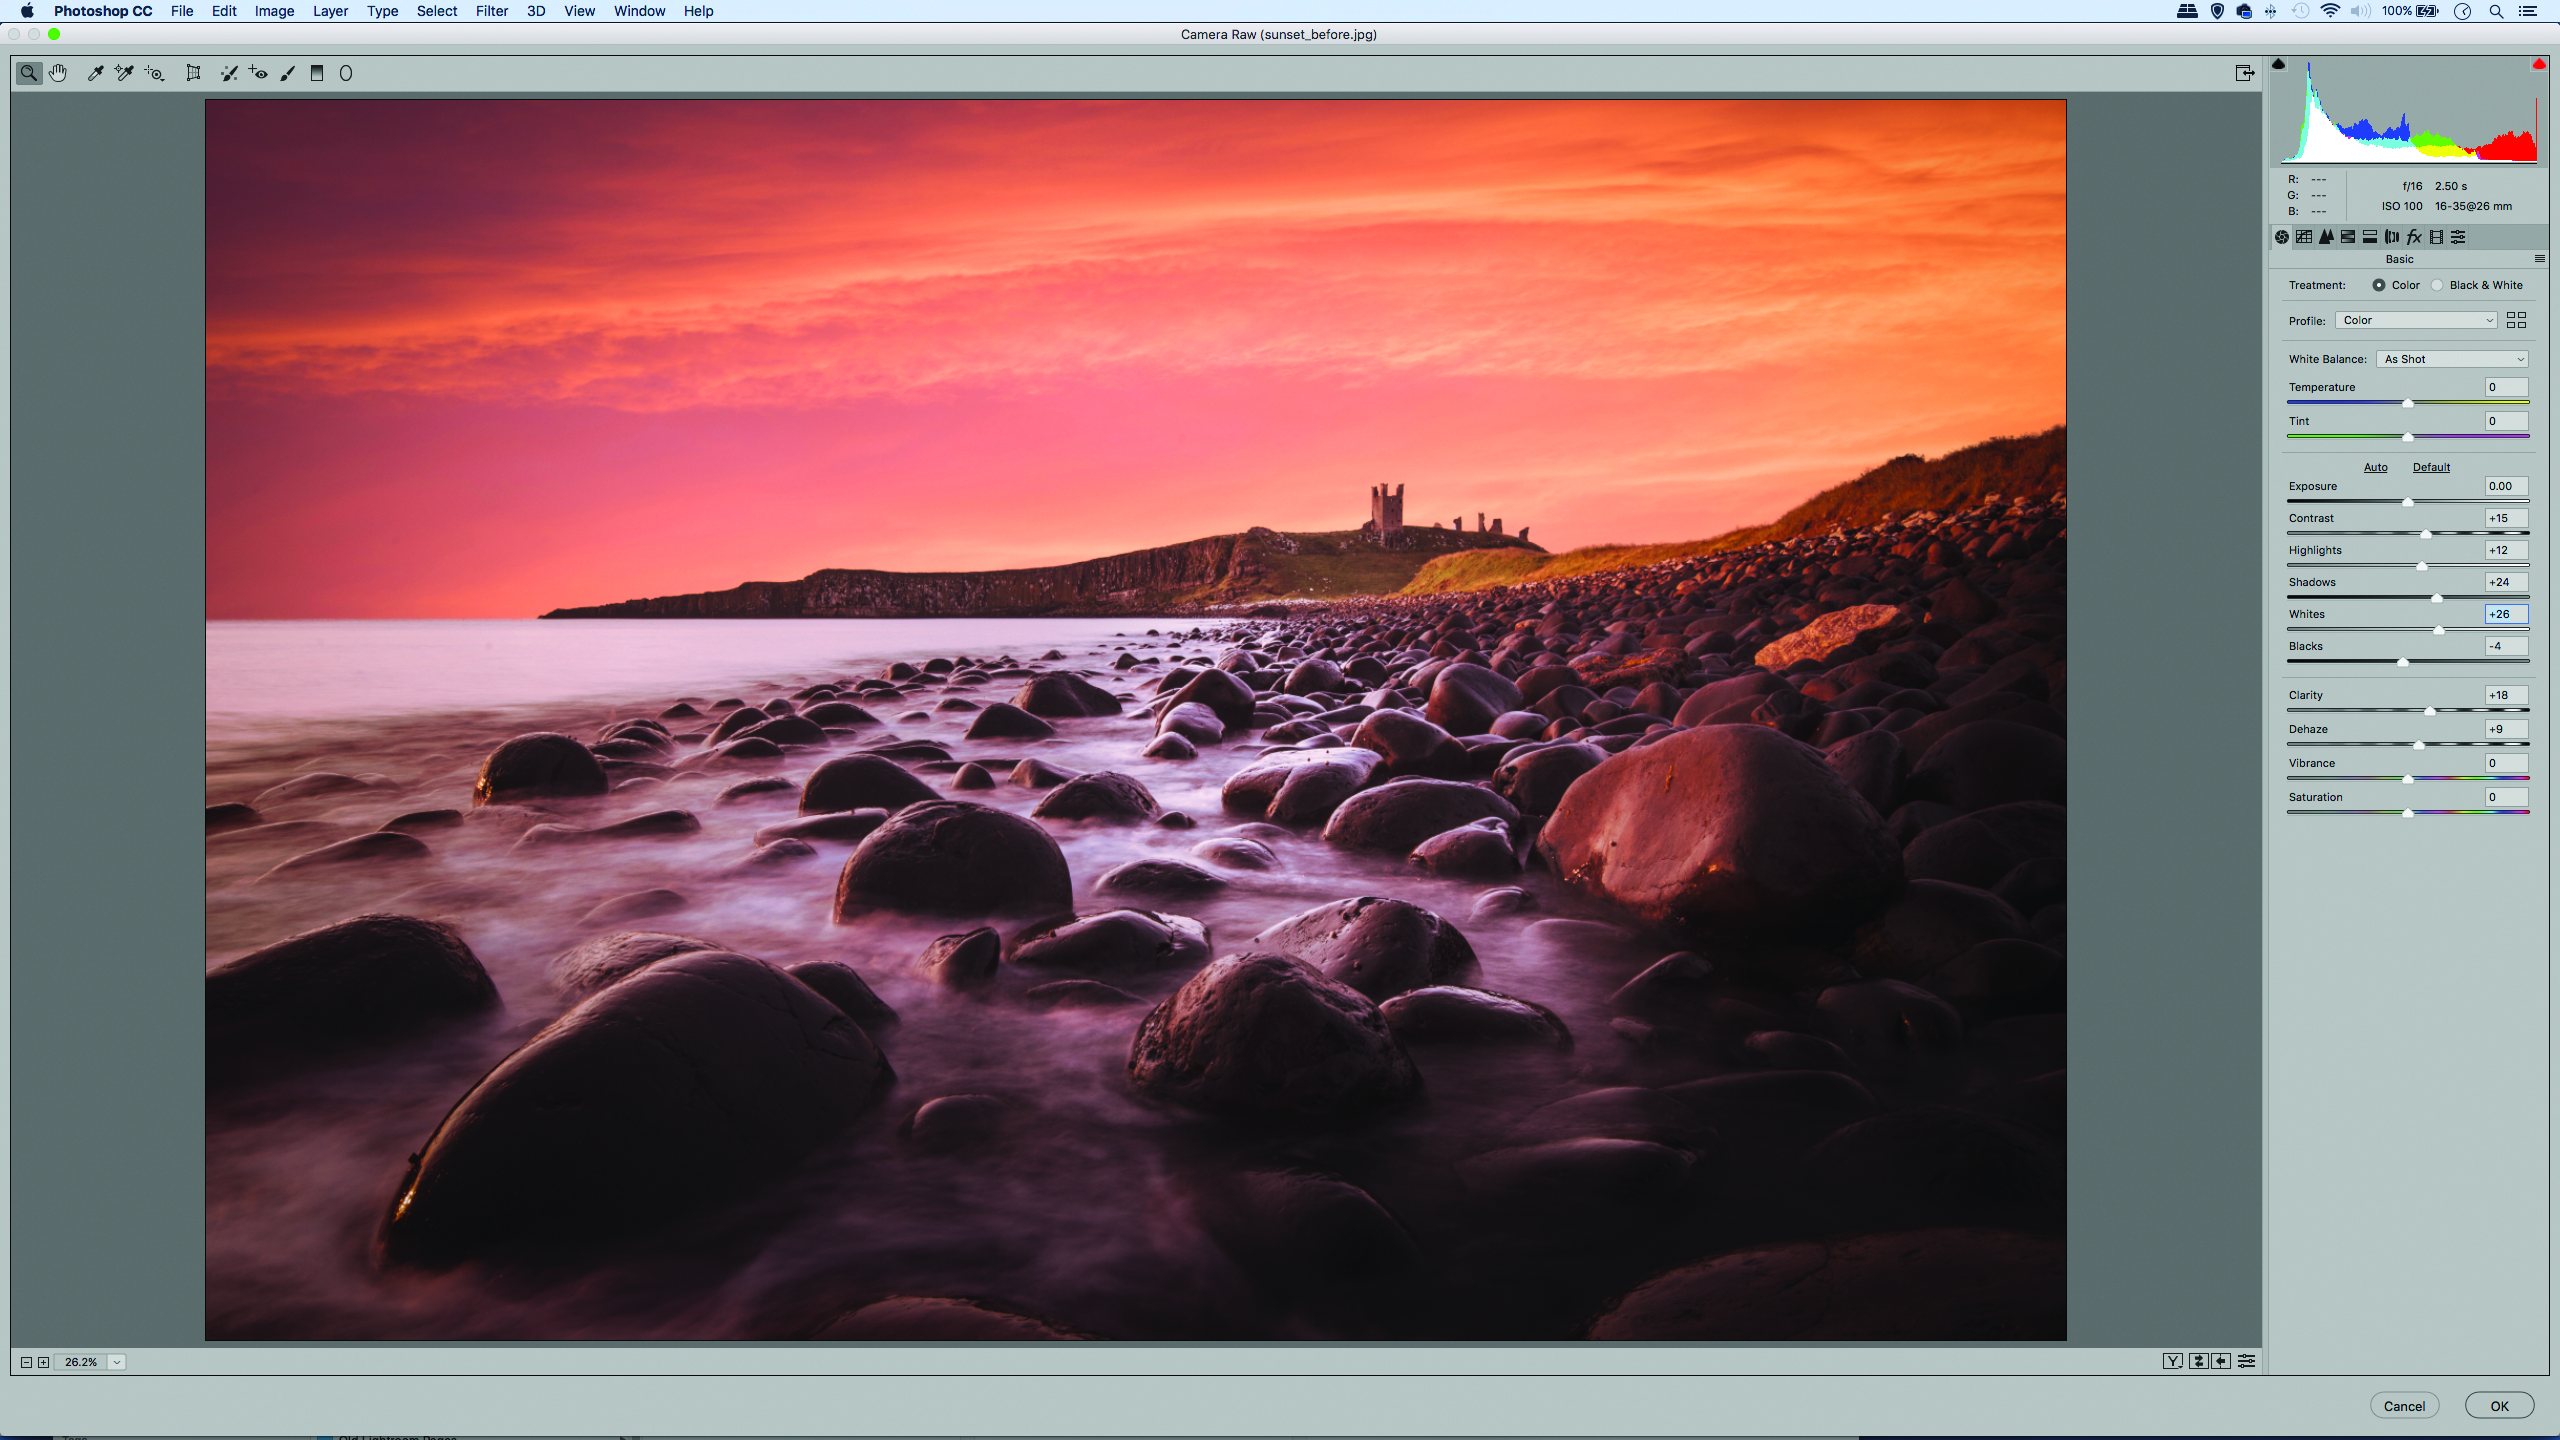
Finally press Cmd/Ctrl+Shift+Alt+E to merge everything into a new layer. We’ll take this layer into Filter> Camera Raw filter for toning. Use the Basic panel sliders as shown to enhance the tones and colours, and make other changes you want.
PhotoPlus: The Canon Magazine is the world's only monthly newsstand title that's 100% devoted to Canon, so you can be sure the magazine is completely relevant to your system.
You might also like the best photo-editing laptops: top laptops for photographers wanting to process their images and video with power.
The lead technique writer on Digital Camera Magazine, PhotoPlus: The Canon Magazine and N-Photo: The Nikon Magazine, James is a fantastic general practice photographer with an enviable array of skills across every genre of photography.
Whether it's flash photography techniques like stroboscopic portraits, astrophotography projects like photographing the Northern Lights, or turning sound into art by making paint dance on a set of speakers, James' tutorials and projects are as creative as they are enjoyable.
He's also a wizard at the dark arts of Photoshop, Lightroom and Affinity Photo, and is capable of some genuine black magic in the digital darkroom, making him one of the leading authorities on photo editing software and techniques.

