Portrait photography masterclass Part 2: One-flash Rembrandt lighting
Capture classic Rembrandt lighting with a single flash head for your portrait photography, as explained by Natasha J Bella
Watch video: Rembrandt lighting
One of the things I love about studio portraits is the variety of lighting styles you can use to add impact and drama to the image. In the second part of my series on studio lighting for portraits, I will be showing you Rembrandt lighting – a classic technique named after the famous 17th Century Dutch painter, Rembrandt Harmenszoon.
Rembrandt lighting is usually recognized by the triangle of light under one eye and contrasting shadows around the face, adding depth and mood to the image. This method has continued to be a popular lighting style used in cinematography, among pro photographers and in studio portraits.
It’s wonderfully easy to achieve this striking look in even a basic home studio setup, as you only need one light and a reflector. I’m going to help you get started with creating your own Rembrandt lighting for a dramatic and engaging portrait.
01 See the light
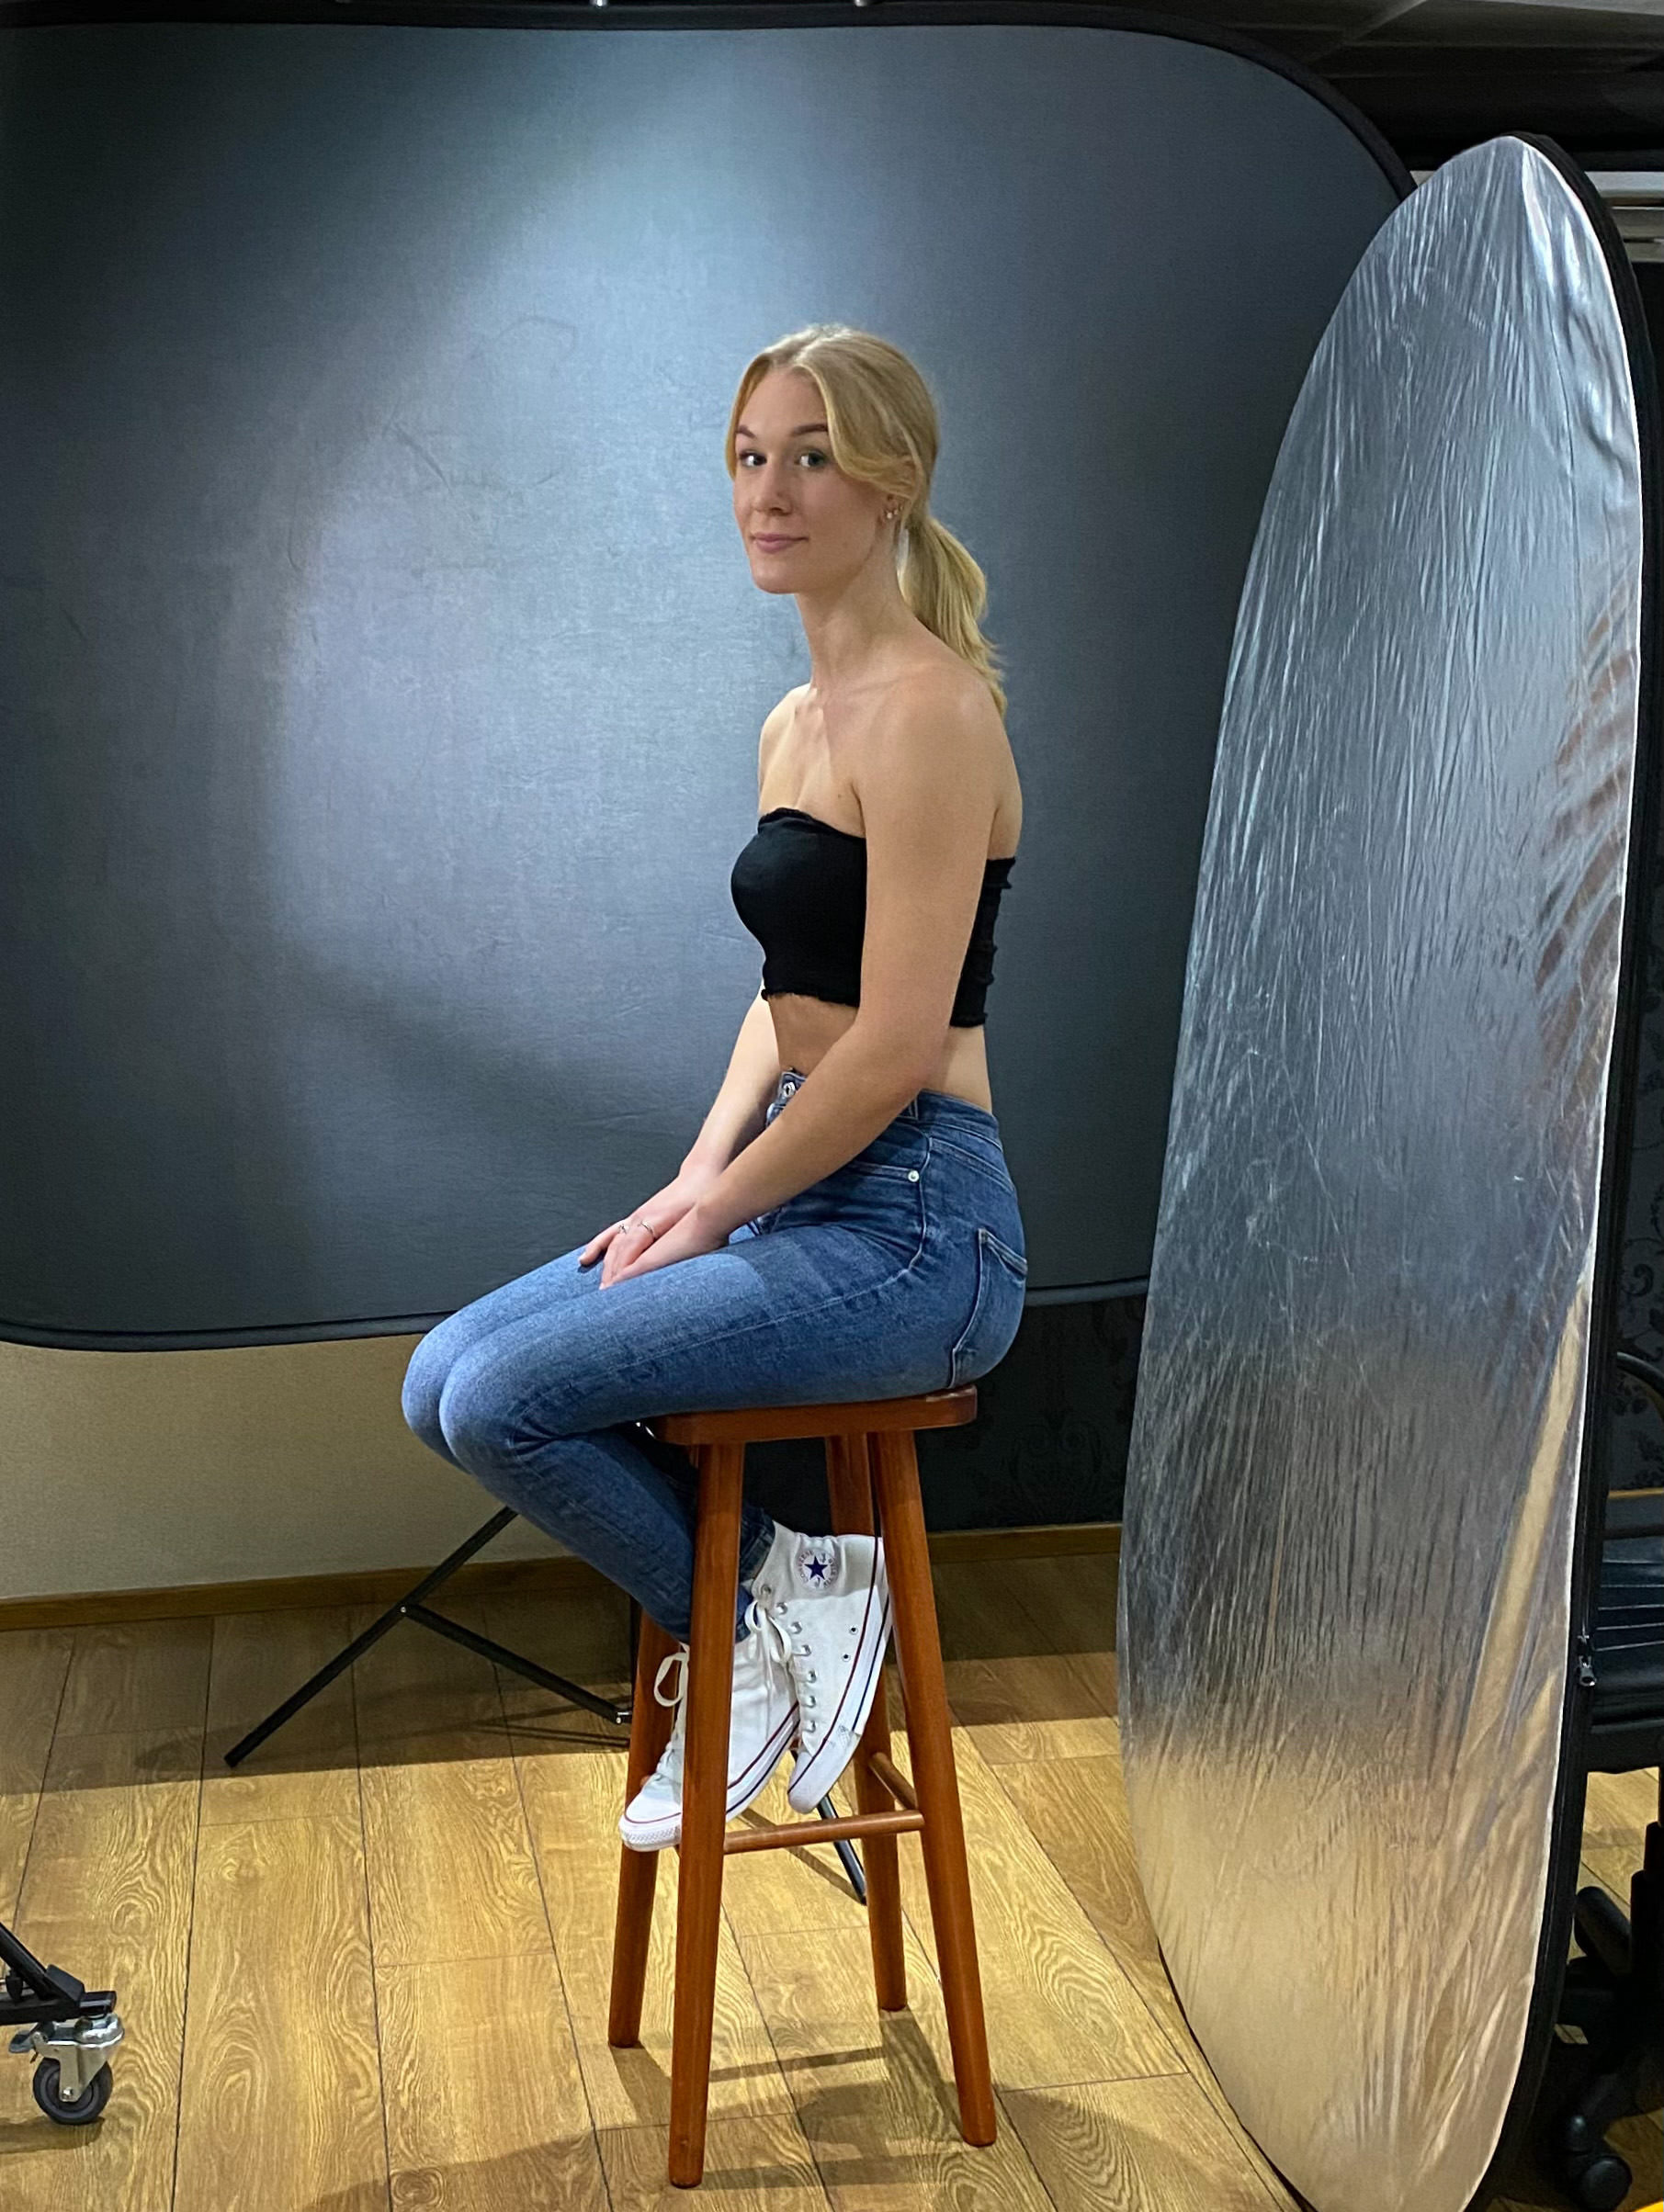
While you can get good results with an off-camera flashgun, a dedicated flash head makes the setup easier as many have a modeling lamp that helps you see where the light from the flash will fall when it’s fired. Turn your modeling lamp on and then turn off room lights, and close any curtains to reduce ambient light.
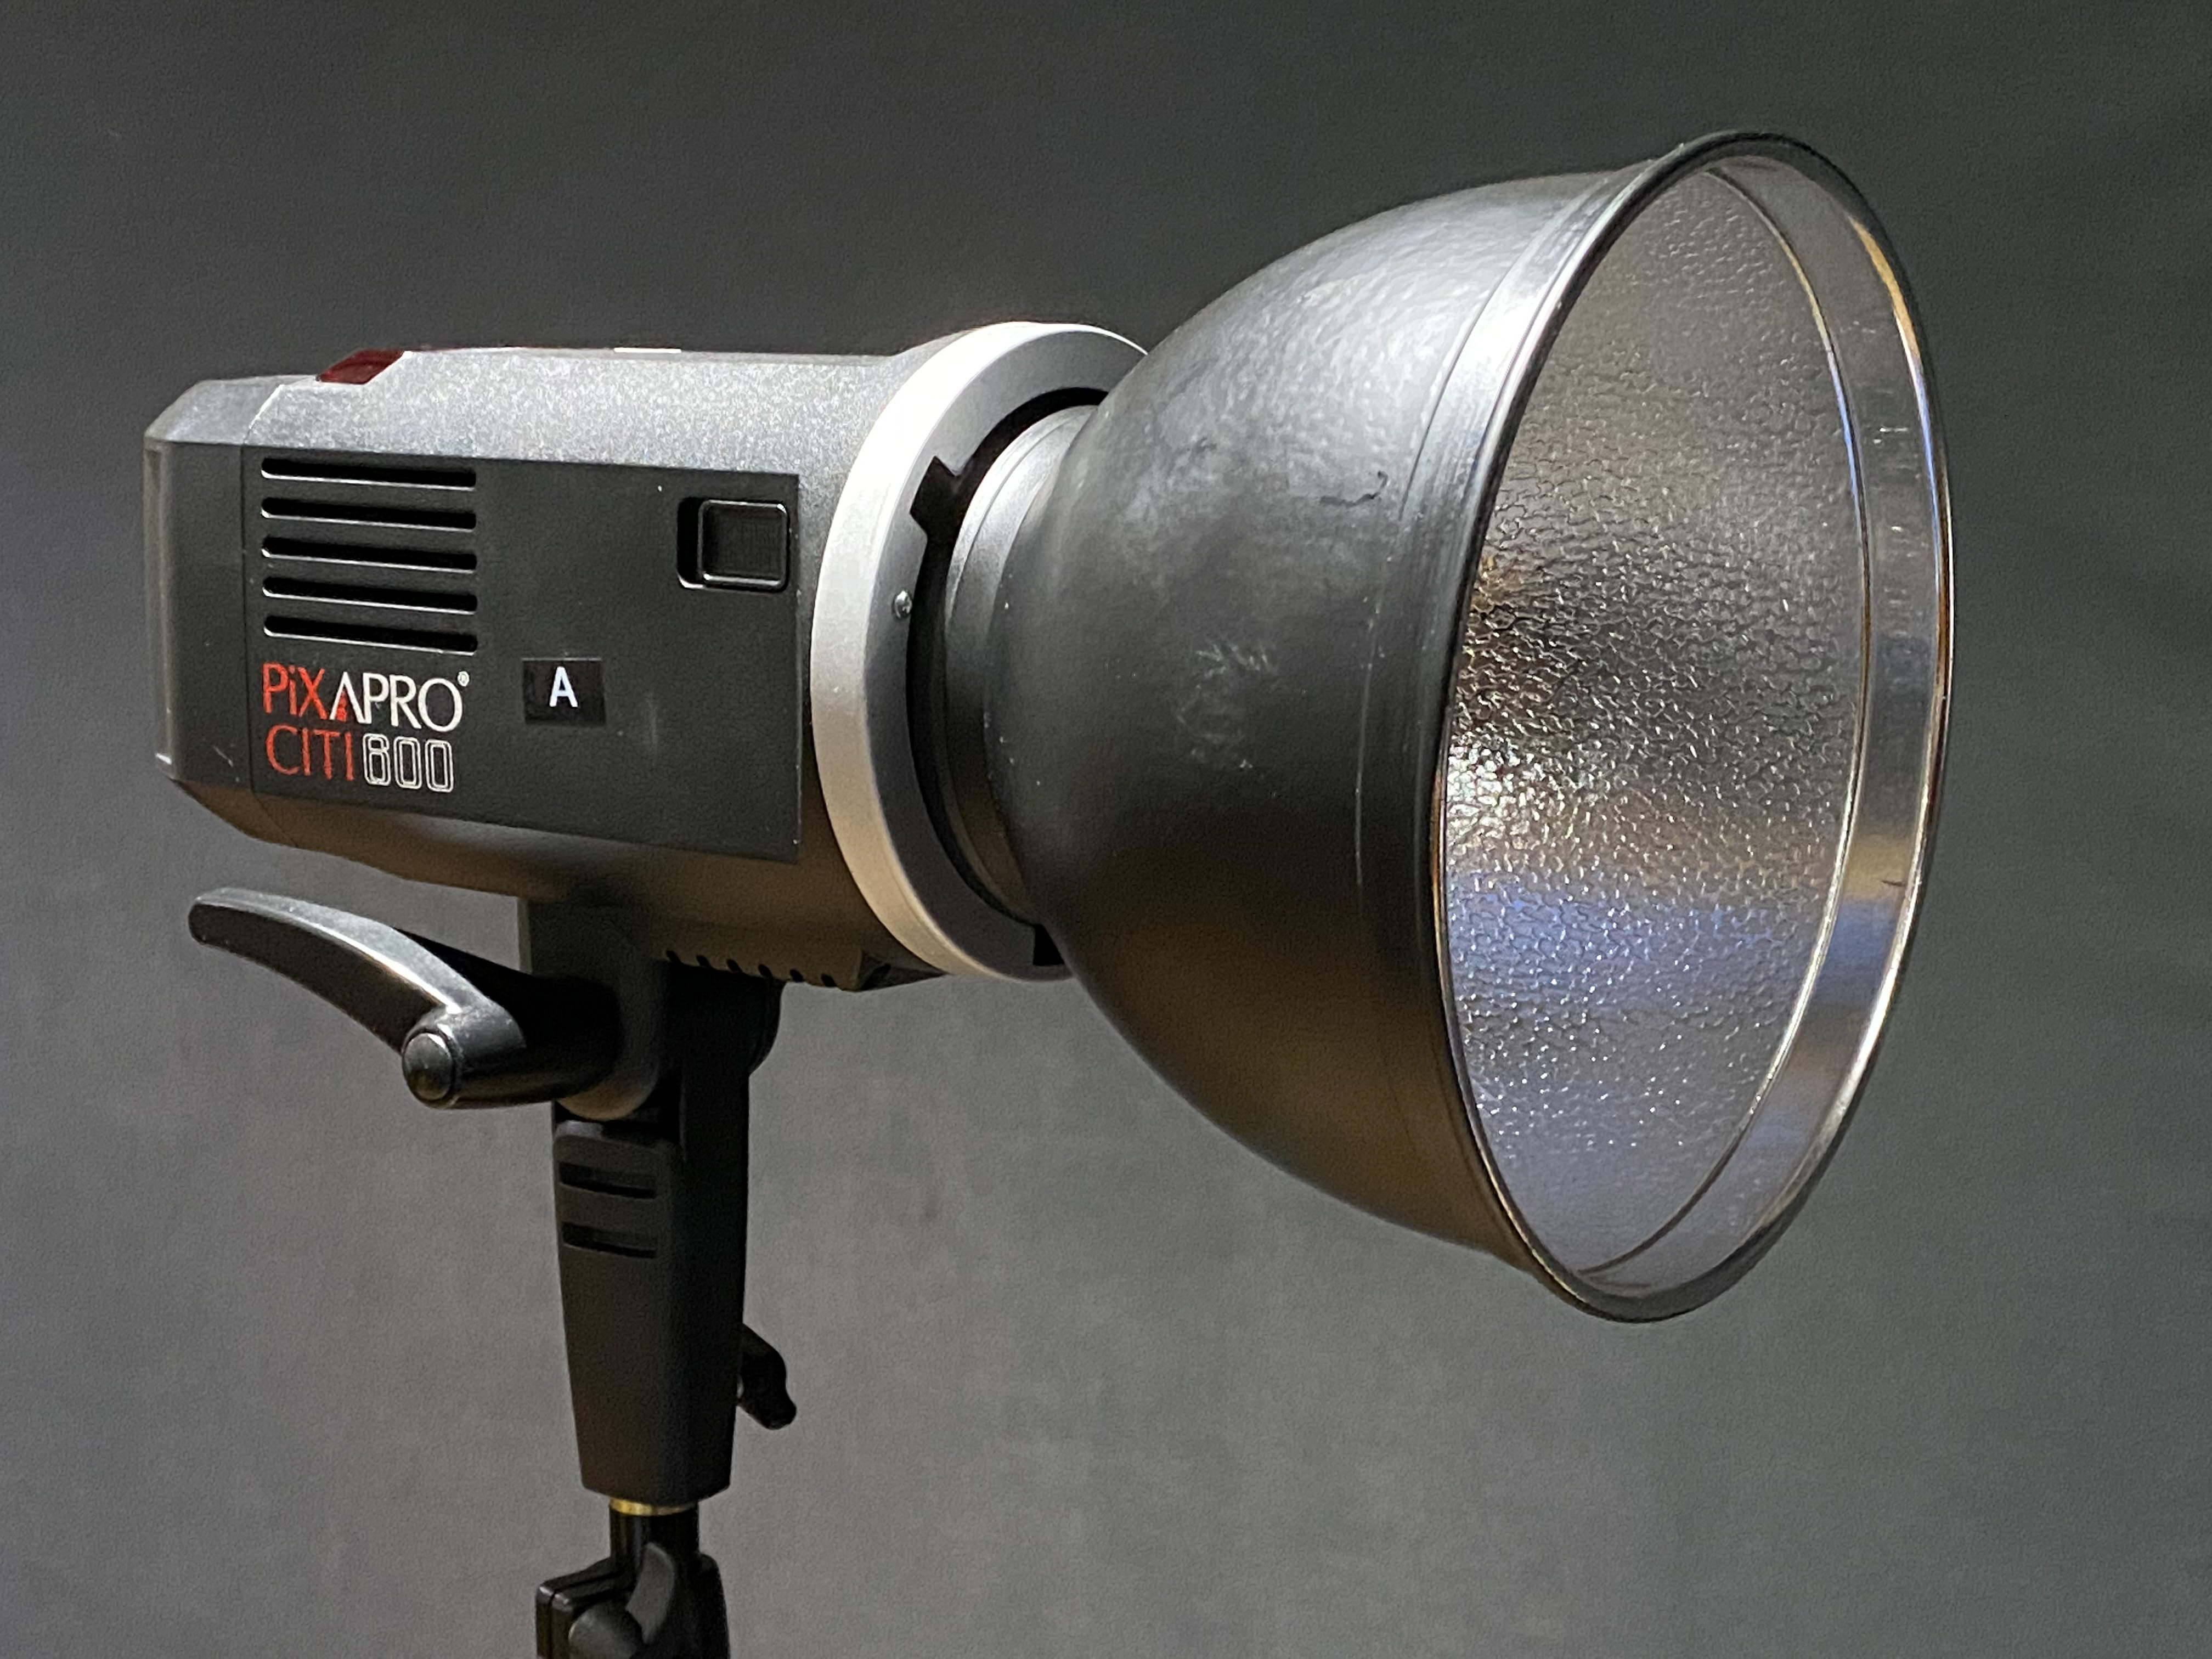
Now you’ll be able to see where the light is falling on the model’s face from your flash head, and you can move the flash around until you see a triangle of light appear under one of the model’s eyes. Here, the aim is to create an inverted triangle no wider than the eye and not lower than the nose. We also raised up our flash on a light stand so that it was pointing slightly down at our model.
02 Position the light perfectly
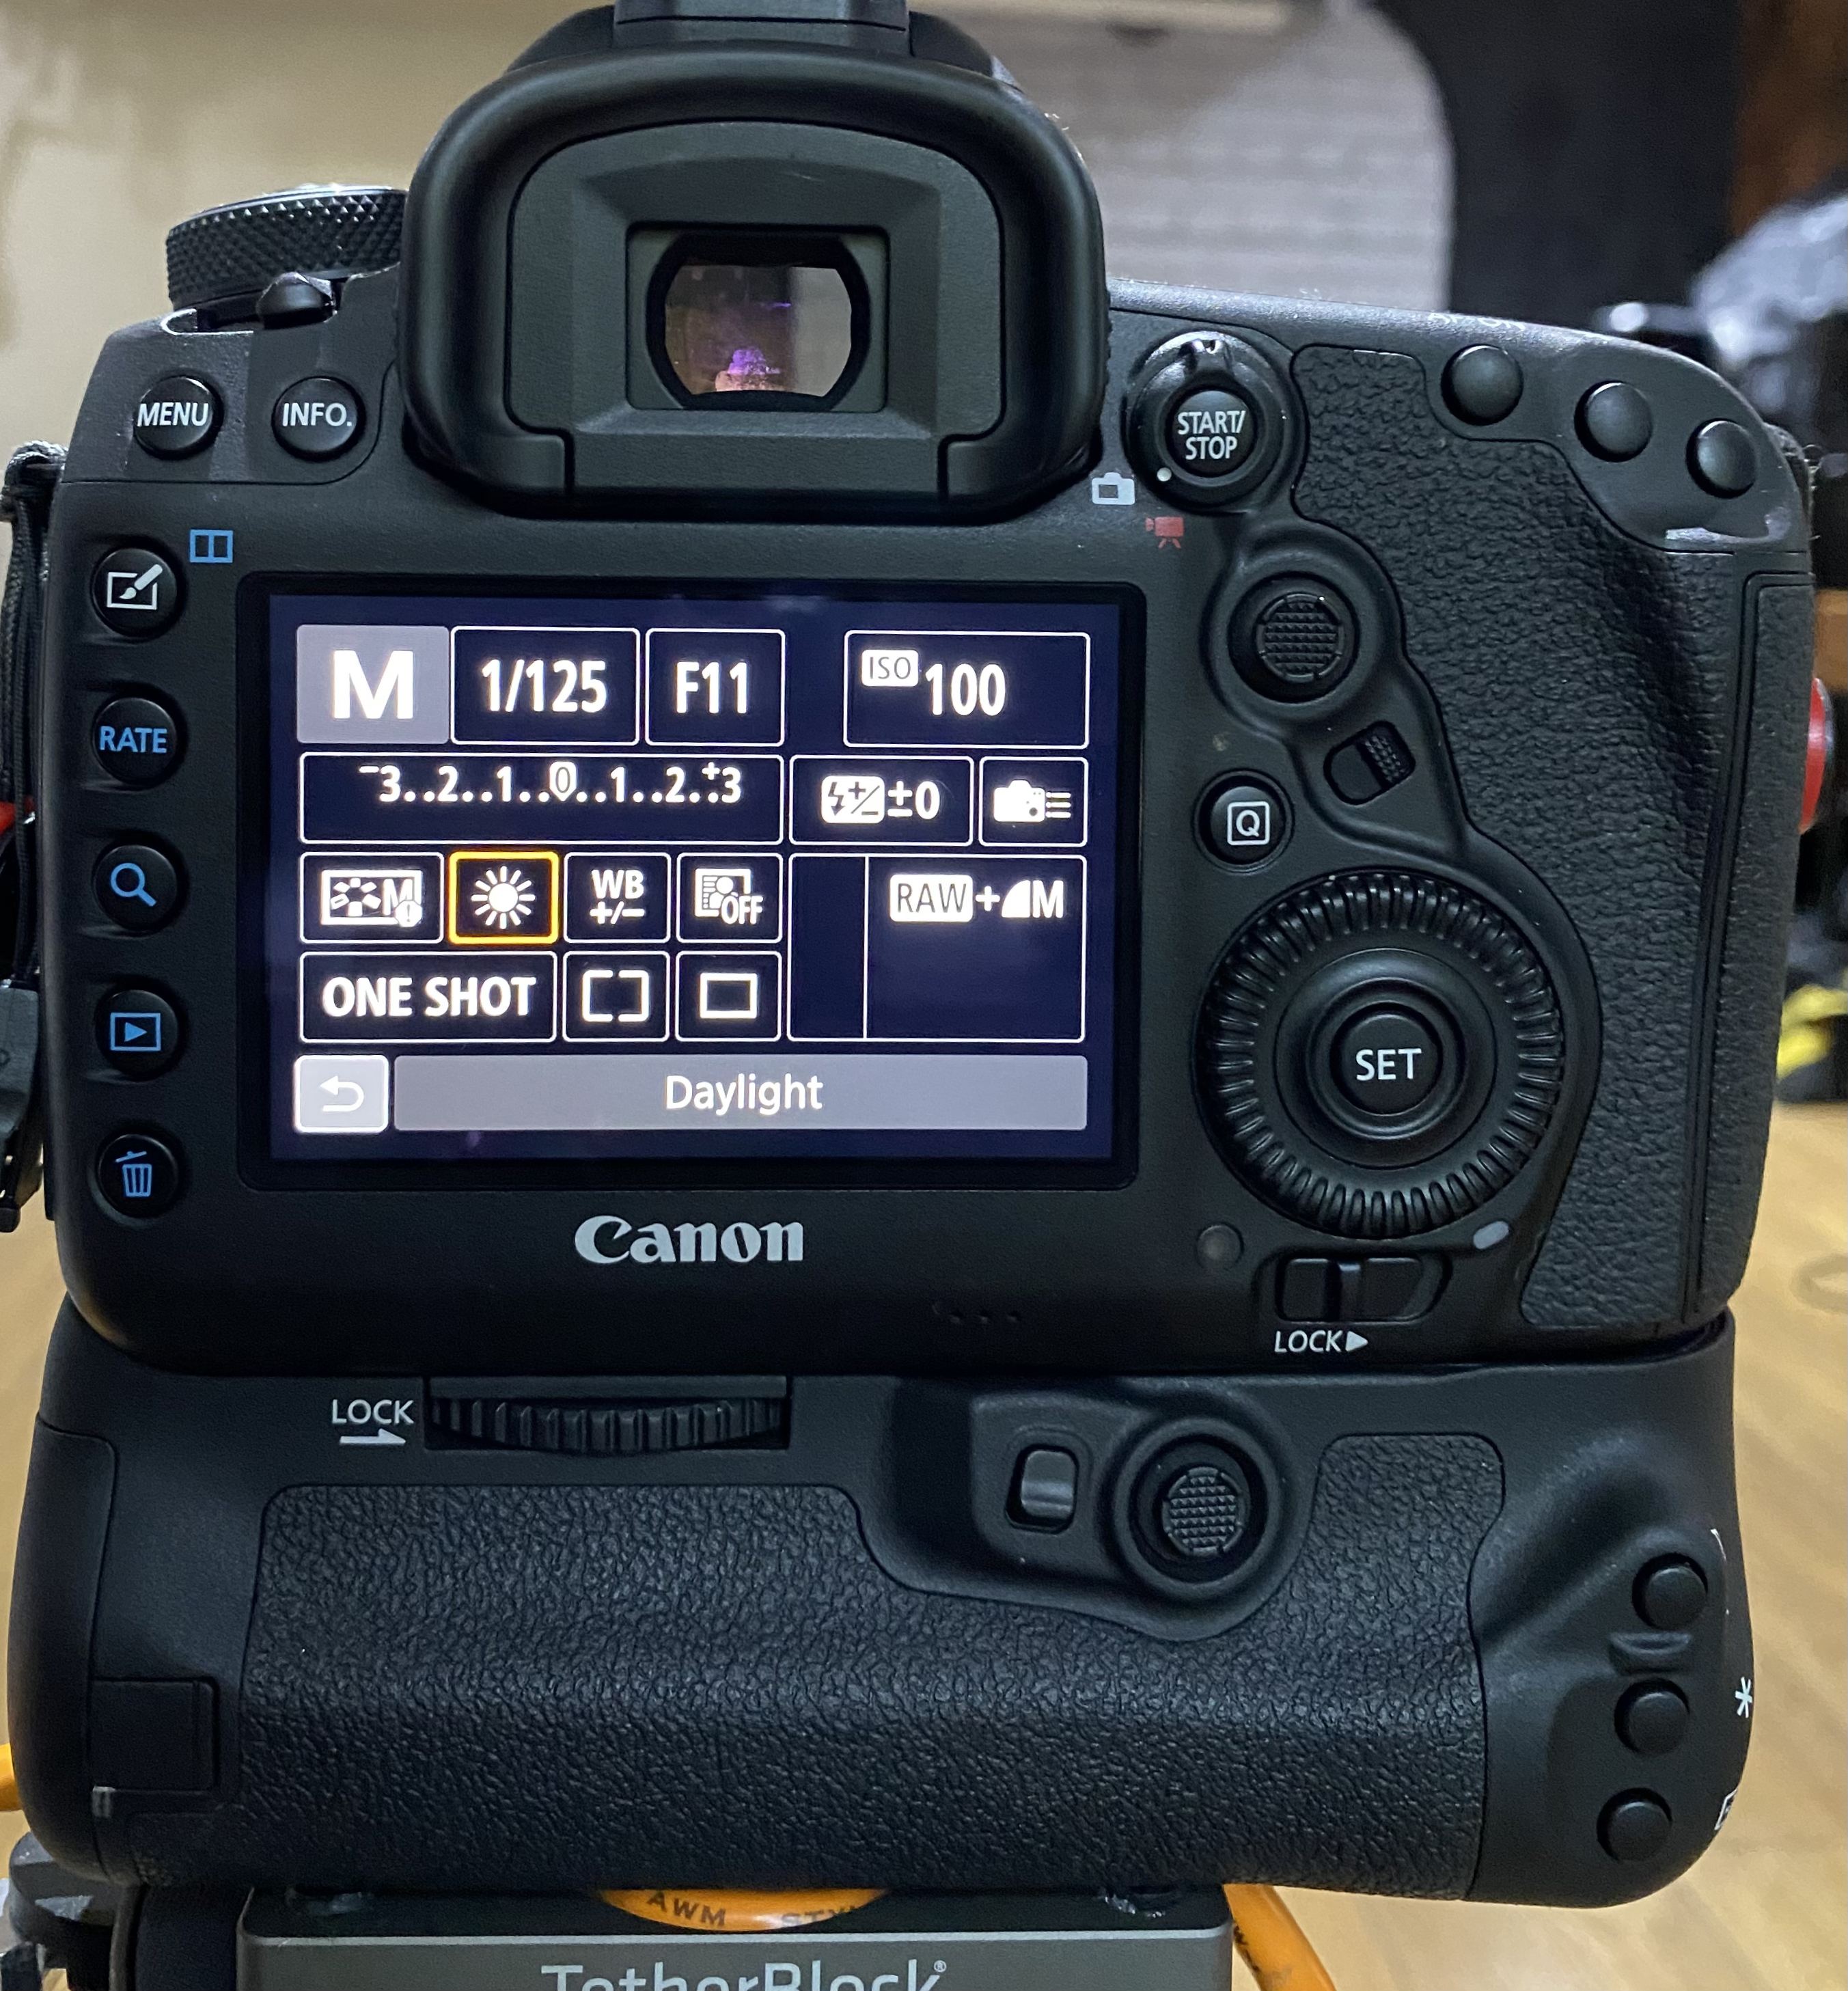
Set your camera up on a tripod and frame up your subject. A locked off tripod helps free up your hands when you need to move the light around. Natasha used manual mode with a shutter speed of 1/125 sec, an aperture of f/11 and ISO100, and used some radio triggers to fire the flash remotely.
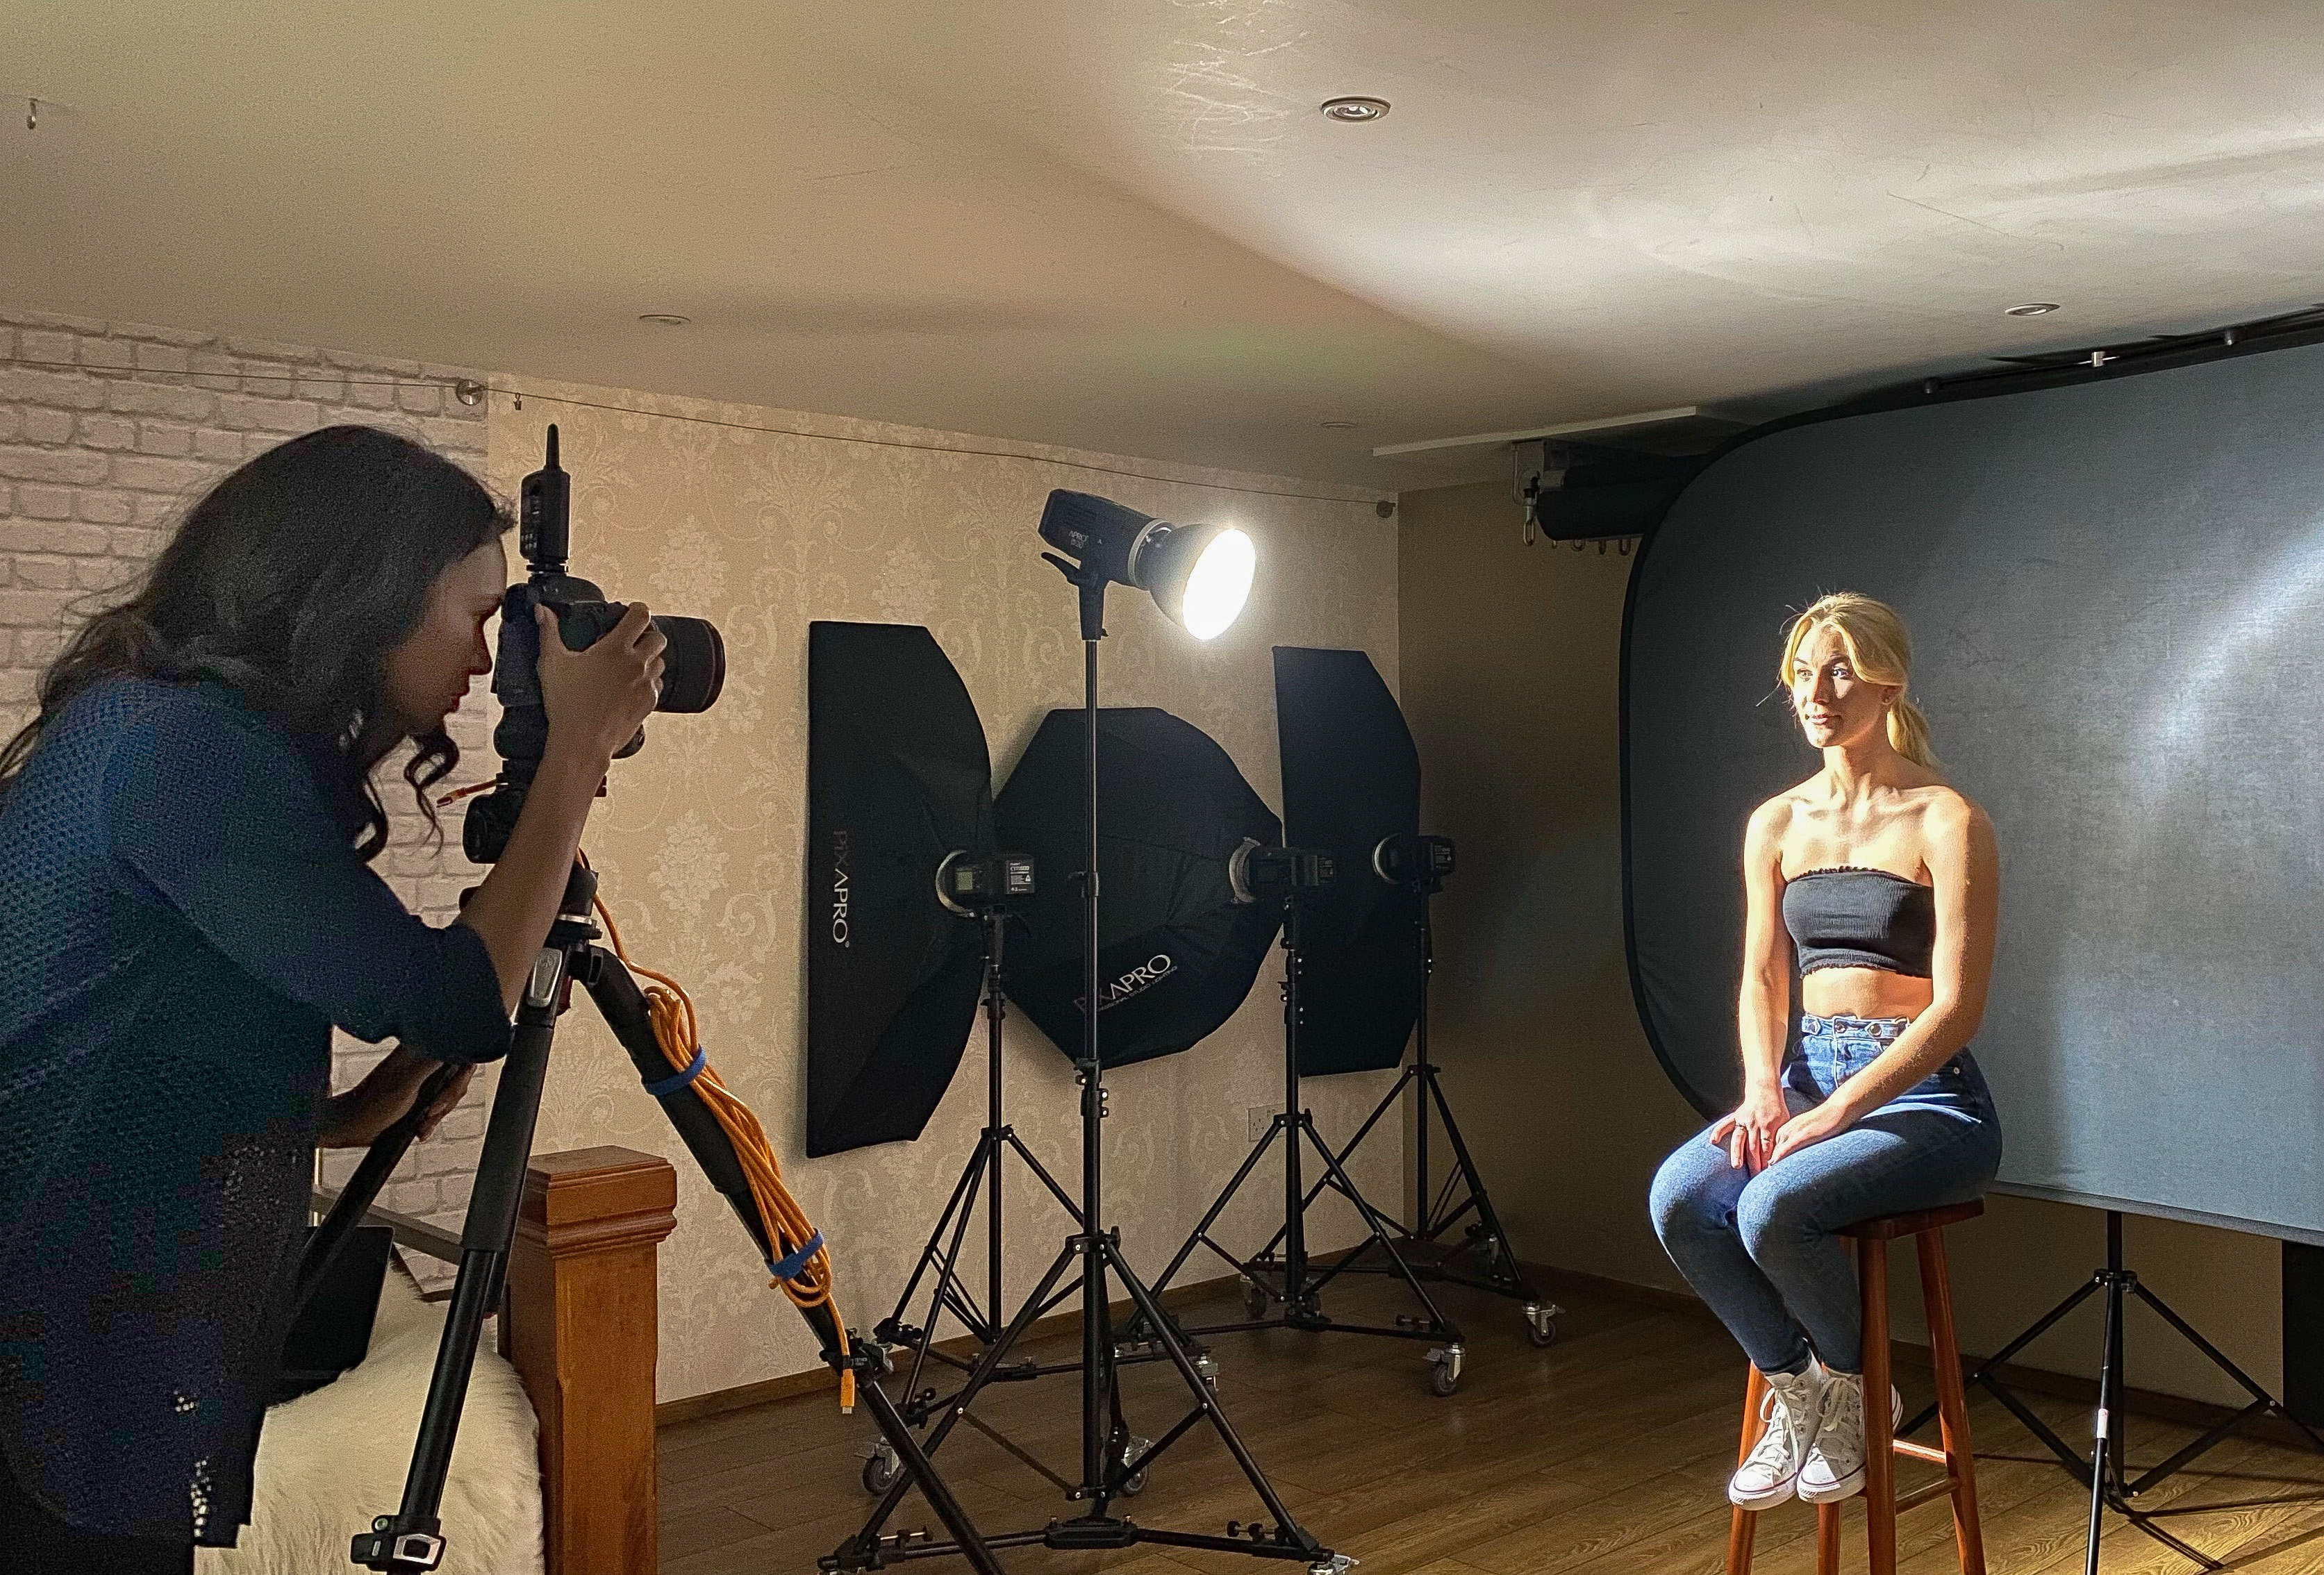
Get your model sat still on a stool, and position your flash to one side of the model at a 45º angle above eye level. The triangle of light is created when the light source passes the nose just enough to highlight under the opposite eye. With the light pointing toward one side of the model’s face, position a reflector at the same height on the opposite side to lift the shadows and add a subtle highlight.
03 Shoot in mono
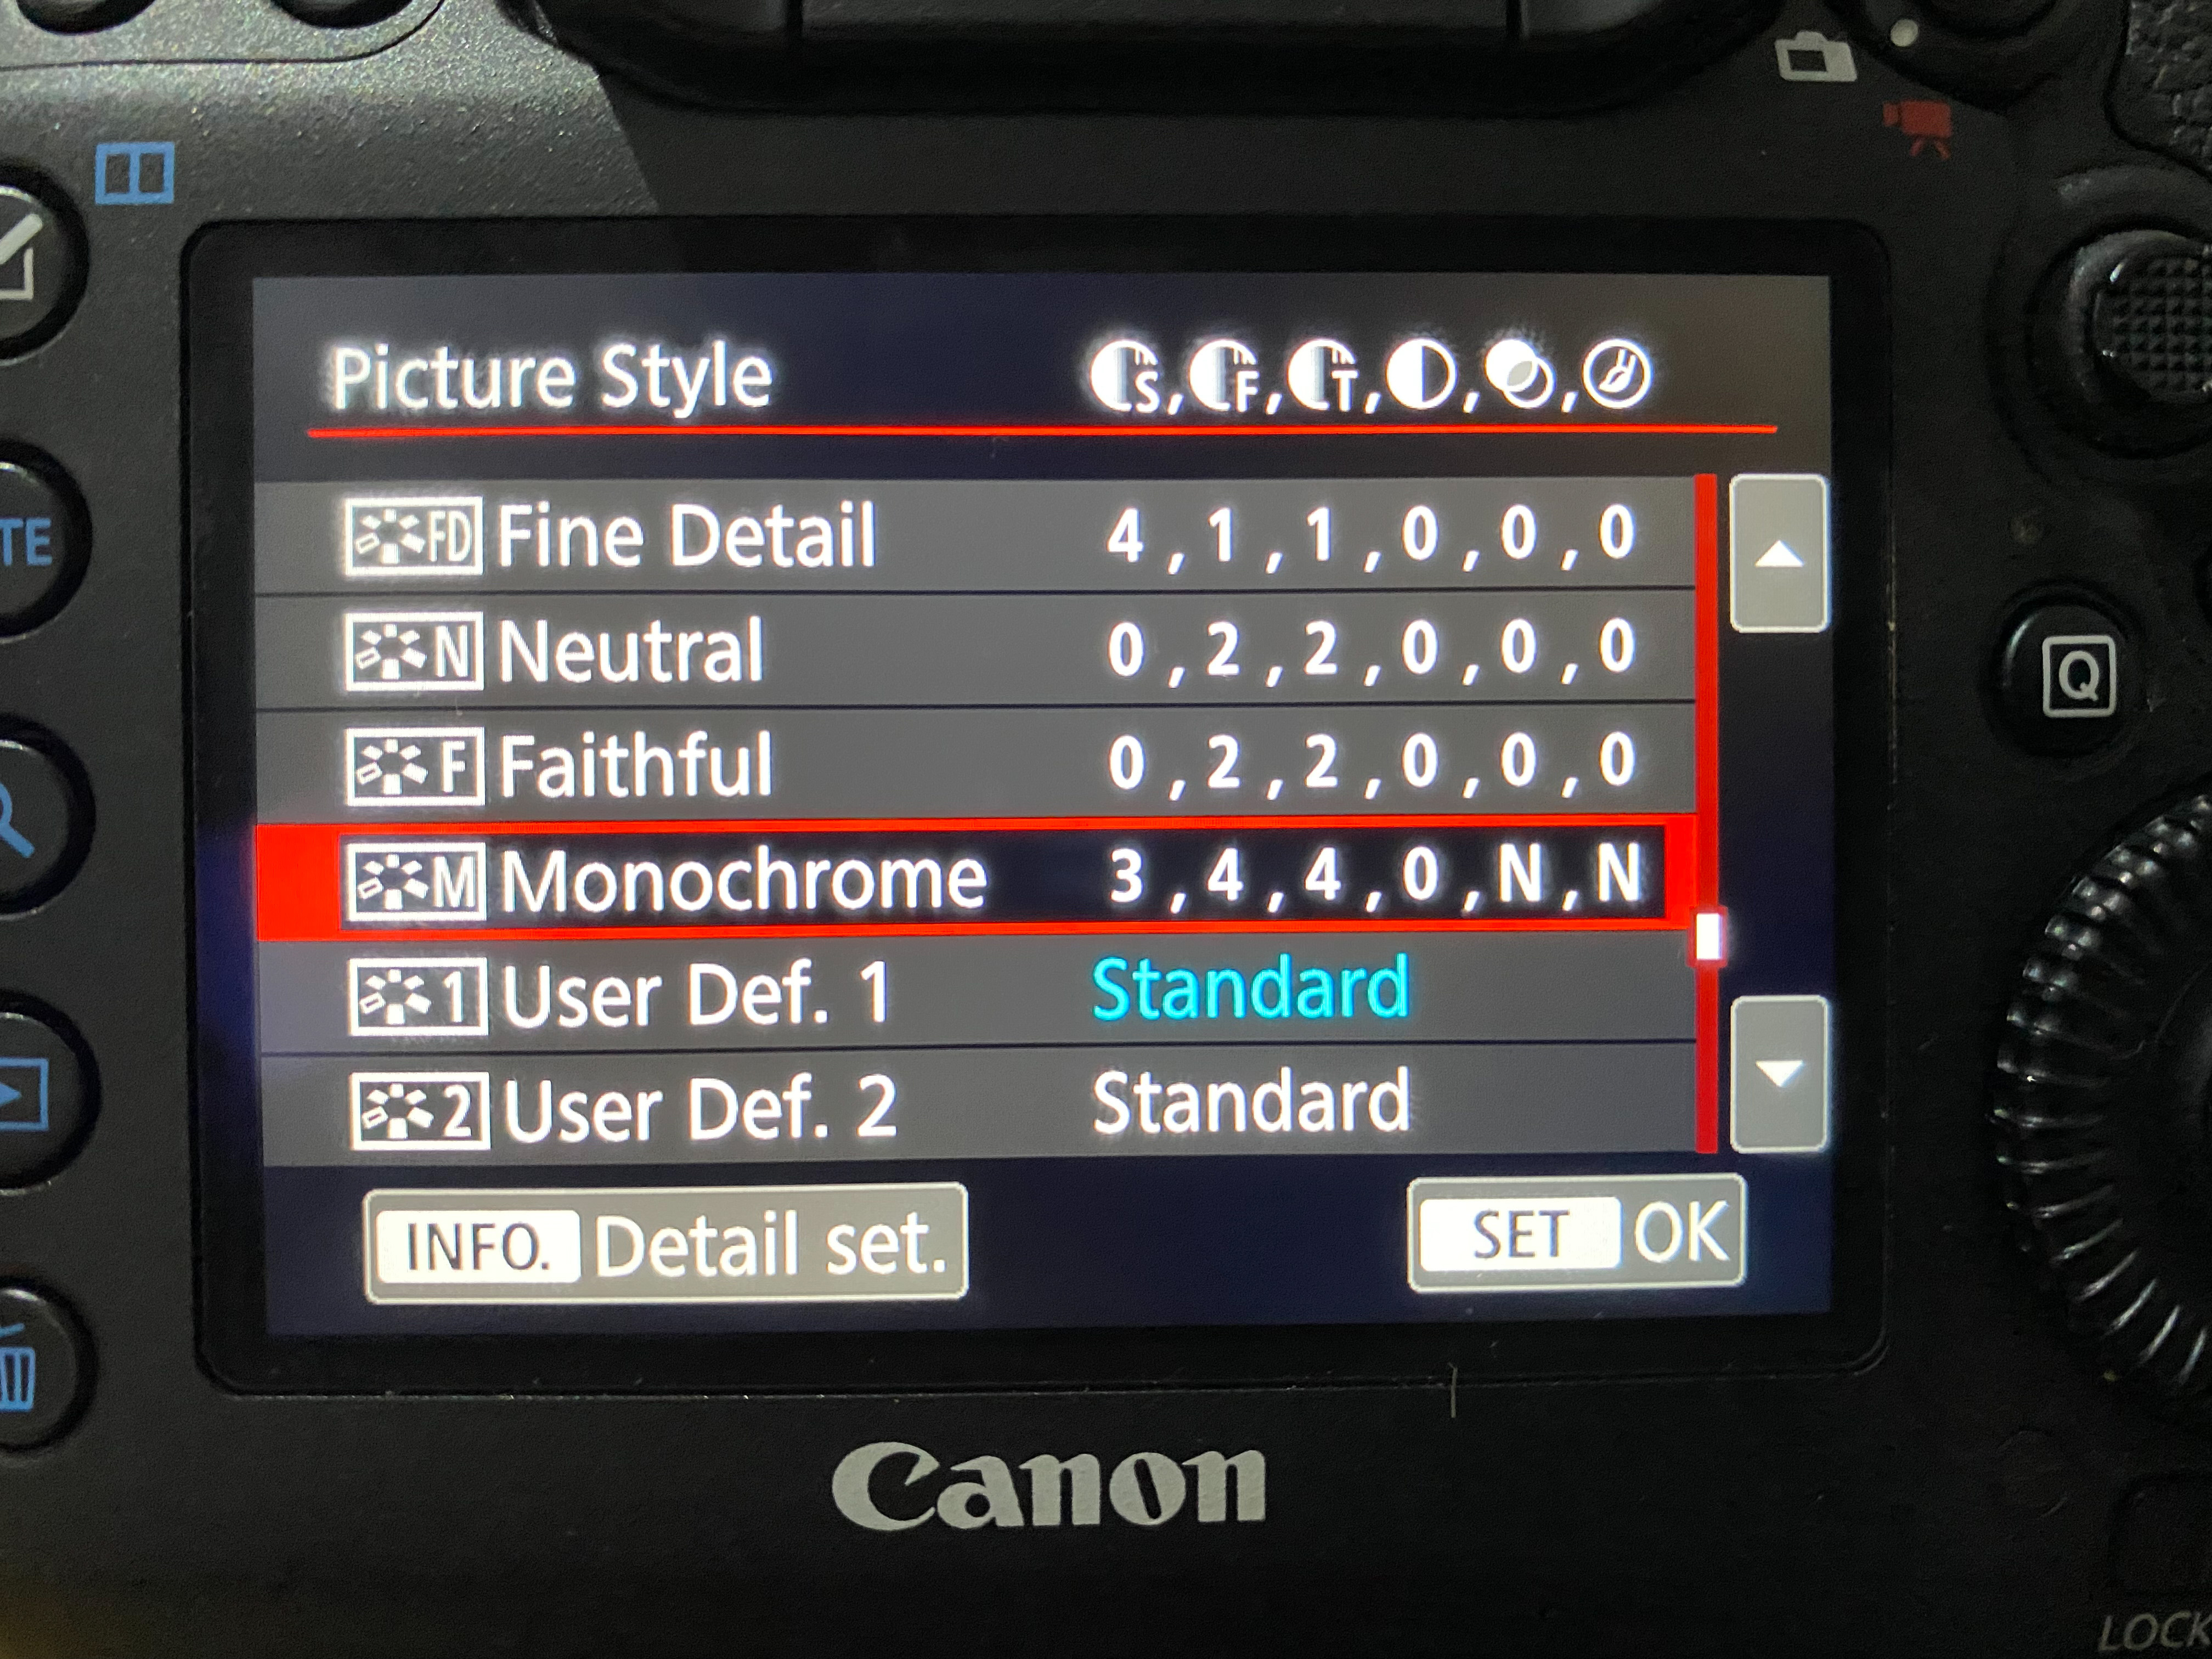
Set your camera to shoot in monochrome so that you can concentrate on looking at the light and shadows without the distraction of color. This will depend on your camera make and model, but to set your Canon EOS camera to mono go into Menu and look for Picture Style, select and scroll down to Monochrome, press Set, and your images will now appear on the LCD in black-and-white.
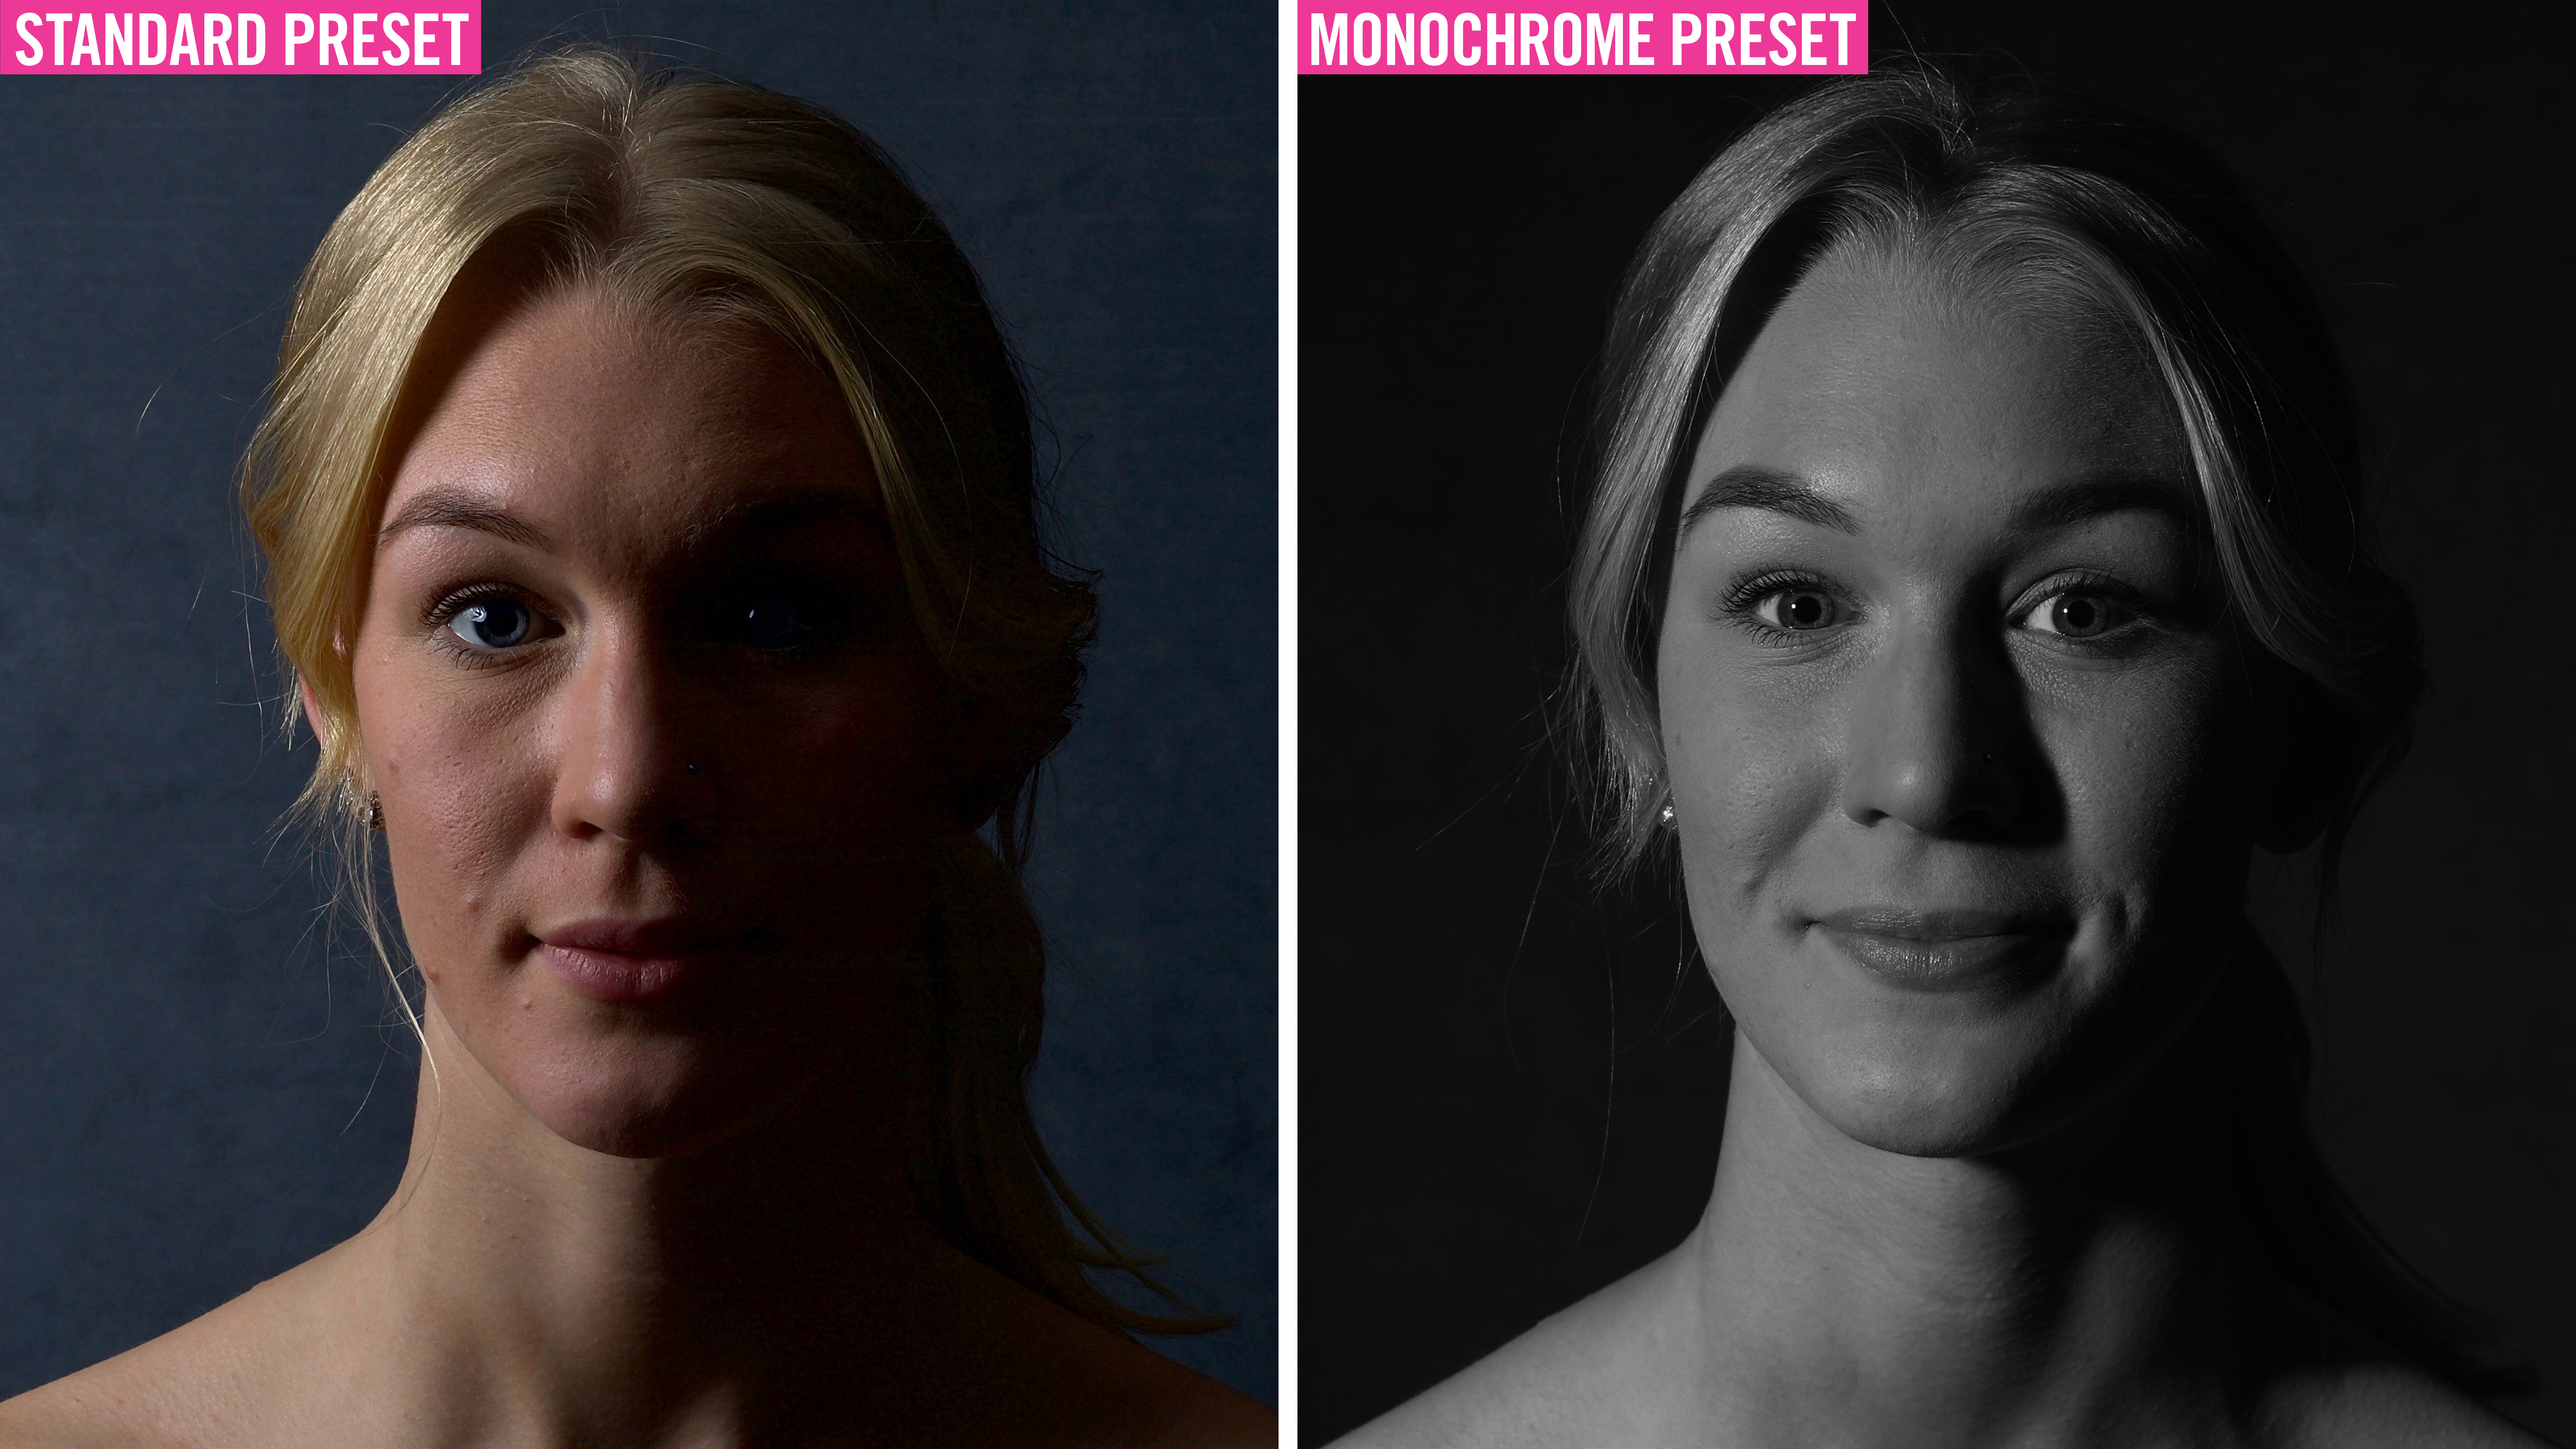
You can also customize your mono preset by pressing the Info button to change the Sharpness, Contrast, Filter and Toning effect. Although your images will appear in black-and-white on your rear LCD and in Live View, by shooting in the raw image format the color information will still be retained – so you can always create a color version later if you prefer.
04 Make your final adjustments
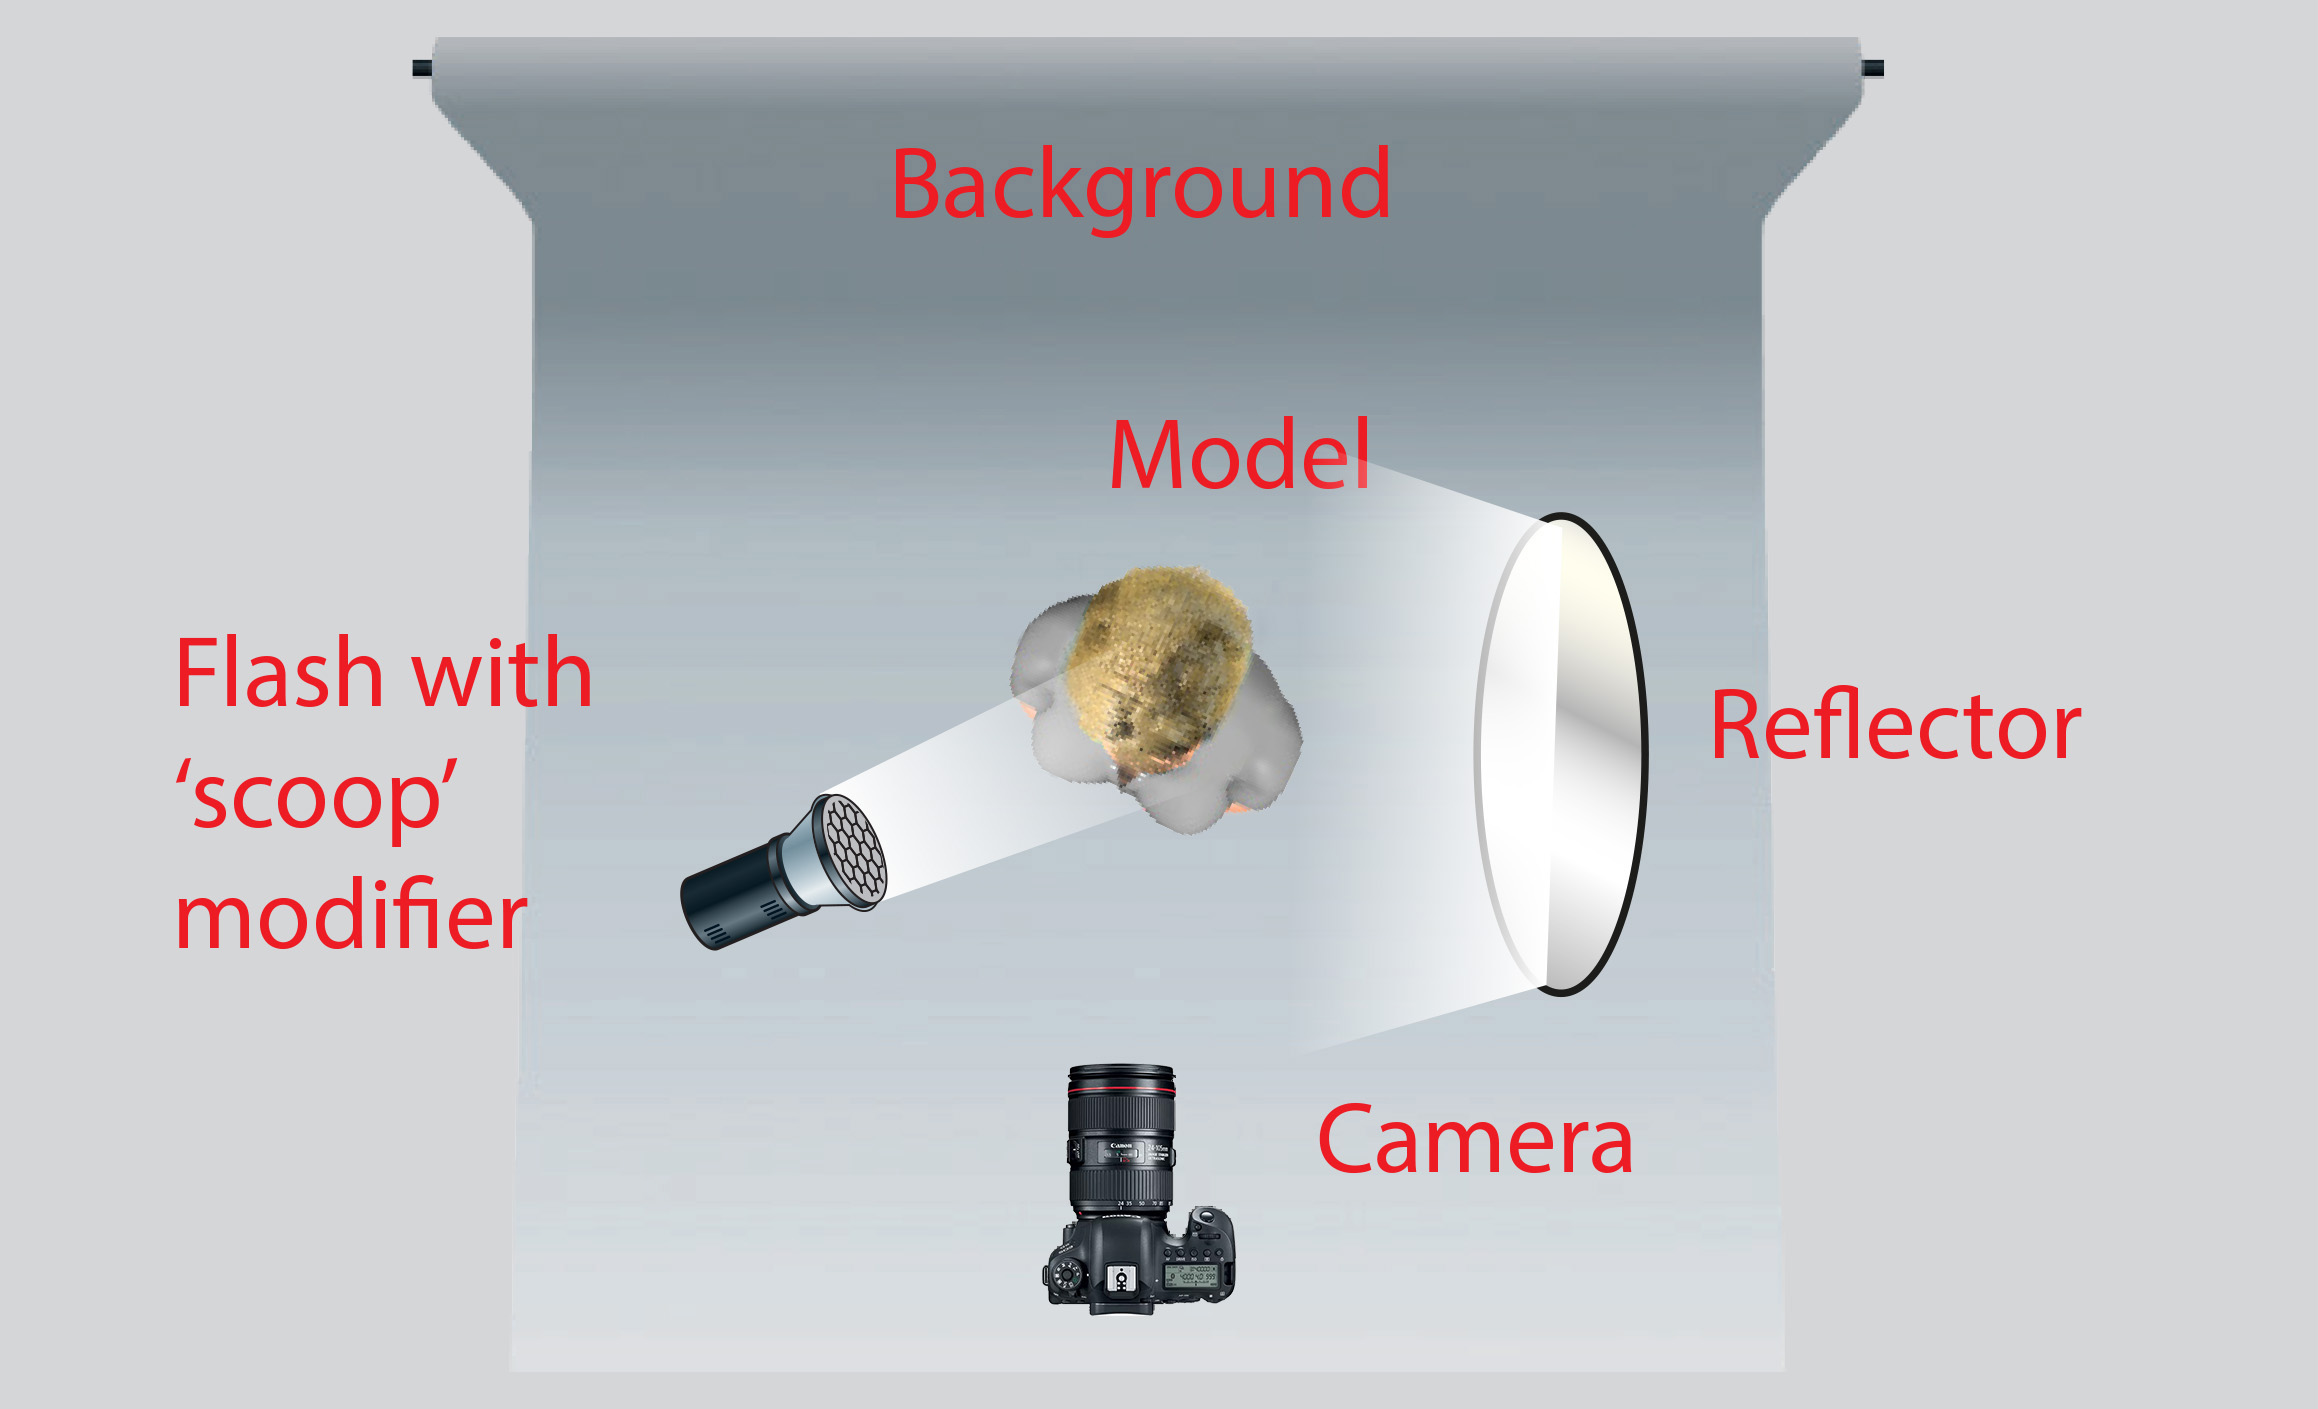
As Rembrandt lighting is a specific lighting style, you should keep a close eye on your shots as some movement from the model will affect the placing of the triangle of light under their eye. Experiment with the angle of the model’s head or pose and watch how it affects the triangle of light. Try moving your flash up or down on its light stand and different angles or experimenting with other flash modifiers like a softbox, umbrella or beauty dish to give the shadows a different softness or harshness.
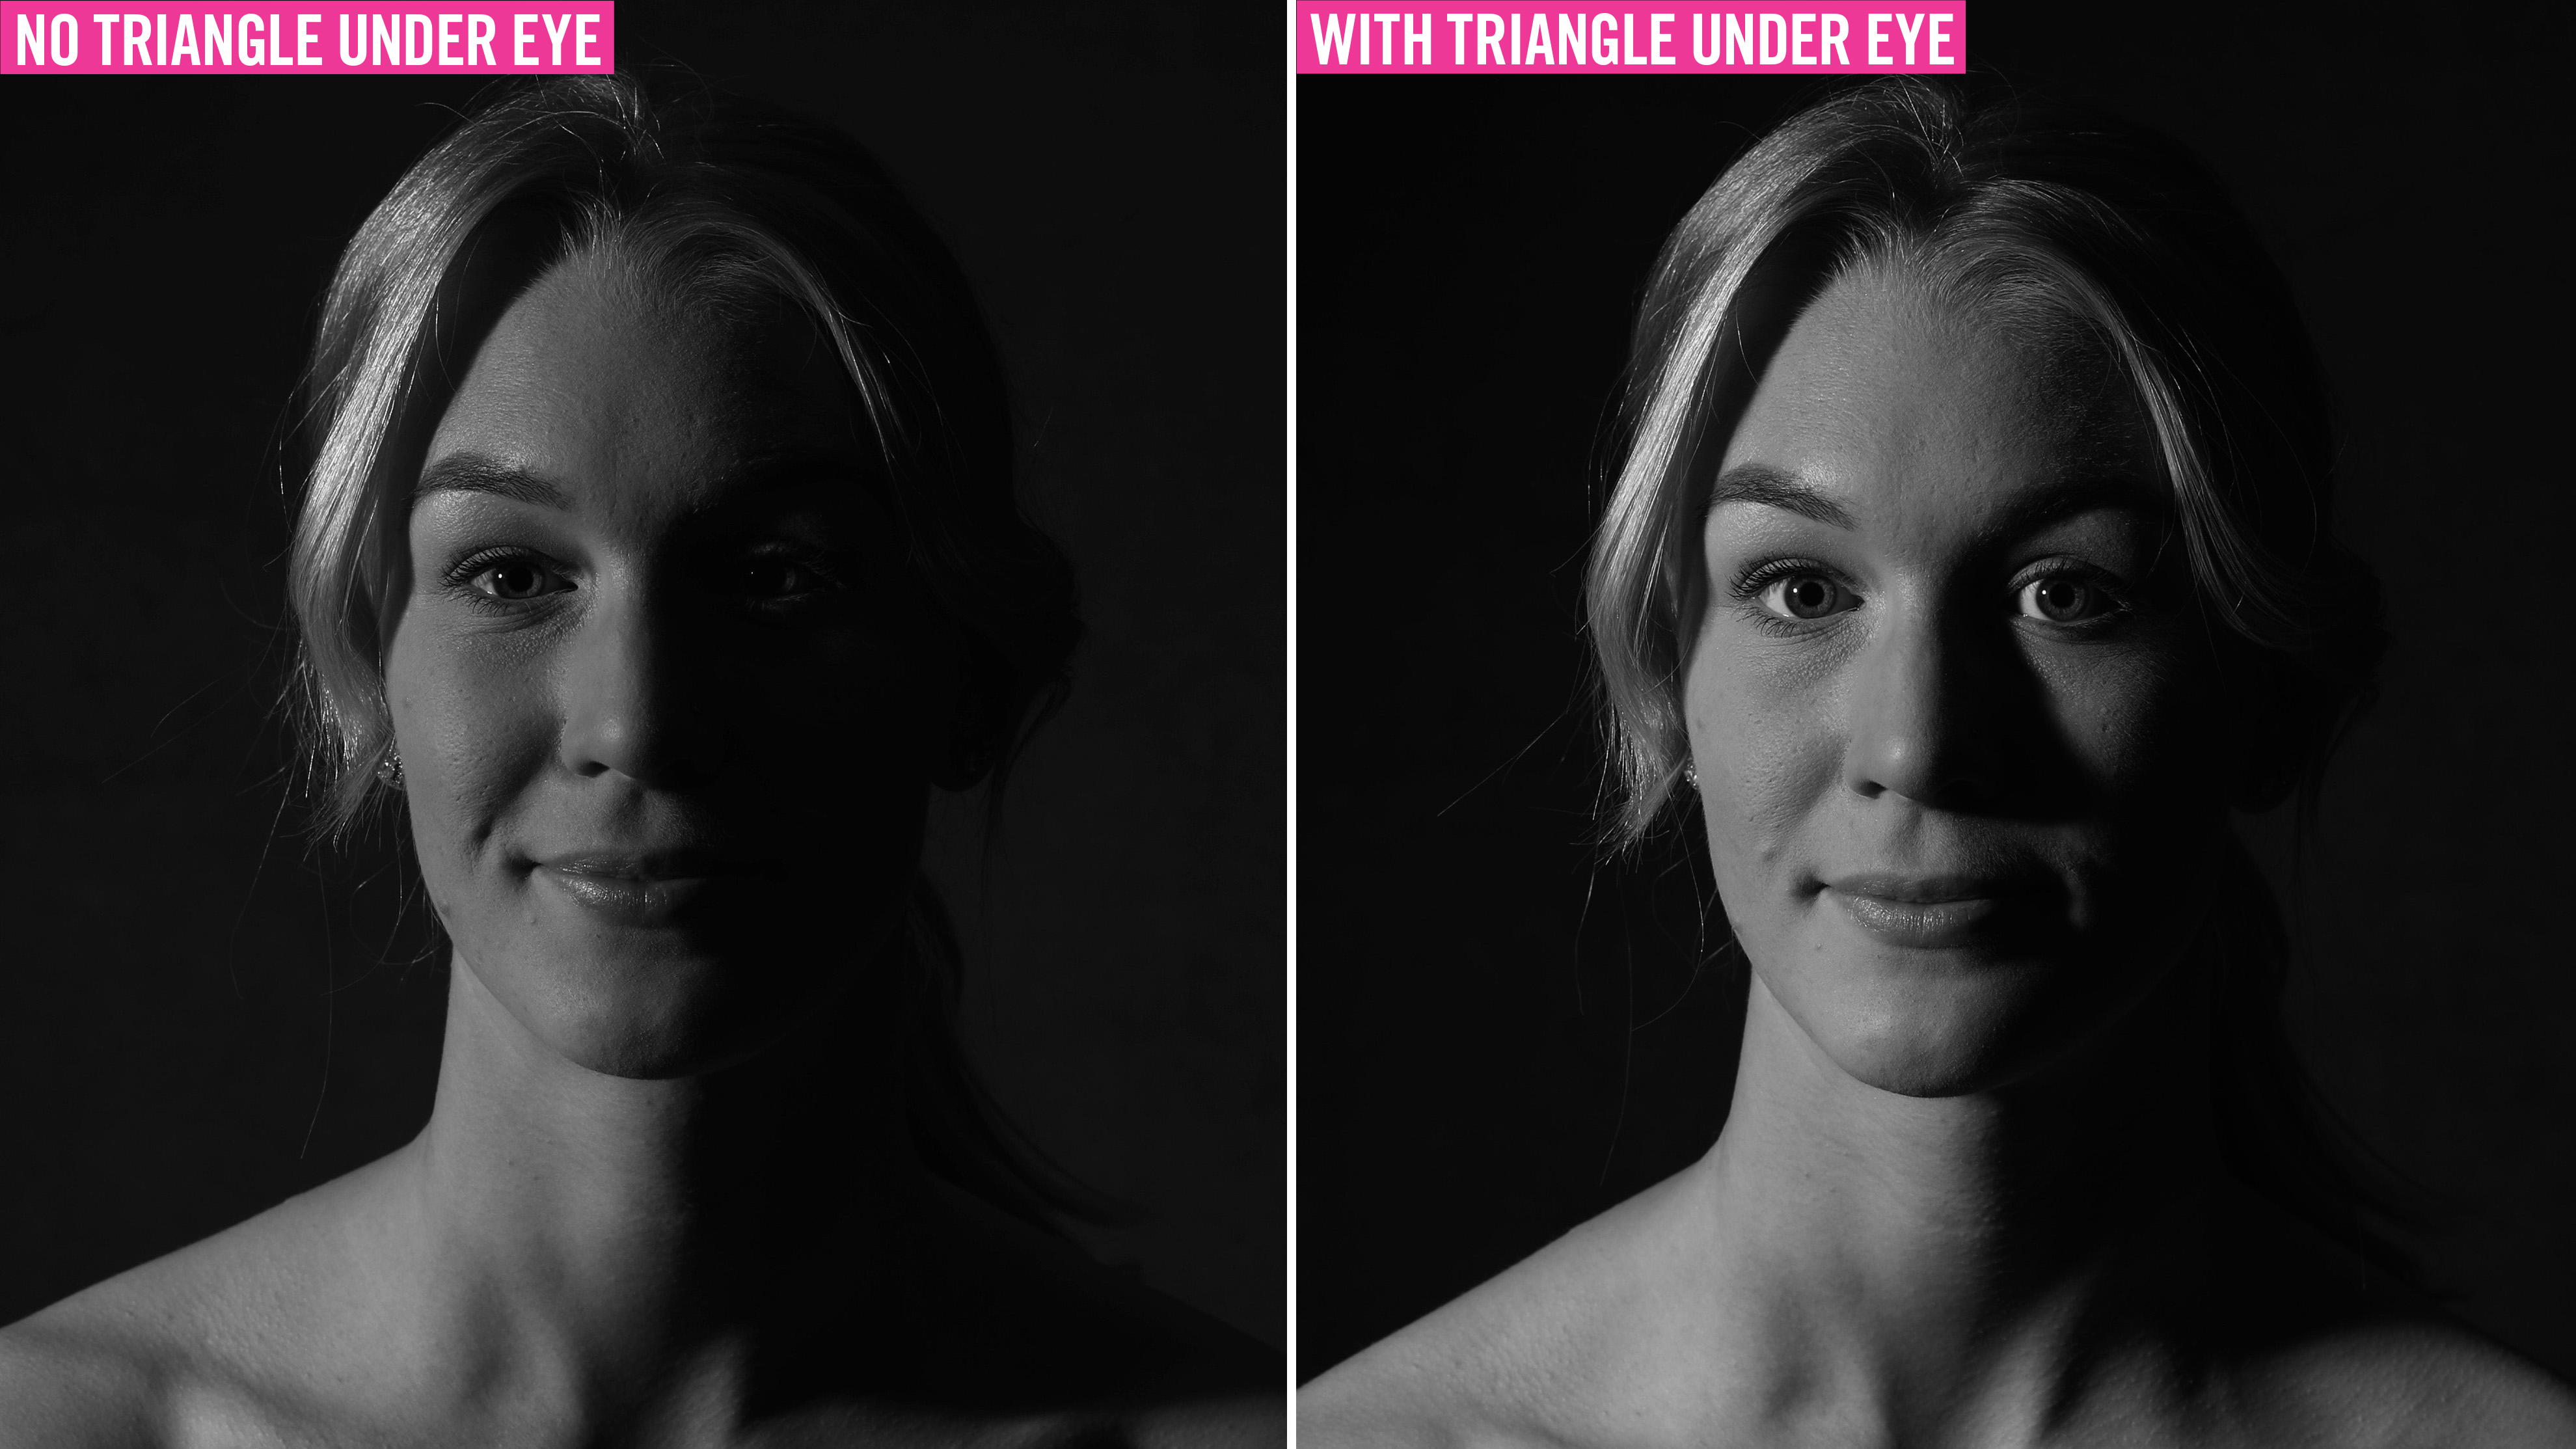
Moving the flash closer to your model or further away and changing the strength of the flash power will also directly affect the intensity of the light, so take a little time to play with all of these elements and take plenty of shots until your Rembrandt lighting looks perfect.
PhotoPlus: The Canon Magazine is the world's only monthly newsstand title that's 100% devoted to Canon, so you can be sure the magazine is completely relevant to your system. Every issue comes with downloadable video tutorials too.
Read more:
Best cameras for portraits
Best portrait photography tips
The best flashgun or strobe
The best Canon flashguns
The best flash triggers for your camera
10 best online photography courses – from beginner guides to masterclasses
Get the Digital Camera World Newsletter
The best camera deals, reviews, product advice, and unmissable photography news, direct to your inbox!
PhotoPlus: The Canon Magazine is the world’s only 100% Canon-focused title on the newsstand. Launched in 2007, for 14 years it has delivered news, reviews, buying guides, features, inspirational projects and tutorials on cameras, lenses, tripods, gimbals, filters, lighting and all manner of photography equipment.
Aimed squarely at enthusiast photographers who use the Canon DSLR or mirrorless camera systems, all content is tailored to Canon users – so everything from techniques to product tests are tailored to those using the EOS camera system.
Editor Peter Travers brings 14 years of experience as both a journalist and professional photographer, with Technique Editor Dan Mold shoring up the magazine with his 6 years of expertise.
